

Imagine biting into a juicy, sweet Mini Love Watermelon, freshly picked from your own backyard, its vibrant red flesh bursting with flavor. 🌞 This compact, personal-sized melon is a game-changer for home gardeners, especially those with limited space or urban setups. Whether you’re a seasoned grower or a beginner, learning how to grow a Mini Love Watermelon is a rewarding journey that brings delicious results. In this comprehensive guide, we’ll walk you through every step—from choosing the perfect spot to harvesting your sweet, compact melons. Backed by decades of horticultural expertise and practical gardening experience, this article offers science-based tips, troubleshooting advice, and insider secrets to ensure your Mini Love Watermelon thrives. Ready to grow your own? Let’s dig in! 🌿
1. What is a Mini Love Watermelon? 🍉
1.1. Overview of the Mini Love Variety
The Mini Love Watermelon is a compact, personal-sized melon weighing 3-6 pounds, making it ideal for small households or single servings. Its juicy, red-fleshed interior is sweet and crisp, encased in a thin, striped rind that’s easy to cut. Unlike traditional watermelons, Mini Love matures quickly—typically in 70-80 days—and boasts disease resistance, particularly to fusarium wilt and anthracnose. Its shorter vines (3-4 feet) make it perfect for small gardens, patios, or even container gardening, earning it a top spot among urban farmers and home gardeners.
1.2. Why Choose Mini Love Watermelons?
Why opt for Mini Love? For starters, its space-saving nature suits balconies, small yards, or raised beds. 🏡 A single plant can produce 2-4 melons, offering just the right yield for small families or individuals. Compared to larger watermelon varieties, Mini Love requires less sprawling space and is easier to manage, making it beginner-friendly. Plus, it’s packed with nutritional benefits, including vitamins A and C, antioxidants, and hydration-boosting electrolytes. Its compact size doesn’t compromise flavor—expect a sugary sweetness that rivals full-sized melons, perfect for summer snacks or desserts.
2. Preparing to Grow Mini Love Watermelons 🌞
2.1. Understanding Your Climate and Growing Zone
Mini Love Watermelons thrive in warm, sunny climates with temperatures between 70-85°F. Check your USDA Hardiness Zone to ensure a growing season long enough for the 70-80 day maturation period. In zones 5-9, plant after the last frost (typically late spring to early summer). For cooler regions (zones 3-4), extend the season with black plastic mulch to warm the soil or use row covers to protect young plants from chilly nights. Timing is critical—soil temperatures below 70°F can stunt germination, so use a soil thermometer for accuracy.
2.2. Choosing the Right Location
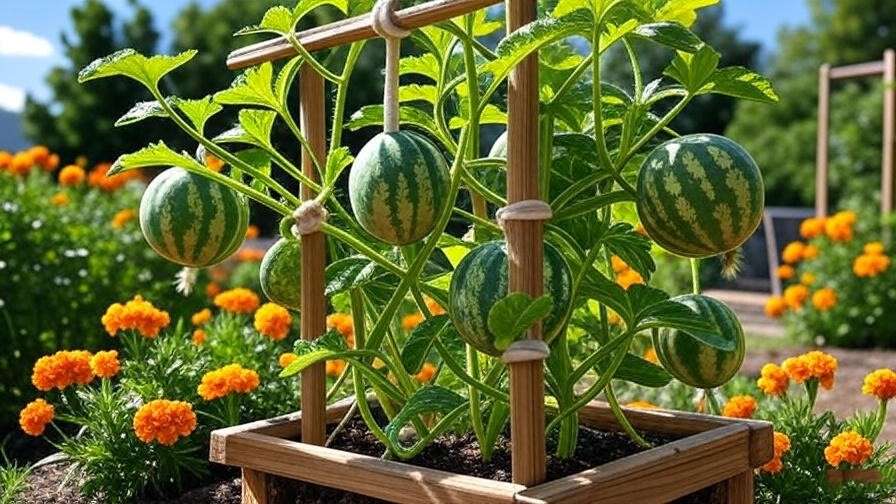
Sunlight is non-negotiable: Mini Love Watermelons need 6-8 hours of direct sun daily. Choose a south-facing spot with minimal shade from trees or buildings. Ensure the soil drains well, as waterlogged roots lead to rot. For ground planting, space plants 2-3 feet apart to allow vines to spread. If space is tight, consider container gardening—use a 5-gallon pot (or larger) with drainage holes. Urban gardeners can place pots on sunny balconies or rooftops, maximizing limited space while keeping plants happy.
2.3. Soil Preparation
Healthy soil is the foundation of a thriving watermelon crop. Mini Love prefers loamy, slightly acidic soil (pH 6.0-6.8). Test your soil with a home kit or send a sample to a local extension service for precise results. Amend clay-heavy or sandy soils with organic matter like compost or aged manure to improve texture and nutrient content. About 2-3 weeks before planting, work in 2-3 inches of compost or a balanced organic fertilizer. Expert tip: Add a handful of bone meal to boost phosphorus, which supports root and fruit development. 🌱
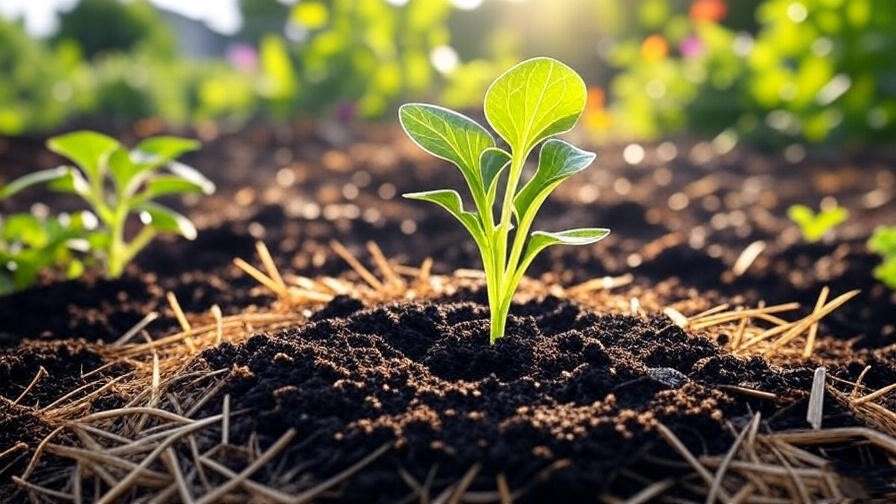
3. Planting Mini Love Watermelons 🌱
3.1. Starting from Seeds vs. Transplants
You can start Mini Love Watermelons from seeds or transplants, depending on your timeline and preference. Seeds are cost-effective and offer more variety, but they take longer to establish. Soak seeds in warm water for 4-6 hours to speed germination, then plant in seed trays with a seed-starting mix. Keep trays in a warm spot (75-85°F) and expect sprouts in 5-10 days. Transplants, available at nurseries, give you a head start but are pricier and may limit variety. If using transplants, choose healthy seedlings with 2-3 true leaves and no signs of stress.
3.2. Planting Techniques
For direct sowing, plant seeds 1 inch deep in small mounds (6-8 inches high) to improve drainage. Space mounds 2-3 feet apart to give vines room to grow. Place 2-3 seeds per mound and thin to the strongest seedling after germination. If transplanting, harden off seedlings for 7-10 days by gradually exposing them to outdoor conditions. Dig a hole slightly larger than the root ball, plant, and water gently. Expert insight: Use biodegradable pots for transplants to minimize root disturbance and reduce transplant shock.
3.3. Watering and Mulching
Keep soil consistently moist during germination and early growth, but avoid waterlogging. Water deeply once or twice a week, delivering 1-2 inches of water depending on weather and soil type. Apply organic mulch, such as straw or wood chips, around plants to retain moisture, regulate soil temperature, and suppress weeds. A 2-3 inch layer works best—avoid piling mulch against stems to prevent rot. Mulching also reduces soil splash, which can spread diseases like anthracnose.
4. Caring for Your Mini Love Watermelon Plants 🌿
4.1. Watering Requirements
Consistent watering is key to healthy vines and juicy fruits. Provide 1-2 inches of water weekly, adjusting for rainfall. Use drip irrigation or a soaker hose to deliver water directly to the soil, minimizing leaf wetness and disease risk. Hand watering works too, but aim at the base of the plant. Watch for signs of trouble: yellowing leaves may indicate overwatering, while wilting suggests underwatering or heat stress. Check soil moisture with your finger—if it’s dry 1 inch down, it’s time to water.
4.2. Fertilizing for Optimal Growth
Mini Love Watermelons are heavy feeders. Start with a balanced fertilizer (10-10-10 NPK) at planting to promote strong vines. Once flowers appear, switch to a phosphorus-heavy formula (5-10-10) to support fruit development. Apply every 2-3 weeks, following package instructions to avoid over-fertilization, which can lead to lush vines but small fruits. Organic options like fish emulsion, compost tea, or bone meal work well for eco-conscious gardeners. Expert tip: Side-dress plants with compost mid-season for an extra nutrient boost.
4.3. Pruning and Training Vines
Pruning improves air circulation and directs energy to fruit production. Once vines develop, remove secondary runners and suckers, keeping 2-3 main vines per plant. Pinch off new growth tips after fruits set to focus energy on ripening. For small spaces, train vines onto a sturdy trellis or A-frame support to save ground space and keep fruits off the soil. Use soft ties or pantyhose to secure vines without damage. Trellising also makes pest monitoring easier and adds an aesthetic touch to your garden. 🏡
4.4. Pollination Tips
Watermelons rely on pollinators like bees to set fruit. 🐝 Encourage bees by planting pollinator-friendly flowers (e.g., lavender, zinnias) nearby. If pollination is slow, hand-pollinate by identifying male (thin-stemmed) and female (swollen-base) flowers. Use a small brush or cotton swab to transfer pollen from male to female flowers in the morning when flowers are open. If fruits aren’t forming, check for inadequate pollination, poor weather, or nutrient deficiencies. Hand-pollination ensures a higher fruit set, especially in urban areas with fewer pollinators.
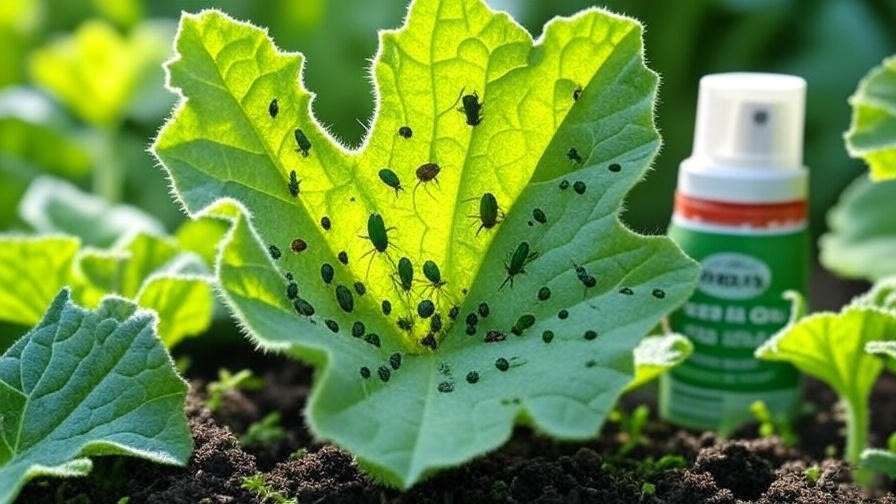
5. Managing Pests and Diseases 🐞
5.1. Common Pests
Mini Love Watermelons are relatively pest-resistant, but aphids, cucumber beetles, and spider mites can pose problems. Aphids suck sap and weaken plants; control them with neem oil or insecticidal soap. Cucumber beetles spread bacterial wilt—use row covers early in the season and hand-pick beetles daily. Spider mites thrive in hot, dry conditions; increase humidity and spray with water to deter them. Expert tip: Plant marigolds or nasturtiums nearby as companion plants to repel pests naturally.
5.2. Common Diseases
Powdery mildew, fusarium wilt, and anthracnose are common watermelon diseases, though Mini Love’s resistance offers some protection. Prevent powdery mildew (white patches on leaves) with good air circulation and organic fungicides like sulfur. Fusarium wilt causes wilting vines; avoid it with crop rotation and resistant varieties. Anthracnose (dark spots on leaves or fruit) spreads in wet conditions—remove affected parts and apply copper-based fungicides. Rotate crops every 2-3 years and avoid overhead watering to minimize disease risk.
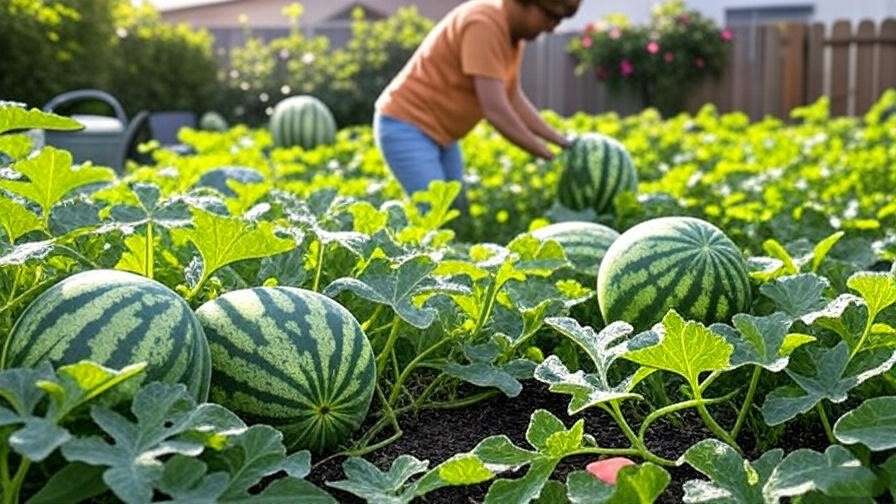
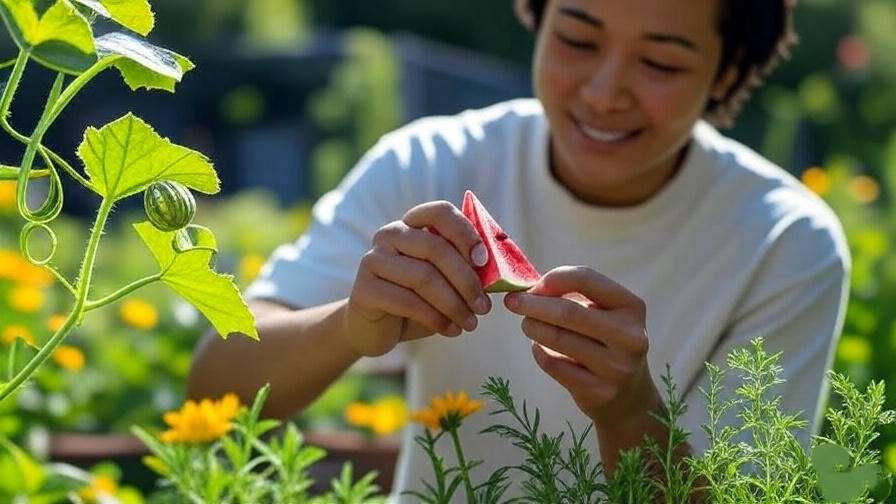
6. Harvesting and Storing Mini Love Watermelons 🍉
6.1. When to Harvest
Knowing when to pick your Mini Love Watermelon is crucial for peak flavor and sweetness. Look for these telltale signs of ripeness: the underside of the melon (where it rests on the ground) turns from white to a creamy or buttery yellow, the nearest tendril (the curly stem near the fruit) dries and turns brown, and tapping the melon produces a dull, hollow thud. Typically, Mini Love Watermelons are ready to harvest 70-80 days after planting, though this varies slightly depending on your climate and growing conditions. Expert insight: Harvest in the early morning when temperatures are cooler to lock in maximum sweetness and juiciness. 🌞
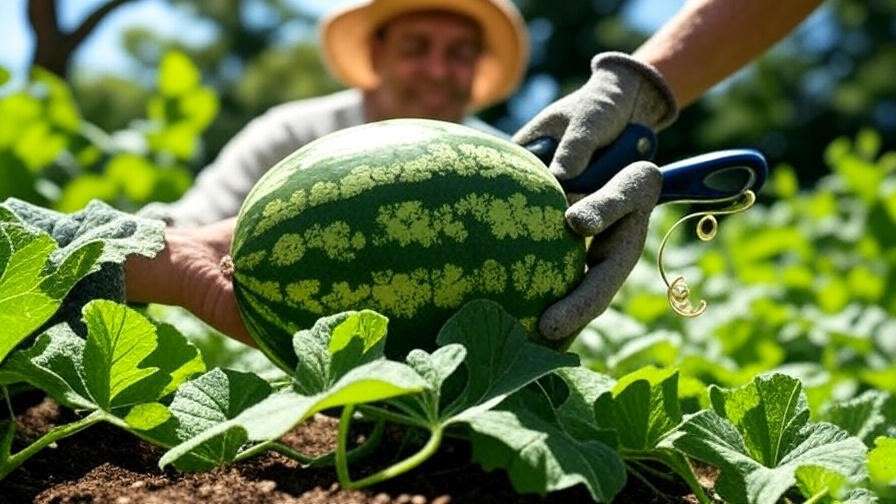
6.2. How to Harvest
Harvest with care to avoid damaging the plant or fruit. Use clean, sharp garden shears or a pruning knife to cut the stem, leaving 1-2 inches attached to the melon. Avoid pulling or twisting the fruit, as this can stress the vine and harm any remaining fruits. Handle the melon gently to prevent bruising, which can affect storage quality. If you’re growing multiple plants, check each melon individually, as they may ripen at different times. Clean your tools between cuts to prevent disease spread.
6.3. Storing Your Harvest
Mini Love Watermelons store well if handled properly. Keep whole melons at room temperature (65-70°F) in a cool, dry place for up to 2 weeks. Avoid stacking them to prevent pressure marks. For cut melons, wrap tightly in plastic wrap or store in an airtight container and refrigerate for up to 5-7 days. If you have an abundance, cube the flesh and freeze it in freezer-safe bags for smoothies, sorbets, or refreshing summer treats. Pro tip: Label frozen melon with the date to ensure freshness within 6 months.
7. Troubleshooting Common Issues 🔧
7.1. Why Aren’t My Watermelons Growing?
If your Mini Love Watermelons aren’t thriving, several factors could be at play. Poor soil quality, often low in nutrients or with improper pH (outside 6.0-6.8), can stunt growth—test and amend soil as needed. Inadequate sunlight (less than 6 hours daily) weakens plants; relocate containers or prune nearby shading plants. Overwatering or poor drainage can cause root rot, while underwatering stresses vines. Check soil moisture and adjust your watering schedule. Solution: Conduct a soil test, ensure full sun, and maintain consistent moisture.
7.2. Small or Misshapen Fruits
Small or oddly shaped melons often result from poor pollination, nutrient deficiencies, or water stress. Incomplete pollination (due to low bee activity or bad weather) leads to underdeveloped fruits—try hand-pollination as described earlier. Low phosphorus or potassium can limit fruit size; apply a 5-10-10 fertilizer during flowering and fruiting. Inconsistent watering causes uneven growth, so maintain a steady 1-2 inches per week. Fix: Hand-pollinate, fertilize appropriately, and use drip irrigation for consistent moisture.
7.3. Yellowing or Wilting Plants
Yellowing leaves or wilting vines signal trouble. Overwatering can suffocate roots, while underwatering causes dehydration—check soil 1 inch deep to gauge moisture. Pests like aphids or diseases like fusarium wilt may also be culprits; inspect leaves and stems for signs. Root issues, such as compaction or rot, can occur in poorly drained soil. Recovery steps: Adjust watering, treat pests or diseases promptly, and improve drainage by adding organic matter or using raised beds.
8. Expert Tips for Maximizing Your Mini Love Watermelon Harvest 🌟
To elevate your gardening game, try these expert strategies:
- Companion Planting: Grow Mini Love Watermelons alongside beans or corn, which enrich soil nitrogen and support vine health. Avoid planting near potatoes, which compete for nutrients.
- Succession Planting: Stagger planting every 2 weeks for a continuous harvest through late summer. This ensures a steady supply of melons without overwhelming your kitchen.
- Reflective Mulch: Use silver or red plastic mulch to boost sunlight reflection, deter pests, and warm the soil, especially in cooler climates.
- Gardening Journal: Track planting dates, weather patterns, and plant health in a journal. This helps identify what works and refine your approach for next season.
- Pollinator Boost: Plant bee-attracting flowers like lavender or borage nearby to ensure robust pollination and higher fruit yields. 🐝
These techniques, honed from years of trial and error by experienced growers, can make the difference between a good harvest and a great one.
9. FAQs About Growing Mini Love Watermelons ❓
Q: Can I grow Mini Love Watermelons in containers?
A: Absolutely! Use a 5-gallon (or larger) pot with drainage holes, placed in full sun. Ensure the container has rich, well-draining soil and water consistently.
Q: How many watermelons will one plant produce?
A: A healthy Mini Love plant typically yields 2-4 fruits, depending on care, pollination, and environmental conditions. Pruning can increase fruit size and quality.
Q: Do Mini Love Watermelons need a lot of space?
A: They need less space than traditional watermelons—space plants 2-3 feet apart or use a trellis for vertical growth in tight spaces.
Q: What’s the best fertilizer for Mini Love Watermelons?
A: Start with a balanced 10-10-10 fertilizer, then switch to a phosphorus-heavy 5-10-10 during flowering and fruiting for optimal results.
Q: How do I know if my watermelon is ripe?
A: Check for a creamy yellow underside, a dried tendril near the fruit, and a dull thud when tapped. Harvest at 70-80 days for peak flavor.
10. Conclusion
Growing a Mini Love Watermelon in your backyard is not just a gardening project—it’s a rewarding experience that brings fresh, sweet fruit to your table with minimal space and effort. 🍉 With its compact size, disease resistance, and beginner-friendly traits, this variety is perfect for urban gardeners, small-space growers, or anyone craving homegrown flavor. By following the expert tips in this guide—choosing the right location, preparing nutrient-rich soil, mastering pollination, and troubleshooting issues—you’ll be well on your way to a bountiful harvest. Start planting today, and share your Mini Love Watermelon journey with us in the comments or on social media using #MiniLoveHarvest! Want to dive deeper? Check out our related articles on container gardening or organic pest control for more expert advice. 🌿