
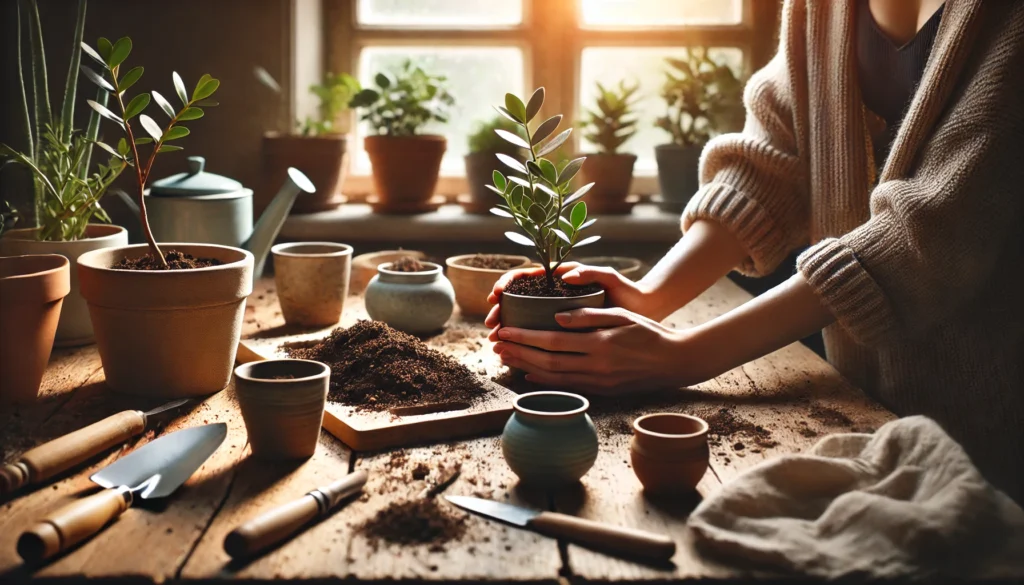
Repotting houseplants without stress may sound like a daunting task, but it doesn’t have to be! If you’ve ever hesitated to repot a plant because you’re unsure where to start, or worried about harming it, you’re not alone. Many plant parents share these concerns. The truth is, repotting is an essential part of plant care, and with the right approach, it can be done quickly and easily, all while ensuring your plants thrive. In this guide, we’ll walk you through simple steps to repot your houseplants without stress, so you can give them the care they deserve.
Signs Your Plant Needs Repotting 🌱
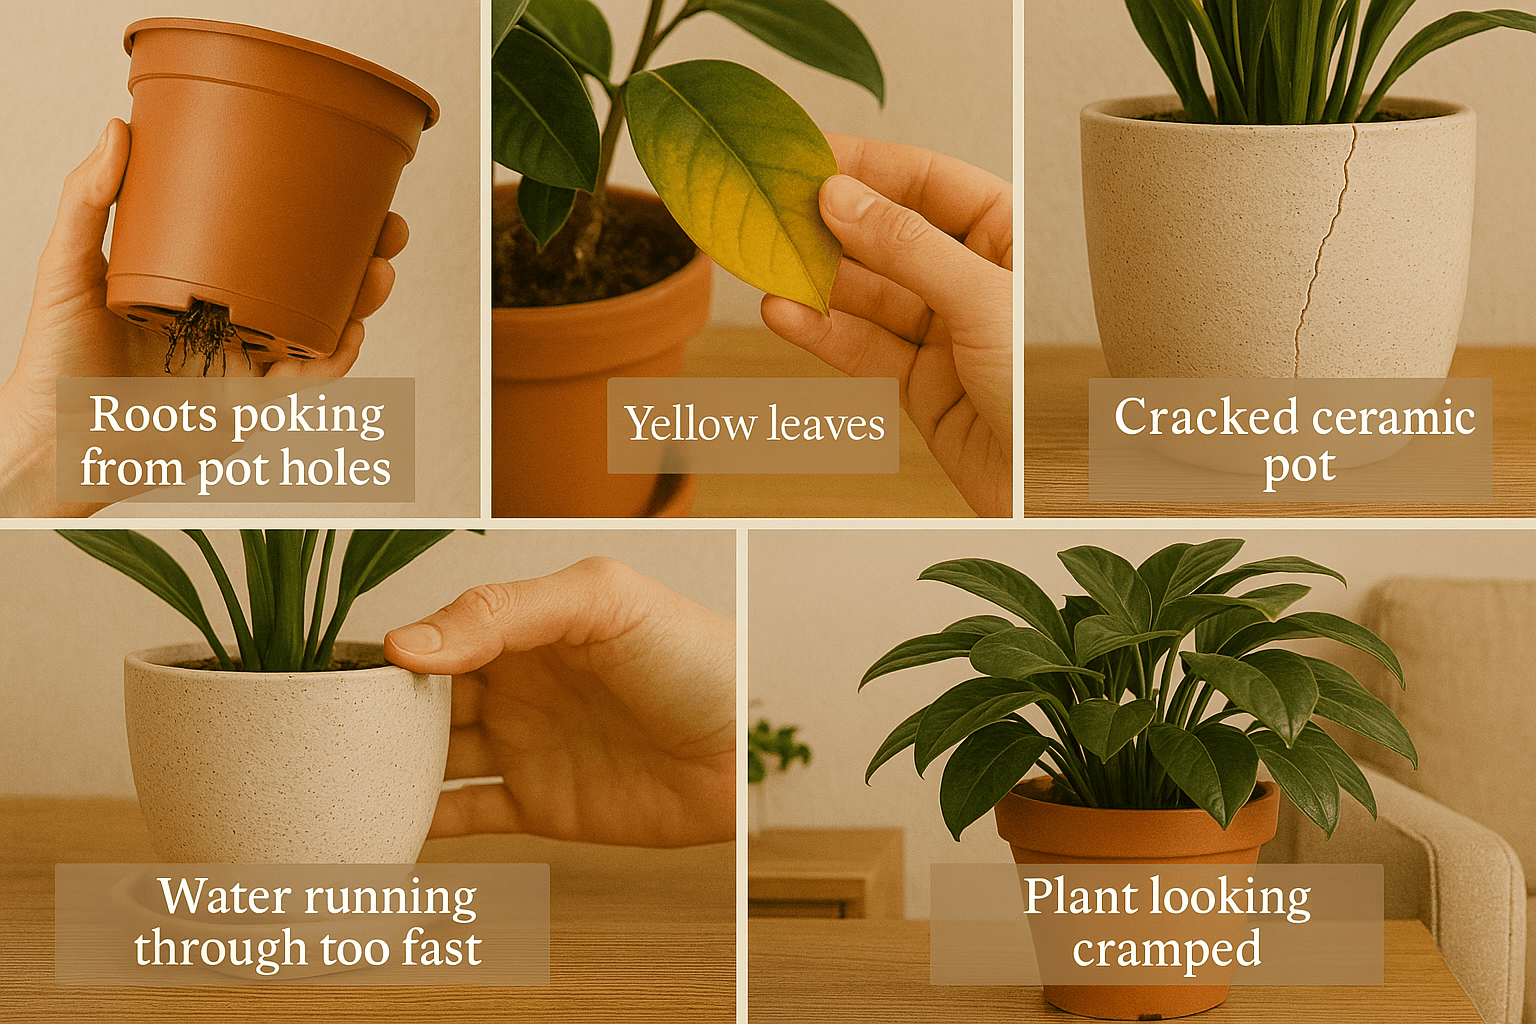
Repotting houseplants without stress starts with knowing when it’s time to do it. Here are the top signs your plant needs a new home:
- Root-Bound 🌿:
If you notice roots poking through the drainage holes or circling around the pot, it’s a clear sign your plant is root-bound. This means the plant has outgrown its pot and needs more space to thrive. - Slow Growth 📉:
When your plant stops growing or its growth becomes noticeably slower, it could be a sign that it’s running out of nutrients in its current soil. - Watering Problems 💧:
If the water drains away too quickly or doesn’t soak into the soil properly, the roots may be too packed, and the plant isn’t absorbing water efficiently. - Cracked or Damaged Pot 🪴:
If you see cracks in the pot or it seems unstable, your plant may need a new, sturdier pot to continue growing well. - Yellowing Leaves 🍂:
While yellow leaves can indicate other issues, if it’s paired with one or more of the signs above, it might mean your plant is ready for repotting.
Keep an eye out for these signs, and your plant will thank you with healthier growth! 🌿✨
Best Time to Repot Houseplants 🌼
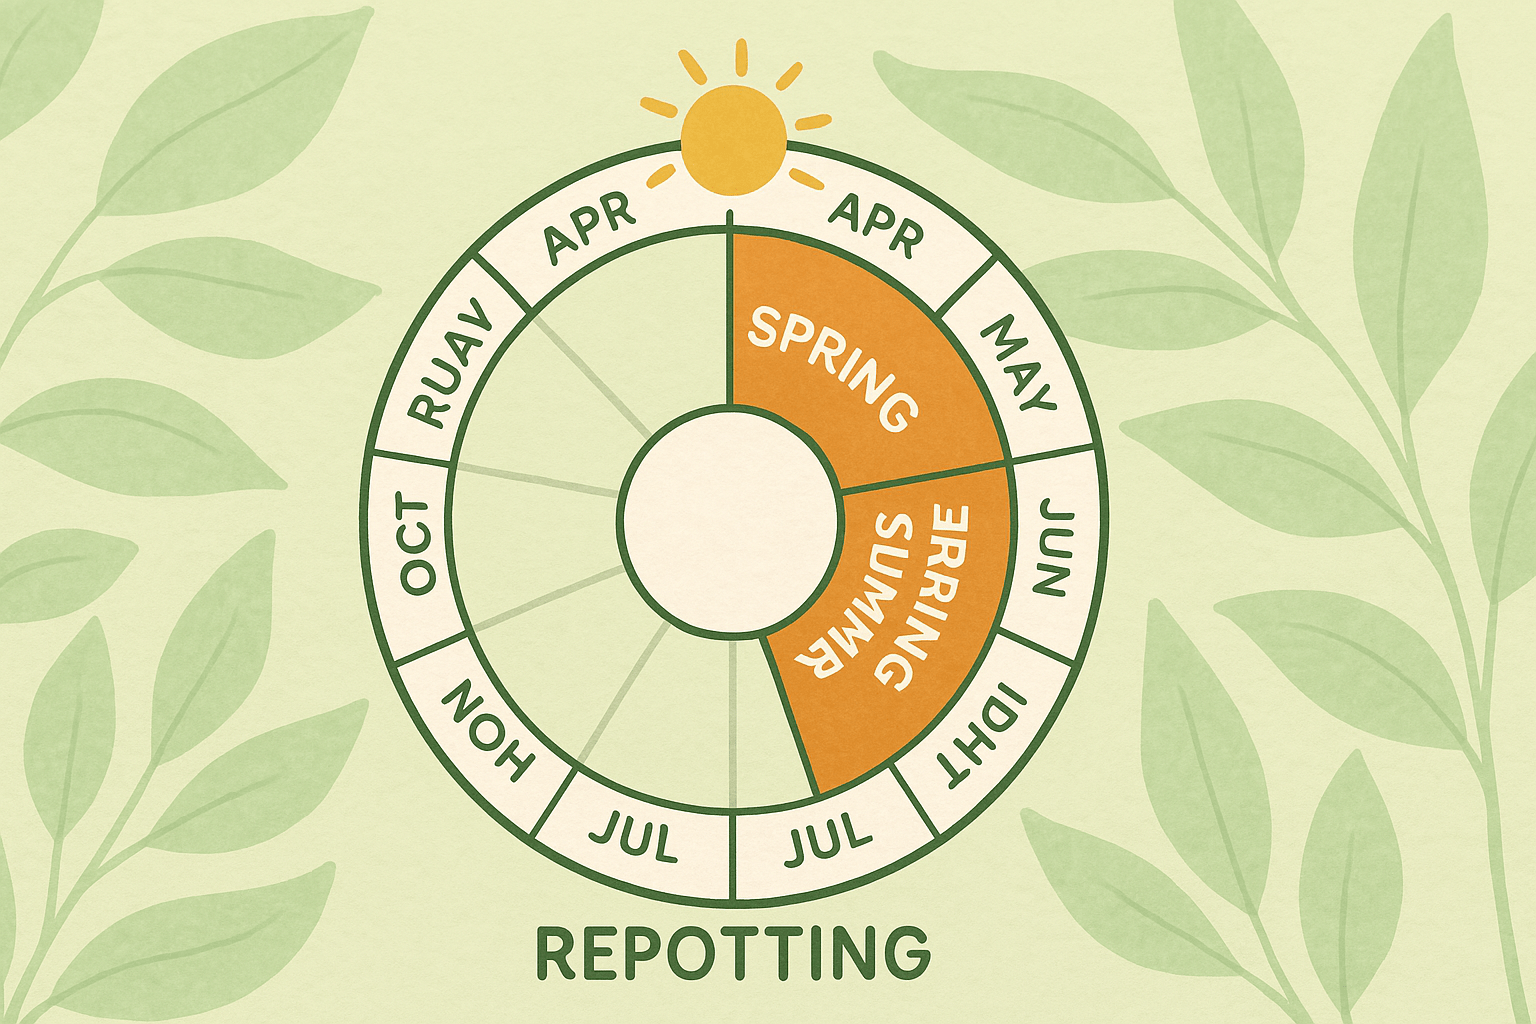
Knowing when to repot houseplants without stress is just as important as knowing how to do it. Here’s when you should plan to repot:
- Spring and Early Summer 🌷:
The best time to repot your plants is during their active growth period, which is usually in the spring or early summer. During this time, plants are more resilient and can recover quickly from the transition. - When the Plant Shows Signs of Stress 🌱:
If your plant is showing any of the signs mentioned earlier (like slow growth or roots growing out of the pot), it’s a good time to repot, regardless of the season. Don’t wait too long—taking action sooner will help the plant bounce back faster. - Avoid Winter and Dormant Seasons ❄️:
Repotting during the winter months or when your plant is in a dormant phase can cause stress. The plant is not actively growing, so it might take longer to adjust to a new pot.
Repotting at the right time ensures your plant has the best chance to thrive without unnecessary stress! 🌿✨
Tools You’ll Need for Stress-Free Repotting 🛠️🌱
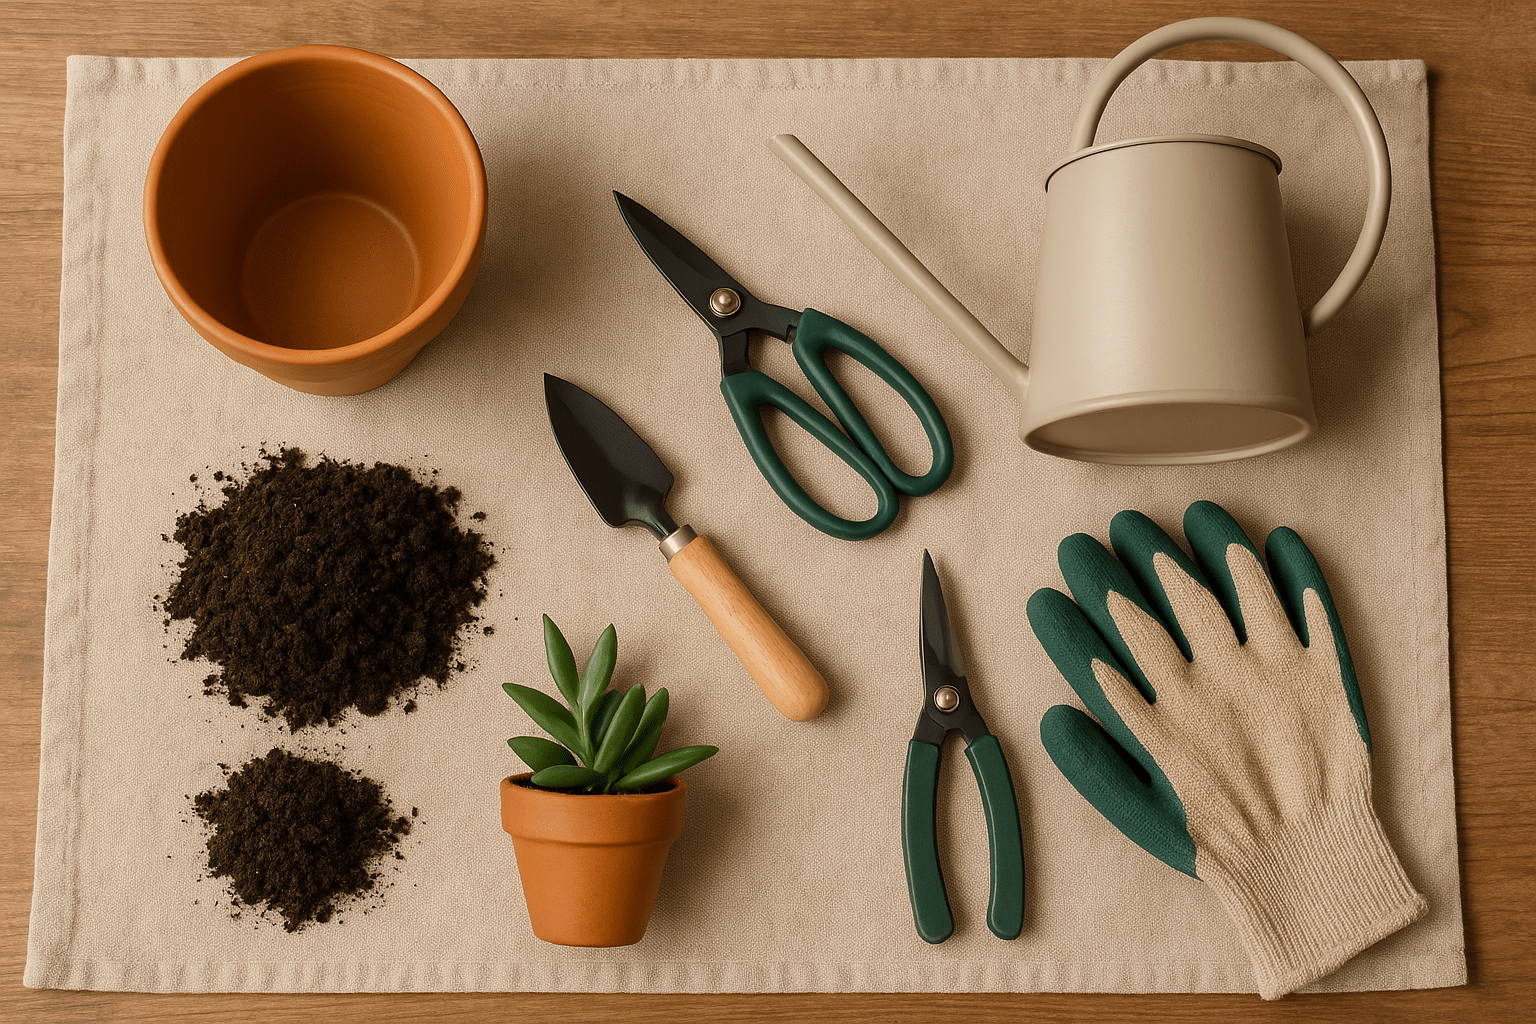
Having the right tools makes repotting houseplants without stress much easier. Here’s what you’ll need to get the job done:
- New Pot 🪴:
Choose a pot that’s 1-2 inches larger than the current one. Make sure it has drainage holes to prevent water from accumulating at the bottom, which can cause root rot. - Well-Draining Soil 🌍:
Select the right type of soil for your plant. For example, succulent soil for succulents, or peat-based mix for tropical plants. Fresh soil helps your plant settle into its new home. - Gardening Gloves 🧤:
Protect your hands from soil, dirt, and any rough edges on the pot. Gloves also help you get a firm grip when handling the plant. - Watering Can 💧:
Water your plant before and after repotting. This helps loosen the roots and ensures they settle well in the new soil. - Trowel or Small Shovel 🥄:
Use this to gently scoop and move the soil into the pot, making sure to fill it around the roots evenly. - Pruning Shears ✂️:
Trim away any damaged or rotten roots with clean pruning shears. This helps prevent further damage and encourages healthy growth.
Having these tools on hand will make the process smoother and ensure your plant thrives in its new pot! 🌱✨
Step-by-Step Guide to Repotting Houseplants Without Stress 🌿🪴
Repotting doesn’t have to be stressful! Follow these easy steps to make the process smooth and successful for both you and your plant:
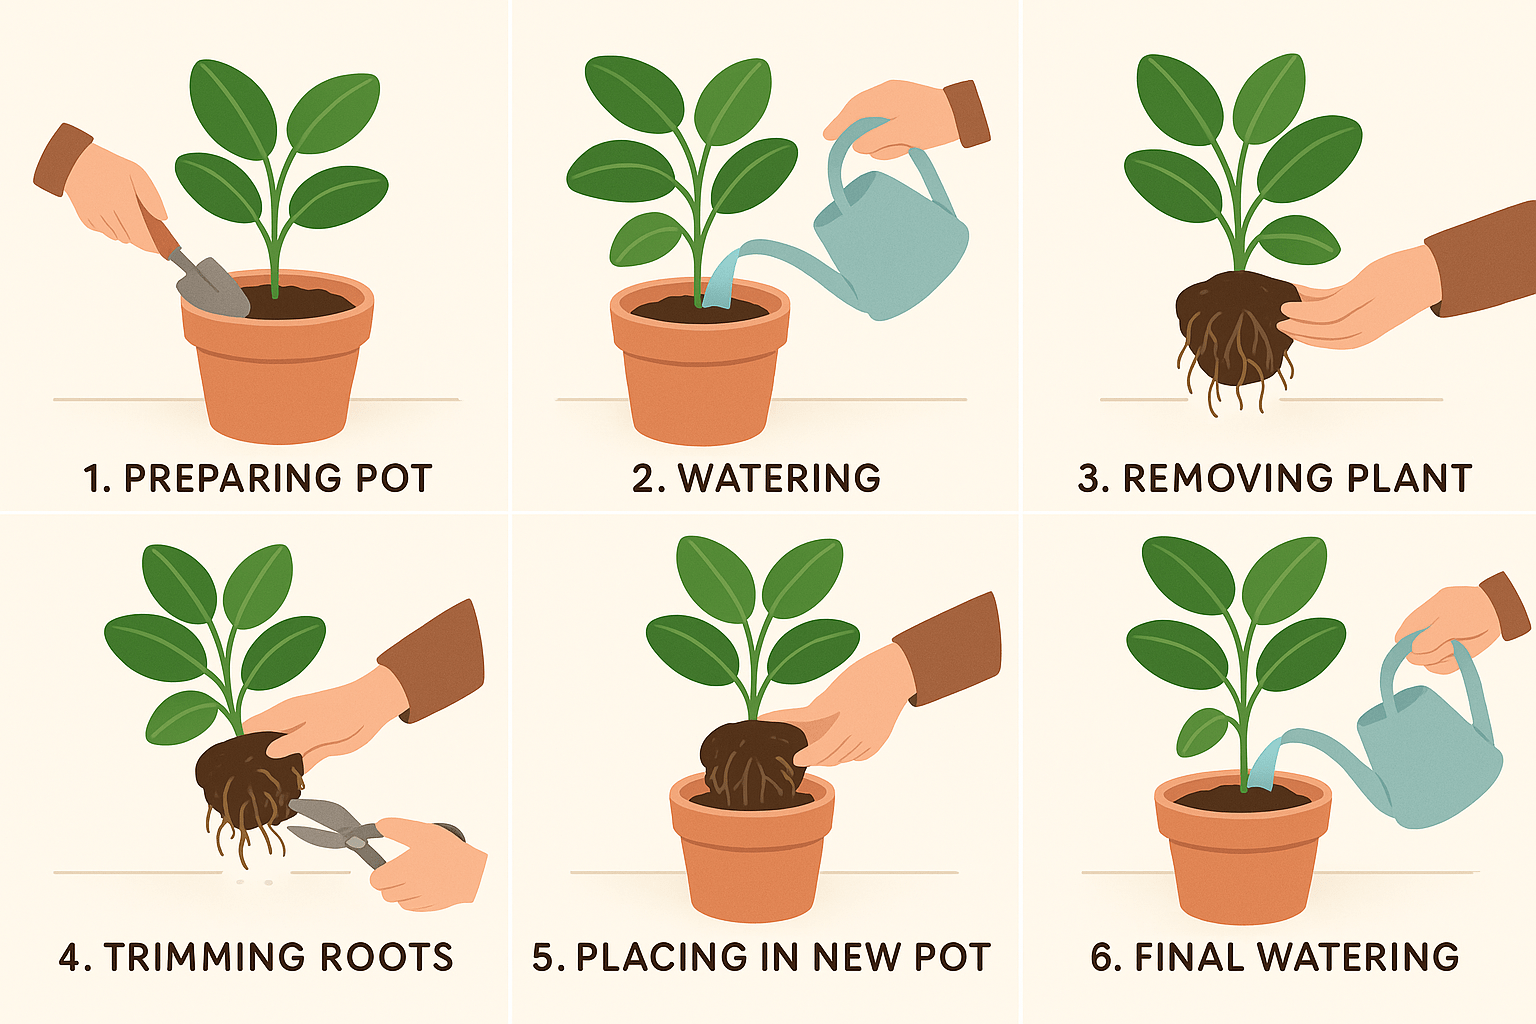
Step 1: Prepare the New Pot 🧑🌾
Start by ensuring the new pot has drainage holes. Add a layer of fresh, well-draining soil at the bottom—about one-third of the pot’s depth. This helps with proper drainage and root health.
Step 2: Water the Plant 💧
Water your plant a few hours before repotting. This softens the soil and makes it easier to remove the plant from its old pot, while also preventing shock to the roots.
Step 3: Remove the Plant from the Old Pot 🌱
Gently tap the sides of the old pot to loosen the soil. Carefully slide the plant out, supporting the base of the stem or the root ball. If it’s stuck, gently wiggle the plant to loosen it.
Step 4: Inspect and Trim the Roots ✂️
Check the roots for any damage, rot, or excessive tangling. Trim away any unhealthy roots with clean pruning shears to encourage fresh growth. Be gentle when handling the roots!
Step 5: Position the Plant in the New Pot 🪴
Place the plant in the center of the new pot, making sure it’s sitting at the same depth as it was in the old pot. Add soil around the root ball, gently pressing it down to eliminate air pockets.
Step 6: Water and Settle the Plant 🌊
After filling in the soil, water the plant gently to help it settle. Make sure the soil is evenly moist, but not soaked. Let the water drain out through the bottom.
That’s it! You’ve just repotted your plant without stress. Now, place it in a spot with indirect light and give it time to adjust to its new home. 🌿✨
Common Mistakes to Avoid While Repotting ⚠️🌿
Repotting your houseplant doesn’t have to be tricky, but avoiding these common mistakes will ensure the process goes smoothly:
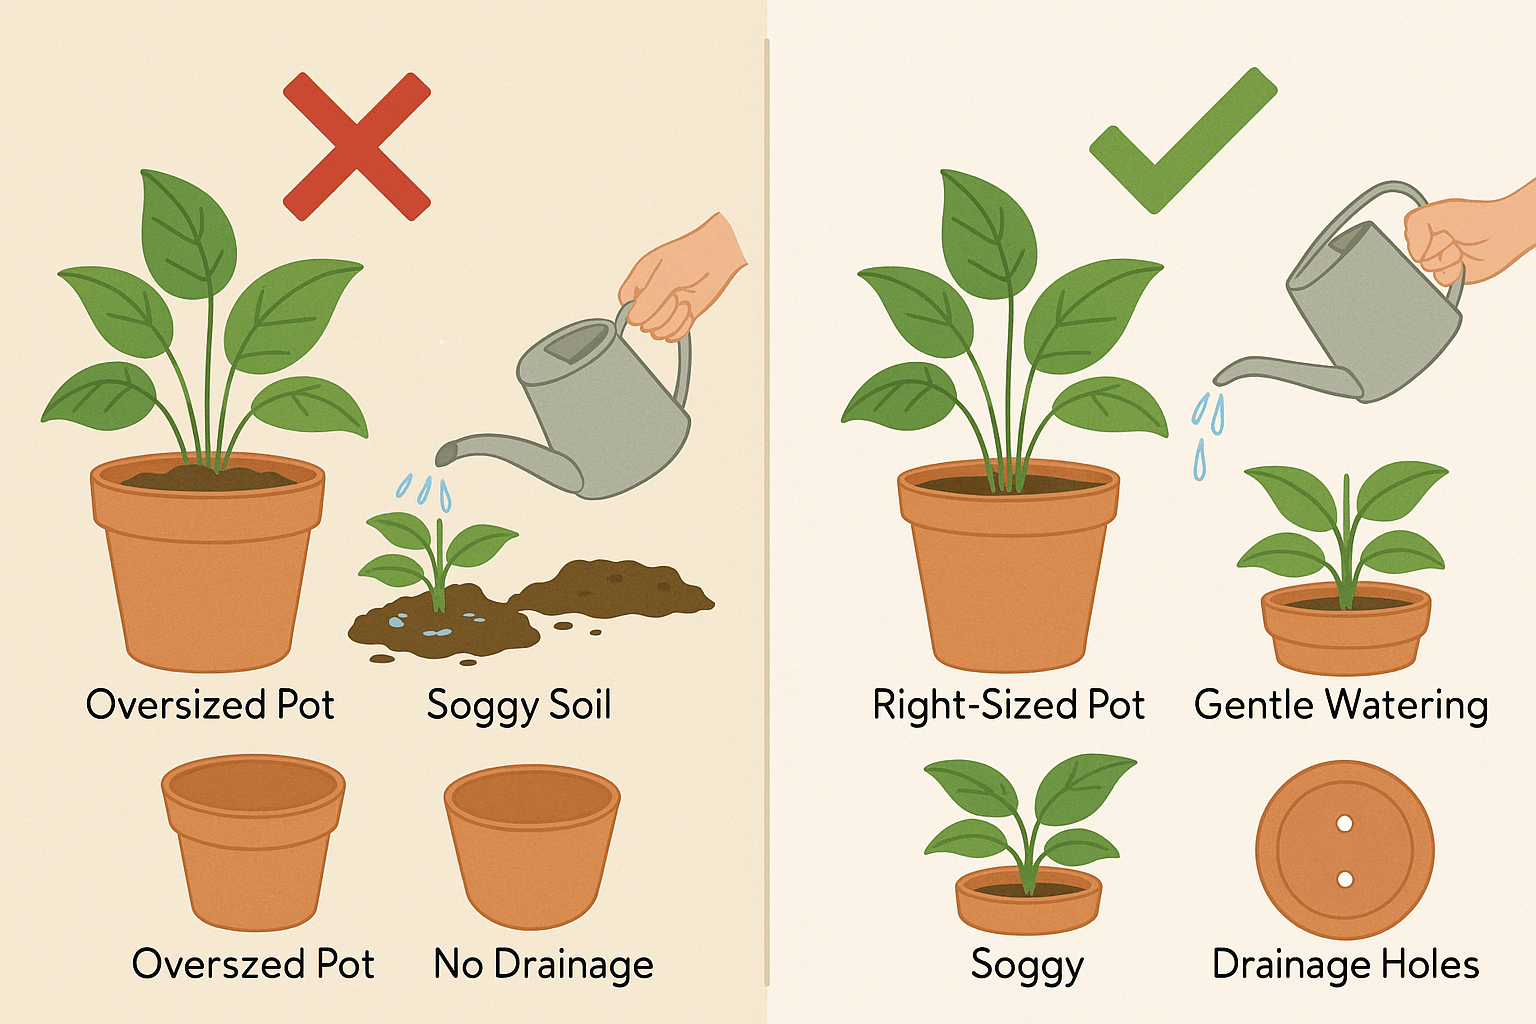
- Choosing a Pot That’s Too Big 🪴
It’s tempting to pick a pot that’s much larger than the current one, but this can cause overwatering. A pot that’s 1-2 inches bigger is ideal. Too much extra space can lead to water retention and root rot. - Over-Watering After Repotting 💦
Resist the urge to water your plant excessively right after repotting. Too much water can stress the roots. Water lightly and allow the plant to adjust to its new home before giving it a full drink. - Not Checking Drainage Holes 🚫
Always check for drainage holes before repotting! Without proper drainage, water can get trapped in the pot, leading to root rot. Ensure the new pot has holes to allow excess water to escape.
- Handling Roots Too Roughly ✂️
Be gentle with the roots when removing the plant from the old pot or when trimming them. Rough handling can damage the roots, slowing down the plant’s recovery and growth. - Ignoring the Right Soil 🌍
Using the wrong soil for your plant type can affect its health. For example, cactus and succulent soil is different from tropical plant soil. Make sure to choose the best soil for your specific plant’s needs.
By avoiding these simple mistakes, you’ll give your plant the best chance to thrive in its new pot! 🌱✨
Post-Repotting Care 🌿💧
After repotting, your plant will need a little extra TLC to adjust to its new home. Follow these tips for smooth recovery:
- Water Gently 💦
Give your plant a light watering right after repotting to help settle the soil around the roots. Wait a few days before watering again to avoid overwatering. The soil should stay slightly moist, not soggy.
- Provide Indirect Light ☀️
Place your plant in a spot with bright, indirect sunlight. Avoid direct sunlight immediately after repotting, as the plant may be stressed and more susceptible to sunburn. - Avoid Fertilizing Right Away 🛑
Hold off on fertilizing for about 4–6 weeks after repotting. Fresh soil typically has enough nutrients for the plant to start, and over-fertilizing can burn the roots. - Keep an Eye on the Plant 👀
Watch for any signs of stress, such as drooping leaves, yellowing, or slow growth. These could indicate the plant is still adjusting. Be patient, as recovery can take a few weeks. - Maintain Humidity 🌬️
If you have a tropical plant, it may appreciate a boost in humidity. Use a humidity tray or mist the leaves occasionally to provide extra moisture in the air.
With these post-repotting care tips, your plant will bounce back quickly and thrive in its new pot! 🌱✨
How Often Should You Repot Your Plants? 🌱🪴
Repotting your plants at the right time is key to their health and growth. Here’s a general guide on how often you should repot:
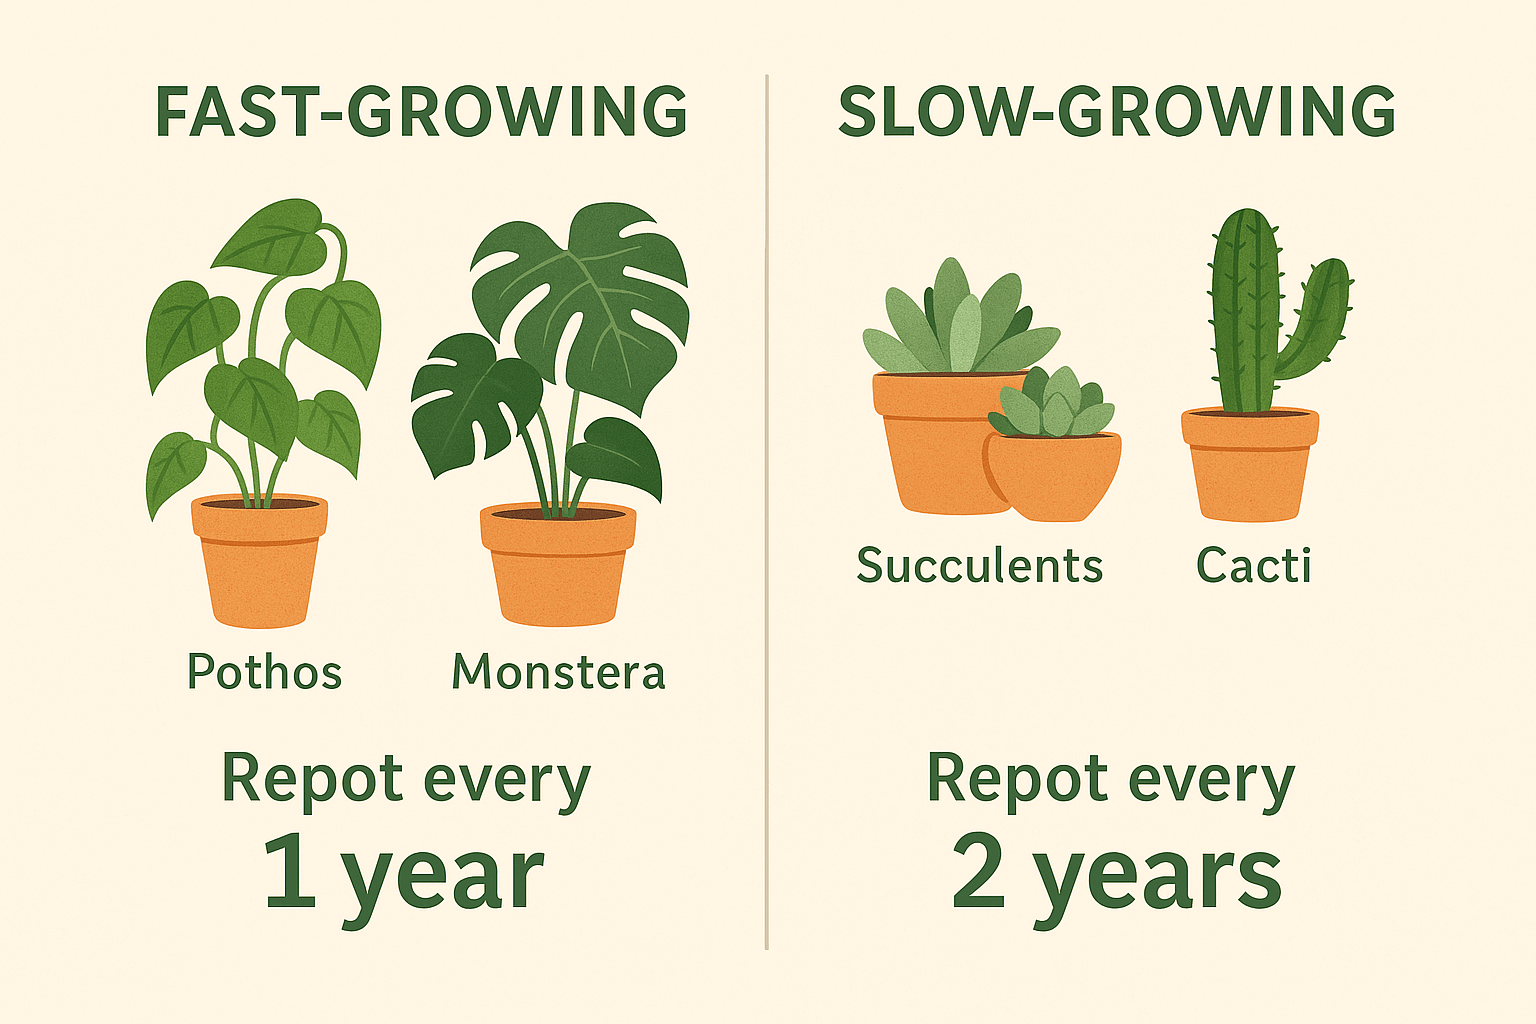
- General Guideline: Every 1-2 Years 📅
Most houseplants benefit from being repotted every 1 to 2 years. This helps refresh the soil, provides more space for growing roots, and gives the plant new nutrients. - Fast-Growing Plants 🌿
If your plant is a fast grower, like a pothos or monstera, it may need repotting more often—about once a year. These plants quickly outgrow their pots and require fresh soil and space. - Slow-Growing Plants 🐢
For slow-growing plants, like succulents or certain cacti, repotting every 2 years is usually sufficient. These plants don’t need as much space, so they can go longer between repottings.
- When You Notice the Signs 👀
Always keep an eye on your plant for signs that it’s ready for a bigger pot (like slow growth, roots pushing out of the drainage holes, or water draining too quickly). If you see any of these signs, it’s time to repot, regardless of how long it’s been.
By understanding your plant’s growth pattern and paying attention to its needs, you can repot at the right time for a healthier, happier plant! 🌿✨
Final Thought
Repotting houseplants without stress is all about timing, preparation, and gentle care. By recognizing the signs that your plant needs repotting and using the right tools, you can create a smooth transition for your plant to thrive in its new pot. Remember to repot during the active growing season, avoid common mistakes like choosing an overly large pot, and follow post-repotting care steps to help your plant settle in.
With a little patience and attention, your plants will reward you with fresh growth and vitality. So, take a deep breath and embrace the process—repotting doesn’t have to be stressful, and your plants will thank you for it! Happy repotting! 🌿💚