
Imagine transforming a blank wall into a lush, green oasis right in the heart of your home. With the growing popularity of vertical gardens, installing a vertical plant wall can completely revolutionize your space. Whether you’re looking to maximize limited space or create a statement piece in your living room, this guide will walk you through the essential vertical plant wall installation tips. From planning and selecting the right plants to the step-by-step installation process, you’ll have everything you need to bring your vertical garden vision to life with ease and style. Let’s dive in!
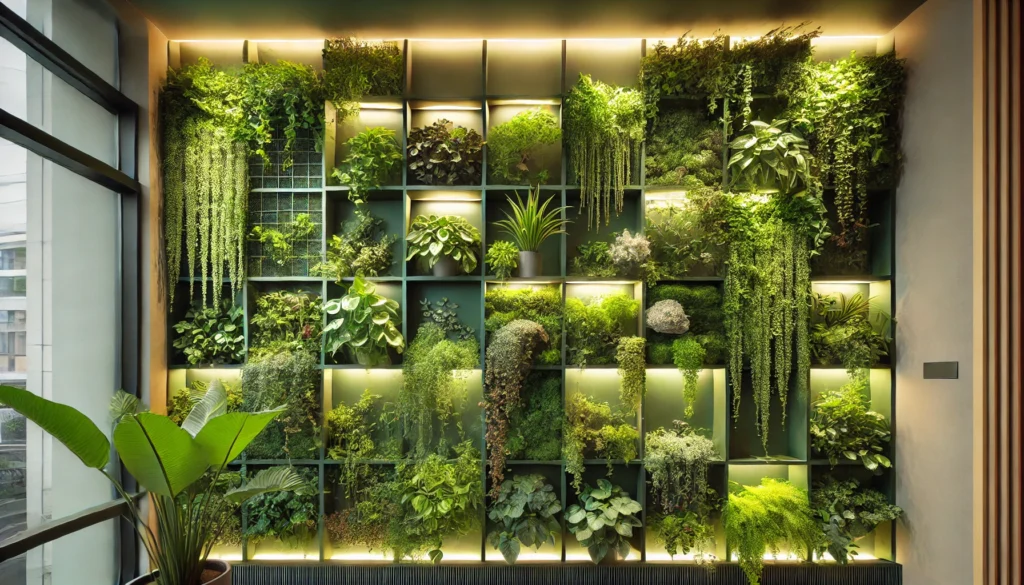
What Is a Vertical Plant Wall? 🌿
A vertical plant wall, also known as a green wall or living wall, is a garden system where plants grow vertically rather than horizontally, using a wall or structure as support. 🌱 It’s an innovative way to bring nature indoors or outdoors while saving space and adding a unique, beautiful touch to any area.

These walls can be created in a variety of ways, including pocket systems, plant panels, or hydroponic setups. 🪴 The key benefit? You get all the charm of a garden without taking up valuable floor space, making it perfect for small apartments, offices, or even outdoor patios. If you’re planning to set one up, exploring vertical plant wall installation tips can help ensure a successful and lasting display.
Why Choose a Vertical Plant Wall?
- Space-Efficient: By growing plants vertically, you can make use of wall space, leaving more room for other activities or furniture. 📏
- Variety of Designs: You can use various systems such as plant pockets, modular panels, or hydroponic systems to create a vertical garden. 🪴
- Eco-Friendly: These walls not only add beauty but also contribute to cleaner air and enhanced humidity levels. 🌬️

In essence, vertical plant walls are an excellent choice for anyone looking to introduce greenery into their space while saving on precious floor area. 🌸
Planning Your Vertical Plant Wall 📝
Planning is the first step in creating a successful vertical plant wall. It ensures that your garden will thrive and suit your space. Here’s how to get started:
Assess Your Space 📍
- Size: Measure the wall area where you want to install your vertical plant wall. Make sure it’s large enough to accommodate the plants you want to grow, but not too cramped.
- Light: Consider how much natural light the space receives. Is it sunny or shady? This will help you choose the right plants for the environment. 🌞🌑
- Accessibility: Ensure the wall is easy to access for watering, pruning, and general maintenance. It’s best to install it where you can easily reach all parts of the wall.
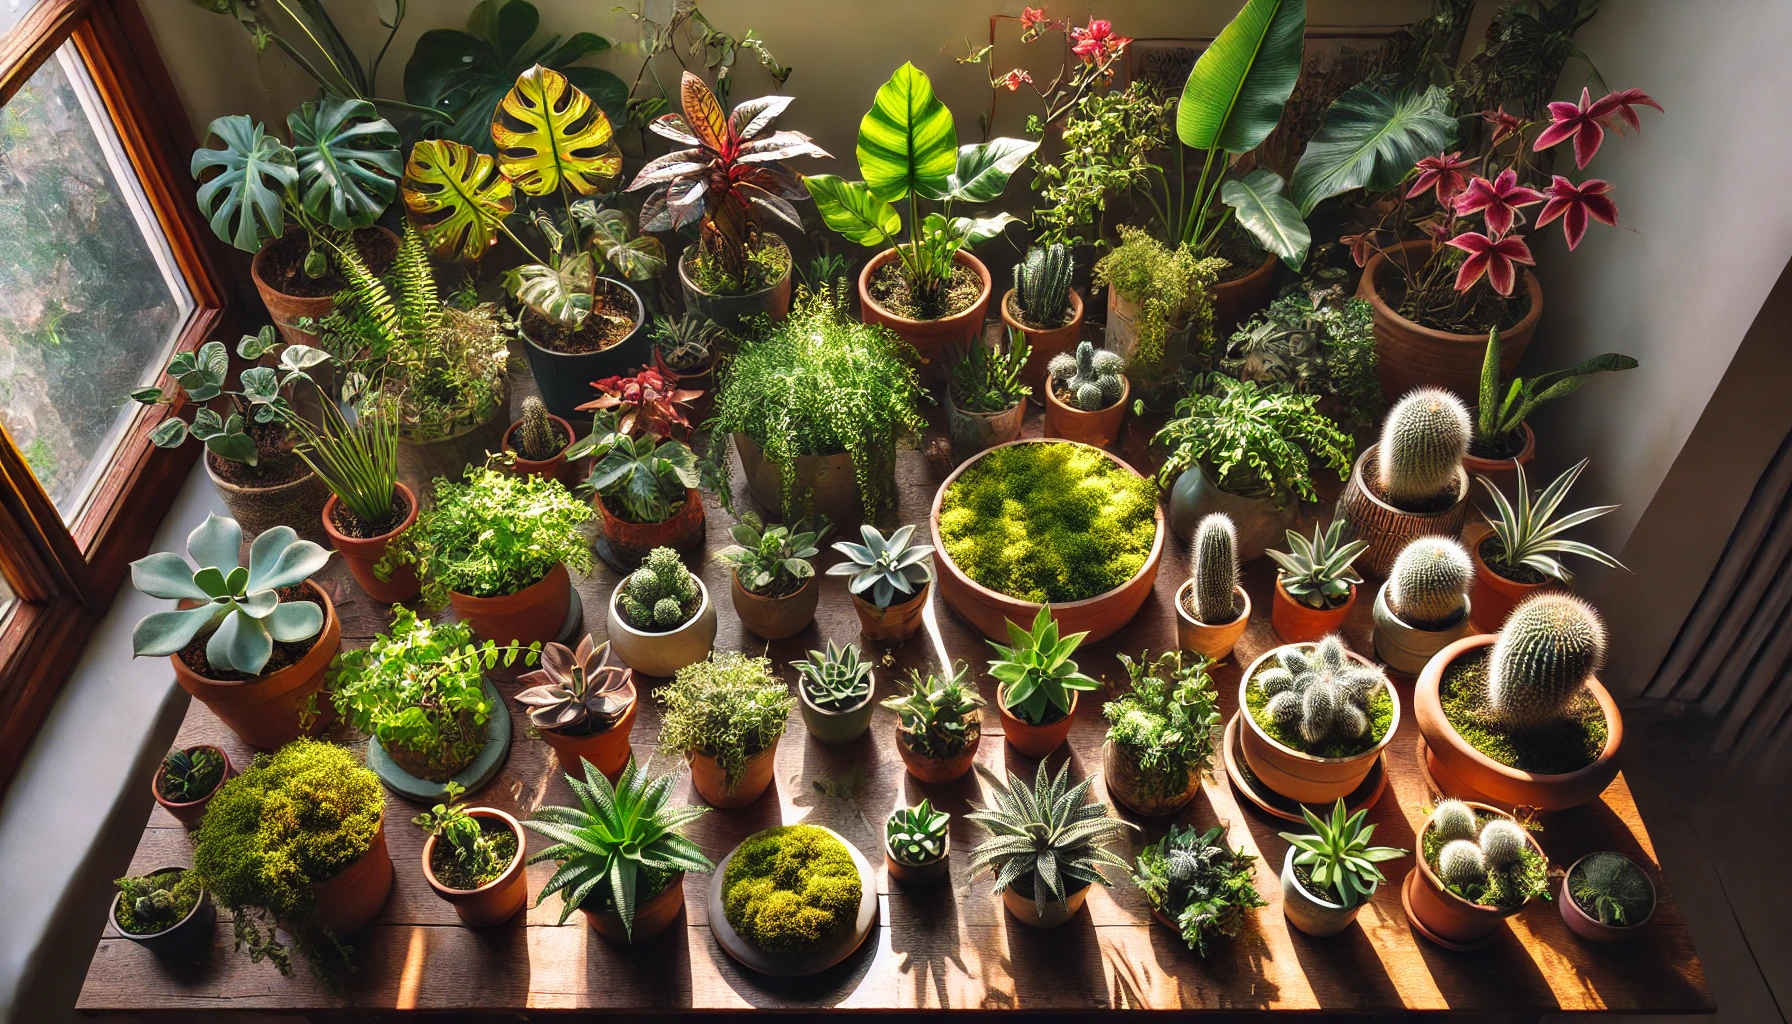
Choose the Right Plants 🌿
- Light Requirements: Match plants with your wall’s light conditions. Low-light plants, like ferns and moss, are perfect for shaded areas, while sun-loving plants like succulents thrive in bright light.
- Water Needs: Some plants need more water than others. Consider your ability to water the wall regularly and choose plants that suit your watering schedule. 💧
- Aesthetic Preferences: Mix and match plants with different textures, colors, and shapes to create a beautiful, dynamic wall. Think about plants that will complement your home’s decor or the outdoor environment.
Plan the Design 🎨
- Style: Decide on a style that suits your space. Do you prefer a modern, minimalist look with sleek panels, or a more rustic feel with a wooden frame and cascading vines?
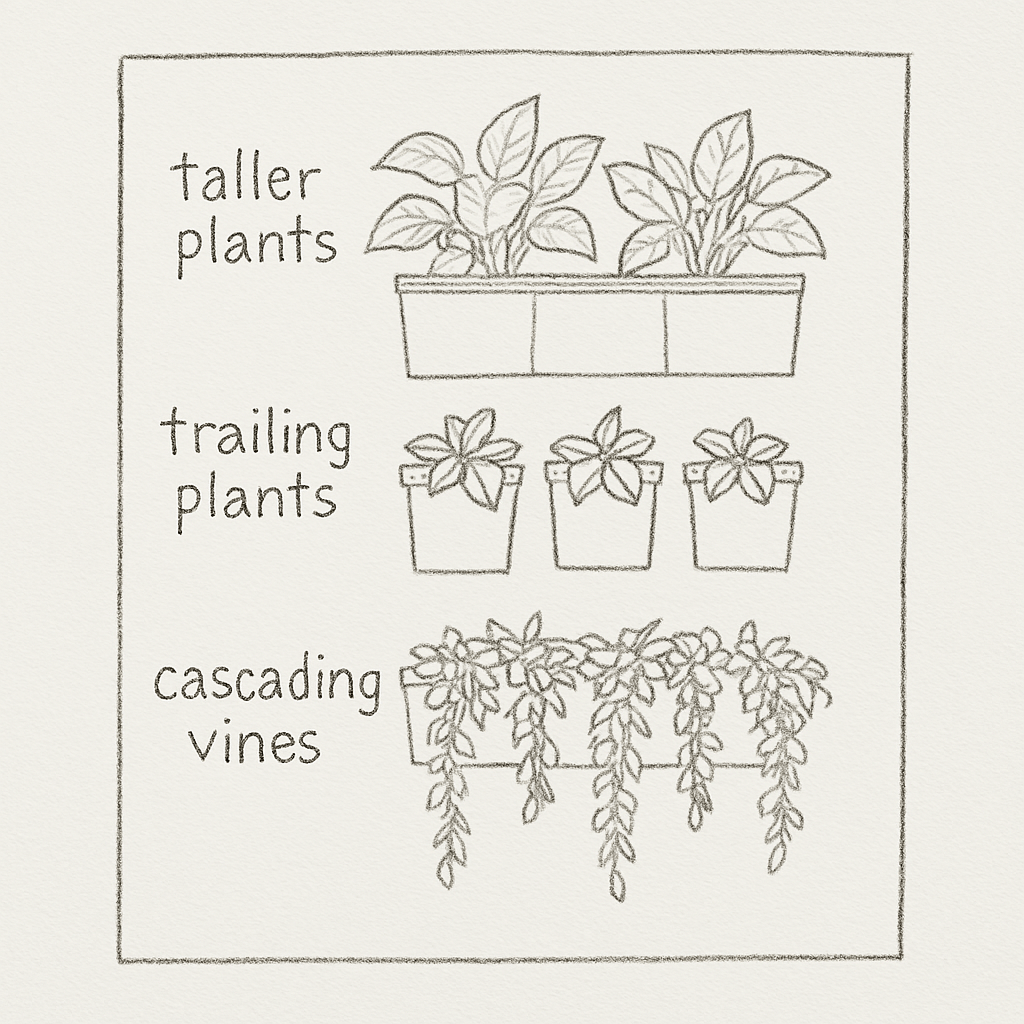
- Plant Arrangement: Plan how you want to arrange the plants. Taller plants should go at the bottom or center, while trailing plants can hang from the top to create a cascading effect. 🌱
By carefully planning your vertical plant wall, you’ll ensure it not only thrives but also adds beauty to your space. 🌿
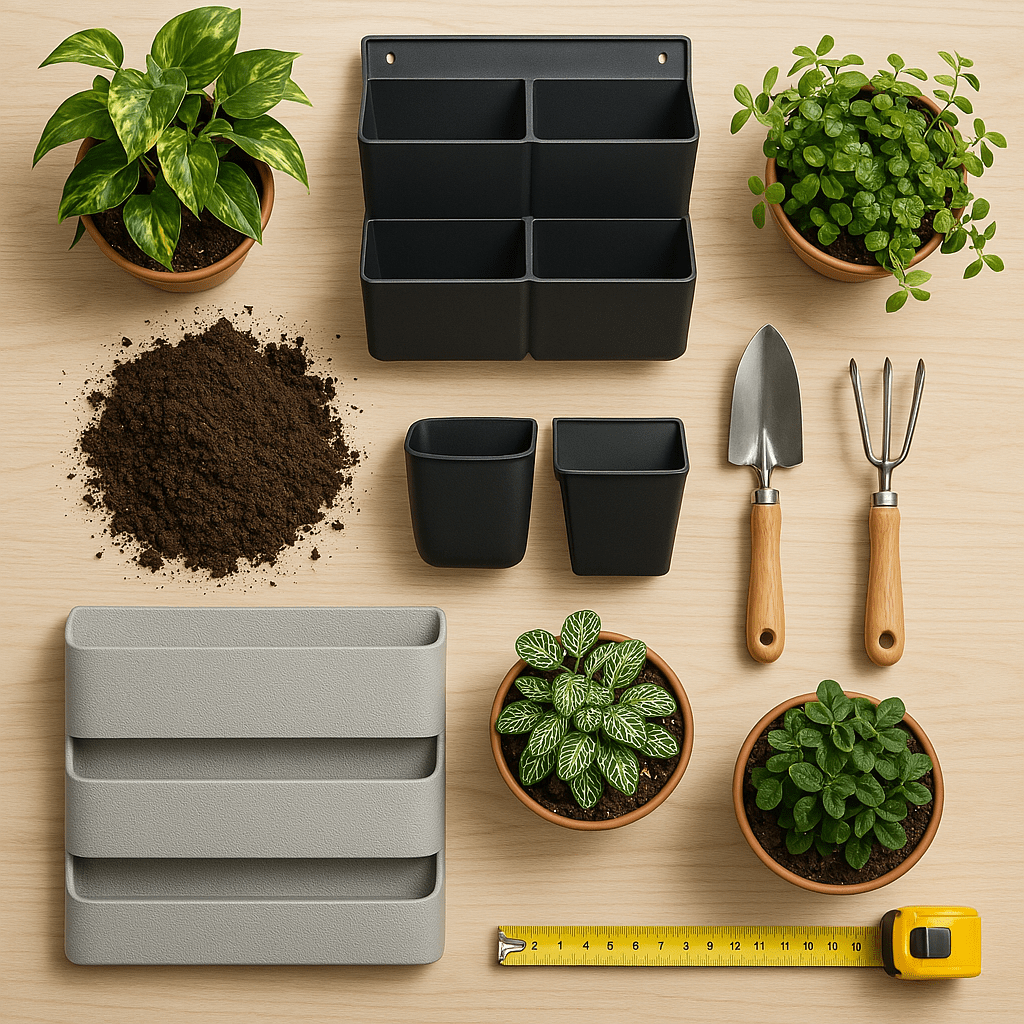
Choosing the Right Materials 🛠️
Selecting the right materials for your vertical plant wall is crucial for both functionality and aesthetics. Here’s a breakdown of the essential components you’ll need to create a stunning and durable plant wall. For best results, follow expert vertical plant wall installation tips to choose materials that suit your space, lighting, and plant choices.
Frame Options 🪚
The frame serves as the foundation for your vertical garden. Common materials include:
- Wood: Offers a natural, rustic look, perfect for creating a cozy, organic vibe. It’s sturdy but may need additional waterproofing to protect against moisture. 🌲
- Metal: A sleek, modern option that provides great durability. It’s perfect for a more industrial or minimalist design. ⚒️
- Plastic: Lightweight and affordable, plastic is an easy option, especially for smaller walls or DIY projects. However, it may not have the same visual appeal as wood or metal. 🧱
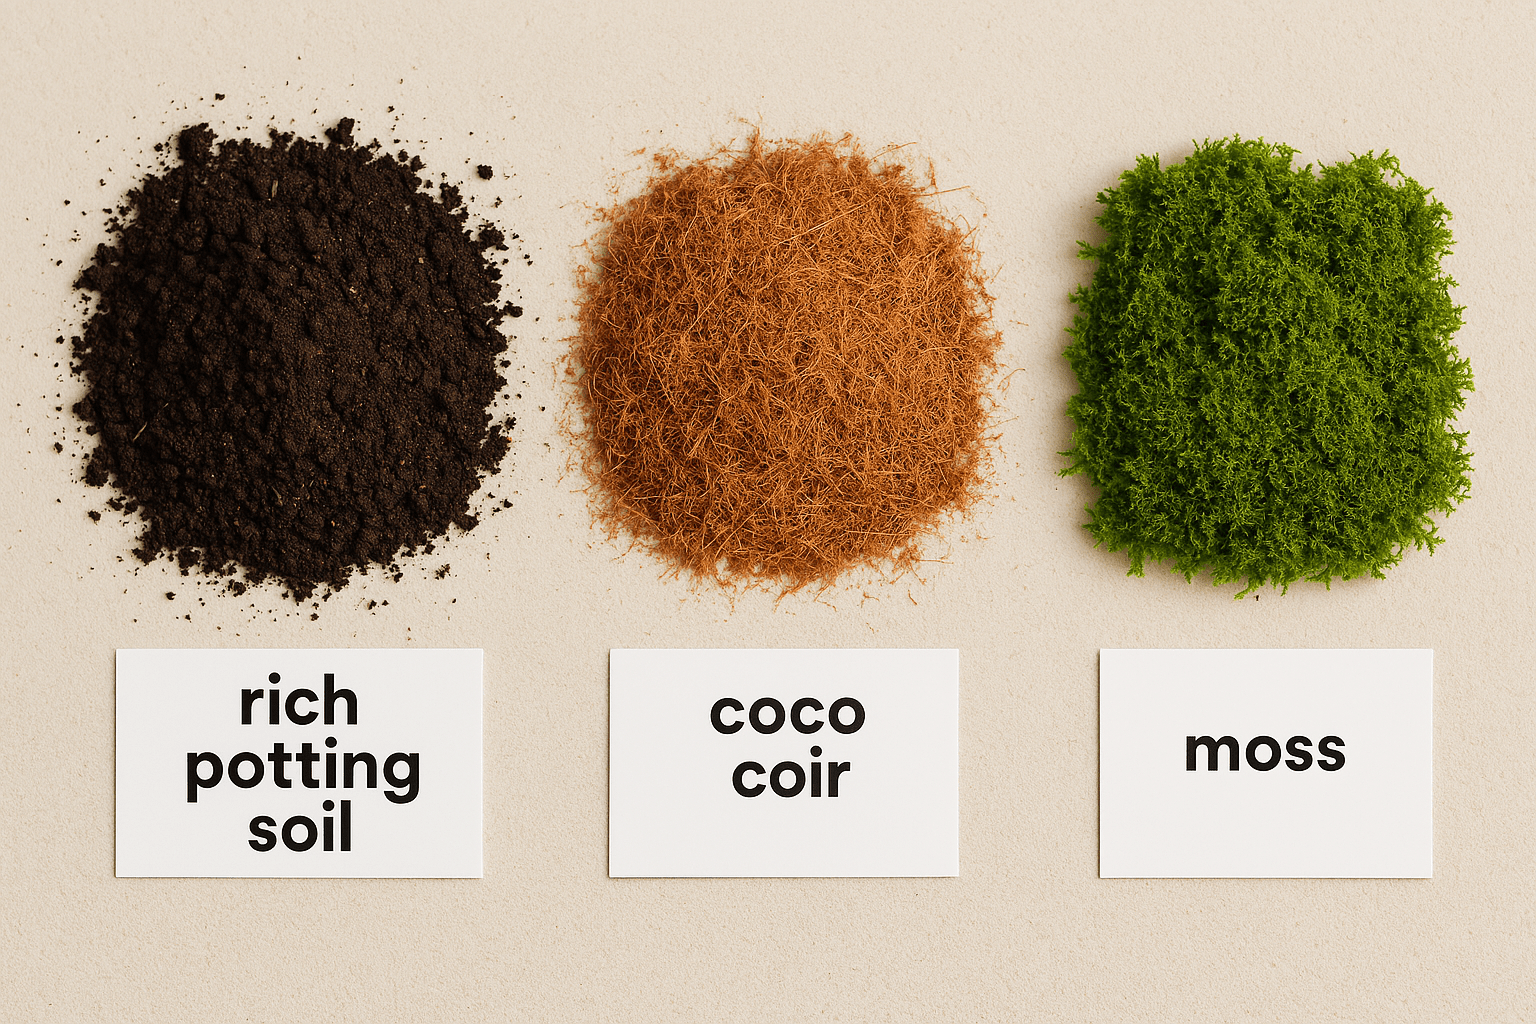
Planting Medium 🌱
What your plants grow in will affect their health and growth. Consider these options:
- Soil-based: The most common medium for vertical gardens, soil offers a natural, well-rounded environment for plant growth. It’s great for most plants but may require a bit more maintenance. 🌍
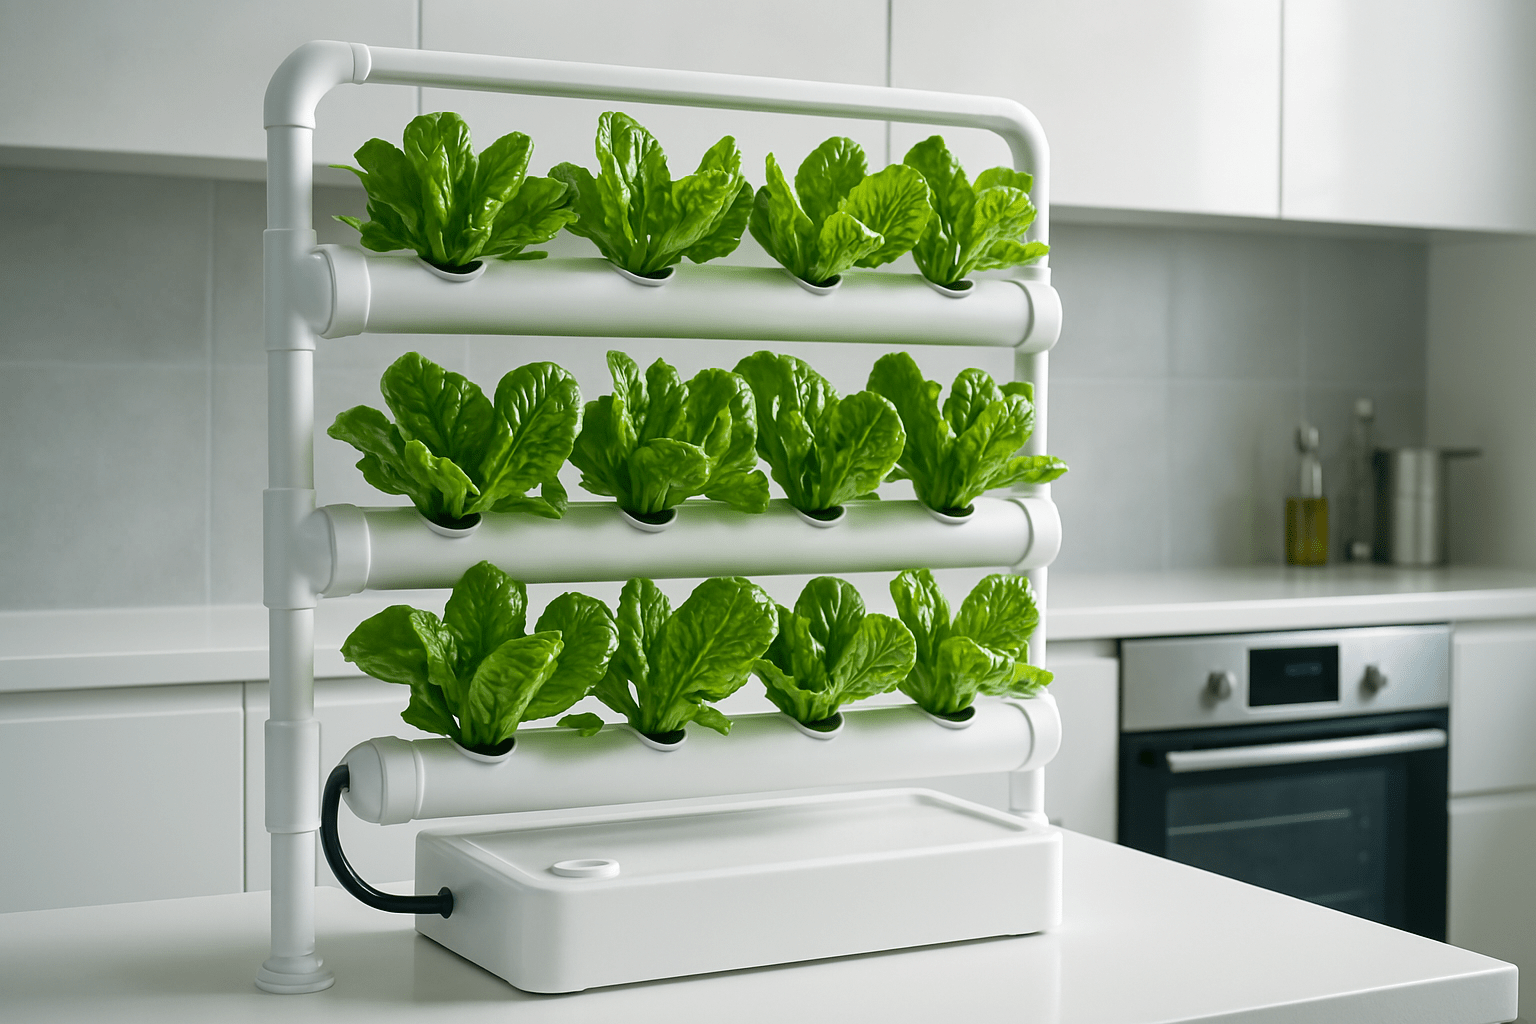
- Hydroponic System: For a soil-free option, hydroponics uses water and nutrients to grow plants. It’s more efficient in terms of water use and maintenance, but it requires a more complex setup and care. 💧
- Coco Coir or Moss: For lightweight, moisture-retaining solutions, coco coir and moss are great alternatives to traditional soil. These are often used in pocket-style vertical gardens. 🌾
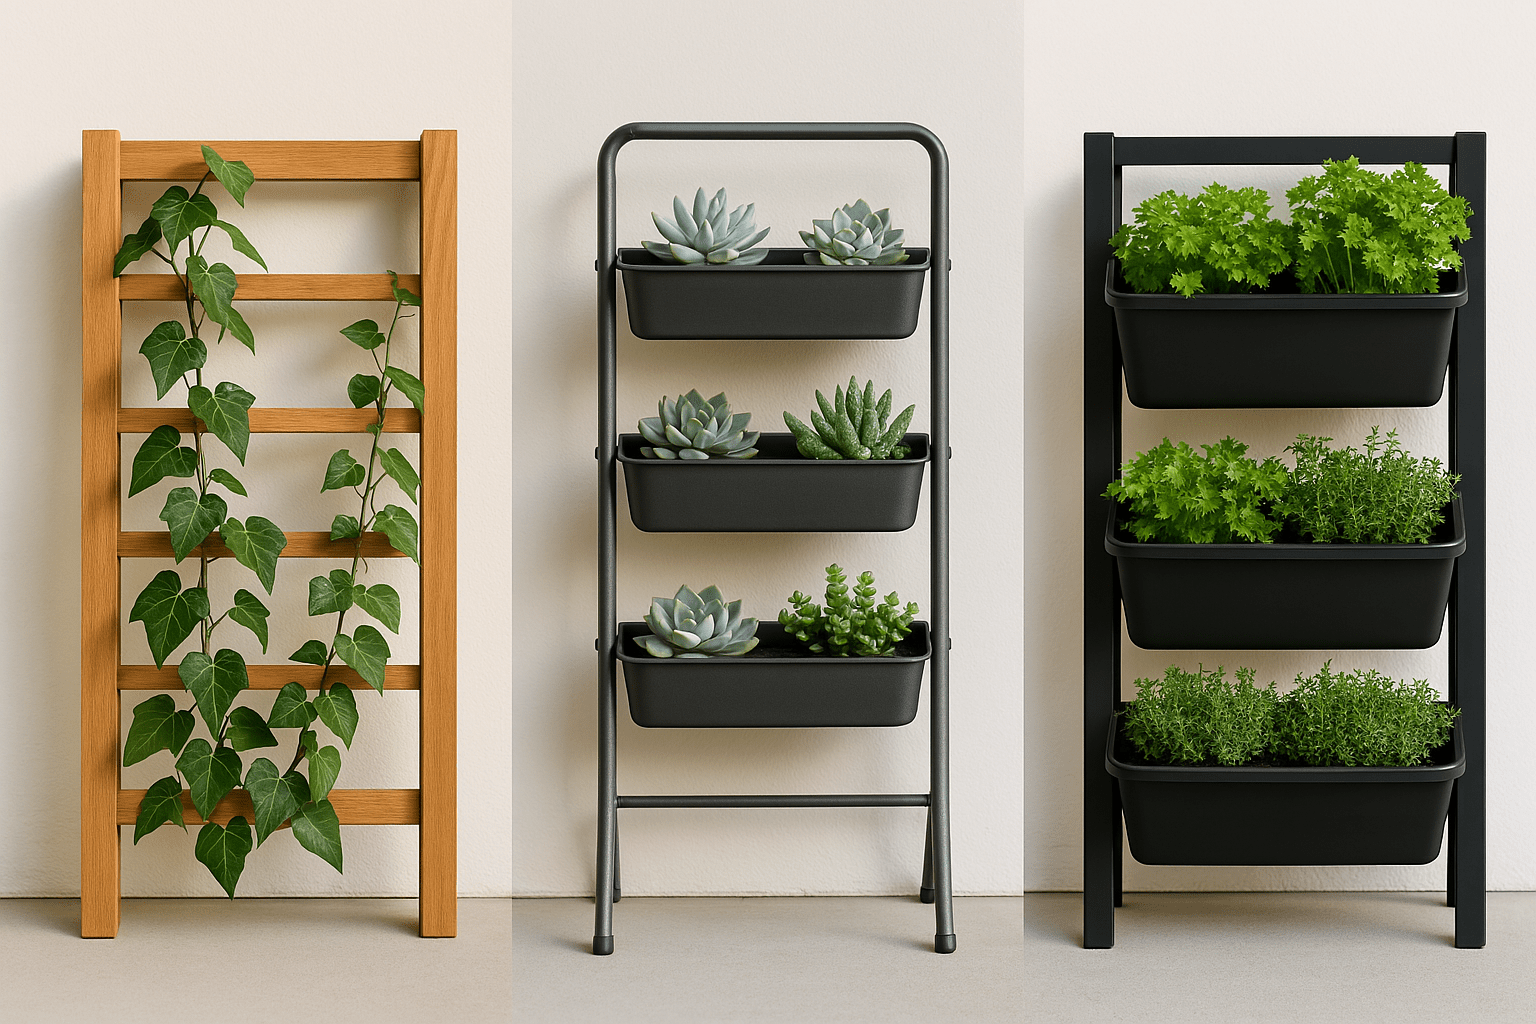
Mounting Systems 🧰
Different mounting systems provide various ways to arrange your plants:
- Pockets or Fabric Panels: These systems use fabric or felt pockets to hold soil and plants. They’re easy to install and great for smaller plants like ferns or ivy. 🌿
- Modular Panels: Pre-made panels that fit together, creating a grid-like structure for plants. These are ideal for larger plant walls and provide flexibility in design. 🪴
- Shelves or Racks: A simple and effective way to mount plants, allowing for easier maintenance. This is perfect for larger plants like succulents or herbs. 🪴
By carefully selecting materials that suit both your design preferences and the needs of your plants, you’ll set your vertical plant wall up for success! 🌟
Preparing Your Wall for Installation 🛠️
Before you start installing your vertical plant wall, it’s essential to prepare your wall properly to ensure a secure and stable setup. Here’s how to get your space ready for installation:
Gather Your Tools 🔧
Make sure you have everything you need before you begin:
- Measuring Tape: For accurate measurements of your wall space and plant arrangement. 📏
- Drill and Screws: To attach the frame or mounting system securely to the wall. 🧰
- Level: To make sure everything is straight and properly aligned. ⚖️
- Screwdriver: For tightening screws into place. 🔩
Choose the Right Wall 🏠
- Sturdy Surface: Your wall needs to be strong enough to support the weight of your plants, soil, and mounting system. Solid surfaces like brick, drywall with studs, or wood panels are ideal.
- Check for Electrical or Plumbing Lines: Avoid drilling into areas where electrical wires or plumbing pipes might be running. Use a stud finder to help locate studs behind the wall for better support. ⚡🔧
Clean the Wall 🧽
Before installation, clean the wall to ensure a smooth, even surface. Dust, dirt, and grease can interfere with the adhesion of mounting materials. A clean surface also prevents potential damage to the plants over time. 🌟
Plan the Placement 🗺️
- Measure the Area: Use your measuring tape to mark the exact area where the frame or plant pockets will be placed.
- Check for Proper Lighting: If installing indoors, ensure the chosen spot gets the right amount of natural light or is suitable for supplemental lighting like grow lights. 🌞💡
With your tools ready and the wall properly prepared, you’ll be set to move on to the installation process. A solid preparation ensures that your vertical plant wall will not only look great but last long! 🌱
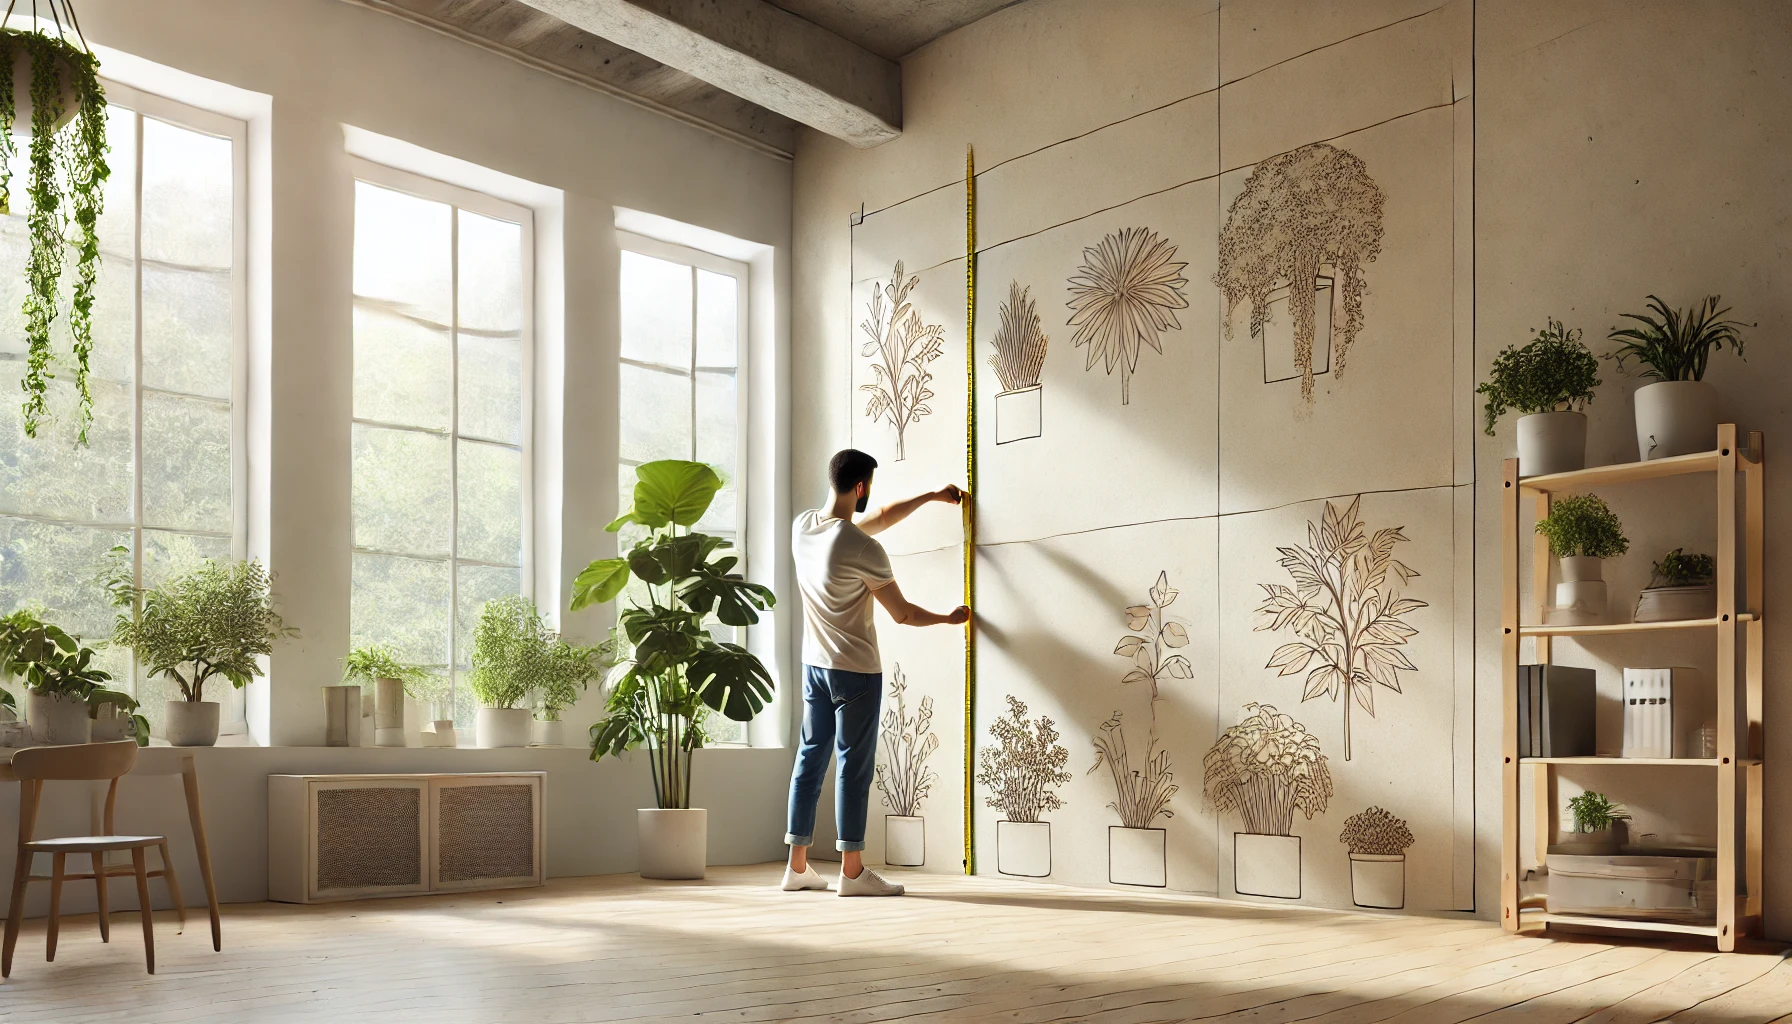
Step-by-Step Vertical Plant Wall Installation 🛠️
Now that your space is prepared, it’s time to get hands-on and install your vertical plant wall! Follow this simple, step-by-step guide to ensure a smooth and successful installation. These vertical you avoid common mistakes and achieve a professional-looking result.
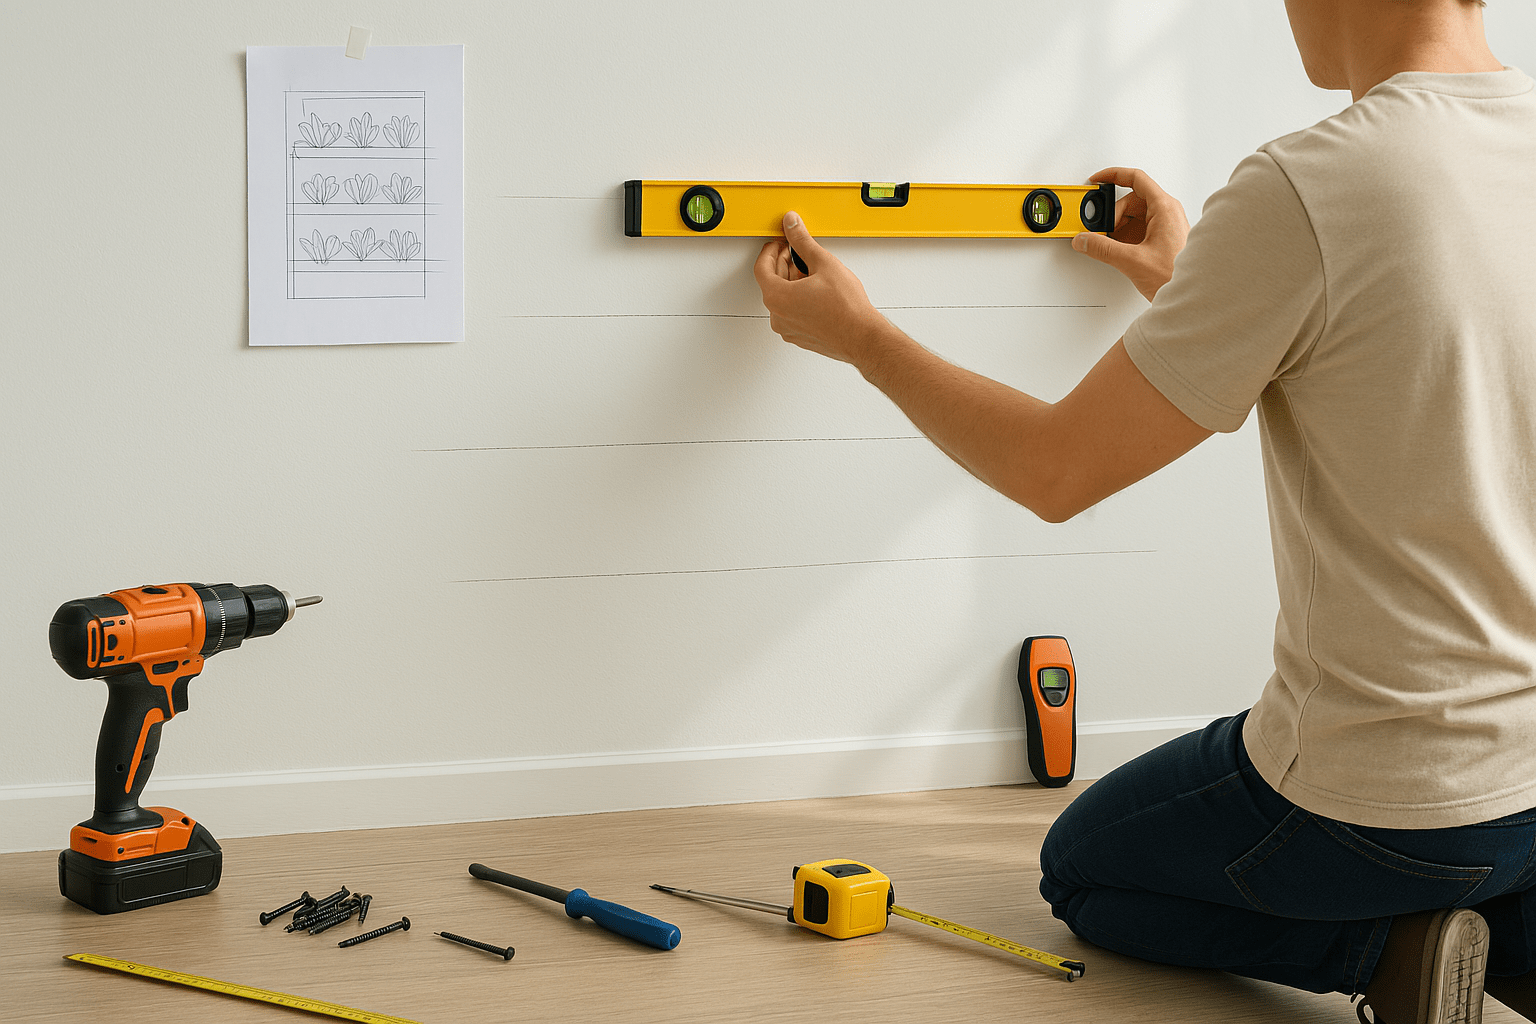
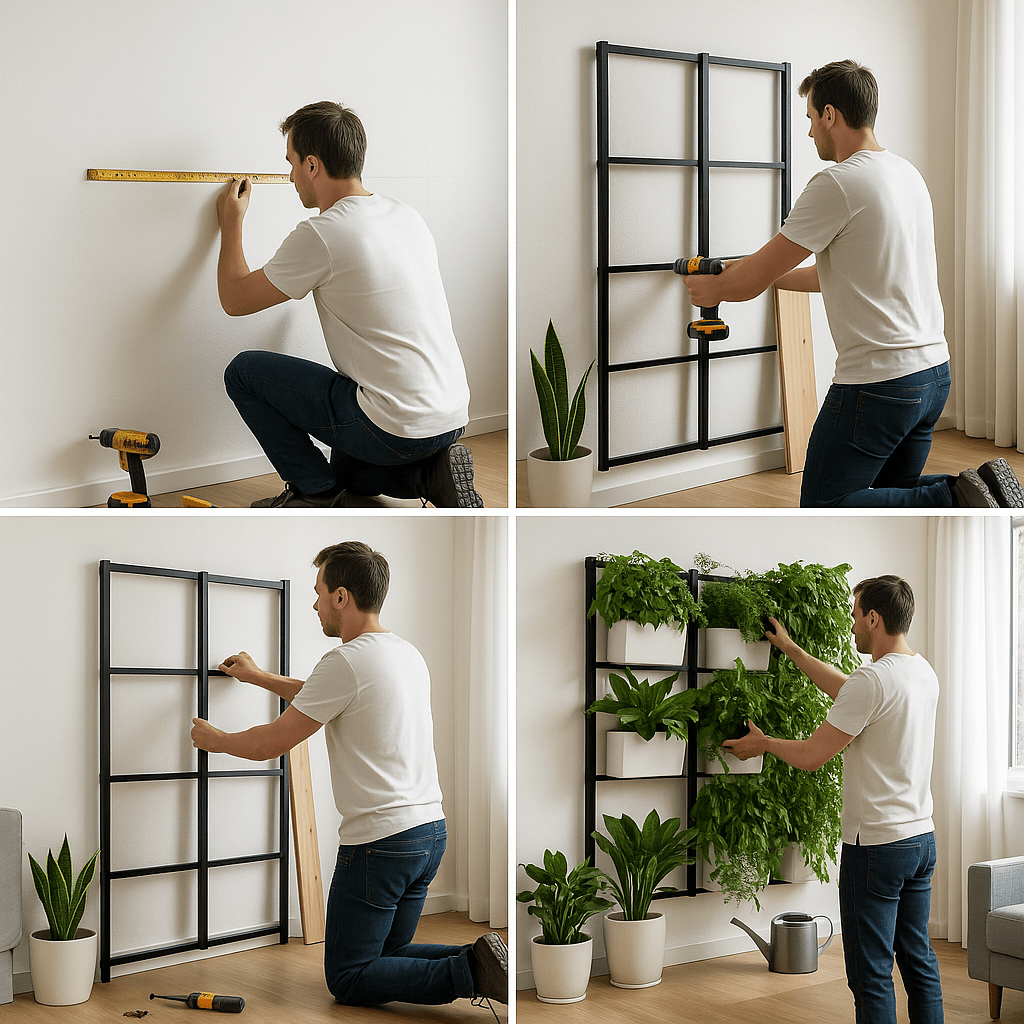
Step 1: Measure and Mark the Wall 📏
- Use a measuring tape to determine the exact area where you want to place your vertical garden.
- Mark the top and bottom edges of the area with a pencil or chalk to ensure your frame is level and centered.
- If your wall will have multiple panels or sections, mark where each one will go, leaving enough space between each for plant growth.
Step 2: Attach the Frame or Mounting System 🔩
- If you’re using a wooden or metal frame, position it against the wall where you’ve marked the area.
- Use a level to ensure the frame is straight and aligned with the wall.
- Drill pilot holes into the wall at the points where the frame will be secured. Make sure to drill into studs or other solid surfaces for stability.
- Attach the frame securely with screws, ensuring that it’s firmly in place and can hold the weight of your plants.
Step 3: Install the Plant Containers or Panels 🪴
- For pocket systems, hang the fabric pockets or panels on the frame, ensuring they are spaced evenly.
- For modular panels, snap them together according to the manufacturer’s instructions, creating a grid for your plants to sit in.
- If using shelves, simply place them onto the frame or mounting system. Ensure the shelves are sturdy and level.
Step 4: Add Plants to Your Vertical Garden 🌱
- Start with the bottom row and work your way up, placing plants in the containers or panels.
- Gently remove each plant from its pot, loosen the roots if necessary, and place it into the planting space.
- Make sure each plant has enough room to grow and isn’t overcrowded. Taller plants should go in the bottom rows, while smaller or trailing plants can go at the top.
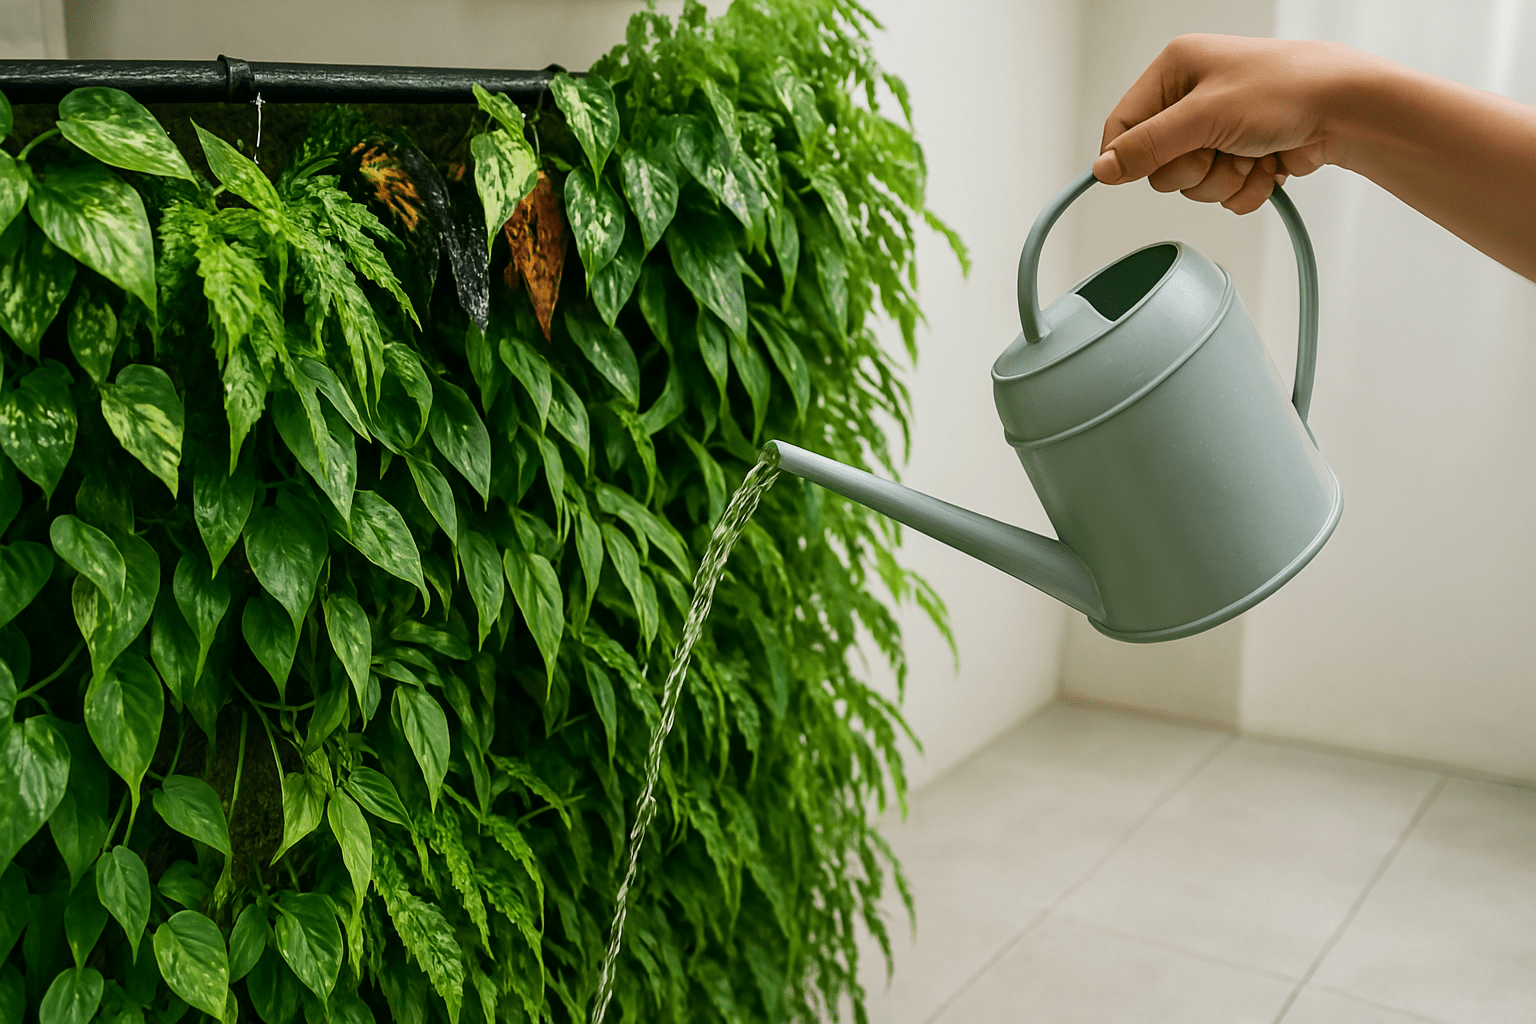
Step 5: Set Up the Watering System 💧
- If your vertical garden system includes a drip irrigation system, set it up according to the instructions provided. Ensure the water reaches all parts of the wall evenly.
- If watering manually, keep a watering can nearby for regular plant care. Consider using a moisture meter to help determine when the plants need water.
Step 6: Check for Level and Adjustments 🔄
- Double-check that the frame, plant containers, and entire wall are level. If anything looks off, adjust it before the plants settle into place.
- Ensure the plants are securely in place and that nothing is shifting.
Once everything is installed, give your plants a good watering and place your vertical garden where it will get the right amount of light. 🌞💚 Your vertical plant wall is now ready to thrive!
Plant Care and Maintenance Tips 🌿
Once your vertical plant wall is set up, regular care and maintenance are essential to keep your plants healthy and vibrant. While the setup is important, don’t overlook post-installation upkeep—many vertical plant wall installation tips also include advice on watering, pruning, and monitoring plant health. Here are some practical tips to ensure your vertical garden thrives:
Watering 💧
- Consistent Watering: Plants in vertical gardens often dry out quicker than those in traditional beds, so make sure to water them regularly. Check moisture levels and adjust the watering schedule as needed.
- Watering Technique: If you’re watering manually, use a watering can with a narrow spout to avoid over-saturating plants at the top. Consider using a drip irrigation system for even, efficient watering.
- Avoid Watering Too Much: Overwatering can lead to root rot. Ensure the plants have proper drainage to prevent water from pooling. 🌊
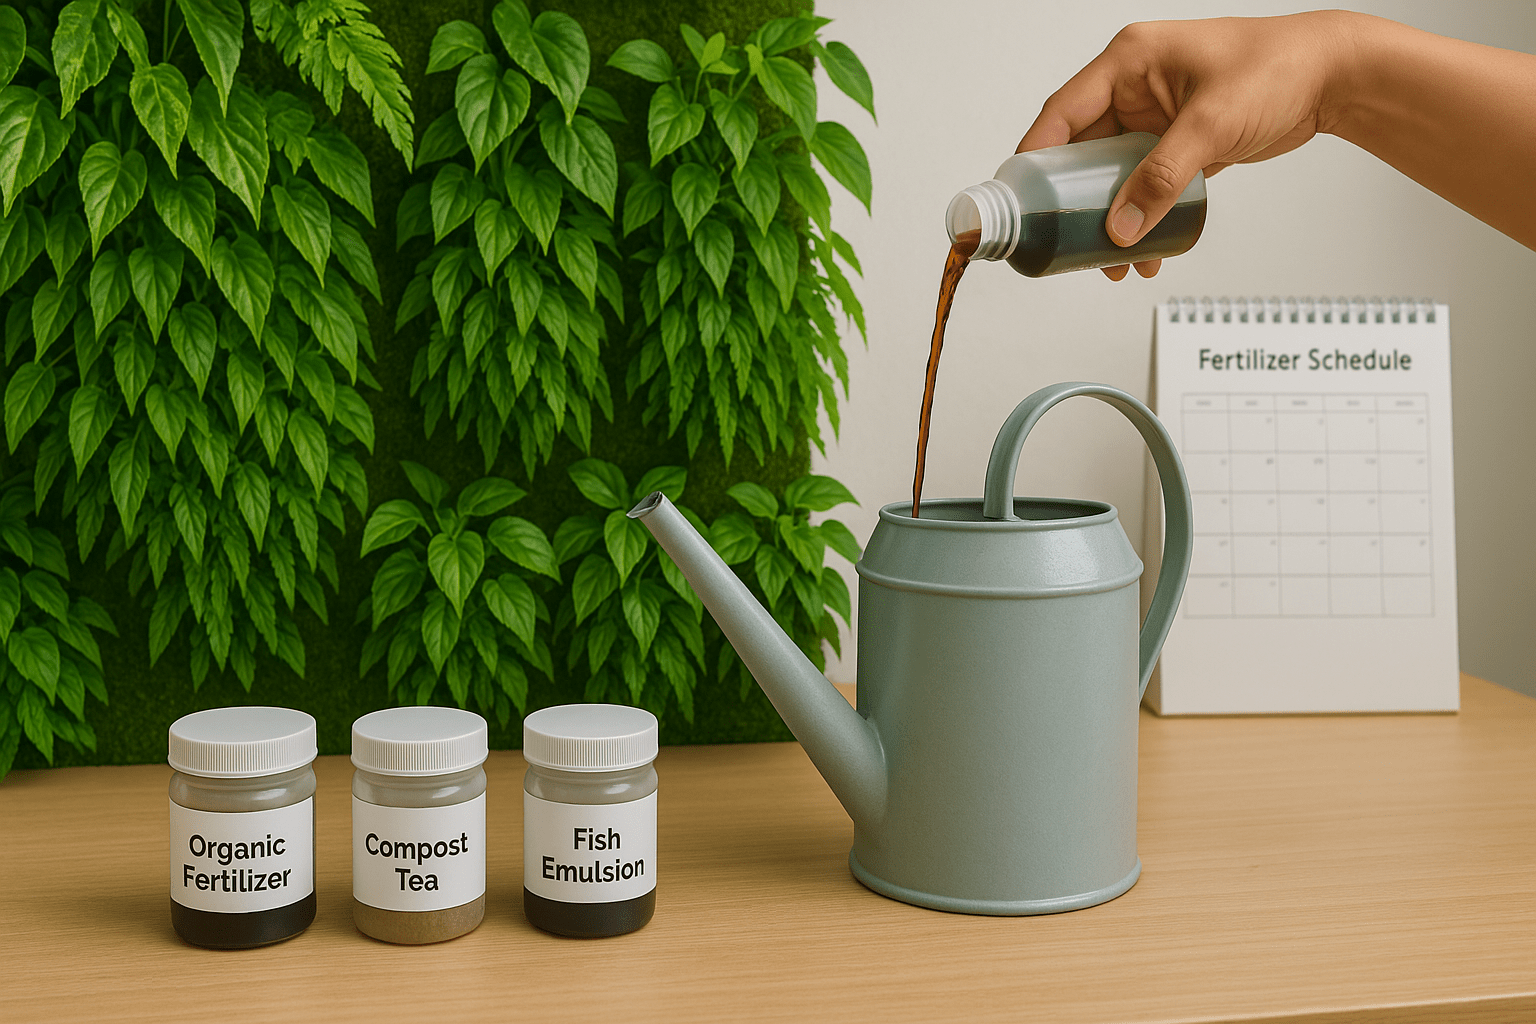
Fertilizing 🌱
- Nutrient Boost: Plants in vertical gardens rely on the nutrients in their soil or growing medium, so regular feeding is important. Use a balanced, water-soluble fertilizer once every 4-6 weeks during the growing season.
- Organic Options: Consider using organic fertilizers like compost tea or fish emulsion for a more natural approach. These options enrich the soil while promoting healthy plant growth. 🌻
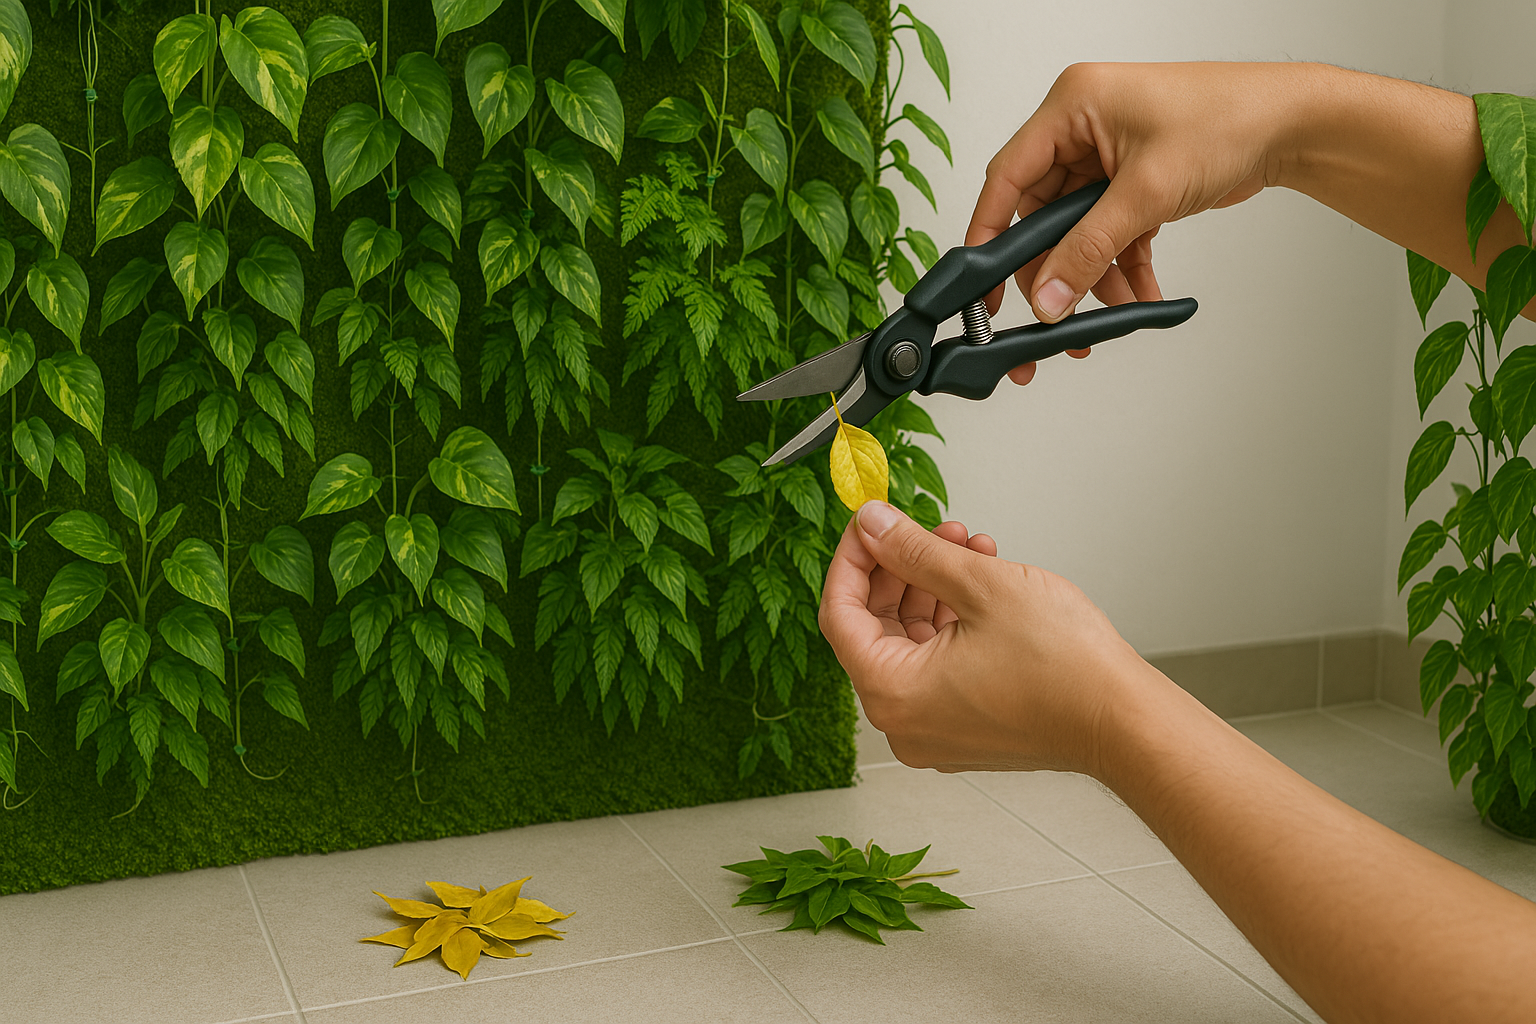
Pruning and Trimming ✂️
- Keep Plants Tidy: Prune dead or yellowing leaves regularly to encourage new growth and prevent pests. This will keep your vertical garden looking neat and healthy.
- Encourage Growth: Trim back overgrown plants to maintain their shape and prevent overcrowding. For trailing plants, regular pruning will help them grow in the desired direction and create a fuller look.
- Reposition Plants: As plants grow, they may need to be repositioned for better light exposure or to avoid crowding. Don’t be afraid to move plants around as they mature. 🌿
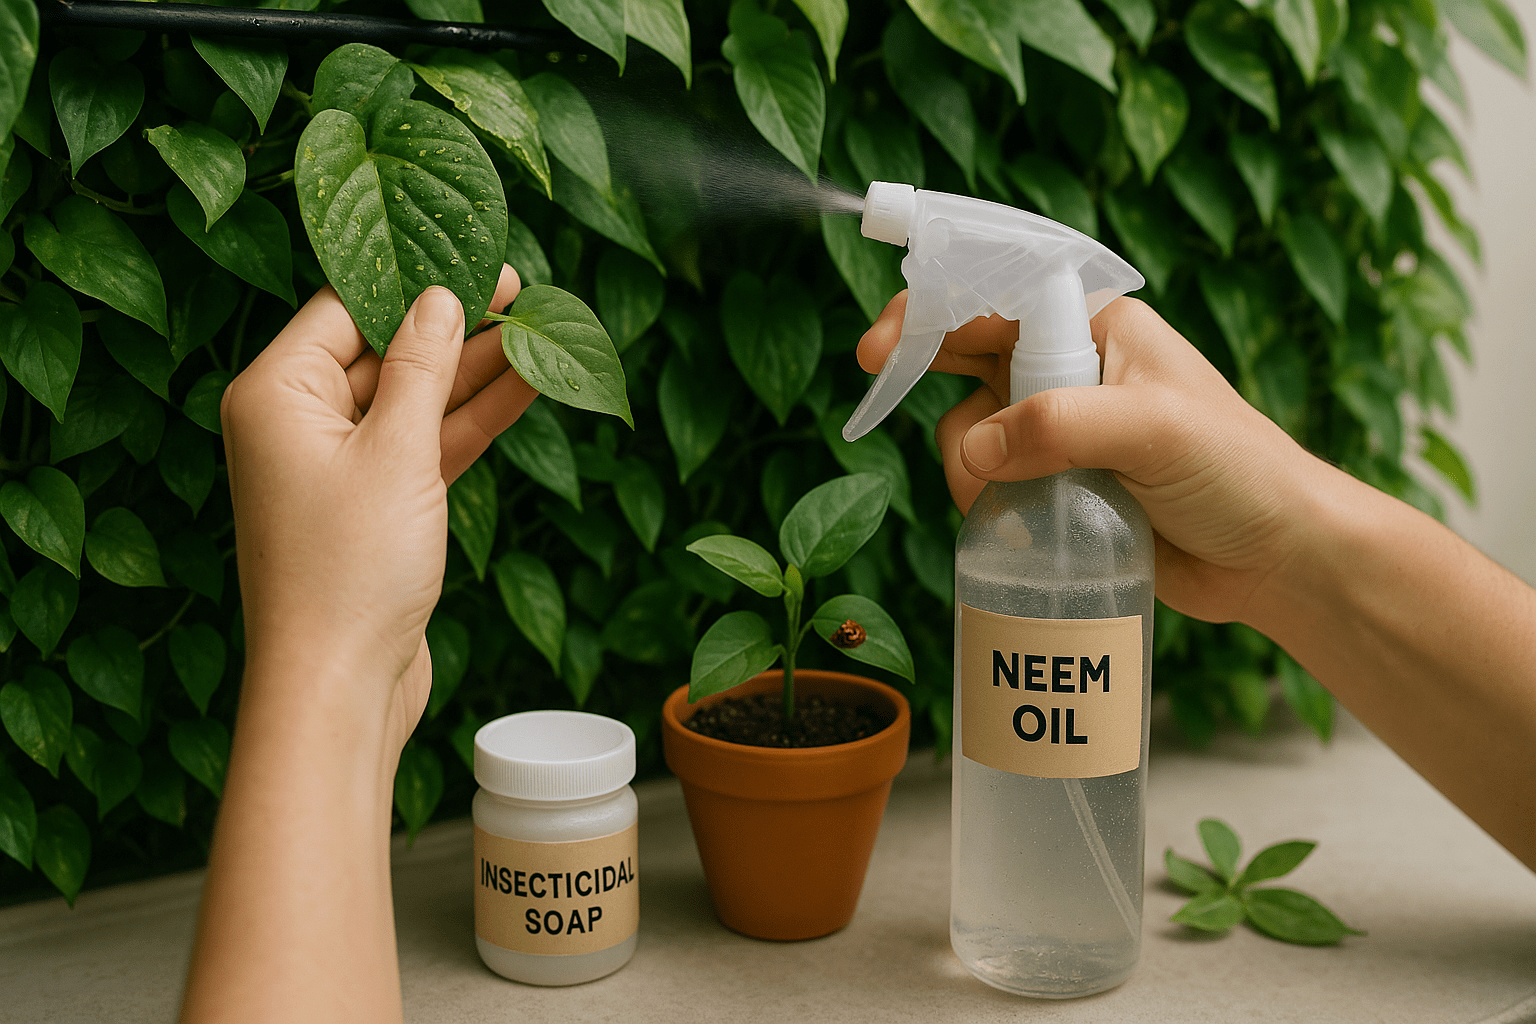
Pest Control 🐞
- Inspect Regularly: Check your vertical plant wall for signs of pests, such as discolored leaves or visible bugs. Early detection is key to preventing infestations.
- Natural Remedies: Use natural pest control methods like neem oil, insecticidal soap, or introducing beneficial insects (e.g., ladybugs) to keep pests in check. Avoid harsh chemicals that could harm your plants.
- Clean the Area: Keep the surrounding area clean and free from fallen leaves or debris, which can attract pests.
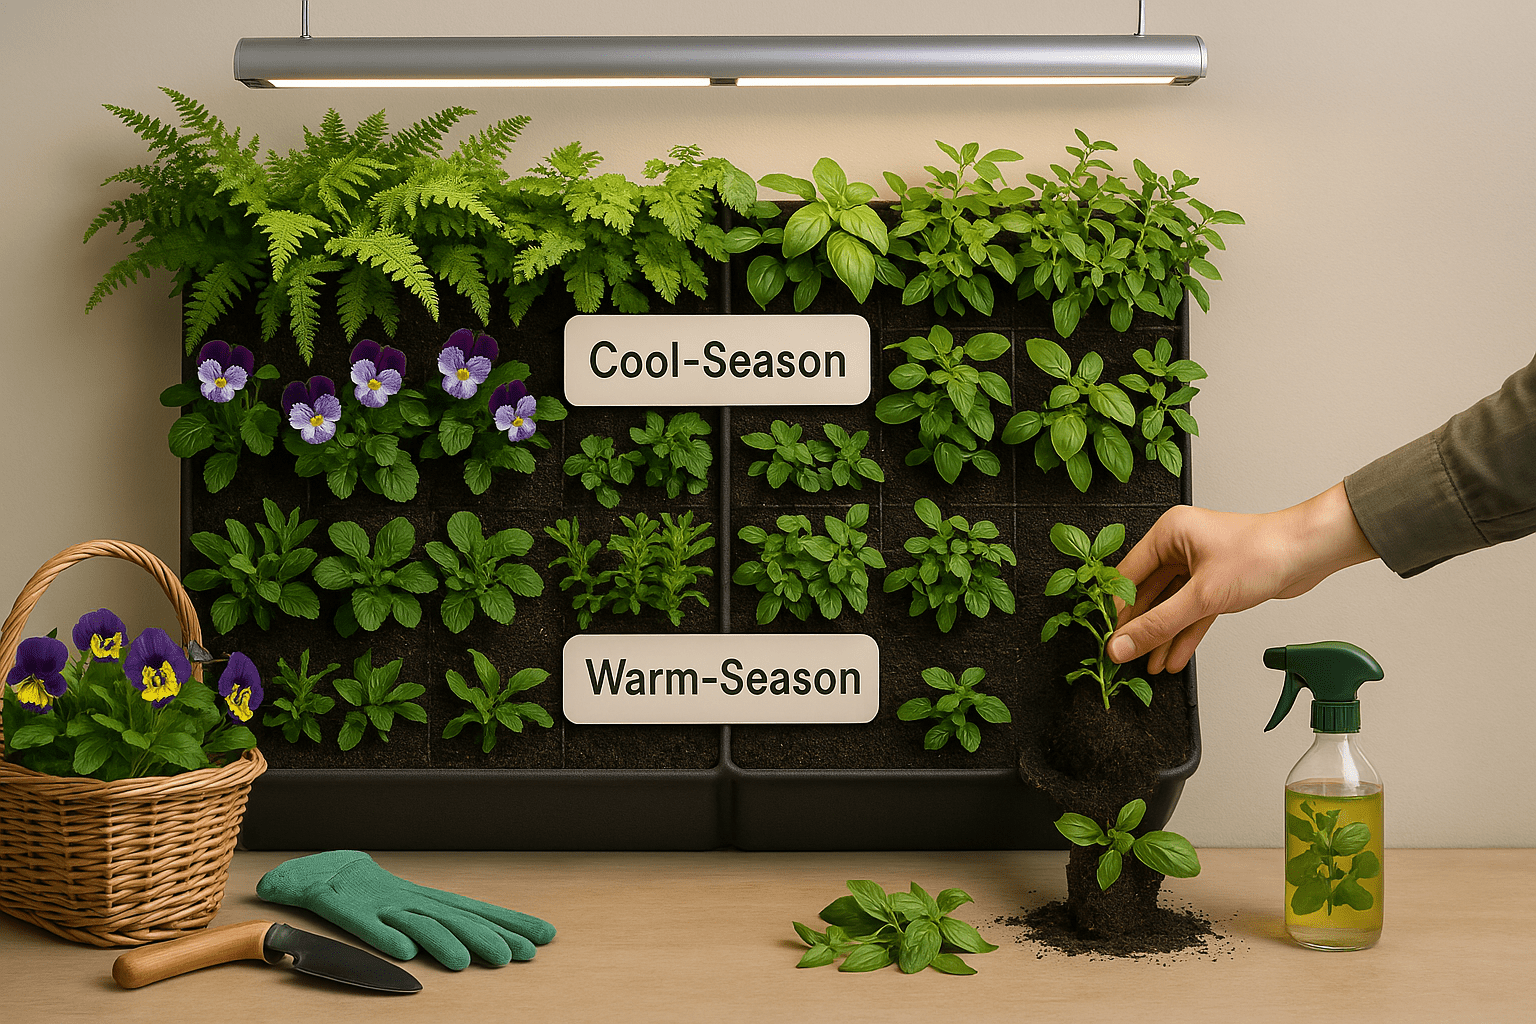
Seasonal Care 🍂
- Adapt to Changes in Seasons: During colder months, you may need to move your vertical plant wall indoors or add grow lights to provide adequate light.
- Refresh the Garden: Rotate seasonal plants to keep the wall looking fresh and vibrant throughout the year. Consider swapping out plants that are no longer suited to the changing weather conditions. 🍁
By following these simple care and maintenance tips, your vertical plant wall will thrive and continue to add beauty to your space for years to come! 🌸💚
Common Mistakes to Avoid 🚫
While setting up a vertical plant wall can be a fun and rewarding project, there are some common mistakes that can hinder its success. Being aware of these pitfalls—and following proven vertical plant wall installation tips—can make all the difference. Here’s what to watch out for to ensure your vertical garden thrives:
Choosing the Wrong Plants 🌿
- Light Mismatch: Placing plants that need full sunlight in a shaded area (or vice versa) can lead to weak growth and poor health. Always choose plants that match the lighting conditions of your space. 🌞🌑
- Overcrowding: Don’t cram too many plants into a small space. Give each plant room to grow, as overcrowding can result in poor air circulation, which encourages pests and disease.
- Ignoring Water Needs: Some plants require more water than others. Ensure your plant choices have similar watering needs, or set up separate irrigation systems for different sections.
Poor Drainage 💧
- Waterlogging: Without proper drainage, water can pool around plant roots, causing root rot. Ensure that your containers, panels, or pockets have adequate drainage holes.
- Inconsistent Watering: A common mistake is overwatering or underwatering, which can harm plants. Use a moisture meter to check the soil’s water levels, or invest in an irrigation system for consistent watering.
Incorrect Wall Placement 📍
- Poor Lighting: Placing your vertical plant wall in a dim corner or away from sunlight can hinder plant growth. If natural light is limited, consider adding supplemental grow lights.
- Temperature Extremes: Avoid areas with fluctuating temperatures, such as near heating vents or air conditioners. Consistent, moderate temperatures are best for plant health. 🌡️
Forgetting About Maintenance 🔧
- Neglecting to Prune: Overgrown plants can block light from reaching others, and dead leaves can invite pests. Regular pruning is essential for keeping your vertical garden neat and healthy.
- Skipping Fertilizing: Plants in vertical gardens may deplete nutrients more quickly than those in the ground. Regularly fertilize your plants to provide them with the nutrients they need to thrive. 🌱
Not Considering Weight and Stability ⚖️
- Insecure Mounting: If the frame or system isn’t securely attached to the wall, it could fall, damaging both your plants and the wall. Ensure everything is properly mounted and able to support the weight of the plants, soil, and water.
- Ignoring Wall Type: Not all walls are suitable for a vertical garden. Ensure your wall can handle the weight and moisture of a plant system, especially for heavier setups like soil-based or hydroponic systems.
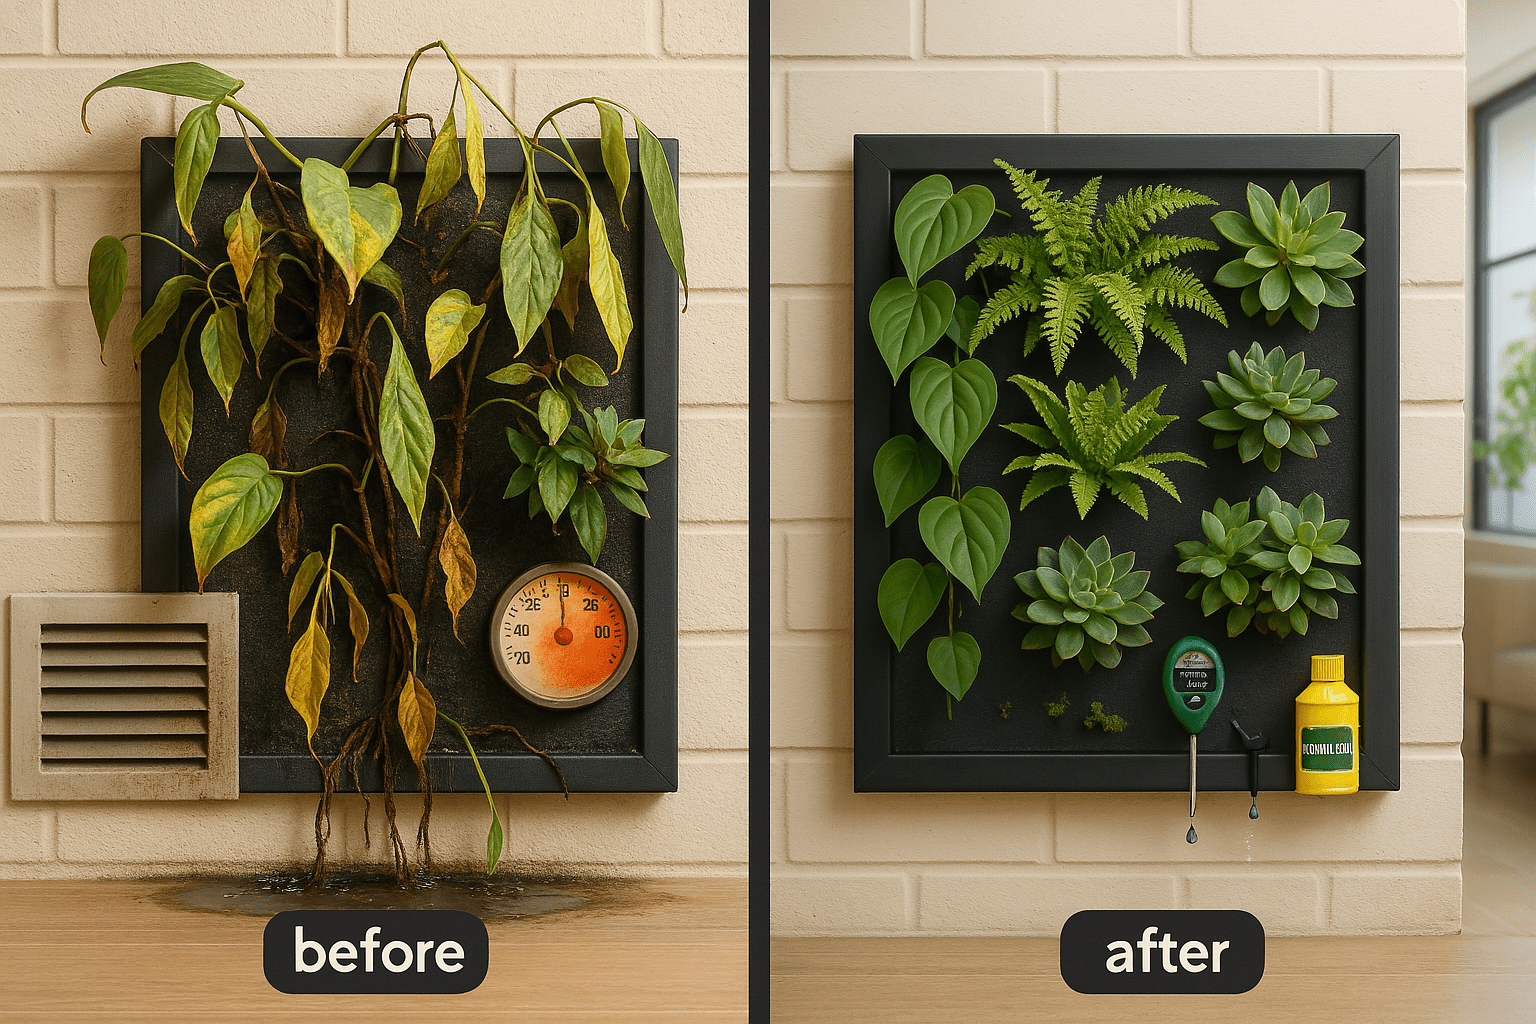
By avoiding these common mistakes, you’ll set your vertical plant wall up for success, ensuring it stays healthy, beautiful, and functional. Happy planting! 🌿
Tips for Enhancing Your Vertical Plant Wall 🌟
Want to take your vertical plant wall to the next level? Here are some creative tips and tricks to enhance its beauty, functionality, and overall impact. In addition to basic vertical plant wall installation tips, these ideas will help you personalize your setup and make it truly stand out.
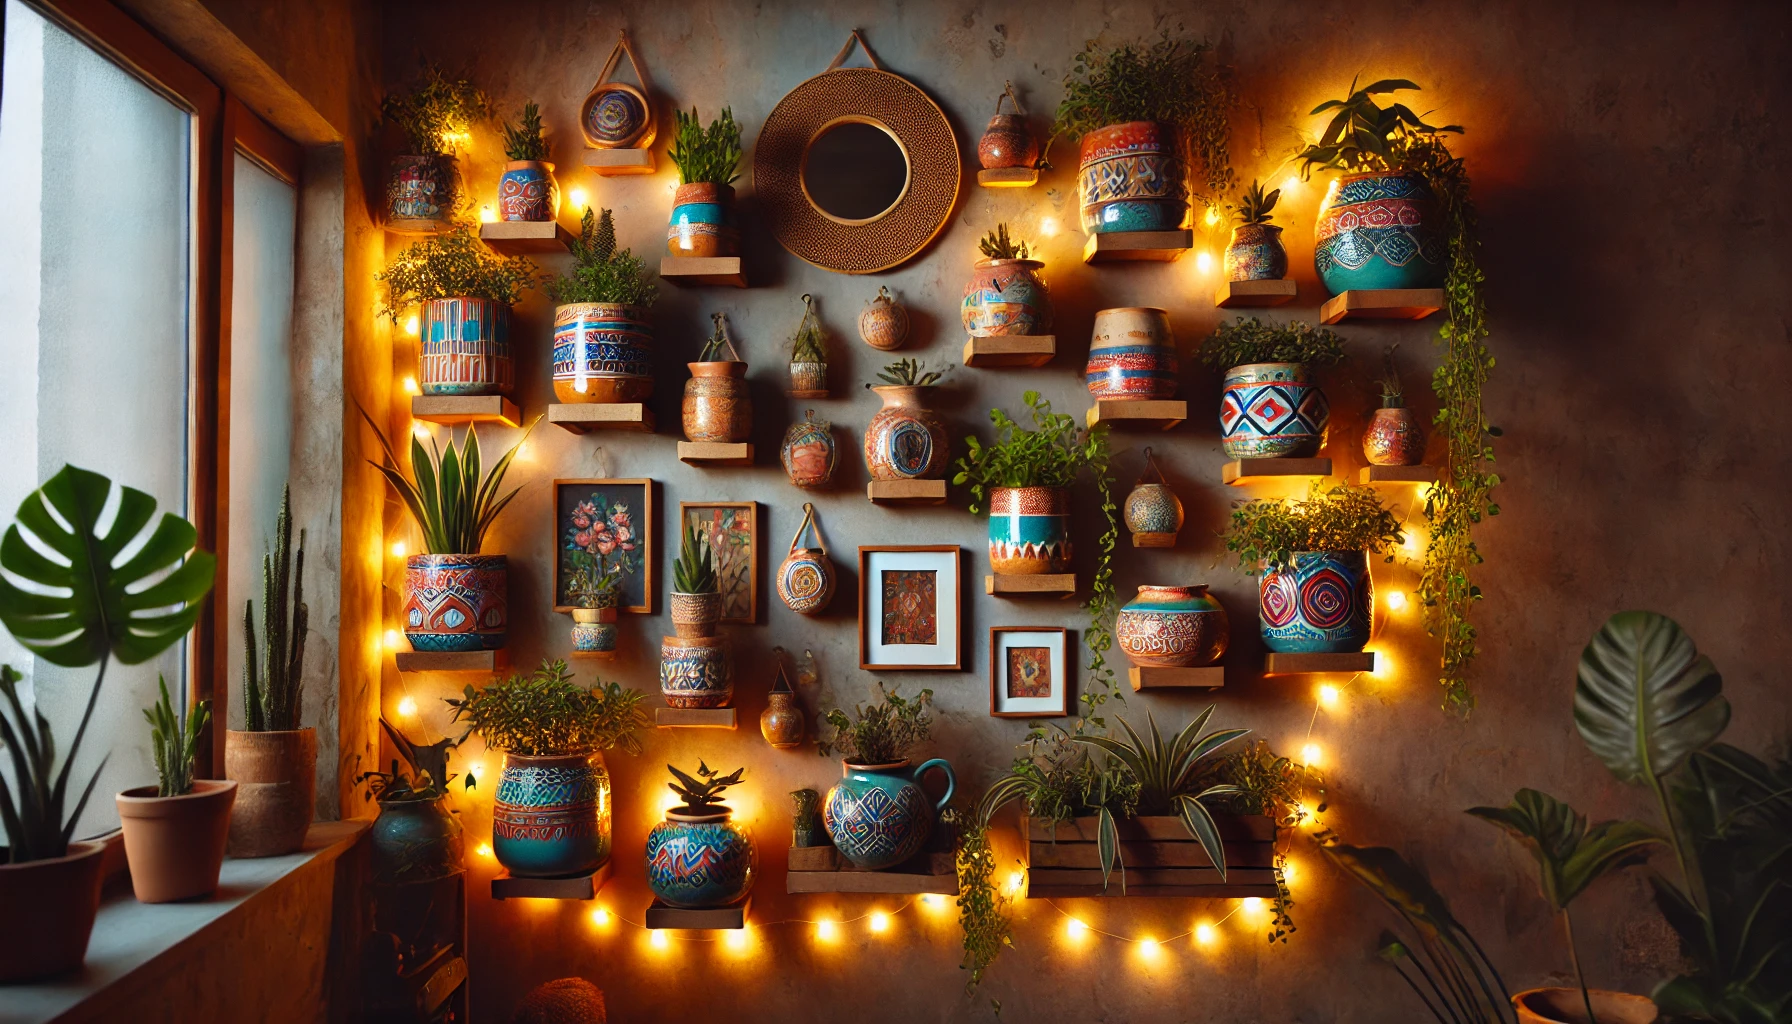
Add Decorative Elements 🎨
- Decorative Planters: Use colorful or uniquely shaped planters to add personality and flair to your wall. These can make your vertical garden stand out even more!
- Fairy Lights: Stringing up small LED fairy lights around the plants will create a magical atmosphere, especially in the evening. The lights can highlight your plants while adding a cozy, inviting vibe. ✨
- Art Pieces or Sculptures: Consider hanging small art pieces, sculptures, or mirrors between your plants to add dimension and style to your garden. 🎭
Mix Plant Varieties 🌿
- Combine Textures and Colors: Play with different plant textures, colors, and shapes to create a dynamic and visually striking wall. For instance, mix soft, trailing plants with tall, upright varieties for contrast.
- Seasonal Swaps: Add seasonal plants to keep your vertical garden fresh year-round. Swap out flowers, herbs, or vines based on the season to add variety and color. 🌸🍂
- Edible Plants: Consider adding herbs or small vegetables like basil, mint, or lettuce to your vertical wall. Not only will they enhance the look, but they’ll also provide you with fresh, home-grown ingredients! 🌿🍅

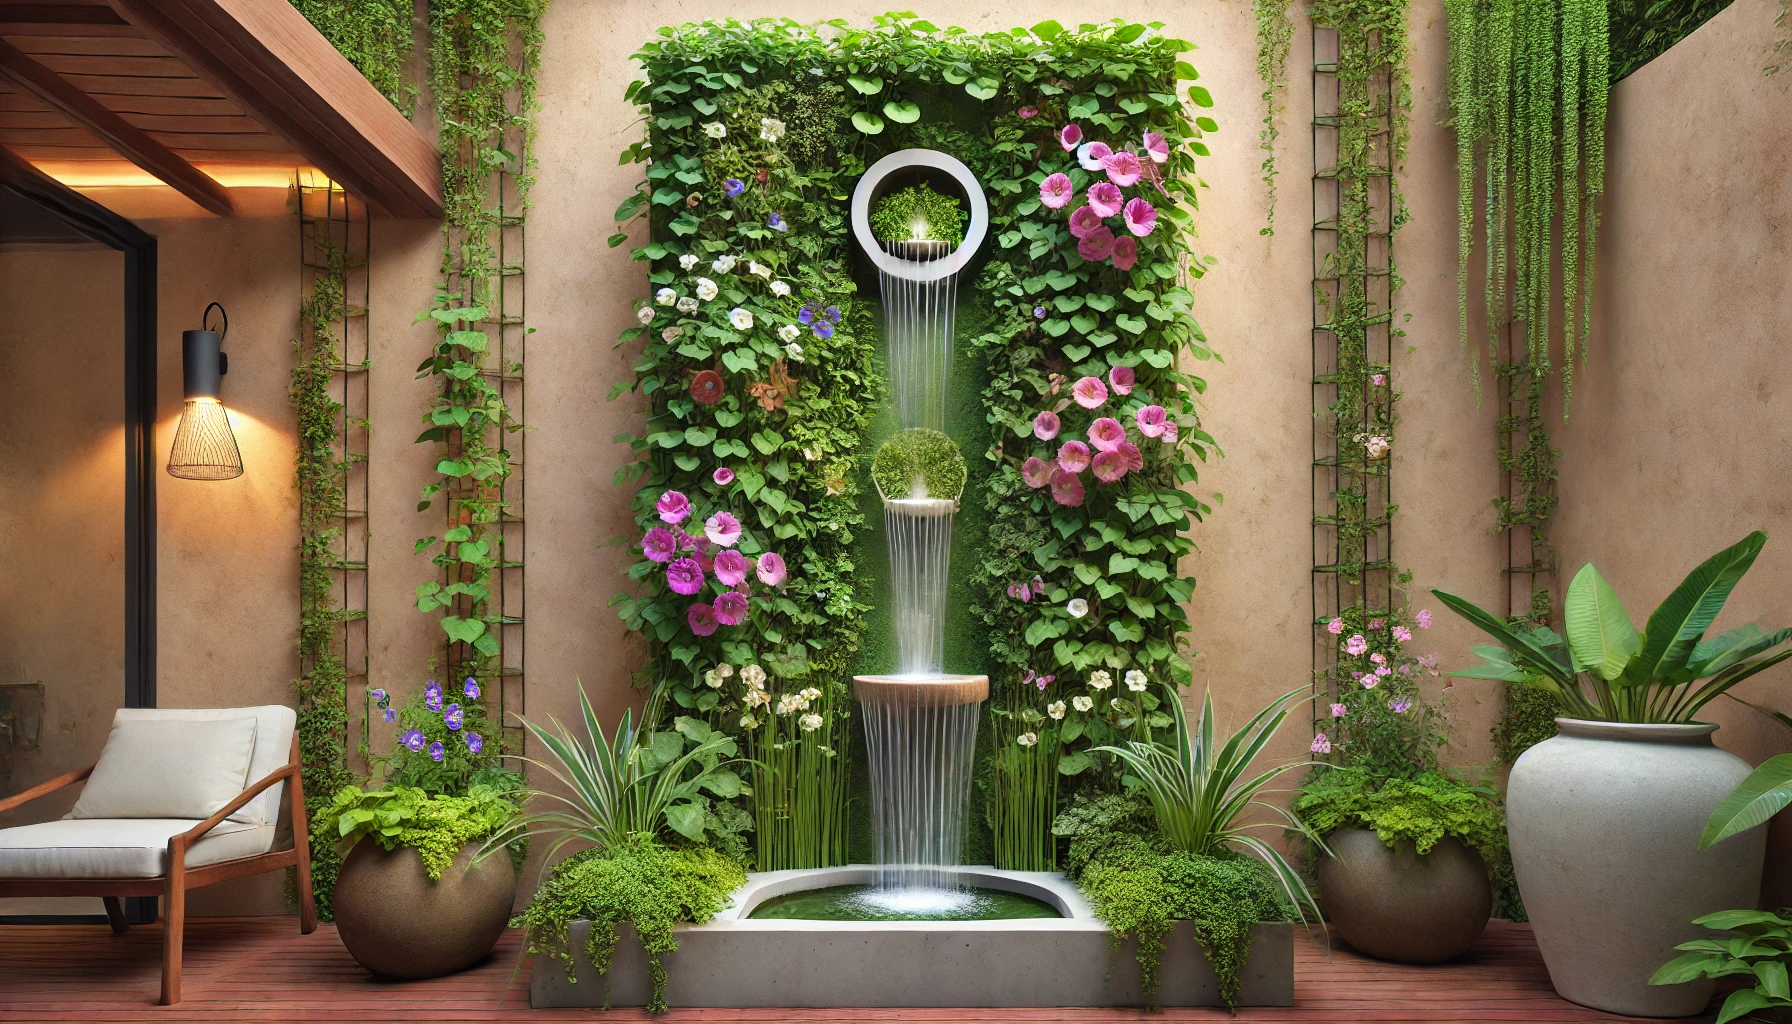
Incorporate Vertical Features 🪴
- Plant Trellises: Add vertical trellises to give climbing plants like peas, beans, or morning glories something to latch onto, creating a stunning upward effect.
- Water Features: Integrate a small, flowing water feature or fountain to introduce sound and movement into your vertical garden. This can enhance the ambiance, especially in outdoor setups. 🌊💧
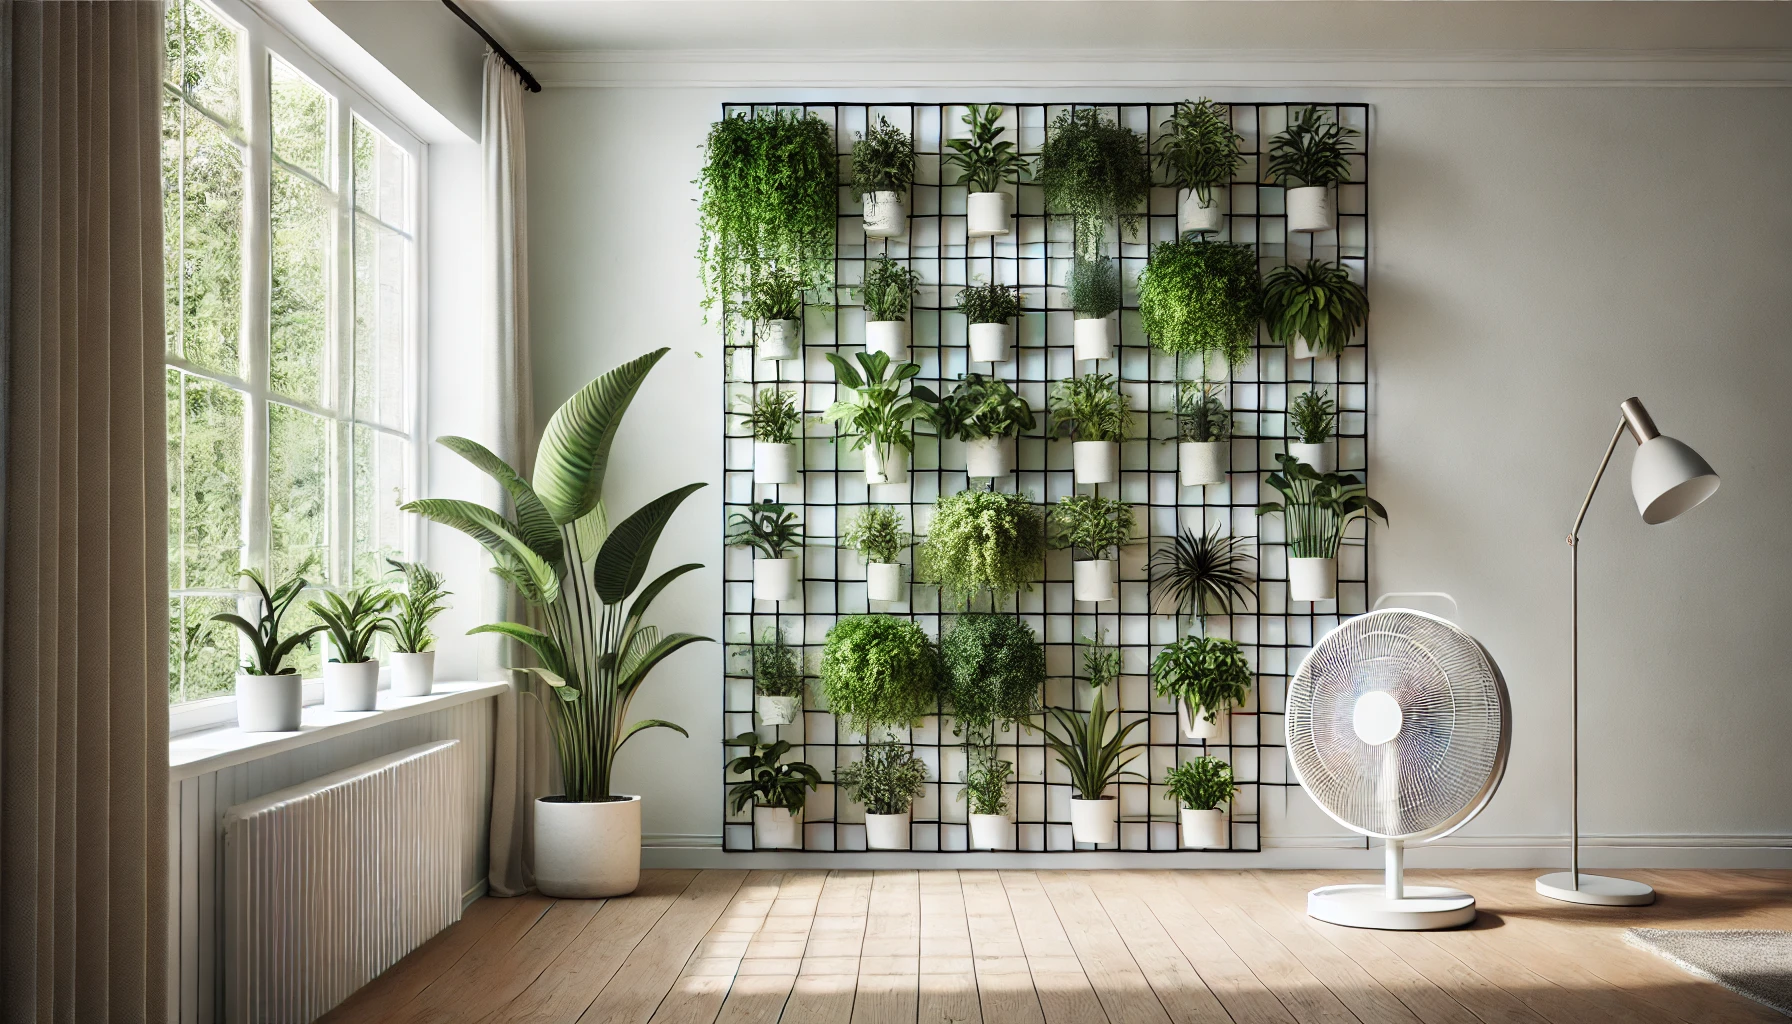
Improve Air Circulation 🌬️
- Space Out Plants: Leave a little breathing room between plants to allow better air circulation, which helps prevent mold, mildew, and pests. This also ensures that each plant gets enough light and space to grow.
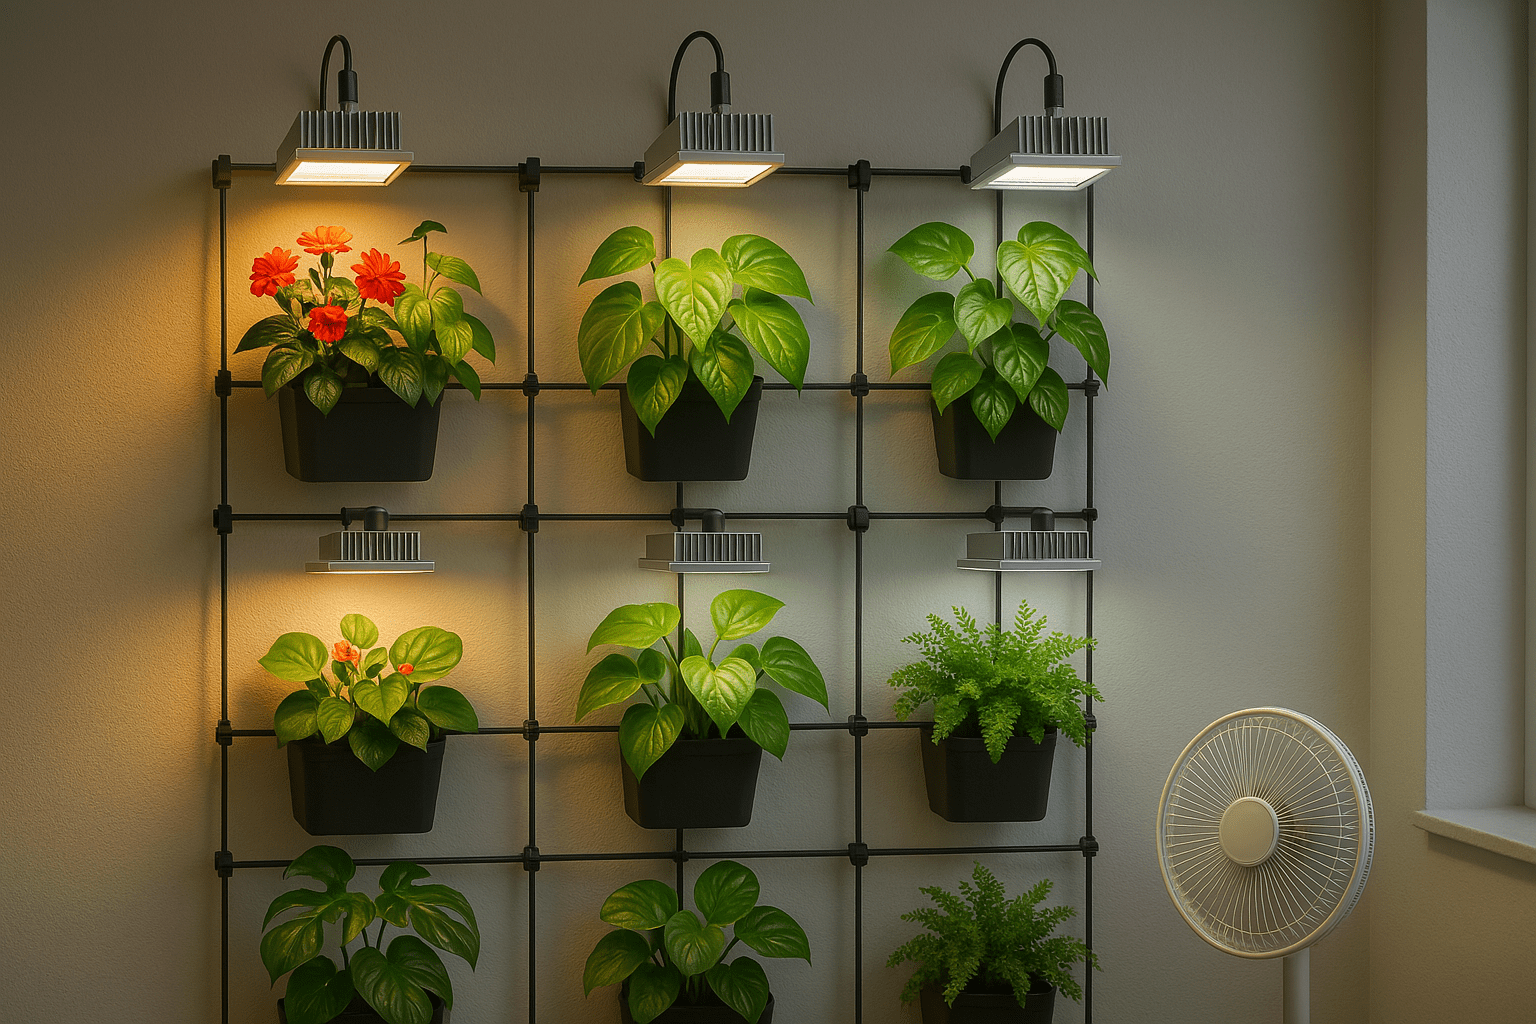
- Fans for Indoor Walls: If your vertical plant wall is indoors, consider using a small fan nearby to keep air flowing and reduce humidity buildup.
Experiment with Lighting 💡
- Adjustable Grow Lights: For indoor vertical gardens, adjustable LED grow lights can ensure your plants get the right light intensity as they grow. You can change the height or angle of the light to cater to each plant’s needs.
- Color Temperature: Use warm white lights to bring out the colors of flowers and plants or cool white for a more crisp and clean aesthetic. Lighting can play a huge role in setting the mood of your space.
Create a Themed Garden 🏡
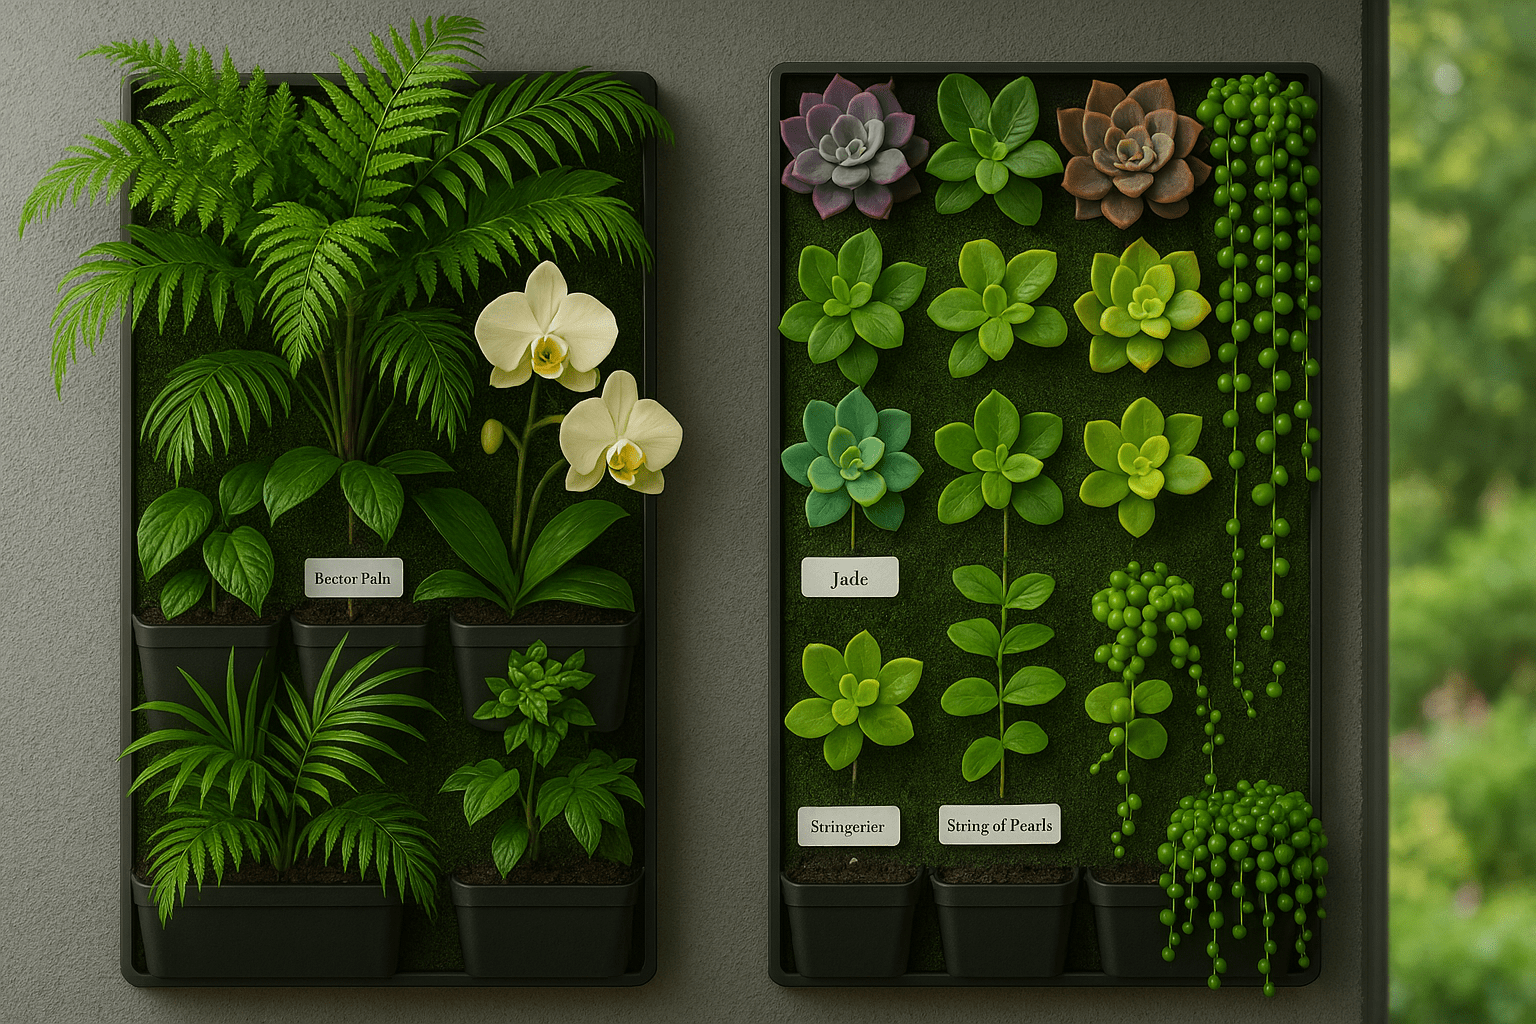
- Tropical or Succulent Gardens: Create a theme by focusing on specific plant types. For example, design a tropical vertical wall filled with ferns, palms, and orchids, or a succulent wall with a variety of colorful and drought-tolerant plants.
- Color Palette: Choose plants that complement a particular color scheme, whether it’s a calming green tone, a vibrant rainbow of flowers, or even monochromatic shades of purple or red.
By adding these enhancements, your vertical plant wall will not only flourish but also become a stunning focal point in your space. Get creative and make it uniquely yours! 🌿💚
Final Thought
By following the tips and steps in this guide, from planning and preparation to care and maintenance, you can build a beautiful, thriving vertical garden that will be the envy of your guests. Remember, patience and attention to detail are key, but the results will be well worth the effort.
With the right plants, materials, and care, your vertical plant wall will not only thrive but also become a stunning focal point in your home. To get the best results, don’t forget to incorporate trusted vertical plant wall installation tips throughout your process. So, roll up your sleeves, get creative, and start building your own vertical garden today! 🌱💚
Happy gardening! 🌿