

Have you ever dreamed of growing beautiful roses right from your own garden? Rooting roses from cuttings at home is a rewarding and cost-effective way to propagate these stunning flowers, allowing you to expand your rose collection or share the beauty with friends and family. Whether you’re a gardening enthusiast or a beginner, learning how to root rose cuttings is a straightforward process that anyone can master. In this guide, we’ll walk you through everything you need to know about rooting roses from cuttings at home, ensuring your success in growing healthy, vibrant roses.
Why Root Roses from Cuttings?
Rooting roses from cuttings is a rewarding and cost-effective way to expand your rose garden. This method allows you to grow new plants that are genetically identical to the parent rose, ensuring you preserve its beauty and characteristics.
Here are the key benefits of rooting roses from cuttings:

Cost Savings: Purchasing rose plants can be expensive, especially rare or specialty varieties. Rooting your own cuttings allows you to grow more roses without the high price tag.
Preserve Desired Traits: When you propagate roses through cuttings, you’re ensuring the new plants will have the same vibrant colors, fragrance, and growth habits as the parent. This is crucial if you have a rose variety you particularly love.
Faster Growth: Rose cuttings often grow quicker compared to seeds, which may take longer to mature. This allows you to enjoy your new plants in a shorter time frame.
Genetic Uniformity: Since cuttings are clones, you can expect consistent results, which is important if you’re looking to create a uniform look in your garden.
Learning Opportunity: Rooting cuttings offers a great way to learn about plant propagation and the fascinating life cycle of roses, which can be a satisfying and educational experience.
Rooting roses from cuttings not only helps you build a beautiful garden but also allows you to enjoy the process of plant propagation.
When is the Best Time to Take Rose Cuttings?
The best time to take rose cuttings is during the late spring to early summer, ideally when the plant is actively growing. This is when the rose bush is in its peak development, providing the healthiest, most viable cuttings.
Ideal Timing: The perfect window for taking cuttings is right after the first bloom cycle, when the plant’s growth is vigorous. This usually occurs in late spring or early summer, when temperatures are moderate, and the plant is flush with fresh growth.

The Right Wood: Use semi-hardwood cuttings for optimal results. These are branches that are not fully mature but have begun to harden. The semi-hardwood cuttings are strong enough to root but still flexible.
Avoid Extreme Weather: Avoid taking cuttings during periods of extreme heat or frost. High temperatures can cause the cuttings to dry out quickly, while frost can harm the new growth, reducing the chances of successful rooting.
Time of Day: Early morning is the best time to take cuttings when the plant is well-hydrated. This ensures your cuttings stay fresh for longer, giving them the best start in their new environment.
By selecting the right time to take your rose cuttings, you set the stage for healthy roots and vibrant new plants.
Materials You’ll Need for Rooting Roses from Cuttings at Home
Rooting roses from cuttings is a rewarding and cost-effective way to grow new plants. To ensure success, you’ll need a few essential materials. Here’s a straightforward list of what you’ll need:
Rose Cuttings
Select healthy, disease-free rose stems from a mature plant. The best cuttings are taken from the current season’s growth, about 6-8 inches long, with at least two nodes (the points where leaves emerge).
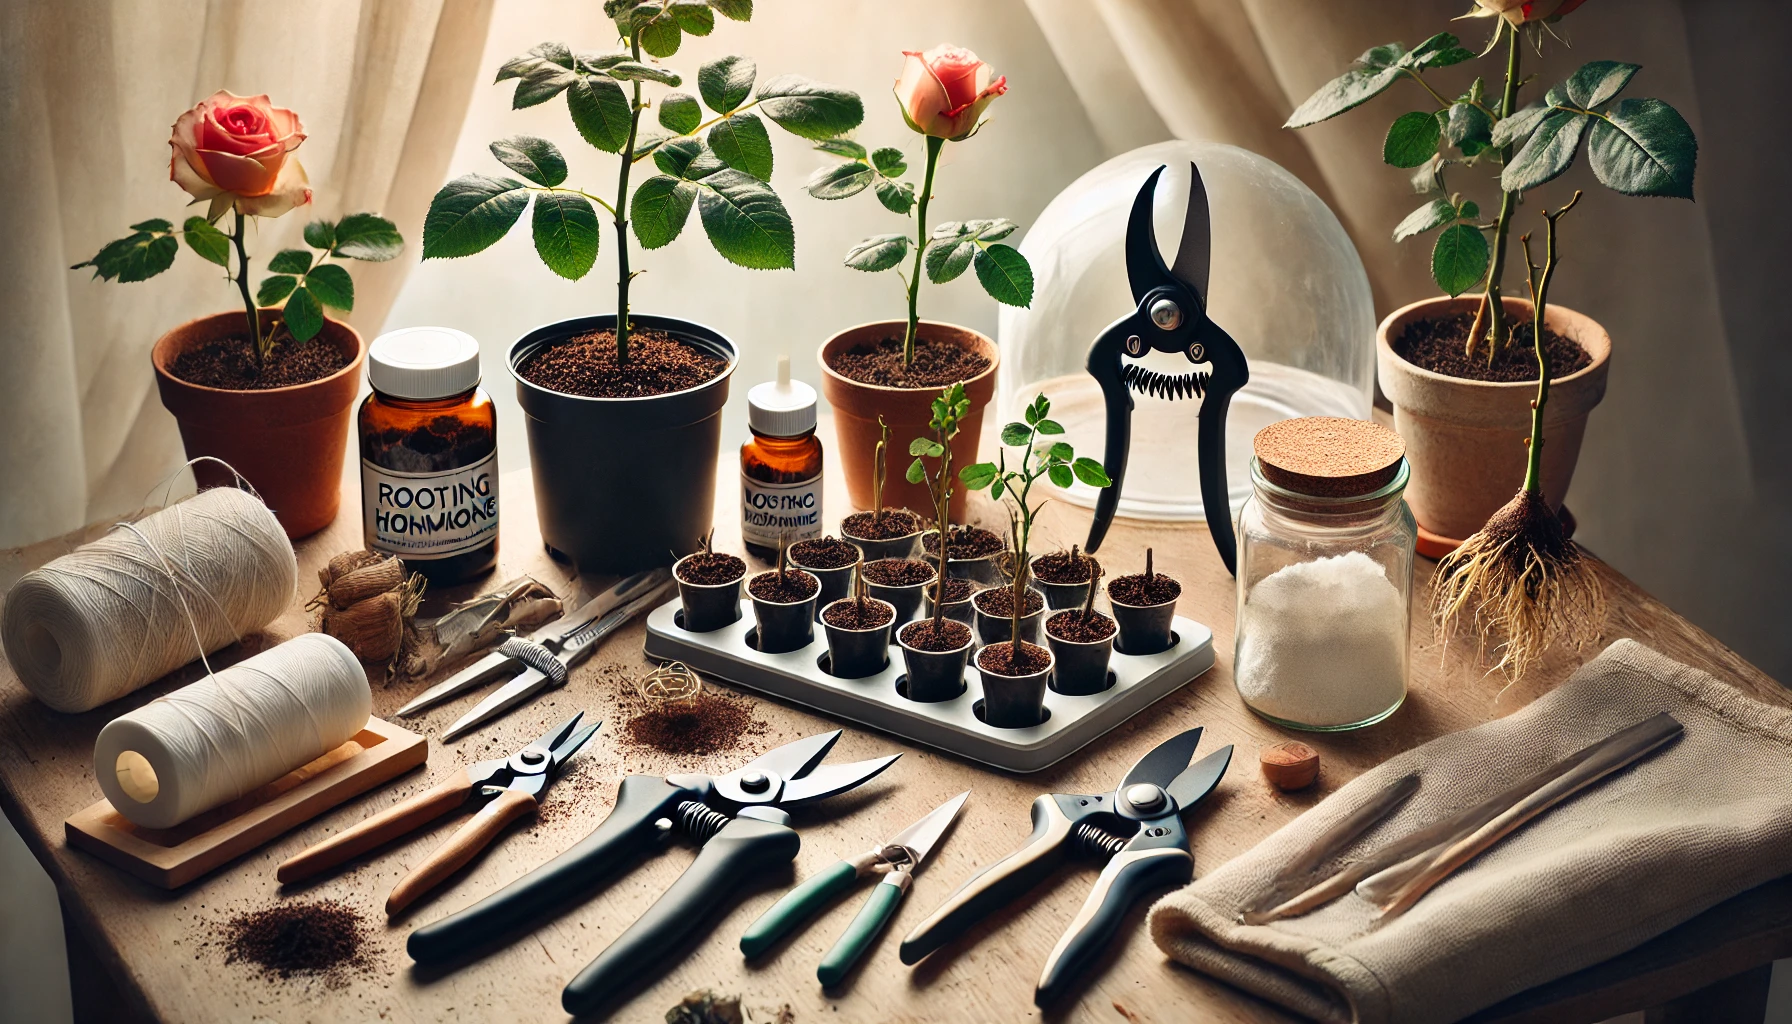
Sharp Pruning Shears
A clean, sharp pair of pruning shears will help you make precise cuts and reduce the risk of damaging the plant. Disinfect your shears to avoid transferring diseases.
Rooting Hormone
While not strictly necessary, rooting hormone can significantly increase your chances of successful rooting. It encourages faster root growth and helps prevent fungal infections.
Clean Pots or Containers
Use small pots or containers with good drainage. Plastic or terracotta pots work well, ensuring the cutting’s roots won’t become waterlogged.
Well-Draining Potting Mix
Roses prefer a lightweight, well-draining soil mix. A mix of peat, perlite, and vermiculite works great for rooting rose cuttings. This prevents water retention while providing enough nutrients.
Plastic Bag or Cloche
Cover the cutting with a plastic bag or small greenhouse cloche to maintain humidity and promote rooting. This creates a mini-greenhouse effect that keeps the cutting warm and moist.
Watering Can or Spray Bottle
Keep the cutting moist but not soaking. A gentle spray from a watering can or a spray bottle will ensure the soil stays evenly moist without becoming waterlogged.
A Warm, Bright Location
Roses root best in a warm, bright area with indirect sunlight. A windowsill or greenhouse is ideal, but avoid direct sun, which can overheat and dry out the cuttings.
By preparing these materials in advance, you can ensure that your rose cuttings have the best chance of success. Following these simple steps will lead to strong, healthy rose plants ready for transplanting.
Step-by-Step Guide to Rooting Roses from Cuttings
Rooting roses from cuttings is a rewarding and straightforward way to propagate your favorite rose varieties. Follow these simple steps to successfully grow roses from cuttings:
Choose the Right Cutting
Select a healthy rose stem from a mature plant. Ideally, choose a stem that has bloomed recently but isn’t too old. The best time to take cuttings is during the growing season, typically in late spring or early summer.

Prepare the Cutting
Use a sharp, clean knife or pruning shears to cut a 6-8 inch long stem just below a leaf node. Remove the lower leaves, leaving only a few at the top. This helps focus the plant’s energy on root development.
Dip in Rooting Hormone
To increase the chances of successful rooting, dip the cut end of the stem into rooting hormone. This promotes root growth and helps prevent rot. Gently tap off any excess hormone to avoid clumping.
Plant the Cutting
Fill a small pot with a well-draining potting mix. Create a hole in the center using a pencil or stick, and place the cutting in the hole. Firm the soil around the stem to ensure it stands upright.
Water and Cover
Water the cutting gently to settle the soil, ensuring the soil is moist but not soggy. Cover the cutting with a plastic bag or a clear plastic bottle to create a humid environment, which aids in rooting. Make sure the cover doesn’t touch the cutting itself.
Provide Proper Care
Place the pot in a bright, warm location but out of direct sunlight. Maintain humidity and water the cutting as needed to keep the soil slightly moist. After a few weeks, gently tug on the cutting—if you feel resistance, it’s likely that roots are forming.
Transplant Once Rooted
Once the cutting has developed a healthy root system, it’s time to transplant it into a larger pot or directly into the garden. Gradually acclimate it to outdoor conditions by reducing humidity before planting.
By following this simple, step-by-step guide, you’ll be able to propagate beautiful roses and enjoy new plants for your garden or share them with friends and family!
Common Mistakes to Avoid When Rooting Rose Cuttings
Rooting rose cuttings can be a rewarding experience, but it’s easy to make mistakes that hinder the process. Here are some common errors to avoid:
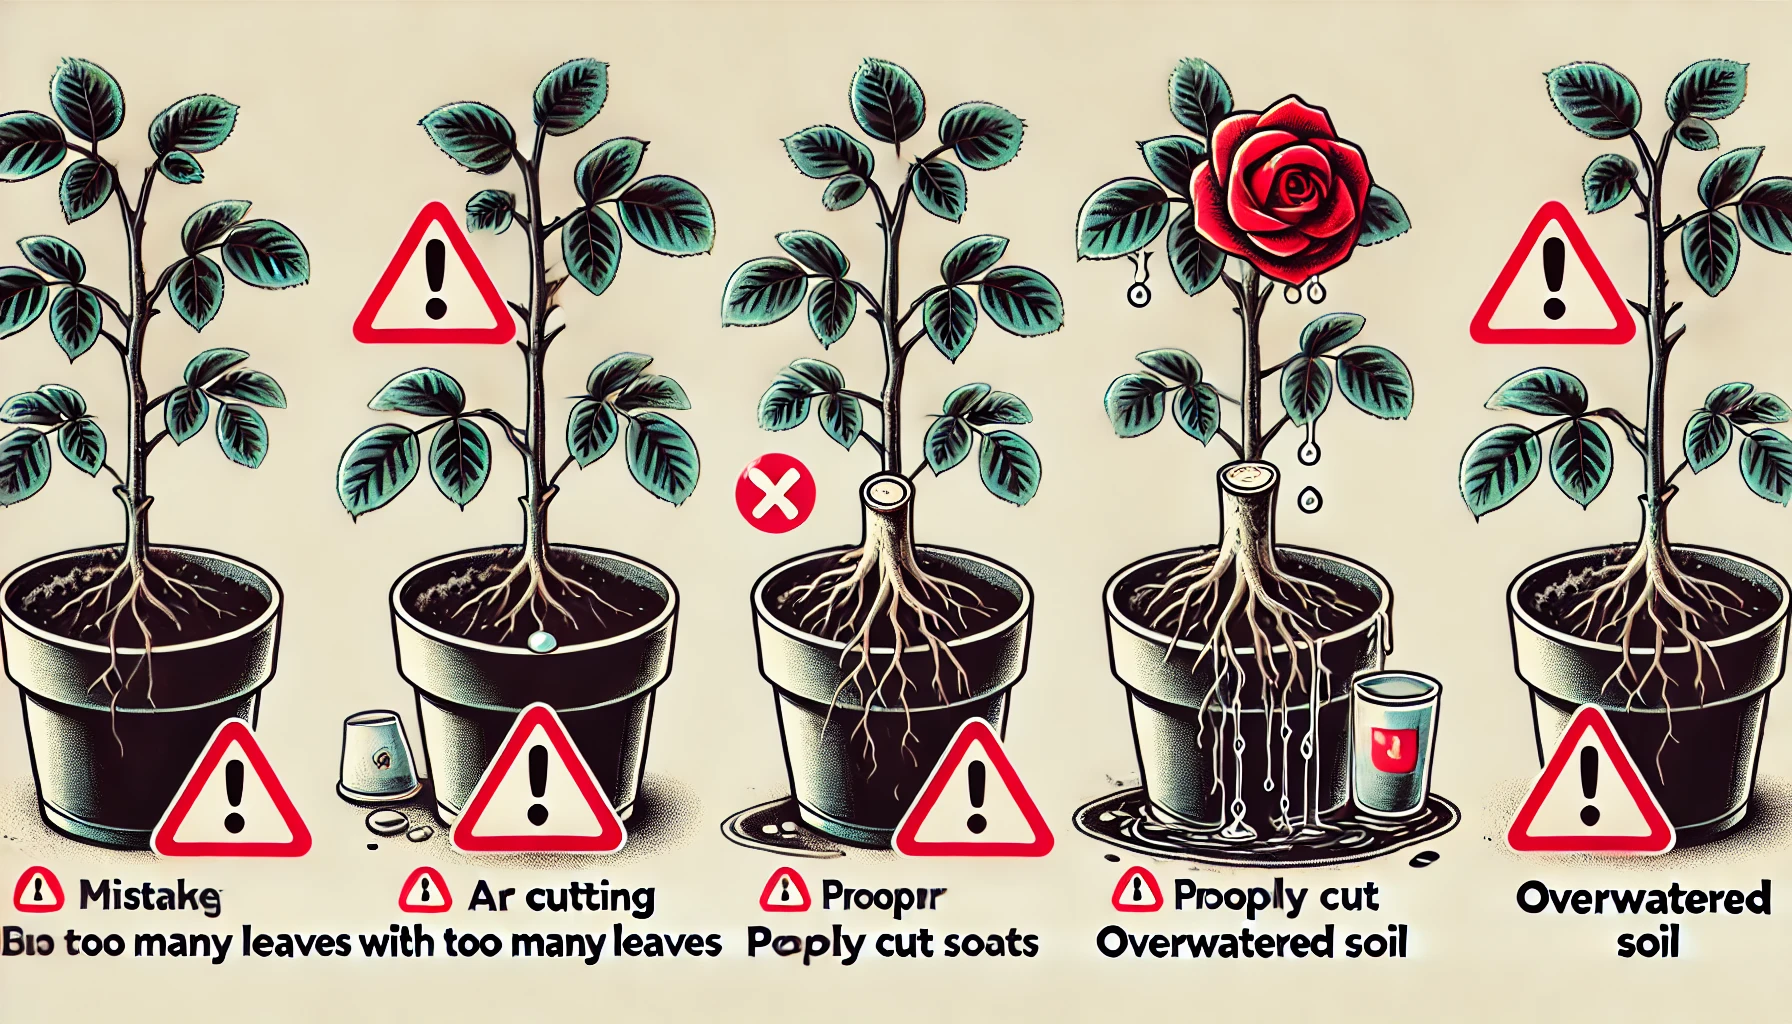
Using Too Old or Too Young Cuttings
One of the most common mistakes is choosing the wrong age of cutting. Rose cuttings should be taken from healthy, semi-hardwood stems, typically from the current season’s growth. Avoid using very young or overly woody stems, as they will have a hard time rooting.
Neglecting to Trim the Cutting Properly
Cutting your rose stem at the wrong angle or leaving it too long can affect its ability to root. Always make a clean, diagonal cut just below a node. This will encourage new growth and improve the chances of successful rooting.
Not Removing Excess Leaves
Rose cuttings should have only a few leaves remaining at the top. Too many leaves cause the cutting to lose water faster, reducing its chances of rooting. Trim excess leaves to prevent dehydration and focus energy on root development.
Using Poor Soil or Growing Medium
A common mistake is using soil that’s too heavy or dense. A light, well-draining mix is essential. Opt for a mixture of sand, perlite, or peat moss to allow roots to grow freely without becoming waterlogged or suffocated.
Overwatering or Underwatering
Balancing moisture is crucial. Overwatering can lead to rot, while underwatering can cause the cutting to dry out. Keep the soil consistently moist but not soggy, and ensure proper drainage to avoid these issues.
Skipping the Rooting Hormone
Not using rooting hormone can make rooting more difficult. While it’s not strictly necessary, applying rooting hormone to the cut end of the stem can significantly boost root development and speed up the process.
Placing Cuttings in Direct Sunlight
Full sun can stress the cutting and cause it to dry out quickly. Place cuttings in a bright, indirect light spot to encourage healthy growth without causing damage.
By avoiding these mistakes, you’ll increase the chances of successfully rooting your rose cuttings and nurturing new plants for your garden. Keep these tips in mind for a smooth, effective propagation process.
Transplanting Rooted Rose Cuttings
Transplanting rooted rose cuttings is a crucial step in ensuring your roses thrive in their new environment. Here’s a step-by-step guide to help you successfully transplant your rooted rose cuttings.
When to Transplant
Wait until your rose cutting has developed a healthy root system. This typically takes about 4 to 8 weeks. You’ll know it’s time when the cutting shows signs of new growth and roots are visible through the bottom of the container.
Prepare the New Planting Site
Choose a sunny spot with well-drained soil for your transplant. Roses love sunlight, so aim for at least 6 hours of direct sunlight daily. Amend the soil with compost to ensure good drainage and fertility.

Water the Cutting
Before transplanting, water the rose cutting thoroughly while it’s still in its pot or container. This helps ease the transition and reduces transplant shock.
Dig a Hole
Dig a hole that’s about twice as wide as the root ball of the cutting and deep enough to allow the roots to spread comfortably. The hole should be about 6 to 8 inches deep.
Transplant the Cutting
Gently remove the rose cutting from its container. Be careful not to damage the delicate roots. Place the cutting into the hole, ensuring the soil line on the cutting is level with the surrounding ground. Fill in the hole with soil, pressing gently around the roots to eliminate air pockets.
Water After Planting
Once the cutting is in place, water it thoroughly again. This helps settle the soil around the roots and provides necessary moisture to start the growth process.
Mulch to Retain Moisture
Apply a layer of mulch around the base of the cutting. Mulch helps retain moisture and keeps the soil temperature stable. It also prevents weeds from competing for nutrients.
Monitor Growth
For the first few weeks, keep a close eye on your newly transplanted rose. Ensure it gets plenty of water, especially during dry periods. Watch for new growth as a sign that the plant is settling in well.
Rooting roses from cuttings at home is a rewarding and cost-effective way to expand your garden. By following the right steps and using the proper materials, you can successfully propagate your favorite rose varieties and watch them grow into beautiful, thriving plants. Remember, patience and attention to detail are key—every cutting is a new opportunity to nurture your plants and create a more vibrant garden. With the tips and techniques shared in this guide, you’re well on your way to becoming a rose propagation pro. So, gather your tools, choose your rose stems, and start the propagation process today! Happy gardening!