

Are you looking for a foolproof way to propagate your favorite plants with stunning success? The sphagnum moss propagation method might be the game-changer you’ve been searching for. This simple yet powerful technique has been a go-to for plant enthusiasts and gardeners worldwide, offering a reliable way to grow healthy, thriving plants from cuttings. Whether you’re a seasoned gardener or a beginner, mastering this method will elevate your plant propagation game and help you cultivate lush greenery with ease. In this guide, we’ll break down everything you need to know to get started and ensure your plants thrive from the start. 🌿 🌟
What is Sphagnum Moss? 🌿
Sphagnum moss is a type of moss that grows in wetland areas, often forming dense mats or layers. Unlike regular moss, sphagnum has unique properties that make it perfect for plant propagation. It has excellent water retention 🦋, absorbs up to 20 times its weight in water, and helps keep the roots of your cuttings moist and healthy.

This moss is lightweight and airy, providing the perfect balance of moisture and oxygen for plant roots to thrive 🌱. It’s often used for orchids, ferns, and many houseplants, giving your cuttings the ideal environment to root successfully.
So, whether you’re new to gardening or an expert, understanding how to use sphagnum moss can make your plant propagation process much easier and more efficient! 🌸
Preparing for Sphagnum Moss Propagation 🛠️🌿
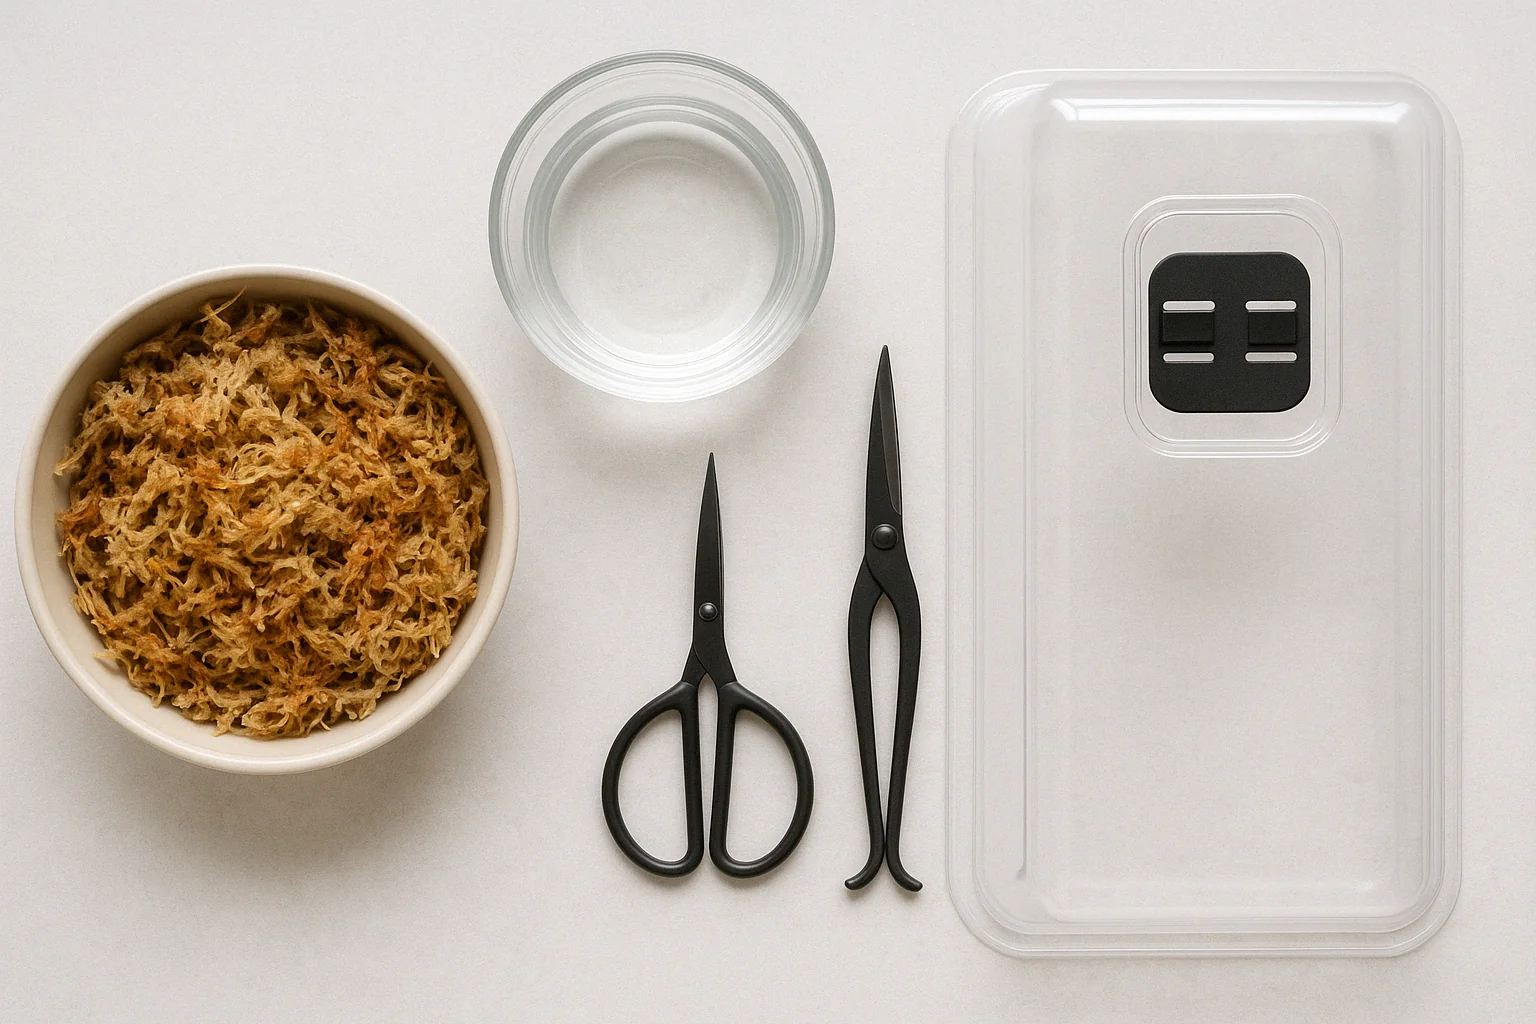
Before you dive into the sphagnum moss propagation method, it’s important to gather everything you need. Here’s how to prepare for a successful propagation session:
1. Gather Your Materials 🧰
- Sphagnum Moss – Choose high-quality, long-fiber sphagnum moss for better water retention.
- Water – Clean, room-temperature water to hydrate the moss.
- Container or Tray – A shallow container or tray to hold the moss and your plant cuttings.
- Rooting Hormone (Optional) – To encourage faster root growth.
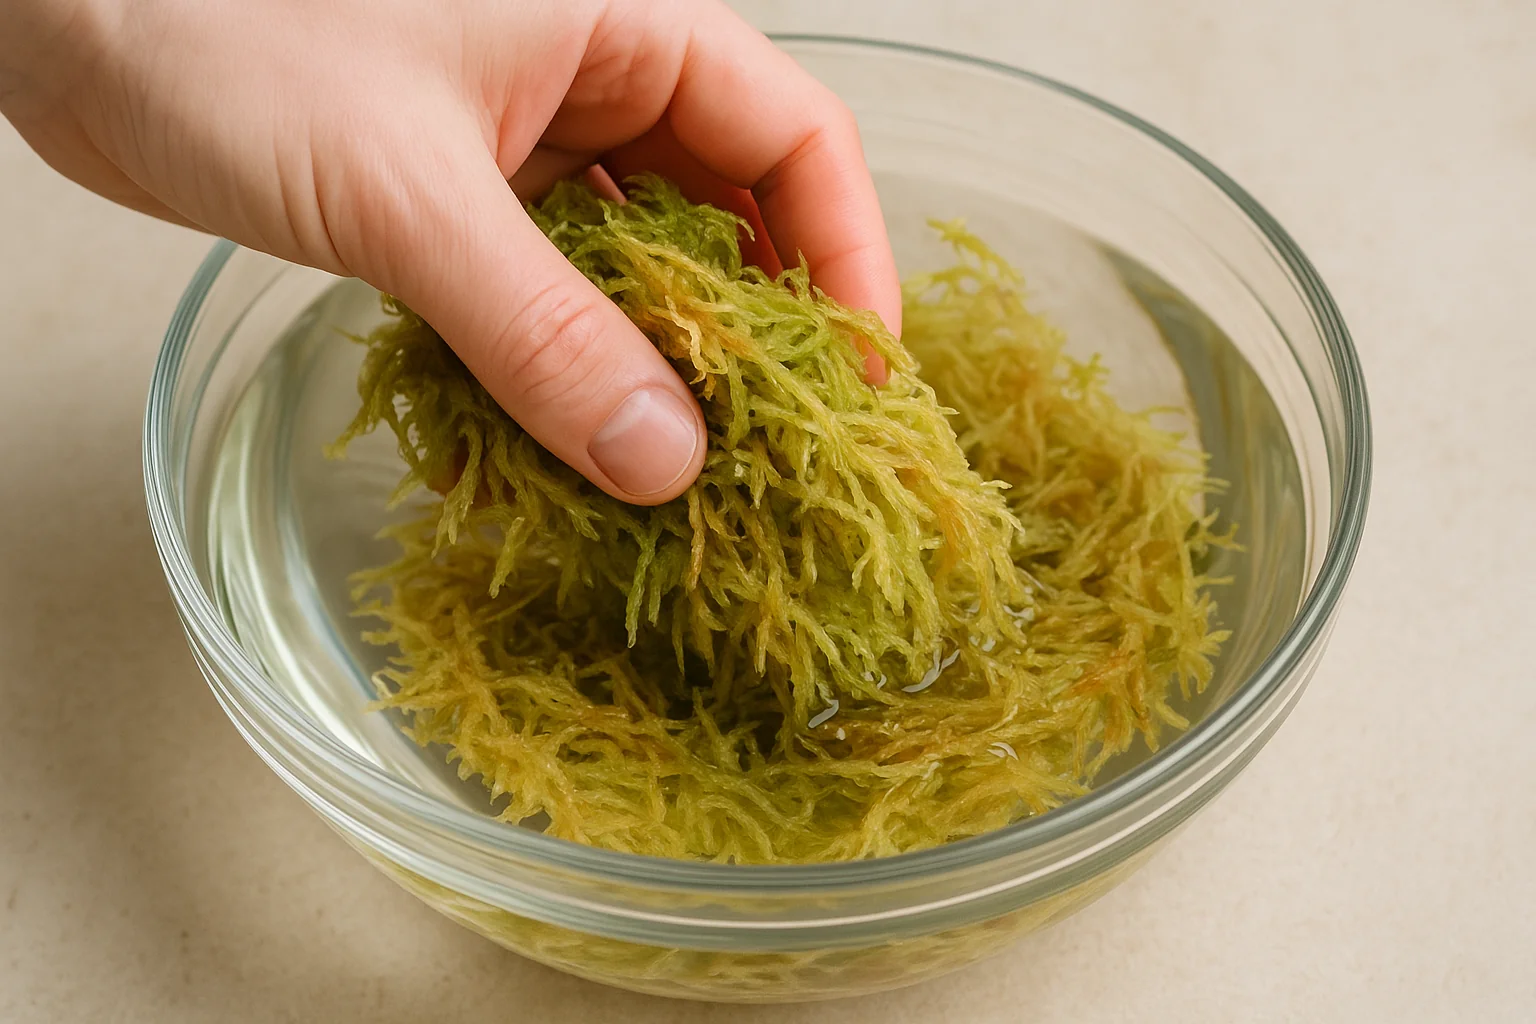
2. Preparing the Sphagnum Moss 💧
Soak the moss in water for about 10-15 minutes until it becomes damp, not soaking wet. Squeeze out any excess water. The moss should feel moist but not dripping.
3. Set Up Your Workspace 🧹
Find a clean, quiet spot with indirect light to work. This will help your cuttings focus on rooting, not fighting the harsh sun.
With these simple steps, you’re ready to start propagating like a pro! 🌱
Step-by-Step Guide to Propagating Plants with Sphagnum Moss 🌱
Now that you’re all set up, let’s walk through the sphagnum moss propagation method step by step. Follow these simple steps for success:
1. Step 1: Select the Plant to Propagate 🌿
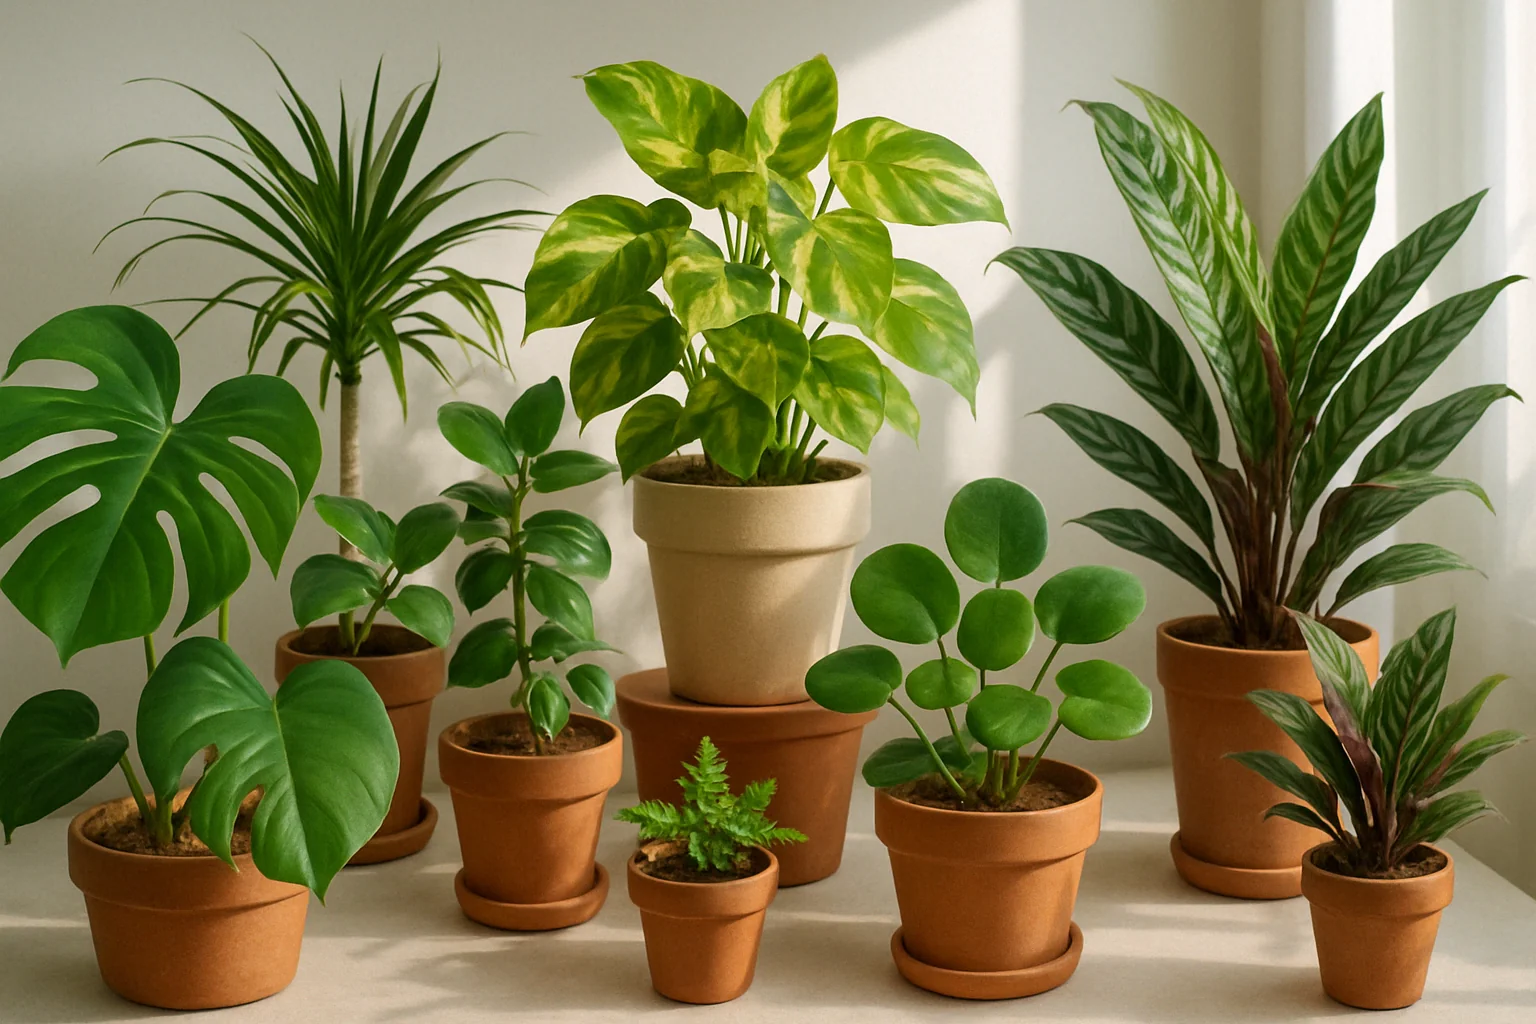
Choose a healthy, mature plant to take a cutting from. Look for strong stems or branches. Popular choices for sphagnum moss propagation include orchids, ferns, and houseplants like pothos and ivy.

2. Step 2: Prepare the Cutting ✂️
Using sharp, clean scissors or pruning shears, cut a healthy section from the plant, about 4-6 inches long. Make sure the cutting has at least one node (the small bump where roots will grow). Remove any excess leaves or stems from the lower part of the cutting.
3. Step 3: Hydrate the Sphagnum Moss 💧
As mentioned earlier, soak the sphagnum moss in water for 10-15 minutes, then squeeze out excess water. The moss should be moist but not dripping.
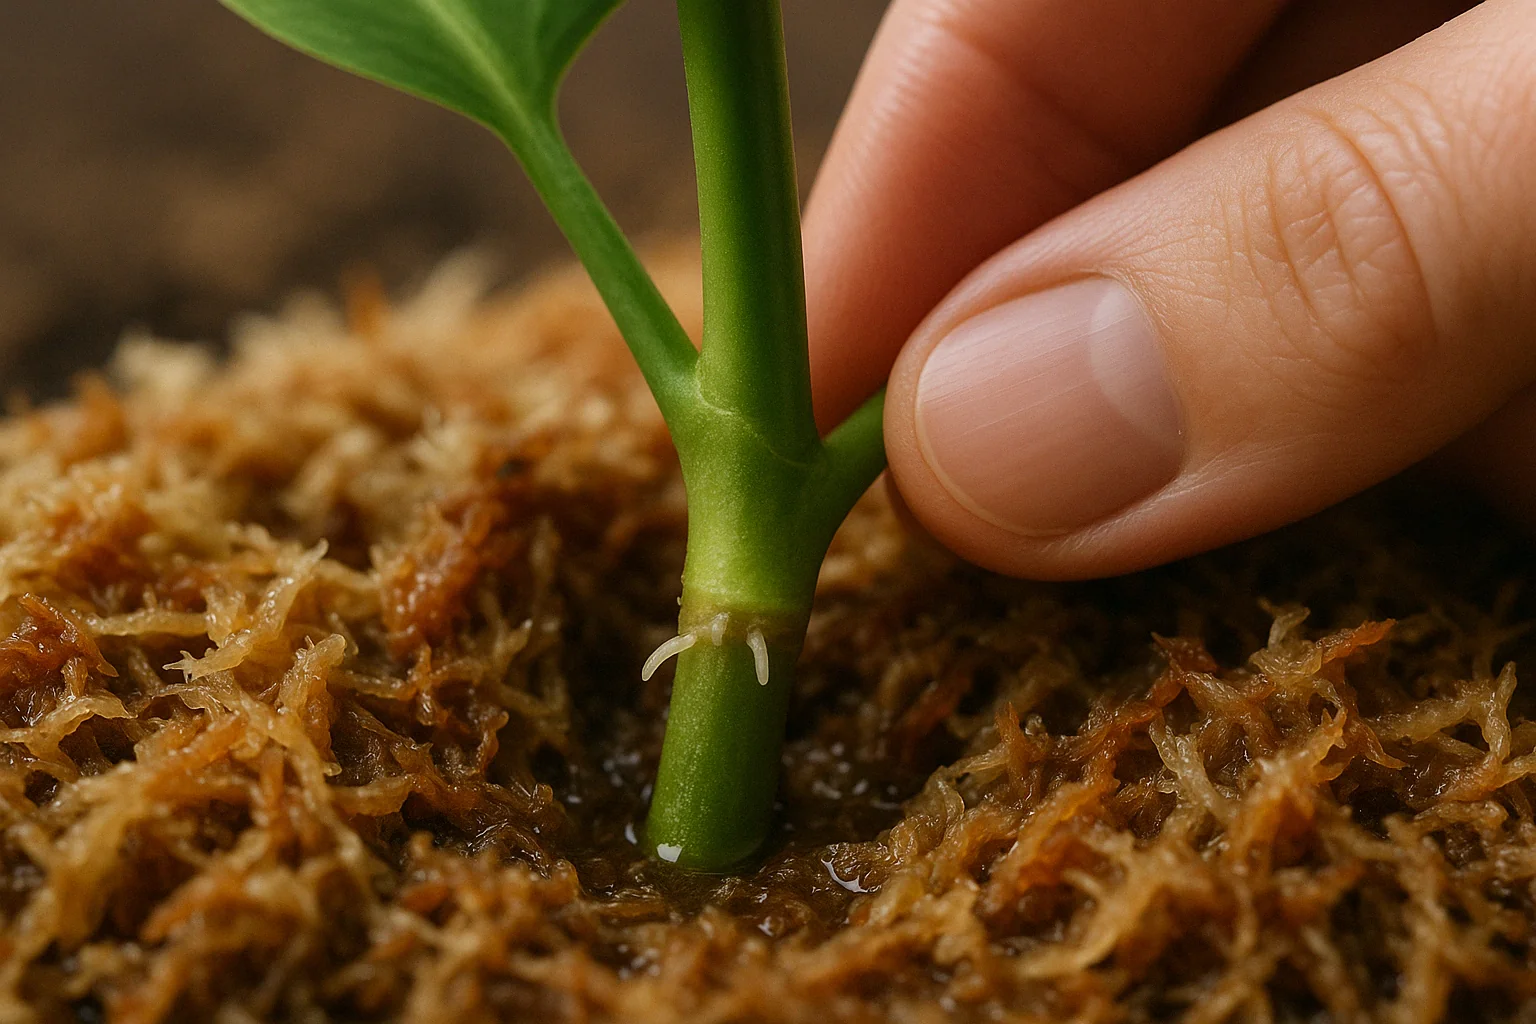
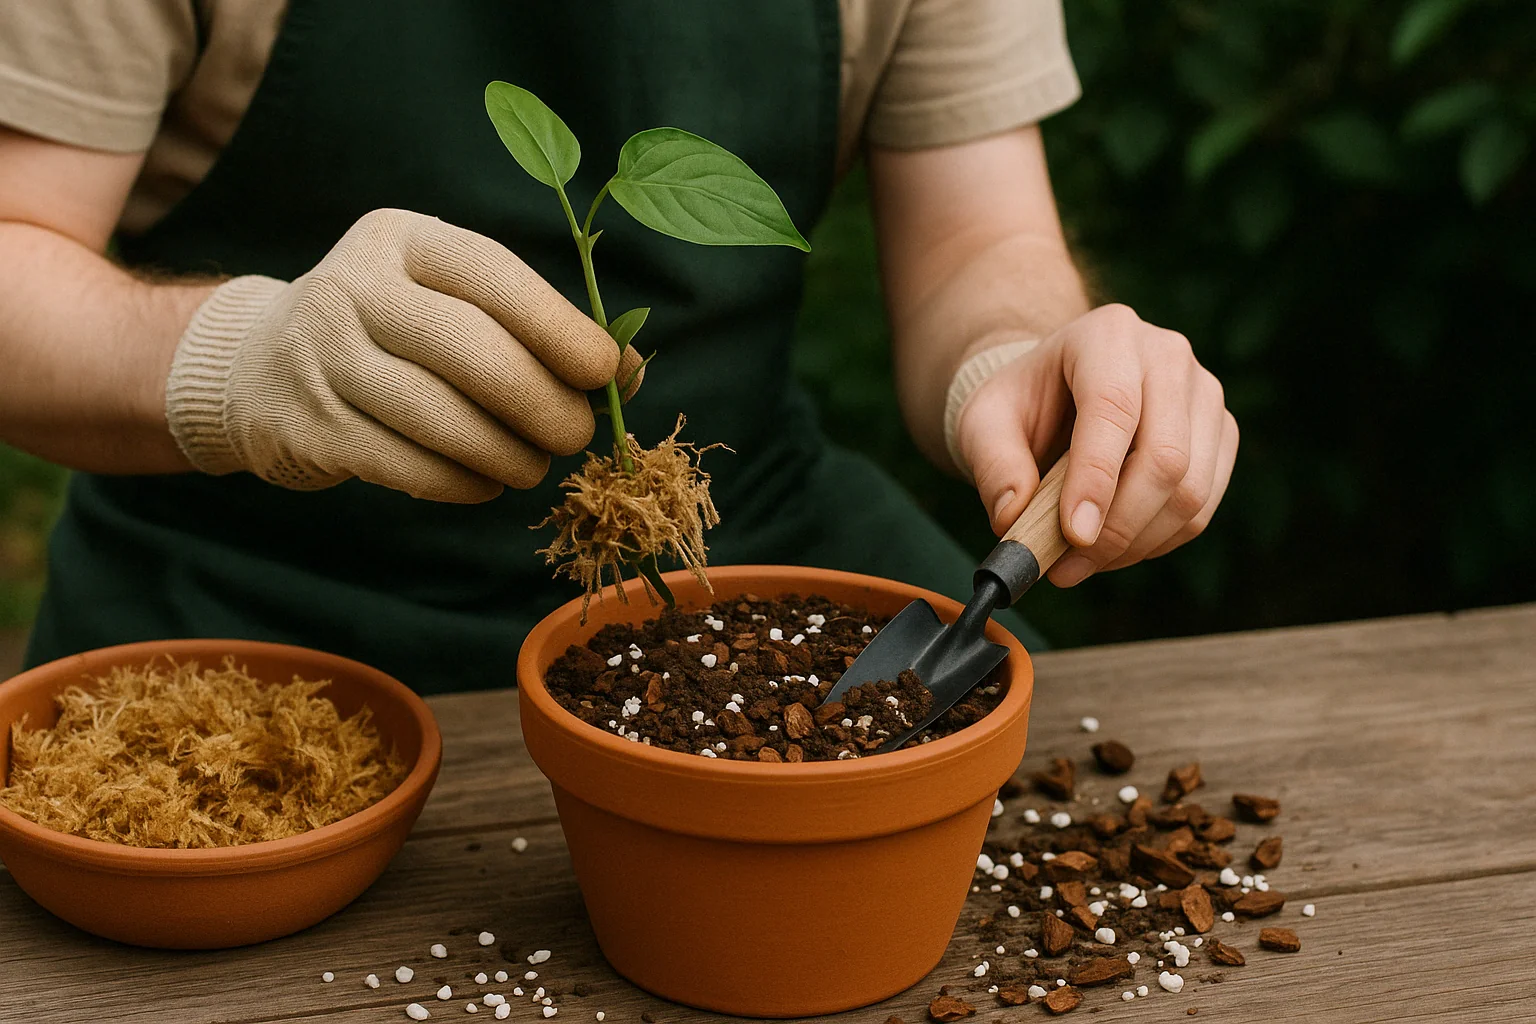
4. Step 4: Place the Cutting in the Moss 🌿
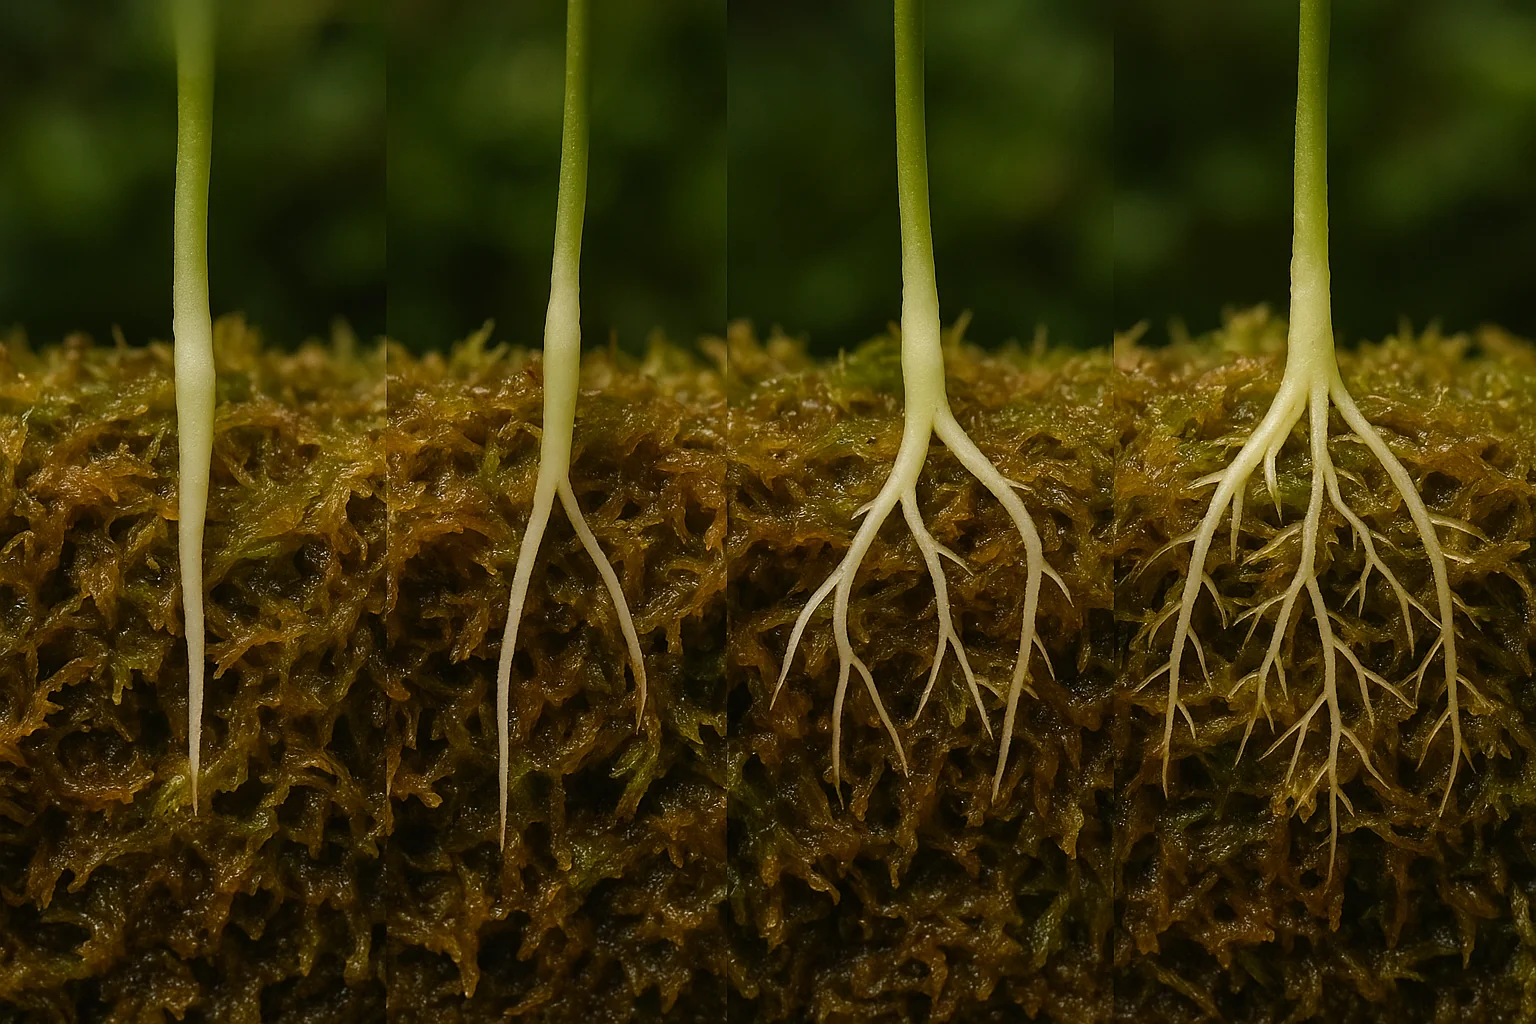
Gently insert the bottom end of the cutting into the sphagnum moss. Make sure the node (where roots will form) is buried in the moss, as this is where the roots will grow. Ensure the cutting is well-supported by the moss.
5. Step 5: Create a Humid Environment 💨
To keep the cutting moist and encourage root growth, cover the container with a plastic bag or place it in a humidity dome. This will trap moisture and maintain a warm, humid environment, which is key for root development.
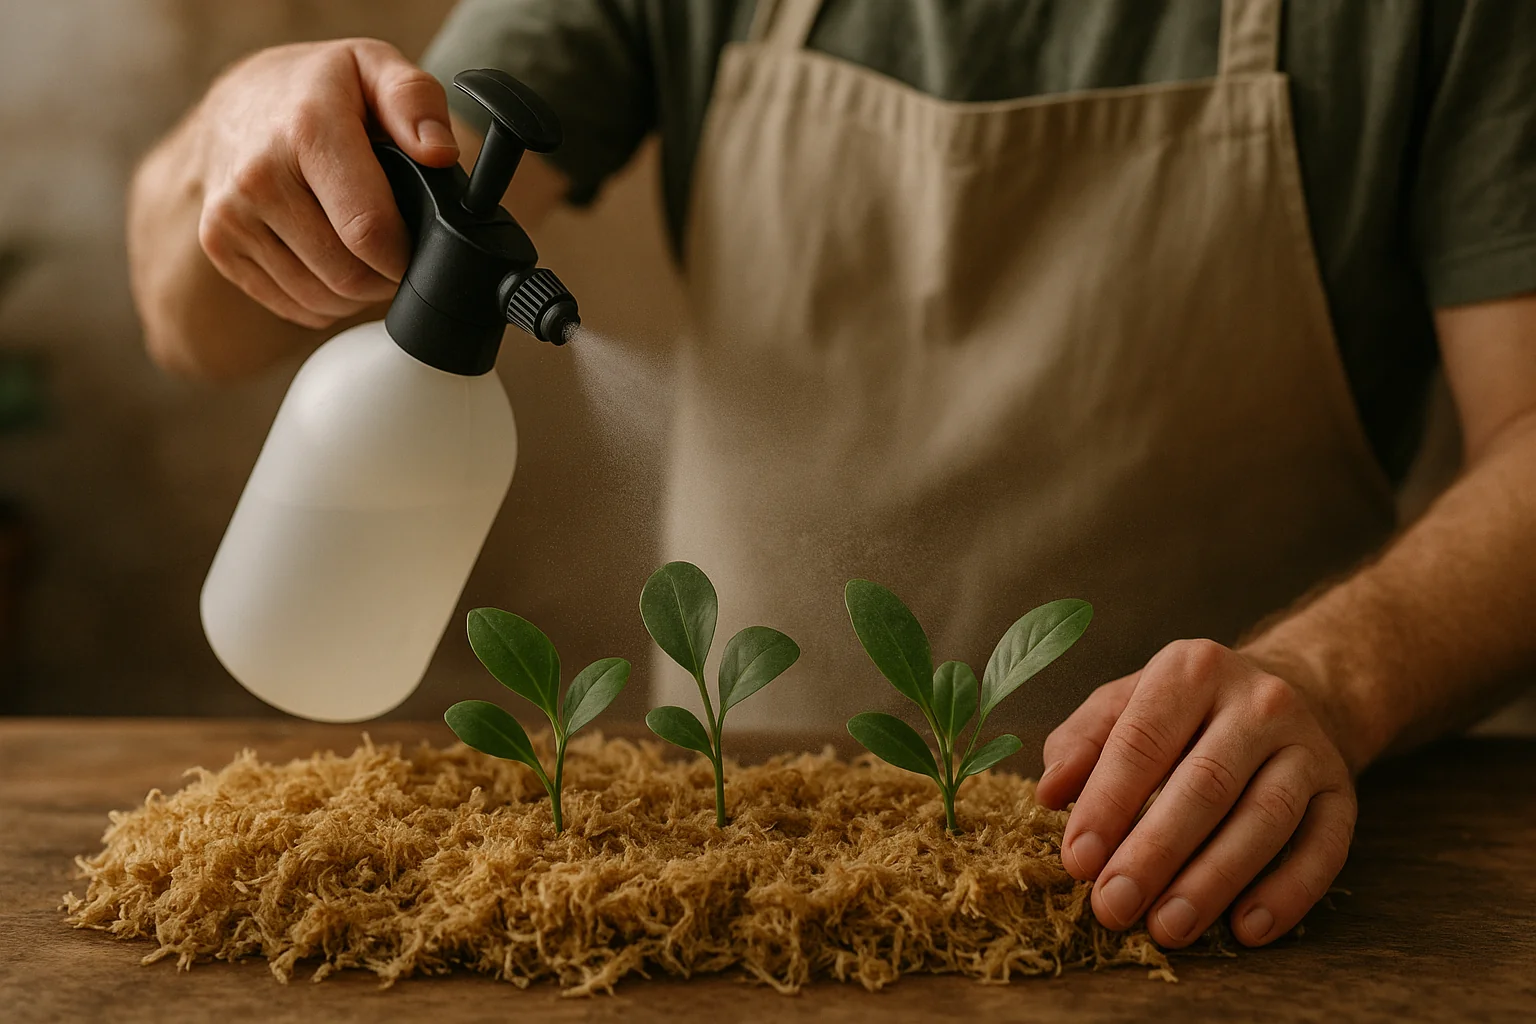
6. Step 6: Monitor and Maintain Conditions 🌞
Keep the cutting in a spot with indirect light and maintain high humidity. Check the moss regularly to ensure it’s still moist (but not too wet). If the moss starts to dry out, gently mist it with water.
By following these steps, you’ll create the perfect conditions for your plant cuttings to grow healthy roots. Stay patient—roots usually take 2-4 weeks to form, depending on the plant! 🌱💚
Caring for Propagated Plants in Sphagnum Moss 🌿💧
Once your cuttings are nestled in sphagnum moss, it’s time to provide the right care to help them grow strong roots and thrive. Here’s how to care for your propagated plants:
1. Watering and Moisture 💦
Keep the moss consistently moist, but avoid over-watering. Sphagnum moss should feel damp, not soggy. If the moss starts to dry out, mist it lightly with water or soak it again for a few minutes. The goal is to keep the humidity high around your cuttings without drowning them.
2. Light and Temperature 🌞
Place your container in a spot with bright, indirect light. Too much direct sunlight can dry out the moss and stress the plant. Ideal temperatures for propagation are between 65°F and 75°F (18°C–24°C). Avoid placing the cuttings in cold or drafty areas.

3. Humidity 🌫️
Maintaining humidity is crucial for successful rooting. If the air is too dry, consider covering the container with a plastic bag or humidity dome. Ensure there’s enough airflow to prevent mold or mildew. If mold appears, gently remove the affected moss and clean the container.
4. Patience is Key ⏳
Rooting takes time. Most plants will take 2-4 weeks to form roots in sphagnum moss. During this period, avoid disturbing the cuttings too much. It’s important to give them the time they need to grow without stress.
5. Troubleshooting Common Issues 🔧
- Mold Growth: If mold develops, reduce humidity slightly, remove affected moss, and clean the container.
- Yellowing or Wilting: If your cutting starts wilting or turning yellow, it could be a sign of over-watering. Let the moss dry out a bit before re-watering.
By maintaining these conditions, your cuttings will be well on their way to forming strong roots and becoming healthy, mature plants! 🌿🌱
Transplanting and Caring for Rooted Cuttings 🌱🌿
Once your cuttings have developed healthy roots, it’s time to give them a new home! Here’s how to transplant and continue caring for your rooted cuttings:
1. Signs Your Cutting Has Rooted 🌱
Your cutting is ready to be transplanted when you see a solid root system. Gently tug on the cutting—if you feel resistance, the roots are likely established. You might also notice new growth at the top of the cutting.

2. Transplanting Rooted Cuttings 🌍
Carefully remove the rooted cutting from the sphagnum moss. Be gentle to avoid damaging the delicate roots. Prepare a pot with well-draining soil—mixing in some perlite or orchid bark can help with drainage. Place the rooted cutting in the soil, burying it just below the root system.
3. Post-Transplant Care 🪴
After transplanting, water the cutting lightly to settle the soil around the roots. Keep it in a shaded area for a few days to allow the plant to acclimate. Gradually move it to a spot with bright, indirect light as it gets stronger.
4. Continued Care for Healthy Growth 🌞
- Watering: Keep the soil moist but not soaking wet. Water when the top inch of soil feels dry.
- Light: Place your newly transplanted plant in a location with bright, indirect light to promote healthy growth.
- Fertilization: After a few weeks, you can start feeding your plant with a diluted, balanced liquid fertilizer to encourage strong growth.
By following these steps, you’ll give your rooted cuttings the best chance to thrive in their new home! 🌿✨
Benefits of Sphagnum Moss for Propagation 🌱🌿
Using sphagnum moss for propagation offers several key advantages that can make your plant care easier and more successful. Here’s why it’s such a popular choice for gardeners:
1. Faster Rooting Process ⚡
Sphagnum moss creates the ideal environment for root growth, allowing your plant cuttings to develop roots faster than in other mediums. Its ability to retain moisture while allowing air circulation accelerates the rooting process, giving you quicker results.
2. Higher Success Rates 🌟
Because sphagnum moss maintains a consistent level of moisture and oxygen, your cuttings are less likely to rot or dry out. This significantly increases the chances of successful propagation, making it easier for beginners and experts alike to grow new plants.
3. Versatility for Various Plants 🌺
Sphagnum moss works well for many types of plants, including orchids, ferns, houseplants, and even some woody shrubs. Whether you’re propagating a delicate indoor plant or a more robust outdoor variety, sphagnum moss offers flexibility and reliability.
4. Lightweight and Easy to Use 🪴
Unlike heavier, soil-based mediums, sphagnum moss is lightweight, making it easy to handle and work with. It’s also easy to store, saving you space and hassle.
5. Improved Water Retention 💧
Sphagnum moss can hold up to 20 times its weight in water, ensuring that your plant cuttings stay hydrated without becoming waterlogged. This moisture control is essential for preventing the roots from drying out or becoming too soggy.
By using sphagnum moss for propagation, you’ll enjoy faster, more successful root development, and better overall plant health. It’s a win-win for any plant lover! 🌱💚
Final Thought 🌿✨
Mastering the sphagnum moss propagation method can be a game-changer for anyone looking to grow healthy, thriving plants from cuttings. By following the simple steps outlined in this guide, you can enjoy faster rooting, higher success rates, and a wide range of plants to propagate. Whether you’re a seasoned gardener or just starting, sphagnum moss provides an easy, effective way to boost your plant collection.
Remember, patience is key—your cuttings will flourish with the right care and conditions. So, gather your materials, set up your space, and start propagating today! 🌱💚 Happy gardening!