
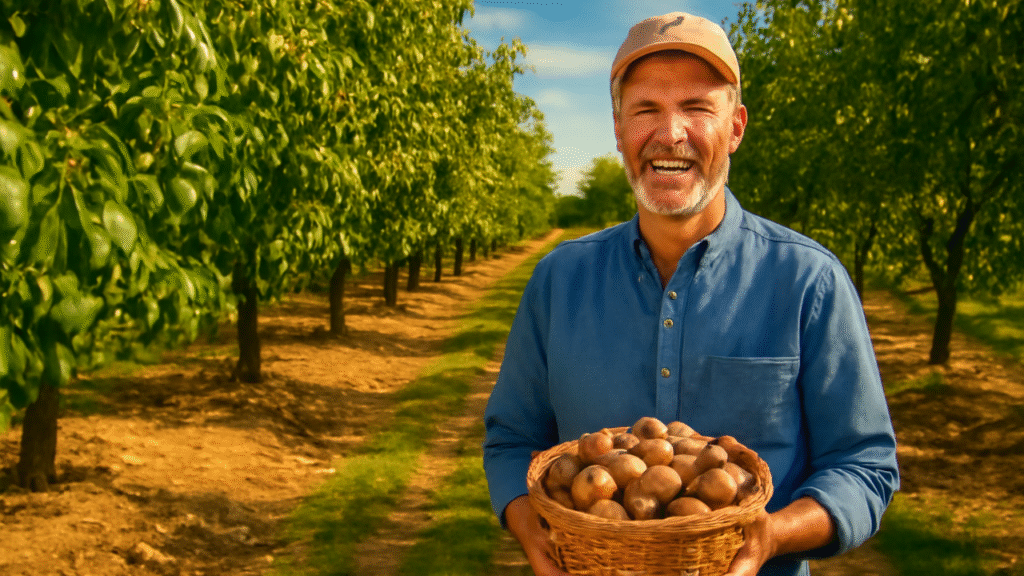
Are you dreaming of harvesting baskets of delicious, high-quality walnuts right from your backyard or orchard? 🌳 The Chandler walnut tree has become the top choice for both new and seasoned growers who want abundant yields, resilient trees, and premium nuts. But while the rewards are impressive, many beginners find themselves overwhelmed by conflicting advice on how to plant, care for, and get the most from their Chandler walnut tree.
If you’ve ever wondered why your walnut tree isn’t thriving, how to boost your annual nut harvest, or how to protect your investment from pests and disease, you’re not alone. This ultimate grower’s guide is designed to cut through the confusion, offering clear, step-by-step solutions that actually work—no guesswork required. Whether you’re planting your first Chandler walnut tree or looking to maximize the yield of mature trees, you’ll find practical tips, expert insights, and proven strategies to help you succeed. Keep reading to discover how to turn your walnut-growing goals into reality!
🌱✨ What is a Chandler Walnut Tree? ✨🌱
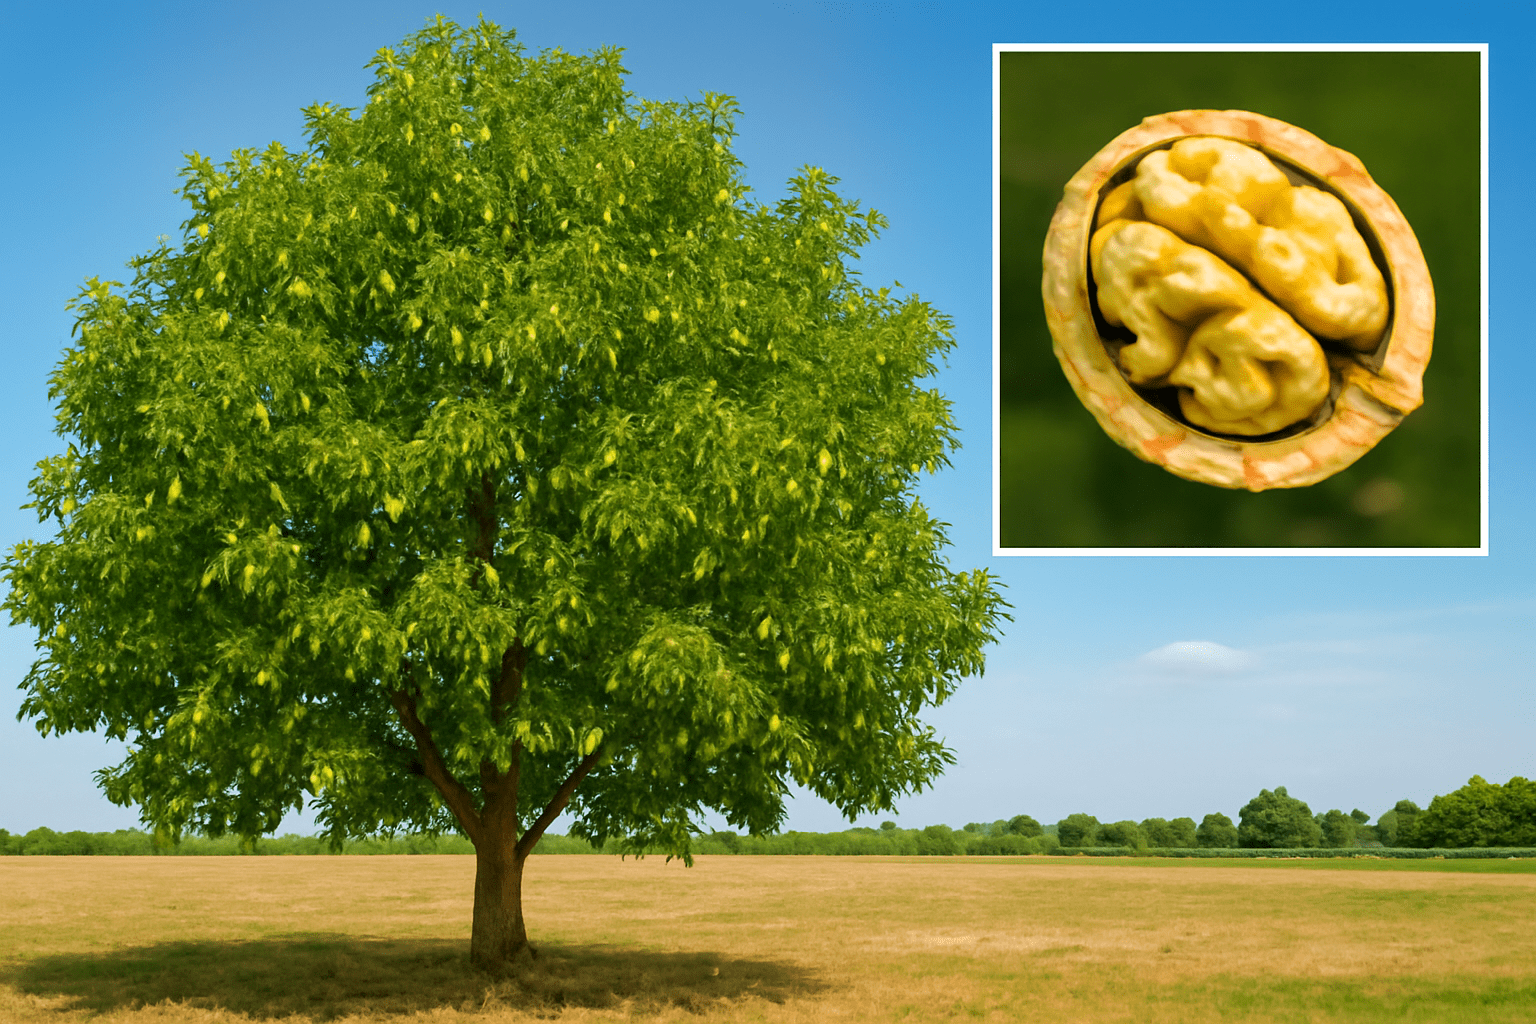
The Chandler walnut tree 🌳 is a superstar in the world of nut trees 🌰—famous for its outstanding nut quality 🌰, impressive yields 🌾, and reliable performance 📈. If you’re searching for a walnut variety 🌰 that’s both beginner-friendly 🌱 and highly productive 💪, the Chandler walnut tree 🌳 is your best bet.
🌍📜 Origin & History 📜🌍
Developed by the University of California 🎓 in the late 1970s, the Chandler walnut tree 🌳 was specifically bred to offer growers 🌱 a tree 🌳 that’s easy to manage 👨🌾 and delivers consistent results 🌱. Today, it’s one of the most widely planted English walnut varieties 🌰 in the world 🌍.
🔑🌱 Key Characteristics 🌱🔑
High Yield 🌾:
- Produces large crops 🌰 of thin-shelled, light-colored walnuts 🌰 that are easy to crack 🥜 and delicious to eat 😋.
Late Leafing 🍂:
- Buds and leaves 🍃 appear later in spring 🌸, reducing the risk of frost damage ❄️—a huge plus for growers 🌱 in cooler climates 🌞.
Vigorous Growth 🌳:
- Grows into a medium to large tree 🌳 with an upright, manageable shape 🌱, making it suitable for both home gardens 🏡 and commercial orchards 🌳.
Quality Nuts 🌰:
- The nuts 🌰 are prized for their mild, buttery flavor 🧈 and high kernel percentage 🥜, making them a favorite for snacking 🍴 and baking 🍪.
🥇🌳 Why Choose Chandler? 🌳🥇
Many growers 🌱 pick the Chandler walnut tree 🌳 because it’s:
Disease-Resistant 🦠:
- Less prone to common walnut diseases 🦠, meaning healthier trees 🌳 and less maintenance 🧑🌾.
Consistent Producer 🔄:
- Year after year 🌱, you can count on a reliable harvest 🌾.
Market Favorite 💵:
- Its nuts 🌰 are in high demand for both home use 🏡 and commercial sale 🏢.
🌰 In a Nutshell (pun intended!) 😄🌰
The Chandler walnut tree 🌳 is perfect for anyone who wants a low-fuss, high-reward walnut-growing experience 🌱. Whether you’re a beginner 🌱 or a seasoned grower 👩🌾, this variety offers a winning combination 🏆 of easy care 🧑🌾, strong disease resistance 🛡️, and top-quality nuts 🌰.
Ready to learn how to plant 🌱 and care 🌿 for your own Chandler walnut tree 🌳? Let’s dig in! 🌳✨
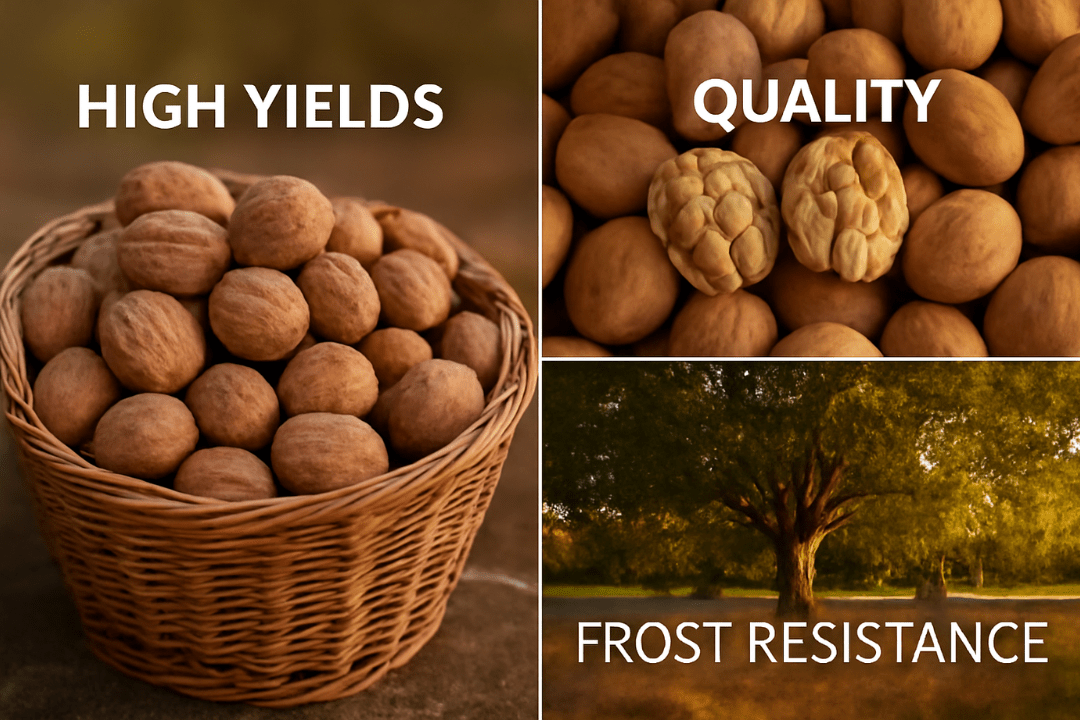
🌟🌰 Benefits of Growing Chandler Walnut Trees 🌰🌟
When you choose a Chandler walnut tree 🌳 for your garden 🌱 or orchard 🍇, you’re investing in a variety 🌰 that’s renowned for its outstanding performance 🏆 and ease of care 💧. Here’s why so many growers 🌱—both beginners 🌱 and experts 👩🌾—consider Chandler 🌳 the gold standard 🥇 for walnut production 🌰:
1️⃣ Exceptionally High Yields 🌳🧺
Chandler walnut trees 🌳 are celebrated for their remarkable productivity 🌱. Once established 🌱, these trees 🌳 reliably produce abundant crops 🌰 year after year 🔄, often yielding more nuts 🌰 than other walnut varieties 🌳. This means you’ll enjoy a steady supply of fresh, homegrown walnuts 🌰 for eating 🍴, sharing 🤝, or selling 💰. If you’re looking to maximize your harvest 🌱, Chandler is hard to beat! 🧺🌳
2️⃣ Superior Nut Quality 🌰✨
The nuts 🌰 from a Chandler walnut tree 🌳 are a grower’s dream 💭. They feature thin shells 🥜 that are easy to crack 🥜, plump kernels 🌰 with a light color 🌿, and a mild, buttery flavor 🧈. These qualities make Chandler walnuts 🌰 highly desirable for both snacking 🍪 and culinary uses 🍳. Whether you’re baking 🍞, roasting 🌰, or selling 🏷️ at a farmers market 🌾, you’ll notice the premium quality right away. 😋
3️⃣ Reduced Risk of Spring Frost Damage ❄️🌱
Spring frosts 🌨️ can devastate walnut crops 🌰, but Chandler trees 🌳 have a natural advantage 💪. They leaf out 🍃 later in the season 🌞, which helps protect the young buds 🌱 from late frosts 🌨️. This late leafing trait 🍂 gives you greater peace of mind 😌 and a better chance at a full harvest 🌰—even in areas with unpredictable spring weather 🌤️. ❄️🌱
4️⃣ Strong Disease Resistance 🌱🦠🚫
One of the biggest headaches 😣 for walnut growers 🌱 is dealing with diseases 🦠 like walnut blight 🦠. Chandler walnut trees 🌳 are bred for resistance 🛡️ to many common diseases 🦠, resulting in healthier trees 🌳 and fewer chemical treatments 🧪. This means less work 💪 for you and a safer 🌱, more sustainable growing environment 🌍. 🌱🦠🚫
5️⃣ Adaptable to Different Climates and Soils 🌍🌱
Chandler walnut trees 🌳 are versatile 🌍 and can thrive 🌞 in a range of climates 🌞, as long as they receive plenty of sunlight 🌞 and are planted in well-drained soil 🌍. Their adaptability 🌱 makes them a great choice for growers 🌱 in various regions 🌍, from backyard gardeners 🏡 to commercial orchardists 🍏. 🌞🌎
6️⃣ High Market Value and Demand 💵📈
Chandler walnuts 🌰 are highly sought after in both local and global markets 🌍. Their attractive appearance 👀, easy-to-crack shells 🥜, and delicious taste 😋 command premium prices 💰. If you’re interested in selling 🏷️ your walnuts 🌰, Chandler offers excellent profitability 💵 and strong market demand 📈, making it a wise investment 💸 for your land 🌳. 💵📈
7️⃣ Beginner-Friendly and Low Maintenance 🌱😊
Even if you’re new to growing nut trees 🌱, Chandler makes the process approachable 💡. Their strong disease resistance 🦠, reliable yields 🌰, and straightforward care requirements 💧 mean you don’t need to be an expert 🧑🌾 to succeed. With just a bit of attention 👀, you’ll be rewarded with years of bountiful harvests 🌰. 😊
🔑 In Summary: 🌰🌳
Growing a Chandler walnut tree 🌳 offers a winning combination 🏆 of high yields 🌱, top-quality nuts 🌰, lower maintenance 💧, and strong market demand 📈. Whether you’re planting a single tree 🌳 in your backyard 🏡 or managing a large orchard 🍇, Chandler gives you the confidence and results you’re looking for. 🌳
Ready to start your journey 🌱? Next, let’s explore how to choose the perfect site 🌳 and prepare for planting 🌱 your Chandler walnut tree 🌳! 🌳✨
📍🌳 Planning & Site Selection 🌳📍
Choosing the right spot 📍 for your Chandler walnut tree 🌳 is the first step toward a healthy 🌱, productive orchard 🍏 or backyard harvest 🌰. A little planning now 🧑🌾 will save you time ⏳, money 💰, and frustration 😫 down the road. Here’s how to set your Chandler walnut tree 🌳 up for success 🌱:
1️⃣🌞 Sunlight Matters Most 🌞1️⃣
Chandler walnut trees 🌳 love sunlight 🌞! Aim for a location that receives full sun 🌞—at least 6 to 8 hours of direct sunlight each day 🌞. More sun 🌞 means stronger growth 🌱, healthier trees 🌳, and bigger nut yields 🌰.
2️⃣🌱 Well-Drained Soil is Essential 🌱2️⃣
Walnut trees 🌳 don’t like “wet feet” 🚫💧. Choose a site with well-drained soil 🌍 to prevent root rot 🦠 and other moisture-related problems 🌧️. If your soil is heavy clay 🏞️ or tends to stay soggy 💧 after rain 🌧️, consider planting on a slight mound ⛰️ or raised bed to improve drainage 💦. You can also mix in organic matter 🍂 to help loosen the soil 🌍.
3️⃣📏 Room to Grow 📏3️⃣
Chandler walnut trees 🌳 grow into large, spreading trees 🌳. Give each tree 🌳 plenty of space 🏡—ideally 25 to 30 feet (7.5 to 9 meters) apart 🌱. This ensures good air circulation 🌬️, reduces disease risk 🦠, and allows each tree 🌳 to reach its full potential 🌳. If you’re planting more than one 🌳, plan your layout carefully 📏!
4️⃣🍃 Avoid Frost Pockets & Windy Spots 🍃4️⃣
Low-lying areas 🌍, where cold air settles ❄️, can expose your trees 🌳 to damaging frosts 🌨️. Select a slightly elevated site 🏞️ if possible. Also, try to avoid spots that are exposed to strong winds 🌬️, which can break branches 🌳 and damage young trees 🌱. If needed, plant a windbreak 🌳 or use protective fencing 🛡️.
5️⃣🧪 Check Soil pH & Fertility 🧪5️⃣
Chandler walnut trees 🌳 prefer a soil pH between 6.0 and 7.5 🌍. Test your soil 🧪 before planting 🌱 and adjust if necessary 🧑🔬—lime can raise pH 📈, while sulfur can lower it 📉. Good fertility 🌿 is important too, so enrich the site with compost 🍂 or well-rotted manure 🌿 before planting 🌱.
6️⃣💧 Water Access 💧6️⃣
Young walnut trees 🌳 need regular watering 💧, especially during their first few years 🌱. Make sure your chosen site 🌍 is close to a reliable water source 💦, whether it’s a hose 💦, irrigation system 🚿, or rain barrel 🌧️.
7️⃣🌱 Plan for the Long Term 🌱7️⃣
Remember, a Chandler walnut tree 🌳 can live for decades ⏳! Think about future growth 🌱, nearby structures 🏠, and how the tree 🌳 will fit into your landscape 🌳 over time 🕰️. Avoid planting too close to buildings 🏠, driveways 🚗, or underground utilities ⚡.
📋 Quick Checklist 📋:
- Full sun 🌞 exposure
- Well-drained 🌱, fertile soil 🌍
- Adequate space (25–30 feet apart) 🌳
- Away from frost pockets ❄️ and strong winds 🌬️
- Proper soil pH (6.0–7.5) 🌍
- Easy access to water 💧
- Room for long-term growth 🌳

By taking the time ⏳ to choose the ideal spot 🌍, you’re giving your Chandler walnut tree 🌳 the best possible start 🌱. Up next: how to plant 🌱 your tree 🌳 for long-lasting health 🌿 and abundant harvests 🌰! 🌳✨
🌳✨ How to Plant a Chandler Walnut Tree 🌳✨
🌱🕰️ When to Plant 🕰️🌱
Best seasons and timing 🌞:
The ideal time 🌞 to plant a Chandler walnut tree 🌳 is during its dormant period—late winter ❄️ to early spring 🌱, before buds begin to swell 🌸. Planting at this time ⏳ gives the tree’s roots 🌱 a chance to establish before the onset of hot weather 🌞, reducing transplant shock 🚫 and supporting strong spring growth 🌱. Avoid planting during summer heat 🌞 or when the ground is frozen ❄️ or waterlogged 💧.
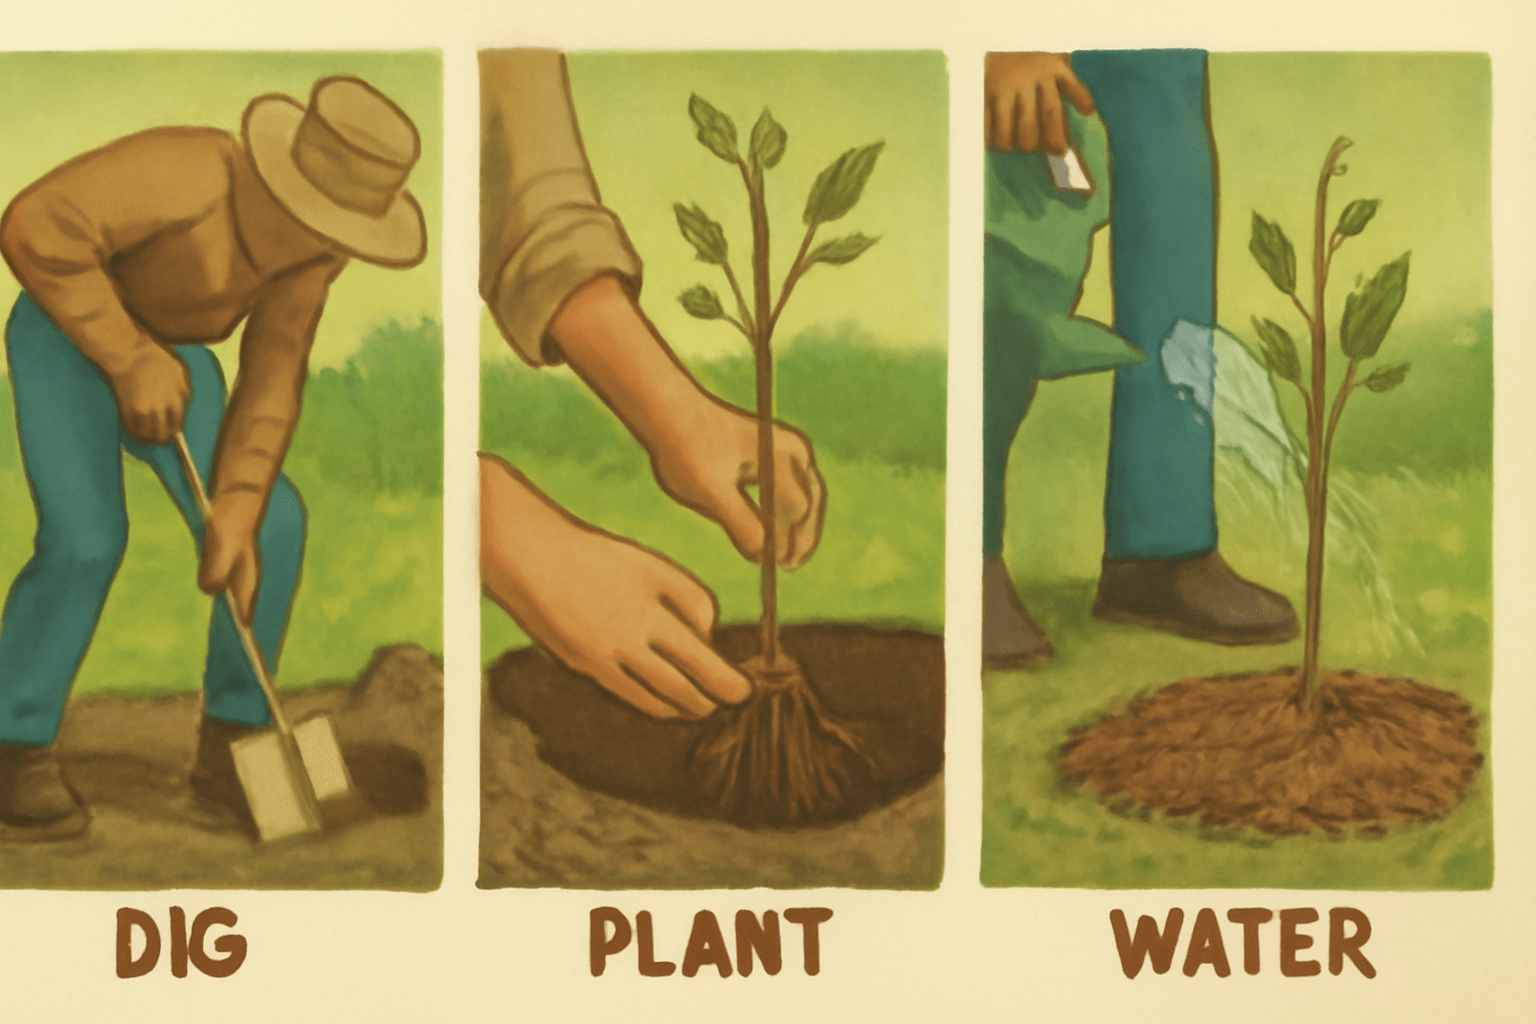
🧑🌾🌍 Step-by-Step Planting Instructions 🌍🧑🌾
1️⃣ Preparing the Soil 🌱
Start by clearing a 3-foot (1-meter) circle 🌍 of all weeds 🌱, grass 🌾, and debris 🌿 where you plan to plant your tree 🌳. This reduces competition for water 💧 and nutrients 🌱. Test your soil pH 🧪 if possible; Chandler walnuts 🌳 thrive in soil 🌍 with a pH of 6.0–7.5. If your soil is heavy clay 🏞️ or drains poorly 🌧️, amend it with organic matter 🌿 such as compost 🍂 or well-rotted manure 🐄 to improve structure and fertility 🌱. Good drainage 💧 is essential, as walnut roots 🌳 are sensitive to “wet feet” 🚫💧.
2️⃣ Digging the Right Hole 🕳️
Dig a hole 🕳️ that is twice as wide as the tree’s root ball 🌰 (or root spread 🌱, for bare-root trees 🌳) and just as deep as the roots 🌱. A wide hole encourages roots 🌳 to grow outward into the surrounding soil 🌍, helping the tree 🌳 establish more quickly 🌱. Loosen the soil 🌍 at the bottom and sides of the hole 🕳️ to make it easier for new roots 🌱 to penetrate.
3️⃣ Placing and Orienting the Tree 🌳
If you’re planting a bare-root tree 🌱, soak the roots 🌱 in a bucket of water 💦 for 2–4 hours ⏳ before planting 🌱 to rehydrate them 💧 and encourage rapid establishment 🌱 (see Pro Tip below). Position the tree 🌳 upright in the center of the hole 🕳️. Gently spread out the roots 🌱 in all directions 🌍. For container-grown trees 🌳, gently loosen any circling roots 🌀 before planting 🌱.
Make sure the root collar 🌱 (where the roots meet the trunk 🌳) is level with the surrounding ground 🌍. If your tree 🌳 is grafted, ensure the graft union (the swollen area near the base) is 2–3 inches 📏 above the soil line 🌍 to prevent scion rooting 🌱 and disease 🦠.
4️⃣ Backfilling and Staking 🌍
Begin refilling the hole 🕳️ with the original soil 🌍, gently firming it as you go to remove air pockets 🕳️. Fill halfway 🏡, then water thoroughly 💦 to help settle the soil 🌍 around the roots 🌱. Finish filling the hole 🕳️ and water again deeply 💧.
If your planting site is exposed to wind 🌬️ or your tree 🌳 is tall and slender 🌱, drive a sturdy stake 🪵 into the ground 🌍 near the tree 🌳, being careful not to damage the roots 🌱. Tie the trunk 🌳 loosely to the stake 🪵 with a soft, flexible material 🧵. Remove the stake 🪵 after the first year 🌱 to allow the trunk 🌳 to strengthen naturally 🌱.
5️⃣ Initial Watering and Mulching 💧🍂
After planting 🌱, give your tree 🌳 a generous, deep watering 💧 to ensure the roots 🌱 are well-hydrated 💦 and help settle the soil 🌍. Apply a 2–4 inch (5–10 cm) layer of mulch 🍂 (such as wood chips 🌳, bark 🌲, or straw 🌾) around the base of the tree 🌳, keeping the mulch 🍂 a few inches away from the trunk 🌳 to prevent rot 🦠. Mulch 🍂 conserves moisture 💧, suppresses weeds 🌿, and protects young roots 🌱 from temperature extremes 🌞❄️.
💡 Pro Tip: Soak Bare-Root Trees 🌱
Soak bare-root trees 🌱 before planting 🌱 for better root establishment 🌱.
Place bare-root trees 🌱 in a bucket of water 💧 for 2–4 hours ⏳ prior to planting 🌱. This step rehydrates the roots 🌱 after storage 📦 and shipping 🚚, dramatically improving survival 🌱 and early growth 🌱.
With careful planting 🌱 and a little extra attention 👀 in the first year 🌱, your Chandler walnut tree 🌳 will reward you with healthy growth 🌱 and, eventually, bountiful harvests 🌰 for years to come! 🌳🌰
🌳✨ Essential Care & Maintenance ✨🌳
Proper care 🌱 during the early years 🕰️ is crucial for your Chandler walnut tree 🌳’s health ❤️, growth 🌱, and future harvests 🌰. Here’s how to keep your tree 🌳 thriving 🌿:
💧🌱 Watering 🌱💧
How much and how often 🌿:
Young Chandler walnut trees 🌳 need consistent moisture 💧, especially during the first 2–3 years 🌱. Water deeply 💦 once or twice a week 🗓️, providing enough to moisten the soil 🌍 to a depth of at least 12–18 inches 🌱. As the tree 🌳 matures 🌿, it becomes more drought-tolerant 🌵, but regular watering 💧 during dry spells 🌞 is still important for nut development 🌰. Avoid shallow, frequent watering 🚫💧, which encourages weak, surface roots 🌱.
Drip Irrigation Tips 💧:
A drip irrigation system 💧 is ideal for walnut trees 🌳. Place emitters in a circle 🔵 around the root zone 🌱, not right against the trunk 🌳. Set your system to deliver slow, deep watering 🌊 early in the morning 🌅. Adjust frequency 🔄 based on rainfall 🌧️ and soil moisture 💦—walnuts 🌰 prefer moist, not soggy, soil 🌍.
🌱🧪 Fertilization 🧪🌱
When and what to feed 🌱:
Begin fertilizing 🌱 in the second year 📅 after planting 🌳. In early spring 🌸, apply a balanced fertilizer ⚖️ (such as 10-10-10) or one specifically formulated for nut trees 🌳. Follow package directions 📦 for amounts based on tree age 🌱 and size 🌳. Avoid over-fertilizing 🚫, which can damage roots 🌱 and reduce nut quality 🌰.
Organic vs. Synthetic Options 🌱:
- Organic options 🌿 include compost 🍂, well-rotted manure 🐄, and organic granular fertilizers 🌱. These improve soil health 🌍 over time 🕰️ and are less likely to burn roots 🌱.
- Synthetic fertilizers ⚡ provide quick nutrients 🏃 but should be used with care ⚠️ to prevent buildup 🏗️ and runoff 🌊. Monitor your tree 🌳’s growth 📈 and adjust feeding 🍽️ as needed.
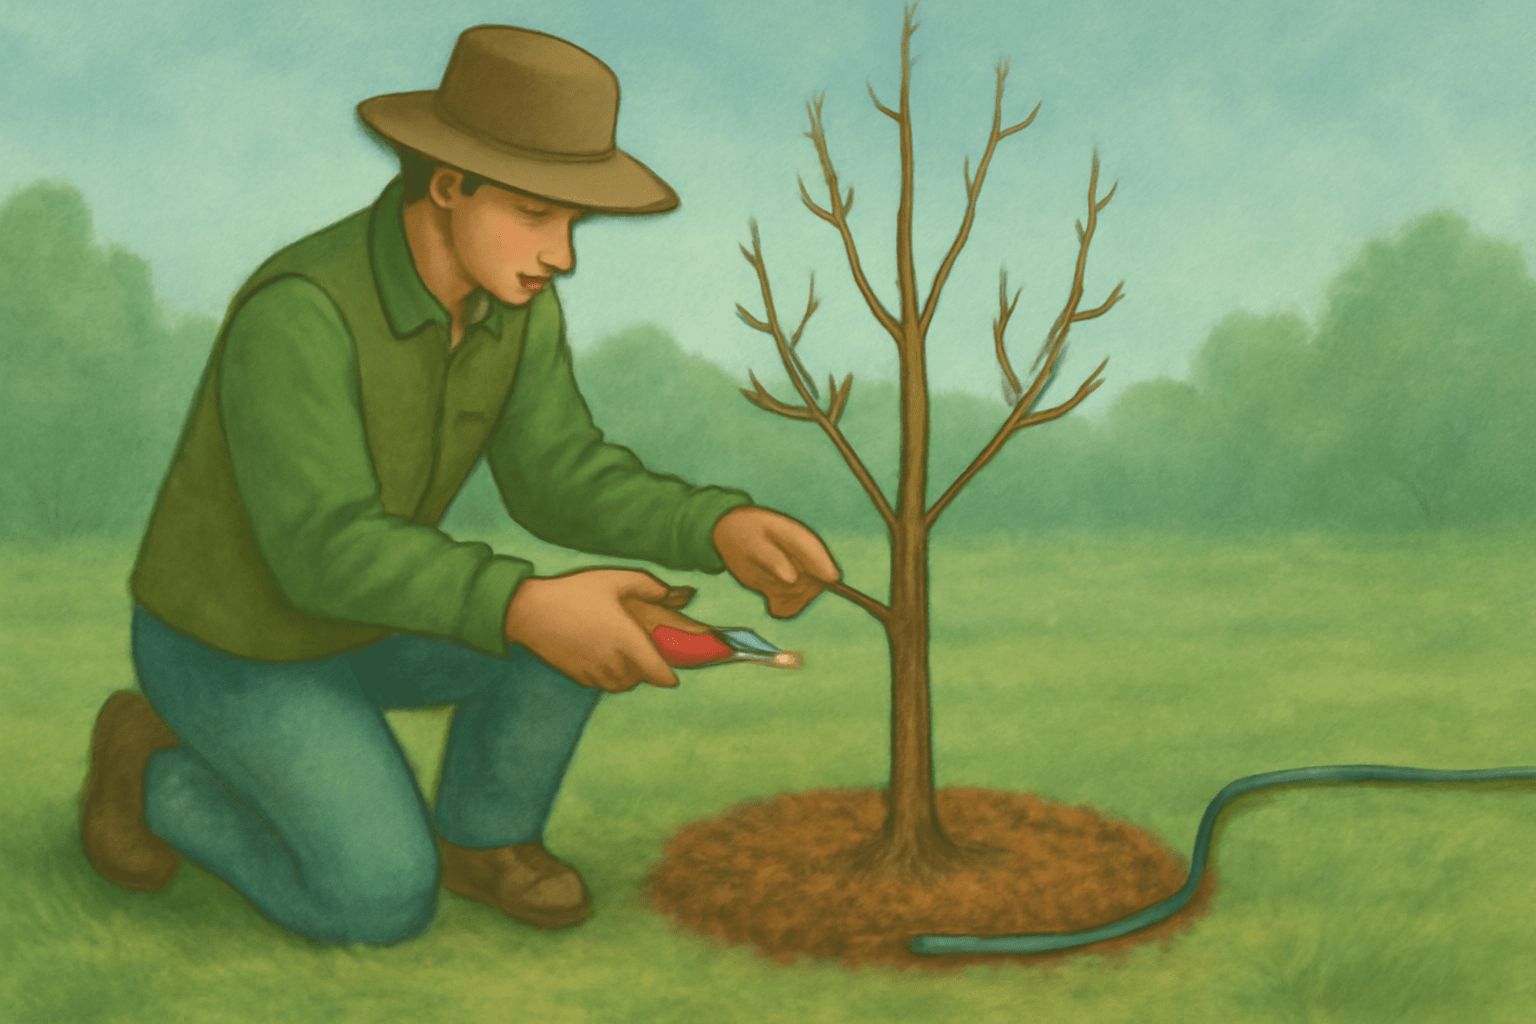
✂️🌳 Pruning & Training 🌳✂️
First-year pruning ✂️:
After planting 🌱, prune back the main leader 🌳 to about 3–4 feet tall 📏 to encourage strong branching 🌿. Remove any broken or crossing branches 🌿.
Annual maintenance 🌱:
Each winter ❄️ (while the tree 🌳 is dormant 🛌), remove dead 💀, diseased 🦠, or weak branches 🌿. Thin crowded areas 🌳 to improve sunlight ☀️ and air circulation 🌬️.
Shaping for health and yield 🌱:
Train your tree 🌳 to a central leader (one main trunk 🌳) with evenly spaced lateral branches 🌿. Proper structure supports heavy nut crops 🌰 and reduces disease risk 🦠.
🍂🌱 Mulching 🌱🍂
Benefits and best practices 🌿:
Apply a 2–4 inch (5–10 cm) layer of organic mulch 🍂 (such as wood chips 🌳, straw 🌾, or compost 🍂) around the base of your tree 🌳, keeping it a few inches away from the trunk 🌳 to prevent rot 🦠. Mulch 🍂 conserves soil moisture 💧, suppresses weeds 🌿, moderates soil temperature 🌞, and adds organic matter 🍂 as it breaks down 🛠️. Replenish mulch 🍂 yearly for best results 🌱.
🦠🌿 Pest & Disease Management 🌿🦠
Common threats 🦠:
- Blight 🦠: Causes black spots on leaves 🍂 and nuts 🌰.
- Walnut husk fly 🦠: Larvae tunnel into husks 🌰, damaging nuts 🌰.
- Aphids 🐜: Sap-sucking insects 🦠 that can stress young trees 🌱.
Organic and Integrated Solutions 🌱:
- Blight 🦠: Prune ✂️ for good airflow 🌬️, avoid overhead watering 🌧️, and apply copper-based sprays 🧴 if needed.
- Walnut husk fly 🦠: Use sticky traps 🪲 to monitor 👀, remove infested nuts 🌰, and encourage natural predators 🦋.
- Aphids 🐜: Spray 💦 with insecticidal soap 🧴 or neem oil 🌿, and attract beneficial insects 🦉 like ladybugs 🦋.
Regular monitoring 🔍 and early intervention ⏳ are key. Healthy, well-cared-for trees 🌳 are naturally more resistant 🛡️ to pests 🦠 and diseases 🦠.
By following these essential care steps 🌱, you’ll set your Chandler walnut tree 🌳 up for vigorous growth 🌱, resilience 💪, and abundant harvests 🌰 for many years to come 🌳! 🌰✨
🌰🌳 Maximizing Nut Yield 🌳🌰
Achieving the best possible harvest 🌿 from your Chandler walnut tree 🌳 requires attention to crop management 🌾, irrigation 💧, harvest timing 🕰️, and post-harvest care 🧑🌾. Here’s how to optimize your nut yield 🌰 for both quality and quantity 📈:
✂️🌱 Thinning and Crop Management 🌱✂️
Why thinning matters 🌱:
While walnut trees 🌳 are generally self-thinning 🌿, in years of heavy flowering 🌸, you may notice clusters of developing nuts 🌰. If too many nuts 🌰 form, the tree 🌳 may produce smaller, lower-quality nuts 🌰 and become stressed 😓.
How to thin ✂️:
- In late spring 🌸 or early summer 🌞, inspect the clusters 🌰.
- Gently remove excess nuts 🌰 from crowded branches 🌳, leaving one or two nuts 🌰 per cluster 🌿.
- Use clean, sharp pruners ✂️ or your fingers 🖐️ to avoid damaging shoots 🌱.
Other crop management tips 🌿:
- Remove any damaged 💀 or diseased nuts 🌰 during the growing season 🌱.
- Monitor for pest infestations 🦠 and address issues promptly 🧑🌾 to prevent crop loss 🏚️.
💧🌳 Proper Irrigation During Nut Development 🌳💧
Critical period 🌱:
The most important time for watering 💧 is from late spring 🌸 through summer 🌞, especially as nuts 🌰 are filling and maturing 🌱. Inadequate moisture 💧 during this period can result in shriveled kernels 🥜 and poor yields 📉.
Best practices 💧:
- Maintain even soil moisture 🌱, aiming for deep, thorough watering 💦 rather than frequent, shallow irrigation 🌱.
- Drip irrigation 💧 or soaker hoses 💦 are ideal, as they deliver water directly to the root zone 🌳.
- Avoid water stress 💦, especially during heat waves 🌞 or drought 🌵.
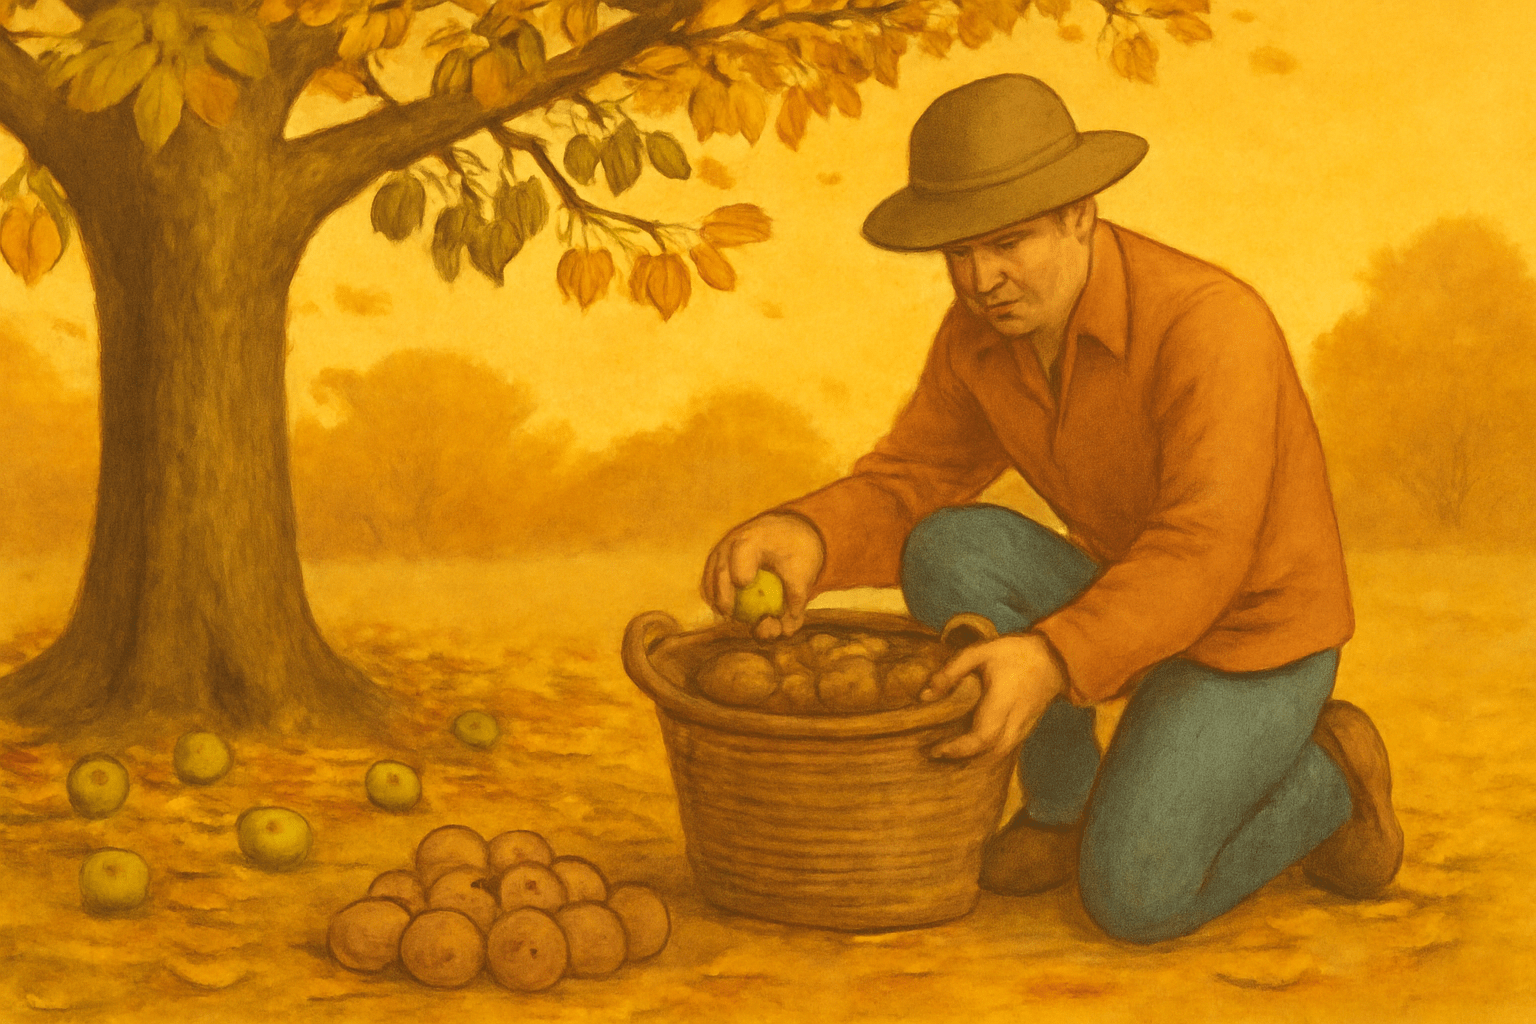
📅🌰 Timing and Techniques for Best Harvest 🌰📅
When to harvest 🌳:
Chandler walnuts 🌰 are typically ready for harvest in late September 🍂 to early October 🍁, depending on your region 🌍. The nuts 🌰 are mature when the outer green hull splits and begins to dry and blacken 🖤.
How to harvest 🌳:
- Shake the branches 🌳 gently or use a long pole 🪵 to dislodge ripe nuts 🌰.
- Gather fallen nuts 🌰 promptly to prevent loss to wildlife 🦊 or mold 🦠.
- Wear gloves 🧤, as walnut husks 🌰 can stain hands 👐 and clothing 👚.
🧑🌾🧴 Post-Harvest Handling and Storage Tips 🧴🧑🌾
Cleaning 🧽:
- Remove the outer husks 🌰 as soon as possible after harvest 🍂 to prevent staining 🖤 and spoilage 🦠.
- Wash the nuts 🌰 to remove any remaining husk material or debris 🌿.
Drying 🌞:
- Spread the nuts 🌰 in a single layer in a well-ventilated 🌬️, shaded area 🌳.
- Turn them daily 🔄, and allow them to dry for 2–3 weeks 🗓️ until the kernels are crisp 🍂 and the shells 🥜 are hard.
Storage 📦:
- Store dried walnuts 🌰 in mesh bags 🧳, baskets 🧺, or breathable containers 🧴.
- Keep them in a cool, dry place 🌡️; refrigerated 🧊 or frozen nuts 🌰 will stay fresh even longer 🔄.
- Properly dried 🌞 and stored walnuts 🌰 can last for several months 🗓️ without losing flavor 🍽️ or quality 💎.
By managing your crop 🌾 carefully, providing adequate water 💧 at key times ⏳, harvesting at the right moment 🕰️, and handling your nuts 🌰 properly after picking 🧑🌾, you’ll consistently enjoy abundant 🍃, high-quality Chandler walnut harvests 🌰 year after year 📅!
🌰🌳 Common Problems & Solutions 🌳🌰
Even with good care 🌱, Chandler walnut trees 🌳 can encounter challenges ⚠️. Here’s how to recognize and address common problems 🛠️ to keep your tree 🌳 healthy and productive 🌰:
🌱💔 Poor Nut Set or Yield 💔🌱
Possible causes 🧐:
- Insufficient pollination 🌸 (Chandlers are self-pollinating but benefit from nearby pollen sources 🌾).
- Nutrient deficiencies 🧪 (especially nitrogen 🌱, zinc 🧴, or boron ⚗️).
- Water stress 💧 during flowering 🌸 or nut development 🌰.
- Late spring frosts ❄️ damaging flowers 🌸.
Solutions 🛠️:
- Plant a compatible walnut variety 🌳 nearby to improve pollination 🌸.
- Fertilize in early spring 🌱 with a balanced ⚖️ or nut tree-specific fertilizer 🧑🌾; supplement with zinc 🧴 if leaf analysis indicates deficiency 🧪.
- Ensure regular, deep watering 💧 during critical growth periods 🌱.
- Protect young trees 🌳 from frost ❄️ with covers 🧥 or by planting in less frost-prone areas 🌍.
🍂🍃 Yellowing Leaves 🍃🍂
Possible causes 🧐:
- Nutrient deficiencies 🧪 (commonly nitrogen 🌱, iron ⚙️, or zinc 🧴).
- Overwatering 💧 or poor drainage 🌊 causing root problems 🌱.
- Pest 🦠 or disease 🦠 issues.
Solutions 🛠️:
- Test soil 🧪 and adjust fertilization 🌱 as needed; foliar sprays 🌿 can quickly correct zinc 🧴 or iron ⚙️ deficiencies.
- Check soil moisture 💧—allow the top few inches to dry between waterings 💦, and improve drainage 🌍 if necessary.
- Inspect for pests 🦠 or disease 🦠 symptoms and treat accordingly 🧑🌾.
🐜🦠 Pest Infestations 🦠🐜
Common pests 🐛:
- Aphids 🐜: Leaves 🍂 may curl or become sticky with honeydew 🍯.
- Walnut husk fly 🦠: Larvae tunnel into husks 🌰, causing black, mushy shells 💀.
- Codling moth 🦋: Worms 🐛 in nuts 🌰.
Solutions 🛠️:
- Control aphids 🐜 with insecticidal soap 🧴, neem oil 🌿, or by encouraging natural predators 🦋 (like ladybugs 🦗).
- Use sticky traps 🪲 to monitor 👀 and control walnut husk flies 🦠; remove and destroy infested nuts 🌰.
- For codling moths 🦋, use pheromone traps 🧴 and pick up fallen nuts 🌰 promptly 🧑🌾.
🦠💉 Disease Identification and Quick Fixes 💉🦠
Common diseases 🦠:
- Walnut blight 🦠: Black spots 🖤 on leaves 🍂, shoots 🌱, and nuts 🌰, especially in wet springs 🌧️.
- Root rot 🦠: Wilting 🌿, yellowing 🌿, and dieback 💀, often in poorly drained soils 🌍.
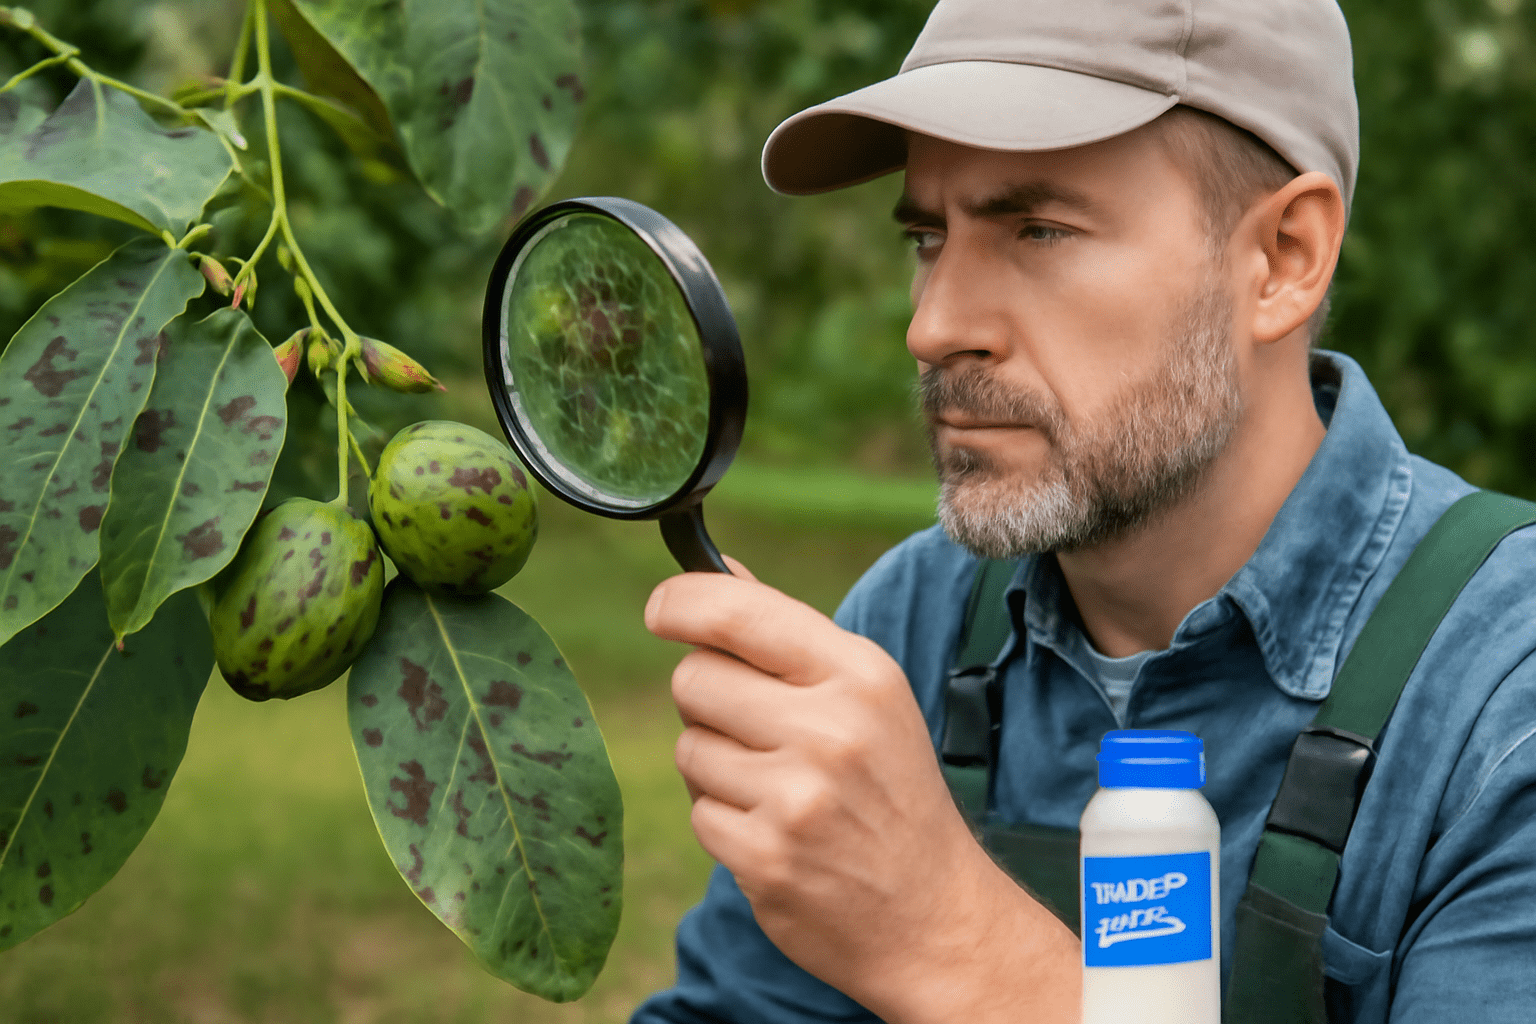
Solutions 🛠️:
- For blight 🦠, prune ✂️ to improve air circulation 🌬️, avoid overhead watering 💧, and apply copper-based fungicides 🧴 early in the season 🌞.
- Prevent root rot 🦠 by planting in well-drained soil 🌍 and avoiding overwatering 💧. Remove and destroy affected plant parts 🪦.
🔍 General Tip 🔍
Regularly inspect your tree 🌳 for signs of stress 💔, pests 🦠, or disease 🦠. Early detection 👀 and prompt action 🏃♂️ are key to keeping your Chandler walnut tree 🌳 healthy 🌱 and productive 🌰!
🌳✨ Final Thoughts ✨🌳
Growing Chandler walnut trees 🌳 is a rewarding journey 🌱 that combines patience ⏳, care 💧, and a little know-how 🧑🌾. With the right attention to watering 💦, feeding 🌱, pruning ✂️, and pest management 🦠, your tree 🌳 will reward you with abundant 🌰, high-quality harvests 🌾 for many years to come 🌱. Remember, most problems 🚨 can be prevented or quickly resolved 🔧 with regular observation 👀 and timely action ⏰.

Whether you’re planting 🌱 a single tree 🌳 in your backyard 🏡 or tending a small orchard 🍏, the investment 💰 you make today will pay off in beauty 🌸, shade 🌳, and delicious walnuts 🌰 for seasons to come 🌳. Happy growing 🌱!