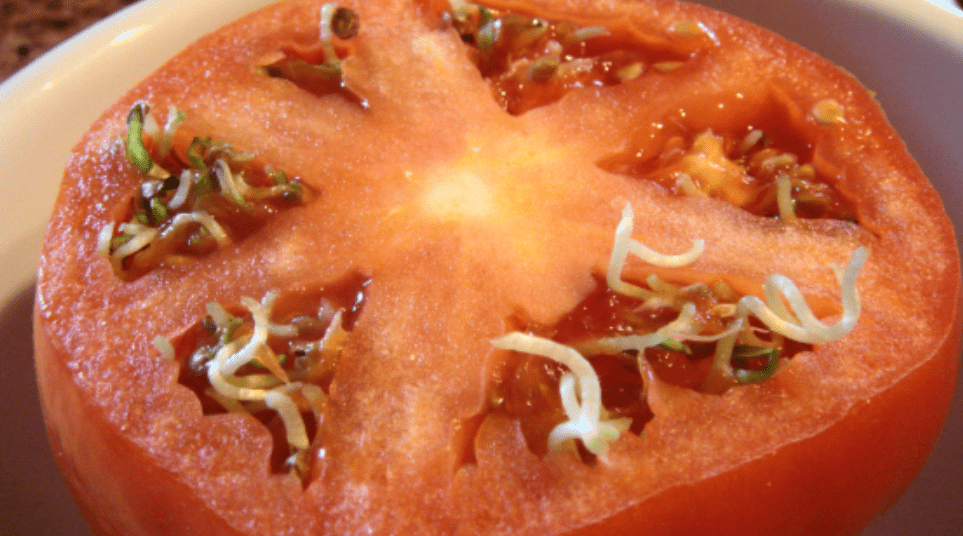
Tomato Sprout Basics: Essential Tips for Beginners
Growing tomato sprouts can be a rewarding and enjoyable experience, especially for beginners. In this article, we will cover the essential tips and techniques to help you successfully grow tomato sprouts. Whether you are new to gardening or looking to expand your knowledge, this post will provide you with the information you need to get started on the right foot. From choosing the right seeds to caring for your sprouts, we’ve got you covered. Let’s get started!
Table of Contents
ToggleUnderstanding Tomato Sprouts
1.What are Tomato Sprouts?
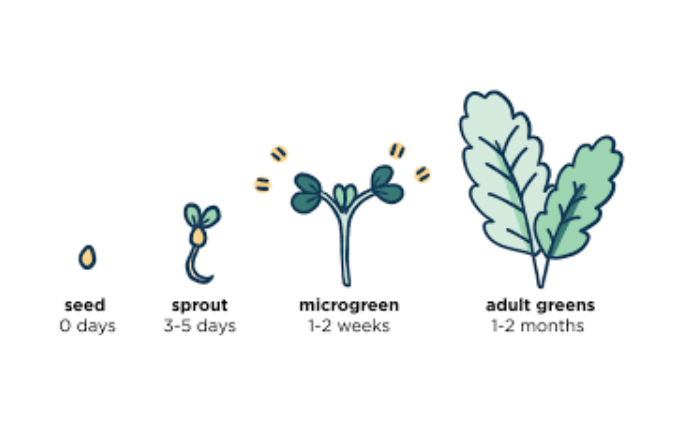
Tomato sprouts are the early growth stages of tomato plants, typically grown from seeds. These small, delicate plants are the first sign of new growth and are the beginning of the tomato plant’s life cycle. They require specific care and attention to ensure they develop into healthy, robust tomato plants.
A.Difference between sprouts and mature plants
The main difference between tomato sprouts and mature plants is their size and stage of development. Sprouts are the initial growth stage of a tomato plant, typically small and delicate, while mature plants are fully developed, larger, and capable of producing fruit. Sprouts require more care and attention as they are more vulnerable to environmental factors and need to be nurtured to ensure healthy growth.
2.Benefits of Starting with Sprouts
Starting with tomato sprouts offers several benefits, including a head start on the growing season. By starting with sprouts, you can transplant them into the garden earlier, allowing for a longer growing season and potentially earlier fruit production. Additionally, growing sprouts from seeds allows for greater control over the growing process and ensures that the plants are healthy and free from disease. It also provides the opportunity to experiment with different varieties of tomatoes and customize your garden to your preferences. Overall, starting with tomato sprouts can lead to a more successful and bountiful harvest.
A.Advantages over direct seeding
Starting with sprouts has several advantages over direct seeding. Sprouts have a higher success rate of germination and are more resilient to environmental conditions. They also allow for more control over the growing process and can lead to a faster and more uniform growth. Additionally, starting with sprouts gives the opportunity to start the growing season earlier and potentially harvest fruits sooner. Overall, starting with sprouts provides a more reliable and efficient way to grow tomatoes.
B.Importance for early crop production
Starting with tomato sprouts is important for early crop production because it allows for an earlier start to the growing season. This can lead to a quicker harvest and a longer growing season overall. Starting with sprouts also gives the opportunity to experiment with different varieties of tomatoes and customize your garden to your preferences. Overall, starting with tomato sprouts can lead to a more successful and bountiful harvest.
Choosing the Right Tomato Seeds
1.Types of Tomato Seeds
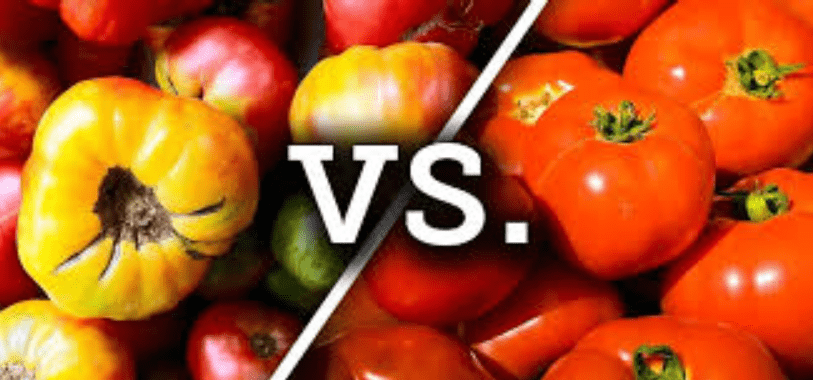
There are many different types of tomato seeds available, including heirloom, hybrid, and open-pollinated varieties. Heirloom tomatoes are known for their unique flavors, colors, and shapes, while hybrid tomatoes are often bred for disease resistance and high yields. Open-pollinated tomatoes are non-hybrid varieties that can be saved and replanted year after year. It’s important to choose the right type of tomato seeds based on your specific growing conditions, preferences, and goals for your garden.
A.Heirloom vs. hybrid
Heirloom tomatoes are known for their unique flavors, colors, and shapes, while hybrid tomatoes are often bred for disease resistance and high yields. It’s important to choose the right type of tomato seeds based on your specific growing conditions, preferences, and goals for your garden.
B.Determinate vs. indeterminate
Determinate tomato plants grow to a certain height and then stop, while indeterminate tomato plants continue to grow and produce fruit throughout the season. It’s important to consider the space available in your garden and your preferred harvesting schedule when choosing between determinate and indeterminate tomato seeds.
2.Seed Selection Criteria
When selecting tomato seeds, it’s important to consider factors such as your specific growing conditions, preferences, and goals for your garden. Heirloom tomatoes are known for their unique flavors, colors, and shapes, while hybrid tomatoes are often bred for disease resistance and high yields. Open-pollinated tomatoes are non-hybrid varieties that can be saved and replanted year after year. Additionally, consider whether you want determinate or indeterminate tomato plants based on your available space and preferred harvesting schedule. Ultimately, choosing the right type of tomato seeds will ensure a successful and enjoyable gardening experience.
A.Disease resistance
Disease resistance is an important factor to consider when selecting tomato seeds. It’s important to choose seeds that are resistant to common tomato diseases in your area to ensure a healthy and productive harvest. Look for seeds labeled as disease-resistant to help protect your plants from issues such as blight and wilt. This will help to minimize the need for chemical treatments and increase the likelihood of a successful growing season.
B.Climate suitability
When choosing tomato seeds, it’s essential to consider the climate in which you will be growing them. Different tomato varieties thrive in different climates, so it’s important to choose seeds that are suitable for your specific growing conditions. For example, if you live in a hot and humid climate, you’ll want to look for heat-tolerant tomato seeds to ensure they can withstand the high temperatures. On the other hand, if you live in a cooler climate, you’ll want to choose seeds that are cold-tolerant. By selecting tomato seeds that are well-suited to your local climate, you’ll increase the likelihood of a successful and bountiful harvest.
Germinating Tomato Seeds
1.Preparing for Germination
To prepare for germination, you’ll want to start by selecting a high-quality potting mix to plant your tomato seeds in. It’s important to use a mix that is well-draining and sterile to help prevent disease and ensure healthy seedlings. You can also use seed trays or small pots to start your seeds indoors before transplanting them outside.
2.Germination Process
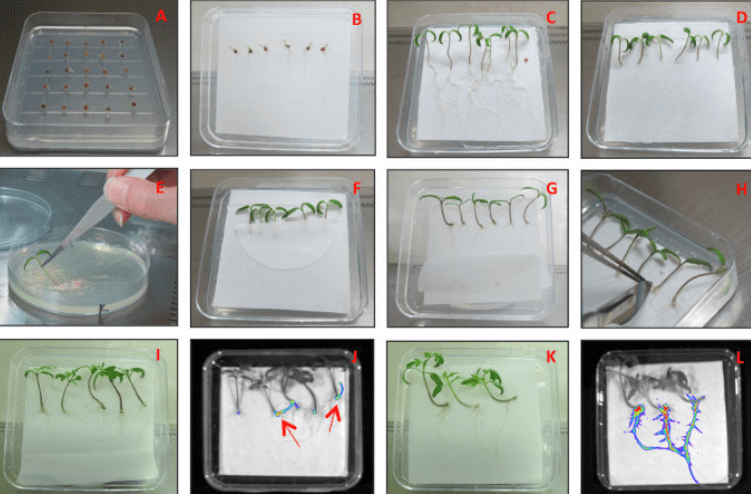
To encourage germination, place your planted tomato seeds in a warm, sunny location or use a heat mat to provide consistent warmth. Keep the soil consistently moist but not soggy, and be patient as it can take anywhere from 5-10 days for tomato seeds to germinate.
3.Caring for Seedlings
Once your tomato seeds have germinated and sprouted, it’s important to continue providing them with the right care to ensure healthy growth. Make sure they receive plenty of sunlight, at least 6-8 hours a day, and keep the soil consistently moist but not waterlogged. As the seedlings grow, you can start to fertilize them with a balanced fertilizer to provide essential nutrients. Additionally, it’s important to gradually acclimate the seedlings to outdoor conditions if they were started indoors before transplanting them into the garden. By following these steps, you can help your tomato seedlings thrive and ultimately lead to a successful harvest.
Transplanting Tomato Sprouts
1.When to Transplant
It’s best to transplant your tomato seedlings outdoors after the last frost date in your area, typically in the spring. Make sure the soil has warmed up and the weather is consistently warm before transplanting to ensure the seedlings have the best chance of survival. It’s also important to harden off the seedlings by gradually exposing them to outdoor conditions before planting them in the garden. This process typically takes about a week and involves slowly increasing the amount of time the seedlings spend outdoors each day. Once the seedlings are hardened off and the weather is right, you can transplant them into your garden or outdoor containers.
2.Preparing the Garden Bed
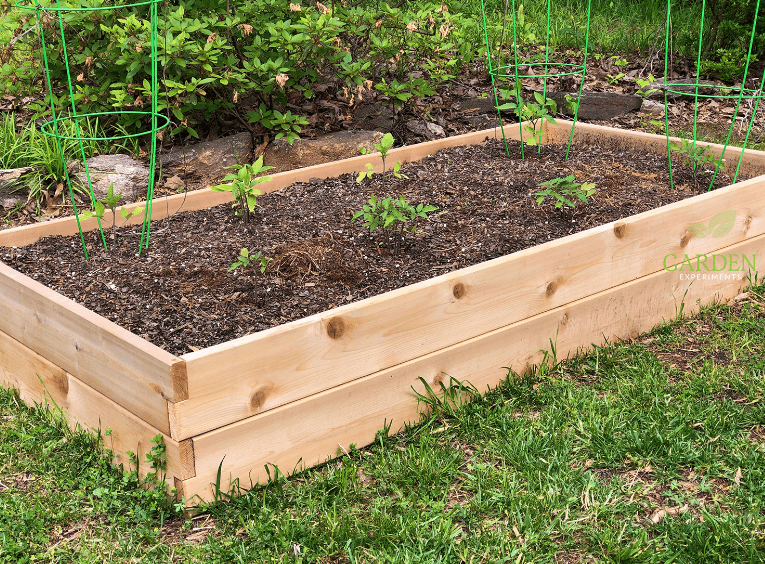
Before transplanting your tomato seedlings, it’s important to prepare the garden bed to ensure they have the best growing conditions. Start by clearing the area of any weeds and debris, and then loosen the soil to a depth of about 12 inches. Adding compost or organic matter to the soil can help improve its nutrient content and drainage. You can also consider adding a layer of mulch to help retain moisture and prevent weeds from growing. Once the garden bed is prepared, you can then transplant your tomato seedlings into the soil, making sure to space them about 18-24 inches apart to allow room for growth.
A.Soil preparation and amendments
Soil preparation and amendments are crucial for the successful growth of tomato sprouts. It’s important to start by clearing the area of any weeds and debris and loosening the soil to allow for proper root growth. Adding compost or organic matter to the soil can help improve its nutrient content and drainage, which is essential for healthy plant growth. Additionally, adding a layer of mulch can help retain moisture and prevent weeds from growing, creating optimal growing conditions for your tomato sprouts. It’s also important to harden off the seedlings by gradually exposing them to outdoor conditions before planting them in the garden. This process typically takes about a week and involves slowly increasing the amount of time the seedlings spend outdoors each day. Once the seedlings are hardened off and the weather is right, you can transplant them into your garden or outdoor containers. By following these soil preparation and amendment tips, you can ensure a successful harvest of tomato sprouts.
3.Transplanting Techniques
Transplanting techniques are important for ensuring the successful growth of tomato sprouts. When transplanting, it’s essential to handle the seedlings carefully to avoid damaging their delicate roots and stems. Before transplanting, it’s helpful to water the seedlings to make the soil easier to work with. When removing the seedlings from their original containers, gently loosen the roots to promote healthy growth. When planting them in the garden or outdoor containers, make sure to dig a hole slightly larger than the root ball and gently place the seedling in the hole, covering the roots with soil. It’s important to water the transplanted seedlings immediately after planting to help them establish themselves in their new environment. By following these transplanting techniques, you can help ensure the successful growth of your tomato sprouts.
Caring for Tomato Plants
1.Watering and Fertilizing
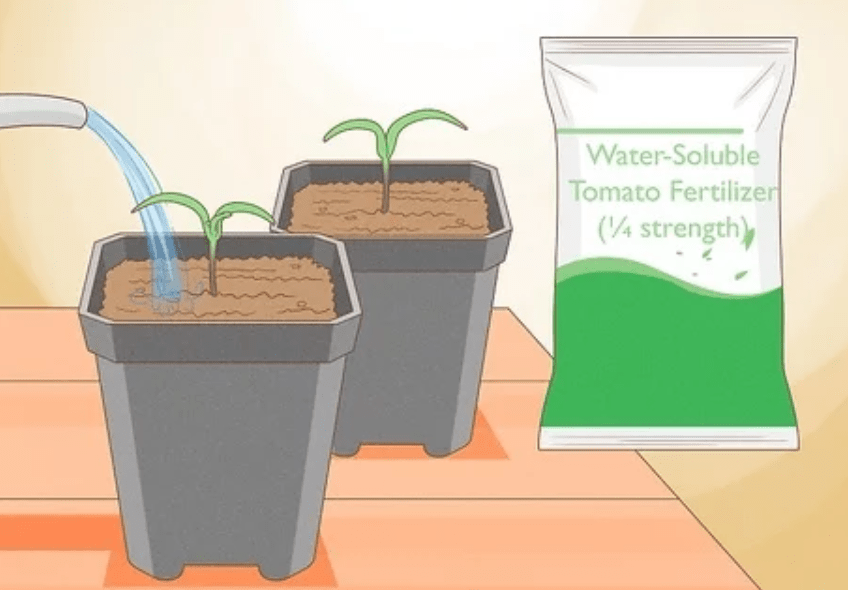
Watering and fertilizing are important aspects of caring for tomato plants. It’s important to water tomato plants consistently, providing them with about 1-2 inches of water per week, either through rain or irrigation. It’s best to water the plants in the morning to allow the foliage to dry during the day, which can help prevent disease. When it comes to fertilizing, using a balanced fertilizer with a higher phosphorus content can help promote fruiting. It’s important to follow the instructions on the fertilizer package and not over-fertilize, as this can lead to excessive foliage growth at the expense of fruit production. By properly watering and fertilizing your tomato plants, you can help ensure a healthy and successful harvest.
2.Pruning and Staking
Pruning and staking are important practices for maintaining the health and productivity of tomato plants. Pruning involves removing suckers, which are the small shoots that grow in the crotches between the main stem and the branches. By removing these suckers, you can help promote better air circulation and reduce the risk of disease. Staking or providing support for your tomato plants is also important, as it can help prevent the plants from becoming overcrowded and allow for better sunlight exposure. This can lead to higher yields and healthier plants. There are various methods for staking, such as using cages, stakes, or trellises, so it’s important to choose the method that works best for your specific tomato plant variety. By incorporating these practices into your tomato plant care routine, you can help ensure strong and productive plants.
3.Pest and Disease Management
Pest and disease management is crucial for maintaining the health and productivity of tomato plants. Common pests that can affect tomato plants include aphids, whiteflies, and tomato hornworms. It’s important to regularly inspect your plants for signs of pest infestation and take appropriate measures to control them, such as using insecticidal soaps or natural predators.
In terms of disease management, common issues that can affect tomato plants include blight, powdery mildew, and bacterial spot. To prevent these diseases, it’s important to plant disease-resistant varieties, practice crop rotation, and provide good air circulation by properly spacing your plants. Using fungicides and other preventative measures can also help control and manage these diseases.
By staying proactive and implementing proper pest and disease management techniques, you can help ensure healthy and productive tomato plants.
Monitoring Growth and Development
Monitoring the growth and development of your tomato plants is essential for ensuring their overall health and productivity. Keep an eye out for signs of healthy growth, such as strong, vibrant green leaves, sturdy stems, and the development of flowers and fruits. It’s important to regularly check for any signs of nutrient deficiencies, such as yellowing leaves or stunted growth, and address them by adjusting your fertilization routine as needed. Additionally, monitoring the growth of your tomato plants allows you to identify any potential issues early on, such as overcrowding or poor root development, and take corrective action to support the plants’ overall health and productivity. By staying vigilant and monitoring the growth and development of your tomato plants, you can help ensure they reach their full potential.
Harvesting Tomatoes
Harvesting tomatoes at the right time is crucial for maximizing their flavor and quality. It’s important to wait until the tomatoes are fully ripe before picking them, as this is when they will have the best taste and texture. Look for tomatoes that are evenly colored and firm to the touch, with a slight give when gently squeezed. It’s also best to harvest tomatoes in the morning when they are at their peak flavor.
When harvesting, use sharp scissors or pruning shears to cut the tomatoes from the vine, leaving a small stem attached. Avoid pulling or twisting the tomatoes off the plant, as this can damage the vines and reduce future fruit production. Once harvested, store tomatoes at room temperature to fully ripen, and then refrigerate if not using them right away.
By harvesting your tomatoes at the right time and handling them with care, you can enjoy the best flavor and quality from your home-grown produce.
Saving Seeds for Future Planting
1.Collecting Seeds
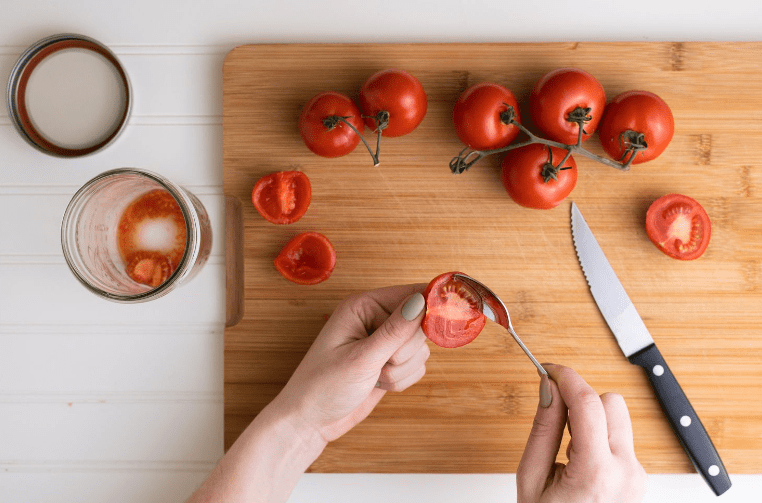
Collecting Seeds from ripe, healthy tomatoes is a great way to save money and continue growing your favorite varieties in future seasons. To collect tomato seeds, simply scoop them out of the ripe tomatoes and place them in a small bowl. Add a little water to the bowl and let the seeds and pulp sit for a few days, stirring occasionally. After a few days, the seeds will separate from the pulp and sink to the bottom of the bowl. You can then carefully pour off the pulp and rinse the seeds in a fine mesh strainer. Once the seeds are clean, spread them out on a paper towel to dry for about a week. Store the dried seeds in a cool, dry place in an airtight container, and they will be ready for planting next season. Remember to label your saved seeds with the variety and the date they were collected to keep track of your seed collection. By saving seeds from your homegrown tomatoes, you can continue growing your favorite varieties year after year.
2.Storing Seeds
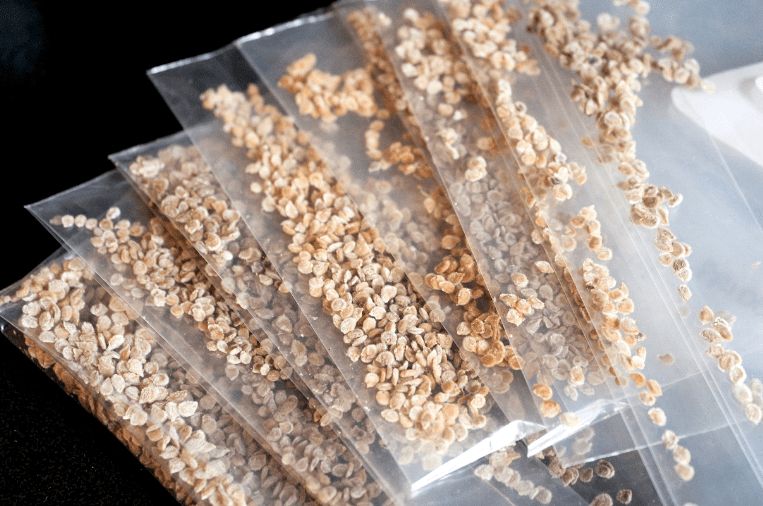
After collecting and drying your tomato seeds, it is important to store them properly to ensure they remain viable for planting in the future. Store the dried seeds in a cool, dry place in an airtight container. It is also a good idea to include a desiccant, such as silica gel packets, to help absorb any excess moisture and preserve the seeds. Be sure to label your saved seeds with the variety and the date they were collected to keep track of your seed collection. By storing your seeds properly, you can continue growing your favorite tomato varieties year after year.
In conclusion, growing tomato sprouts can be a rewarding and enjoyable experience, especially for beginners. By following the tips and techniques outlined in this article, you can ensure a successful harvest and enjoy the fruits of your labor. Whether you have a green thumb or are just starting out, these essential tips will help you on your journey to becoming a successful tomato sprout grower. Happy gardening!
Frequently Asked Questions (FAQs)
The best time to plant tomato seeds is typically 6-8 weeks before the last expected frost date in your area. This will give the seedlings enough time to grow before being transplanted outdoors.
Tomato sprouts should be watered regularly, keeping the soil consistently moist but not waterlogged. It’s important to water the base of the plant to avoid getting the foliage wet, which can lead to disease.
Tomato sprouts thrive in well-draining, nutrient-rich soil. A good potting mix specifically designed for seed starting or a mix of compost and peat moss can work well for tomato sprouts.
Tomato sprouts require plenty of sunlight, ideally 6-8 hours of direct sunlight per day. If growing indoors, consider using grow lights to provide adequate light for the seedlings.
Tomato sprouts should be transplanted outdoors after the last frost date in your area, once the weather has warmed up and there is no longer a risk of frost.
To prevent common issues like damping off or fungal diseases, it’s important to provide good air circulation, avoid overwatering, and keep the plants free from debris and dead leaves.
A balanced, water-soluble fertilizer can be used to feed tomato sprouts once they have developed their first set of true leaves. Be sure to follow the instructions on the fertilizer packaging for best results.
Some common mistakes to avoid include overwatering, starting seeds too early, using poor quality soil, and neglecting to provide adequate support for the plants as they grow.
