
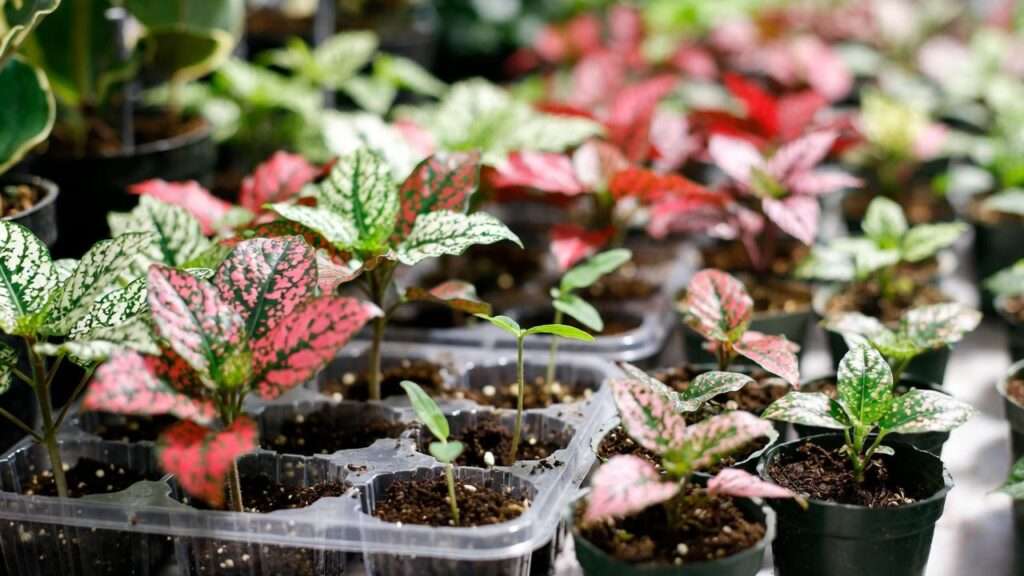
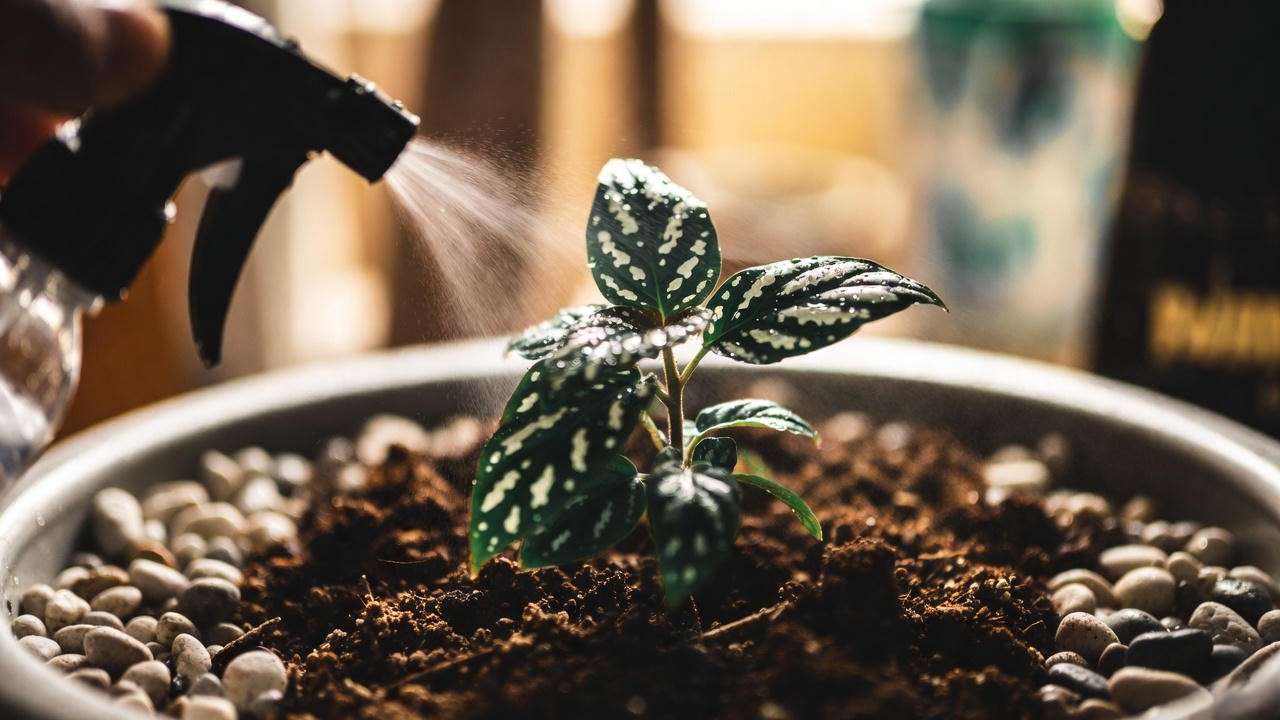
Picture this: tiny, delicate polka dot plant seedlings pushing through the soil, starting as plain green sprouts and soon exploding into a riot of pink, red, or white speckles that look like nature’s own confetti party. There’s something truly magical about nurturing these whimsical plants from seed—it’s affordable, deeply rewarding, and perfect for beginners craving that instant “wow” factor in their indoor jungle or shaded patio. 😍
If you’ve ever searched for “polka dot plant seedlings,” you’re likely excited to grow these eye-catching Hypoestes phyllostachya (also called freckle face plants) but worried about common hurdles: slow germination, leggy growth, faded colors, or seedlings that just don’t thrive. Don’t worry—I’ve grown hundreds of these charming plants from seed over the years, both as a houseplant enthusiast and in professional greenhouse settings, and I’m here to guide you every step of the way.
This complete beginner’s guide will walk you through everything you need to successfully start, raise, and maintain vibrant polka dot plant seedlings. By the end, you’ll have lush, bushy plants that steal the show in any space. Let’s dive in! 🌟
What Are Polka Dot Plants? A Quick Overview 🟢🔴
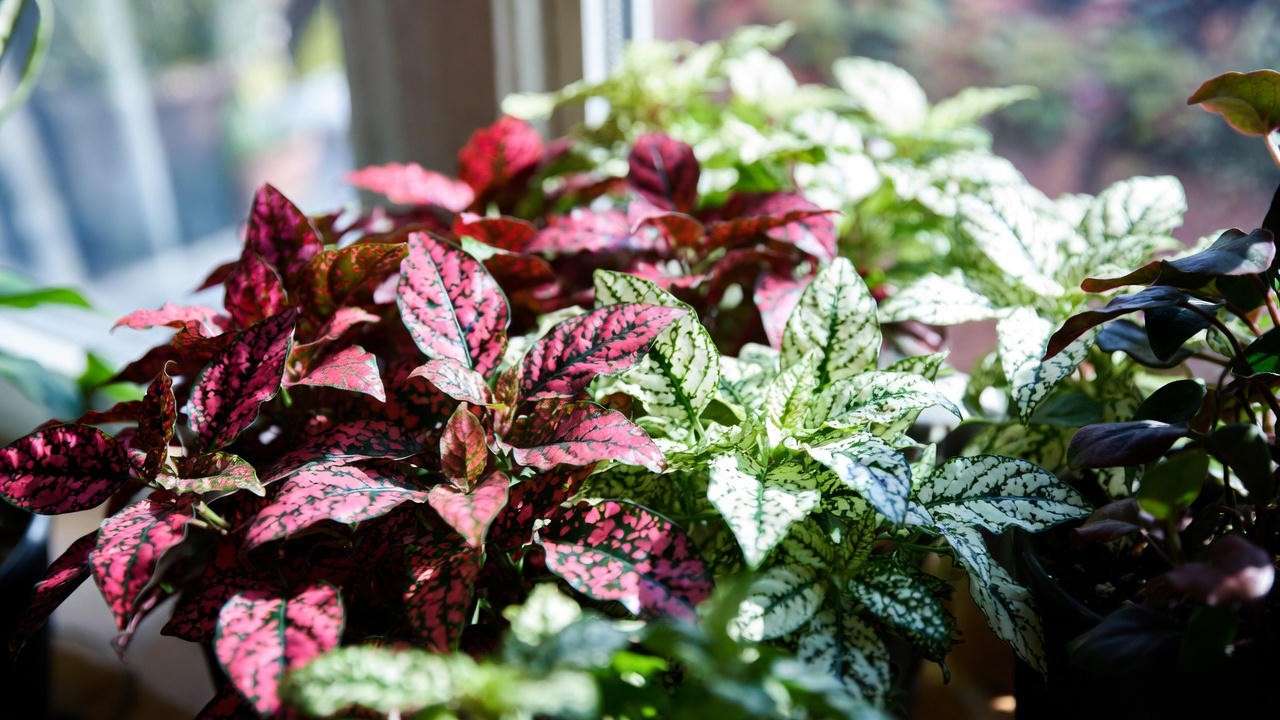
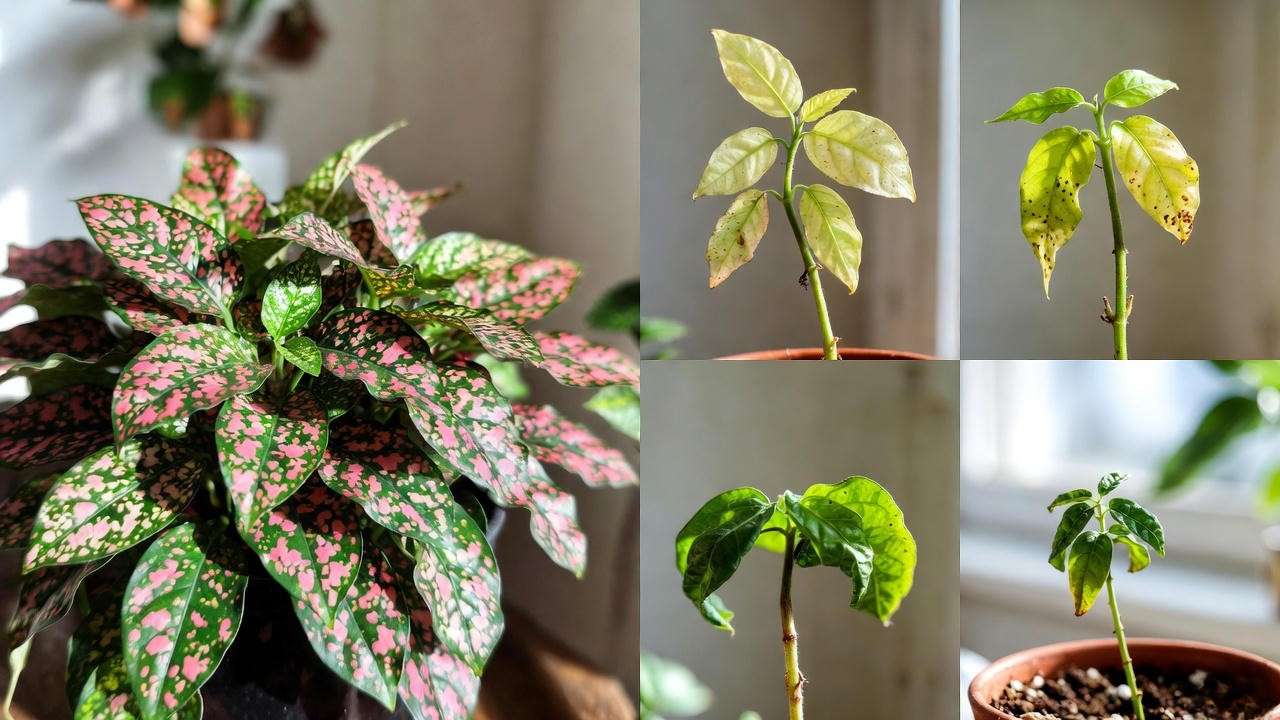
Polka dot plants (Hypoestes phyllostachya) are tropical evergreen perennials native to the warm, humid forests of Madagascar. In most climates, they’re grown as annuals outdoors or as beloved houseplants indoors. What makes them irresistible is their foliage: oval leaves splashed with contrasting dots and splashes in pink, red, white, or even rose against a deep green background.
These plants typically reach 12–18 inches tall and wide, forming compact, bushy mounds when cared for properly. While they do produce small lavender flowers, most growers pinch them off to keep energy focused on the stunning leaves—the real star of the show! 🎨
Popular Varieties for Seed Growing 🌈
Seed-grown polka dot plants offer delightful variety because patterns can differ slightly from plant to plant, giving you one-of-a-kind specimens. Here are some top series and cultivars ideal for starting from seed:
- Pink Splash: The classic—bright green leaves heavily dotted with vibrant pink. Perfect for beginners and incredibly forgiving.
- Red Splash: Bold crimson splashes that create dramatic contrast; great for adding warmth to arrangements.
- White Splash: Soft, elegant white freckles for a subtler, sophisticated look.
- Confetti Series: Compact growth habit with mixed color options—ideal for small pots or terrariums.
- Carmina: Deep red tones that intensify in brighter light.
Expert Tip: When buying seeds, look for fresh packets from reputable suppliers. Older seeds can have lower germination rates, but even then, success is usually above 70% with proper technique. 🌱
When and Why Start Polka Dot Plant Seedlings 📅
Timing is everything when growing polka dot plant seedlings. Because they adore warmth and humidity, the best sowing windows are:
- Indoors year-round: Start anytime if growing as houseplants. For outdoor summer displays, sow 8–12 weeks before your last spring frost.
- Direct outdoor sowing: Only after nighttime temperatures reliably stay above 50°F (10°C), preferably 60°F (16°C) or warmer.
Why bother growing from seed instead of buying nursery starts?
- Cost savings: A packet of 50–100 seeds costs less than one mature plant.
- More plants: Easily fill containers or share with friends.
- Bushier growth: Seed-grown specimens often branch more vigorously than propagated cuttings.
- Pure joy: Watching those first polka dots appear on true leaves is pure plant-parent magic! ✨
Step-by-Step Guide: Starting Polka Dot Plant Seedlings from Seed 🌱
Ready to get your hands dirty? Here’s my proven method for near-perfect germination rates.
Materials You’ll Need 🛒
- Fresh polka dot plant seeds
- Sterile seed-starting mix (peat moss + perlite or vermiculite for excellent drainage and aeration)
- Seed trays, cell packs, or small pots
- Clear plastic dome or plastic wrap for humidity
- Spray bottle for gentle misting
- Warm location (70–75°F / 21–24°C)
- Optional: Bottom heat mat and grow lights
Sowing the Seeds: Detailed Instructions 👩🌾
- Prepare the medium: Fill your trays with pre-moistened seed-starting mix. Level the surface but don’t pack it down tightly—airflow is key.
- Sow the seeds: Polka dot plant seeds are tiny and require light to germinate. Scatter them evenly on the surface—aim for 1–2 seeds per cell if using plugs, or broadcast lightly in trays. Do NOT bury them!
- Lightly press: Gently press seeds into the mix for good contact.
- Mist thoroughly: Use a fine spray to settle everything without displacing seeds.
- Cover for humidity: Place a clear dome or wrap to create a mini greenhouse. This prevents drying out.
- Provide warmth and light: Keep in bright indirect light (no direct sun yet). A south- or east-facing window works, or use fluorescent/LED grow lights 6–12 inches above.
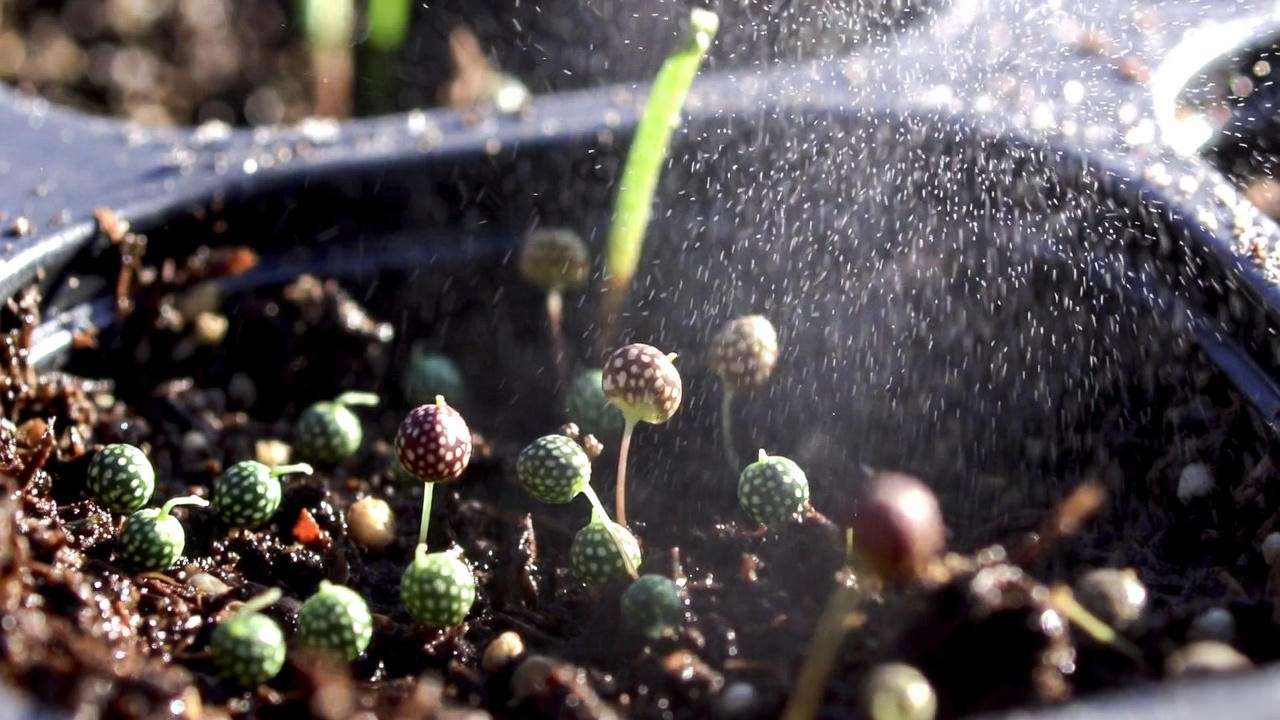
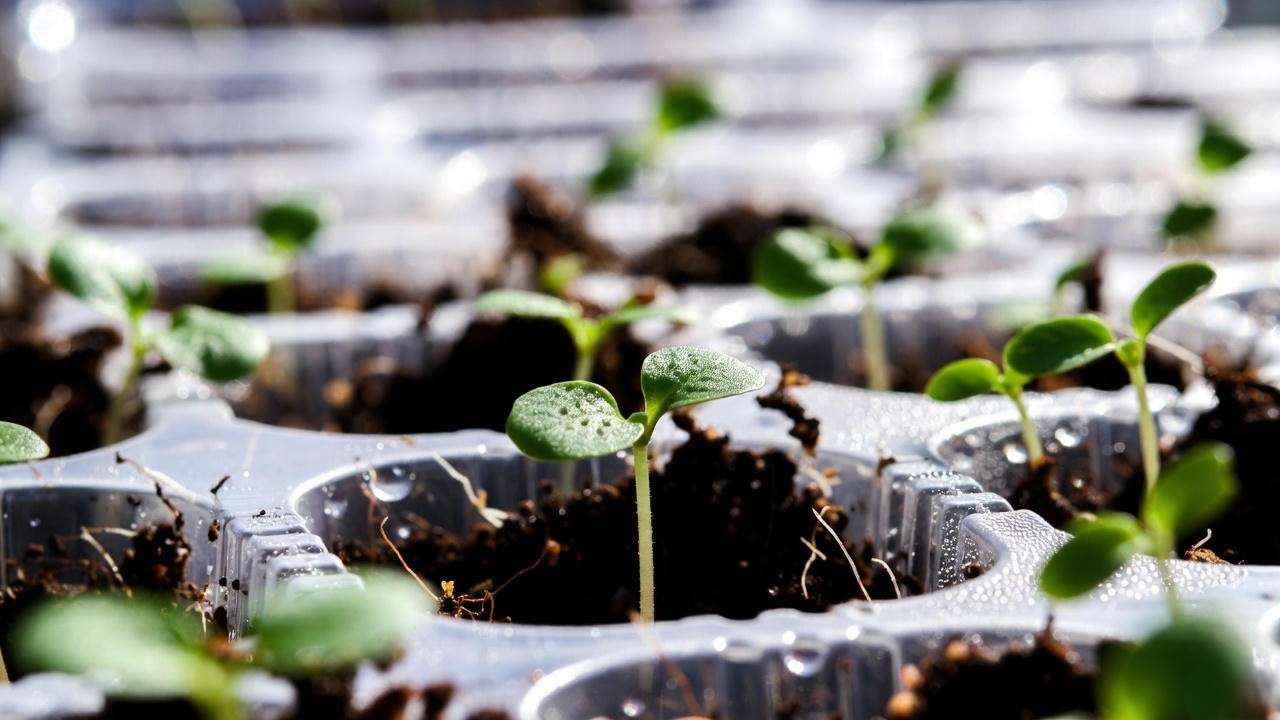
Germination Expectations ⏱️
Under ideal conditions, you’ll see the first sprouts in as little as 4–7 days, though 10–14 days is common. The initial cotyledons (seed leaves) will be plain green—don’t panic! The signature polka dots appear with the first set of true leaves, usually within 2–3 weeks of germination. That’s when the real excitement begins! 🎉
Seedling Care After Germination 💧
- Remove the cover gradually: Over 2–3 days to acclimate seedlings and prevent fungal issues.
- Maintain moisture: Keep the mix consistently damp but never soggy—think “wrung-out sponge.”
- Bright indirect light: This is crucial for vibrant future coloration.
- Thin if needed: If multiple seeds sprout in one spot, snip the weakest with scissors to avoid root disturbance.
Expert Insight: I’ve found that using distilled or rainwater for the first few weeks reduces the risk of mineral buildup that can harm delicate roots.
Transplanting Polka Dot Plant Seedlings: When and How 🚀
Once your polka dot plant seedlings have developed their first set of true leaves—those adorable dotted ones—you’ll know it’s time to give them more room to grow. Transplanting at the right stage prevents root-bound stress and encourages strong, bushy development. 🌱
Signs Your Seedlings Are Ready 📏
- They have at least 2–4 true leaves (not just cotyledons).
- Seedlings are 2–3 inches tall, usually 3–6 weeks after germination.
- Roots are visible at the bottom of seed cells or gently circling the starter mix.
Waiting too long can cause stunting, while moving them too early risks shock. From my experience, transplanting around the 4-week mark yields the best results.
How to Transplant Safely 🪴
- Prepare new pots: Choose 3–4 inch pots with drainage holes. For a fuller look, plant 3–5 seedlings together in a 6-inch container—they love company!
- Potting mix: Use a rich, well-draining houseplant mix. I recommend a blend of peat moss, perlite, and compost (pH 5.5–6.5). Avoid heavy garden soil, which compacts and retains too much water.
- Water the seedlings: Moisten the starter mix an hour before transplanting—this makes removal easier.
- Gently remove: Tip the tray and ease seedlings out, handling by leaves (not stems) to prevent crushing delicate tissue.
- Plant at the right depth: Set seedlings at the same depth they were growing—no deeper, to avoid stem rot.
- Firm and water: Gently press soil around roots and water thoroughly until it drains from the bottom. This settles air pockets.
- Acclimate: Place in bright indirect light and maintain high humidity for the first week (a clear plastic bag over the pot works wonders).
Pro Tip: Grouping several seedlings together creates that lush, full appearance polka dot plants are famous for. Single plants can look sparse, but clusters mimic their natural mounding habit. 😊
Essential Care for Thriving Polka Dot Plant Seedlings and Beyond 🌞
Now that your seedlings are settled, consistent care will transform them into vibrant, colorful beauties. These tropical natives crave conditions that mimic their Madagascan origins—warmth, humidity, and filtered light.
Light Requirements ☀️
Light is the #1 factor determining color intensity in polka dot plants.
- Ideal: Bright, indirect light for 6–8 hours daily. An east-facing window is perfect; west or south with sheer curtains works too.
- Too little light: Causes leggy growth, pale leaves, and loss of polka dots (plants revert to mostly green).
- Too much direct sun: Scorches leaves, turning them brown and crispy.
If natural light is limited (common in winter), supplement with full-spectrum LED grow lights. Keep lights 8–12 inches above plants for 12–14 hours per day. I’ve rescued many faded seedlings simply by adding a simple shop light setup—colors return within weeks! 🌈
Watering and Humidity 💦
Polka dot plants hate extremes—both drought and soggy soil spell trouble.
- Watering: Keep soil consistently moist but never waterlogged. Water when the top ½–1 inch feels dry. Use room-temperature water to avoid shock.
- Humidity: They thrive at 50–70% relative humidity. In dry homes, mist daily, use a pebble tray with water, or place near a humidifier. Bathrooms and kitchens are naturally ideal spots.
- Drainage is critical: Always use pots with holes. Standing water leads to root rot faster than anything else.
Expert Insight: Bottom watering (placing pots in a saucer of water for 10–20 minutes) helps prevent wet foliage and encourages deep rooting in young plants.
Soil and Potting Mix 🪨
A lightweight, aerated mix is non-negotiable:
- Recommended recipe: 50% peat moss or coco coir, 30% perlite/vermiculite, 20% compost or worm castings.
- Repot annually in spring as plants grow quickly and can become root-bound, which reduces vigor.
Temperature and Environment 🌡️
- Daytime: 70–80°F (21–27°C)
- Nighttime: Not below 60°F (16°C)
- Avoid cold drafts, air conditioning vents, or sudden temperature swings.
In USDA zones 10–11, they can live outdoors year-round. Elsewhere, treat as tender annuals or bring indoors before fall.
Fertilizing Young Plants 🍽️
Seedlings don’t need heavy feeding early on—their starter mix usually has enough nutrients for the first 4–6 weeks.
- Start fertilizing lightly once true leaves are fully developed.
- Use a balanced, water-soluble fertilizer (e.g., 10-10-10 or 20-20-20) diluted to ¼–½ strength.
- Apply every 4–6 weeks during spring and summer; reduce or stop in fall/winter.
Over-fertilizing causes salt buildup and burned leaf tips. If growth seems slow, a single dose of diluted seaweed or fish emulsion often perks them right up.
Pruning and Pinching for Bushy Growth ✂️
Polka dot plants naturally want to stretch upward, but regular pinching creates the compact, full shape we love.
- Begin pinching when plants reach 4–6 inches: Remove the top ½ inch of each stem just above a leaf node.
- Repeat every 2–4 weeks during active growth.
- Remove any flower spikes immediately—they’re insignificant and rob energy from foliage.
This simple habit turns leggy seedlings into dense, colorful mounds. I’ve seen pinched plants triple in width compared to unpruned ones!
Common Problems with Polka Dot Plant Seedlings and Solutions ⚠️
Even with the best care, issues can arise. Here’s how to spot and fix the most frequent problems.
Leggy Growth 😩
- Cause: Insufficient light (the #1 culprit).
- Solution: Move to a brighter location immediately. Pinch back stems severely—cut to 2–3 inches if needed. New growth will be compact and colorful.
Faded or Lost Polka Dots 🎨
- Cause: Low light or nutrient imbalance.
- Solution: Increase light exposure gradually. A light feeding can help, but light is usually the main fix. Colors often return in 2–4 weeks.
Yellowing Leaves or Leaf Drop 🍂
- Causes: Overwatering, underwatering, low humidity, or cold stress.
- Solutions:
- Check soil moisture—adjust watering schedule.
- Boost humidity with misting or trays.
- Move away from drafts.
Pests and Diseases 🐛
Young seedlings are especially vulnerable:
- Common pests: Aphids, spider mites, whiteflies, mealybugs.
- Signs: Sticky residue, fine webbing, tiny moving dots.
- Treatment: Rinse gently with water, then apply insecticidal soap or neem oil weekly until clear. Isolate affected plants.
- Diseases: Root rot (from overwatering), powdery mildew (poor airflow).
- Prevention: Good drainage, spacing, and airflow. Avoid wetting leaves when watering.
Expert Advice: Inspect plants weekly—early detection saves lives! A magnifying glass helps spot tiny pests before they explode.
Other Issues
- Curling leaves: Too much direct sun or low humidity.
- Browning edges: Dry air, underwatering, or fertilizer burn.
- Wilting despite moist soil: Likely root rot—repot into fresh mix and trim damaged roots.
Advanced Tips for Vibrant, Long-Lasting Polka Dot Plants 🔍
Once you’ve mastered the basics, these expert-level strategies will take your polka dot plant seedlings to the next level—producing show-stopping color and longevity that outshine store-bought specimens.
- Maximize color intensity 🌈: Rotate plants quarterly so all sides get even light exposure. Uneven light leads to one-sided fading. For the boldest pinks and reds, aim for the highest indirect light possible without direct sun—think a sheer-curtained south window or premium grow lights.
- Propagation backups ✂️: Polka dot plants are short-lived (1–2 years) if allowed to flower. Take stem cuttings in spring or summer: snip 3–4 inch tips, remove lower leaves, and root in water or moist soil. Roots appear in 7–14 days. This ensures you always have young, vigorous plants ready.
- Outdoor summer magic ☀️: In warmer months, move potted plants to dappled shade outdoors (porch, under trees). The increased airflow and natural humidity boost growth and color dramatically. Just acclimate gradually over a week to prevent sunburn.
- Companion planting ideas 🪴: Pair with ferns, calathea, or begonias in shaded arrangements for a lush tropical vibe. Their similar humidity needs make them perfect roommates.
- Overwintering success ❄️: If grown outdoors as annuals, bring indoors before temperatures dip below 50°F. Cut back by half and place in your brightest window—they’ll rebound beautifully in spring.
Fun Fact: In ideal warm, humid climates (like parts of Florida or Hawaii), polka dot plants can self-seed and naturalize in shaded garden beds, creating whimsical groundcover year after year! 🌼
Frequently Asked Questions (FAQs) ❓
Here are the most common questions I get from fellow plant parents about growing polka dot plant seedlings:
- How long until polka dot plant seedlings show their signature dots? The first true leaves (after the plain green cotyledons) usually display dots within 2–4 weeks of germination. Patience—it’s worth the wait! 🟥
- Can I grow polka dot plant seedlings outdoors? Absolutely! They thrive in partial to full shade outdoors during summer in most climates. Just bring them in before frost or treat as annuals.
- Why are my polka dot plant seedlings not germinating? Common culprits: temperature too low (below 65°F), soil too dry/wet, or old seeds. Use a heat mat, keep consistently moist, and buy fresh seeds from trusted sources.
- Are polka dot plants toxic to pets or humans? Great news—they’re non-toxic to cats, dogs, and people! A safe, colorful choice for homes with curious pets or kids. 🐶🐱
- How big do polka dot plants get when grown from seedlings? With proper pinching and care, expect 12–18 inches tall and wide. Unpruned plants can stretch to 24 inches but become leggy.
- What are the best companion plants for polka dot plants? Shade-loving friends like nerve plants (Fittonia), pilea, ferns, or rex begonias create stunning mixed containers with complementary textures and colors.
- My seedlings are growing fast—when should I repot again? Check roots every 2–3 months. If circling the pot, move up one size in spring. They’re fast growers!
- Can I grow polka dot plants in low light? They’ll survive but lose most color and become leggy. Bright indirect light is essential for that freckled beauty.
Conclusion: Start Your Polka Dot Plant Seedling Journey Today! 🌟
Growing polka dot plant seedlings from seed is one of the most rewarding experiences in houseplant parenting. From those first tiny green sprouts to lush, speckled foliage bursting with personality, every stage brings joy and a sense of accomplishment. With the right timing, light, humidity, and a little regular pinching, you’ll enjoy vibrant, bushy plants that brighten any corner of your home or garden.
Whether you’re adding a pop of pink to your desk, creating a whimsical terrarium, or filling shaded patio pots with color, these charming Hypoestes will quickly become favorites. You now have all the tools and knowledge—from germination tricks to troubleshooting legginess—to succeed where others struggle.
So grab those seeds, set up your trays, and watch the magic unfold. Your polka dot plant adventure starts now—happy growing! 🌱💚
Feel free to share your seedling progress photos or questions in the comments below. I’d love to hear how your freckle-faced beauties turn out! 👇😊


