
Picture this: You’re enjoying a peaceful afternoon in your yard when a sudden gust of wind sends a heavy, brittle branch crashing down—narrowly missing your car or, worse, a family member. 😱 Dead branches, often called “deadwood,” aren’t just unsightly; they create real hazards, harbor pests and diseases, and drain vital energy from your tree’s healthy parts.
Mastering proper techniques for dead branch removal is one of the most important skills any tree-loving homeowner or gardener can learn. It keeps your family safe, protects your property, and helps trees thrive for decades. As an arboriculture enthusiast drawing from established standards like ANSI A300 pruning practices and International Society of Arboriculture (ISA) guidelines, this in-depth guide goes beyond basic tips. You’ll get expert-level, step-by-step instructions, safety protocols, common pitfalls, species considerations, and pro insights to make your efforts more effective than typical online advice. Ready to transform risky deadwood into stronger, healthier trees? Let’s dive in! 🌿🔧
Why Remove Dead Branches? The Real Benefits for Your Trees and Yard
Dead branch removal—also known as deadwooding or crown cleaning—isn’t busywork; it’s essential tree maintenance that delivers multiple wins:
- Enhances Safety First ⚠️: Dead limbs become brittle over time and can fall without warning during storms, high winds, or even calm days. Removing them eliminates falling hazards that threaten people, vehicles, roofs, fences, and outdoor play areas.
- Promotes Tree Health & Vitality 🌱: Live branches get more resources—water, nutrients, and energy—when dead ones are gone. Better airflow and sunlight penetration reduce fungal issues, insect infestations, and decay spread.
- Improves Appearance and Property Value ✨: A clean canopy looks vibrant and well-cared-for, boosting curb appeal and potentially increasing home value.
- Prevents Escalating Problems 🚫: Unremoved deadwood invites pathogens (like decay fungi) and pests (borers, beetles). It also increases storm damage risk as weak branches fail first, stressing the whole tree.
Think of dead branch removal as preventive healthcare: Small, smart actions now prevent costly emergencies later—like emergency tree removal or structural damage. Regular deadwooding supports natural compartmentalization (CODIT: Compartmentalization Of Decay In Trees), where trees seal off wounds effectively. 🩺🌲
How to Identify Dead Branches: Don’t Guess—Know for Sure! 🔍
One of the biggest rookie errors? Cutting live or dormant branches mistaken for dead. Always confirm before pruning!
Visual Signs of Dead Branches
- No leaves, buds, or new growth during the active season (spring/summer) 🌿❌
- Dry, brittle twigs that snap easily with no flexibility
- Discolored, shriveled, or peeling bark (often grayish or black)
- Presence of fungus, mushrooms, conks, or visible cavities/decay
- Smaller twigs at the end die back first (dieback pattern)
Reliable Field Tests
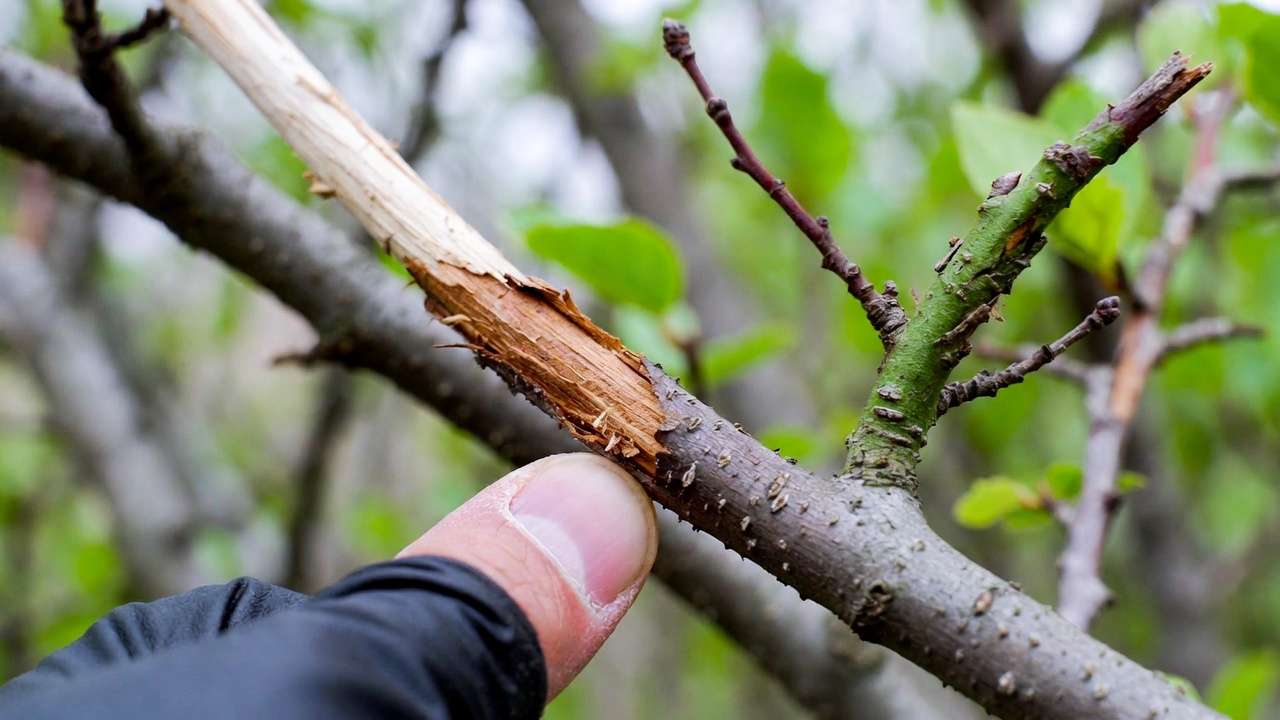
- The Scratch (or Fingernail) Test: Gently scrape the outer bark on a twig or branch with your thumbnail or a knife. Green, moist tissue underneath = alive and photosynthesizing. Brown, dry, or brittle = dead.
- The Snap Test: Bend a small twig—if it snaps cleanly with a dry, woody interior (no green fibers), it’s dead. Live twigs bend and show green cambium.
- Seasonal Clue: Late winter/early spring (dormant period) makes identification easiest—no leaves obscure your view! ❄️👀
Pro Insight: Some trees (like certain oaks or maples) may appear “dead” in dormancy but are just resting. Always double-check multiple points along the branch. If unsure, consult a local certified arborist—better safe than sorry!
Best Time to Remove Dead Branches: Timing Matters! ⏰
Good news: Dead branches can safely be removed any time of year if they pose an immediate hazard (e.g., over a walkway or roof).
For optimal tree health and minimal stress:
- Dormant Season (Late Winter to Early Spring) 🌱: Ideal window—trees aren’t actively growing, wounds heal faster in spring, visibility is best, and disease transmission risk drops (fewer insects/fungi active). Aim for mid-February to early May in most temperate climates.
- Year-Round for Hazards 🚨: Remove dangerous deadwood immediately—safety trumps timing.
- Avoid During Active Growth for Large Jobs: Pruning live tissue in summer stresses trees, especially in drought or heat. Exceptions: Remove hazardous dead branches anytime.
Species-Specific Notes:
- Avoid pruning oaks and elms during growing season (spring-fall) to prevent oak wilt or Dutch elm disease spread.
- Flowering trees: Prune after bloom if removing live parts, but deadwood anytime.
- In tropical/subtropical areas (like parts of Bangladesh), year-round is often fine due to minimal dormancy—focus on dry seasons to reduce fungal risks. 🌍
Always check local regulations or extension services for regional advice!
Essential Tools & Safety Gear: Prepare Like a Pro! 🛠️🪖
Proper dead branch removal starts with the right equipment—dull or wrong tools cause torn bark, disease entry, and injury.
Recommended Tools
- Hand Pruners/Bypass Secateurs: For small branches (<½–1 inch diameter) ✂️
- Loppers: Medium branches (1–2 inches)
- Pruning Saw or Folding Saw: Larger branches (curved blade for pull cuts)
- Pole Saw/Pruner: Reach higher branches safely (extendable, lightweight)
- Chainsaw (only if trained!): Large limbs—leave to pros

Sharpen tools regularly—clean cuts heal faster! Disinfect between trees (alcohol wipe) to prevent disease spread.
Critical Safety Gear
- Safety glasses/goggles 👓
- Sturdy gloves (cut-resistant)
- Hard hat/helmet
- Long pants, closed-toe boots, long sleeves
- Ear protection for saws
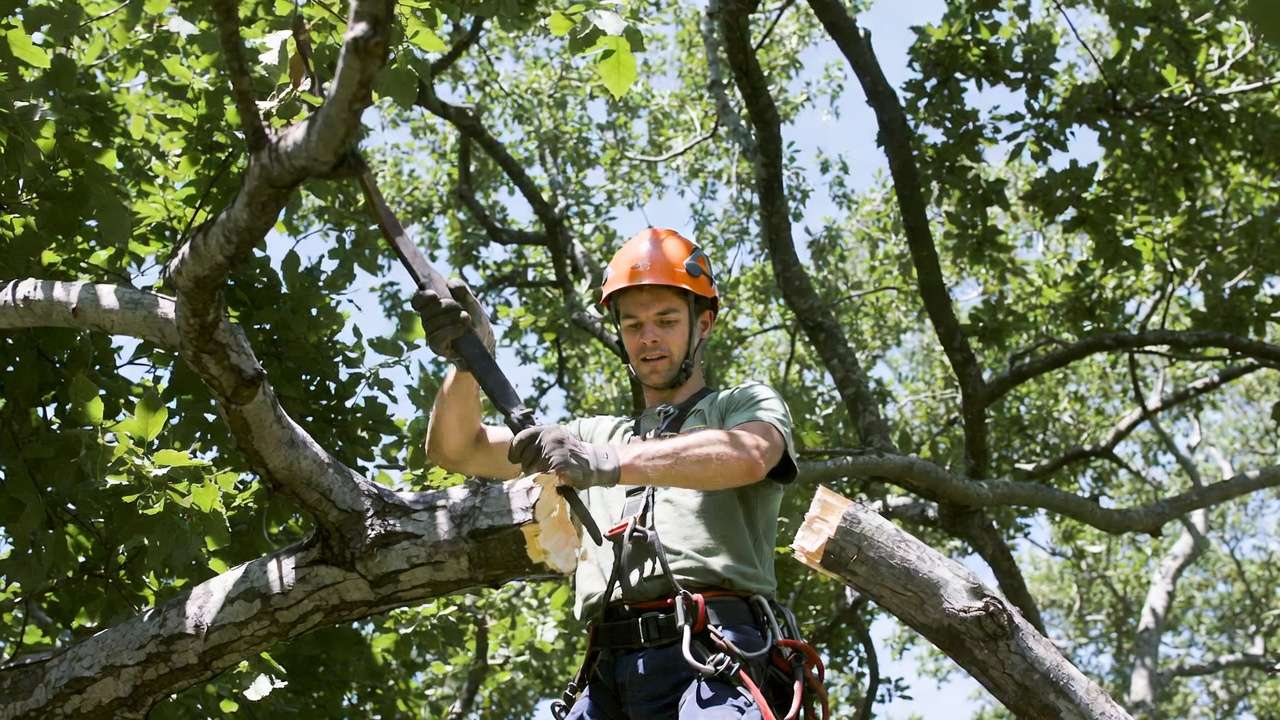
- Sturdy ladder (extendable, stable) or better—harness/rope system for heights
- Spotter/partner for larger jobs
Never work alone on ladders or heights. If a branch is over power lines, structures, or too high/large—call professionals immediately! ⚡🚫
Step-by-Step Guide: Proper Techniques for Dead Branch Removal
Now we reach the heart of the article—the actual how-to process. Follow these steps precisely to achieve clean, healthy cuts that promote fast healing and protect tree structure. The goal is always to remove only dead tissue while preserving the tree’s natural defense systems.
1. Assess & Plan Before You Cut 🗺️
- Walk completely around the tree and identify every dead branch from multiple angles.
- Note branch diameter, height, location (over structures? near wires?), and any obstacles below.
- Decide: Can you safely reach it with hand tools or a pole saw? If the branch is >4–6 inches thick, over 15–20 feet high, near power lines, or requires climbing—stop and call a certified arborist.
- Check weather: Avoid windy, rainy, or icy conditions.
Pro Tip: Mark questionable branches with bright flagging tape so you don’t miss any during the job. 📍
2. Removing Small Dead Branches (Under 1–2 inches diameter)
Small branches are the easiest and safest to handle.
- Use sharp bypass pruners or loppers.
- Locate the branch collar—the slightly swollen, wrinkled area where the branch meets the trunk or larger limb. This is the tree’s natural healing zone—never cut into it!
- Make your cut just outside the collar at a slight downward angle (about 45°) so water runs off the wound.
- Do not leave stubs (they rot and invite disease) and do not cut flush against the trunk (this removes protective collar tissue and slows healing).
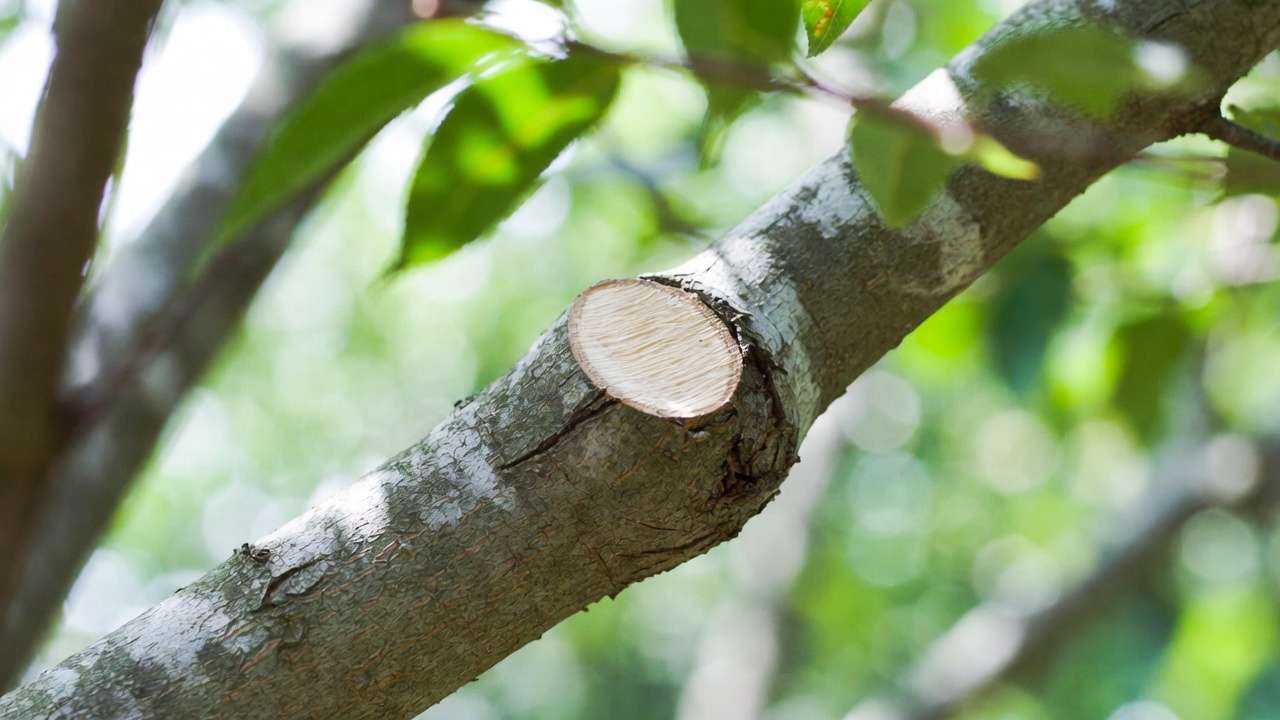
Correct cut appearance: A small, smooth oval wound that looks natural and begins to callus over within months. 🌱
3. The 3-Cut Method for Larger Dead Branches (2–10+ inches)
This is the gold-standard technique taught to professional arborists. It prevents the infamous “barber-chair” split and bark tearing that can girdle and severely damage the tree.
Step A – Undercut (relief cut)
- About 12–18 inches out from the trunk (farther on very large limbs), make an upward cut on the underside of the branch, going about ⅓ to ½ way through the diameter.
- This prevents the bark from ripping downward when the branch falls.
Step B – Top cut to drop the branch
- Move 2–4 inches farther out from the undercut.
- Cut downward from the top until the branch cleanly separates and falls.
- The undercut ensures a controlled drop with no tearing.
Step C – Final collar cut
- Now remove the remaining stub by cutting just outside the branch collar.
- Angle the cut slightly away from the trunk so water sheds.
- The final wound should be oval-shaped, smooth, and show no torn bark.
Visual mnemonic: Think of it as “undercut → drop → collar finish.” Done correctly, the tree heals rapidly with minimal decay risk.
(For very large limbs, professionals may use rigging ropes, pulleys, and sectional dismantling to lower pieces safely—never attempt this without training and equipment!)
4. Handling High or Awkward Dead Branches
- Use a lightweight, sharp pole pruner or pole saw with an extendable handle (up to 12–16 ft reach).
- Keep both feet firmly planted—never over-reach or lean too far.
- For branches higher than pole-reach range or requiring awkward angles → professional job only.
- Never use a ladder and chainsaw combination—extremely dangerous!
Safety Reminder: If a branch is “hanger” (partially detached and swinging), treat it like a live hazard—call pros immediately. ⚠️
5. Immediate Aftercare & Cleanup
- No wound dressing/paint needed! Modern arboriculture (supported by decades of research) shows trees compartmentalize decay naturally via CODIT. Dressings can actually trap moisture and promote rot.
- Remove all fallen branches and debris from the base to discourage pests, fungi, and fire risk.
- Water the tree deeply if the season is dry—pruning stress is minimal with deadwood removal, but hydration helps.
- Apply 2–4 inches of organic mulch in a wide ring around the base (keep it away from the trunk) to retain moisture and support root health.
Common Mistakes to Avoid: Don’t Harm Your Tree! ❌
Even well-meaning homeowners make these errors—here’s how to sidestep them:
- Flush cuts — Cutting into or through the branch collar destroys the tree’s natural barrier zone → poor wound closure and decay spread.
- Leaving stubs — Stubs die back further and become entry points for insects and fungi.
- Over-pruning in one session — Removing more than 20–25% of live canopy at once (plus deadwood) shocks the tree, especially mature specimens.
- Topping or lion-tailing — Cutting back to stubs or removing too many inner branches weakens structure and invites watersprouts.
- Pruning during high disease-risk periods without species knowledge (e.g., oak wilt in spring/summer).
- Using dull tools — Tears bark instead of clean cuts → slower healing.
- Ignoring ladder safety — Most pruning injuries happen from falls—use three points of contact and never overextend.
Avoid these mistakes and your trees will reward you with vigor and longevity! 🙌
When to Call a Professional Arborist
DIY dead branch removal is perfect for accessible, small-to-medium branches. Call an ISA-certified arborist (look for the ISA credential and liability insurance) when:
- Branches exceed 4–6 inches in diameter
- Work requires climbing, ropes, or aerial lifts
- Branches hang over power lines, roofs, driveways, or neighbor property
- You see large cavities, cracks, leaning trunks, or extensive dieback
- The tree is very old, valuable, or historically significant
- You simply feel unsure about safety or technique
Professionals follow ANSI A300 pruning standards, use proper rigging, and can spot hidden structural issues you might miss. In Bangladesh (especially storm-prone areas like Barisal Division), hiring pros during monsoon prep is smart tree insurance! 🌧️💪
Bonus Tips & Expert Insights from Arboriculture Practice
- Monthly inspections — Walk around trees after storms and during seasonal changes—early detection prevents big problems. 📅
- Young vs. mature trees — Young trees benefit from light shaping alongside deadwood removal; mature trees need conservative work.
- Habitat bonus — In natural or wildlife-friendly yards, leave some small-diameter dead twigs (pencil-sized) in the canopy—they provide food and shelter for birds and beneficial insects. 🐦
- Combine with other care — Deadwooding pairs beautifully with mulching, proper watering, and soil testing for best results.
- Regional note for Bangladesh — High humidity and frequent rain increase fungal risk—prioritize clean cuts and good airflow. Avoid heavy pruning just before or during monsoon season if possible.
Frequently Asked Questions (FAQs)
Q: Does removing dead branches really help the tree grow better? A: Absolutely. It redirects water, nutrients, and carbohydrates to live tissue, improves light/air penetration, and reduces disease pressure. 🌳
Q: Can I remove dead branches in summer or during the rainy season? A: Yes for immediate hazards. Otherwise, late winter/early spring is ideal for most species to minimize stress and disease risk.
Q: How much deadwood can I safely remove at once? A: Focus on hazards first. As a rule, don’t remove more than 20–25% of the live canopy in a single year unless the tree is heavily damaged.
Q: What if a large dead branch is still attached tightly? A: Don’t force it—risk of splitting or pendulum swing is high. This is a classic job for professional rigging and controlled removal.
Q: Do I need to seal pruning cuts? A: No—research shows sealants can trap moisture and encourage decay. Let the tree heal naturally.
You now have the complete knowledge to tackle dead branch removal with confidence and care. Grab your sharp pruners, put on your safety gear, and give your trees the attention they deserve. Safer yards, healthier trees, and many more peaceful afternoons ahead! 🌲❤️


