
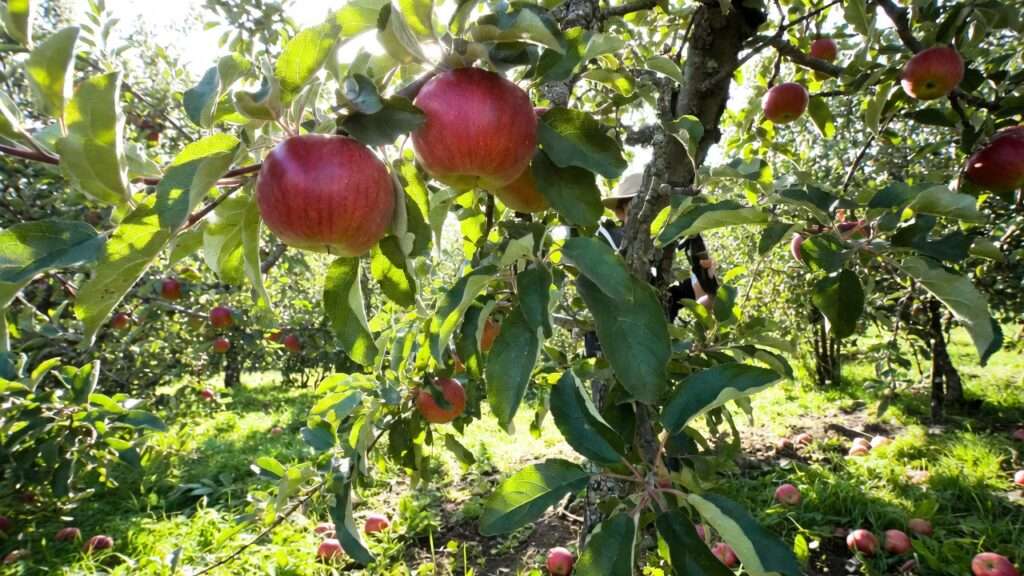
Have you ever stared at your apple tree, loaded with tiny, spotty, or barely-there fruits, and wondered why your neighbor’s tree is bursting with big, juicy apples? 😩 The secret isn’t magic fertilizer or endless watering — it’s proper pruning! The best way to prune apple trees transforms overgrown, unproductive trees into healthy, high-yielding powerhouses that produce larger, sweeter, and more abundant fruit every season. 🌟
Pruning isn’t just about cutting branches; it’s a science-backed technique that improves light penetration, boosts air circulation, prevents diseases like fire blight and apple scab, strengthens branch structure, and directs the tree’s energy toward fruit production instead of excessive leafy growth. When done correctly, regular pruning can increase your harvest by 30–50% while making picking easier and safer. 🍏
In this comprehensive guide — backed by university extension experts from UMN, Penn State, Wisconsin Horticulture, and more — you’ll learn the proven central leader method (the gold standard for most home apple trees), exact timing, tools, step-by-step instructions, age-specific tips, and how to avoid costly beginner mistakes. Whether you have a young sapling, a mature producer, or a neglected old-timer, follow along and watch your tree thrive! Let’s dive in and get those bigger, healthier apples this year! ✨
Why Prune Apple Trees? The Science & Benefits 🌱
Pruning is essential for apple tree health and productivity. Here’s why it works wonders:
- Removes the “3 Ds” — Dead, damaged, and diseased wood prevents the spread of pests and pathogens.
- Stimulates better fruiting — By removing excess growth, the tree channels energy into developing larger, higher-quality apples instead of endless shoots.
- Creates ideal structure — An open, pyramid-shaped canopy (like a Christmas tree 🎄) allows sunlight to reach inner branches and fruit buds, improving color, size, and flavor.
- Boosts long-term health — Better airflow reduces fungal diseases, while strong branch angles prevent breakage under heavy fruit loads.
- Increases overall yield — Well-pruned trees often produce more consistent crops year after year, with less alternate bearing.
University experts emphasize that proper pruning balances vegetative (leafy) and reproductive (fruiting) growth for sustained productivity. Skip it, and your tree becomes a tangled mess with small, shaded fruit. 😔
When Is the Best Time to Prune Apple Trees? ⏰
Timing is critical! The best time for major pruning is late winter to early spring — while the tree is dormant, after the worst cold has passed but before buds swell and new growth starts. ❄️➡️🌸
- Why late winter/early spring wins: Wounds heal quickly as spring growth begins, and you can clearly see the tree’s structure without leaves. In most regions (including temperate climates like much of the US, Europe, and similar zones), aim for February to early April.
- Regional tweaks: In colder northern areas, wait until late March/April to avoid freeze damage. In milder southern or coastal zones, late January/February works well. Avoid pruning during extreme cold snaps.
- Light summer pruning option: Remove water sprouts (vigorous upright shoots) or thin crowded areas in mid-summer to control size without stimulating excessive regrowth.
- Never prune in fall! Fresh cuts in autumn invite diseases when the tree can’t heal before winter.
Pro tip: Check your local frost dates — prune when the risk of hard freezes is low. 🌡️
Tools You’ll Need for Perfect Pruning ✂️🔧
Sharp, clean tools make clean cuts that heal fast and reduce disease risk. Gather these essentials:
- Bypass hand pruners — For branches up to ¾ inch (sharp blades slice cleanly!)
- Loppers — For 1–2 inch branches
- Pruning saw — For larger limbs (foldable ones are great for home use)
- Rubbing alcohol or bleach solution — Disinfect tools between cuts to prevent spreading disease
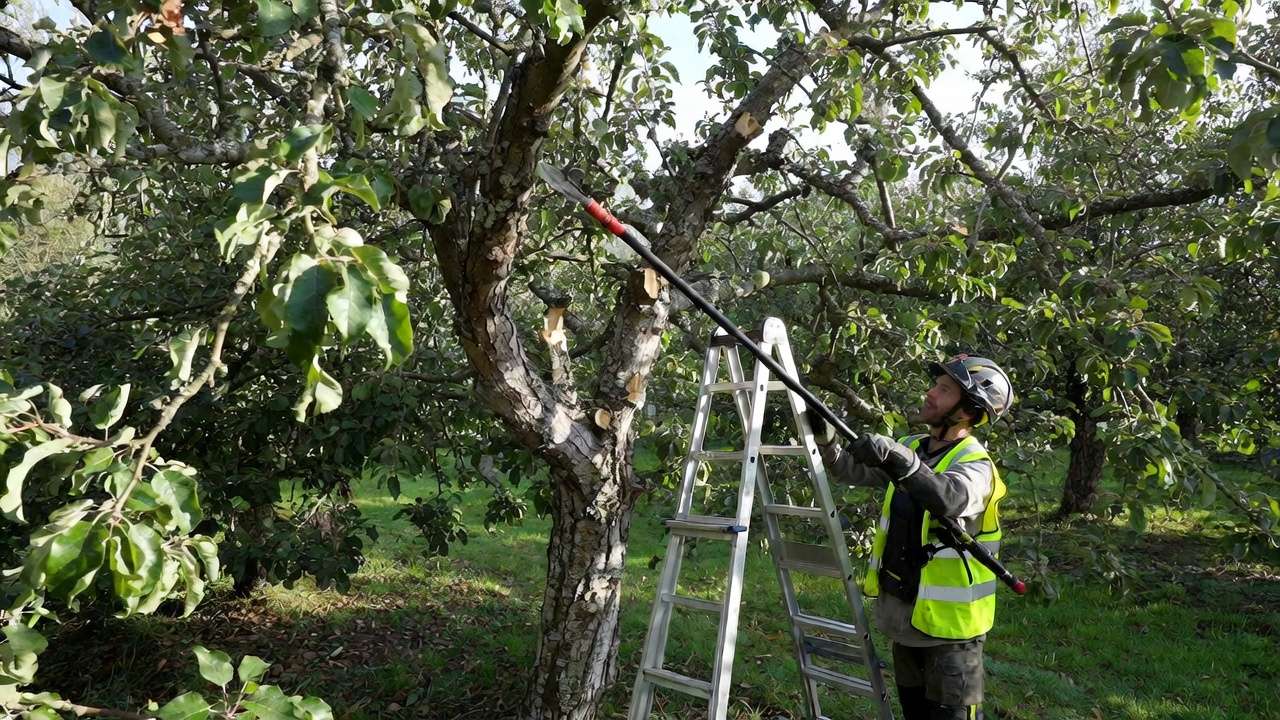
- Gloves, safety glasses, and sturdy ladder — Safety first! 😷
- Optional: Pole pruner for tall branches
Always sharpen tools before each session — dull blades tear wood and invite infection. 🧼
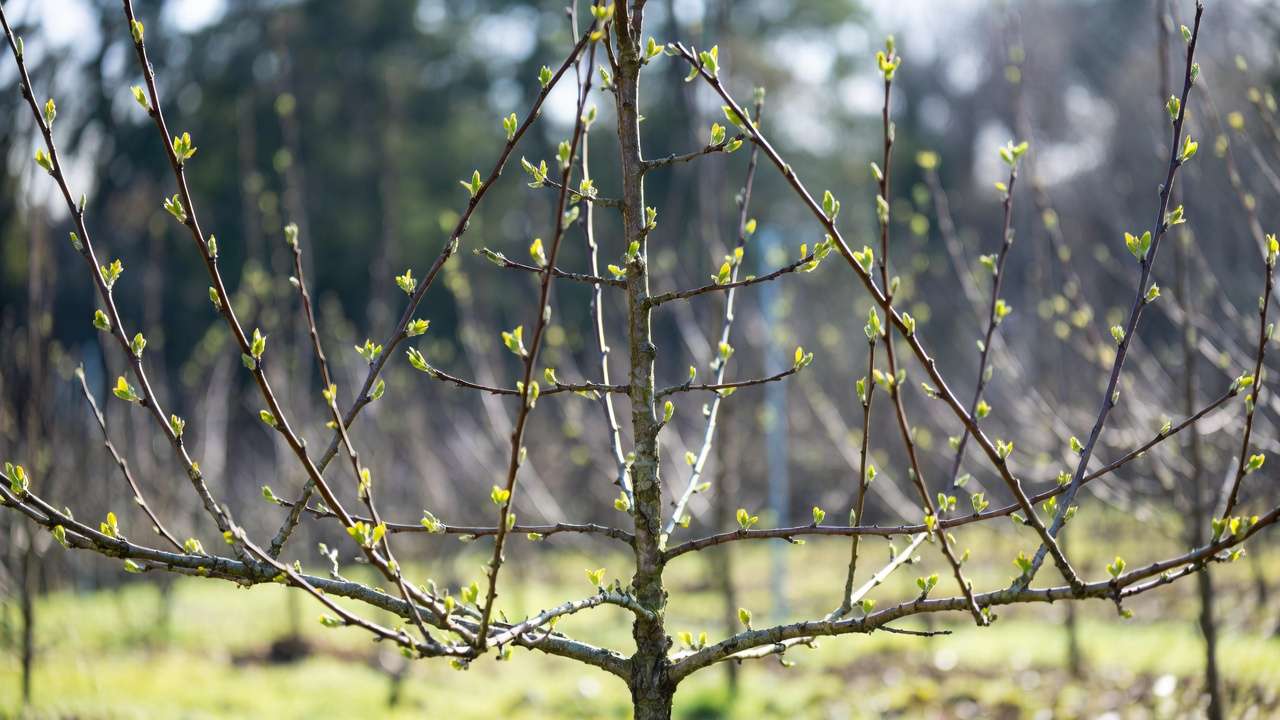
Understanding Apple Tree Structure & Pruning Basics 📐
Most home apple trees are trained to the central leader system — a strong main trunk (leader) with tiers of scaffold branches forming a conical, pyramid shape. This allows light to reach all parts of the tree. 🌲
Key terms to know:
- Scaffold branches — Permanent main limbs, ideally spaced 6–12 inches apart vertically, growing at 45–60° angles for strength.
- Water sprouts — Vigorous upright shoots that steal energy — remove them!
- Suckers — Shoots from the base or roots — eliminate immediately.
- Thinning cuts — Remove entire branches at their origin (best for opening the canopy).
- Heading cuts — Cut back to a bud (used sparingly on young trees to encourage branching).
Good crotch angles (wide, U-shaped) are strong; narrow V-angles risk splitting under fruit weight.
Here are some helpful diagrams showing the ideal central leader shape and proper scaffold branch angles:
And proper pruning cuts (note the branch collar — never cut flush or leave stubs!)
This structure sets the foundation for everything that follows! 🌟
The Best Way to Prune Apple Trees: Complete Step-by-Step Guide (Core Section!) 🍏✨
This is the heart of the article—the proven, university-recommended method that will give you bigger, healthier fruit. Follow these steps in order every late winter/early spring, and your tree will thank you with a bumper crop! 🌟
Step 1: Assess & Plan Your Tree
Before making a single cut, step back 10–15 feet and look at the overall shape. Ask yourself:
- Is the tree lopsided or too dense in the center?
- Are there dead, broken, or rubbing branches?
- Does light reach the lower branches? Take a quick photo of your tree now—it’s super motivating to compare with your “after” photo later! 📸 Plan to remove no more than 25–30% of the canopy in one year (less for young trees). Over-pruning shocks the tree and triggers excessive water sprout growth.
Step 2: Remove the “3 Ds” First (Dead, Damaged, Diseased)
Always start here—it’s non-negotiable!
- Dead wood: Dry, brittle, no green under the bark when scratched.
- Damaged wood: Broken, cracked, or split branches.
- Diseased wood: Blackened tips (fire blight), cankers, or powdery mildew spots. Cut these out completely back to healthy wood. Disinfect your pruners after every diseased cut with rubbing alcohol. This simple step prevents most disease spread! 🦠🚫
Step 3: Eliminate Suckers, Water Sprouts & Low Branches
- Suckers — Shoots growing from the base or rootstock. Remove them all the way down.
- Water sprouts — Vigorous upright shoots growing straight up from branches. These steal energy and block light—cut them off at their base.
- Low-hanging branches — Anything below knee height (about 18–24 inches). Remove them so you can mow, harvest, and walk underneath easily. Quick rule: “Knee-high, let it fly!” 🌿✈️
Step 4: Thin Out Crowded, Crossing & Inward-Growing Branches
Now open the canopy for sunlight and airflow:
- Remove branches that cross or rub against each other (they cause wounds and disease).
- Eliminate any branch growing toward the center of the tree.
- Thin crowded areas so remaining branches are spaced 6–12 inches apart vertically and horizontally. Focus on thinning cuts (removing entire branches) rather than heading cuts—these open the tree without stimulating too much new growth. Aim for a lacy, open-center look where a bird could fly through without touching branches! 🐦
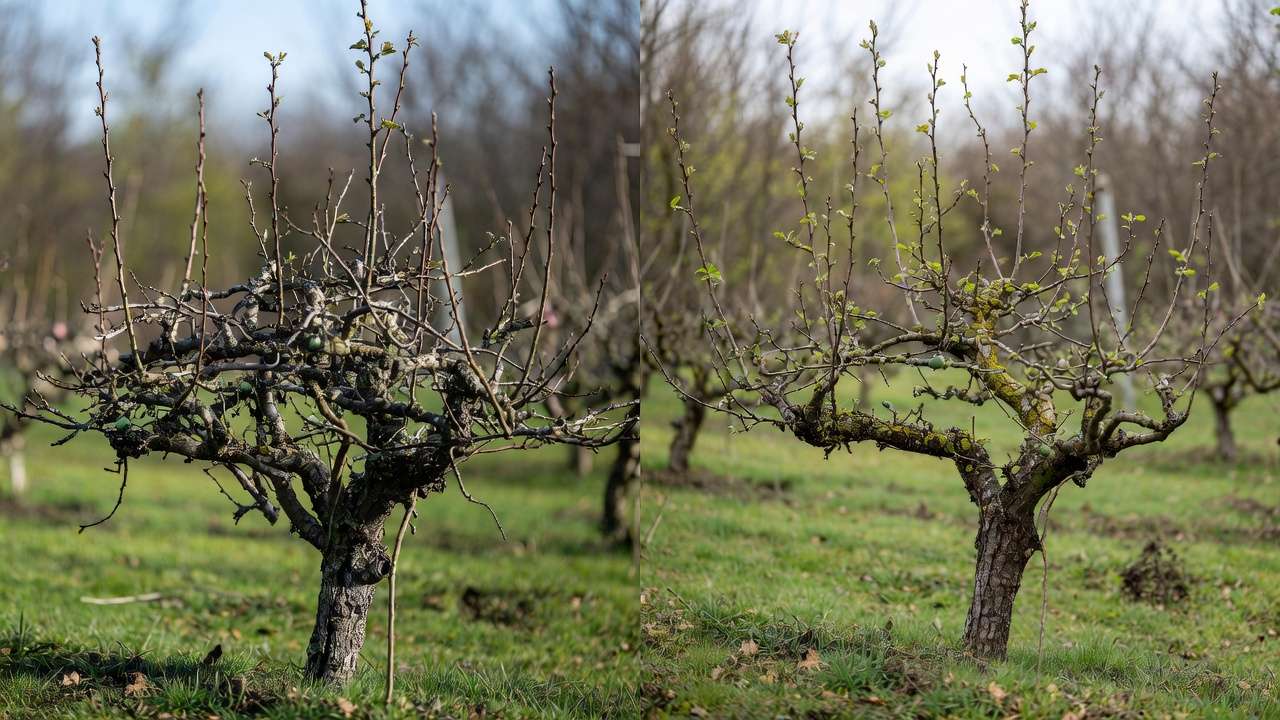
Here are real before-and-after photos to inspire you:
Step 5: Maintain the Central Leader & Scaffold Balance
Keep the tree shaped like a pyramid (narrower at the top):
- The central leader should be the tallest part.
- Select 3–5 strong scaffold branches in the lower two-thirds, spaced evenly around the trunk.
- If the leader is damaged, choose a new one by heading back to a strong outward-facing bud.
- Remove any competing leaders that try to take over. This balanced shape prevents top-heavy trees that snap in wind or snow.
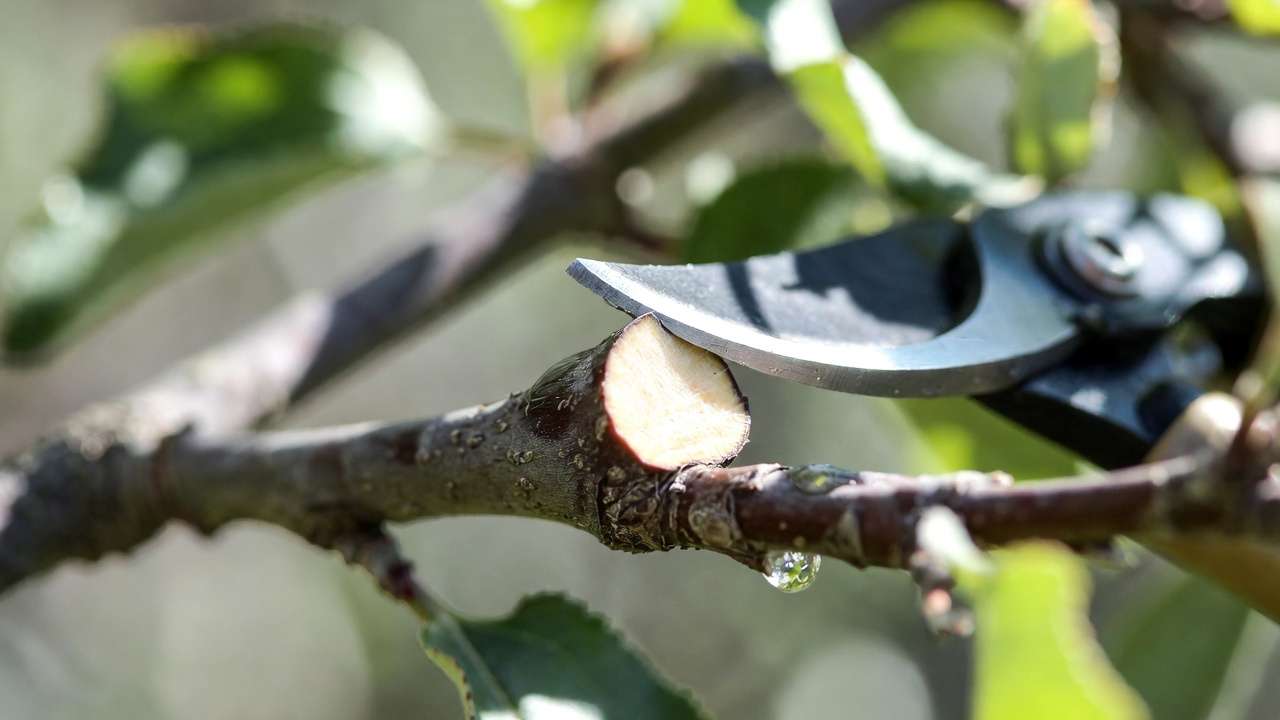
Step 6: Make Proper Cuts (Technique Matters!)
The secret to fast healing is cutting in the right place:
- Always cut just outside the branch collar (that swollen ring where the branch meets the trunk—nature’s healing zone).
- Angle the cut at 45° sloping away from the bud or branch you’re keeping.
- For large branches (>2 inches), use the 3-cut method:
- Undercut 6–12 inches out to prevent tearing.
- Top-cut farther out to remove the bulk.
- Final clean cut just outside the collar. Never leave stubs or cut flush—these invite rot!
Here’s a clear diagram of perfect pruning cuts:
Step 7: Final Check & Clean Up
Step back again. Look from all angles.
- Can sunlight reach the center?
- Is the shape balanced and open?
- Did you remove no more than 25–30%? Rake up all clippings and dispose of them (don’t compost diseased wood). Mulch around the base afterward to retain moisture and suppress weeds. Done! 🎉
Pruning by Tree Age: Young, Mature & Old Apple Trees 👶➡️🧓
Different ages require different approaches. Here’s how to tailor the best way to prune apple trees based on your tree’s life stage:
Young Trees (1–5 Years Old) – Building Strong Structure
Your main goal is formative pruning — creating the perfect framework for future heavy fruiting.
- Year 1 (after planting): Head the central leader back to 24–30 inches above ground to encourage strong branching. Remove any branches below 18–24 inches.
- Years 2–3: Select 3–5 scaffold branches with wide angles, spaced evenly around the trunk. Head the leader to encourage new tiers. Thin out competing shoots. Keep the tree open and balanced.
- Years 4–5: Continue selecting scaffolds, maintain central leader dominance, and begin light thinning of crowded areas. Rule of thumb: Prune more heavily in early years (up to 30–40% of growth) to shape the tree right from the start.
Young trees respond vigorously to pruning — use this to your advantage! 🌱
Mature Trees (6–15+ Years Old) – Maintenance Mode
Now your tree is in full production. Focus on maintenance pruning to keep it healthy and productive:
- Remove the 3 Ds, water sprouts, suckers, and crossing branches as described earlier.
- Thin crowded areas to maintain light and airflow.
- Keep the central leader slightly taller than the scaffolds.
- Limit total removal to 15–25% of the canopy each year.
- Pay special attention to fruiting wood: Apple trees bear most fruit on spurs (short, stubby branches that live 5–15 years). Don’t remove healthy spurs unless they’re overcrowded!
Mature trees should look open, airy, and slightly conical every spring. 🍎
Old, Overgrown, or Neglected Trees – Renovation Pruning
Don’t give up on that old giant! Renovation brings them back to life — but it takes patience (usually 2–3 years).
- Year 1: Remove all dead, diseased, and damaged wood + water sprouts and suckers. Thin out the worst crowded areas. Reduce height by heading back the tallest branches by 20–30%.
- Year 2: Open the center more aggressively. Remove crossing branches and select new scaffolds if needed.
- Year 3: Fine-tune the shape and resume normal maintenance. Important: Never remove more than 30–40% in one season on old trees — it can cause excessive water sprout regrowth and stress.
Many gardeners see their biggest harvests 2–4 years after starting renovation! 🏆
Common Pruning Mistakes to Avoid (Beginner Traps!) ❌
Even experienced gardeners slip up sometimes. Here are the top mistakes and how to dodge them:
- Pruning too much at once — Removing >30% shocks the tree → massive water sprout explosion.
- Pruning at the wrong time — Fall or early winter cuts invite disease.
- Leaving stubs or cutting flush — Both slow healing and invite rot. Always cut just outside the branch collar.
- Ignoring fruiting habit — Tip-bearing varieties (e.g., some heritage apples) fruit at branch tips — don’t head them too much! Spur-bearing (most modern varieties) fruit on short spurs — protect them.
- Not disinfecting tools — One diseased cut can spread fire blight or canker throughout the tree.
- Trying to fix everything in one year — Especially on old trees. Patience wins!
Avoid these, and you’ll be miles ahead of most home gardeners. 😎
Expert Tips & Pro Secrets for Maximum Results 🌟
Here are orchard-level tricks that take your pruning (and your harvest) to the next level:
- Use branch spreaders or weights — Gently spread young scaffold branches to 45–60° angles in spring/summer for stronger crotches.
- Thin fruit aggressively — After bloom, thin to 1 apple every 6–8 inches. Bigger, better-quality fruit!
- Mulch & water after pruning — Helps the tree recover and heal cuts faster.
- Monitor for fire blight — If you see blackened shoot tips (“shepherd’s crook”), prune 12 inches below the damage and sterilize tools obsessively.
- Consider summer pinching — For very vigorous trees, pinch back new shoots in June/July to reduce next year’s pruning work.
- Keep records — Note what you did each year. You’ll spot patterns and improve! 📝
Frequently Asked Questions (FAQs) ❓
Can I prune my apple tree in summer? Yes — light summer pruning (removing water sprouts, thinning crowded areas) is fine and helps control size. Avoid heavy pruning in summer — it can reduce next year’s fruit buds.
How much should I prune each year? 15–25% of the canopy for mature trees; up to 30–40% for young or renovation trees. Less is usually better than more!
My tree is way too tall — can I cut it way back? Yes, but gradually! Reduce height over 2–3 years by heading back the leader and upper branches. Sudden big cuts cause water sprouts and stress.
What if I prune wrong? Will I kill my tree? Almost never! Apple trees are tough. Worst case: too much regrowth or reduced fruit next year. Just follow the steps next season and you’ll recover.
Do dwarf and semi-dwarf trees need different pruning? Same principles, but dwarf trees need less overall pruning and benefit from more frequent light thinning to prevent over-cropping.
Conclusion: Start Pruning & Enjoy the Fruits of Your Labor! 🎉
Pruning is the single most powerful thing you can do for your apple tree. Done right, the best way to prune apple trees delivers bigger, sweeter, healthier fruit, easier picking, fewer diseases, and a beautiful, long-lived tree.
Grab your sharp tools this late winter or early spring, follow this step-by-step guide, and take it one branch at a time. You’ve got this! 🍏✨
Once you see those first giant, picture-perfect apples, you’ll wonder why you ever hesitated.
Happy pruning — and even happier harvesting! 🌳🥧


