
Tired of staring at a sluggish compost pile that seems to take forever to break down, while your garden plants and fruit trees are crying out for that dark, crumbly gold? You’re not alone—many home gardeners struggle with the same question: how often should I actually turn my compost? Get the compost turning schedule right, and you can transform kitchen scraps and yard waste into nutrient-rich compost in as little as 6–8 weeks instead of 6–12 months. The difference? Faster decomposition, fewer odors, better pathogen control, and healthier soil that makes your plants thrive and your trees stronger. 🌳
In this comprehensive guide, we’ll dive deep into science-backed turning frequencies, customizable schedules for different setups and climates (perfect for humid regions like Bangladesh!), step-by-step techniques, seasonal tweaks, troubleshooting, and pro tips to maximize results. Whether you’re a beginner or seasoned gardener, you’ll walk away with a clear plan tailored to your needs—because the right aeration schedule isn’t one-size-fits-all. Let’s turn your compost game around! 🚀
Why Turning Your Compost Pile Is Essential 🛠️
Composting is essentially nature’s recycling process, powered by billions of microorganisms breaking down organic matter. But for fast, high-quality results, those microbes need oxygen—enter turning (also called aerating or flipping the pile).
Without regular turning, oxygen levels drop, shifting the process from aerobic (fast, hot, odor-free) to anaerobic (slow, smelly, potential pathogen-friendly). Aerobic decomposition relies on oxygen-loving bacteria and fungi that generate heat (thermophilic phase: 130–160°F or 55–70°C), speeding breakdown and killing weed seeds, pathogens, and fly larvae.
Key benefits of proper turning:
- Accelerates decomposition — Regular aeration can cut processing time in half or more.
- Produces nutrient-rich compost — Better-balanced breakdown preserves nitrogen, potassium, and micronutrients vital for plant and tree health.
- Prevents problems — Reduces foul odors (rotten egg or ammonia smells), matting, and pest attraction.
- Improves soil quality — Finished compost enhances structure, water retention, and microbial life in garden beds and around tree roots.

For low-maintenance gardeners, passive (cold) composting works without much turning—but if you want faster, hotter, safer results for your vegetable patches or orchard, turning is non-negotiable. Backed by university extensions like Oklahoma State and Rodale Institute, turning is the single biggest lever for speed and quality.
Factors That Determine Your Ideal Compost Turning Schedule ⚖️
No two piles are identical, so your schedule depends on several variables:
- Pile size and type — Small backyard heaps (3x3x3 ft minimum for heat) need more frequent turns than large ones. Tumblers or bins are easier to aerate, allowing 2–3x/week.
- Materials balance — Ideal carbon:nitrogen ratio (30:1) with greens (nitrogen-rich: veggie scraps, grass) and browns (carbon-rich: leaves, cardboard). Too many greens → wet/smelly → more turns needed.
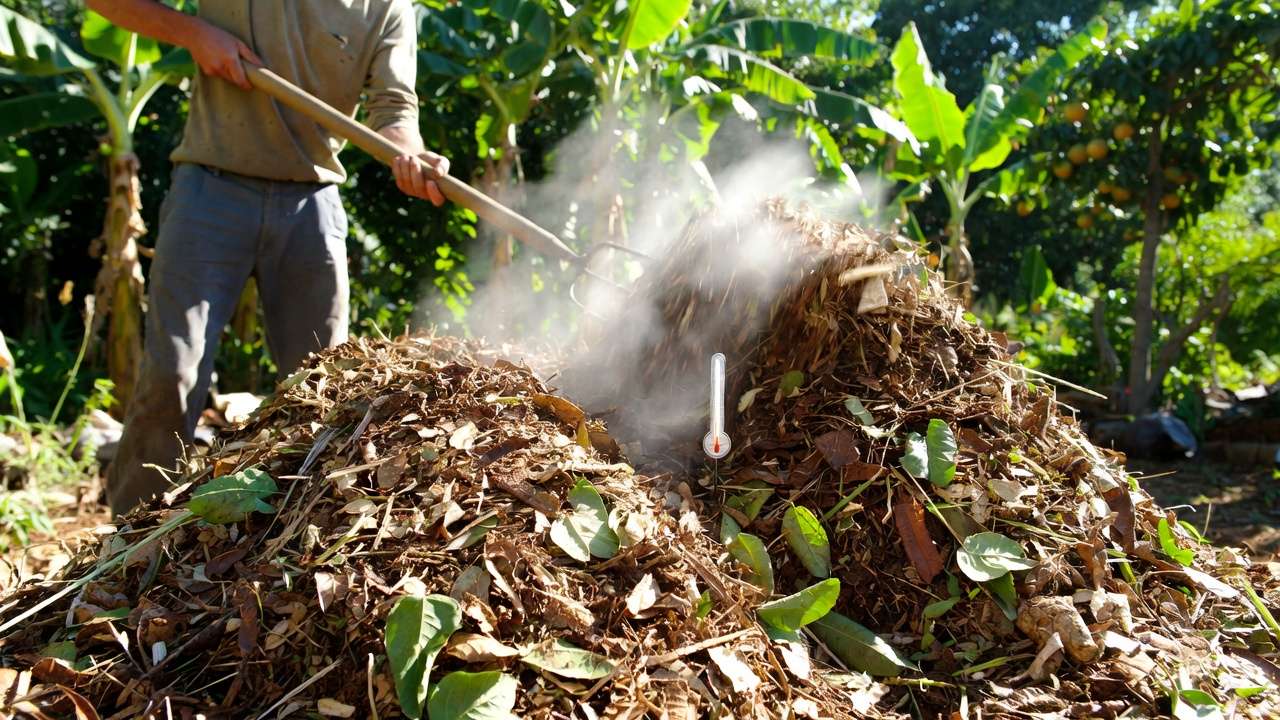
- Temperature — Use a long compost thermometer. Turn when temps drop below 104–120°F (40–49°C) after peaking—this signals oxygen depletion.
- Moisture — Should feel like a wrung-out sponge (50–60%). Too dry slows microbes; too wet goes anaerobic.
- Season and climate — In warm, humid areas like Barisal Division, decomposition speeds up but excess rain can waterlog piles—turn to aerate and prevent sogginess.
- Goals — Hot/fast for quick garden use vs. slow/passive for minimal effort.
Monitor these with simple tools: thermometer, moisture meter (or hand squeeze test), and your nose!
Recommended Compost Turning Schedules: Choose Your Speed 🗓️
Here are proven schedules based on extension service research (Oklahoma State, Rodale, etc.) and real gardener experiences.
Fast/Hot Composting Schedule (For Quick, Pathogen-Free Results) 🔥
- Frequency — Every 3–4 days during the active thermophilic phase (Oklahoma State recommendation).
- How it works — Build pile to heat up quickly (aim for 130–160°F). Turn when temp starts dropping to re-oxygenate.
- Timeline — 5–6 turns in first 2–3 weeks, then taper as heat sustains less.
- Expected finish — 6–8 weeks to usable compost (plus 2–4 week curing).
- Best for — Gardeners in planting seasons who want nutrient-dense “black gold” fast for veggies, flowers, or tree mulching.
Pro tip: This mimics the famous Berkeley method (turn every 2–3 days initially) but adjusted for home scale.
Balanced Weekly Schedule (Most Practical for Home Gardeners) 📅
- Frequency — Once a week.
- Why optimal — Studies show weekly turns maintain longer heat periods without over-disrupting beneficial fungi and actinomycetes. More frequent than weekly often yields diminishing returns.
- Timeline — Consistent turns + check temp/moisture each time.
- Expected finish — 3–6 months.
- Best for — Busy folks who want speed without daily commitment—perfect balance for most backyard setups.
Many gardeners report this as the “sweet spot” for reliable results.
Low-Effort / Passive Schedule (Set-It-and-Forget-It) 😌
- Frequency — Every 2–4 weeks, or only when odor/temp drops noticeably.
- Timeline — Minimal turns; rely on initial good layering and bulking agents (straw, wood chips) for airflow.
- Expected finish — 6–12+ months.
- Best for — Tree caretakers or low-maintenance gardeners who add yard waste gradually.
Cold composting still produces great humus—just slower.
Tumbler / Bin-Specific Schedules 🔄
- Frequency — 2–3 times per week (easier mechanics allow more aeration without heavy lifting).
- Adjustments — Rotate daily if your model has good vents; still monitor temp.
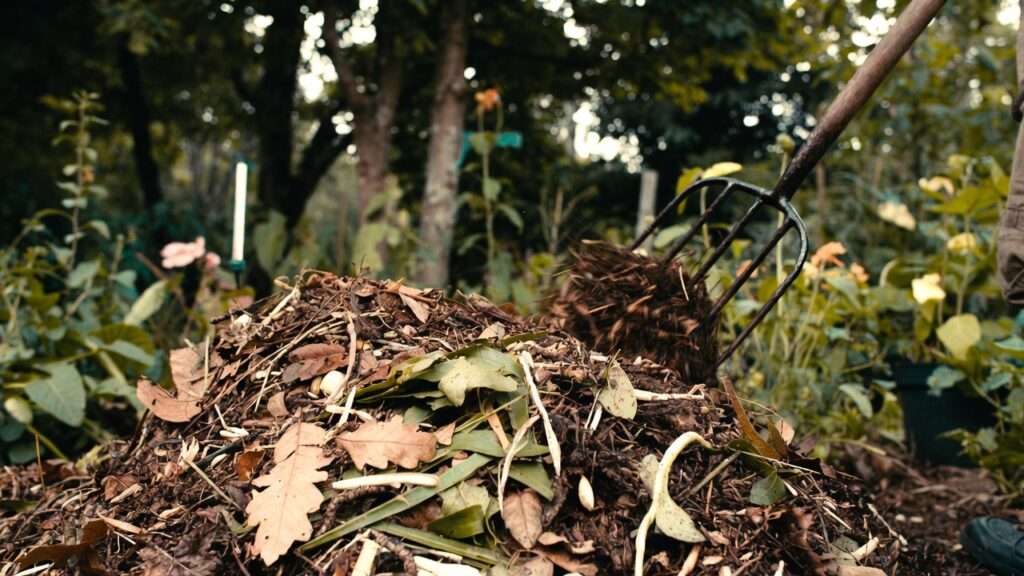
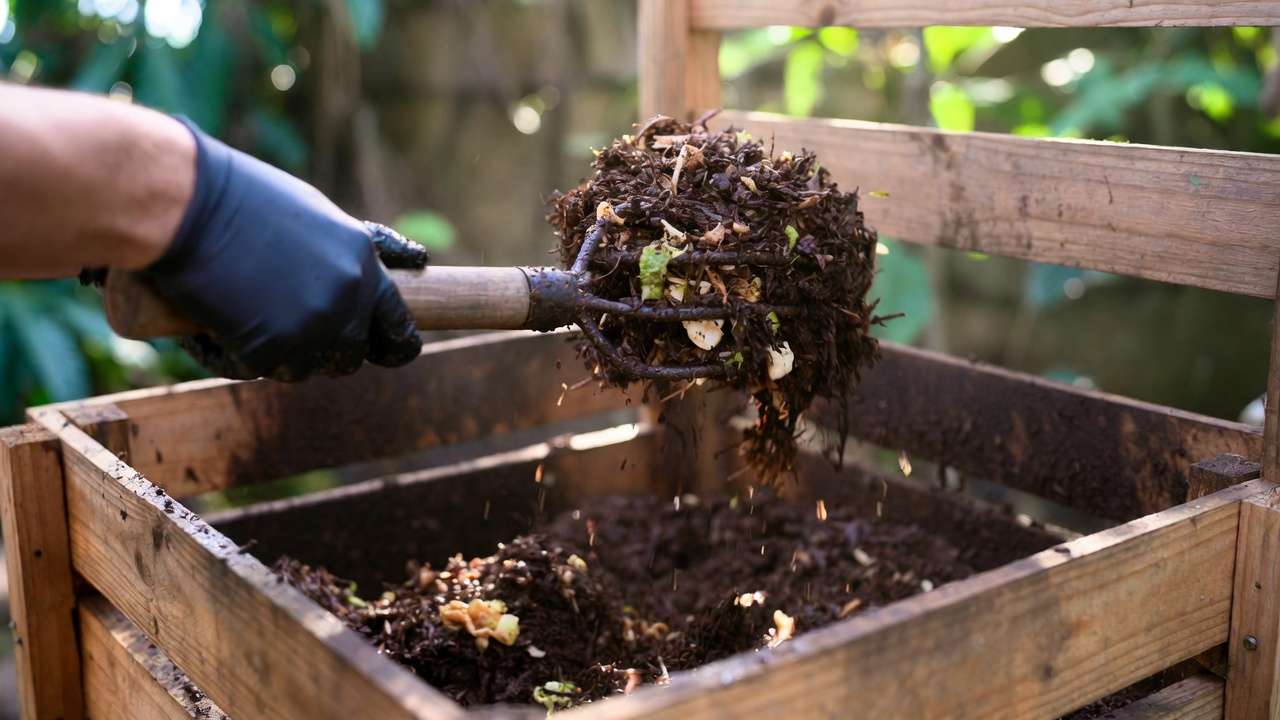
Step-by-Step: How to Turn Your Compost Pile Properly 🔧
Turning isn’t just flipping material around—it’s a deliberate process that reintroduces oxygen, redistributes heat and moisture, and mixes ingredients for even breakdown. Here’s the expert way to do it right:
- Gather your tools 🛠️
- Long-handled pitchfork or garden fork (best for most piles)
- Compost aerator (corkscrew-style tool—great for tight spaces or bins)
- Shovel (for scooping and layering)
- Compost thermometer (essential—$10–20 investment)
- Wheelbarrow or tarp (to catch material if rebuilding the pile)
- Gloves and old clothes (it gets messy!)
- Assess before turning
- Check temperature: If it’s dropped below 104–120°F (40–49°C) after a peak, it’s time.
- Squeeze a handful: Should feel moist like a wrung-out sponge. Too dry? Add water. Too wet? Add dry browns.
- Smell test: Earthy = good. Rotten eggs/ammonia = anaerobic → turn ASAP.
- Turning technique (open pile method)
- Start from the outside and work inward.
- Fork material from the edges and top to the center of a new pile (or the same spot if space is tight).
- Break up any matted or clumped layers with the fork.
- If rebuilding: Create layers—browns, greens, a bit of old finished compost (for inoculating microbes), and sprinkle water as needed.
- Aim to fluff and aerate—don’t just stir gently. Full turnover exposes inner material to air.
- Tumbler or bin method
- Simply rotate the barrel 8–12 times (or per manufacturer instructions).
- Open vents/doors afterward to release heat and moisture buildup.
- Common mistakes to avoid
- Over-turning: Disrupts fungal networks and actinomycetes (important for breaking down tough materials like woody branches). Limit to recommended frequency.
- Under-turning: Leads to cold spots, slow zones, and odors.
- Turning when too hot: Can kill beneficial heat-loving microbes—wait for the drop.
- Safety notes ⚠️
- Wear gloves to avoid splinters, bacteria, or fungal spores.
- Avoid turning during extreme heat (protect yourself) or heavy rain (don’t compact wet material).
Done right, each turn should take 10–30 minutes depending on pile size—and leave your pile noticeably fluffier and steaming again within hours! 🌡️
Seasonal Compost Turning Adjustments 🌦️
Your local climate dramatically affects microbial activity—and therefore your turning schedule. Living in Barisal Division (warm, humid, with a strong monsoon), here’s how to adapt:
- Spring & Summer (March–October) 🌞
- Fastest decomposition due to heat and humidity.
- Increase frequency: Every 3–5 days for hot piles, weekly for balanced.
- Watch for rapid drying after rain—turn and water if needed.
- Monsoon/Rainy Season (June–October) ☔
- Excess moisture is the biggest challenge.
- Turn more often (every 4–7 days) to prevent waterlogging and anaerobic zones.
- Add extra browns (dry leaves, shredded cardboard) during turns.
- Cover pile with tarp/breathable sheet to control rain while allowing airflow.
- Fall (November) 🍂
- Moderate temps—weekly turns usually sufficient.
- Great time to build new piles with abundant fallen leaves.
- Winter (December–February) ❄️
- Cooler temps slow microbial activity (below 50°F/10°C, process nearly stops).
- Reduce turning to every 3–4 weeks or only when odor appears.
- Insulate pile (straw bales, old blankets, or locate in sunny spot) to retain heat.
- In mild Bangladeshi winters, you can still get slow but steady progress.
Pro gardener tip for humid climates: Build piles slightly taller and narrower in monsoon to shed water, and slightly wider in dry season to retain moisture.

Troubleshooting Common Compost Turning Problems 🛑
Even with the best schedule, issues arise. Here are fixes:
- Pile not heating up Causes: Too dry, too wet, low nitrogen, small pile, cold weather. Solutions: Adjust moisture, add fresh greens (kitchen scraps, manure), turn to mix, insulate, or rebuild with better C:N balance.
- Bad odors (rotten eggs = anaerobic, ammonia = excess nitrogen) Solution: Turn immediately to aerate, add dry browns, cover pile loosely.
- Pests (flies, rodents, ants) Solution: Bury food scraps deeper, turn more frequently, cover pile, avoid meat/dairy.
- Too dry (feels dusty, no heat) Solution: Water during turning—aim for sponge consistency.
- Too wet/soggy (matted, smelly) Solution: Add carbon-rich materials (straw, shredded paper), turn to aerate, improve drainage (elevate pile on branches).
- Slow decomposition overall Solution: Check C:N ratio (30:1 ideal), shred large items, turn on schedule, add finished compost as microbial booster.
Expert Tips for Maximum Nutrient-Rich Compost 🌟
Here are battle-tested techniques that experienced gardeners (including many in humid tropical and subtropical regions) use to get noticeably better results:
- Use a compost thermometer religiously It’s the single most valuable tool. Track temperature trends rather than just one reading. A good pile should rise quickly after turning, stay hot 3–7 days, then gradually drop. Turn at the drop = maximum efficiency.
- Inoculate with finished compost or garden soil Add 1–2 shovelfuls of finished compost or rich garden soil at each turning. This introduces billions of beneficial microorganisms and can shave weeks off the process.
- Chop or shred larger materials Woody branches, corn stalks, thick vegetable stems, etc. break down much faster when cut into 2–5 cm pieces. Use garden shears, a machete or even a lawn mower for leaves and soft stems.
- Create air channels from the beginning When building the pile, insert a few vertical sticks or perforated pipes (bamboo works well and is locally available) to improve passive airflow. This reduces how often you need to turn.
- Layer strategically during turning Alternate greens and browns in thin layers. Place coarser, woodier materials toward the bottom and center (they need more time). Put fresh kitchen scraps in the middle where it’s hottest.
- Add natural activators (optional but effective)
- Fresh grass clippings
- Comfrey leaves
- Coffee grounds (in moderation)
- Well-rotted manure (chicken, cow, goat)
- Urine (diluted 10:1 with water) – surprisingly effective nitrogen boost
- Integrate compost into plant & tree care
- Fruit trees — Apply 5–10 cm layer of finished compost as mulch around the drip line (keep it away from the trunk).
- Vegetable beds — Mix 2–5 cm into the top 15–20 cm of soil before planting.
- Potted plants — Blend 20–30% compost with potting mix for better water retention and nutrition.
- Keep records Simple notebook or phone photo log of turning dates, temperature readings, and observations helps you fine-tune your schedule for your specific conditions over time.
How to Know When Your Compost Is Ready + How to Use It 🌳
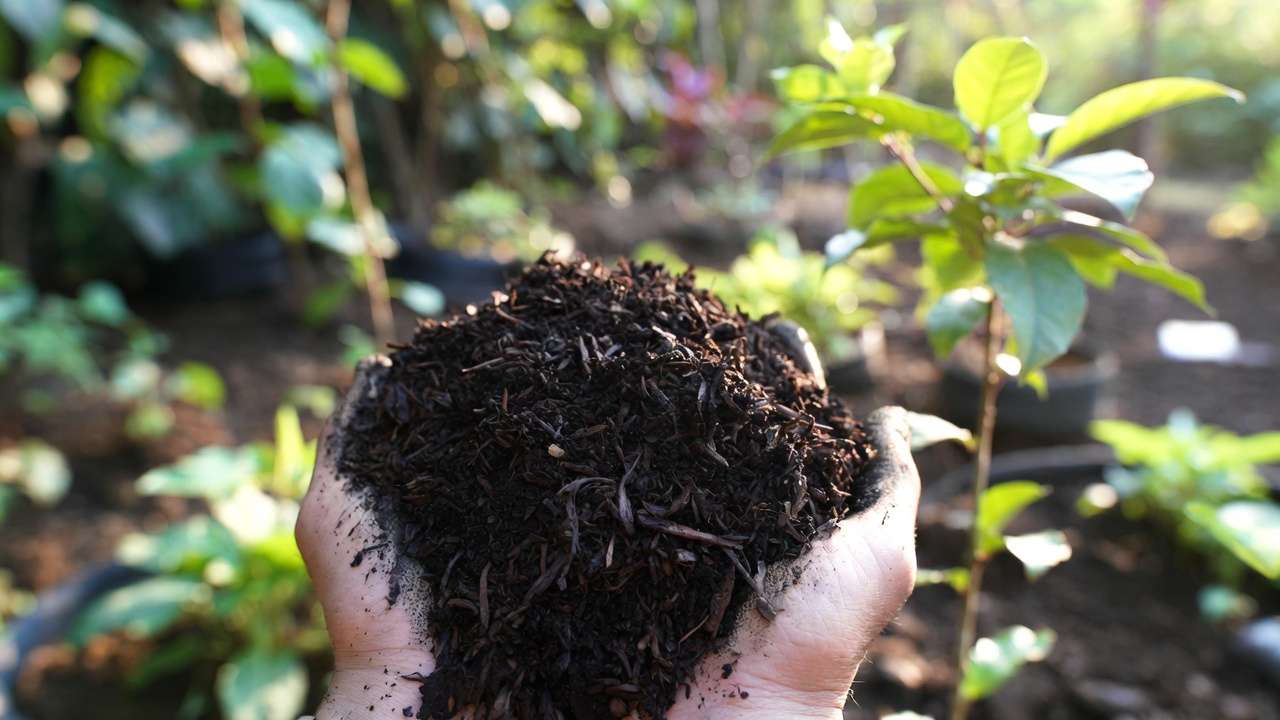
Signs your compost is finished (or nearly finished):
- Dark brown to black color
- Crumbly, soil-like texture
- Earthy forest-floor smell (no sour or ammonia odor)
- Original materials mostly unrecognizable (except maybe small woody bits)
- Volume reduced by 50–75%
- Temperature close to ambient (no longer hot)
Curing phase (highly recommended) After the active hot phase, let the pile sit undisturbed for another 4–8 weeks. This allows:
- Slower fungi and actinomycetes to finish breaking down tough materials
- pH to stabilize (usually near neutral)
- Any remaining ammonia to dissipate
Quick tests for readiness:
- Bag test — Put a handful in a sealed plastic bag for 3–5 days. If it smells bad when opened → not ready.
- Plant test — Sow fast-germinating seeds (radish, lettuce) in pots with the compost. Good germination and healthy growth = ready.
How to use your finished compost
- Top-dressing — Spread 2–5 cm around trees, shrubs, and perennials in early spring or after monsoon.
- Soil amendment — Mix into garden beds before planting vegetables.
- Potting mix — Combine 20–40% compost with garden soil, sand, and/or coco peat for containers.
- Compost tea — Steep a shovelful in water for 24–48 hours (aerated is best) and use as a liquid fertilizer.
FAQ: Quick Answers to Compost Turning Questions ❓
Q: How often should a complete beginner turn compost? A: Start with the balanced weekly schedule (once a week). It’s forgiving and gives good results without overwhelming you.
Q: Is turning every day or every 2 days better? A: Usually no. Very frequent turning (daily) disrupts the beneficial fungal networks and actinomycetes that are important for breaking down woody and complex materials. Stick to the recommended frequencies unless you’re following a very specific hot method (e.g., Berkeley).
Q: Do I need to turn in winter? A: Rarely. In Barisal’s mild winter, you can turn once every 3–4 weeks if the pile smells or you want to keep it active. Most people just let it rest.
Q: What’s the absolute fastest realistic turning schedule? A: The hot/fast schedule (turning every 3–4 days when temperature drops) combined with excellent material balance, small pieces, and good moisture can give usable compost in 6–8 weeks in warm weather.
Q: Can I make good compost without ever turning? A: Yes — cold/passive composting works. It just takes 6–18 months instead of 2–6 months. Many gardeners use both methods: one fast pile and one slow pile.
Conclusion + Call to Action 💚
Mastering your compost turning schedule is one of the highest-leverage things you can do to improve your garden and orchard. The right frequency — adjusted for your climate, materials, and time availability — can cut composting time dramatically while producing richer, safer compost for your plants and trees.
Start simple:
- Choose the weekly balanced schedule if you’re unsure
- Get a compost thermometer (it changes everything)
- Turn when the temperature drops and adjust moisture
- Observe and tweak over the next few months
Your garden will reward you with healthier plants, better yields, and richer soil — all from materials you already have at home. ♻️🌿
Have you started adjusting your turning schedule yet? Which method are you trying first? Let me know in the comments — I’d love to hear your progress and answer any questions!
Happy composting! 🌱


