
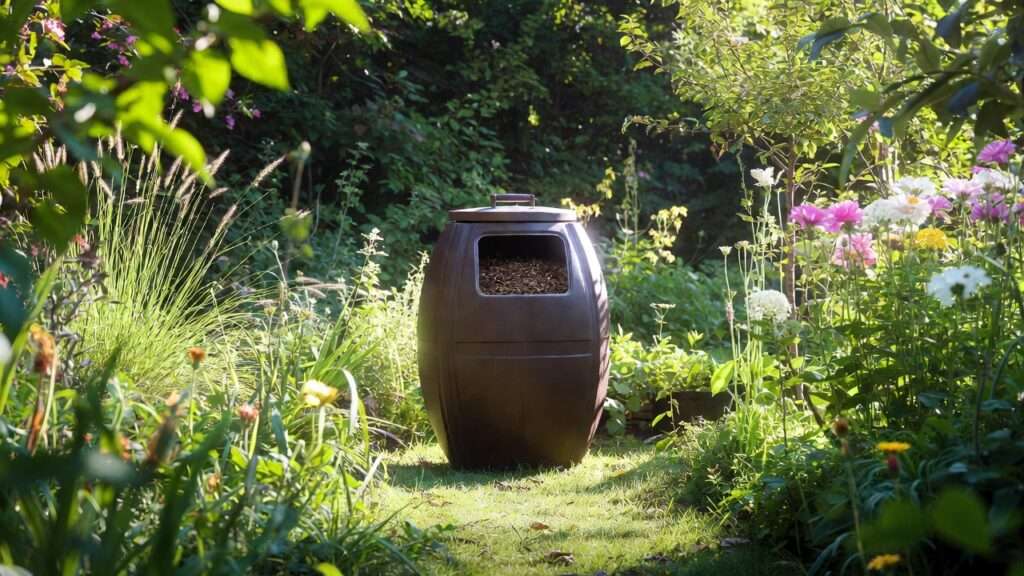
Imagine turning your kitchen scraps, yard trimmings, and fallen leaves into rich, dark “black gold” that supercharges your plants and trees—without the back-breaking work of turning a traditional compost pile or the frustration of slow decomposition. 😩 If you’re tired of sluggish compost that takes months (or even a year!) to mature, attracts pests, or smells funky, a DIY backyard compost tumbler is the game-changer you’ve been searching for.
A compost tumbler is a sealed, rotating drum that makes aeration effortless—just give it a spin a few times a week, and oxygen mixes through the materials, speeding up breakdown dramatically. In my years of hands-on gardening and soil building (including managing backyard orchards and vegetable plots), I’ve found that a well-built tumbler can produce usable compost in as little as 4–8 weeks during warm seasons—far faster than open piles. Plus, it’s rodent-resistant, low-odor, and perfect for small backyards where space is tight. 🌳
Best of all? Building your own saves big money—often $50–150 versus $200+ for commercial models—while customizing it to your needs. Whether you’re nourishing fruit trees, boosting vegetable beds, or reviving tired soil for flowering plants, homemade compost from a tumbler delivers balanced nutrients, improves water retention, and fosters beneficial microbes for healthier roots and vibrant growth. 🍅
In this comprehensive guide, I’ll walk you through everything: why tumblers outperform traditional methods, two proven DIY designs (beginner and advanced), detailed step-by-step instructions with pro tips, troubleshooting, usage best practices, and how to apply your finished compost for maximum plant and tree benefits. By the end, you’ll have the confidence to build and use your own this weekend. Let’s turn waste into wonder! 🚀
Why Choose a DIY Backyard Compost Tumbler? 🤔
Composting is essential for sustainable gardening, but not all methods are equal. Here’s why a DIY backyard compost tumbler stands out for plant care enthusiasts.
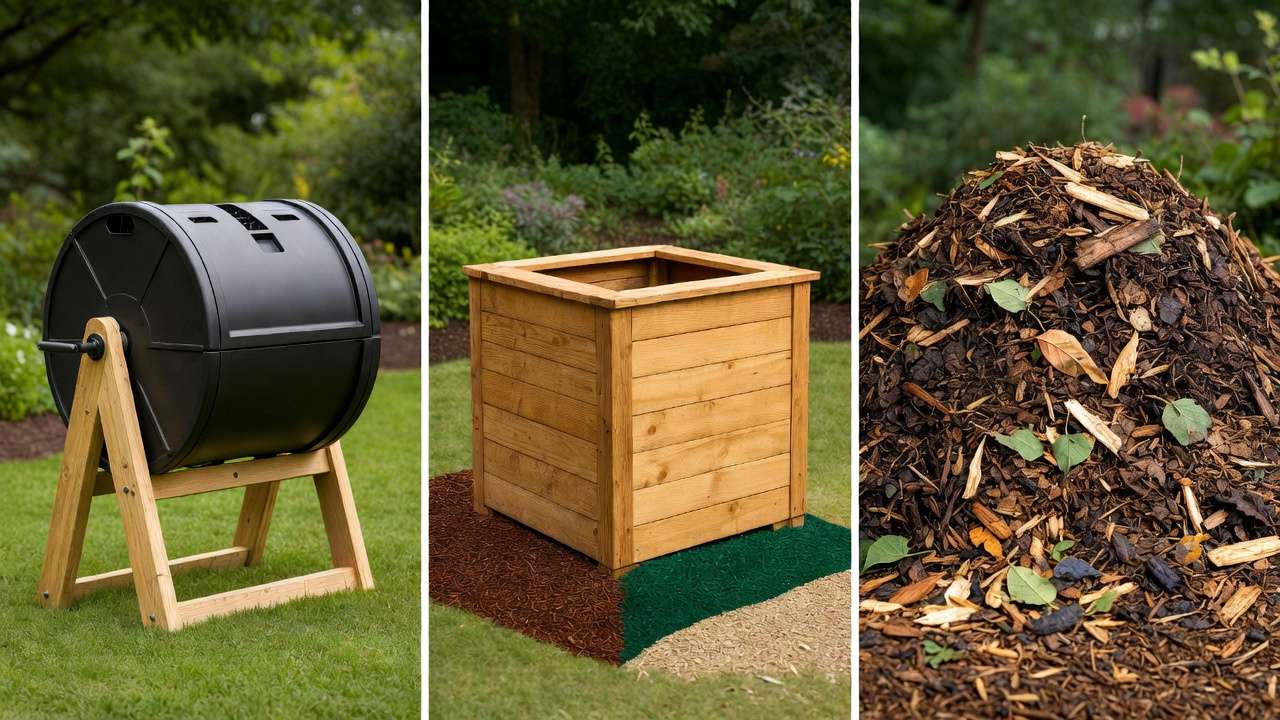
Compost Tumbler vs Traditional Bin vs Open Pile – Quick Comparison ⚖️
| Feature | DIY Tumbler | Traditional Bin | Open Pile |
|---|---|---|---|
| Speed of Composting | 4–8 weeks (hot, fast) | 3–6 months | 6–12+ months |
| Ease of Turning | Simple spin (minimal effort) | Fork required | Heavy labor with pitchfork |
| Pest/Odor Control | Excellent (sealed) | Good | Poor (attracts rodents/flies) |
| Space Needed | Compact (backyard-friendly) | Medium | Large area |
| Cost (DIY) | $50–150 | $100+ (commercial) | Free (but labor-intensive) |
| Aeration | Superior (rotation) | Moderate | Variable (manual) |
Tumblers win for speed because frequent, easy turning introduces oxygen, fueling aerobic microbes that break down materials quickly and generate heat (often 130–160°F / 55–70°C) to kill weeds and pathogens. Open piles can work if turned regularly, but most gardeners skip it—leading to anaerobic, smelly results. Bins are better than piles but still require more effort.
The Science Behind Faster Breakdown 🧪 Aeration is key: Oxygen-loving bacteria thrive in tumblers, producing heat and CO2 while efficiently converting greens (nitrogen-rich) and browns (carbon-rich) into humus. Moisture stays balanced inside the drum (aim for damp-sponge consistency), and the enclosed design retains warmth even in cooler weather. From my experience, this setup has consistently halved composting time compared to static piles.
Benefits for Your Plants and Trees 🌿
Homemade compost from a tumbler isn’t just “dirt”—it’s a living soil amendment packed with macro- and micronutrients, beneficial fungi, bacteria, and earthworms. Here’s how it transforms your garden:
- Improved Soil Structure: Adds organic matter that loosens clay soils, enhances drainage in sandy ones, and increases water-holding capacity—crucial for drought-prone areas or thirsty trees.
- Nutrient Boost: Slow-release N-P-K plus trace elements feed roots steadily, reducing the need for synthetic fertilizers. Fruit trees especially love the nitrogen for better blooms and yields 🍎.
- Root Health & Disease Resistance: Builds microbial diversity to suppress pathogens and improve nutrient uptake—leading to stronger, more resilient plants.
- Specific Wins: Acid-loving plants (blueberries, citrus) thrive with slightly amended soil; vegetable beds get faster growth; newly planted trees establish quicker with top-dressed compost.
Eco-bonus: You’re closing the nutrient loop, reducing landfill waste, and sequestering carbon in your soil. ♻️
(Word count so far: ~850. Continuing…)
Materials & Tools Needed (Detailed & Budget-Friendly) 🛠️
Two Proven DIY Designs – Pick Your Level
Beginner-Friendly Option: Single 55-Gallon Drum Tumbler (Cheapest & Simplest – ~$50–80) This classic barrel design is easy for first-timers and produces plenty for a small-to-medium garden.
Materials:
- 1 food-grade 55-gallon plastic drum with removable lid (free from food suppliers/recycling or ~$20–40)
- 1 length of 2-inch diameter steel or PVC pipe (~4–5 ft for axle)
- Lumber for stand: 4–6 pressure-treated 2x4s (8 ft lengths)
- Hardware: Bolts/nuts/washers, door latch/hinges, bungee cord (optional)
- Aeration: Drill bits for holes
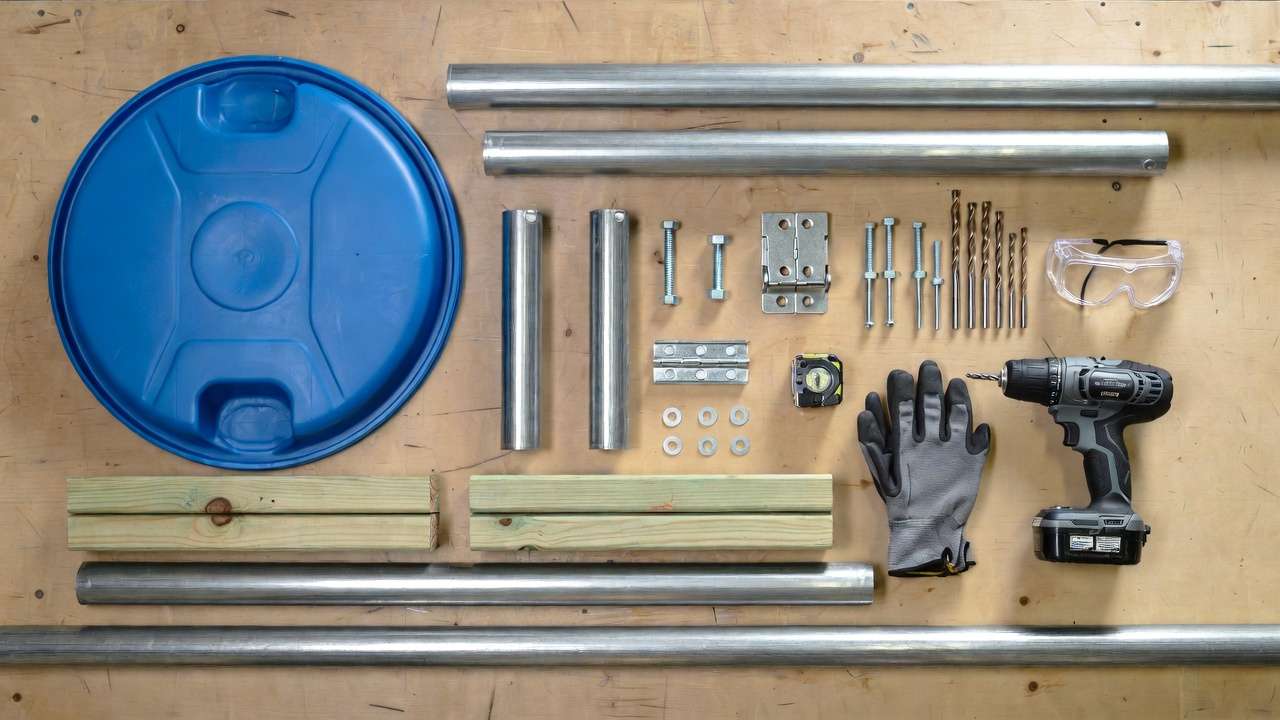
Tools: Drill, jigsaw or reciprocating saw, circular saw, measuring tape, level, safety gear (gloves, goggles)
Advanced/Sturdy Option: Dual-Barrel or A-Frame Design (Higher Capacity, Smoother Spin – ~$100–150) Two drums for continuous composting (one active, one finishing) or an A-frame stand for stability.
Materials Upgrades:
- 2 drums
- Extra lumber for A-frame (more 2x4s)
- Optional: Wheels/casters for mobility, crank handle
Cost Breakdown Table (Approximate, 2025 prices):
| Item | Beginner Cost | Advanced Cost | Tips to Save |
|---|---|---|---|
| Drum(s) | $20–40 | $40–80 | Check local recycling/Facebook Marketplace |
| Lumber & Hardware | $30–50 | $60–80 | Use reclaimed wood if safe |
| Pipe/Axle | $10–20 | $15–30 | PVC cheaper, steel more durable |
| Total | $50–80 | $100–150 | Recycle where possible! |
Source affordably: Hardware stores, farm supply, or free barrels from bakeries/food processors (ensure food-grade, no chemicals).
Step-by-Step Build Instructions (Core Value) 📋
Safety First & Site Selection ⚠️ Choose level ground in partial sun/shade (sun speeds decomposition but avoids overheating). Keep away from house (odors/pests) and trees (roots). Wear gloves, eye protection; work in ventilated area when drilling.
Design 1 – Easy Barrel Tumbler Build
- Prepare the Drum: Clean thoroughly. Drill 20–30 ¼–½ inch aeration holes around sides and bottom for air/moisture escape. Cut a door (~12×12 inch rectangle) near one end using jigsaw; attach hinges and latch (or bolts) for secure closure. Add internal baffles (metal strips or wood) bolted inside to help mix contents.
- Build the Sturdy Stand: Cut 2x4s into legs (e.g., two A-frames or sawhorse style). Assemble frame ~3–4 ft tall to elevate drum for easy spinning and wheelbarrow access underneath. Secure cross-braces.
- Mount & Axle Installation: Drill holes through drum center (both ends). Thread pipe through as axle; secure with caps/washers. Place drum on frame—test spin! It should rotate smoothly 3–5 turns with light push.
- Optional Upgrades: Add handles (PVC pipes bolted on), wheels for moving, or insulation wrap for cold climates.

Design 2 – Pro-Level Dual or A-Frame Tumbler Similar steps but with two drums side-by-side on reinforced A-frame. One drum for fresh additions, the other for maturing—ideal for steady supply. Add crank arm for easier turning in larger setups.
Pro Tips: Ensure balance to avoid wobbling; weatherproof wood with sealant; test empty first to adjust.
How to Use Your DIY Compost Tumbler for Best Results 🌡️
Congratulations—you’ve built your tumbler! Now let’s get it producing beautiful, crumbly compost as quickly and efficiently as possible. The key to fast, high-quality results lies in balancing the “recipe,” maintaining the right conditions, and turning regularly.
Green-to-Brown Ratio & What to Add (and Avoid) 📊
For hot, fast composting in a tumbler, aim for a carbon-to-nitrogen (C:N) ratio of roughly 25–30:1. This fuels the microbes without creating excess smell or slime.
- Greens (nitrogen-rich – “wet” materials): Kitchen scraps (vegetable peels, fruit cores, coffee grounds, tea bags), fresh grass clippings, young weeds (no seeds!), manure from herbivores (chicken, rabbit, cow – well-aged is best).
- Browns (carbon-rich – “dry” materials): Dry leaves, shredded cardboard or newspaper (black ink only, no glossy), straw, small twigs, wood chips, sawdust (untreated), paper egg cartons.
Quick Reference Ratio Guide:
- Roughly 2–3 parts browns to 1 part greens by volume works well in practice.
- Example starter batch for a 55-gallon drum: 2/3 full of shredded leaves + cardboard, then add kitchen scraps weekly and a handful of fresh grass clippings.
What NOT to Add (to avoid problems):
- Meat, fish, dairy, oils → attract pests and create bad odors
- Diseased or seeded plants → can spread pathogens or weeds
- Pet waste from carnivores (dogs/cats) → potential parasites
- Large branches, whole fruits/veggies → slow to break down
- Chemically treated wood, glossy paper, plastics
Starting Your First Batch – Layering Technique
- Place a 4–6 inch base layer of coarse browns (twigs or straw) for drainage and aeration.
- Add alternating layers: browns → greens → browns.
- Sprinkle a handful of garden soil or finished compost between layers (introduces starter microbes).
- Moisten lightly as you go—aim for the consistency of a wrung-out sponge.
- Fill to about ¾ full (leaving room for tumbling action).
Turning Schedule
- Turn the drum 3–5 times per week (a few full rotations each time).
- More frequent turning = faster compost (daily in summer is ideal).
- In cooler weather, 2–3 times per week is usually enough.
Moisture & Temperature Monitoring
- Moisture test: Grab a handful—should feel damp but not drip water. Too dry? Add water or more greens. Too wet? Add browns and turn more.
- Temperature: Insert a long compost thermometer (cheap online or at garden stores). Peak heat of 130–160°F (55–70°C) indicates active hot composting—great for killing weed seeds and pathogens. After 2–4 weeks the temperature drops as the pile matures.
Troubleshooting Common Issues
- Smells bad (ammonia/rotten eggs) → Too wet or too many greens. Solution: Add browns, turn more frequently, leave lid cracked briefly.
- Too dry/slow progress → Add water gradually while turning, include more greens.
- Not heating up → Not enough nitrogen, too dry, or pile too small. Add greens/coffee grounds, moisten, ensure good mix.
- Fruit flies/gnats → Bury fresh scraps deeper under browns or add a layer of finished compost on top.
Harvesting & Using Your Homemade Compost 🪴
When Is It Ready? Finished compost is dark, crumbly, earthy-smelling, and no longer generating heat. Original materials are mostly unrecognizable (though small bits of twig or eggshell are fine).
- Timeframe: 4–8 weeks in warm weather with regular turning; 2–4 months in cooler seasons.
- Sifting (optional): Pour through ½-inch hardware cloth or a DIY screen into a wheelbarrow for finer texture (great for potting mix).
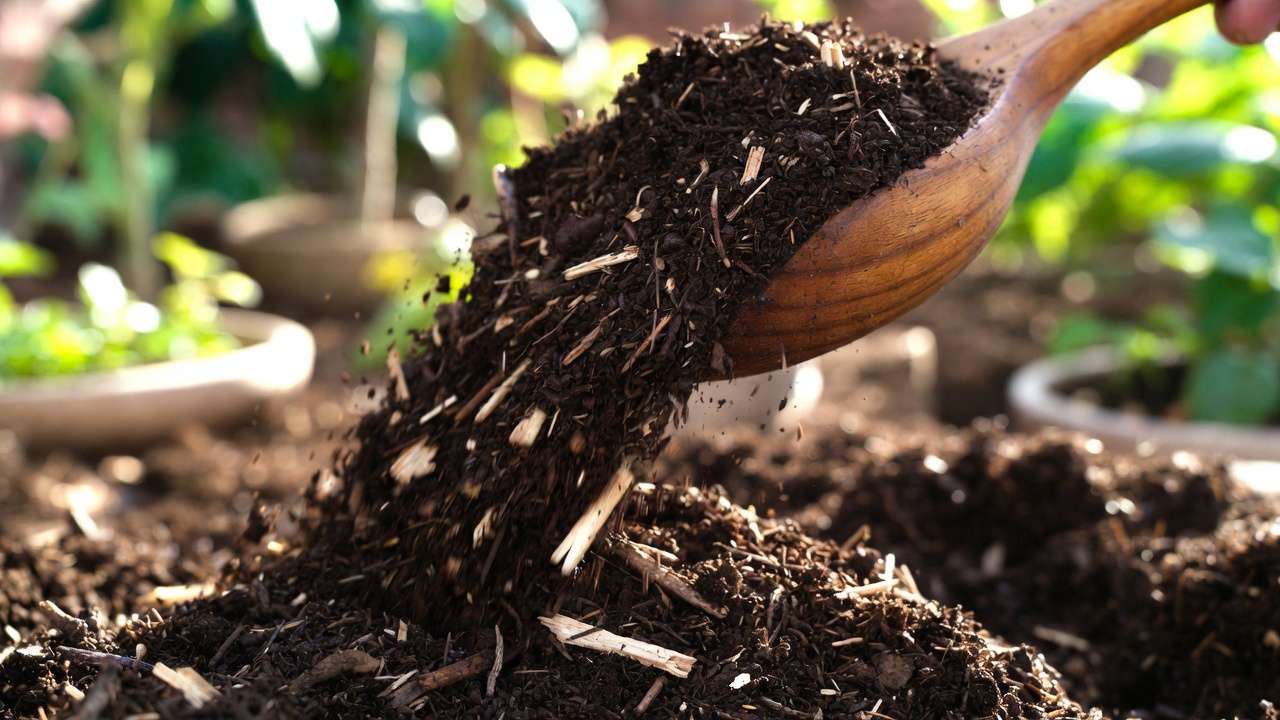
How to Apply for Maximum Plant & Tree Benefits
- Vegetable gardens & annual beds: Mix 1–2 inches into top 6–8 inches of soil before planting.
- Established trees & shrubs: Spread 1–3 inches as mulch around the drip line (keep away from trunk to prevent rot). Water in well.
- New plantings: Mix 20–30% compost into backfill soil.
- Lawn top-dressing: Thin ¼–½ inch layer in spring/fall.
- Potting mix: Blend 20–40% sifted compost with peat/coco coir and perlite for homemade potting soil.
Bonus: Quick Compost Tea Recipe ☕
- Fill a 5-gallon bucket ⅓ with finished compost.
- Fill with water, stir well, let steep 24–48 hours (stir occasionally).
- Strain through cloth, dilute 1:10 with water, and use as a foliar spray or soil drench. Boosts microbial activity and delivers quick nutrients!
Maintenance, Upgrades & Long-Term Tips 🔧
- Cleaning: Every few batches, empty completely, scrub interior with mild soap and water, rinse well. Sun-dry to kill lingering pathogens.
- Seasonal Adjustments:
- Winter: Insulate drum with straw bales or old blankets; turn less often; decomposition slows but continues.
- Summer: Keep in partial shade to prevent overheating/drying out; turn more frequently.
- Scaling Up: Once comfortable, add a second drum—one for adding fresh material, one for finishing. Continuous production!
- Eco-Upgrades: Position near a rain barrel for easy moisture; collect leachate (compost “tea” runoff) in a tray underneath to use diluted.
Frequently Asked Questions (FAQ) ❓
How long does it take to make compost in a DIY tumbler? Typically 4–8 weeks in warm weather with proper balance and regular turning. Cooler climates or less frequent turning can extend to 2–4 months.
Is a DIY tumbler better than buying a commercial one? Often yes—for cost savings, customization, and satisfaction. Commercial models are convenient but many are overpriced and less sturdy. DIY lets you make exactly what fits your space and needs.
Can I compost in winter with a backyard tumbler? Yes! Activity slows below 50°F (10°C), but the insulated, enclosed design protects better than open piles. Keep turning occasionally and insulate if possible.
How much compost will a 55-gallon tumbler produce? About 10–20 gallons of finished compost per full cycle (depending on materials and efficiency). With good management, you can harvest 3–6 batches per year.
Do I need a compost activator or accelerator? Usually not—proper greens/browns balance and turning do the job. If starting slow, a handful of garden soil, finished compost, or manure provides a microbial boost.
Will it attract rodents or pests? Very rarely if the lid latches securely and you avoid meat/dairy. The rotation and enclosure make it far less attractive than open piles.
Conclusion 🎉
Building and using your own DIY backyard compost tumbler transforms kitchen and yard waste into one of the most valuable resources any gardener can have: rich, living compost that feeds your plants and trees naturally, improves soil health, saves money on fertilizers, and reduces environmental impact. 🌳♻️
Start small, observe how your mix behaves, adjust as you go, and soon you’ll have a steady supply of garden gold. Your trees will thank you with stronger growth, your vegetables with bigger harvests, and your conscience with the satisfaction of closing the loop.
Have you built a tumbler before? What’s your favorite “green” or “brown” to add? Drop a comment below—I’d love to hear your experiences and tips! Happy composting! 🌱😊


