
Have you ever stared at your pile of kitchen scraps—banana peels, coffee grounds, veggie trimmings—and wished there was a faster, more magical way to turn them into rich fertilizer for your garden? 😩 Traditional composting can take months (or longer in humid climates like ours in Barisal Division), and your plants and trees often end up with lackluster soil that drains poorly or lacks nutrients. What if I told you there’s a living, breathing solution that works quietly in the background, multiplies on its own, and produces black gold—vermicastings—that’s 5–10 times more nutrient-rich than regular compost?
That’s the power of breeding worms for composting, also known as vermicomposting. Red wiggler worms (Eisenia fetida) are tiny composting superheroes that devour organic waste, breed rapidly, and gift you with castings packed with water-soluble nutrients, beneficial microbes, and enzymes that supercharge plant growth and tree root health. 🌳
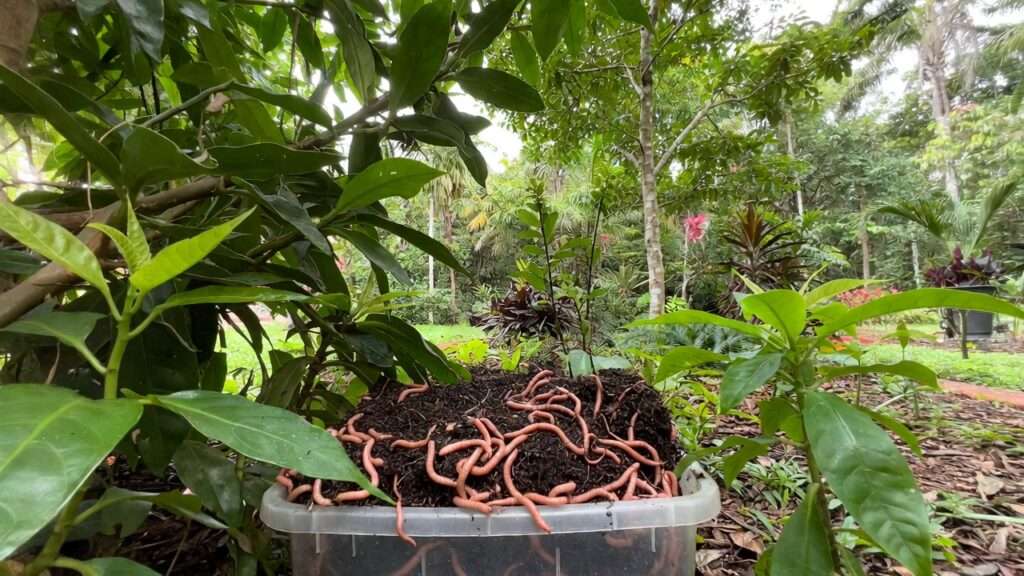
In warm, humid regions like Mathba, Barisal, where temperatures hover perfectly in the worms’ sweet spot much of the year, this method is especially rewarding. Start with just a pound of worms, provide the right home and food, and watch your population double (or more) every 60–90 days while transforming waste into premium soil amendment. No more buying expensive fertilizers or dealing with slow decomposition—your garden gets ongoing, organic nutrition that leads to stronger roots, vibrant leaves, better fruiting, and healthier trees.
As someone who’s maintained vermicompost systems for years, helping fellow gardeners in tropical areas boost their plant and tree care naturally, I’ve seen firsthand how a simple worm bin can revolutionize home gardening. This comprehensive beginner’s guide walks you through every step—from choosing worms to harvesting castings and applying them for maximum plant benefits—so you can build a thriving, self-sustaining system tailored to our local climate. Let’s dive in and get your worms breeding happily! 🐛✨
Understanding Vermicomposting Basics
Vermicomposting is composting with the help of specific earthworms—primarily red wigglers—that live on the surface and thrive in organic-rich environments. Unlike traditional hot composting, which relies on heat-loving bacteria and needs turning for aeration, vermicomposting is cooler, quieter, and worm-powered. The worms eat decaying matter, digest it in their gizzards (with help from grit), and excrete castings that are already broken down into plant-available form.
Why breed your own worms instead of buying them repeatedly? Starting small and letting nature do the work is incredibly cost-effective and sustainable. A healthy red wiggler can produce 2–3 cocoons per week under ideal conditions, with each cocoon hatching 2–5 baby worms after 2–3 weeks of incubation. Babies mature into breeders in about 8–10 weeks. This exponential growth means your initial 1 lb (around 1,000 worms) can become 5–10 lbs in just a few months—providing endless castings and even extras to share or sell! ♻️
The payoff for your plants and trees is massive:
- Improved soil structure — Castings create stable aggregates for better drainage and aeration.
- Nutrient boost — High in slow-release nitrogen (N), phosphorus (P), potassium (K), plus micronutrients like calcium and magnesium.
- Microbial magic — Billions of beneficial bacteria and fungi suppress soil-borne diseases and enhance nutrient uptake.
- Water retention — Castings hold up to 10 times their weight in water, crucial during dry spells.
- pH balancing — Near-neutral, helping acidic or alkaline soils.
Studies from sources like NC State Extension and university research confirm vermicast outperforms regular compost in promoting plant growth, root development, and disease resistance—perfect for fruit trees, veggies, and ornamentals in our region.
Best Worm Species for Beginners
Not all worms are created equal for composting!
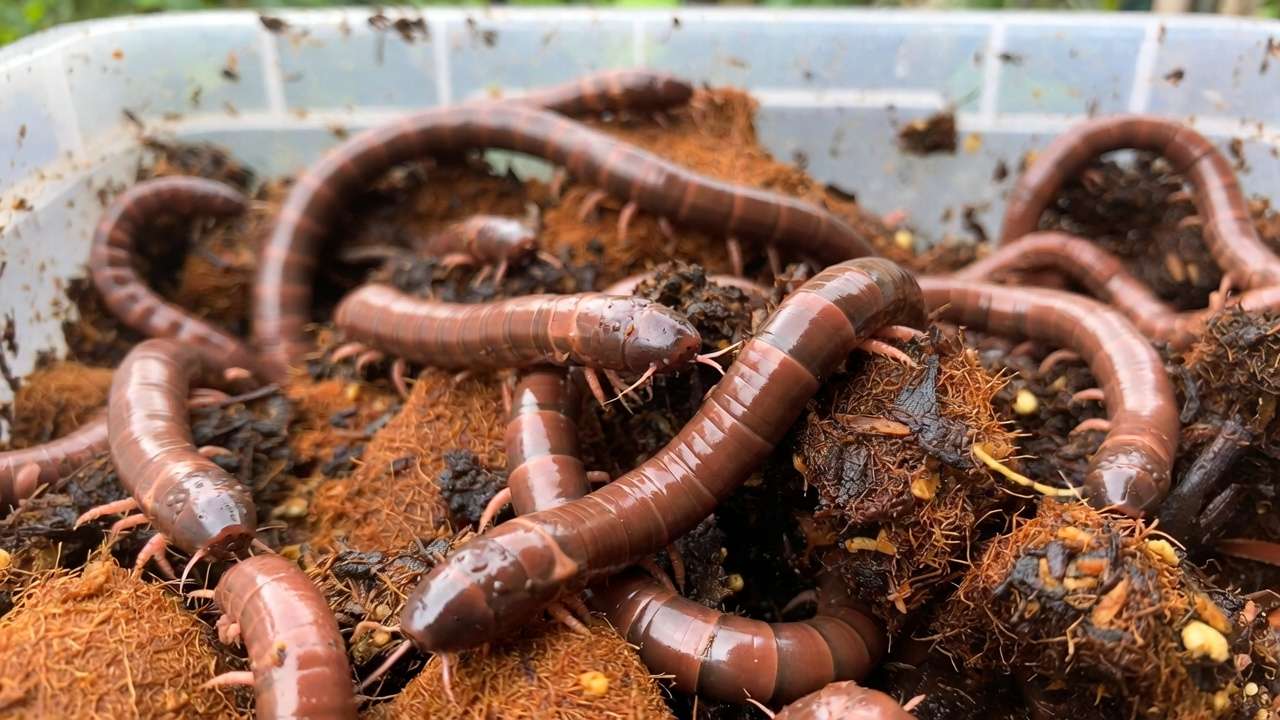
Red wigglers (Eisenia fetida) are the undisputed champions 🏆. They’re surface-dwellers, breed prolifically, tolerate a wide range (though prefer 55–85°F / 13–29°C), and handle kitchen scraps like pros. They reproduce fastest near 76–80°F with 70–90% humidity—conditions we often hit naturally in Barisal during cooler months.
Avoid common garden earthworms (deep burrowers that dislike rich organics) or nightcrawlers (slower breeders, prefer cooler temps). Stick with red wigglers for reliable breeding worms for composting.
Where to source healthy starters Look for local suppliers, agricultural co-ops, or online worm farms shipping to Bangladesh. Start with ½–1 lb per square foot of bin surface area for quick establishment. Avoid wild-caught worms—they may carry pests or diseases.
Building the Perfect Worm Bin
Your worms’ home is key to successful breeding and composting.
DIY vs. Pre-Made Bins
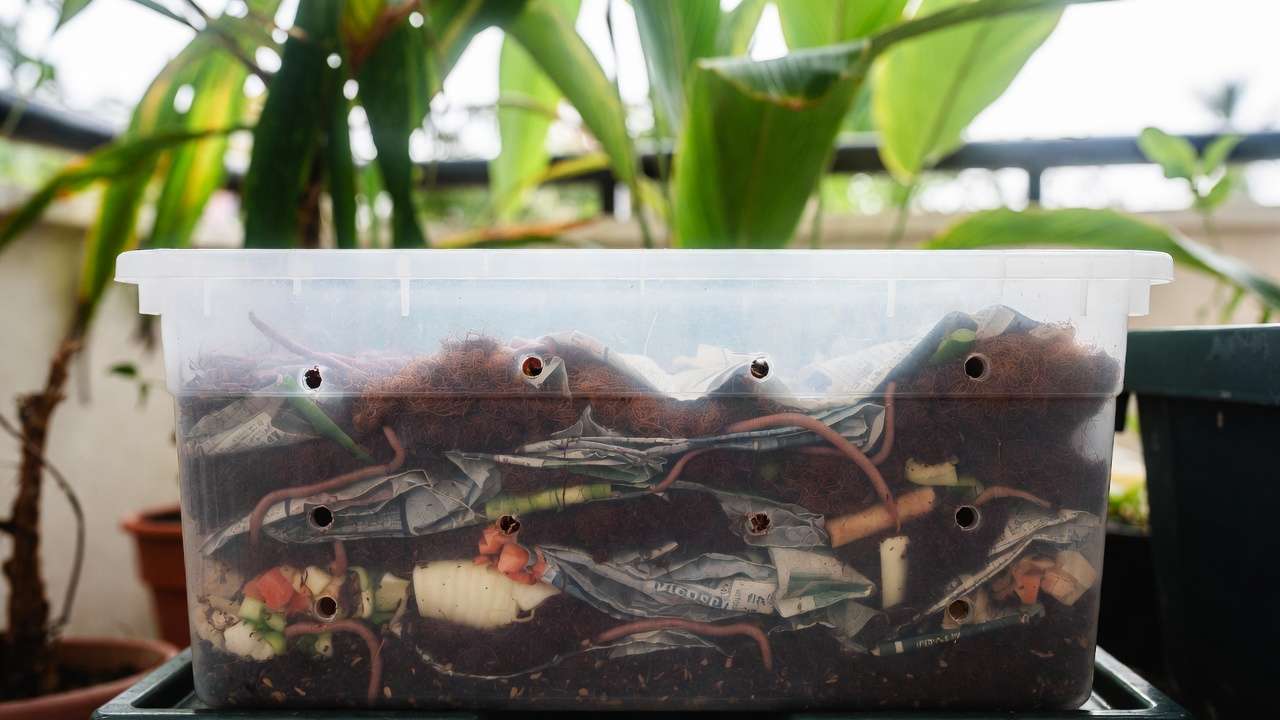
- DIY budget option — Use a 18–20 gallon plastic tote with drilled ventilation holes (1/8–1/4 inch) on sides and lid. Add drainage holes at the bottom with a tray underneath. Cost: low!
- Upgraded systems — Stacked tray bins (like Worm Factory style) or flow-through designs make harvesting easier as worms migrate upward. Great for scaling up.
Ideal Location & Environmental Conditions 🌡️ Place indoors (shaded balcony, kitchen corner) or outdoors under cover. Key parameters:
- Temperature: Optimal 65–80°F (18–27°C) for breeding; they slow below 55°F or stress above 90°F. In hot Barisal summers, keep bins shaded, elevate for airflow, or add frozen water bottles to cool.
- Humidity: 70–90% — bedding should feel like a wrung-out sponge.
- Light: Worms hate bright light (they’re photosensitive), so use opaque bins or cover.
- Ventilation: Holes prevent anaerobic smells.
Preparing Bedding – The Foundation 💧 Start with 4–6 inches of moist bedding: shredded newspaper/cardboard (browns), coconut coir (excellent in humid areas), aged leaves, or peat-free mix. Soak and squeeze to sponge consistency. Add a handful of garden soil for grit and microbes. This cozy bed encourages worms to settle and start breeding fast!
The Art of Feeding for Maximum Reproduction
Now that your bin is set up with cozy bedding, it’s time to feed your worms—and feed them right! Proper nutrition is the secret to turbo-charging breeding worms for composting. Happy, well-fed red wigglers produce more cocoons, leading to faster population growth and more castings for your plants. 🐛🍎
Red wigglers eat about half their body weight per day under ideal conditions (up to 100% when thriving). For a 1-pound starter colony, that means 0.5–1 pound of food scraps daily once established. Start slower in the first weeks to avoid overwhelming them.
What to Feed: The Best Foods for Fast Breeding Worms love a balanced “vegan” diet of greens (nitrogen-rich) and browns (carbon-rich). Favorites include:
- Vegetable scraps (carrots, lettuce, cucumber, zucchini, pumpkin—melons and squash are huge hits! 🎃)
- Fruit scraps (banana peels, apple cores, berries—soft fruits are especially loved)
- Coffee grounds and filters (great nitrogen source)
- Tea bags (remove staples)
- Crushed eggshells (adds grit for digestion and calcium for cocoon production)
- Aged leaves or shredded paper/cardboard
For maximum reproduction, offer a “gourmet smorgasbord”: Mix juicy fruits and veggies with coffee grounds and a sprinkle of eggshells. Studies and experienced vermicomposters report that high-sugar, soft foods like watermelon rinds or overripe bananas trigger faster cocoon laying (up to 2–3 cocoons per worm per week under perfect conditions).
Foods to Avoid 🚫
- Citrus (oranges, lemons—too acidic in large amounts)
- Meat, dairy, or oily foods (cause odors and attract pests)
- Spicy foods or onions/garlic in excess
- Salty or processed foods
Pro Tips to Accelerate Breeding
- Feed small amounts frequently — Bury food 2–3 inches deep in different spots to prevent smells and encourage even eating.
- Add grit — Eggshells or coffee grounds help worms grind food in their gizzards.
- Maintain optimal pH — Aim for 6.0–7.5 (slightly acidic to neutral); add eggshells if too acidic from fruits.
- Moisture & temperature — Keep bedding damp and temps around 76–80°F for peak reproduction.
- Breeding fact — Mature worms (8–10 weeks old) produce 2–3 cocoons weekly, each hatching 2–5 babies in 10–20 days. With good care, your colony can multiply 5–10x in months! ❤️🐛
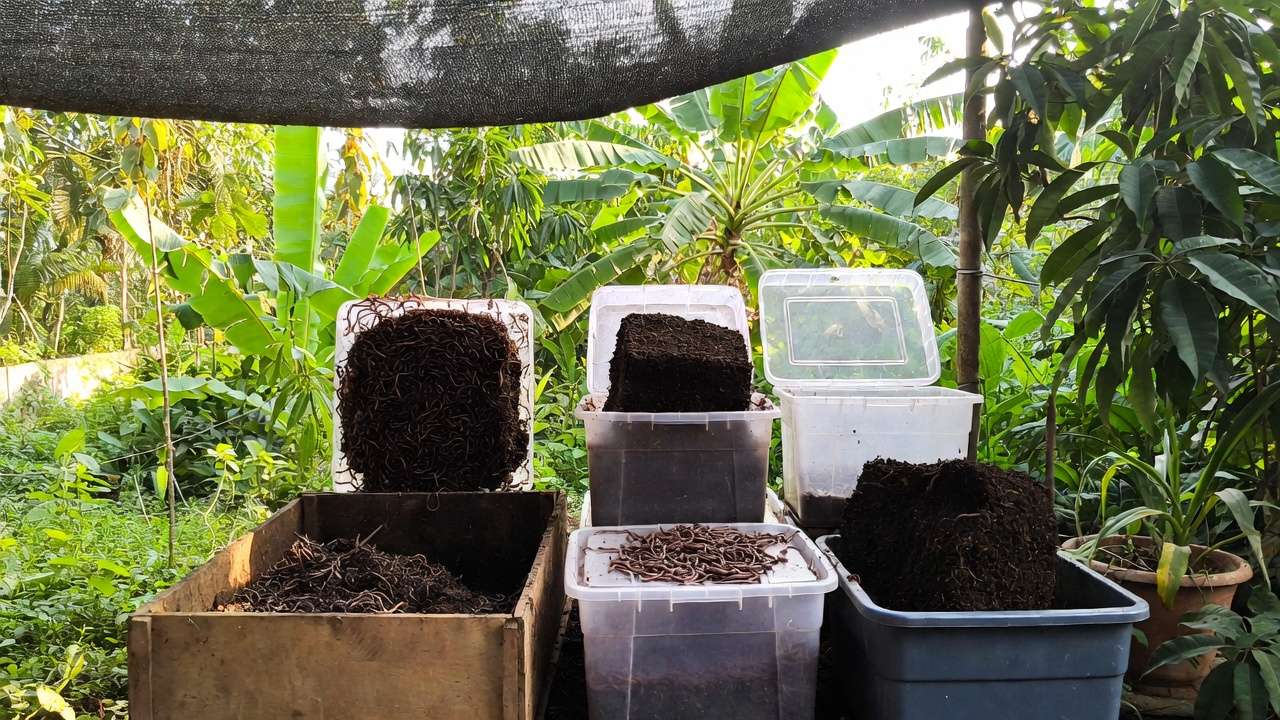
Breeding-Specific Strategies Create a “breeder bin” by moving mature worms to a fresh bin with extra-rich food (e.g., blended veggie pulp). This reduces competition and boosts cocoon production. Keep surface area large—worms breed best when not overcrowded.

(These images show happy red wigglers thriving in a well-fed bin—notice how active and clustered they are around food!)
Keeping Your Worms Happy & Multiplying
Maintenance is simple but crucial for ongoing success.
Daily/Weekly Maintenance Checklist
- Check moisture (squeeze bedding—should release a few drops).
- Monitor temperature and add shade/ice bottles during hot Barisal summers.
- Fluff bedding gently every 7–10 days for aeration.
- Add fresh food 2–3 times per week, burying to deter flies.
Common Problems & Fixes ⚠️
- Smelly bin — Overfeeding or too wet. Fix: Stop feeding 3–5 days, add dry bedding, fluff for air.
- Fruit flies — Cover food with bedding; use apple cider vinegar traps.
- Worms escaping — Usually too wet, dry, hot, or acidic. Adjust conditions immediately.
- Slow breeding — Often low temp, overcrowding, or poor food. Boost with warmer spot, more space, and nutrient-rich feeds.
- Mites or ants — Reduce moisture; keep bin elevated.
In humid climates like ours, over-wet bins are common—add absorbent cardboard if needed. With these fixes, most issues resolve in days.

(Example of a simple DIY tote setup—easy to maintain and perfect for beginners!)
Turning Castings into Garden Gold
Harvesting is exciting—the reward for your efforts! Wait 3–6 months until most material is dark, crumbly castings with few scraps left.
Methods for Beginners
- Light method (easiest): Dump bin contents on a tarp under bright light. Worms burrow down; scoop off top castings every 30 minutes.
- Migration method — Add fresh food to one side; worms move over, harvest the empty side.
- Screening — Use a 1/8-inch mesh to sift castings (worms stay behind).
Store castings in a breathable bag in shade—they last indefinitely.
Application Tips for Thriving Plants & Trees
- Top-dressing — Sprinkle 1/2–1 inch around plant bases or tree trunks for slow nutrient release.
- Worm tea — Steep 1 cup castings in 1 gallon water for 24–48 hours; dilute and water plants.
- Potting mix — Mix 20–30% castings with soil for seedlings or repotting.
- Tree care — Apply around drip line for stronger roots, better fruiting, and disease resistance. 🌳🍎
Your trees will show deeper green leaves, improved drought tolerance, and healthier growth thanks to the microbes and nutrients.
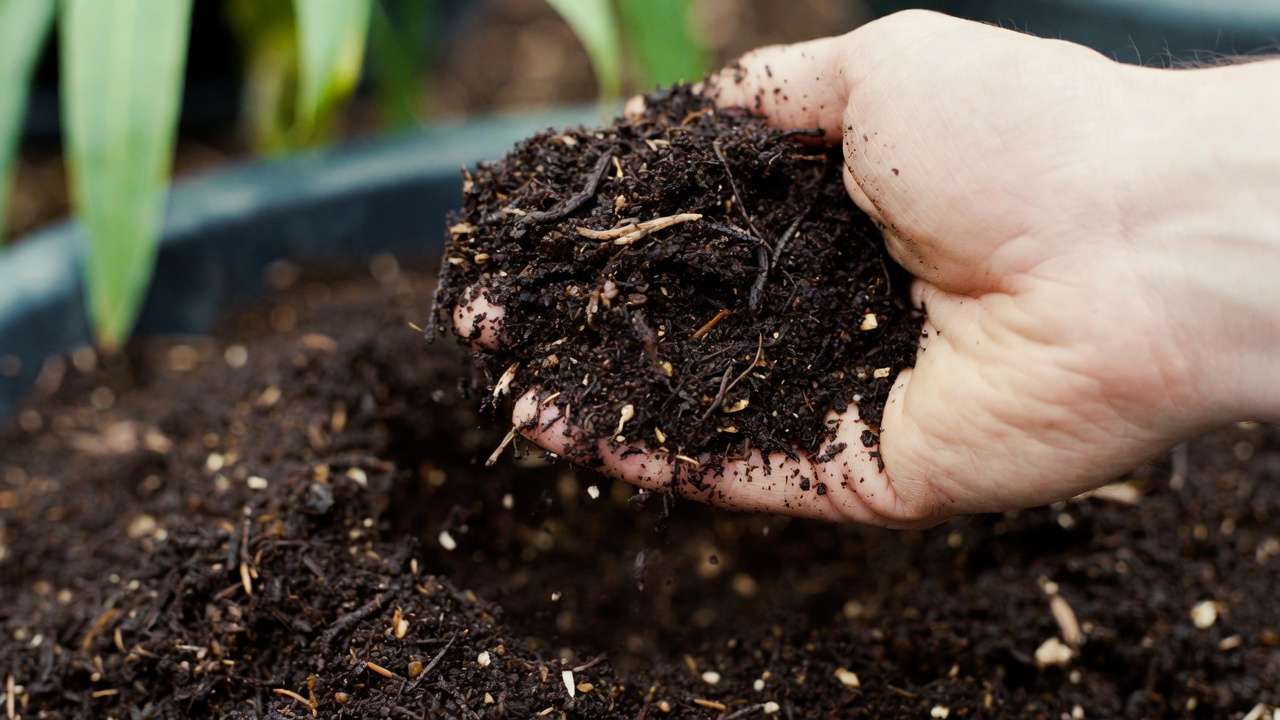
(Close-ups of rich, dark worm castings—pure black gold for your garden!)
Level Up Your Vermicompost Game
Once your basic system is humming along and producing beautiful castings, it’s time to think bigger. Scaling up your worm breeding operation not only gives you more fertilizer for your growing garden but also turns a simple hobby into a sustainable mini-ecosystem. Here are practical ways to advance while staying beginner-friendly. 🚀
Scaling Up Production
- Add more bins — When your original bin reaches capacity (about 1–2 lbs of worms per square foot of surface), start a second or third bin using worms from the first. This creates a continuous harvest cycle: one bin resting/harvesting while others actively feed and breed.
- Outdoor or semi-outdoor setups — In Mathba’s warm, humid climate, a shaded spot under a tree or on a covered porch works wonderfully year-round. Use larger wooden bins, old bathtubs, or even ground-level trench systems lined with plastic for drainage.
- Sell or share extras — Once your population explodes (very common after 6–9 months), you’ll have surplus worms. Local gardeners, nurseries, or Facebook groups in Barisal often look for red wigglers—turn your hobby into a small side income or community goodwill.
Seasonal Adjustments for Bangladesh Climates
- Monsoon season (June–October) — Heavy rains can make bins too wet. Elevate bins, add extra dry bedding (shredded cardboard), and cover to prevent flooding.
- Hot dry periods (March–May) — Temps can climb above 90°F. Move bins to maximum shade, bury them partially in soil for natural cooling, place frozen water bottles inside, or mist lightly in evenings. Worms slow breeding above 85°F but recover quickly once cooled.
- Winter (December–February) — Cooler nights (down to 55–65°F) slow activity. Insulate bins with blankets or move indoors if possible. Breeding will pause but worms survive well.
Integrating with Other Composting Methods Combine vermicomposting with bokashi (fermentation bucket) for faster pre-processing of tough scraps, or layer finished worm castings into traditional compost piles for a nutrient turbo-boost. This hybrid approach maximizes waste diversion and soil improvement.
Pro Tip from Experience After several cycles, I’ve found that feeding a “worm smoothie” once a month—blended veggie/fruit scraps with a bit of water—sparks massive cocoon production. It’s like an energy drink for breeders! Just don’t overdo it—too much liquid can drown them.
Worm Composting FAQs
Here are the questions I hear most often from beginners in our region—answered clearly so you can troubleshoot fast. ❓
How fast do red wigglers actually breed? Under optimal conditions (75–80°F, moist bedding, abundant food), mature worms produce 2–3 cocoons per week. Each cocoon hatches 2–5 babies in 10–20 days. Babies reach maturity in 8–10 weeks. Realistically, a healthy 1 lb starter colony can grow to 5–10 lbs in 4–6 months.
Can I use regular garden earthworms for composting? No—garden earthworms are deep-soil burrowers and dislike the rich, moist surface environment of a worm bin. They won’t breed well or process food efficiently. Stick with red wigglers (Eisenia fetida) or European nightcrawlers (for cooler setups).
What if my bin starts to smell bad? A healthy bin smells earthy, like fresh soil. Bad odors (rotten or ammonia) mean anaerobic conditions from overfeeding, too much moisture, or not enough air. Stop adding food for 3–5 days, fluff bedding, add dry shredded paper/cardboard, and ensure good ventilation. Problem usually fixes itself quickly.
Are red wigglers suitable for hot, humid places like Barisal? Yes—they thrive in 70–85°F with high humidity, which matches our climate for most of the year. Just provide shade and airflow during peak summer heat.
How much castings can I expect per month? A mature 2–3 lb colony can produce 1–2 lbs of finished castings per month once fully established. Scale that up with more worms/bins for serious garden feeding.
Do worms need darkness all the time? They prefer dark, but a little indirect light won’t harm them. Use opaque bins or keep lids on to prevent them from wandering toward light.
Can I put worm castings directly on my plants without composting further? Absolutely—worm castings are already fully processed and safe to use right away. They won’t burn plants like fresh manure can.
What if fruit flies appear? Cover fresh food scraps completely with bedding. Trap flies with a jar of apple cider vinegar + dish soap. Reduce feeding slightly until numbers drop.
Final Thoughts: Start Small, Grow Big, Feed Your Garden Naturally
Breeding worms for composting is one of the most rewarding, low-effort ways to close the loop in your home garden. You turn everyday kitchen waste into premium, microbe-rich fertilizer that makes your plants greener, your trees stronger, and your soil more alive—all while reducing garbage and saving money on store-bought amendments.
Start with one small bin, a pound of red wigglers, and a handful of veggie scraps. Within weeks you’ll see activity, within months you’ll harvest your first castings, and soon after that your worm family will be multiplying happily on its own. Your fruit trees will reward you with better flowering and fruit set, your vegetables will grow more vigorously, and you’ll feel the quiet pride of nurturing a living system.
The planet (and your backyard) will thank you. 🌍🪱
Ready to get started? Grab a bin, order some worms, and drop a comment below—tell me your first setup plans or any questions you have. I love hearing how fellow gardeners in Barisal and beyond are making vermicomposting work for them!
Happy worm farming, and happy gardening! 🌿✨


