

Imagine turning your kitchen scraps into black gold that transforms lackluster houseplants into vibrant, thriving green companions—all without stepping outside or dealing with bulky outdoor compost piles. 🌱 If you’re an indoor gardener tired of expensive fertilizers, struggling with poor soil quality, or simply wanting a sustainable way to boost plant health year-round, setting up an indoor worm farm (also known as vermicomposting) could be the game-changer you’ve been searching for.
In this comprehensive guide, we’ll walk you through every step of creating and maintaining a successful indoor worm farm tailored specifically for plant lovers. Whether you live in a small apartment in Khulna or any urban space, this low-odor, space-efficient system produces worm castings—nature’s premium organic fertilizer—that can dramatically improve soil structure, water retention, nutrient availability, and even help your indoor trees and houseplants resist pests and diseases.
By the end, you’ll have the confidence to start your own worm bin, avoid common pitfalls, harvest rich vermicompost, and use it to nurture healthier plants. Let’s dive in and build your indoor ecosystem today! 🪱
Why Set Up an Indoor Worm Farm? The Plant Care Benefits You Can’t Ignore
Vermicomposting isn’t just recycling—it’s supercharging your indoor gardening routine. Worm castings (the end product) contain a perfect balance of essential nutrients like nitrogen, phosphorus, potassium, calcium, and micronutrients, all in plant-available forms. Unlike synthetic fertilizers, they release slowly, preventing burn and promoting long-term soil health.
Key benefits for your houseplants and indoor trees include:
- Improved Soil Structure — Castings help create crumbly, aerated soil that roots love, reducing compaction in pots.
- Better Water Retention and Drainage — The humus-like material holds moisture without waterlogging, ideal for tropicals like monstera or fiddle-leaf figs.
- Enhanced Microbial Activity — Beneficial bacteria and fungi thrive, supporting root health and natural disease resistance.
- Natural Pest Deterrence — Some studies suggest castings can reduce issues like fungus gnats when used as a top-dress.
- pH Balancing — Worm castings tend toward neutral pH, helping acid-loving or alkaline-preferring plants.
For apartment dwellers or those in humid climates like Bangladesh, indoor worm farms are perfect: compact, nearly odorless when managed properly, and they handle kitchen waste efficiently without attracting flies.
Compared to traditional composting, vermicomposting works faster (weeks to months vs. months to years) and produces higher-quality output for potted plants.
Choosing the Right Worm Bin for Indoor Use
The foundation of success is selecting (or building) an appropriate bin. For beginners, aim for 10–20 gallons (about 40–75 liters) to start small and scale up.
Popular Options in 2025–2026:
- Stackable Tray Systems (e.g., Worm Factory 360 or similar brands) — Top recommendation for indoors. Worms migrate upward to fresh food, making harvesting easy by removing bottom trays full of finished castings. Excellent ventilation, leachate collection tray for “worm tea,” and compact footprint.
- DIY Plastic Storage Bin — Affordable and customizable. Use two 18–20 gallon opaque bins (one inside the other for drainage). Drill ventilation holes in the lid and small drainage holes in the bottom of the inner bin.
- Continuous Flow-Through (CFT) Bins — Like the Hungry Bin. Gravity allows castings to drop out the bottom—minimal disturbance.
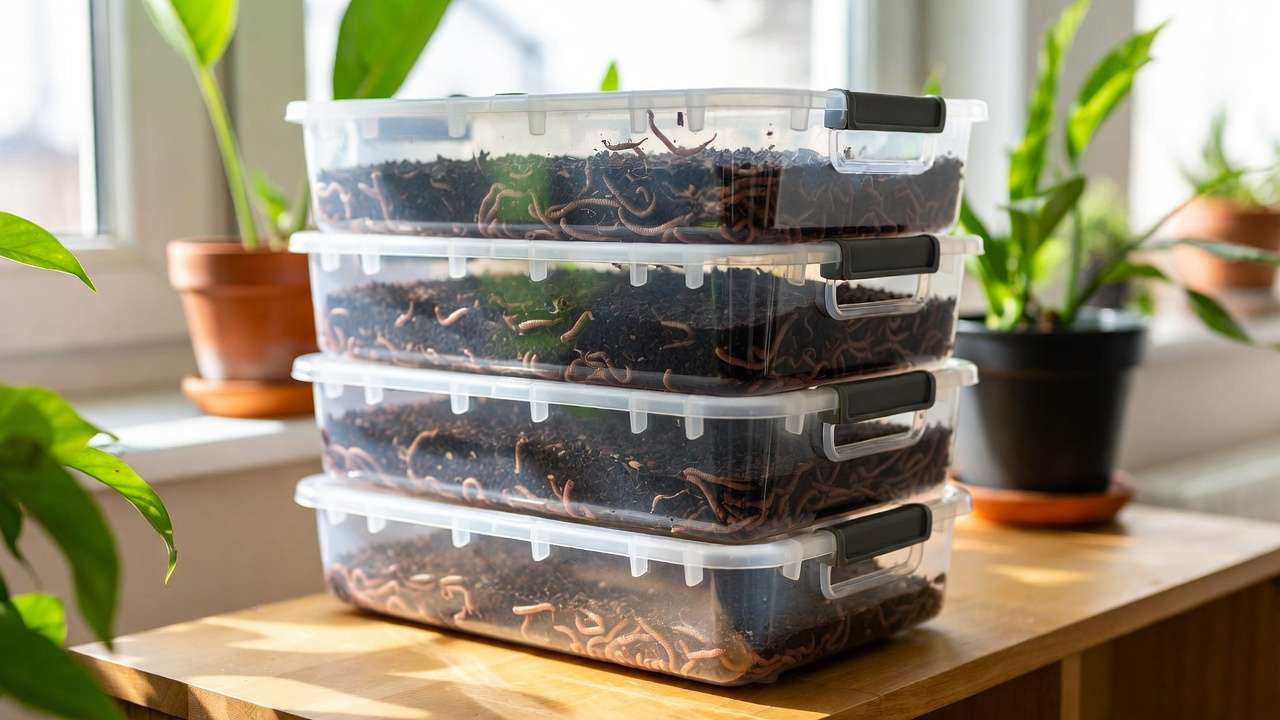
Avoid metal containers (can rust or heat up) or clear bins (worms prefer dark). Place your bin in a stable spot: under the kitchen sink, in a laundry room, or spare closet. Ideal temperature: 15–25°C (59–77°F)—room temperature works great in most homes.
Pro Tip: Start with a surface area of at least 2 square feet for good worm distribution and airflow.
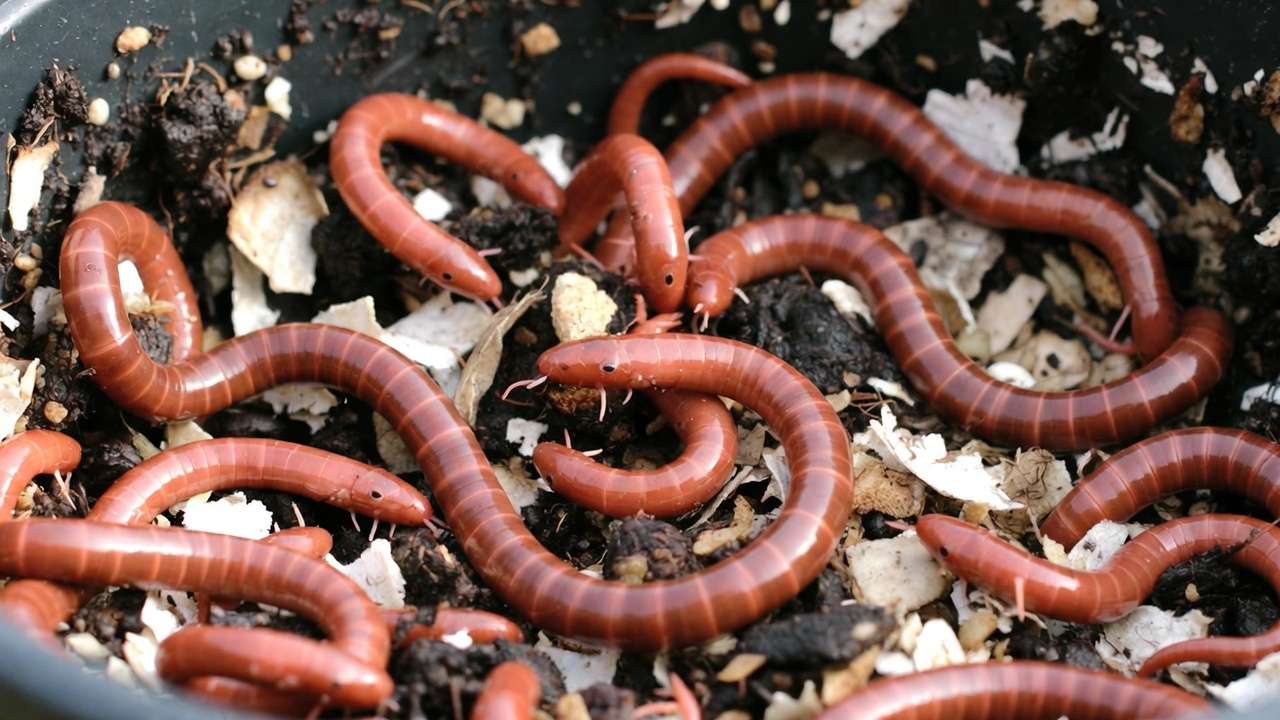
Sourcing the Best Composting Worms
Not all worms are equal for indoor vermicomposting. Red Wigglers (Eisenia fetida) or Redworms are the gold standard:
- They thrive in confined spaces.
- Process food quickly.
- Tolerate disturbances.
- Reproduce rapidly (doubling population every 60–90 days under ideal conditions).
Avoid nightcrawlers or earthworms from your garden—they prefer deeper soil and may not survive well indoors.
Where to Get Them:
- Online suppliers (search for local or international worm farms shipping to Bangladesh).
- Local gardening groups or agricultural extensions.
- Start with ½–1 pound (≈500–1,000 worms) for a beginner bin.
Acclimate them slowly: Don’t dump them in immediately. Let the bin settle first.
Preparing the Perfect Bedding
Bedding is the worms’ home, food, and moisture regulator. Aim for a carbon-rich mix that’s fluffy and moist like a wrung-out sponge.
Best Bedding Materials (use a mix):
- Shredded newspaper or cardboard (non-glossy)
- Coconut coir (excellent water retention, sustainable)
- Aged compost or potting soil (adds grit for worm digestion)
- Fall leaves (chopped)
- Egg cartons or paper towel rolls
Avoid: glossy paper, colored ink heavily, diseased plant material.
Step-by-Step Bedding Setup:
- Shred materials into 1–2 inch pieces.
- Soak in non-chlorinated water for 10–20 minutes, then squeeze out excess.
- Fill bin ⅔–¾ full (about 6–8 inches deep).
- Fluff it up—worms need air pockets.
- Optional: Add a handful of garden soil for grit and microbes.
Let bedding sit 3–7 days to condition before adding worms.
Adding Worms and Starting to Feed
Once bedding is ready:
- Gently place worms on top.
- They’ll burrow in within hours if conditions are right.
- Wait 1–2 weeks before feeding heavily—let them acclimate.
Feeding Guidelines (Golden Rule: Start Slow!)
Worms eat roughly half their body weight per day once established, but beginners often overfeed, causing the #1 problem: odors and fruit flies.
- What to Feed: Vegetable peels, fruit scraps (no citrus in excess), coffee grounds, tea bags, crushed eggshells, small amounts of cooked veggies.
- Avoid or Limit: Meat, dairy, oily foods, spicy items, citrus (acidic), onions/garlic (strong smells), diseased plants.
- How to Feed: Bury scraps in pockets under bedding to reduce odor and flies. Start with ¼–½ cup per pound of worms, increase gradually.
- Frequency: Every 3–7 days, depending on consumption.
Monitor: If food disappears quickly and no smell, add more. If pile-up occurs, pause feeding.
Maintaining Your Indoor Worm Farm: Temperature, Moisture, and Aeration
Success comes from mimicking nature:
- Temperature — 15–25°C optimal. Below 10°C worms slow; above 30°C they may die. In hot months, place in cooler spot or add frozen water bottles.
- Moisture — 70–80% (squeeze test: few drops). Too dry? Add water. Too wet? Add dry bedding.
- Aeration — Fluff bedding weekly with a hand fork. Holes in bin provide oxygen.
- pH — Worms prefer near-neutral (6–7). Add eggshells if too acidic.
Leachate (liquid drainage) = worm tea! Dilute 1:10 with water for foliar feed or soil drench—super for plants! 🚿
Harvesting Worm Castings: When and How
Your bin is ready to harvest when 70–80% is dark, crumbly castings (usually 3–6 months).
Methods:
- Light Separation — Dump contents on plastic sheet under bright light. Worms move down; scrape castings off top.
- Tray Migration — In stackable bins, add fresh food to top tray; worms move up.
- Screening — Use ⅛-inch mesh to sift castings.
Store finished castings in breathable bag. Use within 6–12 months for max potency.
Using Worm Castings to Supercharge Your Houseplants and Trees
This is where the magic happens for plant care enthusiasts:
- Potting Mix Amendment — Mix 10–30% castings into soil for new plants or repotting.
- Top-Dressing — Sprinkle ½–1 inch on soil surface; water in. Great for established pots.
- Worm Tea — Steep 1 cup castings in 1 gallon water 24–48 hours (aerate if possible). Use as liquid fertilizer every 2–4 weeks.
- Seed Starting — Add to seedling mix for stronger starts.
- Troubleshooting Plant Issues — Use for yellowing leaves (nutrient boost), poor growth, or recovery after repotting.
Many growers report bigger leaves, more blooms, and healthier roots within weeks.
Common Mistakes and Troubleshooting: Learn from Others’ Errors
Even experts slip—here are the top issues and fixes:
- Overfeeding → Smells anaerobic. Fix: Stop feeding 1–2 weeks, add dry bedding.
- Too Wet → Sour odor, worms escape. Add carbon, improve drainage.
- Fruit Flies → Cover food scraps fully, use apple cider vinegar trap nearby.
- Worms Dying/Escaping → Check temp/moisture. Escapes often mean conditions poor.
- Slow Processing → Too cold, not enough food variety, or low population.
Regular checks (weekly) prevent 90% of problems.
Scaling Up and Advanced Tips
Once comfortable:
- Add a second bin.
- Experiment with bokashi pre-composting for meat/dairy.
- Breed worms for extra castings or sharing.
- Integrate with aquaponics or indoor hydroponics.
Sustainability bonus: Reduces household waste by 20–30% and cuts fertilizer purchases.
Final Thoughts
Setting up an indoor worm farm is one of the most rewarding steps you can take as a plant caretaker. It closes the loop on waste, creates free premium fertilizer, and deepens your connection to natural cycles—all indoors. Start small, be patient, and watch your houseplants thank you with lush growth.
Ready to begin? Grab a bin, some bedding, and those red wigglers. Your plants (and the planet) will love you for it! 🌿🪱
Advanced Troubleshooting: Deeper Dives into Persistent Problems
Building on the basics, let’s address more nuanced issues that experienced indoor vermicomposters in humid climates like Khulna often face. These draw from real-world feedback and extension service recommendations.
- Anaerobic Conditions (Foul, Rotten Egg Smell) Caused by overfeeding, excess moisture, or poor aeration. The bin turns slimy and blackish. Fix: Immediately stop adding food. Gently turn the contents to introduce oxygen. Add generous amounts of dry shredded cardboard or newspaper (aim for 2–3 parts carbon to 1 part wet material). If leachate is excessive, drill extra drainage holes and elevate the bin slightly. In 1–2 weeks, the smell should subside as aerobic microbes rebound. Prevent recurrence by feeding only what worms can process in 3–4 days.
- Mite or Mold Infestations White mold is usually harmless (beneficial fungi), but excessive mold or tiny white/gray mites indicate too much moisture or acidic conditions. Solution: Reduce watering, add more dry bedding, and bury food deeper. For mites, a light top layer of diatomaceous earth (food-grade) can help without harming worms. Mold often resolves itself as balance returns.
- Worms Trying to Escape Common at night—look for worms on walls, lid, or floor. Triggers: extreme temperature swings, overfeeding leading to heat/acid buildup, or chemical contamination (e.g., residues from citrus or cleaning products). Remedy: Check and correct temperature/moisture first. Add a bright light above the bin temporarily (worms hate light and will burrow back in). Tape any gaps around the lid. If persistent, harvest and restart in fresh bedding.
- Slow or No Reproduction After 2–3 months, you should see tiny cocoons and baby worms. If not: population too low, poor food variety (add more variety like pumpkin or melon scraps), or temperature consistently below 18°C. Boost with extra protein-rich feeds (e.g., occasional coffee grounds) and ensure consistent 20–25°C.
- Fruit Flies or Gnats Persistent in tropical humidity. Prevention/Control: Always bury food 2–3 inches deep. Cover the surface with a damp sheet of newspaper or cardboard. Set up a simple trap: jar with apple cider vinegar + drop of dish soap + plastic wrap with holes. Empty weekly. Some growers use a layer of moist coco coir on top as a barrier.
Regular monitoring (every 5–7 days) and small adjustments keep most issues minor. Patience is key—your worm community self-regulates over time.
Scaling Up Your Indoor Worm Farm Safely
Once your first bin is thriving (3–6 months in), many plant enthusiasts expand to produce more castings for larger collections or even sharing with fellow gardeners.
- Add Parallel Bins Start a second or third identical system using worms harvested from the first. This spreads risk—if one bin has issues, others continue.
- Upgrade to Multi-Tray or Flow-Through Systems Invest in a 3–5 tray stackable unit. Add food only to the top tray; worms migrate up as lower trays finish. Harvest by removing bottom tray—minimal mess.
- Increase Population Gradually Aim to double every 3–4 months under ideal conditions. Feed more volume only after observing full consumption. Rule of thumb: 1 lb of worms processes ~0.5 lb food scraps per day once mature.
- Space Optimization for Apartments Stack bins vertically on shelves in a shaded corner. Use wheeled platforms for easy moving during cleaning. In humid areas, ensure good airflow to prevent mold on exteriors.
- Pre-Composting with Bokashi (Advanced Hybrid) For meat/dairy scraps you can’t feed directly: ferment first in a bokashi bucket (anaerobic with bran inoculant), then add to worms after 2 weeks. This expands what you can compost indoors.
With careful scaling, a small setup can produce 20–50+ kg of castings annually—enough for dozens of houseplants and small indoor trees.
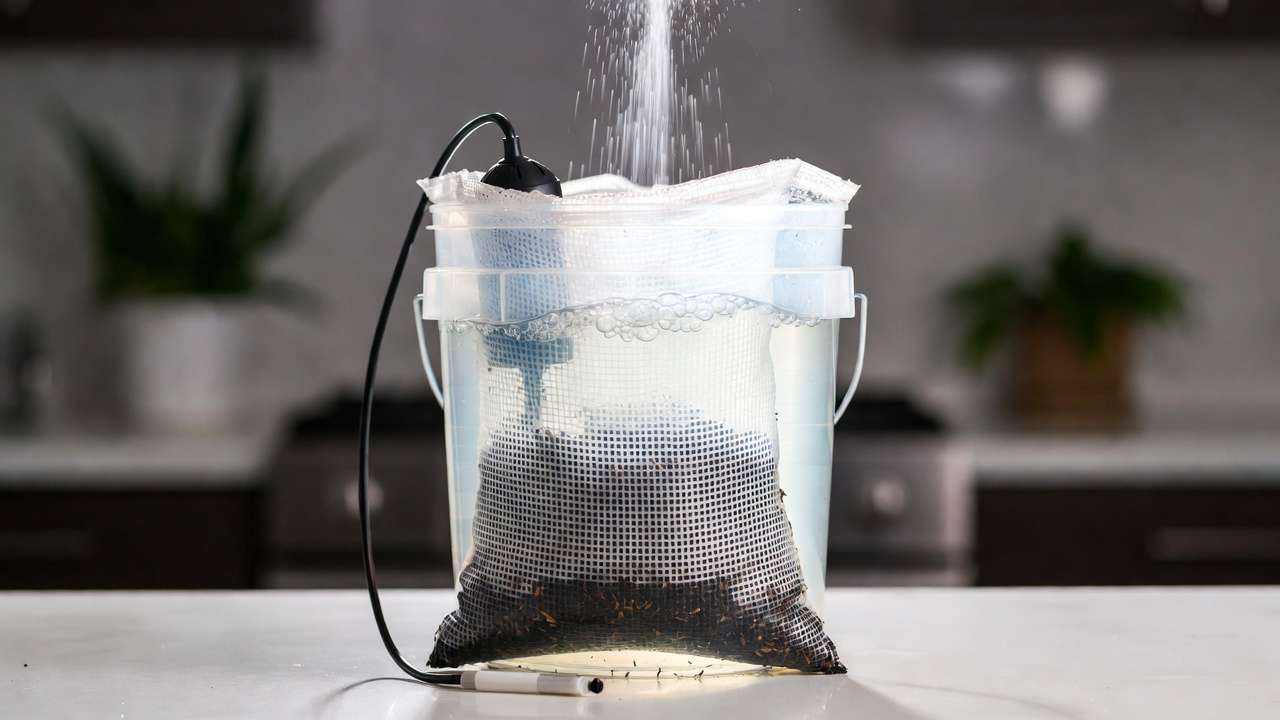
Bonus: Making and Using Advanced Worm Tea Recipes
Worm tea (vermicompost extract) is a powerhouse liquid fertilizer for foliar sprays or root drenches.
Basic Aerated Worm Tea (Best Results):
- Fill a 5-gallon bucket halfway with non-chlorinated water.
- Add 1–2 cups mature castings in a mesh bag or old sock.
- Aerate with an aquarium pump for 24–48 hours (increases beneficial microbes).
- Dilute 1:10–1:20 with water.
- Use immediately—microbes are alive!
Non-Aerated Quick Version: Steep 1 cup castings in 1 gallon water for 24 hours, stir occasionally, strain, dilute 1:10.
Apply every 2–4 weeks during growing season. Great for reviving leggy pothos, boosting monstera growth, or helping bonsai/ficus recover.
Safety Note: Always test on one leaf first to check for sensitivity.
Frequently Asked Questions (FAQs)
How much kitchen waste can my worm farm handle? Start with ¼–½ lb scraps per day for 1 lb worms. Mature systems handle up to 1 lb/day.
Will it smell in a small apartment? Properly managed—no. Bury food, maintain moisture balance, and use carbon bedding. Any mild earthy smell is normal.
Can I use worm castings for all plants? Yes! Safe for succulents (use sparingly), orchids (top-dress lightly), carnivorous plants (avoid or dilute heavily), and trees in pots.
How long do worms live? Red wigglers live 1–2 years, but populations sustain through reproduction.
Is vermicomposting worth it in hot, humid Khulna? Absolutely—indoor control keeps temps stable. Many locals succeed by placing bins in air-conditioned rooms or shaded areas.
Conclusion: Transform Your Plant Care Routine Today
An indoor worm farm isn’t just composting—it’s a living, breathing mini-ecosystem that rewards you with superior, chemical-free nutrition for every houseplant and indoor tree in your collection. By following this detailed, step-by-step approach—from bin selection and worm acclimation to advanced harvesting, troubleshooting, and application—you’ll avoid beginner frustrations and achieve thriving results faster.
Start small, observe closely, and enjoy the process. In a few months, you’ll have dark, crumbly castings that make your plants stand taller, leaves glossier, and growth more vigorous—all from scraps you’d otherwise throw away.
Your green thumb just got greener. Happy vermicomposting! 🌿🪱✨


