
Imagine this: You’ve just brought home a promising little nursery stock juniper or a vibrant ficus, full of potential to become your next stunning bonsai masterpiece. But as you stare at its wild branches, one big question hits you — should you grab the wire and bend them into dramatic positions right away, or patiently prune and let nature guide the growth? Many bonsai hobbyists face this exact dilemma, often ending up with scarred branches from rushed wiring or years of slow progress from pruning alone. The good news? The clip-and-grow method vs. wiring debate has clear answers based on species, your skill level, time, and desired style. In this in-depth guide, we’ll break it down head-to-head so you can choose (or smartly combine) the right technique for healthier, more beautiful trees. Let’s dive in! 🌱
Bonsai shaping is an art that balances control with the tree’s natural vigor. Two primary techniques dominate: the clip-and-grow method (also called grow-and-clip or pruning-based development) and wiring (mechanical bending). Both build structure, ramification (fine branching), and taper, but they differ hugely in speed, risk, aesthetics, and suitability. Understanding clip-and-grow vs. wiring helps avoid common pitfalls like wire scars, weak growth from over-pruning, or unnatural-looking branches. Whether you’re a beginner in Dhaka tending indoor ficus or an intermediate enthusiast styling conifers, this comparison will empower you to make confident decisions.
What Is the Clip-and-Grow Method? 🌿
The clip-and-grow method relies on selective pruning to direct energy and encourage back-budding, creating natural, proportional branching over time. It’s rooted in traditional Chinese Lingnan penjing, where minimal intervention yields organic, flowing forms.
Understanding Clip-and-Grow Basics You let branches extend freely to build thickness and length, then “clip” them back to force new buds lower down or in desired directions. Repeated cycles of growth → prune → regrow build fine ramification without force. This low-stress approach promotes tree health, as it works with apical dominance and natural growth patterns rather than against them.
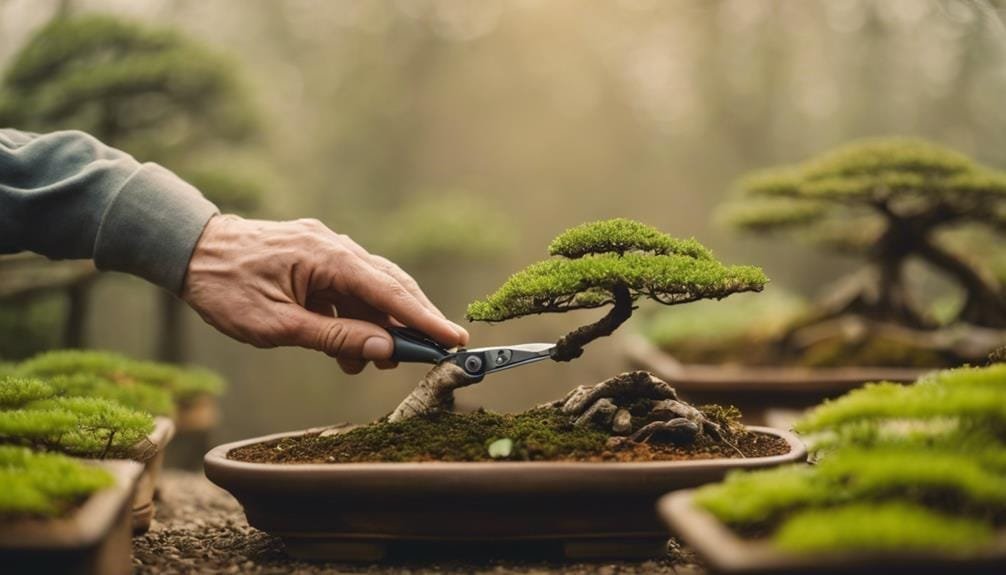
Step-by-Step: How to Apply Clip-and-Grow
- Allow new shoots to grow out 6–12 inches (depending on species) to strengthen them.
- Prune back to 2–4 leaves or nodes, cutting above an outward-facing bud to direct growth.
- Time it right: Prune after spring flush for deciduous or during active growth for tropicals.
- Use sharp concave cutters for clean cuts that heal fast — never tear!
- Repeat seasonally, always prioritizing strong apical tips for taper.
Best Tree Species for Clip-and-Grow 🌱 This shines with vigorous back-budders:
- Deciduous: Japanese maples, Chinese elms, beech, hornbeam — they respond with explosion of fine twigs.
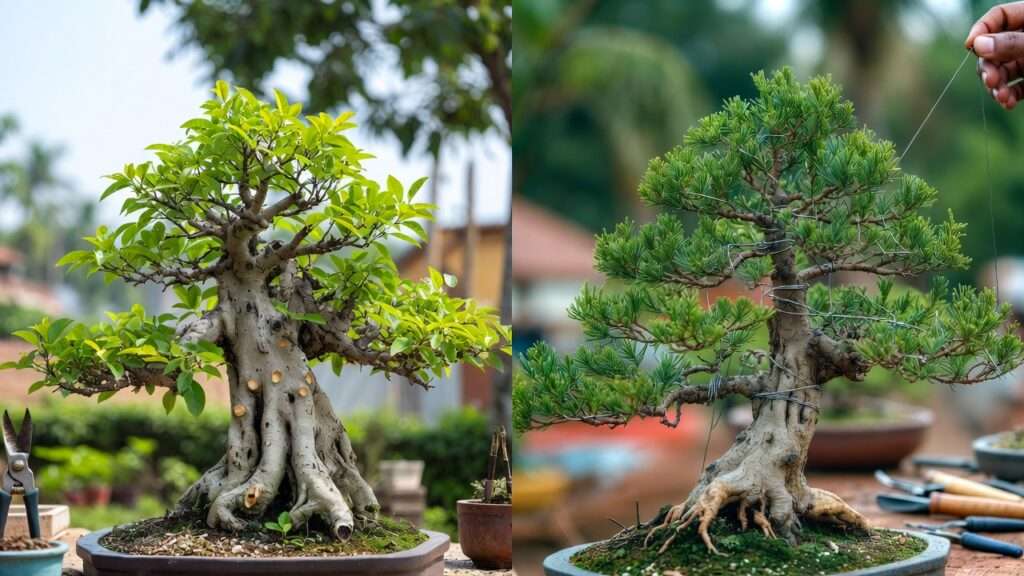
- Tropicals/fast growers: Ficus (retusa, benjamina), Brazilian rain tree, bougainvillea, jade — fast cycles build pads quickly. Why? These species forgive pruning errors and develop natural twists/twigs that look authentic in informal upright or broom styles. Conifers like juniper struggle here without initial wiring.
What Is Wiring in Bonsai? 🔧
Wiring uses annealed copper or aluminum wire to bend and hold branches in precise positions until they set. It’s the hallmark of Japanese bonsai styling for dramatic, controlled forms.
Wiring Fundamentals Wire allows immediate repositioning of stiff or young branches, creating movement, pads, and dramatic cascades impossible with pruning alone. Aluminum is softer and beginner-friendly (removes easily, less scarring on thin bark), while copper is stiffer for conifers (holds better long-term).
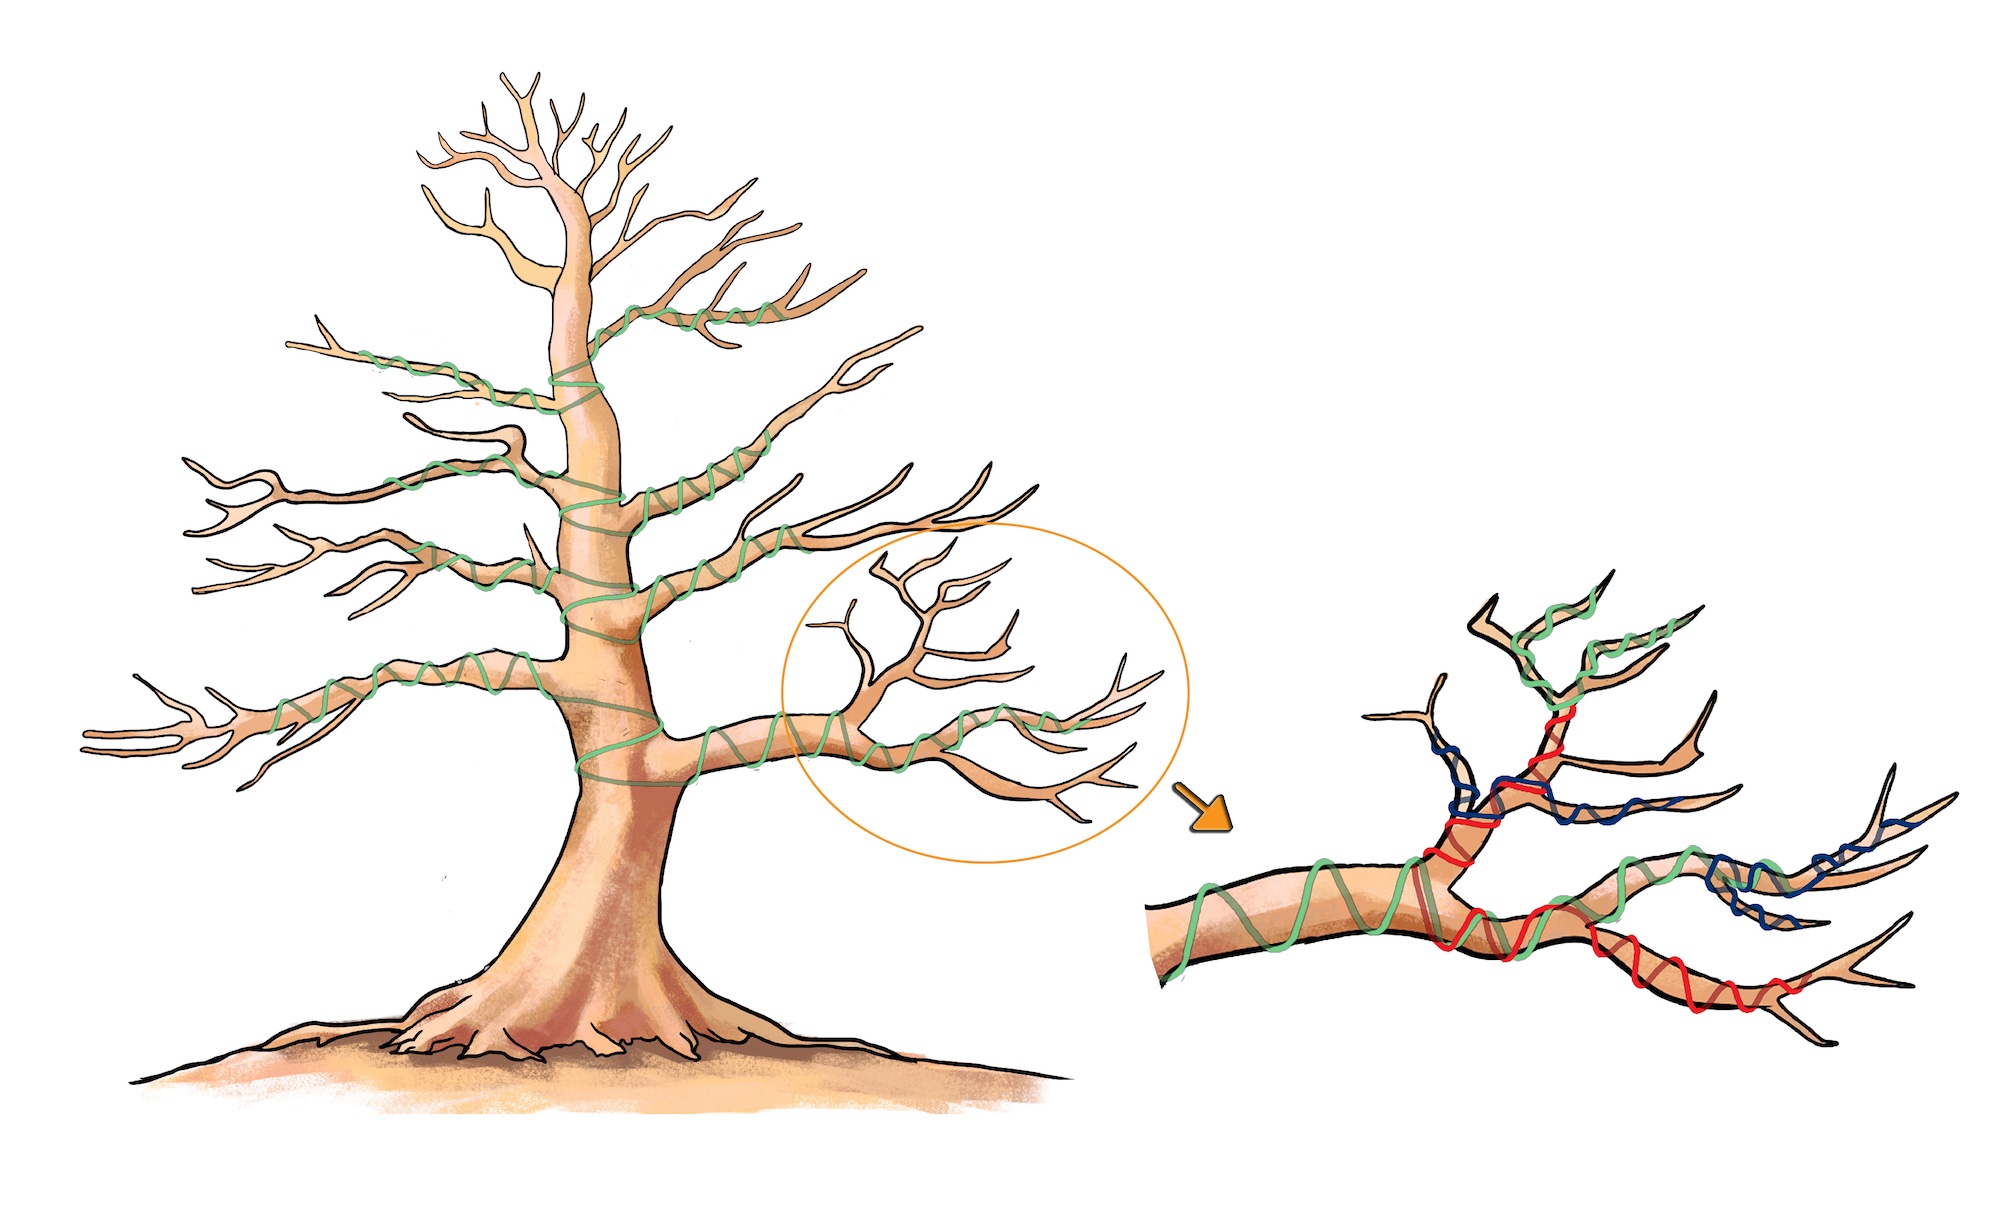
Step-by-Step: Safe Wiring Technique
- Wire during dormant/early growth (spring for most).
- Start at trunk-branch junction, coil at 45° angle — one wire per branch section.
- Bend gently; never force — hear a crack? Stop!
- Check monthly as trunk/branch thickens; remove before wire bites in (4–12 months).
- After removal, branches may spring back slightly on conifers — rewire if needed.
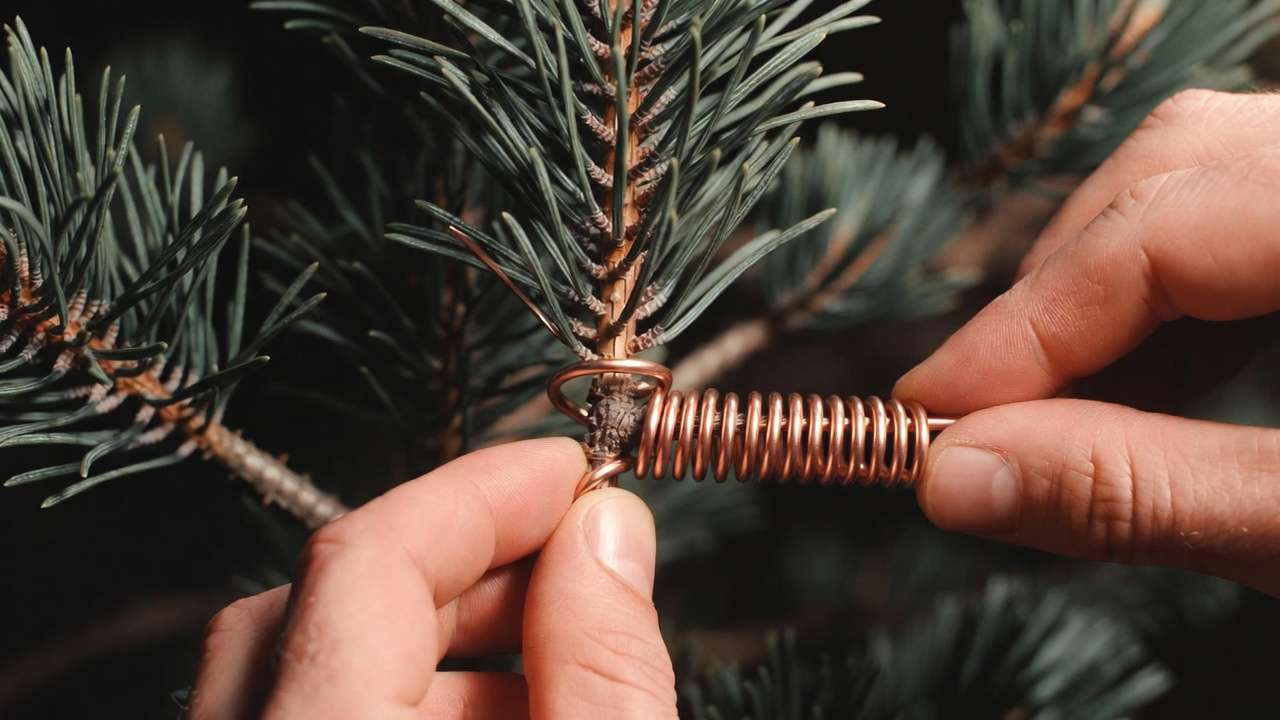
Best Tree Species for Wiring 🌲 Conifers excel: Juniper, pine (Japanese black/white), spruce, cypress — woody branches hold shape well. Some deciduous benefit early for major bends before switching to clip-and-grow.
Clip-and-Grow vs. Wiring: Head-to-Head Comparison ⚖️
No method is universally superior — it depends on your goals. Here’s a clear breakdown:
| Aspect | Clip-and-Grow 🌿 | Wiring 🔧 | Winner? (Depends On…) |
|---|---|---|---|
| Speed of Results | Slower (years for full ramification) | Faster (months for major shaping) | Wiring for quick transformations |
| Natural Appearance | Highly organic, tapered, fine twigs naturally | Can look artificial if over-wired; precise but rigid | Clip-and-Grow for realism |
| Risk of Damage | Very low — no bending stress | Higher — scars, breaks if poor technique | Clip-and-Grow for safety |
| Control & Precision | Gradual, tree-dependent | Immediate, exact angles | Wiring |
| Skill Level Needed | Beginner-friendly | Intermediate/advanced | Clip-and-Grow for starters |
| Ramification Build | Excellent — repeated cuts force dense budding | Limited unless combined with pruning | Clip-and-Grow |
| Time Investment | High patience; long cycles | Quicker initial, but maintenance rewiring | Wiring short-term |
Pros and Cons Breakdown Clip-and-Grow Pros: No risk of breakage, builds healthier trees, ultra-natural look ✨, excellent for fine ramification. Cons: Takes longer, less dramatic bends possible early on.
Wiring Pros: Precise control 🎯, faster styling for yamadori or stiff species, enables complex designs like cascades. Cons: Risk of wire marks/scars, potential branch death if left too long, requires skill to avoid damage.
When to Choose Clip-and-Grow (and Real-Life Examples) 🌳
The clip-and-grow method is often the smarter, safer starting point for most hobbyists — especially if you value long-term tree health, natural aesthetics, and minimal risk. It’s particularly powerful when:
- You’re working with tropical or subtropical species that grow vigorously year-round (ficus, Brazilian rain tree, serissa, portulacaria, bougainvillea).
- You’re styling deciduous trees (Japanese maple, Chinese elm, beech, trident maple, hornbeam) where back-budding is explosive and fine ramification develops beautifully through repeated pinching.
- You want an informal upright, broom, literati, or any style that emphasizes organic flow over dramatic twists.
- You’re a beginner or intermediate who wants to avoid the learning curve (and potential heartbreak) of wire scars.
- You have field-grown or larger nursery stock where building taper and branch thickness naturally is the priority before refining details.
Real-Life Example 1: Ficus retusa Indoor Bonsai A common scenario in Dhaka’s warm, humid climate: You buy a 1-meter-tall nursery ficus with thick trunk but leggy branches. Wiring the brittle older wood risks snapping; clip-and-grow lets you cut back hard in spring/summer, forcing dozens of new buds along the trunk and old branches. After 2–3 growing seasons of selective pruning (always leaving strong apical shoots), you end up with dense pads and perfect taper — all without a single wire mark. Many urban tropical bonsai enthusiasts in Bangladesh and Southeast Asia rely almost exclusively on this method for their indoor collections.
Real-Life Example 2: Trident Maple from Collected Stock A field-grown trident maple yamadori often has thick, stiff branches. Early heavy wiring can crack them. Instead, top enthusiasts let it grow freely for 1–2 years to thicken sacrifice branches, then clip-and-grow to build the framework. The result? Graceful, naturally tapering branches that look decades older than they are. Masters like Nigel Saunders have long advocated this “slow food” approach for maples — patience yields elegance that forced bending rarely matches.
Expert Insight 🌟 Kyuzo Murata (legendary Japanese bonsai master) famously said that the finest trees are “grown, not wired.” While that’s partly poetic, it reflects a core truth: clip-and-grow builds physiologically stronger trees with better energy distribution and finer twigging over decades.
When to Choose Wiring (and Real-Life Examples) ⚡
Wiring becomes the go-to technique when you need immediate structural change, dramatic movement, or when working with species that don’t back-bud reliably after hard pruning.
Choose wiring when:
- You’re styling conifers (juniper procumbens, Japanese black pine, hinoki cypress, spruce) — their woody branches hold bends exceptionally well.
- You’re creating cascade, semi-cascade, windswept, or literati styles that require sharp angles and flowing lines impossible to achieve gradually.
- You’re working with yamadori (collected wild trees) or nursery stock with stiff, already-thick branches that won’t respond quickly to pruning alone.
- You want faster visible progress — especially if you’re showing trees in exhibitions or just love seeing transformation within a season or two.
Real-Life Example 1: Juniper Procumbens ‘Nana’ Nursery Stock A classic beginner project: a small potted juniper with straight, upright branches. Wiring the primary branches down in late winter/early spring creates instant pads and movement. After setting (6–12 months), remove wire and switch to clip-and-grow for ramification. Without that initial wiring, you’d spend 5+ years waiting for natural downward growth that may never happen strongly enough.
Real-Life Example 2: Japanese Black Pine Styling Japanese black pine rarely back-buds on old wood. Wiring young candles and branches into position is almost mandatory early in development. Once the structure is set, clip-and-grow (candle pinching) refines the foliage pads. This hybrid approach is the standard in professional Japanese bonsai nurseries.
Expert Insight 🌟 Modern bonsai artists like Ryan Neil (Bonsai Mirai) emphasize that wiring is a “tool for youth” — use it heavily on flexible young branches to establish structure, then transition to clip-and-grow for refinement and longevity.
The Best Approach: Combining Clip-and-Grow + Wiring 🤝
Here’s the secret most professionals won’t tell you at first: the highest quality bonsai almost always use both techniques in sequence.
Typical professional timeline:
- Years 1–3 (or first 1–2 growing seasons): Heavy wiring to establish trunk line, primary branch structure, and movement.
- Years 3+: Remove wire once branches set → switch to clip-and-grow for ramification, taper refinement, and pad development.
- Ongoing: Light wiring only when repositioning pads or correcting minor issues; clip-and-grow becomes the primary maintenance tool.
Pro Hybrid Tips
- Wire young, flexible shoots first — they set faster and scar less.
- Use aluminum wire on deciduous/tropicals (easy removal); copper on conifers (superior hold).
- Always wire before major pruning — you want to position branches while they’re still elongating.
- After wire removal, aggressive clip-and-grow forces the tree to fill in the designed framework with fine twigs.
This combined strategy gives you the speed and drama of wiring + the natural beauty and health of clip-and-grow. It’s why champion-level bonsai look both artistic and impossibly alive.
Common Mistakes & How to Avoid Them 🚫
Even experienced bonsai artists slip up sometimes — but most damaging mistakes are preventable with awareness and good habits. Here are the biggest pitfalls in each technique, plus expert-level fixes.
Clip-and-Grow Mistakes
- Over-pruning too early or too aggressively — Cutting back every shoot before the tree has enough energy reserves weakens it, causes dieback, and slows ramification. Fix: Always leave at least 4–6 leaves/nodes on new shoots before the first prune. Build strength first, then refine. Monitor tree vigor — yellowing leaves or slow growth means stop cutting and fertilize more.
- Ignoring apical dominance — Pruning only lower branches while leaving the apex unchecked creates top-heavy trees with weak lower structure. Fix: Prioritize pinching the strongest apical tips regularly to force energy sideways and downward. This builds balanced, tapered branching.
- Wrong timing for tropicals vs. temperate species — Pruning ficus in winter (low light in Dhaka) leads to weak regrowth; pruning maples during active summer growth can cause excessive bleeding. Fix: For tropicals — prune year-round during active growth. For deciduous — major structural cuts in late winter/early spring, pinching during growing season.
Wiring Mistakes
- Leaving wire on too long → The classic “wire bite” scar that ruins branch aesthetics forever. Fix: Check every 4–6 weeks (monthly on fast growers). Remove as soon as the branch holds position without support — often 3–12 months depending on species and wire thickness.
- Wiring thick/old branches — They snap or crack internally, leading to dieback months later. Fix: Reserve heavy wiring for branches under 1–2 years old and still flexible. For older wood, use clip-and-grow or branch splitters/jacks cautiously (advanced technique).
- Poor coiling technique — Crossing wires, too tight coils, or wrong angle (not 45°) causes uneven pressure and deep scars. Fix: Start coils from the trunk junction outward, keep even spacing (about 1–2 wire diameters apart), and always wrap in the direction of the bend for better hold.
- Wiring during stress periods — After repotting, defoliation, or extreme heat/humidity swings common in Dhaka summers. Fix: Wire only healthy, well-watered trees in stable conditions.
Bonus Expert Tip 🌟: Many pros use a “wire diary” — note the date, wire gauge, branch diameter, and species for each wired section. This prevents forgetting and helps you refine your timing over years.
Which Technique Should YOU Choose? Decision Guide 📊
Still unsure? Answer these quick questions to get a personalized recommendation:
- What species are you working with?
- Tropical/fast grower (ficus, Brazilian rain tree, jade, serissa) → Clip-and-grow primary (wiring optional early).
- Conifer (juniper, pine, cypress) → Wiring primary early, then clip-and-grow.
- Deciduous temperate (maple, elm, beech) → Clip-and-grow primary, light wiring if needed for big bends.
- What’s your experience level?
- Beginner (less than 2 years) → Start with clip-and-grow to build confidence and avoid damage.
- Intermediate/advanced → Use both — wire for structure, clip-and-grow for refinement.
- What style are you aiming for?
- Natural, flowing, informal (broom, informal upright, windswept lite) → Clip-and-grow dominant.
- Dramatic, angular, cascade, or formal upright with sharp movement → Wiring essential early.
- How much time/patience do you have?
- Want visible progress in 1–3 years → Wiring (or hybrid) for faster shaping.
- Happy to wait 5–10+ years for mature beauty → Clip-and-grow for the most authentic results.
- Is the tree nursery stock, pre-bonsai, yamadori, or already partially styled?
- Nursery stock (young/flexible) → Wiring works great initially.
- Yamadori or older wood → Clip-and-grow safer; wiring risky.
Quick Recommendation Examples
- Indoor ficus in Dhaka apartment → Clip-and-grow 90% of the time.
- Juniper procumbens cascade project → Wire heavily first 1–2 years, then clip-and-grow.
- Japanese maple shohin → Mostly clip-and-grow, occasional light wiring on new branches.
Conclusion: Grow Your Perfect Bonsai 🌟
The clip-and-grow method vs. wiring isn’t a battle with one winner — it’s a toolkit. Clip-and-grow gives you safe, natural, physiologically strong development that ages gracefully over decades. Wiring delivers speed, precision, and the dramatic flair that turns heads at shows or in your collection.
The real masters (from Kyuzo Murata’s minimal-intervention philosophy to Ryan Neil’s structured-yet-organic modern approach) almost always combine them: wire to sculpt the skeleton when the tree is young and pliable, then clip-and-grow to flesh out the fine details and let nature refine the masterpiece.
Your bonsai journey is unique — experiment, observe how your specific tree responds, keep notes, and enjoy every season of growth. Mistakes happen (and scars teach more than perfect successes), but with patience and the right technique at the right time, you’ll create trees that feel alive, timeless, and truly yours.
What’s your current project? Drop a comment below with your species, style goal, or a photo — I’d love to suggest the best path forward for you! Happy styling, and may your trees thrive. 🌳✨
FAQs ❓
Is clip-and-grow better than wiring for beginners? Yes — it’s lower risk, more forgiving, and teaches you to read tree vigor and growth patterns without the stress of potential breakage or scars.
Can you create a good bonsai without any wiring at all? Absolutely — many tropical and deciduous bonsai (especially informal styles) are developed almost entirely with clip-and-grow. It produces very natural, elegant results, though dramatic cascades or sharp angles are harder without wiring.
How long does clip-and-grow take compared to wiring? Clip-and-grow often takes 2–5× longer to reach a refined look (5–15+ years for mature ramification), while wiring can give major structural progress in 1–3 years. Hybrid approaches split the difference.
What if my tree gets wire scars? Minor scars often fade over years as bark thickens. Severe ones can be minimized by carving/shaving or using branch splitters in advanced work — but prevention is best. Remove wire early!
Best wire for beginners? Aluminum or copper? Aluminum — it’s softer, easier to apply/remove, and less likely to scar thin bark. Save copper for conifers once you’re comfortable.


