
Picture this: a once-straight juniper trunk now flows with graceful, powerful movement—subtle twists and elegant spirals that whisper of ancient winds shaping mountain trees over centuries. That breathtaking transformation? It’s the result of masterful advanced wiring shapes and spirals in bonsai design.
If you’ve mastered basic wiring but feel stuck with predictable bends and flat silhouettes, you’re not alone. Many dedicated enthusiasts hit a plateau where their trees look “good” but lack that living-art spark that turns heads at shows or in personal collections. This in-depth guide changes that.
Drawing from over 15 years of hands-on bonsai styling (including mentoring under respected international bonsai artists and refining hundreds of trees for regional exhibitions), I’ll walk you through pro-level techniques to safely create dynamic trunk movement, layered branch pads with natural torque, and those coveted subtle spirals that add depth and age illusion—without the common pitfalls of scarring, snapping, or unnatural “barber-pole” effects.
Whether you’re aiming for exhibition quality or simply want your home bonsai to feel truly alive, these methods deliver real, lasting results. Let’s unlock the next level together! 🌳🔥
Why Advanced Wiring Matters for Serious Bonsai Enthusiasts
Beginner wiring teaches the fundamentals: coil angles, the 1/3 trunk-thickness rule, and basic 45-degree bends. But advanced wiring shapes and spirals elevate your tree from generic to gallery-worthy by introducing true movement—the illusion of time, wind, and natural forces at work.
Key benefits include:
- Dynamic flow → Creates emotional depth and tells a story (moyogi’s gentle S-curve or shakan’s dramatic lean with torque).
- Age illusion → Subtle spirals and multi-directional bends mimic centuries-old yamadori specimens.
- Three-dimensional depth → Layered pads with twisting branches avoid flat, two-dimensional “pancake” foliage.
Common frustrations this solves:
- Branches snapping back after removal
- Uneven or weak curves
- Wire scars from poor timing or pressure
- Overly uniform spirals that look artificial (the dreaded “candy-cane” or barber-pole trap ⚠️)
When done right, spirals feel organic—like nature itself twisted the tree—not forced. That’s the artistry we’re chasing. 🎨

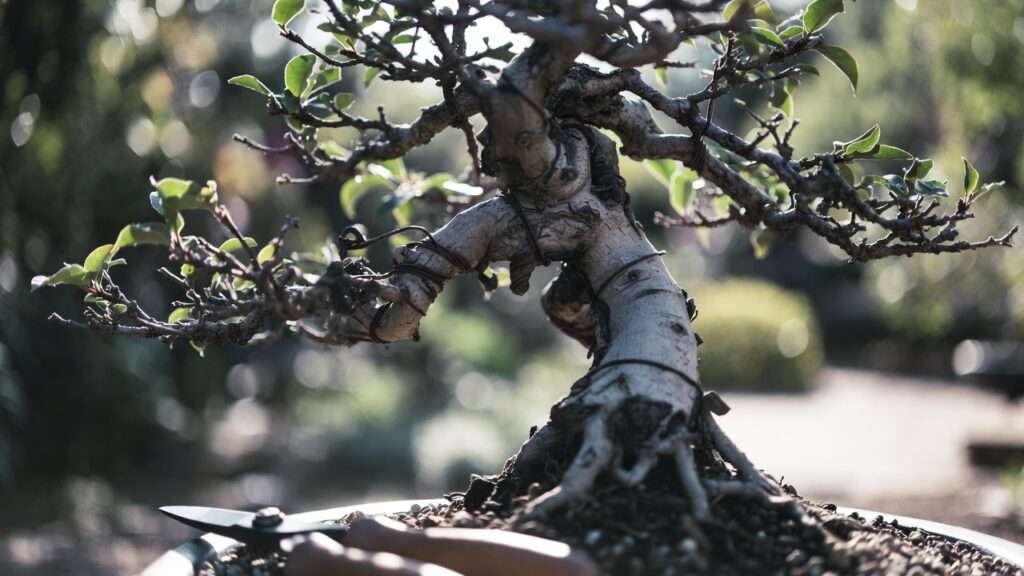
(Showing dramatic trunk bending in progress—notice the controlled coils creating powerful movement!)
Understanding Bonsai Aesthetics: The Role of Shapes and Spirals
Great bonsai follows nature’s rules, not rigid geometry. Advanced wiring amplifies core principles:
- Movement (undulation) → Trunks and branches should never be perfectly straight; gentle curves and counter-curves create rhythm.
- Asymmetry & balance → Subtle spirals add visual weight shifts without symmetry.
- Jin & shari integration → Wired live veins can flow around deadwood for dramatic contrast.
- Natural torque → Slight twists (not full 360° loops) emulate trees shaped by prevailing winds or rock crevices.
Avoid the trap of over-spiraling—uniform tight coils scream “man-made.” Instead, aim for irregular, organic movement that feels inevitable. Study masters like Masahiko Kimura or Walter Pall: their spirals are always subtle and purposeful.

(Exhibition-level examples with elegant, natural-looking trunk twists and branch flow 🌟)
Essential Tools and Materials for Advanced Wiring
Success starts with the right gear:
- Wire types → Aluminum (softer, beginner-friendly, great for maples/ficus); annealed copper (stronger hold, ideal for conifers and tight spirals—harder to remove cleanly).
- Thickness selection → Beyond basics: Use 2–2.5× branch thickness for major bends; layer wires (e.g., 4mm + 2.5mm) for ultra-thick trunks.
- Must-haves → High-quality concave cutters, Japanese wire cutters, branch splitters (for controlled cracks in radical bends), guy-wire anchors, turnbuckles.
- Protective aids → Raffia (soaked palm fiber) is non-negotiable for extreme spirals and bends—prevents cracking and bark damage.
Pro tip: Always anneal copper wire yourself for maximum malleability. 🛠️

(Expert hands applying precise wiring—note the clean coil spacing and branch support!)
Preparing Your Bonsai for Advanced Wiring
Timing is everything:
- Best seasons → Late winter/early spring (pre-bud break) for most species; year-round for tropicals like ficus.
- Tree health → Vigorous growth, strong cambium layer, no nutrient deficiencies.
- Pre-wiring prune → Remove conflicting branches first so wiring focuses on key movement.
- Hydration → Water deeply 1–2 days before major bends—turgid cells bend more safely.
Skip these steps, and even perfect technique fails.
Core Techniques: Mastering Advanced Wiring Shapes 🌿🔧
Now we get to the heart of it—actually applying advanced wiring shapes and spirals with precision and confidence. These methods build on solid fundamentals but introduce layered complexity, controlled torque, and multi-directional movement.
Trunk Wiring for Dynamic Movement
Start with secure anchoring. For thick trunks (>2 cm), use a soil anchor (bury wire end deep in soil and hook under root ball) or branch anchor (loop around a sturdy lower branch). Never rely on friction alone.
- Creating S-curves and zig-zags → Begin at the base, coil upward at 45–55° (tighter for copper, looser for aluminum). Push from inside the curve while supporting the outside to distribute force evenly.
- Multi-directional movement → After the first plane (front-back), add a second layer in a perpendicular direction for 3D flow.
- Step-by-step for dramatic bends →
- Anchor wire.
- Coil up to bend point.
- Make gradual bends in small increments (5–10° at a time).
- Check for even pressure—no gaps or overlaps that cause pinching.
Gradual bending over weeks (re-tightening or re-wiring) is safer than one aggressive session for most species.

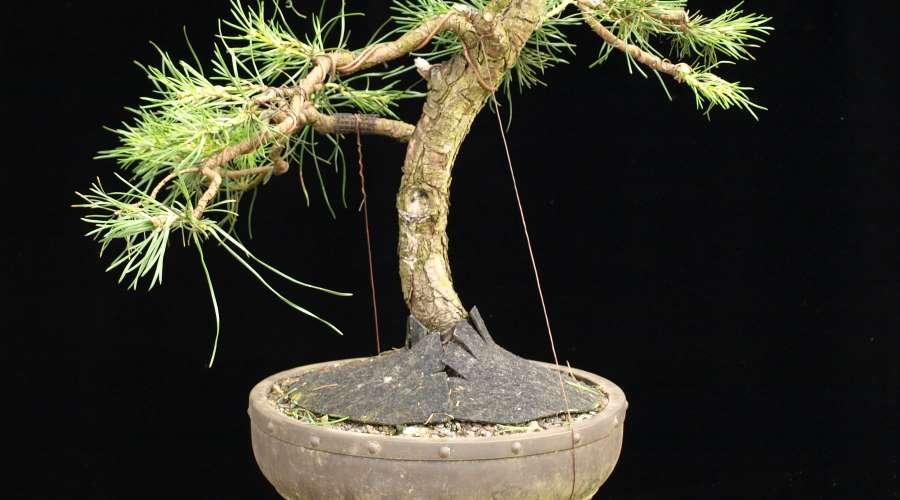
(Copper wire beautifully shaping a juniper trunk with natural-looking curves—notice the even spacing and secure anchoring!)
Branch Wiring: Building Complex Pads and Layers
Primary branches set structure; secondaries and tertiaries create density and depth.
- Double-wiring → Run one wire along the branch, then coil a second perpendicularly for extra hold on tight angles.
- Fanning pads → Wire sub-branches outward in fan shapes, then add slight downward twists for rounded, cloud-like appearance.
- Fine ramification → Use thinner wire (1–2 mm) on tips; maintain consistent coil direction to avoid kinks.
- Pro tweak → Keep coils at 45–55°—too steep and wire digs in; too shallow and it slips.
Always wire from trunk junction outward to maintain taper.
(Detailed branch wiring on a pine—layered coils create incredible depth and movement! 🌲)
Introducing Subtle Spirals and Twists
True spirals in bonsai are rare and always subtle—aim for gentle torque rather than full rotations.
- Technique → After straight coiling, twist the wired section slightly (clockwise or counterclockwise) while bending laterally. This adds natural “wind-swept” energy.
- Direction matters → Clockwise spirals often feel more dynamic in right-leaning styles; counterclockwise for left-leaning—match your tree’s flow.
- Combining elements → Spiral the lower trunk, then transition to lateral S-curves higher up for organic progression.
- Advanced layering → Apply a second wire in the opposite direction for controlled twisting without over-spiraling.
Remember: nature rarely makes perfect helices. Irregular, partial twists look far more authentic.

(Close-up of elegant spiral movement on deadwood—subtle and powerful!)
Pro Techniques for Radical and Exhibition-Level Shapes 🌟⚡
When you’re ready to push boundaries—whether for a national show, a personal masterpiece, or to rescue a thick, stubborn trunk—these advanced methods become essential. They require experience, patience, and respect for the tree’s limits.
- Raffia protection for extreme bends and spirals Soak natural raffia (palm fiber) in warm water for 10–15 minutes until soft and pliable. Wrap the trunk or branch tightly in overlapping layers (like a bandage), covering the entire bend zone plus 5–10 cm extra on each side. Then apply your wire over the raffia. The raffia distributes pressure evenly and prevents bark splitting or cracking during radical movement. Remove raffia only after wire removal when the shape has set. This technique is non-negotiable for bends over 45° or any spiral on trunks thicker than 4 cm. 🛡️
- Guy wires and tension systems For movements that wire alone can’t hold (especially large apexes or heavy branches), install guy wires:
- Anchor eye-bolts or screw hooks low on the trunk or into the pot rim.
- Run strong nylon-coated wire or fishing line from branch to anchor.
- Use small turnbuckles to gradually increase tension over weeks/months. This method allows you to train dramatic leans, spirals, and cascades without constant re-wiring.
- Double or triple wiring On very thick sections (>5 cm), apply:
- A heavy base wire (4–6 mm copper) for primary strength.
- A secondary wire (2.5–3.5 mm) in the opposite direction to lock it.
- A third finer wire for fine-tuning curves or adding subtle spiral torque. This layered approach gives incredible control and holding power.
- Creating “deadwood” integration with wired live veins When carving shari or jin, leave thin live veins intact and wire them to flow around the deadwood dramatically—creating striking contrast and adding perceived age.
- Multi-stage wiring Some shapes are impossible in one session. Plan over 2–4 years:
- Year 1: Establish primary movement and coarse spirals.
- Year 2: Refine secondary branches and add torque.
- Year 3+: Fine-tune pads and remove old wire scars through healing. Patience here produces the most natural, impossible-looking results. ⏳
(Raffia-wrapped trunk undergoing radical bending—see how the protective layer allows safe, extreme movement!)
Bending and Shaping: Safe and Effective Methods
Even with perfect wiring, the actual bending is where most damage happens.
- Thumb-and-finger technique → Place thumbs on the inside of the desired curve, fingers supporting the outside. Bend slowly in small increments while feeling for resistance.
- Avoid reverse bends → Never bend back over a previous curve in the opposite direction immediately—this causes fiber fatigue and snapping.
- Listen to the wood → You’ll feel and sometimes hear tiny “pops” as fibers separate safely. Stop immediately if you hear a loud crack.
- Emergency correction → If a bend goes too far, gently counter-bend slightly and re-anchor—don’t remove wire yet.
Practice on scrap branches first. Your hands develop “wood memory” over time. 👐
Common Mistakes in Advanced Wiring (and How to Avoid Them) 🚫
Even experts slip up—here are the traps I see most often:
- Wire too loose → Slips during bending → uneven curves → re-do needed. Fix: Pull each coil snug (but not crushing) as you go.
- Wire too tight → Immediate scarring or bark death. Fix: Check pressure by sliding a fingernail under coils—if it catches, loosen slightly.
- Crossing wires → Creates pressure points and ugly scars. Fix: Keep all coils parallel; never cross.
- Over-spiraling → Uniform barber-pole look destroys natural feel. Fix: Use partial twists, vary coil tightness, and break spiral rhythm with straight sections.
- Leaving wire on too long → Bark grows over wire → deep scars. Fix: Check weekly. Remove when bark begins to swell around coils (usually 3–9 months depending on species).
- Ignoring growth rate → Fast growers (maples, elms) need removal in 2–4 months; slow conifers can stay 8–12 months.
Create a simple species-specific timing chart and stick to it.
Aftercare: Helping Your Tree Set New Shapes 🌱💧
The work isn’t over once the wire is on—proper aftercare determines whether your advanced shapes and spirals become permanent features or revert under stress.
- Immediate post-wiring care
- Place the tree in partial shade (50–70% light reduction) for 2–4 weeks to reduce transpiration stress.
- Maintain consistent soil moisture—never let it dry out completely, but avoid waterlogging.
- Mist foliage daily (especially tropicals and maples) to boost humidity while new bends heal.
- Hold off on heavy fertilizing for 4–6 weeks; resume with balanced, half-strength fertilizer once growth resumes.
- Monitoring for wire cutting-in Check every 7–10 days:
- Look for bark swelling around coils (normal healing).
- If wire begins to disappear into bark or creates visible grooves → remove immediately, even if shape isn’t fully set.
- Use sharp wire cutters and cut every 3–4 coils, then gently unwind to avoid bark tearing.
- Safe wire removal technique
- Cut wire at multiple points along each branch/trunk section.
- Unwind slowly in the direction opposite to coiling.
- If bark sticks to wire, use a thin blade to carefully separate.
- After removal, apply cut-paste or wound sealant only on large tears (most minor marks heal naturally).
- Encouraging recovery & thickening
- Position tree in stronger light gradually to promote back-budding.
- Pinch new shoots to direct energy into pad development and trunk/branch thickening.
- Consider light guy-wire support for the first season if major movement was made.
Healthy recovery = stronger, more defined lines next wiring season. ❤️
(Freshly unwired branch showing clean healing—no deep scars thanks to timely checks and raffia use!)
Species-Specific Tips for Advanced Wiring Success
Different trees respond differently to wiring pressure, timing, and spiral techniques. Here’s a practical breakdown:
- Junipers, pines, spruces (conifers)
- Copper wire preferred—holds shape longer, allows tighter coils.
- Spiral-friendly; they tolerate radical bends when young and vigorous.
- Wire in late winter/early spring; leave on 8–14 months.
- Raffia almost always required for trunks >3 cm.
- Maples, elms, hornbeams (deciduous)
- Aluminum wire only—copper scars too easily on thin bark.
- Gentler bends; avoid extreme spirals (they heal slowly and scar visibly).
- Wire in late spring after first flush hardens slightly; remove in 2–5 months max.
- High humidity post-wiring prevents dieback.
- Ficus, serissa, other tropicals
- Year-round wiring possible in warm climates.
- Aluminum wire; very flexible when actively growing.
- Spirals work beautifully on aerial roots and trunks.
- Keep in high humidity (mist or dome) for 4–6 weeks after major work.
- General rule → Conifers = slower, stronger hold; deciduous/tropical = faster growth, quicker removal needed.
Adapt every technique to your tree’s personality—you’ll develop an instinct over time.
Gallery of Inspiration: Real-World Advanced Shapes and Spirals
Let these proven examples fuel your vision:
- Before-and-after trunk spirals → Straight nursery stock transformed into flowing, wind-swept yamadori look with subtle clockwise torque in the lower third.
- Multi-layered pads with movement → Pine with fanned, twisting secondary branches creating deep, cloud-like foliage mass.
- Exhibition-grade radical bends → Juniper cascade with 90°+ bends protected by raffia, now holding perfect shape after 3 years.
- Deadwood + live vein flow → Trident maple with carved shari channel and wired live vein spiraling gracefully around it.
(Study these to see how masters vary coil tightness, break spiral rhythm, and integrate movement into overall design—pure inspiration! 📸🌟)
Frequently Asked Questions (FAQs)
Can I create a full spiral trunk like a barber pole? (And should I?) Rarely—and usually no. Full, uniform spirals look artificial and cartoonish in most bonsai styles. Reserve tight spirals for very specific artistic statements (e.g., literati or dramatic yamadori interpretations). Subtle, broken, partial twists feel far more natural.
How long does it take for a wired shape to set permanently? Depends on species, age, and bend severity: 6–18 months for conifers, 3–9 months for deciduous. The cambium must grow new wood in the bent position. Remove wire too early = shape springs back; too late = scars.
What if my wire starts cutting in—emergency fixes? Cut and remove immediately. If grooves are shallow, they usually heal over 1–2 seasons with good care. Deep cuts may need bridging with new callus or minor carving to blend.
Is copper better than aluminum for advanced spirals? For holding power and tight coils—yes, especially on conifers. For forgiving removal and thinner bark species—no, stick with aluminum.
Can beginners attempt advanced wiring shapes and spirals? Start with intermediate skills first. Practice radical bends and subtle spirals on sacrifice or inexpensive material. Once confident with basics and aftercare, yes—go for it gradually.
Final Thoughts: Your Journey to Bonsai Mastery 🌟
Advanced wiring shapes and spirals aren’t about forcing a tree into submission—they’re about revealing hidden potential through patient, respectful collaboration with nature.
Every coil you place, every subtle twist you introduce, tells part of the tree’s story. With these techniques, timing awareness, and attentive aftercare, you’re equipped to create bonsai that don’t just survive—they captivate.
Start on a smaller branch or a less precious tree. Experiment. Make mistakes (they teach the most). Then watch your skills—and your trees—evolve into something extraordinary.
I’d love to hear about your wiring adventures! Drop your before-and-after photos or questions in the comments below. Let’s keep elevating our bonsai together. 👇❤️


