
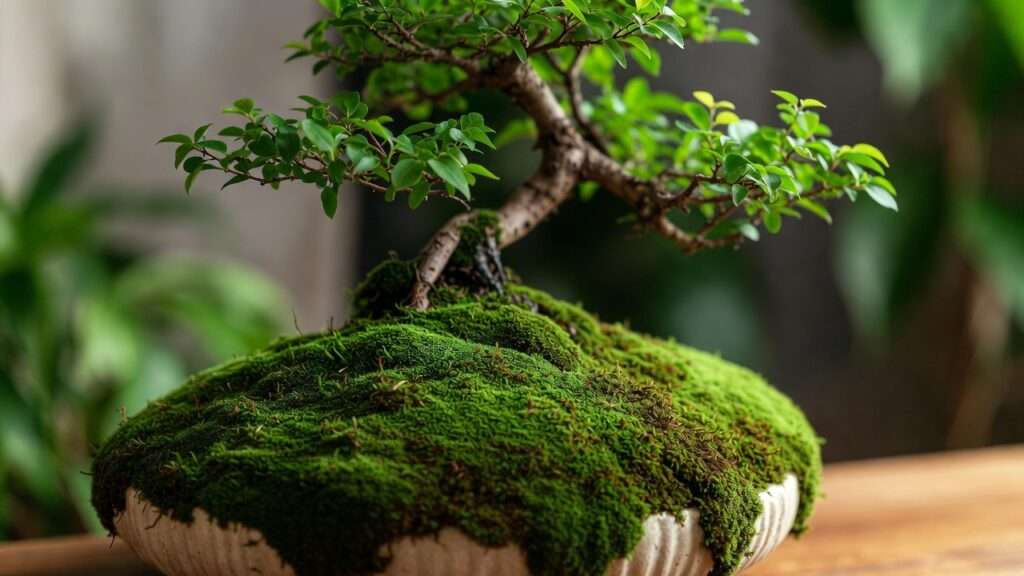
Imagine stepping into a misty ancient forest, but scaled down to fit perfectly in the palm of your hand. Your bonsai tree stands proud, its twisted trunk and delicate branches telling stories of time — yet something feels missing. The soil surface looks bare, flat, and unnatural, stealing focus from the tree’s majestic form. Now picture adding a soft, velvety carpet of vibrant green moss that gently hugs the roots, creates rolling mini-landscapes, and instantly ages your bonsai into a timeless masterpiece. 🌲💚
That’s the transformative power of cultivating moss for bonsai aesthetics. For many bonsai enthusiasts, achieving this lush, realistic ground cover is a persistent challenge — moss dies off quickly, patches form unevenly, or it overgrows and harms the tree. This in-depth guide, built from years of hands-on bonsai cultivation and observation of professional displays, solves these problems head-on. You’ll learn proven techniques to grow healthy, long-lasting moss that enhances moisture retention, insulates roots, prevents soil erosion, and elevates your miniature tree to exhibition-level beauty. Whether you’re a beginner seeking that first “wow” factor or an advanced artist refining your saikei landscapes, this comprehensive resource will help you master moss like never before. Let’s dive in and bring your bonsai to life! 🌟

Why Moss Matters in Bonsai Aesthetics
Moss isn’t just decorative — it’s an essential element in creating believable miniature nature scenes. In traditional Japanese bonsai and saikei (tray landscapes), moss represents the forest floor, adding depth, texture, and a sense of age that bare soil simply can’t achieve.
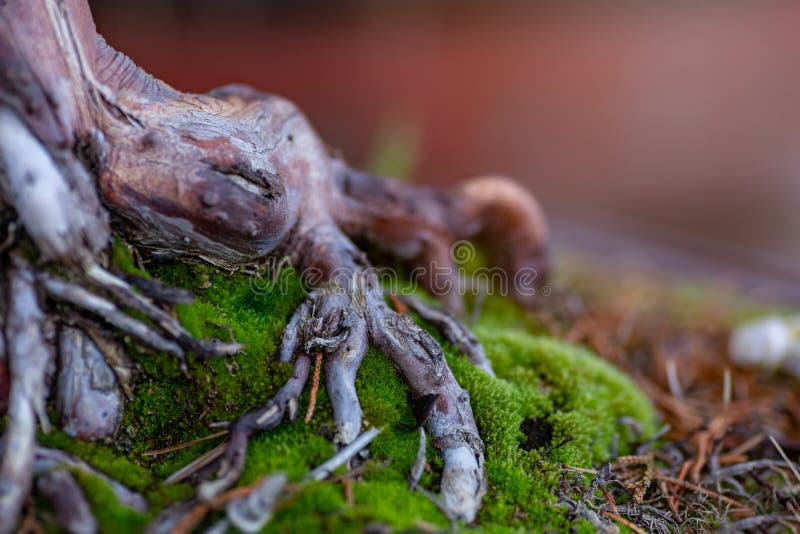
- Visual Harmony & Realism: Moss provides soft contrast against rugged bark, exposed nebari (surface roots), and foliage, drawing the eye naturally through the composition. It softens harsh soil lines and unifies the design.
- Aging Illusion: Lush moss evokes centuries-old trees growing in damp woodlands, making even young bonsai appear ancient and wise.
- Practical Benefits: Beyond looks, moss acts as a living mulch. It retains soil moisture longer (crucial in fast-draining bonsai mixes), reduces evaporation, insulates roots from temperature swings, and prevents fine soil particles from washing away during watering. In hot climates, it keeps roots cooler; in cold ones, it offers protection from frost. 🌡️🍂
Many beginners overlook these dual roles, leading to disappointing results. When done right, moss turns a good bonsai into an extraordinary one.
Understanding Moss: Types Best Suited for Bonsai
Not all mosses are created equal — choosing the right variety is key to success. Mosses fall into two main growth habits:
- Pleurocarpous (spreading, mat-forming): Ideal for even carpets; low-growing and easy to maintain.
- Acrocarpous (upright, cushion-like): Great for textured “hills” and variety.
Top recommendations for bonsai aesthetics (based on sun tolerance, compactness, and adaptability to inorganic soils):
- Bryum caespiticium (Sun Moss) ☀️: Compact, sun-tolerant, and thrives in alkaline conditions common in bonsai mixes. Perfect for outdoor displays.
- Dicranum scoparium (Rock Cap or Mood Moss): Rugged texture with a velvety look; excellent for creating natural undulations and shade tolerance.
- Sphagnum moss (shredded/live): Not a true ground cover but a game-changer for establishment — mix with collected moss for superior moisture retention and antimicrobial properties that prevent root issues.
- Cushion moss and sheet moss: Dense mounds or flat carpets for uniform coverage; great for moisture-loving species like maples.
Avoid tall, forest-floor mosses from deep shade — they often die in bonsai’s brighter, drier conditions or compete aggressively with roots. Always match moss to your tree’s needs: acidic-loving varieties for azaleas/maples, more tolerant ones for pines/junipers. Test soil pH first for best results! 🌱
Collecting vs. Cultivating Moss: Which Path Is Right for You?
Collecting wild moss is quick and free — look for sun-exposed spots like concrete cracks, sidewalks, or rocks (these adapt best to bonsai soil). Use a putty knife to lift patches with some substrate attached, and always collect ethically (small amounts, avoid protected areas). Pros: Instant variety and realism. Cons: Potential pests, inconsistency, and legal/ethical concerns.
Cultivating your own ensures steady supply, disease-free starts, and tailored growth. Start with collected “starters” and propagate — the hybrid approach wins for most hobbyists. Why cultivate? It guarantees consistent texture, color, and health year-round, avoiding die-off from mismatched environments. 🧪
Step-by-Step Guide to Cultivating Moss for Bonsai 🌱✨
Now that you understand why moss is so valuable and which types work best, let’s get into the practical cultivation process. This method combines traditional bonsai wisdom with reliable propagation techniques to give you consistent, beautiful results — often faster and more reliably than relying solely on wild collection.
1. Preparing Your Moss Starter Culture 🌿
The foundation of successful moss cultivation is a strong starter. The most effective approach is the “moss slurry” or “moss dust” method, beloved by bonsai professionals for even, natural-looking spread.
- Option A: Live Moss Starter — Collect or purchase small patches of suitable moss (e.g., Bryum or Dicranum). Gently rinse off excess dirt or insects under cool water, then pat dry.
- Option B: Dried Moss Method (great for propagation) — Dry collected moss completely in shade for 1–2 weeks, then crumble it finely between your fingers or in a blender (pulse gently) to create “moss dust” rich in spores.
- Best Blend (Expert Recommendation): Mix 50% fresh/live moss pieces with 50% dried/shredded sphagnum moss. Sphagnum holds moisture exceptionally well, has natural antifungal properties, and helps the culture establish without rot. Add a tiny pinch of buttermilk or plain yogurt (contains lactic acid bacteria that encourage moss growth) to kickstart microbial activity — an old bonsai club trick! 🧪
Store your starter in a sealed container in the fridge for up to a month if not using immediately.
2. Setting Up the Ideal Growing Environment
Moss thrives when conditions mimic its natural habitat — high humidity, consistent moisture, and appropriate light — while adapting to bonsai’s inorganic soil mix.
- Soil Surface Preparation: Before applying moss, ensure the top ¼–½ inch of bonsai soil is slightly compacted but not hard-packed. Remove any debris or weeds. For better adhesion, lightly scratch the surface or add a very thin layer of sifted akadama or sphagnum peat to create a hospitable “seedbed.”
- Light Requirements: Most bonsai moss prefers bright, indirect light or dappled shade (morning sun is ideal). Full-sun tolerant varieties like Bryum can handle more direct exposure. Avoid deep shade under dense canopies — moss will stretch and weaken.
- Humidity & Watering: Aim for 70–90% humidity during establishment. Use a clear plastic dome, humidity tray filled with pebbles and water, or mist 2–3 times daily with a fine spray bottle. Water gently from above or bottom-soak the pot briefly to avoid disturbing new growth. Keep consistently moist but never waterlogged — soggy conditions invite algae and rot. 💦
- Temperature: 60–80°F (15–27°C) is optimal for fastest colonization. Protect from extreme heat (>90°F) with shade cloth and from freezing with frost protection.
Place your bonsai in a sheltered outdoor spot or semi-shaded greenhouse for best results.
3. Application Techniques for Stunning Coverage
This is where the magic happens — turning a bare pot into a living landscape.
- Slurry/Sprinkle Method (for natural, gradual coverage): Blend your moss starter with buttermilk or yogurt and a little water to make a thin paste. Paint or sprinkle it evenly over the soil surface. Press lightly with your fingers or a small board to ensure good contact. This method can take 4–12 weeks to fill in fully but creates the most realistic, varied texture.
- Live Pad/Chunk Placement (for instant impact): Cut or tear live moss into small pieces (1–2 inches) and press them firmly onto the soil, especially around the nebari and base of the trunk. Space them 1–2 inches apart to allow spreading. This is perfect for upcoming shows or when you want quick aesthetic improvement.
- Layering for Depth: Combine techniques — place larger clumps for “hills” and sprinkle dust in between for smooth transitions. Mix 2–3 moss types for realistic variation in color and texture, mimicking a natural forest floor.
Pro Tip: After application, lightly mist with a weak diluted seaweed extract or moss-specific fertilizer (low nitrogen) to encourage rooting and growth without burning.
4. Maintenance & Long-Term Care 🌿🧑🌾
Once moss begins to establish (usually visible greening within 1–3 weeks and noticeable spreading in 4–8 weeks), shift focus to sustainable care that keeps it lush without overwhelming your bonsai.
- Misting & Watering Routine: Continue light daily misting for the first 2–3 months, then reduce to 2–4 times per week depending on climate. In humid regions like Dhaka’s monsoon season, natural humidity may suffice — monitor soil moisture with your finger (top inch should stay slightly damp). Always use rainwater, distilled, or dechlorinated tap water to avoid mineral buildup that can brown moss tips.
- Grooming & Trimming: Every 4–6 weeks, gently trim overgrown or straggly patches with fine scissors to maintain neat contours and prevent shading lower branches. Remove any yellowing or dead sections promptly to stop mold spread.
- Seasonal Adjustments:
- Summer (hot & dry): Increase misting frequency, provide afternoon shade, and place pot on a humidity tray.
- Monsoon/Rainy Season: Excellent natural conditions — reduce supplemental watering but ensure excellent drainage to prevent waterlogging.
- Winter: Protect from frost (move indoors or cover with breathable frost cloth if temperatures drop below 5°C). Moss may slow or go semi-dormant; reduce watering but don’t let it dry out completely.
- Fertilization: Moss needs very little. A monthly very dilute (1/10 strength) application of balanced liquid fertilizer or seaweed extract during active growth (spring–fall) encourages vigor without promoting algae. Avoid high-nitrogen feeds.
- Troubleshooting Die-Off: If patches brown or disappear, check for: over/under-watering, too much direct sun, poor humidity, or competition from tree roots. Gently re-apply starter culture to affected areas and adjust conditions. Most moss recovers quickly with correction. 🔧
With consistent care, your moss can last years, gradually thickening into a beautiful, self-sustaining carpet.
Advanced Tips for Professional-Level Bonsai Moss Aesthetics 🎨
Once you’ve mastered basic cultivation, these techniques separate good bonsai from show-quality displays:
- Creating “Rolling Hills” & Texture Variation: Build subtle elevation by layering small mounds of sphagnum or peat under live moss clumps before pressing them down. Use taller acrocarpous moss in foreground “hills” and flatter pleurocarpous varieties in background areas for realistic depth.
- Integrating Companion Plants: Add tiny ferns (Selaginella), miniature mondo grass, or lichen pieces for enhanced forest realism — but sparingly, ensuring they don’t compete with the tree’s roots or dominate visually.
- Show Preparation Timing: Apply fresh moss pads 4–6 weeks before a display for peak vibrancy. Mist heavily the day before to bring out rich green color. For color harmony, choose moss tones that complement foliage (cool greens for blue-needled pines, warmer tones for deciduous maples).
- Expert Insight: Many top bonsai artists (inspired by masters like Masahiko Kimura and Kunio Kobayashi) treat moss as a living accent that highlights design elements — thick around nebari to emphasize powerful roots, thinner near the trunk to avoid hiding jin/shari, and graduated density to guide the viewer’s eye along movement lines.
Experiment freely — the best moss landscapes evolve through observation and small adjustments over seasons.
Common Mistakes & How to Avoid Them ❌
Even experienced growers encounter these pitfalls — here’s how to sidestep them:
- Overwatering → Rot & Algae: Solution: Mist instead of soaking; ensure pot has excellent drainage.
- Wrong Moss for Climate/Light: Sun-loving Bryum fails in deep shade; shade moss scorches outdoors. Solution: Match species to your tree’s placement.
- Applying Too Thickly: Blocks air to roots and invites fungal issues. Solution: Thin layers (max ½ inch) with gaps for spreading.
- Ignoring Tree Health: Moss shouldn’t steal water/nutrients. Solution: Only moss healthy, well-fed trees; reduce moss if tree shows stress.
- Unsustainable Collection: Over-harvesting wild moss harms ecosystems. Solution: Cultivate your own supply after initial collection.
Avoid these, and your moss will thrive for years.
FAQs About Cultivating Moss for Bonsai Aesthetics ❓
How long does it take for moss to establish fully? 2–6 months for good coverage, 8–12 months for lush, mature carpet — patience is key!
Can I grow moss indoors/under grow lights? Yes — use 6500K full-spectrum LEDs at 12–14 hours/day, high humidity (60%+), and consistent misting. Best for temperate species.
Is moss harmful to my bonsai tree? Rarely — when healthy and thin, it benefits the tree. Thick, matted moss can reduce oxygen to roots; keep it groomed.
Are commercial moss spores or kits worth buying? They work well for beginners but are often overpriced. DIY slurry from collected + sphagnum is cheaper and equally effective.
How do I revive dying moss on my bonsai? Scrape off dead parts, mist heavily for 1–2 weeks, improve humidity/light balance, and re-apply fresh starter culture to bare spots.
Conclusion: Elevate Your Bonsai Journey with Living Moss 🌳💚
Mastering cultivating moss for bonsai aesthetics is one of the most satisfying and transformative skills you can develop as a bonsai enthusiast. What begins as a simple desire to cover bare soil often evolves into an artistic partnership with nature — where every tiny green patch contributes to telling the story of your miniature tree.
Through consistent misting, thoughtful species selection, patient application, and attentive grooming, you’ll soon enjoy that soft, velvety carpet that makes your bonsai feel alive, ancient, and perfectly at home in its pot. The moss doesn’t just decorate; it protects roots from summer heat and winter chill, holds precious moisture in our fast-draining mixes, prevents unsightly soil splash during watering, and — most importantly — completes the illusion of a wild, timeless landscape in miniature form.
Here in Dhaka, with our hot-humid monsoons and warm year-round temperatures, we actually have near-ideal natural conditions for moss cultivation during much of the year. Take advantage of the rainy season to establish new cultures with minimal effort, then provide just a bit of afternoon shade and consistent misting during the drier months to maintain that lush look. Many local bonsai practitioners have discovered that a small shaded corner of the balcony or rooftop, combined with the techniques in this guide, can produce remarkably vibrant moss displays even in an urban setting.
Start small if you’re new to this — perhaps experiment on one or two less precious trees first. Collect a bit of sidewalk or wall moss during the next walk after rain, mix it with sphagnum, apply the slurry method, and watch the transformation unfold over the coming weeks and months. Keep notes on what works in your specific microclimate: which moss varieties spread fastest, how often you need to mist in April versus July, which trees respond best to thicker versus thinner coverage.
The journey is just as rewarding as the destination. Over time, your moss will become a living, evolving part of each bonsai’s personality — thickening in some areas, thinning gracefully in others, responding subtly to seasonal changes and your care. That slow, organic development is what makes bonsai such a meditative and deeply fulfilling art form.
So go ahead — get your hands a little dirty, mist generously, and be patient. Before long, you’ll step back from your display shelf or garden table and feel that quiet thrill when you realize: this doesn’t just look like a tiny tree in a pot anymore… it looks like a real piece of the forest, carried home and cared for with love.
Thank you for reading this in-depth guide.


