
Imagine stepping into your garden during a blistering summer afternoon: leaves wilting, soil cracked and bone-dry, and your once-vibrant plants looking stressed despite your best watering efforts. Sound familiar? In hot, dry conditions, plants and trees face intense heat stress, rapid moisture loss, and weed invasions that sap their energy. The good news? Summer mulch application tips can change everything. By applying mulch correctly during the hottest months, you can slash soil evaporation by up to 50%, lower root-zone temperatures by 10–20°F, suppress weeds naturally, and give your plants the resilience they need to thrive through drought and heatwaves. 💧🌱
As a horticulture enthusiast with years of experience helping gardeners in challenging climates (including hot, humid regions like parts of South Asia), I’ve seen firsthand how proper mulching transforms struggling landscapes into lush, low-maintenance havens. Drawing from university extension research (like Penn State, UC Davis, and Texas A&M) and real-world tree care practices, this comprehensive guide delivers expert-level summer mulch application tips to solve your biggest warm-season problems—no fluff, just actionable advice.
Ready to shield your garden? Let’s dive in and turn summer stress into summer success! 🔥➡️🌿
Why Mulch in Summer? The Science-Backed Benefits for Plants and Trees 🌡️
Mulching isn’t just cosmetic—it’s one of the most effective, low-effort ways to combat summer extremes. Here’s why it’s essential right now:
Moisture Retention & Drought Protection 💧 Organic mulches act as a barrier, dramatically reducing evaporation from the soil surface. Studies from extension services show that a 2–4 inch layer can cut water loss by 50% or more, meaning fewer watering sessions and lower bills—perfect for drought-prone summers.
Soil Temperature Regulation 🔥 Bare soil can hit 100°F+ in direct sun, cooking shallow roots and stressing plants. Mulch insulates, keeping soil 10–20°F cooler. This protects delicate feeder roots in trees, shrubs, perennials, and veggies from heat burn.
Weed Suppression Without Chemicals 🌿 By blocking sunlight, mulch prevents most weed seeds from germinating. This saves time and reduces competition for water and nutrients—crucial when every drop counts.
Improved Soil Health Over Time 🪱 As organic mulches (wood chips, bark, straw) slowly decompose, they add organic matter, improve soil structure, boost microbial activity, and enhance nutrient availability. It’s a long-term win for healthier plants.
Protection for Trees & Shrubs 🌳 Shallow-rooted trees especially benefit—mulch shields against mower damage, temperature swings, and transplant shock in new plantings.
Bonus environmental perks: Mulch reduces runoff, conserves water, and supports beneficial insects. In hot climates, it’s practically a survival strategy for your landscape!
(Pro tip: These benefits are backed by sources like Penn State Extension and UC Davis Arboretum guidelines.)
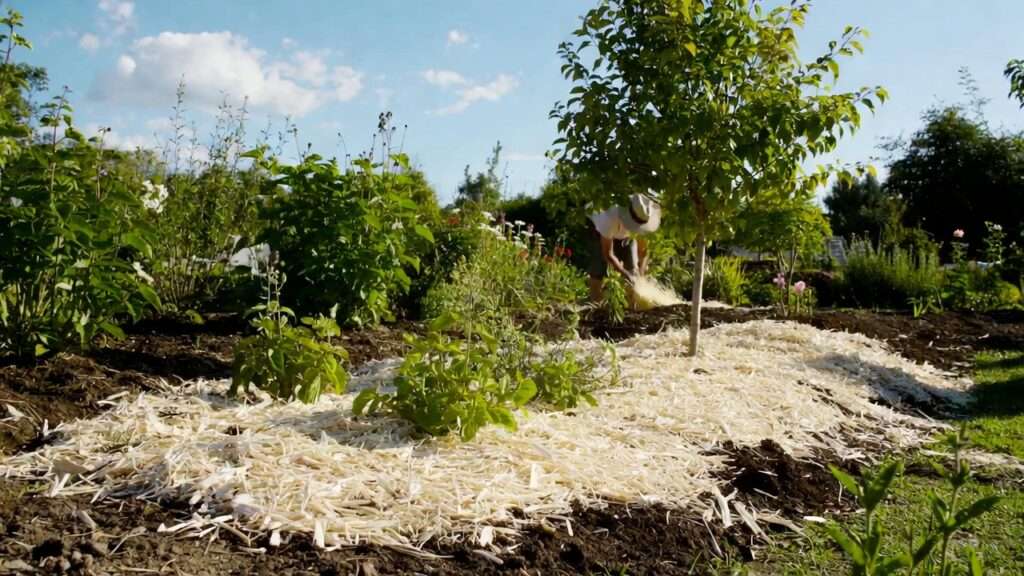
(Example: Before and after mulching a garden bed—notice how the mulch layer transforms dry, weedy soil into a protected, moisture-retaining zone! 🌱)
Choosing the Right Mulch for Hot Summer Conditions 🛠️
Not every mulch handles intense heat equally. Here’s how to pick winners:
Best Organic Mulch Types for Summer (H3)
- Wood chips / shredded bark — Excellent all-around choice; retains moisture well and decomposes slowly. Hardwood or softwood works; avoid fresh arborist chips if not aged (they can temporarily tie up nitrogen).
- Pine straw / pine needles — Lightweight, acidic (great for azaleas, blueberries), and highly insulating—popular in hot, dry areas.
- Shredded leaves or compost — Free/cheap homemade option; adds nutrients fast but may need refreshing.
- Straw (wheat, oat, barley) — Superb for veggies; light color reflects heat, excellent insulation without matting.
Inorganic Options When Needed (H3)
Gravel, river rock, or volcanic stone suit xeriscape plants or succulents—they don’t break down but can overheat soil if dark and in full sun.
Light vs. Dark Mulch: What Reflects Heat Best? (H3) 🌤️
In extreme summer sun, lighter-colored mulches (straw, light wood chips, pine straw) reflect more heat and keep soil cooler than dark ones (black dyed mulch, dark bark). Dark mulches absorb heat—fine in spring but risky in peak summer.
:strip_icc()/BHGs_SIM_DoItYourself_JennaLeBlanc_MID_7006854_2905_preview-75f50e7e3e9546efa8f320796f4abfa3.jpg)
(Light gravel/stone paths vs. dark mulch beds—lighter options shine in hot sun for heat reflection! ☀️)
When Is the Best Time to Apply Mulch in Summer? ⏰
One of the most common questions I get is: “Isn’t summer too hot to mulch?” The answer is no—it’s actually one of the best times to refresh or apply mulch, especially if your garden is already showing signs of heat stress.
- Mid-to-late summer is perfect for topping up — If your existing mulch has thinned out (common after rain, wind, or decomposition), adding more now locks in remaining soil moisture and provides immediate relief during peak heat and drought periods.
- Apply after a good rain or deep watering — This prevents mulch from sitting on bone-dry soil, which can actually trap dryness underneath. Early morning or late evening is ideal to avoid stressing yourself or the plants in blazing midday sun ☀️.
- Avoid right before heavy storms — Fresh mulch can sometimes wash away or cause minor runoff if not settled.
- Never too late — Even in August or September heat, a fresh layer can still save plants from late-summer drought stress before cooler fall weather arrives.
In tropical/subtropical climates like parts of Bangladesh (where summers are intense and humid), refreshing mulch in July–September often makes the difference between surviving plants and thriving ones! 🌴
Step-by-Step: How to Apply Mulch Correctly in Summer (Core How-To Guide) 🛠️
This is the heart of the article—follow these steps precisely for maximum protection and zero damage.
- Prepare the Area First 🧹 Remove existing weeds by hand or shallow hoeing (don’t use herbicides if possible—mulch will handle future weeds). Water the soil deeply 1–2 days before if it’s very dry. This pre-moistening helps mulch settle and start working immediately.
- Calculate How Much Mulch You Need 📏 Simple formula: Length × Width × Desired Depth (in feet or meters) ÷ Coverage per bag/cubic yard. Example: A 10 ft × 10 ft bed at 3 inches (0.25 ft) depth = 25 cubic feet. Most bags cover ~2–3 sq ft at 3 inches—plan accordingly!
- Apply the Perfect Depth (2–4 inches ideal) 📏
- 2–3 inches for most garden beds, perennials, and shrubs.
- 3–4 inches around trees and larger plants (but never more—thicker layers can suffocate roots and cause rot).
- Too thin (<2 inches) = weak weed control and fast drying.
- Too thick (>4–5 inches) = blocks oxygen/water penetration and invites fungal issues.
(Handy visual: The 3-3-3-3 Rule for trees—3 inches deep, 3 inches away from trunk, in a 3-foot ring. Simple, effective, and tree-safe! 🌳)
- The Golden Rule: Keep It Away from Stems & Trunks! 🚫 Leave a 2–6 inch mulch-free zone around tree trunks, shrub bases, and plant stems. This prevents “mulch volcanoes,” moisture-trapping rot, bark decay, insect harboring, and rodent damage.
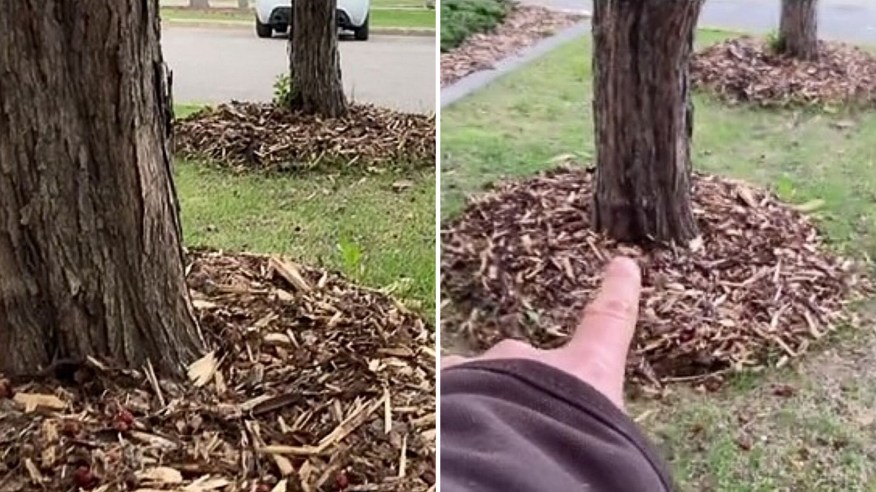
(Bad examples: Mulch volcanoes piled high against trunks—leading to rot, pests, and long-term tree decline. Avoid this at all costs! 😱)
- Spread Evenly & Gently Rake or fluff mulch to a uniform layer. For trees, extend to the drip line (outer edge of branches) if possible— that’s where most feeder roots live.
- Water After Application 💦 Give the mulched area a slow, deep soak. This settles the mulch, eliminates air pockets, and activates moisture retention right away.
- Special Tips for Trees, Shrubs, Veggies & Flower Beds 🌳🍅🌸
- Trees: Follow the 3-3-3 rule above.
- Veggies: Use straw or compost (light colors help reflect heat); reapply mid-season for tomatoes/peppers in hot weather.
- Flower beds: 2–3 inches of shredded bark or pine straw for color and weed control.
- Containers/raised beds: Thin 1–2 inch layer to avoid overheating pots.
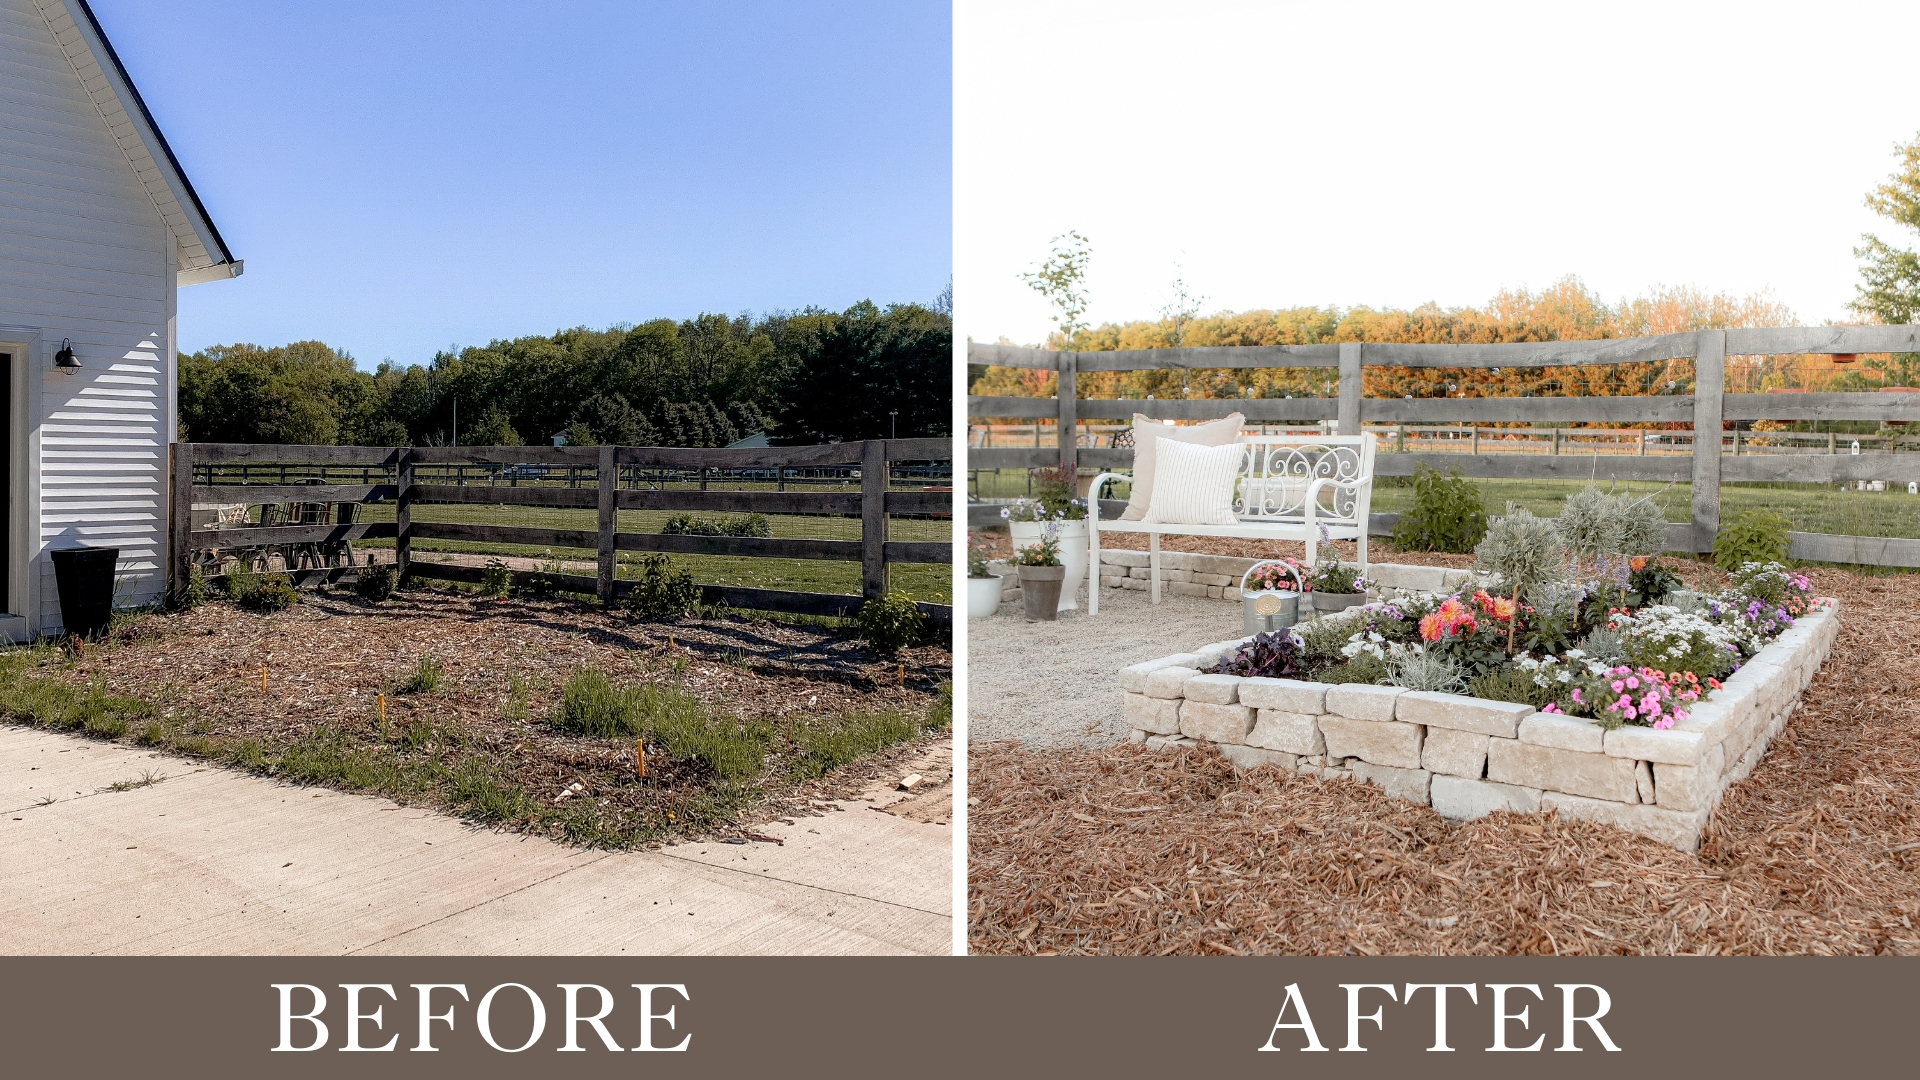
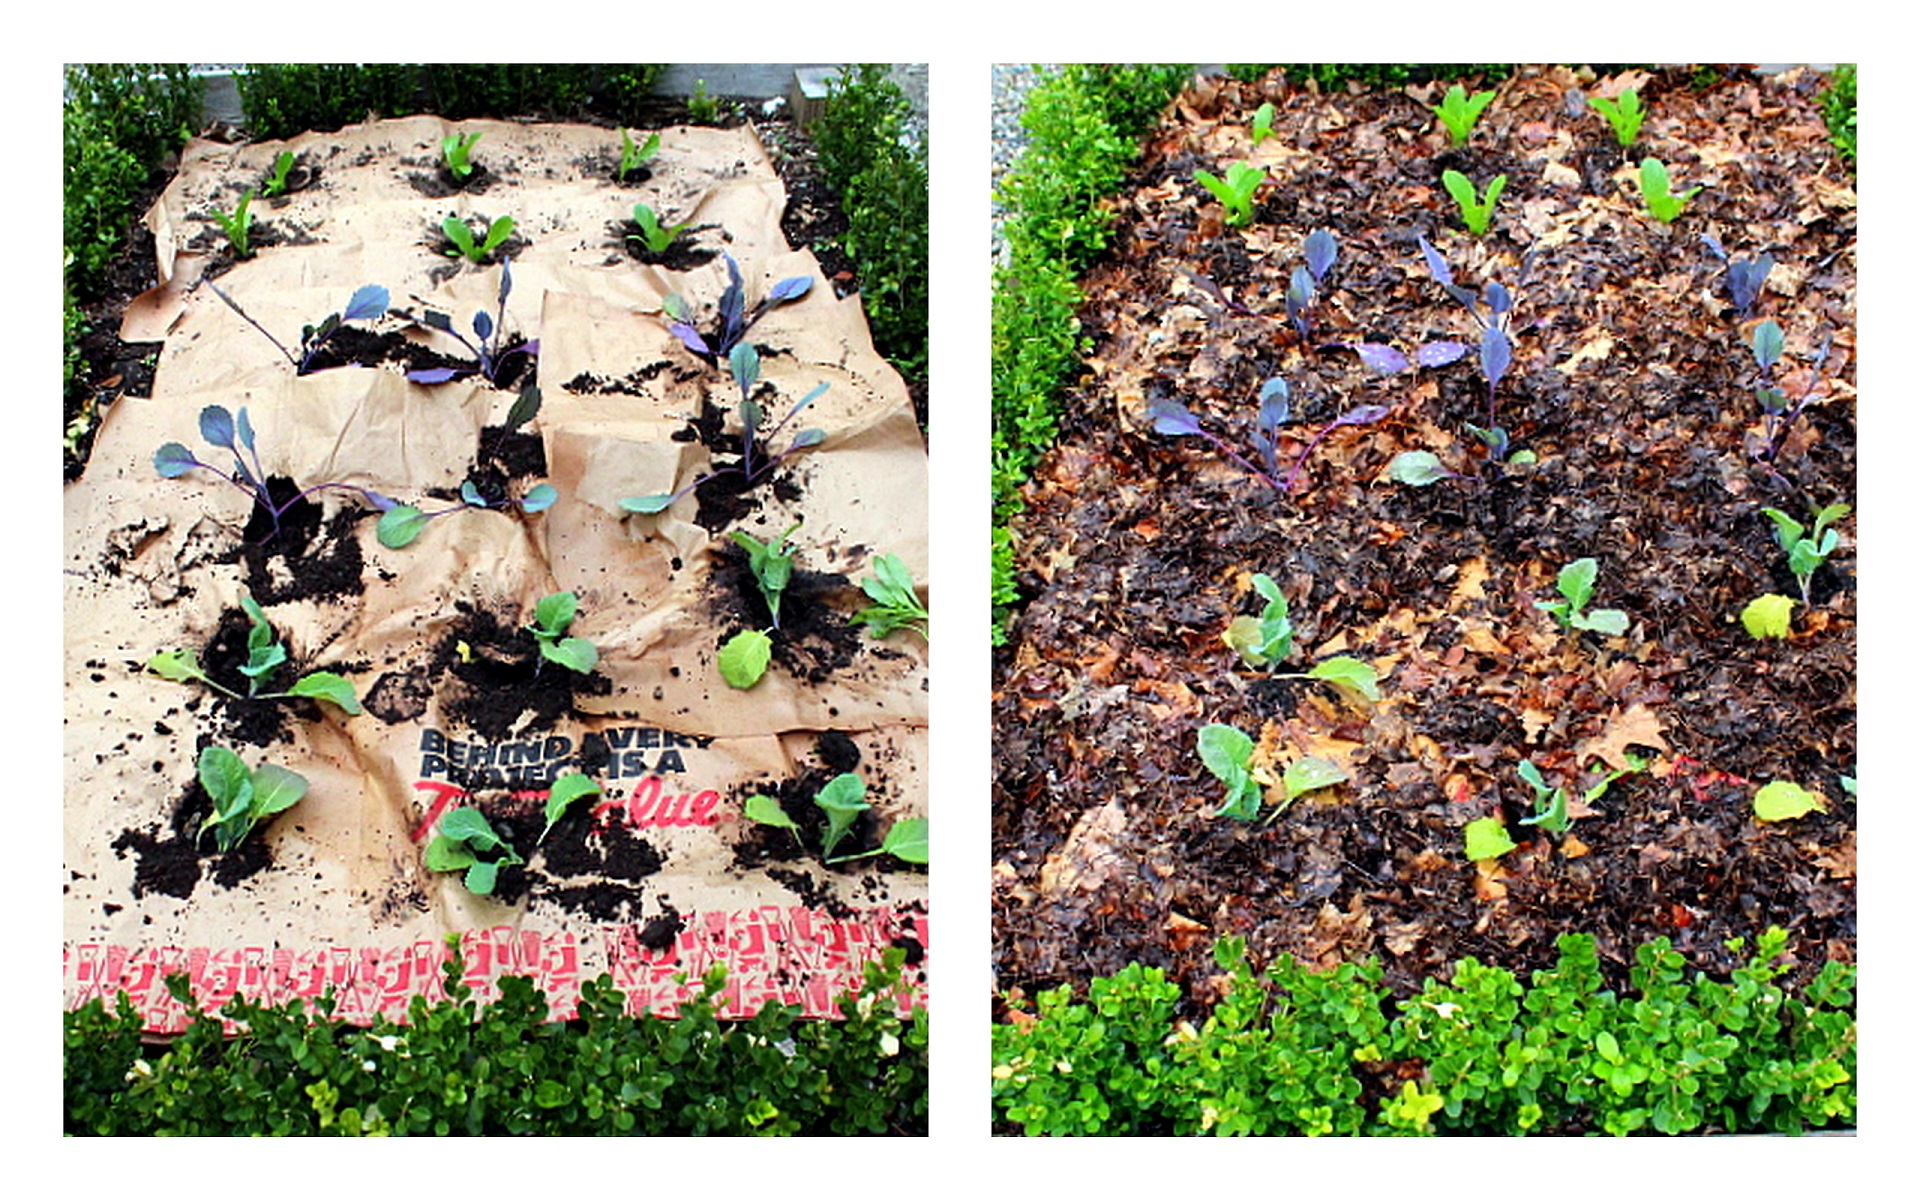
(Before-and-after magic: Bare, weedy beds transformed into lush, protected flower gardens with proper mulching! 🌸✨)
Common Summer Mulching Mistakes (and How to Fix Them) 🚫
Even experienced gardeners make these slip-ups—here’s how to avoid (or correct) the most damaging ones during hot weather:
- Mistake #1: Creating “Mulch Volcanoes” Around Trees & Shrubs Piling mulch high against trunks looks neat at first but traps moisture against bark → leads to rot, fungal diseases (like Phytophthora), insect entry points, and girdling roots over time. Fix: Always maintain a 2–6 inch mulch-free ring around the base. If already volcanoed, gently pull mulch back now—better late than never!
- Mistake #2: Applying Mulch Over Existing Weeds Weeds will push right through thin mulch layers, wasting your effort. Fix: Hand-pull or shallow-hoe weeds first. A light pre-mulch solarization (clear plastic for 2–4 weeks in sun) can kill stubborn weeds before mulching.
- Mistake #3: Using Too Thick a Layer (>4–5 inches) Excess mulch blocks air exchange, causes anaerobic conditions, invites fungal problems, and can suffocate shallow roots—especially bad in humid summers. Fix: Stick to 2–4 inches max. Rake and thin out over-applied areas.
- Mistake #4: Using Fresh, Uncomposted Wood Chips or Dyed Mulch Incorrectly Fresh chips temporarily rob soil of nitrogen during decomposition (nitrogen drawdown). Dyed mulches may contain questionable chemicals. Fix: Age wood chips 6–12 months or mix in a nitrogen source (compost, blood meal). Opt for natural, undyed mulches when possible—safer for edible plants.
- Mistake #5: Mulching Bone-Dry Soil Without Pre-Watering Dry mulch on dry soil can actually repel water (hydrophobic effect) and trap heat deeper. Fix: Always deep-water soil 1–2 days before mulching in summer.
- Mistake #6: Ignoring Light-Colored Mulch in Extreme Heat Dark mulches absorb and radiate heat, raising soil temps even more. Fix: Switch to straw, light pine straw, or pale wood chips when temps regularly exceed 35°C (95°F).
Avoid these pitfalls and your mulch becomes a powerful ally instead of a hidden problem! 🌿
(Visual warning: Classic mulch volcano vs. proper flat donut shape around a tree base—see the difference in root health potential!)
Expert Tips & Advanced Tricks for Maximum Summer Protection 🌟
Take your mulching game to the next level with these pro strategies:
- Top-dress existing mulch instead of removing old layers—simply add 1–2 inches of fresh material on top each summer. This saves labor and maintains continuous protection.
- Combine mulch with drip irrigation or soaker hoses — Place lines under the mulch for ultra-efficient, deep watering with zero evaporation loss.
- Mulch containers & raised beds carefully — Use 1–2 inches only (pots heat up fast). Consider white or reflective mulch in very hot areas to bounce sunlight away.
- Refresh frequency in hot climates — In places like Dhaka (with intense pre-monsoon heat and humidity), check mulch depth every 6–8 weeks and top up as needed.
- DIY mulch on a budget — Shred fall leaves, use grass clippings (thin layer, dried first to avoid matting), or collect free arborist wood chips (ask local tree services—they often give them away!).
- Mulch for new plantings in summer — Install immediately after planting, then water deeply. This dramatically improves establishment success during heat stress.
These small tweaks can boost plant survival and performance by 30–50% in tough summers, according to extension trials.
FAQs: Your Summer Mulching Questions Answered ❓
Can I mulch in the middle of summer heat? Yes! Mid-summer is actually an excellent time to refresh mulch—plants get instant moisture and temperature relief.
How much mulch does one tree need? For a medium tree (10–20 ft spread), aim for a 3–4 ft radius ring, 3 inches deep ≈ 1–2 cubic feet (roughly 1–2 large bags).
Is mulching vegetables in summer okay? Absolutely—straw or compost works best. Keep mulch 1–2 inches away from stems to prevent rot, especially on tomatoes and peppers.
What if it rains heavily right after mulching? Usually fine—mulch settles nicely. If it washes away, just re-spread. Heavy clay soils may need slight raking to prevent matting.
Organic vs. inorganic mulch—which is better for heat? Organic (wood chips, straw, pine needles) wins for heat/drought protection because it insulates better, adds nutrients, and supports soil life. Inorganic (gravel) is better for very low-water xeriscapes but can overheat soil if dark.
Conclusion: Transform Your Garden This Summer 🌿✨
Summer doesn’t have to mean scorched plants, constant watering, and weedy beds. With the right summer mulch application tips—choosing heat-friendly materials, applying at the perfect depth and distance, avoiding volcanoes, and refreshing strategically—you can protect roots from heat, lock in precious moisture, and cut maintenance dramatically.
Your plants (and your water bill!) will thank you. Grab your rake, gloves, and a bag of quality mulch today—give your garden the summer shield it deserves! 💪🌞
Have you tried any of these techniques? Drop a comment below with your results or your biggest mulching win—I’d love to hear how it’s working in your garden (Dhaka heat included!). For more plant-saving tips year-round, subscribe or check out our guides on drought-resistant plants and tree care in hot climates.
Happy mulching! 🌱


