
Imagine stepping into your garden in late fall or early spring, only to find fresh, crisp kale, vibrant spinach, or even tender young seedlings thriving under a light blanket of frost while everything else around them has wilted or perished. 😱 That magical extension of your growing season isn’t a dream—it’s the power of simple, low-tech season extenders like cold frames and cloches for frost protection.
As a passionate gardener with over 15 years of hands-on experience in zones ranging from temperate to cooler climates (including managing small urban plots and larger backyard setups), I’ve relied on these tools to push my harvest weeks—or even months—beyond the typical frost dates. Whether you’re dealing with unpredictable late frosts that threaten your tomato transplants 🍅, want to overwinter hardy greens for fresh winter salads 🥬, or simply aim to stretch your gardening joy in cooler weather, choosing between a cold frame and a cloche can make all the difference.
In this comprehensive guide, we’ll break down exactly what each tool is, their key differences, pros and cons, best uses for specific plants, real-world performance for frost protection, DIY tips, common pitfalls to avoid, and expert-backed strategies to maximize results. By the end, you’ll have the knowledge to pick the perfect option (or smartly combine them) for your garden’s needs—saving plants, money, and frustration along the way. Let’s dig in! 🌿
What Is a Cold Frame? 🛠️
A cold frame is essentially a mini, unheated greenhouse: a bottomless rectangular box (often made of wood, bricks, or recycled materials) topped with a transparent, sloped lid—typically old windows, polycarbonate panels, or glass—that captures and traps solar heat during the day.
- How it provides frost protection: The solid sides block wind, while the lid creates a passive solar effect. Daytime sun warms the air and soil inside, and that heat radiates back at night, keeping temperatures 4–10°F (2–6°C) warmer than outside (sometimes more with good insulation or added blankets on extreme nights). In trials and real gardener reports, well-built cold frames reliably shield plants from light to moderate frosts and even allow growth during mild winters.
Common types include:
- Traditional hinged wooden frames (easy to vent by propping open).
- DIY versions using straw bales topped with old windows for excellent insulation.
- Permanent sunken designs dug partially into the ground for extra thermal mass from the soil.
Cold frames excel at protecting larger areas—think an entire raised bed of greens—making them ideal for season-long extension rather than quick fixes.
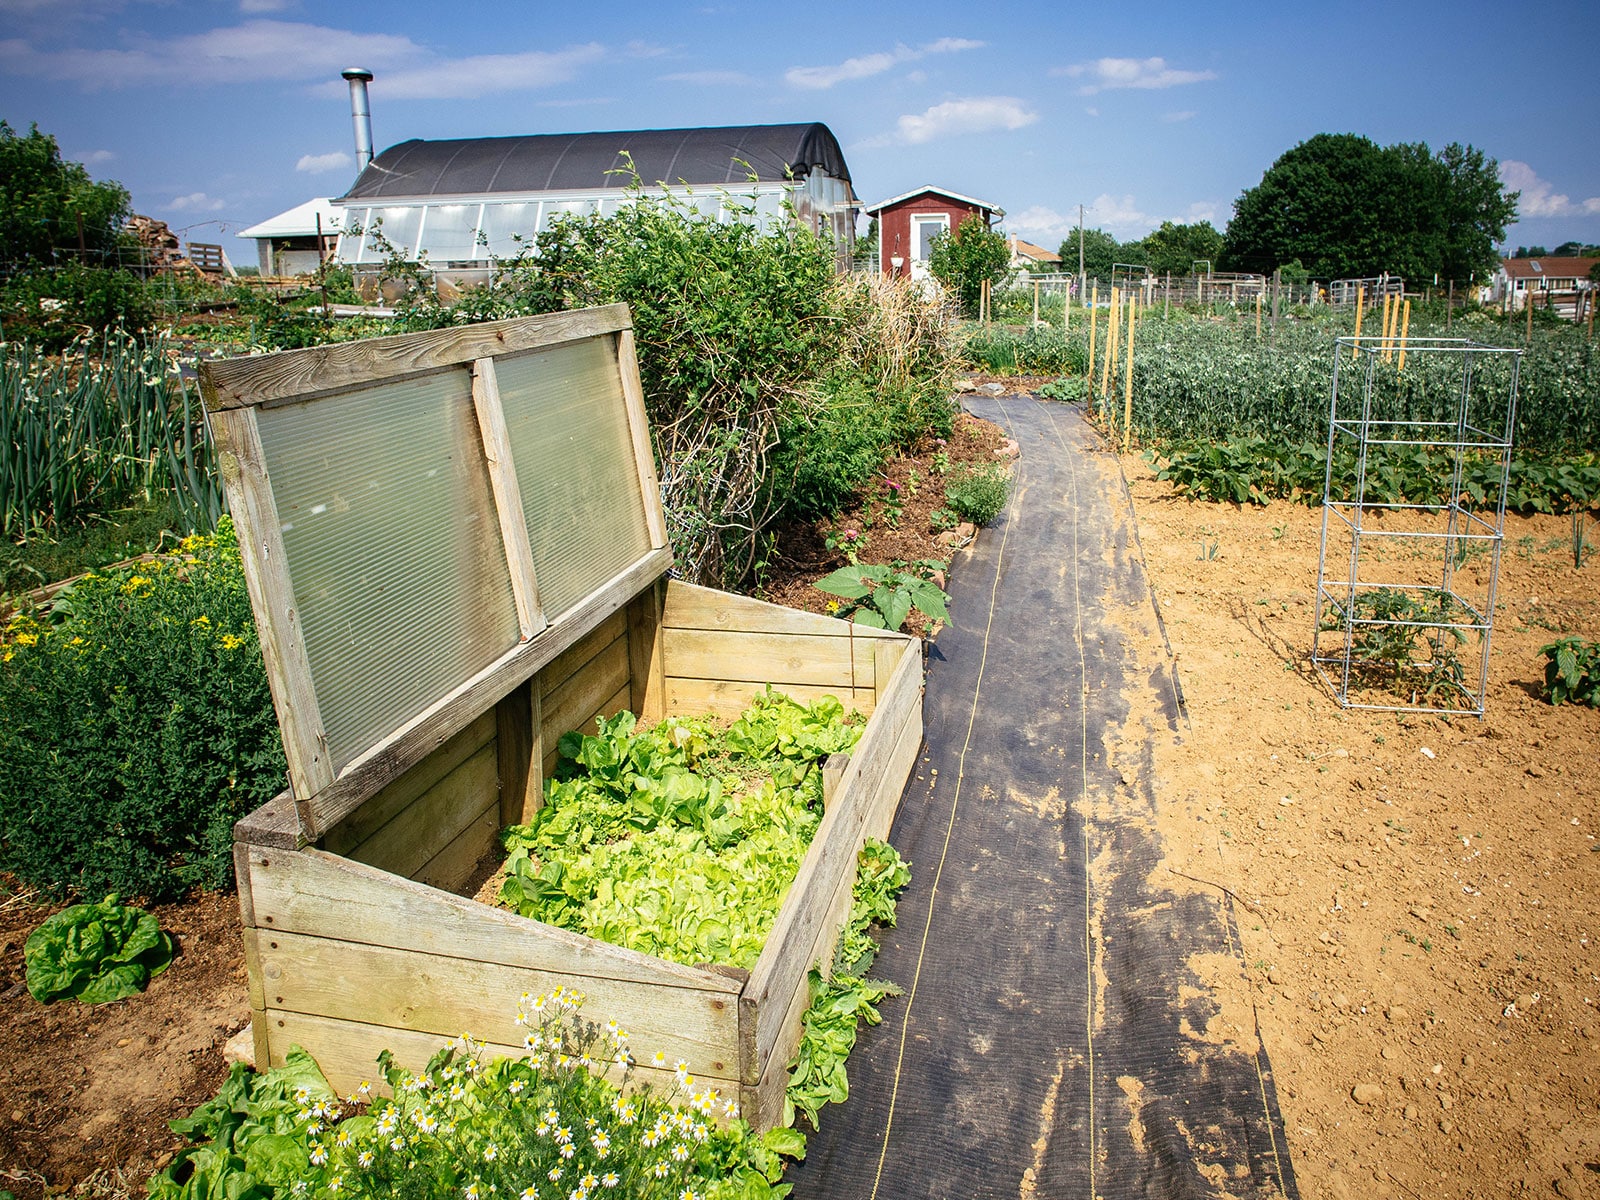
(Image: A classic wooden cold frame with hinged glass lid, placed in a sunny garden spot, protecting rows of lush winter greens.)
What Is a Cloche? 🌼
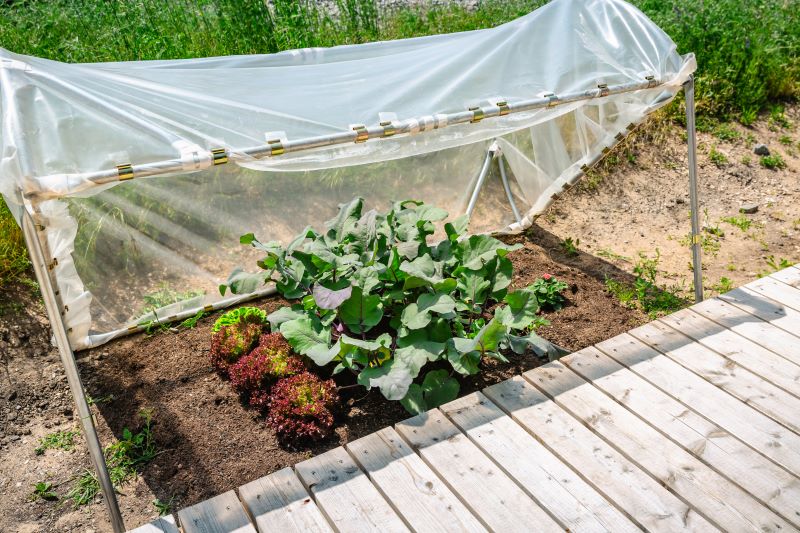
A cloche (from the French word for “bell”) is a portable, individual or small-group plant cover—classically a bell-shaped glass dome, but modern versions include plastic milk jugs, cut soda bottles, commercial vented domes, or even tunnel-style hoops draped with plastic.
- How it works for frost protection: It creates a tiny microclimate around one or a few plants, trapping warmth and blocking wind. Protection is typically lighter—around 2–6°F (1–3°C)—best suited for light frosts, short cold snaps, or early-season boosts. Heavier cloches (like water-filled “Wall O’ Water” styles) can add more warmth by absorbing daytime heat.
Popular options:
- Super-cheap DIY: Repurposed plastic bottles or jugs (cut the bottom off and place over seedlings).
- Commercial: Vented plastic bells for better airflow, or collapsible tunnels for rows.
Cloches shine for targeted, temporary use—perfect when you only need to shield a single prized pepper plant during a surprise freeze.
(Image: Clear plastic cloches covering young tomato plants in spring, with vents visible for airflow control.)
Key Differences: Cold Frames vs. Cloches Side-by-Side 📊
Here’s a quick comparison to help you visualize the trade-offs:
| Feature | Cold Frames | Cloches |
|---|---|---|
| Coverage | Multiple plants / small bed (e.g., 4×8 ft) | Individual plants or small clusters |
| Size & Portability | Fixed or semi-permanent | Highly portable & easy to store |
| Heat Retention | Higher (solid sides + larger air volume) | Moderate (more air exchange) |
| Ventilation Control | Excellent (hinged lid props open easily) | Basic (vents or manual lift-off) |
| Frost Protection Level | 4–10°F (2–6°C), reliable for weeks | 2–6°F (1–3°C), best for nights/light frosts |
| Cost | $50–300 (DIY often under $50 with scraps) | $5–50 (DIY nearly free) |
| Best For | Long-term season extension | Spot protection & quick deployment |
| Overheating Risk | Higher on sunny days (needs monitoring) | Lower, but still vent on warm days |
Cold frames offer more robust, consistent protection thanks to better insulation and wind blocking, while cloches win on flexibility and low cost.
How to Use Cold Frames and Cloches Effectively for Maximum Frost Protection 🛠️🌡️
Proper use turns these simple tools into powerful allies against frost. Here’s my step-by-step expert approach, refined from years of trial, error, and bountiful harvests.
1. Strategic Placement
- Position both cold frames and cloches in the sunniest, south-facing spot possible (in the Northern Hemisphere) to maximize solar gain.
- Choose a sheltered location—near a south-facing wall, fence, or hedge—to reduce wind chill and retain more heat. Avoid low-lying frost pockets where cold air pools.
- For cold frames, face the slope toward the south for optimal winter sun angle.
2. Ventilation Rules (The #1 Key to Success!)
- Always vent on sunny or mild days — even in winter, internal temps can soar above 80–90°F (27–32°C) quickly, scorching plants. Prop the cold frame lid open 2–6 inches (or fully on warm days) by mid-morning.
- Close before sunset to trap evening heat. Use automatic vent openers (cheap hydraulic arms) for hands-off reliability if you’re away.
- For cloches, poke holes, lift slightly, or remove entirely on warm days. Vented commercial cloches make this easier.
3. Temperature Monitoring
- Invest in a simple min-max thermometer or soil probe (~$10–20). Track soil and air temps inside vs. outside. Aim to keep soil above freezing for hardy crops; tender ones need 40°F+ (4°C+).
- On extreme cold nights, add extra insulation: old blankets, burlap, or straw over the lid/cloche.
4. Watering and Soil Management
- Water less frequently under covers—soil stays moister longer due to reduced evaporation. Check soil moisture before watering to avoid soggy conditions that invite rot.
- Use well-draining soil mixes; add compost for better heat retention. Mulch around plants inside for extra insulation.
5. Layering for Extra Protection
- Combine with floating row covers (lightweight fabric) draped inside the cold frame or over cloches for an additional 2–8°F boost.
- Place dark-colored water jugs or stones inside as thermal mass—they absorb daytime heat and release it slowly at night. 💧
(Image: A wooden cold frame with lid propped open for ventilation on a sunny day, showing young plants thriving inside – essential to prevent overheating.)

(Image: Modern polycarbonate cold frame with automatic vents and lush lettuce crop – great example of effective daily management.)

Plants That Benefit Most from Cold Frames vs. Cloches 🌿🥦
Cold Frames: Best for Hardy, Bed-Scale Crops These structures excel with cool-season vegetables that tolerate light frost but thrive with consistent protection:
- Leafy greens: Lettuce (especially winter varieties), spinach, arugula, mache (corn salad), claytonia — harvest fresh salads all winter in mild zones. 🥬
- Brassicas: Kale, collards, Swiss chard, broccoli raab.
- Roots: Overwintered carrots, beets, parsnips, leeks.
- Herbs: Parsley, cilantro, chervil.
I’ve successfully grown spinach under a cold frame through -10°F (-23°C) nights with blanket insulation—plants bounce back beautifully!
Cloches: Ideal for Tender, Individual Protection Use these for heat-loving plants that can’t handle frost at all:
- Nightshade family: Tomatoes, peppers, eggplants (protect early transplants or late-season fruit). 🍅🌶️
- Cucurbits: Cucumbers, squash, melons.
- Herbs: Basil (very frost-sensitive).
- Young perennials or fruit trees: Protect new blueberry bushes or fig cuttings during their first winters.
Cloches give that crucial few extra weeks for hardening off or ripening the last fruits.
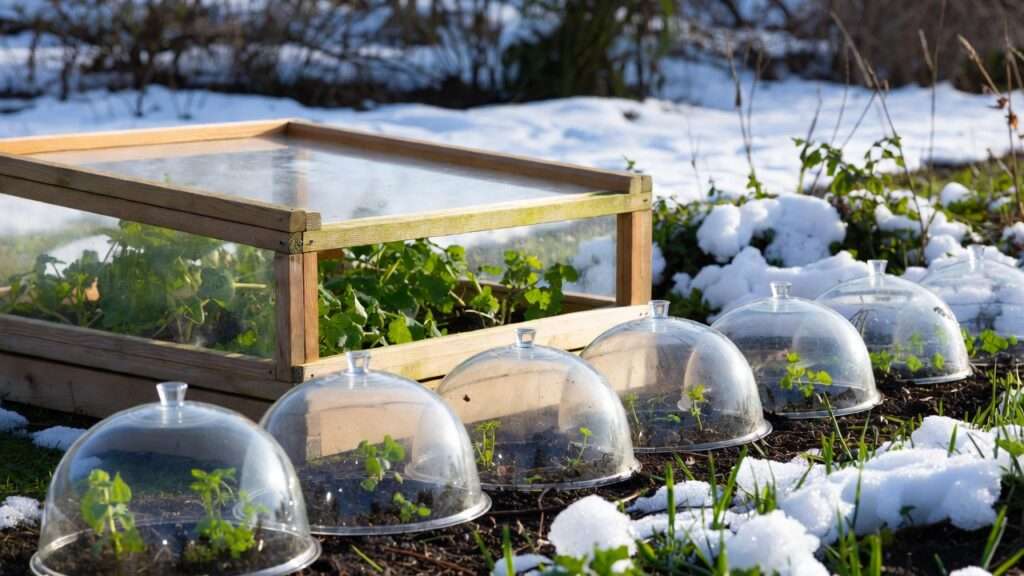
(Image: Thriving winter greens like kale, spinach, and lettuce growing happily inside a cold frame – classic cold-hardy beneficiaries.)
DIY Builds and Budget-Friendly Options ♻️
Easy Cold Frame DIY
- Old-window method (my favorite): Collect free/cheap discarded windows. Build a simple wooden box (cedar or pressure-treated lumber) to fit, slope the back higher than front (12–18° angle). Hinge the windows as lids. Cost: $20–80.
- Straw bale version: Stack bales into a rectangle, top with old windows or clear plastic sheeting. Super-insulating and decomposes into compost later!
Super-Simple Cloche Hacks
- Cut the bottom off 1-gallon milk jugs or 2-liter bottles → instant mini cloche.
- Use wire hoops + row cover fabric for mini hoop tunnels over rows.
- Water-filled Wall O’ Water: Fill plastic cylinders with water around plants for 10–15°F protection.
These recycled builds keep costs near zero while delivering real frost protection.
(Image: Classic DIY cold frame built from reclaimed old windows – rustic, effective, and eco-friendly.)

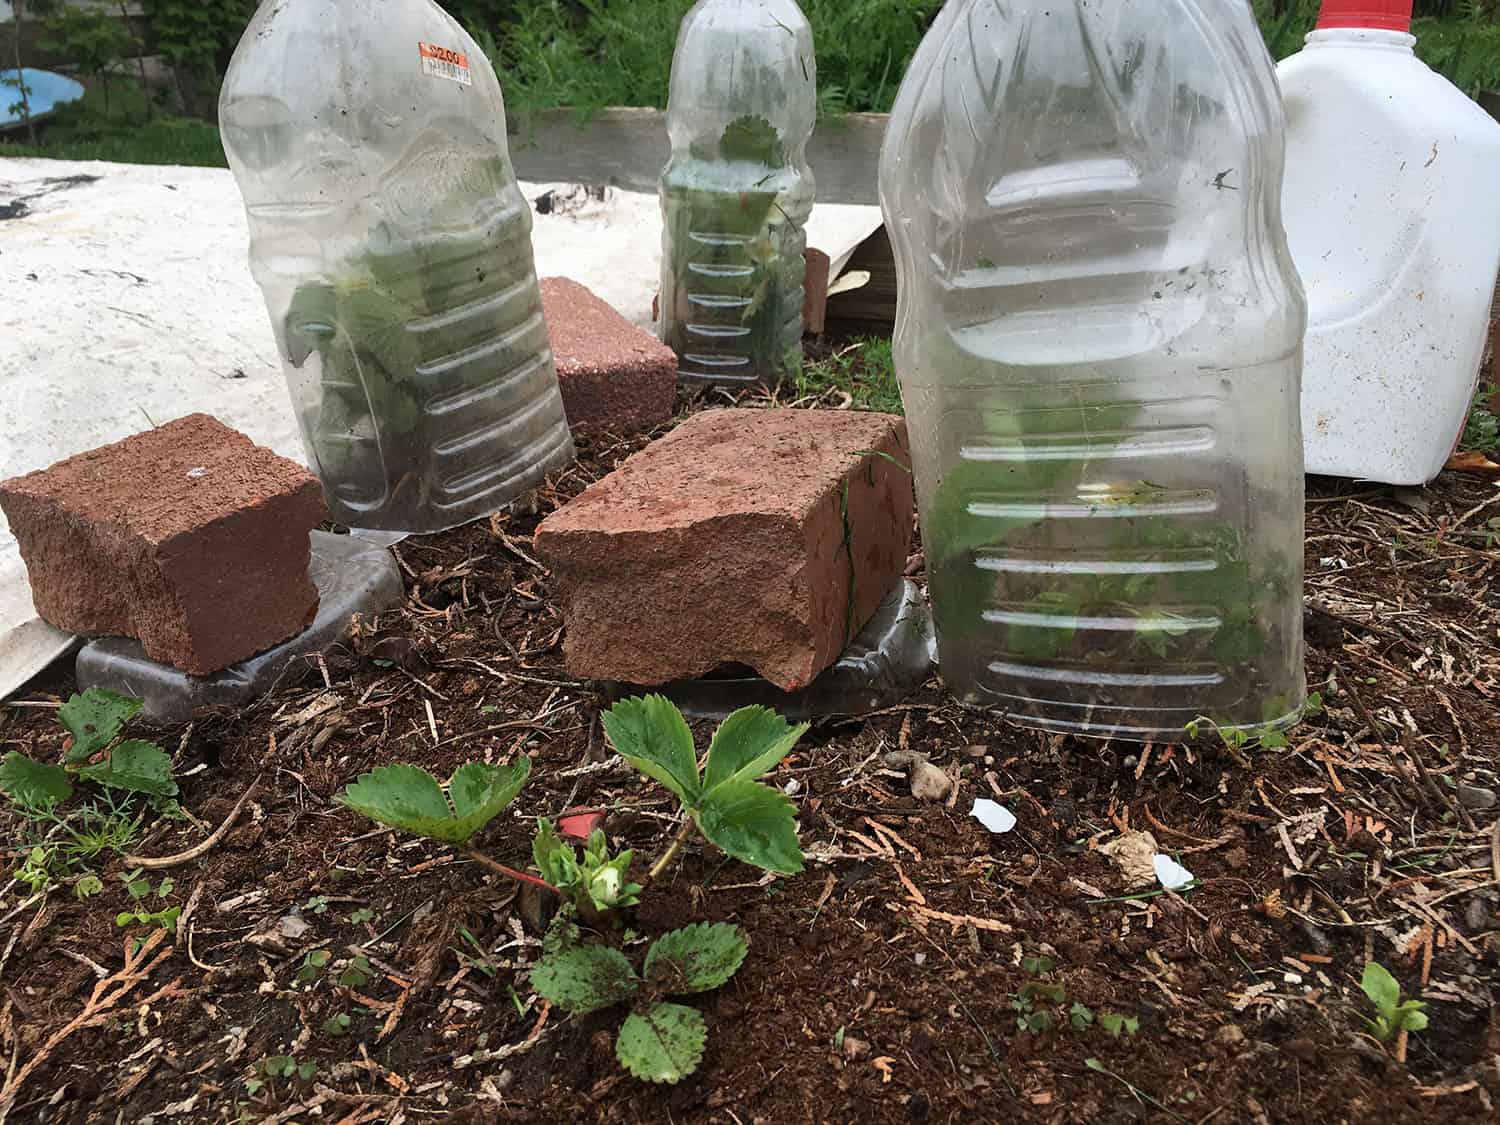
*(Image: Simple DIY milk jug cloches protecting strawberry plants from frost – cheap, cheerful, and works great!) *
Common Mistakes to Avoid ⚠️😩
Even experienced gardeners slip up—I’ve made most of these myself over the years. Learn from them to keep your plants happy and healthy.
- Forgetting to vent — The biggest killer! On any day above freezing with sun, cold frames (and cloches) turn into ovens. Scorched leaves, wilting, or cooked seedlings are common results. Always check and vent by late morning.
- Poor anchoring/securing — Lightweight cloches blow away in wind, exposing plants to frost. Use rocks, stakes, or bury edges slightly. Cold frames can shift if not level—secure bases properly.
- Using at the wrong time/conditions — Don’t rely on cloches for hard freezes (below 28°F/-2°C); they often aren’t enough. Cold frames struggle in prolonged sub-zero spells without extra blankets. Match the tool to the expected low.
- Ignoring condensation and airflow — Trapped moisture leads to fungal diseases like damping-off or powdery mildew. Ensure good ventilation and avoid overcrowding plants inside.
- Overwatering under covers — Soil dries slower; soggy roots rot quickly. Water only when the top inch feels dry.
- Leaving covers on too long in spring — Plants get leggy or weak without gradual hardening off. Gradually increase exposure over 7–10 days.
(Image: Scorched hosta leaves from overheating in a cold frame or under cover – classic example of what happens when you forget to vent on a sunny day.)

(Image: Garden bed covered with frost blanket/row cover over hoops – a great layering technique to add extra protection on cold nights without the full commitment of a cold frame.)
Expert Insights and Real Gardener Experiences 🌟
From university extension services (like those from Cornell, Oregon State, and RHS) and seasoned growers:
- Cold frames reliably add 4–8 weeks of season extension in zones 5–7; some report 10+ weeks with insulation. Cloches typically give 1–4 weeks, best for transitional protection.
- In cooler, cloudy climates, prioritize good insulation (polycarbonate over single-pane glass) and thermal mass (dark water containers).
- Many gardeners in variable weather zones combine both: Use cold frames for main crop beds and cloches for stragglers or experimentals.
- Success story: One Midwest gardener overwintered an entire bed of ‘Winterbor’ kale and ‘Bloomsdale’ spinach in a DIY cold frame, harvesting through February with occasional blanket topping—far fresher than store-bought!
Pro tip from pros: Track your local first/last frost dates (via tools like the Old Farmer’s Almanac or USDA zone maps) and start experimenting small. Adjust based on your microclimate.
(Image: Thriving cold frame full of lush lettuce and greens in fall – real-world proof of effective frost protection and season extension.)
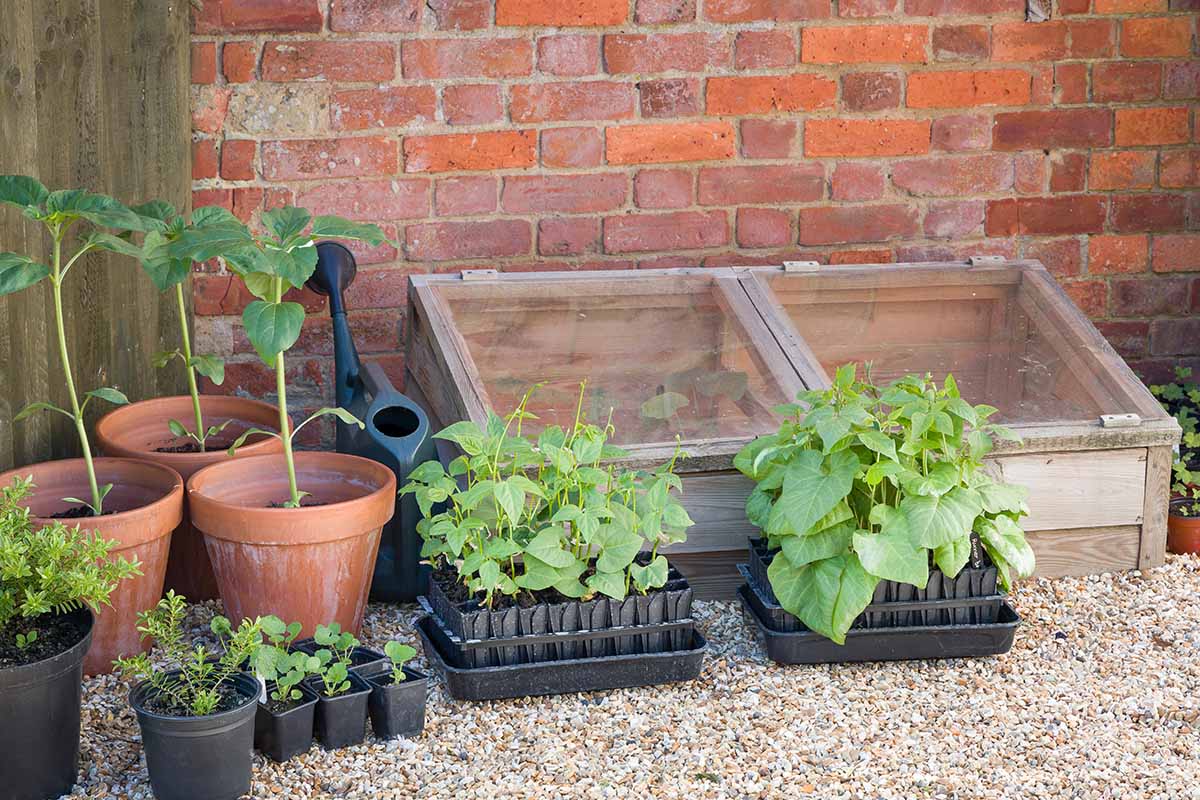
(Image: Multiple cold frames in a productive garden setup, protecting seedlings and extending the growing season beautifully.)
FAQs: Cold Frames vs. Cloches for Frost Protection ❓
Can cold frames protect against hard freezes? Yes, often down to the mid-20s°F (-4°C) or lower with insulation/blankets, but not guaranteed below 20°F (-7°C) without heat source.
Are cloches better for small gardens? Absolutely—cloches take minimal space, are portable, and perfect when you only need to protect a handful of plants.
How much warmer do they make it inside? Cold frames: 4–10°F (2–6°C) average, up to 15°F+ in ideal conditions. Cloches: 2–6°F (1–3°C), more with water-filled types.
Do I need to water differently under covers? Yes—less often. Check soil moisture manually; overwatering is common and leads to root issues.
Best materials for DIY? Cold frames: Old windows, polycarbonate sheets, cedar/pressure-treated wood. Cloches: Recycled plastic bottles, vented commercial bells, or hoop + fabric tunnels.
Conclusion: Pick the Right Tool and Enjoy a Longer Harvest 🌱🍅
Cold frames and cloches are both fantastic, low-cost ways to fight frost and extend your growing season—but they shine in different scenarios. Go with a cold frame for robust, bed-scale protection and serious season stretching with hardy crops. Choose cloches for quick, affordable spot-saving of tender plants or when space/budget is tight. Or combine them for maximum flexibility!
Start small: Build or buy one, experiment this season, monitor results, and scale up. With proper placement, ventilation, and care, you’ll soon be harvesting fresh produce long after your neighbors have packed it in—and that’s the real joy of gardening.


