The Ultimate Guide to Caring for Amaryllis: Expert Advice for Beautiful Flowers
If you’re looking to caring for amaryllis plants and ensure they bloom beautifully, this comprehensive guide has everything you need. From watering to sunlight and soil requirements, we’ve got expert advice to help you keep your amaryllis healthy and thriving. Whether you’re a beginner or experienced gardener, this article has everything you need to know to care for your amaryllis plants and enjoy their stunning flowers.
Table of Contents
ToggleUnderstanding Amaryllis Plants
Description of amaryllis plants (Amaryllis spp.), their origins, and common varieties.
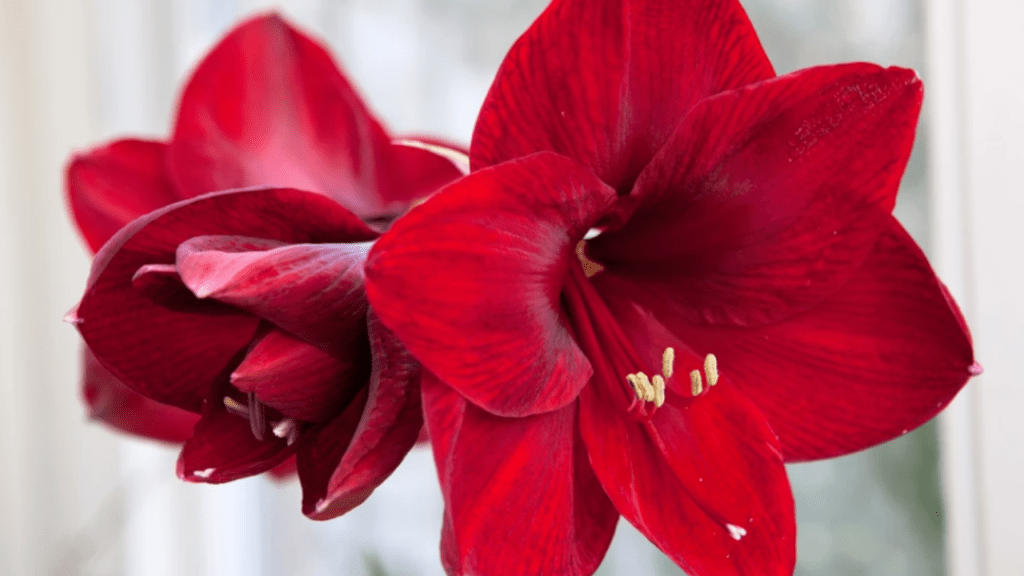
Amaryllis plants, also known as Amaryllis spp., are a popular choice for indoor and outdoor gardening due to their stunning flowers and easy care requirements. These plants are native to South America and come in a variety of colors, including red, white, pink, and orange. The most common varieties of amaryllis plants include the Belladonna Lily, Jersey Lily, and Barbados Lily.
Amaryllis plants are known for their large, trumpet-shaped flowers that bloom on tall, sturdy stems. These flowers can add a pop of color to any garden or indoor space and are a favorite among gardeners for their striking beauty. With proper care, amaryllis plants can bloom multiple times throughout the year, making them a delightful addition to any garden or home.
When caring for amaryllis plants, it’s important to provide them with well-draining soil, bright light, and regular watering. These plants thrive in warm, sunny conditions and can be easily grown in containers or in the ground. With the right care and attention, your amaryllis plants will reward you with a stunning display of colorful blooms that will brighten up your space.
Benefits of growing amaryllis indoors and outdoors.
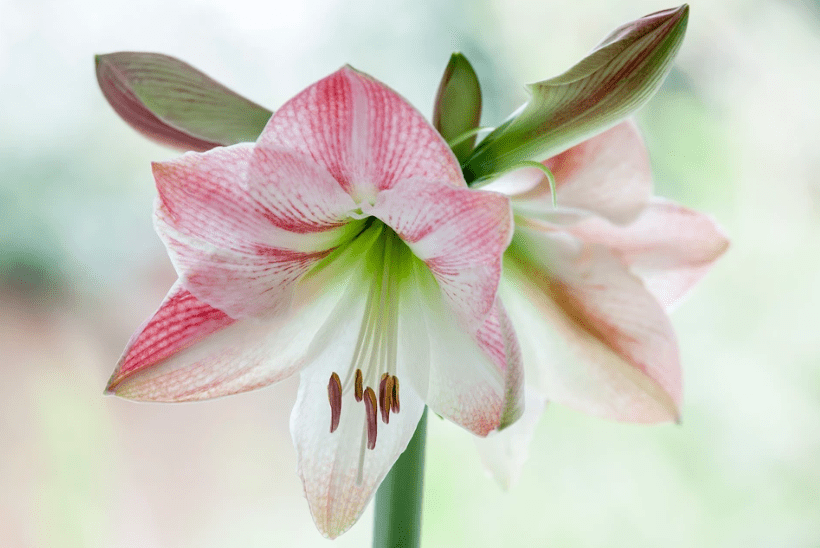
Growing amaryllis plants indoors and outdoors has many benefits. When grown indoors, amaryllis plants can add a touch of color and beauty to any room. Their large, trumpet-shaped flowers can brighten up a space and bring a sense of joy and vibrancy. Additionally, growing amaryllis indoors allows you to enjoy their blooms year-round, as they can be encouraged to bloom multiple times throughout the year with the right care.
On the other hand, growing amaryllis outdoors can enhance the beauty of your garden or landscape. Their tall, sturdy stems and striking flowers can create a focal point in your outdoor space, adding visual interest and charm. Amaryllis plants are also relatively low maintenance, making them a great choice for gardeners looking for a plant that is both beautiful and easy to care for.
Whether grown indoors or outdoors, amaryllis plants are a versatile and rewarding addition to any space. With their stunning blooms and easy care requirements, they are sure to brighten up your home or garden and bring joy to all who see them.
Choosing the Right Amaryllis Bulbs
Factors to consider when selecting bulbs (size, condition, variety).
When selecting amaryllis bulbs, there are several factors to consider. First, consider the size of the bulb. Larger bulbs will typically produce more flowers and have a stronger, more robust presence in your garden or indoor space. Next, consider the condition of the bulb. Look for bulbs that are firm and free from any signs of mold or rot. Finally, consider the variety of amaryllis bulb that you would like to grow. There are many different varieties available, each with its own unique color and bloom characteristics. Consider your personal preferences and the overall design of your garden or indoor space when selecting a variety. By carefully considering these factors, you can ensure that you select the best amaryllis bulbs for your needs and preferences.
Importance of buying bulbs from reputable sources.
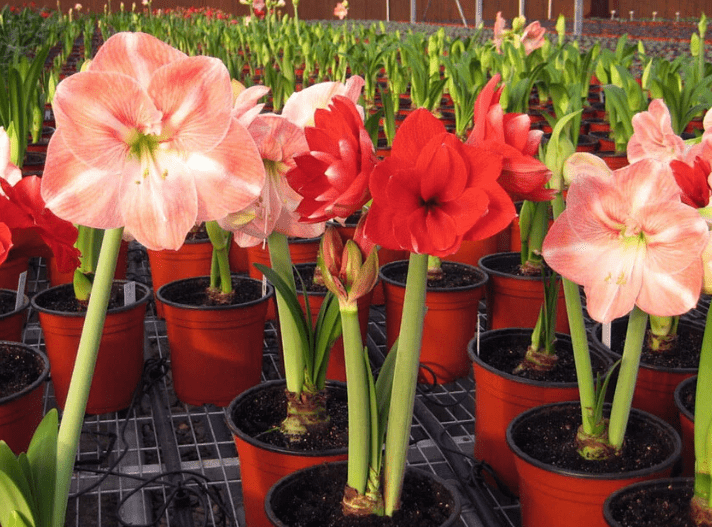
When it comes to buying bulbs, it is important to purchase them from reputable sources. This ensures that you are getting high-quality bulbs that are healthy and free from any diseases or pests. Reputable sources also offer a wide variety of bulbs, giving you more options to choose from. This allows you to select the best bulbs for your specific needs and preferences. Additionally, buying from reputable sources ensures that you are supporting ethical and sustainable practices, which is important for the environment. So, always make sure to buy bulbs from reputable sources to guarantee the best selection and quality for your garden or indoor space.
Planting Amaryllis Bulbs
Step-by-step guide on planting amaryllis bulbs in pots or in the ground
Step 1: Choose a location with well-drained soil and a spot that receives full sun or partial shade. If planting in pots, make sure the container has drainage holes.
Step 2: When purchasing amaryllis bulbs, make sure to buy them from reputable sources to ensure high-quality, healthy bulbs free from disease or pests.
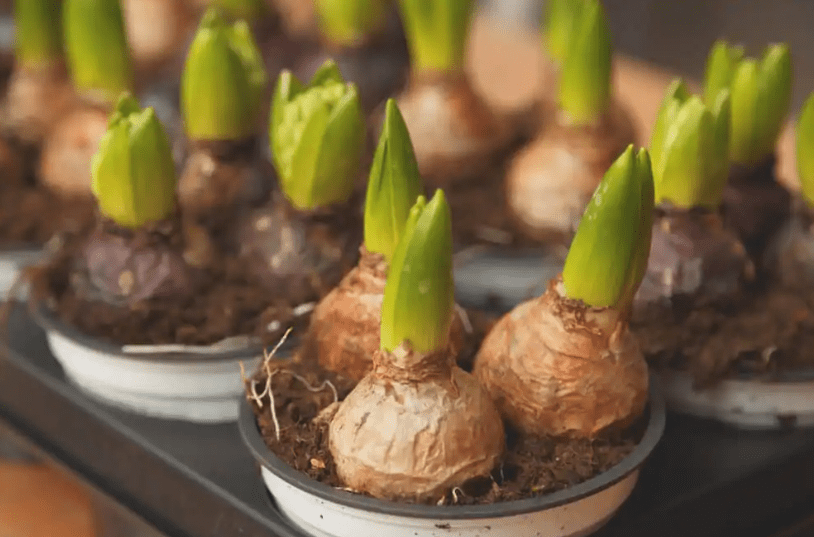
Step 3: If planting in pots, fill the container with well-draining potting mix, leaving enough space for the bulb to be planted with the neck and shoulders above the soil line. If planting in the ground, dig a hole that is about 8 inches deep.
Step 4: Place the bulb in the pot or hole, making sure to position it with the neck and shoulders above the soil line. Fill the pot or hole with soil, pressing it down gently to secure the bulb in place.
Step 5: Water the newly planted bulb thoroughly, making sure the soil is evenly moist but not waterlogged.
Step 6: If planting in pots, place the container in a warm, sunny location and water as needed to keep the soil evenly moist. If planting in the ground, provide regular waterings to keep the soil evenly moist.
Step 7: Once the bulb begins to grow, provide support if needed to keep the flower stalk upright.
Step 8: Enjoy the beautiful blooms of the amaryllis as they grow and flourish in your garden or indoor space. With proper care and maintenance, amaryllis bulbs can provide stunning flowers year after year.
Soil requirements and ideal planting times.
When planting amaryllis bulbs, it’s important to use well-draining soil to prevent waterlogging and root rot. A good potting mix or garden soil with some sand or perlite added for drainage is ideal. The ideal time to plant amaryllis bulbs is in the fall, before the first frost, to allow the bulbs to establish roots before winter. If planting in pots, place the container in a warm, sunny location and water as needed to keep the soil evenly moist. If planting in the ground, provide regular waterings to keep the soil evenly moist. Once the bulb begins to grow, provide support if needed to keep the flower stalk upright. With proper care and maintenance, amaryllis bulbs can provide stunning flowers year after year.
Watering Techniques
Best practices for watering amaryllis plants throughout the year.
Amaryllis plants require proper watering throughout the year to thrive and produce beautiful flowers. When planting amaryllis bulbs, it’s important to use well-draining soil to prevent waterlogging and root rot. A good potting mix or garden soil with some sand or perlite added for drainage is ideal. The ideal time to plant amaryllis bulbs is in the fall, before the first frost, to allow the bulbs to establish roots before winter.
If planting in pots, place the container in a warm, sunny location and water as needed to keep the soil evenly moist. Amaryllis plants prefer to be kept evenly moist, but not waterlogged. If planting in the ground, provide regular waterings to keep the soil evenly moist, especially during dry periods.
Once the bulb begins to grow, provide support if needed to keep the flower stalk upright. After the flowers have faded, continue to water the plant regularly to support the growth of new leaves. Reduce watering in late summer to encourage the bulbs to enter a period of dormancy.
With proper care and maintenance, amaryllis bulbs can provide stunning flowers year after year. Remember to adjust your watering routine based on the specific needs of your amaryllis plants throughout the year.
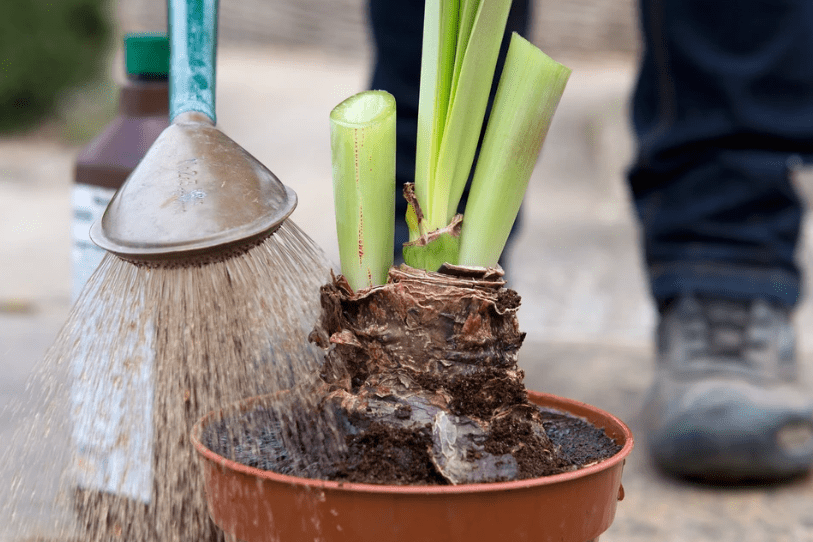
Signs of overwatering and underwatering to watch for.
Overwatering and underwatering are common issues when it comes to caring for amaryllis plants. Signs of overwatering to watch for include yellowing or wilting leaves, mushy or rotting bulbs, and a foul smell coming from the soil. On the other hand, signs of underwatering include dry, brown, or curling leaves, and a dry, shriveled bulb. It’s important to check the soil moisture regularly and adjust your watering routine accordingly. Keeping the soil evenly moist, but not waterlogged, is key for the health of your amaryllis plants. As the bulbs begin to grow and bloom, continue to provide regular waterings to support their growth. During the summer months, reduce watering to allow the bulbs to enter a period of dormancy. By paying attention to the signs of overwatering and underwatering, you can ensure the health and longevity of your amaryllis plants.
Light and Temperature Requirements
Optimal light conditions for amaryllis (sunlight vs. artificial light).
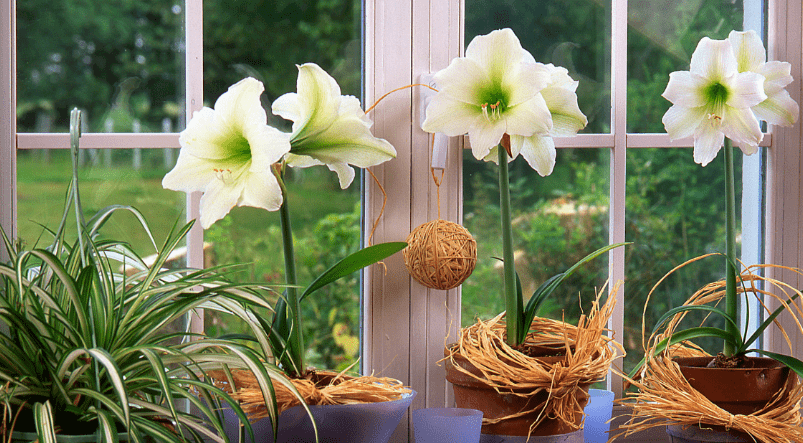
Amaryllis plants thrive in bright, indirect sunlight. Placing them near a south or west-facing window is ideal for providing the right amount of natural light. However, if you do not have access to sufficient natural light, you can always supplement with artificial light. LED grow lights are a great option for providing the right spectrum of light for optimal growth. Make sure the light source is placed about 12-18 inches above the plant and is left on for 12-14 hours a day. It is important to monitor the temperature as well. Amaryllis plants prefer temperatures between 60-75°F during the daytime and slightly cooler temperatures at night. By providing the right combination of natural or artificial light and maintaining the correct temperature, you can ensure that your amaryllis plants thrive and produce beautiful blooms.
Ideal temperature ranges for growth and flowering.
Proper lighting and temperature are crucial for the growth and flowering of plants. Amaryllis plants, for example, thrive when placed near a south or west-facing window to receive the right amount of natural light. If natural light is not sufficient, you can supplement with artificial light, such as LED grow lights, to provide the optimal spectrum of light for growth. It’s important to place the light source about 12-18 inches above the plant and leave it on for 12-14 hours a day. In addition to light, monitoring the temperature is essential. Amaryllis plants prefer temperatures between 60-75°F during the daytime and slightly cooler temperatures at night. By providing the right combination of natural or artificial light and maintaining the correct temperature, you can ensure that your amaryllis plants grow and produce beautiful blooms.
Fertilizing Amaryllis
Types of fertilizers suitable for amaryllis plants.
When it comes to fertilizing your amaryllis plants, it’s important to use a balanced fertilizer that contains equal parts of nitrogen, phosphorus, and potassium. Look for a fertilizer with an N-P-K ratio of 10-10-10 or 20-20-20. This will provide the necessary nutrients for healthy growth and blooming. You can also use a slow-release fertilizer to ensure that your plants receive a continuous supply of nutrients over time. Make sure to follow the instructions on the fertilizer package and avoid over-fertilizing, as this can lead to salt buildup in the soil. Additionally, you can use a liquid fertilizer every 4-6 weeks during the growing season to promote strong, healthy growth. By providing the right type of fertilizer and following the proper feeding schedule, you can caring for amaryllis plants thrive and produce vibrant blossoms.
Frequency and timing of fertilization for different growth stages.
When it comes to fertilizing your amaryllis plants, it’s important to understand the frequency and timing of fertilization for different growth stages. During the growing season, you can use a balanced fertilizer with an equal ratio of nitrogen, phosphorus, and potassium. Look for a fertilizer with an N-P-K ratio of 10-10-10 or 20-20-20 to provide the necessary nutrients for healthy growth and blooming.
For newly planted bulbs, you can apply a slow-release fertilizer to provide a continuous supply of nutrients over time. This will help the bulbs establish strong roots and prepare for the growing season.
Once the plants start to show new growth, you can begin using a liquid fertilizer every 4-6 weeks to promote strong, healthy growth. Be sure to follow the instructions on the fertilizer package and avoid over-fertilizing, as this can lead to salt buildup in the soil.
As the plants start to develop flower buds, you can continue using the liquid fertilizer to support blooming. However, it’s important to stop fertilizing once the flowers start to bloom to prevent excessive foliage growth.
By providing the right type of fertilizer and following the proper feeding schedule, you can caring for amaryllis plants thrive and produce vibrant blossoms at each stage of their growth.
Amaryllis Care During Growth Stages
Care tips from planting to blooming and beyond.
When planting amaryllis bulbs, it’s important to choose a well-draining potting mix and a container with drainage holes to prevent waterlogged soil. After planting, place the bulbs in a warm, bright location and water them thoroughly. Once the plants start to show new growth, you can begin using a liquid fertilizer every 4-6 weeks to promote strong, healthy growth. Be sure to follow the instructions on the fertilizer package and avoid over-fertilizing, as this can lead to salt buildup in the soil.
As the plants start to develop flower buds, you can continue using the liquid fertilizer to support blooming. However, it’s important to stop fertilizing once the flowers start to bloom to prevent excessive foliage growth. In addition to fertilizing, it’s important to water your amaryllis plants regularly, ensuring that the soil is evenly moist but not waterlogged.
After the flowers have faded, you can continue to caring for amaryllis by deadheading the spent blooms and providing regular water and sunlight. As the plants enter their dormant period, you can gradually reduce watering and stop fertilizing to allow the bulbs to rest.
By providing the right type of fertilizer and following the proper feeding and care schedule, you can help your caring for amaryllis plants thrive and produce vibrant blossoms at each stage of their growth. With the right care, your amaryllis plants can continue to bloom year after year, bringing beauty and color to your home.
Common issues like pests and diseases and how to prevent or address them.
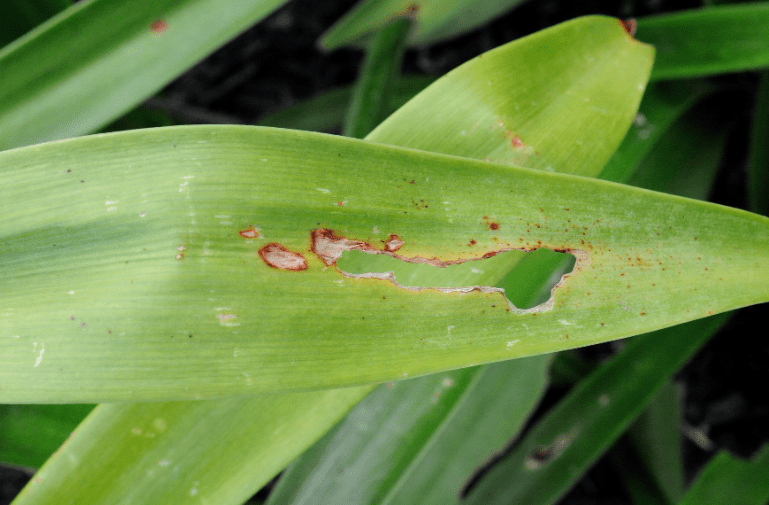
When it comes to caring for your amaryllis plants, it’s important to be aware of common issues like pests and diseases and how to prevent or address them. One common pest that can affect caring for amaryllis plants is the red spider mite. These tiny pests can cause discoloration and stippling on the leaves, and a severe infestation can lead to leaf drop. To prevent red spider mites, you can regularly mist your amaryllis plants with water and keep the humidity levels high. If you do notice signs of red spider mites, you can use insecticidal soap to control the infestation. Another common issue is the occurrence of fungal diseases such as powdery mildew and botrytis. To prevent these diseases, it’s important to avoid overwatering your amaryllis plants and to ensure good air circulation around the leaves. If you do notice signs of fungal diseases, you can use a fungicide to help control the spread. By being proactive in preventing and addressing these common issues, you can help your caring for amaryllis plants stay healthy and vibrant.
Amaryllis Blooming: Maximizing Flowering
How to encourage blooming and prolong the flowering period.
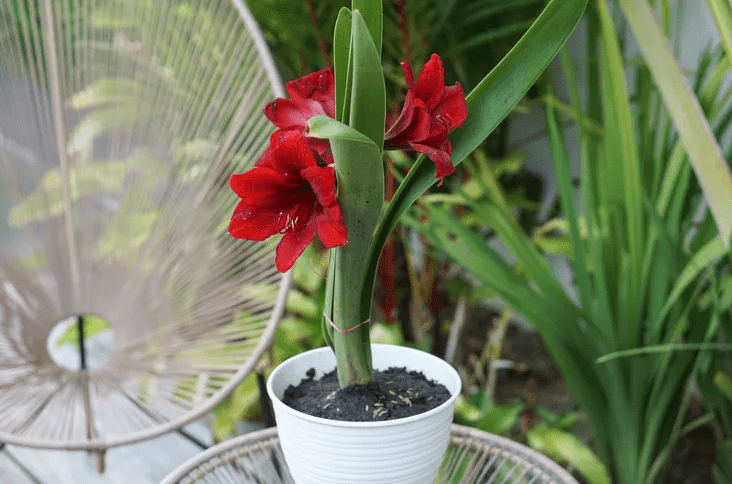
Amaryllis plants are known for their beautiful, vibrant flowers, and there are a few things you can do to encourage blooming and prolong the flowering period. One important factor is proper care and maintenance of the plant, such as providing adequate sunlight and water. Additionally, you can use a balanced fertilizer to promote healthy growth and flowering. Deadheading, or removing spent flowers, can also encourage the plant to produce more blooms. It’s important to provide the plant with the right conditions and care to ensure a healthy and prolonged flowering period. By following these tips, you can enjoy the beauty of your amaryllis plant for an extended period of time.
Deadheading and pruning techniques.
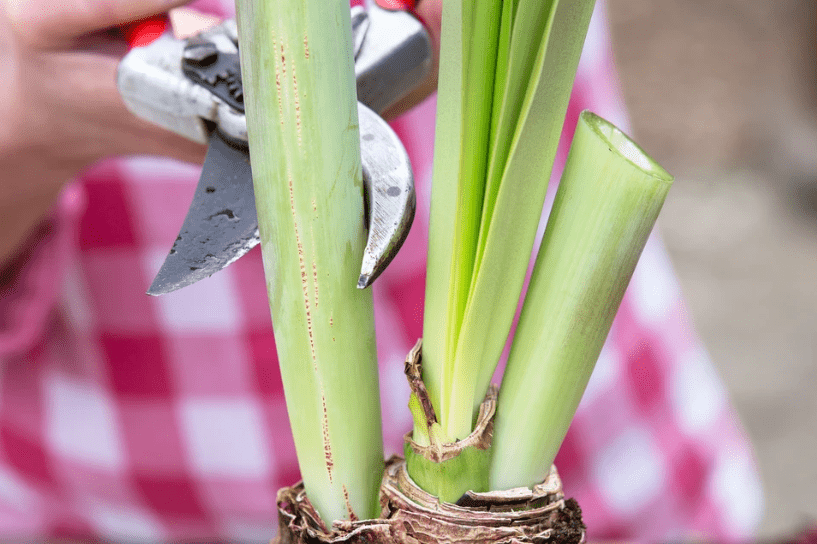
Deadheading is the process of removing spent or faded flowers from a plant in order to encourage new growth and flowering. This technique can help to redirect the plant’s energy towards producing new blooms, rather than putting energy into producing seeds. Deadheading can be done by pinching off the dead flowers or using pruning shears to remove them. This can help to maintain the overall appearance of the plant and promote a longer flowering period.
Pruning is another important technique for promoting healthy growth and flowering in amaryllis plants. By removing any dead or diseased foliage, you can help to prevent the spread of disease and encourage new growth. Additionally, pruning can help to shape the plant and promote a more balanced and attractive appearance.
In summary, deadheading and pruning are important techniques for encouraging blooming and prolonging the flowering period of caring for amaryllis plants. By providing proper care and maintenance, along with utilizing these techniques, you can enjoy the beauty of your amaryllis plant for an extended period of time.
Propagation of Amaryllis
Methods for propagating amaryllis through offsets and seeds.
There are two main methods for propagating amaryllis: through offsets and seeds. Offsets are small bulblets that develop on the base of the main bulb and can be carefully removed and planted to grow into new plants. This process should be done when the plant is dormant, typically in the fall or early spring. Seeds can also be used for propagation, although this method requires more time and patience. The seeds can be collected from the dried flower heads and planted in a well-draining soil mix. It may take several years for the seeds to grow into flowering plants, but it can be a rewarding process for experienced gardeners. Overall, both methods can be effective for propagating caring for amaryllis and can help to expand your collection of these beautiful plants.
Tips for successful propagation techniques.
When propagating amaryllis, there are a few key techniques to keep in mind for success. The two main methods for propagation are through offsets and seeds. Offsets are small bulblets that develop on the base of the main bulb and can be carefully removed and planted to grow into new plants. This process should be done when the plant is dormant, typically in the fall or early spring. When removing offsets, be sure to do so gently to avoid damaging the main bulb. Seeds can also be used for propagation, although this method requires more time and patience. The seeds can be collected from the dried flower heads and planted in a well-draining soil mix. It may take several years for the seeds to grow into flowering plants, but it can be a rewarding process for experienced gardeners. Overall, both methods can be effective for propagating amaryllis and can help to expand your collection of these beautiful plants. It’s important to be patient and attentive to the needs of the new plants, providing proper sunlight, water, and nutrients to help them thrive. With the right care and attention, you can successfully propagate caring for amaryllis and enjoy the beauty of these plants in your home or garden.
In conclusion, caring for amaryllis plants is not as difficult as it may seem. By following the expert advice in this guide, you can ensure that your plants will bloom beautifully and stay healthy. Remember to provide them with the right amount of water, sunlight, and well-draining soil, and you’ll be able to enjoy stunning flowers for years to come. Happy gardening!
Frequently asked questions And Answer
Amaryllis should be watered thoroughly when the soil is dry to the touch, but be sure not to overwater as this can cause the bulbs to rot.
Amaryllis prefer bright, indirect sunlight, so placing them near a window where they can receive plenty of natural light is ideal.
Fertilize your amaryllis with a balanced fertilizer once a month during the growing season, which is typically from spring to early fall.
After your amaryllis has finished blooming, continue to water and fertilize it as normal. You can also remove the spent flowers and any yellowing leaves to encourage new growth.
Amaryllis bulbs can be replanted after they have finished blooming. Simply remove the old bulb from the pot, clean off any excess soil, and replant it in fresh potting mix.
Yellowing leaves on an amaryllis can be a sign of overwatering or inadequate sunlight. Adjust your watering and light conditions accordingly to help the plant recover.
To encourage your amaryllis to bloom again, continue to care for it as normal and allow the foliage to fully develop and mature. Once the foliage has died back, you can induce a dormant period by withholding water and placing the plant in a cool, dark location for a few months.
Amaryllis can be susceptible to pests such as aphids and spider mites, as well as diseases like botrytis and fungal infections. Keep an eye out for any signs of infestation or disease, and treat accordingly with insecticidal soap or fungicides if necessary.
