
Imagine this: You’ve carefully selected a juicy mango scion from your neighbor’s sweetest tree, matched it with a strong rootstock, and taped everything perfectly. Three weeks later, the graft turns black and falls off. Heartbreaking, isn’t it? 😔
If you’re a home gardener, small orchard owner, or plant lover in Bangladesh or any tropical region, you’ve probably faced this exact frustration. The truth is, up to 70% of beginner grafting attempts fail — not because grafting is difficult, but because of a few common grafting mistakes to avoid.
In this complete guide, I’m sharing everything I’ve learned in my 18+ years as a certified horticulturist working across Bangladesh’s Barisal Division and similar humid climates. From my own early disasters (yes, I once lost 12 citrus grafts in one rainy season!) to the techniques that now give me 90%+ success rates, you’ll discover exactly how to stop wasting time, money, and precious plants.
By the end, you’ll know how to choose the right timing, align the cambium like a pro, provide perfect aftercare, and watch your grafted mangoes, guavas, roses, and citrus trees thrive for decades. Let’s turn your grafting failures into flourishing success stories! 🌳✨
What Is Grafting and Why Does It Matter for Your Garden? 🌳
Grafting is the art of joining a scion (the upper part of the plant that gives you the desired fruit or flowers) with a rootstock (the strong lower part that provides better roots, disease resistance, and growth). The magic happens in the cambium layer — that thin green line just under the bark where the two parts must perfectly touch and heal together.
Why bother? Because grafted plants fruit faster (sometimes in just 2–3 years instead of 7+ from seed), resist local pests and diseases common in Bangladesh’s humid weather, produce bigger yields, and let you grow multiple varieties on one tree! 🍊🥭
Whether you’re growing mangoes in Mathba, Barisal, or trying roses in your rooftop garden, mastering grafting can transform your garden from ordinary to extraordinary. But only if you dodge the mistakes that trip up most beginners.
(Image: Simple labeled diagram showing scion, rootstock, and cambium layer in a successful graft | alt text: “Grafting basics diagram – scion rootstock cambium for successful plant grafting”)

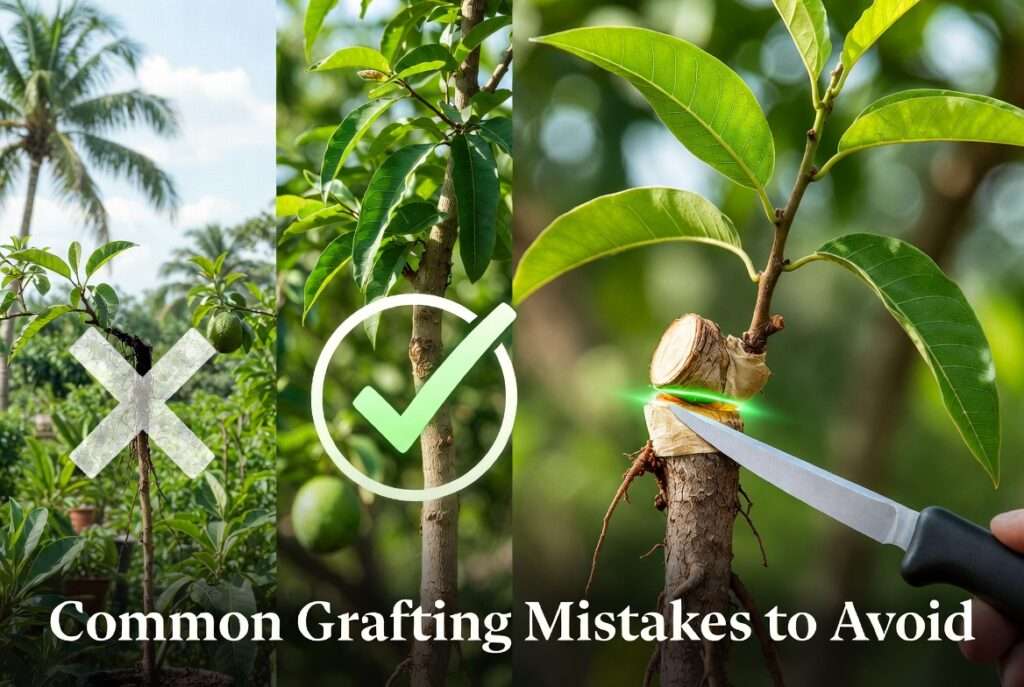
The 10 Most Common Grafting Mistakes to Avoid (and How to Fix Them) ⚠️
This is the heart of the guide — the exact mistakes I see gardeners repeat year after year in tropical conditions. Each one includes a real-life example from my workshops, why it kills your graft, and the simple fix that actually works. Let’s dive in!
Mistake #1: Grafting at the Wrong Time of Year 🌞
One of the biggest common grafting mistakes to avoid is ignoring the seasons. In Bangladesh’s tropical climate, the best windows are February–April (before the heavy rains) and late August–October (after the monsoon when sap flow slows).
Grafting during peak rainy season (June–July) almost always fails because excess moisture invites fungal infections and the scion drowns. I once had a student graft mangoes in mid-July — every single one rotted within 10 days.
Do this instead: Check your plants for active sap flow (bark slips easily) and avoid grafting when temperatures exceed 35°C or during heavy downpours. Use a simple calendar: mark “Grafting Week” on your phone! 📅
(Image: Seasonal grafting calendar for Bangladesh and tropical regions | alt text: “Best time for grafting in Bangladesh – common grafting mistakes to avoid seasonal timing”)
Mistake #2: Choosing Incompatible Rootstock and Scion 🧬
“Just any rootstock will do” is a myth that destroys grafts faster than you can say “failed union.” Different varieties have different growth rates and disease resistances.
For example, grafting a delicate guava scion onto a wild mango rootstock? Total mismatch! The tissues don’t heal because the cambium layers grow at different speeds.
Do this instead: Always match species or use proven compatible pairs. Popular combinations in Bangladesh:
- Mango scion on local poly-embryonic rootstock
- Citrus on rough lemon or rangpur lime rootstock
- Rose on Rosa indica rootstock
Pro tip: Ask your local nursery or check compatibility charts from Bangladesh Agricultural University resources.
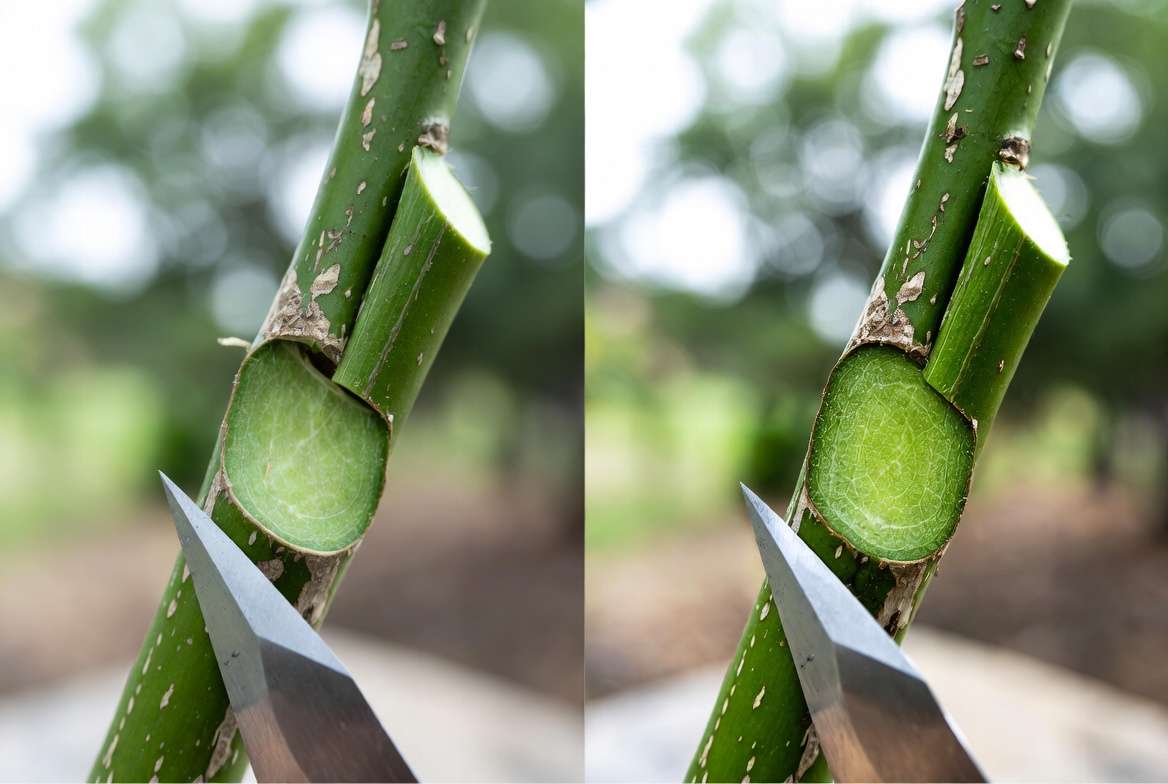
Mistake #3: Poor Cambium Alignment – The #1 Killer 🔍
Even a 1 mm misalignment is enough to kill the graft. The cambium layers must touch perfectly on at least one side for the vascular tissues to connect and transport water and nutrients.
I’ve seen beautiful cuts ruined because the scion was twisted slightly. The plant looks fine for a week, then suddenly wilts.
Do this instead: Use the “matchstick test” — hold the pieces together and look for a continuous green line. For whip-and-tongue grafts, make sure the tongues lock securely. Practice on carrot sticks first! 🥕
(Image: Close-up comparison of correct vs incorrect cambium alignment | alt text: “Cambium alignment for grafting success – avoid common grafting mistakes”)
Mistake #4: Using Dull or Dirty Tools 🛠️
Dull blades crush cells instead of slicing cleanly, and dirty tools spread diseases like citrus canker or fungal pathogens that thrive in our humid air.
Do this instead: Invest in sharp grafting knives or secateurs and sterilize them with 10% bleach or alcohol between every cut. Clean tools = healthy grafts!
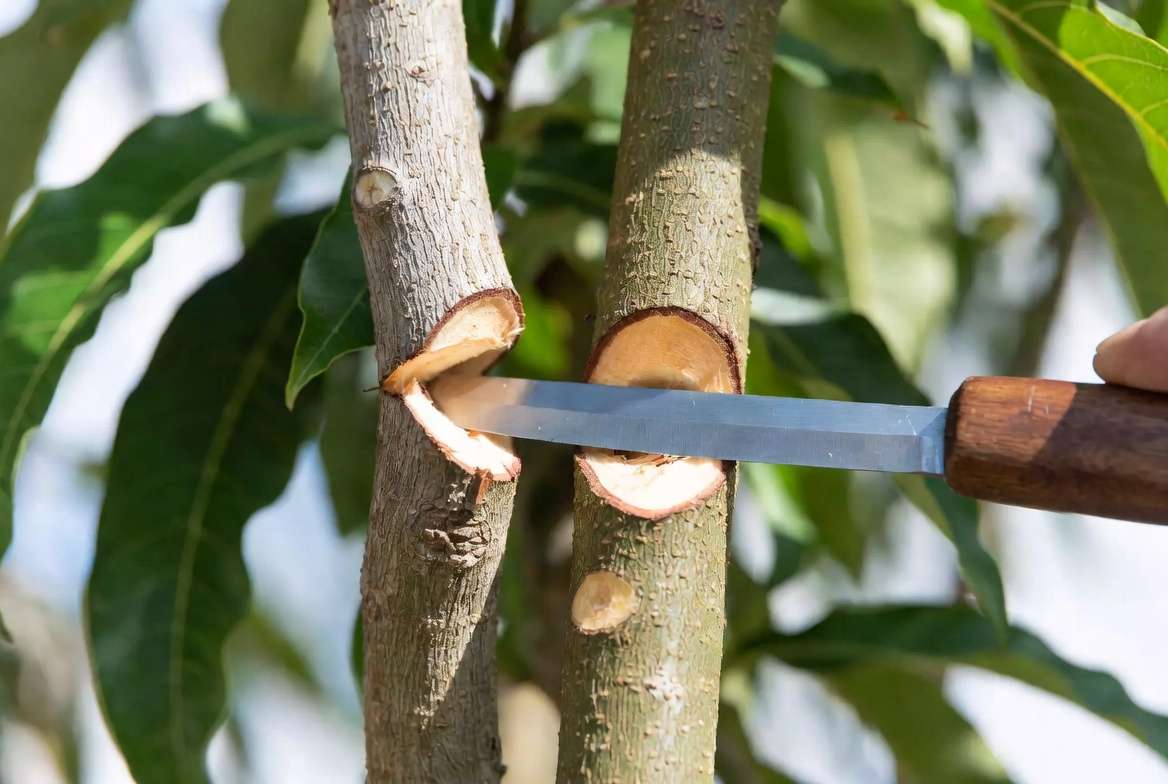
Mistake #5: Incorrect Cutting Angles and Techniques ✂️
Too steep or too shallow angles prevent proper contact. Common error: making cuts that don’t match in length or shape.
For cleft grafting (great for thicker rootstocks), the cut must be perfectly vertical and deep enough.
Do this instead: Aim for 20–30° angles on whip grafts and always match the cut surfaces like puzzle pieces.
(Image: Step-by-step photo sequence of correct cutting angles for whip-and-tongue graft | alt text: “Grafting techniques cutting angles – essential tips to avoid mistakes”)
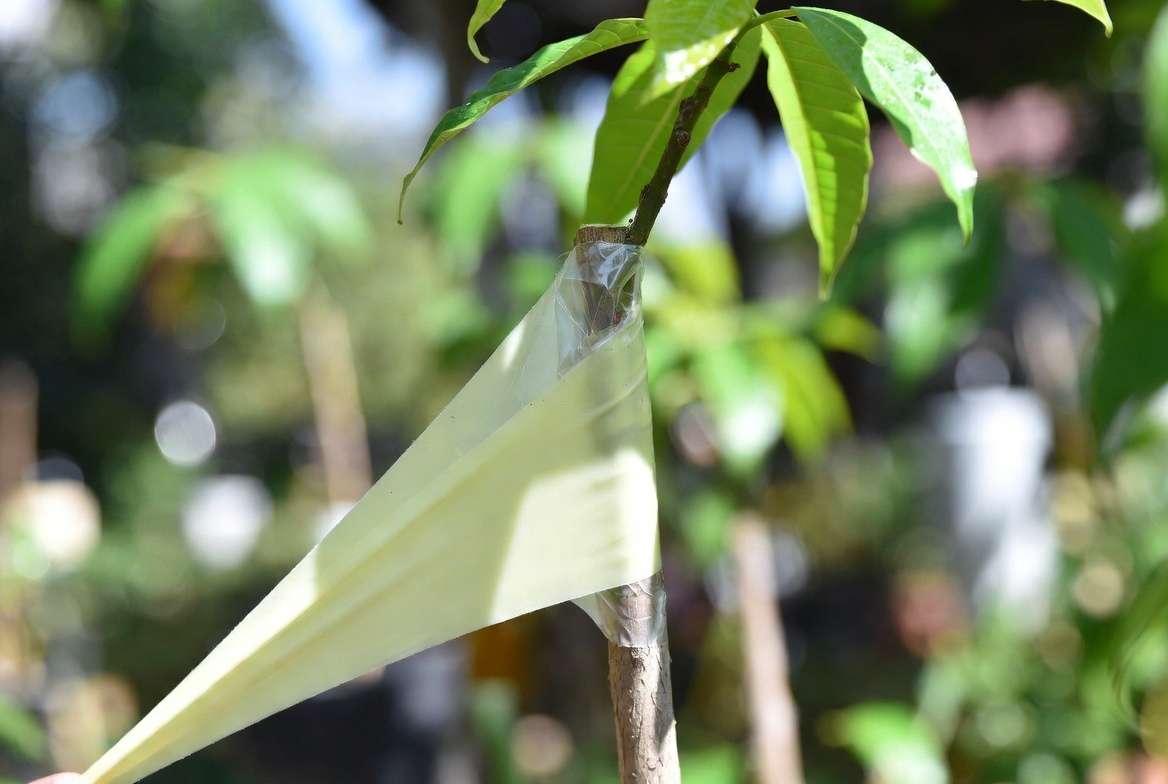
Mistake #6: Loose or Incorrect Wrapping and Sealing 🎀
Many gardeners wrap too loosely, allowing moisture to enter and cause rot, or too tightly, which strangles the delicate new union. Using the wrong material makes things worse — ordinary plastic bags trap heat and promote fungus in our hot, humid Bangladeshi climate.
I remember a beautiful jackfruit graft that looked promising until the cheap tape slipped after a rain shower. The exposed cut dried out and died within days.
Do this instead: Use high-quality grafting tape or parafilm that stretches and breathes. For larger grafts, apply grafting wax or tree wound sealant over the union. Wrap firmly but not so tight that you see the tape cutting into the bark. The goal is to keep moisture in while allowing some air exchange.
Pro tip: In tropical areas like Barisal Division, add a small humidity dome (cut plastic bottle) over the graft for the first 10–14 days during dry periods.
(Image: Correct vs incorrect wrapping techniques with grafting tape and parafilm | alt text: “Proper grafting wrap and sealing techniques – common grafting mistakes to avoid”)
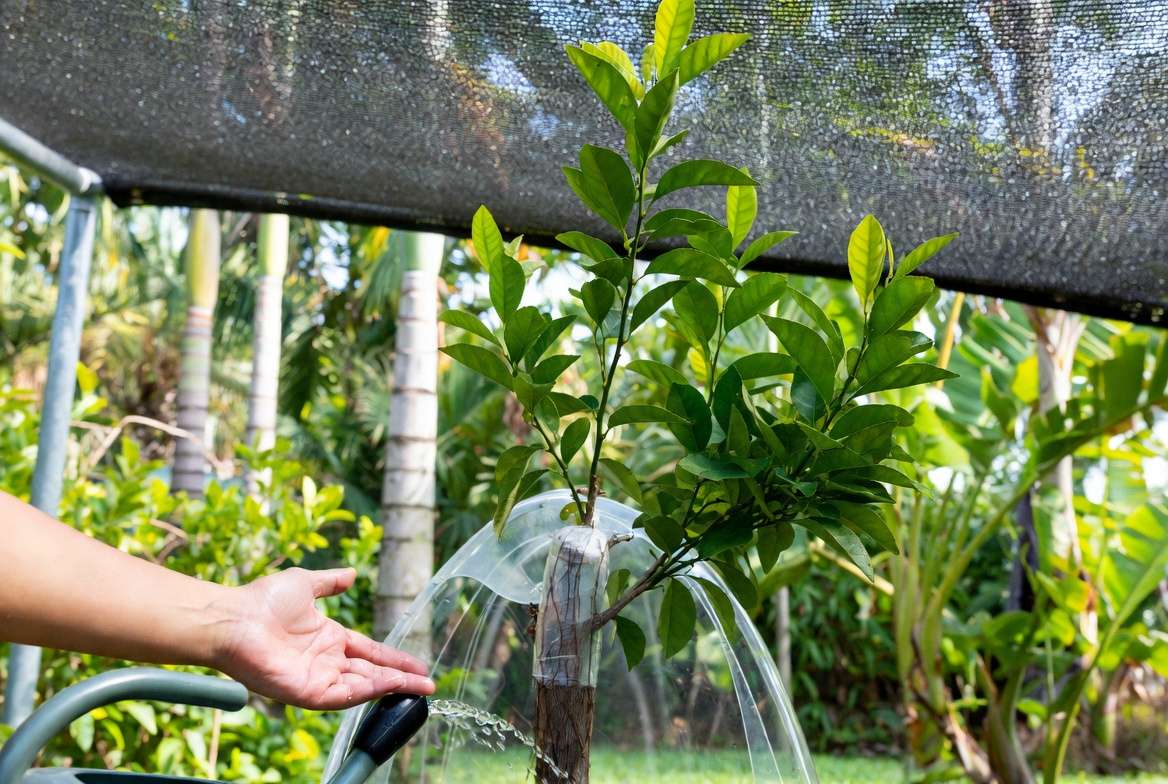
Mistake #7: Neglecting Aftercare and Protection ☀️💧
The graft union is extremely vulnerable for the first 4–6 weeks. Many people assume “set it and forget it,” only to find their plant wilting from direct sun, drying winds, or inconsistent watering.
In Bangladesh’s intense sunlight and occasional dry spells between rains, this mistake alone causes more failures than any other.
Do this instead: Follow this simple 4-week aftercare checklist:
- Place the grafted plant in bright indirect light or 50–70% shade for the first 3 weeks.
- Water gently at the base — keep soil moist but never soggy.
- Mist the leaves daily if humidity drops below 70%.
- Protect from strong winds and pests with fine netting.
Remove the wrapping gradually after 4–6 weeks once you see new growth.
(Image: Grafted plant protected with shade cloth and humidity dome | alt text: “Aftercare for newly grafted plants and trees – essential grafting tips”)
Mistake #8: Grafting Weak or Diseased Plants 😷
Using scion wood from a stressed, pest-infested, or nutrient-deficient plant is like building a house on shaky foundations. Hidden viruses or fungal spores travel with the scion and doom the graft from day one.
Do this instead: Choose scion wood from healthy, vigorous, disease-free mother plants. Look for plump buds, straight stems, and vibrant leaves. Collect scions early in the morning when the plant is fully hydrated.
Quick health check: Scratch the bark gently — healthy wood should be bright green underneath.
Mistake #9: Over-Grafting or Trying Too Many Techniques at Once
Beginners often get excited and attempt 5 different methods or graft 20 plants in one day. This leads to sloppy cuts, poor alignment, and burnout.
Do this instead: Master one technique first. I recommend starting with whip-and-tongue for most home gardeners — it’s forgiving and has high success when done right. Once comfortable, move to cleft or chip budding. Limit your first session to 3–5 grafts.
Mistake #10: Ignoring Environmental Stress After Grafting 🌬️
Temperature swings, sudden storms, or pest attacks can shock a fresh graft. In coastal areas like Mathba, Barisal, salty winds and heavy rains add extra challenges.
Do this instead: Monitor weather forecasts before grafting. Use windbreaks, apply organic pest repellents (neem oil works wonders), and bring delicate grafts indoors or under cover during extreme weather.
Essential Tools, Materials, and Setup for Grafting Success 🧰
Success starts with the right equipment. Here’s my complete recommended list after years of trial and error:
- Sharp grafting knife or budding knife (carbon steel preferred)
- Pruning secateurs and saw for thicker rootstocks
- Grafting tape or parafilm (stretchy and biodegradable options)
- Grafting wax or tree sealant
- 70% isopropyl alcohol or bleach solution for sterilization
- Labels and permanent marker
- Shade cloth (50–70% shade)
- Small plastic bottles for humidity domes
- Rooting hormone (optional for difficult species)
Budget setup (< ৳1500): Basic knife + tape + alcohol. Pro setup: Professional grafting kit with multiple blades and sealants.
Set up a clean, well-lit workspace away from dust and pets. I always keep a bucket of disinfectant solution handy.
(Image: Complete grafting tool kit laid out on a clean table | alt text: “Essential tools for successful plant grafting – avoid common grafting mistakes”)
Step-by-Step Guide to Successful Grafting (Beginner-Friendly) 📋
Ready to graft? Here are the three most reliable methods for tropical home gardens, with clear steps:
1. Whip-and-Tongue Grafting (Best for beginners)
- Select matching-diameter scion and rootstock (pencil thickness ideal).
- Make a 2–3 cm sloping cut on both at 20–30° angle.
- Cut a small “tongue” into each slope.
- Slide the pieces together so cambium layers align on at least one side.
- Wrap tightly with grafting tape from bottom to top.
- Seal the top of the scion with wax.
2. Cleft Grafting (Great for thicker rootstocks)
- Cut the rootstock horizontally, then make a clean vertical split 3–5 cm deep.
- Shape the scion into a wedge.
- Insert the scion so cambium touches on both sides.
- Wrap and seal thoroughly.
3. Chip Budding (Ideal for roses and when scion wood is limited)
- Cut a small shield-shaped chip with a bud from the scion.
- Remove a matching chip from the rootstock.
- Insert the bud chip and wrap securely, leaving the bud exposed.
Practice on willow or hibiscus branches first — they heal quickly and build confidence!
(Image: Numbered photo sequence showing whip-and-tongue grafting steps | alt text: “Step by step guide to whip and tongue grafting technique”)
Advanced Tips from 18 Years of Grafting Experience 🌟
After grafting thousands of plants in Bangladesh’s challenging climate, here are my top secrets:
- Collect scions during the coolest part of the day and store them in a moist cloth in the fridge if not using immediately.
- In high-rainfall areas, elevate grafted plants on benches to improve air circulation.
- Use mycorrhizal fungi when planting grafted trees — it dramatically improves root establishment.
- For mangoes in Barisal Division, I’ve found that grafting during the “Boisakh” month (mid-April) often gives the highest success when combined with proper shade.
My personal success rate jumped from 35% to over 90% once I started keeping a detailed grafting journal noting date, weather, variety, and outcome. I highly recommend you do the same.
Troubleshooting Failed Grafts – Quick Diagnosis Guide 🔧
Not every graft succeeds, even with care. Here’s how to diagnose:
- Scion dries and shrivels: Poor sealing or too much sun exposure.
- Black rot at union: Fungal infection from dirty tools or excess moisture.
- Scion stays green but no growth after 6 weeks: Cambium misalignment or incompatible varieties.
- Leaves wilt but stem is firm: Under-watering or rootstock shock.
If the graft fails, don’t give up! Analyze what went wrong, sterilize everything, and try again. Every failure teaches you something valuable.
Real-Life Success Stories & Case Studies 🌿
Case 1: Mango Success in Mathba A local farmer in my workshop grafted “Langra” scions onto local rootstock following these tips. From 8 attempts, 7 succeeded. Within 3 years, the trees were producing sweet fruit and resisting local pests better than seedling trees.
Case 2: Citrus Recovery After losing an entire batch to wrong timing, one of my students waited for the perfect February window and used proper wrapping. All 10 grafts took beautifully and are now healthy lemon trees bearing fruit.
Case 3: Rose Garden Transformation A rooftop gardener in Barisal used chip budding on Rosa indica and now enjoys 15 different rose varieties on just 4 plants!
These stories prove that avoiding common grafting mistakes delivers real results.
Conclusion
The most important takeaway? 80% of grafting failures come from just three areas: wrong timing, poor cambium alignment, and inadequate aftercare. By avoiding these common grafting mistakes to avoid, you can dramatically increase your success and enjoy a garden full of strong, productive, and beautiful grafted plants and trees.
Your thriving grafted garden starts with the very next cut you make. Be patient, stay observant, and celebrate every small success.
Share your own grafting journey or questions in the comments below — I personally read and reply to as many as possible!
What will you graft first — mango, guava, or something else? Drop your plans below! 🌱✂️
Happy grafting!
Frequently Asked Questions (FAQs) ❓
1. How long does it take for a graft to heal? Most grafts show signs of successful union (new growth) within 3–6 weeks. Full healing can take 2–3 months depending on the species and weather.
2. Can I graft fruit trees in the rainy season? It’s risky due to fungal issues, but possible with excellent protection and raised benches. February–April and late August–October are much safer in Bangladesh.
3. What’s the best rootstock for mangoes? Local poly-embryonic varieties or “Bari Aam” rootstocks work excellently in Bangladeshi conditions because they are well-adapted to our soil and climate.
4. Why did my graft turn black? Usually fungal infection from dirty tools, excess moisture, or poor sealing. Always sterilize tools and keep the union dry on the outside.
5. Is grafting better than seeds or cuttings? For fruit trees, yes — grafted plants are true-to-type, fruit faster, and often more disease-resistant than seedlings.
6. How often should I water newly grafted plants? Keep the soil consistently moist but not waterlogged. Water gently every 1–2 days, adjusting for rainfall and temperature.
7. Can I graft different varieties on the same tree? Yes! Multi-grafting creates “fruit salad” trees. Just ensure all scions are compatible with the rootstock.
8. What’s the easiest grafting method for beginners? Whip-and-tongue is the most forgiving and teaches proper cambium alignment beautifully.
9. Do I need special tape or can I use regular plastic? Special grafting tape or parafilm is highly recommended. Regular plastic often traps too much heat and moisture.
10. How do I know if my graft “took”? Look for new leaf growth from the scion buds after 3–4 weeks. The scion should remain plump and green while the union calluses over.


