
Have you ever wondered how to grow your very own ash tree from scratch? 🌳 Ash trees are known for their beauty, resilience, and environmental benefits. But did you know that you can easily grow them from ash tree seeds? Whether you’re looking to enhance your backyard or contribute to a greener planet, planting ash trees can be a rewarding experience.
However, if you’re a beginner, you might be wondering: How exactly do I collect and grow ash tree seeds? The process can seem daunting at first, but with the right steps, it’s simpler than you think. This guide will walk you through every stage—from collecting the seeds to nurturing your ash tree seedlings. 🌱
By the end of this article, you’ll have all the knowledge and confidence to successfully grow ash trees from seed. No matter where you’re starting from, this guide is designed to give you practical, step-by-step advice to make your tree-growing journey a success! Keep reading to discover how to turn those ash tree seeds into thriving trees!
Understanding Ash Tree Seeds 🌱
Ash trees are known for their majestic height and beautiful canopy, making them a popular choice for landscaping and reforestation. But before you can grow one, it’s important to understand ash tree seeds—the foundation of your new tree.
What Are Ash Tree Seeds? 🌱
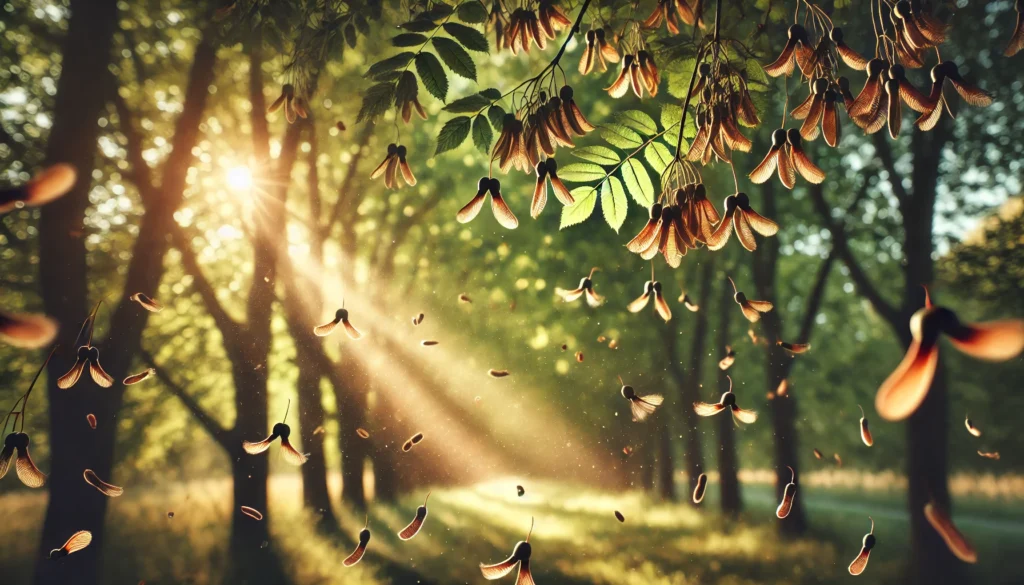
Ash tree seeds are small, winged structures called samaras. These seeds are unique because they have a small “wing” that helps them float and travel through the air. This design allows them to spread over large distances, which is how ash trees naturally reproduce in the wild. When they fall from the tree, the wings help them catch the wind, letting them land in different areas.
Why Are Ash Trees Special? 🌳
Ash trees are not only stunning but also beneficial to the environment. They provide shade, improve air quality, and offer shelter to wildlife. By growing your own ash tree from seed, you’re contributing to a greener planet while enjoying the beauty of nature in your own backyard.
Types of Ash Trees 🌳
There are several species of ash trees, with some of the most common being:
- White Ash (Fraxinus americana): Known for its tall, straight trunk and vivid fall colors.
- Green Ash (Fraxinus pennsylvanica): A hardy species often used for urban landscaping.
- Black Ash (Fraxinus nigra): Typically found in wetland areas, it’s known for its dark, durable wood.
Each type of ash tree has slightly different seed characteristics, but all ash seeds follow the same general principles for collection and growth.
AEO Answer 🌍:
Ash tree seeds are winged samaras that float through the air to propagate new ash trees. These seeds are essential for growing ash trees and contribute to a greener environment.
Understanding these basic facts about ash tree seeds will set the stage for your tree-growing journey. With this knowledge, you’ll be ready to collect, plant, and nurture your very own ash tree, no matter your experience level! 🌳
When to Collect Ash Tree Seeds 🕒🌳
Knowing the right time to collect ash tree seeds is crucial for successful germination. Collecting them too early or too late can affect their ability to grow. Here’s everything you need to know to time your seed collection perfectly. ⏳🌱
Optimal Timing for Seed Collection ⏰📅
The best time to collect ash tree seeds is in late summer to early fall. This is when the seeds are fully mature and ready to be harvested. Typically, you’ll find the seeds falling from the tree around August to October, depending on your location and climate. 🍂🍁
Signs That Seeds Are Ready
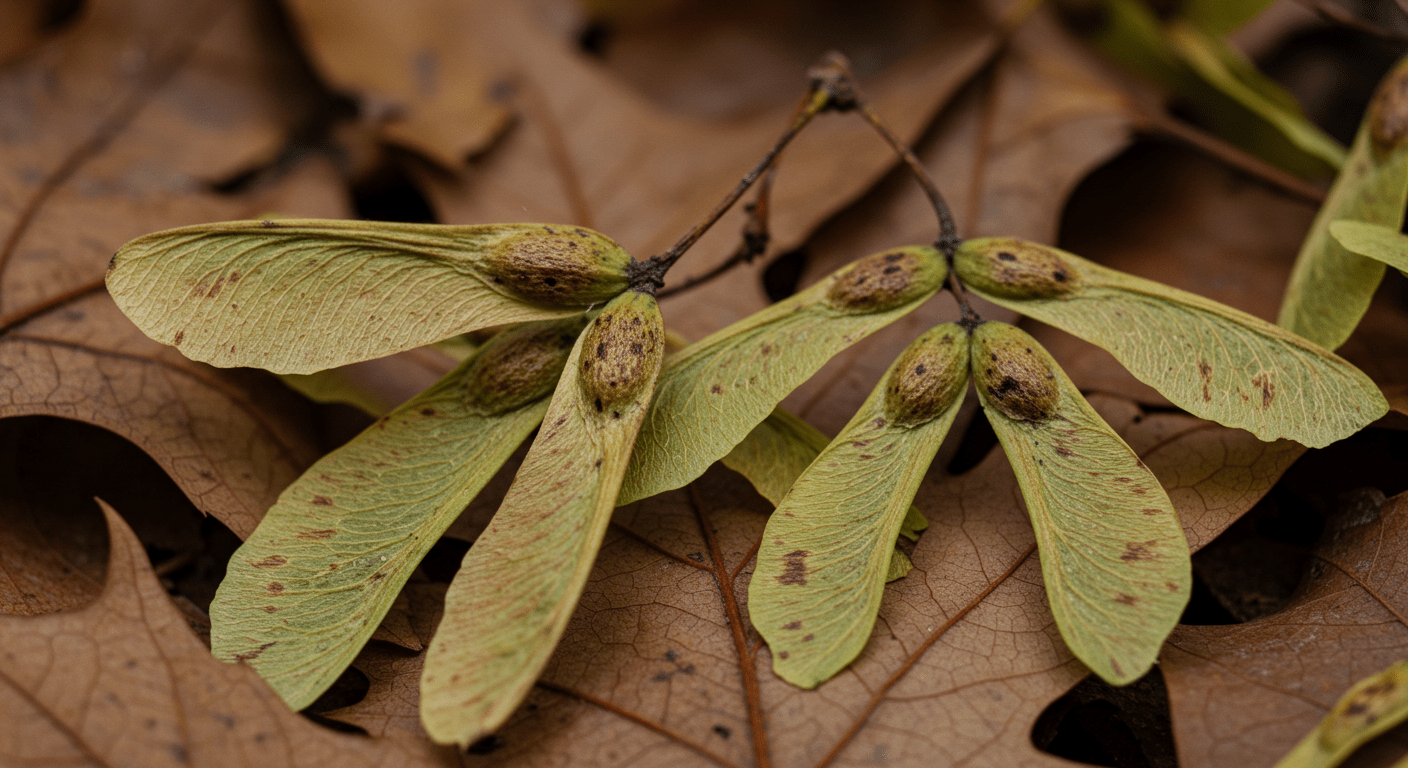
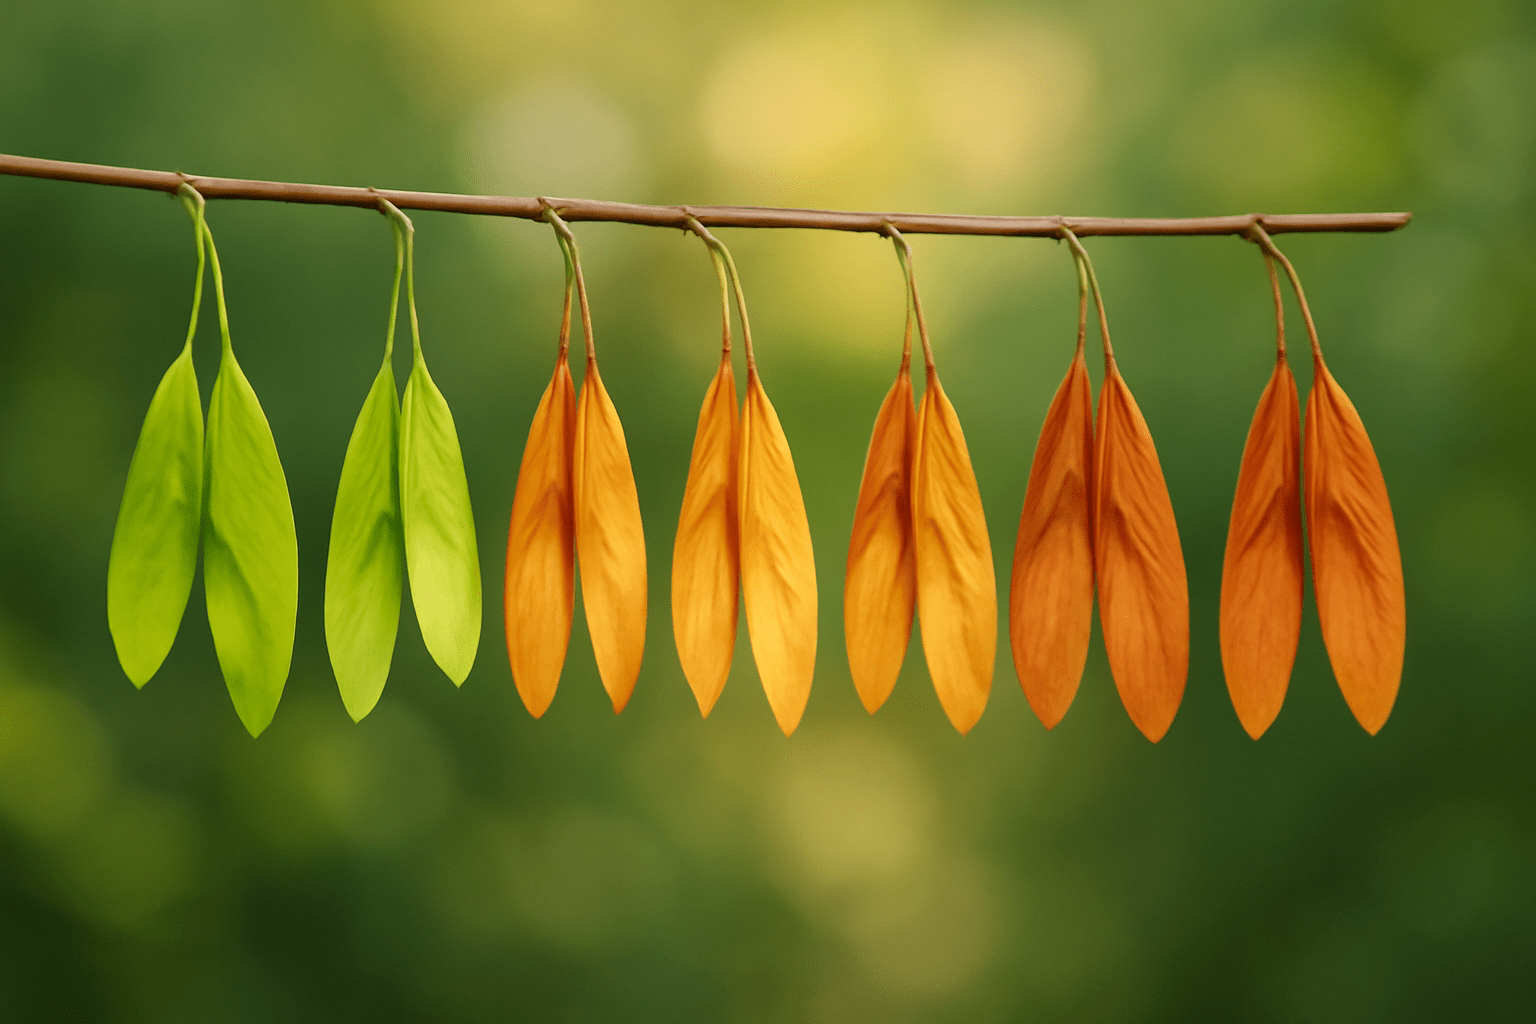
Color Change 🌰🍂
Ash seeds start off green and gradually turn brown as they mature. When they reach a golden-brown color, it’s a good indication that they are ready for collection. 🌟
Drying Out 🌿💨
Fully mature ash seeds will begin to dry out and separate from the tree. You may notice them naturally falling to the ground in clusters. When you see this, it’s your cue to start gathering them. 🌾
Easier to Harvest 🌳🌬️
The seeds become easier to collect once they are ready. The wings on the samaras will often begin to loosen, making it simpler to catch them as they fall or to pick them directly from the tree. 🦋🌳
Best Weather Conditions for Collection 🌤️☀️
Although you can collect ash seeds in any dry weather, try to avoid wet or windy days. Dry, calm weather is ideal, as it makes the seeds easier to handle and prevents them from getting damaged during collection. Windy days may scatter seeds too far, making them harder to collect. 🌤️🌬️
AEO Answer 🌍🌱:
Collect ash tree seeds in late summer to early fall, when they turn golden-brown and start falling from the tree. Dry, calm weather is the best for harvesting them effectively. 🌳
Timing is everything when it comes to collecting ash tree seeds. By gathering them at the right moment, you’re giving yourself the best chance to grow healthy, thriving ash trees. 🌿🌳
How to Collect Ash Tree Seeds 🌳
Collecting ash tree seeds is a simple process, but timing and technique are key to ensuring that you get the best seeds for growing your ash tree. In this section, we’ll guide you through the step-by-step process of collecting ash tree seeds, from finding the right tree to storing your seeds properly for future planting.
Step 1: Locate the Ash Trees 🌳
Before you can collect seeds, you need to identify and locate ash trees in your area. Look for the following characteristics to spot an ash tree:
Leaves 🍃
Ash trees have compound leaves with 5–9 leaflets arranged along a central stem.
Bark 🌳
The bark is greyish-brown with diamond-shaped patterns.
Flowers 🌸
Ash trees produce small, greenish flowers in clusters before the leaves appear.
You can find ash trees in urban parks, forests, or natural reserves. In many areas, these trees grow naturally, so keep an eye out for them as you explore.
Step 2: Time Your Collection ⏰
The best time to collect ash tree seeds is late summer to early fall, usually between August and October. During this period, the seeds begin to mature and fall off the tree.
When to Harvest 🌰
Ash tree seeds are ready when they turn brown and start falling from the tree. This indicates that they are mature and more likely to germinate.
Look for Fallen Seeds 🍂
You can also gather seeds directly from the ground. Be sure to pick them up quickly, as birds or other animals may eat them.
Step 3: Gather the Seeds 🧺
To collect the seeds, you don’t always need fancy equipment, but a few tools will make the process easier:
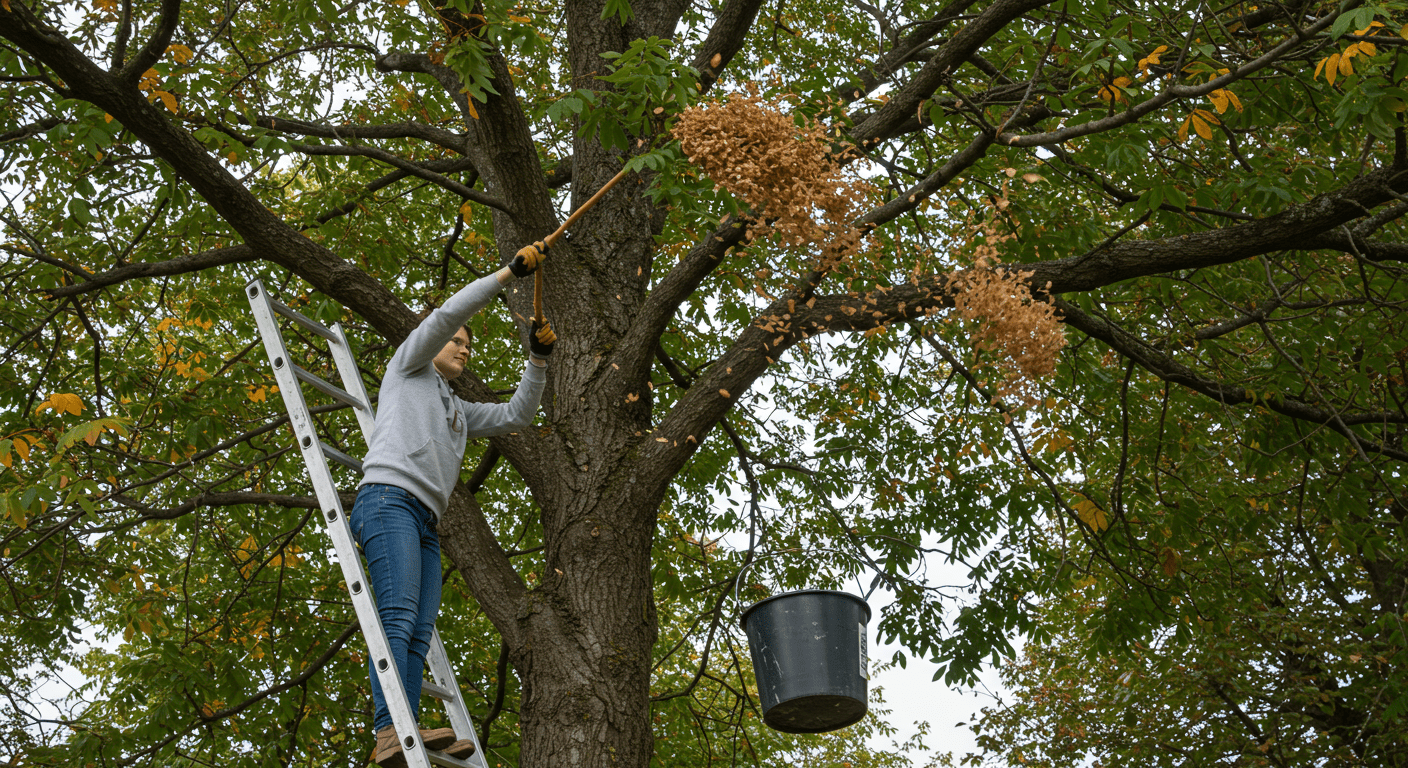
Bucket or Cloth 🧺
Use a bucket or large cloth to catch the seeds as they fall. This is especially helpful if you’re collecting seeds from trees with many branches.
Ladder 🪜
If the seeds are high up in the tree, use a ladder to safely reach them.
Gloves 🧤
While not necessary, gloves can help protect your hands from any rough branches or sharp objects.
Gently shake the branches or wait for the seeds to fall naturally. If you see any remaining seeds still attached to the tree, you can gently pull them off by hand.
Step 4: Clean the Seeds 🧼
Once you’ve gathered your ash tree seeds, it’s time to clean them. You want to remove any leaves, twigs, or debris that might be mixed in with the seeds.
How to Clean 🧼
Simply spread the seeds out on a flat surface and use your hands to remove any dirt or plant matter.
Dry the Seeds 🌞
After cleaning, spread the seeds out in a dry, well-ventilated area. Let them dry for a few days before storing them. Drying ensures that the seeds won’t rot or develop mold during storage.
Step 5: Store the Seeds Properly 📦
Once cleaned and dried, it’s essential to store your ash tree seeds correctly to maintain their viability:
Storage Container 📦
Place the seeds in a breathable container like a paper bag or an open jar. Avoid using plastic bags, as they can trap moisture and cause the seeds to spoil.
Cool, Dry Location ❄️
Store your seeds in a cool, dry place, ideally in the refrigerator if you plan to stratify them (more on this in the next section).
Pro Tip 📝
Keep track of the tree species when collecting multiple types of ash tree seeds to avoid confusion later on. You can label the containers or use separate bags for each species.
How to Prepare Ash Tree Seeds for Planting 🌱🌳
Preparing ash tree seeds for planting is a crucial step to ensure your seeds germinate successfully. While it may seem like a complex process, it’s actually simple when broken down into a few key steps. Here’s everything you need to know to get your seeds ready for planting: 🌿✨
1. Cold Stratification: Why It’s Necessary ❄️🧊
Ash tree seeds require a period of cold stratification to break dormancy. This mimics the natural winter conditions the seeds would experience in the wild. Without it, the seeds may not germinate or may take much longer than expected. 🌧️
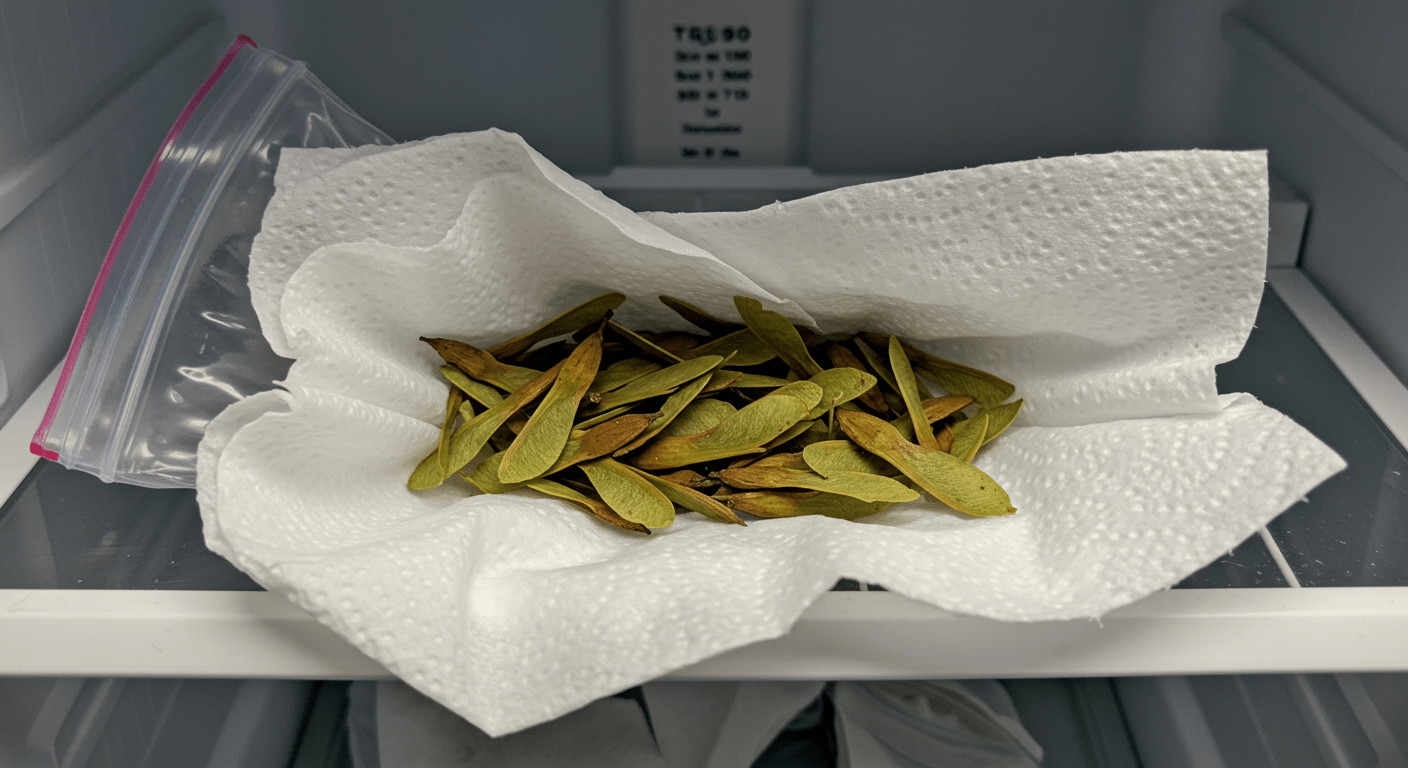
How to Stratify Ash Tree Seeds 🌱:
Step 1: Place your ash tree seeds in a damp paper towel. Make sure it’s just moist, not soaking wet. 💧
Step 2: Put the paper towel with the seeds inside a plastic bag or container. Seal it tightly to keep the moisture in. 🔒
Step 3: Store the bag or container in the fridge for 30–60 days. This cold treatment is key to encouraging your seeds to sprout. ❄️
2. Optional: Direct Planting 🌍🌱
If you don’t want to go through the stratification process, you can plant ash tree seeds directly into the soil. While stratification increases your chances of success, direct planting can still work if you live in an area with cold winters. ❄️🌲
Planting Outdoors 🌳🌞:
- Find a spot with well-draining soil and full sunlight. ☀️
- Plant the seeds about 1 inch deep, and keep the soil moist until they start to sprout. 💧🌱
3. Drying and Cleaning the Seeds 🧼🌞
Before stratifying or planting, it’s important to clean and dry the seeds properly to prevent mold or rot during storage or germination. 🍂🌿
How to Clean Ash Tree Seeds 🧼:
- Remove any debris, twigs, or leaves from the seeds. 🍃
- Spread the seeds out on a paper towel or a clean surface to dry for 1–2 days in a warm, dry place. 🌞
4. Storing Ash Tree Seeds for Future Planting 📦🌿
If you’re not planting your seeds right away, you can store them for later. Proper storage ensures your seeds stay viable until you’re ready to plant them. 🗓️🌱
How to Store Ash Tree Seeds 📦:
- Keep the seeds in a cool, dry place in a breathable container (like a paper bag or mesh sack). 🍂🌬️
- Avoid storing them in plastic bags, as this can trap moisture and lead to mold. 🚫💧
With these easy steps, you can ensure your ash tree seeds are ready for planting. Whether you choose to stratify them or plant them directly, this preparation will give your seeds the best possible start. 🌱🌳 Ready to take the next step in planting your own ash tree? Let’s move on to the next section, where we’ll discuss how to plant those seeds for the best results! 🌿🌍
Planting Ash Tree Seeds 🌱🌳
Now that you’ve collected and prepared your ash tree seeds, it’s time to plant them! 🌿 This is the moment where your hard work pays off, and the magic of growing ash trees begins. Here’s everything you need to know about planting those seeds and giving them the best start in life. 🌟
1. Choose the Right Location 🏡🌞
Before you plant, make sure you select the perfect spot for your ash tree seeds. Ash trees love sunlight, so choose a sunny location with plenty of direct light. Whether you’re planting in your garden or a large pot, make sure the spot gets at least 6-8 hours of sunlight each day. 🌞🌻
Tip: Ash trees need space to grow, so avoid planting them too close to structures or other plants. They can grow tall and wide, so give them room to spread out. 🌳
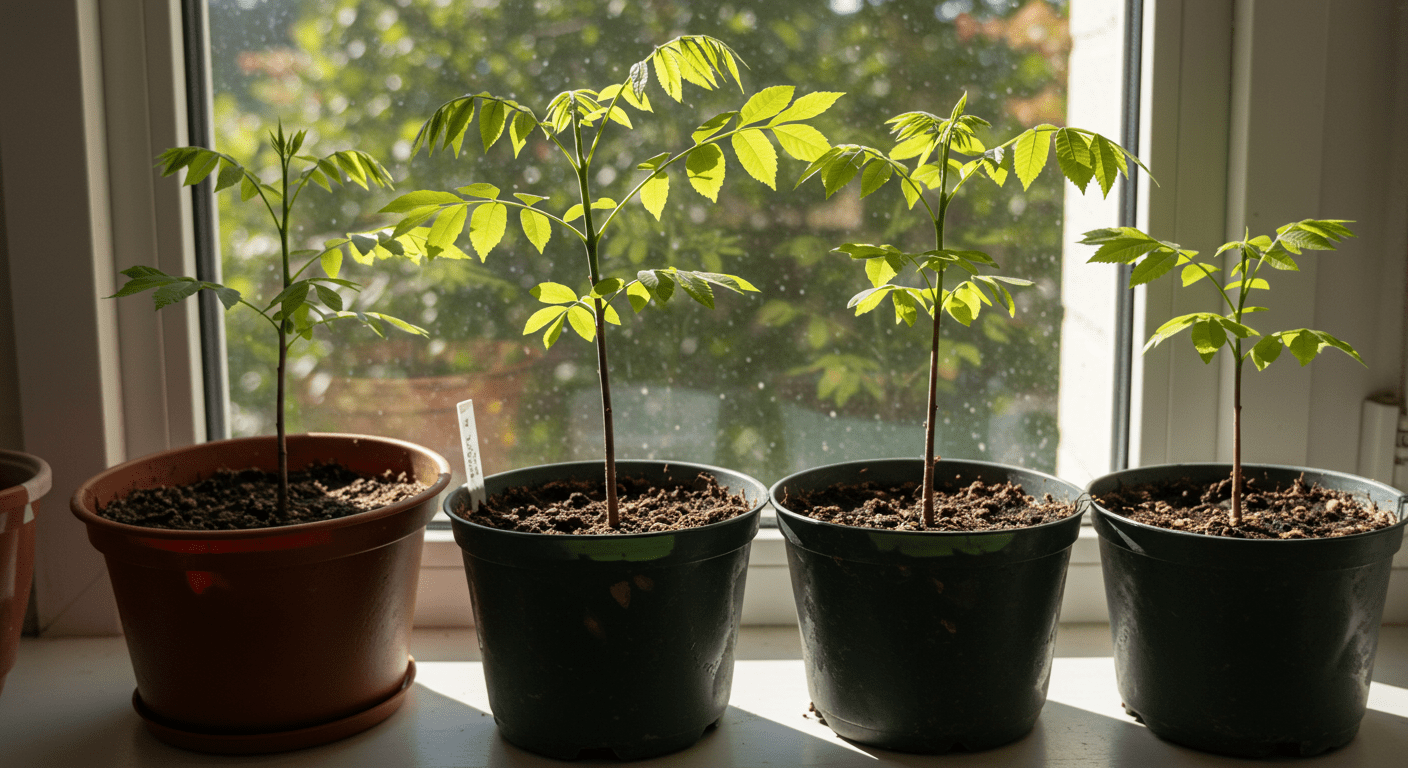
2. Planting Ash Tree Seeds in Pots 🪴
If you’re starting in pots, fill them with a well-draining potting mix. Avoid heavy soil that traps water, as ash seeds need moist but not soggy conditions. A good mix should be light, airy, and capable of holding moisture without getting waterlogged. 💧🌱
How to Plant:
- Place the seeds about 1 inch deep into the soil. 🌱
- Cover them lightly with more soil, making sure they’re fully tucked in. 🏡
Tip: If you’re using a pot, choose one that’s at least 12 inches wide to give the seedling room to grow. 🪴
3. Planting Ash Tree Seeds Outdoors 🌳
If you’re planting directly into the ground, prepare the soil by loosening it up and removing any weeds. Ash trees prefer slightly acidic to neutral soil, so test your soil pH if you’re unsure. 🌍

How to Plant Outdoors 🌳:
- Create small holes about 1 inch deep. 🌱
- Place the seeds in the holes and cover them with soil. 🌍
- Space each seedling about 3-5 feet apart to ensure they have room to grow. 🌳
4. Watering 💧🌿
Watering is crucial for your ash tree seeds to thrive. After planting, give the seeds a good watering to help settle the soil. Keep the soil consistently moist, but avoid over-watering, as soggy soil can lead to seed rot. 🌧️💦
Tip: Use a gentle watering can or a spray bottle to avoid disturbing the soil too much. Check the soil regularly, and water when it feels dry to the touch. 🌸
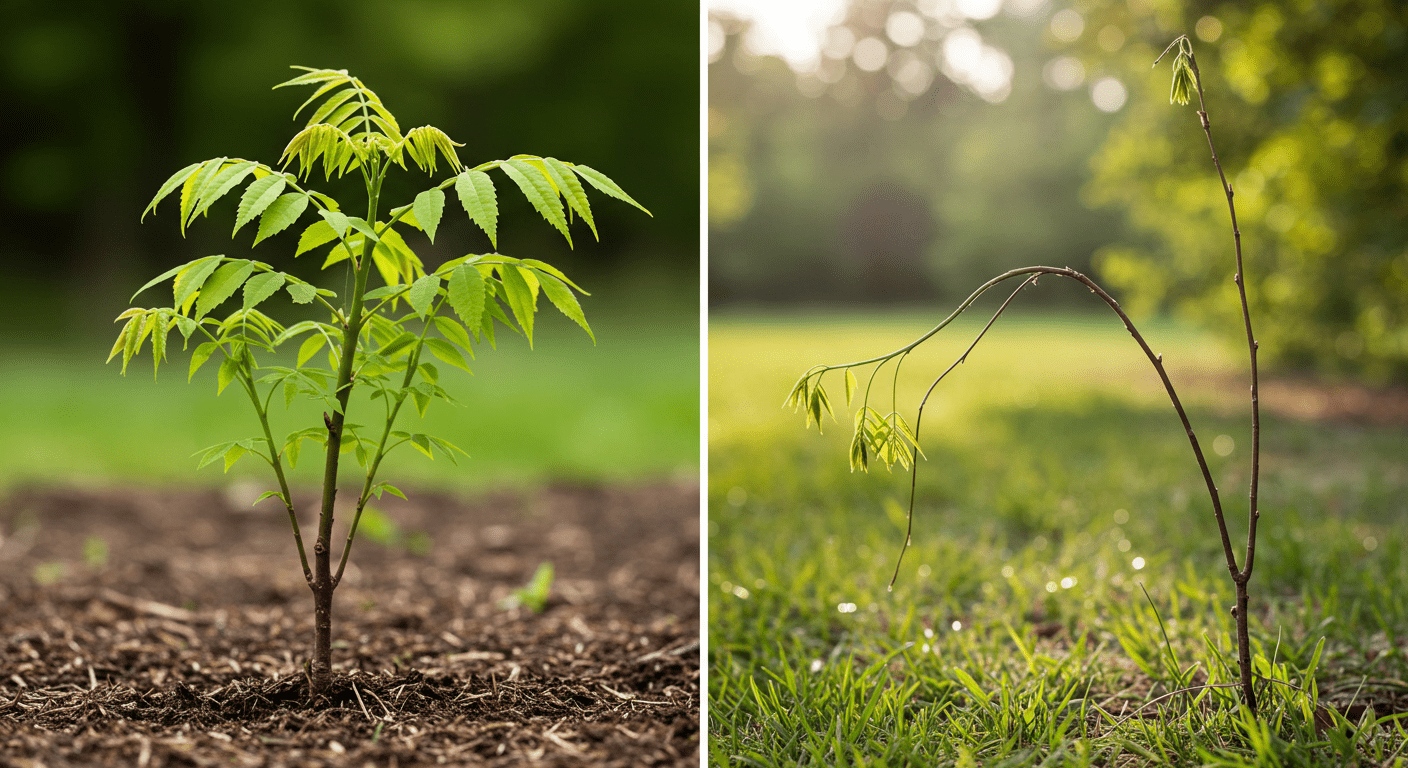
5. Germination and Waiting Time ⏳
After planting, be patient! Ash tree seeds can take anywhere from 2 to 4 weeks to germinate. During this time, keep the soil moist and ensure they’re getting plenty of sunlight. 🌞💧
Tip: If you planted the seeds in pots, move them to a sunny windowsill or a location with good light. If you planted outdoors, make sure the area is clear of heavy foot traffic. 🚶♂️🚶♀️
By following these simple steps, your ash tree seeds will have the best chance of germinating and growing into healthy, vibrant trees. 🌳 With patience, care, and a little bit of love, you’ll soon see your ash tree seeds sprout and start their journey toward becoming a full-grown tree! 🌱🌳
🌳 Growing and Caring for Your Ash Tree Seedlings 🌿
Congratulations! You’ve successfully collected and germinated your ash tree seeds—now it’s time to watch them grow! 🌱 Growing ash tree seedlings can be an exciting and fulfilling process, but it requires proper care and attention. In this section, we’ll cover everything you need to know to nurture your young ash trees into strong, healthy trees. Let’s dive in! 😊
🌞 1. Providing the Right Sunlight 🌞
Ash trees love the sun! ☀️ To ensure your seedlings thrive, place them in a spot where they can receive full sunlight. Ideally, they should get at least 6-8 hours of direct sunlight per day. If you’re growing them indoors, consider using a grow light to supplement natural light, especially during the winter months.
Tip: If you’re growing ash trees in pots, make sure to rotate the pots occasionally so each side gets an equal amount of sunlight. 🌞
💧 2. Watering Needs 💧
Watering your ash tree seedlings is essential, but too much water can lead to root rot! 😟 Keep the soil moist but not soaking wet. Ash trees prefer well-drained soil, so make sure the pots or garden bed has good drainage.
Watering Frequency: Check the soil daily during hot weather. If the top inch of the soil feels dry, it’s time to water. During colder months, reduce watering, but never let the soil dry out completely.
🌿 3. Soil Care and Fertilization 🌿
Ash trees aren’t too picky about soil, but they do best in well-drained, fertile soil. If you’re growing your tree in a pot, use a potting mix that allows water to flow through easily. When planting outdoors, ensure the soil is rich in nutrients and not compacted.
Fertilization: Ash tree seedlings can be fertilized after their first year of growth. Use a balanced, slow-release fertilizer to promote steady growth. Apply it in early spring and again in late summer. Avoid over-fertilizing, as this can weaken the tree’s roots. 🌱
🌬️ 4. Ensuring Proper Airflow 🌬️
Good airflow is vital for the health of your ash tree seedlings. 🌀 Too much moisture with poor airflow can lead to fungal issues, like mildew or mold. If you’re growing your tree indoors, place it in a spot with proper ventilation. Outdoors, make sure there’s enough space between seedlings to allow air to circulate freely.
Tip: Avoid overcrowding. If your seedlings are in a pot, be sure to re-pot them once they outgrow their container. 🌬️
✂️ 5. Pruning and Shaping ✂️
As your ash tree seedlings grow, regular pruning will help them develop a strong structure. 🌳 Focus on removing any dead or damaged branches, especially during the first few years of growth. Light pruning can encourage healthy new growth and a well-shaped tree.
Shaping Tip: When pruning, make clean cuts near the base of the branch to allow the tree to heal faster. Don’t remove too much at once—prune gradually over time. ✂️
🛠️ Troubleshooting Common Ash Tree Growing Issues 🌱
Growing ash trees from seed can be a rewarding experience, but just like with any plant, there may be a few bumps along the way. Don’t worry—common issues are easy to address with the right knowledge! Let’s dive into the most frequent problems you might face when growing ash tree seeds and how to solve them. 🌳
🌱 Problem 1: Low Germination Rate 🌱
Cause: Ash tree seeds need cold stratification to break dormancy. If you skip or rush this process, germination may be poor. 😕
Solution: Ensure you cold-stratify your seeds for 30–60 days by storing them in a damp paper towel in the fridge. This mimics the natural winter conditions ash seeds need to germinate. Remember, patience is key—seeds can take a few weeks to sprout! ⏳
🌿 Problem 2: Seedlings Are Too Weak or Leggy 🌿
Cause: Leggy seedlings (tall with weak stems) are often a sign of insufficient light. Ash trees love full sunlight, and your seedlings might be stretching for more. 🌞
Solution: Move your seedlings to a sunny windowsill or under a grow light if indoors. Ash trees need at least 6–8 hours of sunlight daily to grow strong and healthy. 🌞 If grown outdoors, ensure they’re planted in a spot with direct sunlight.
🍂 Problem 3: Seedling Diseases (e.g., Ash Dieback) 🍂
Cause: Ash seedlings can be vulnerable to fungal infections like Ash Dieback, especially in damp conditions. 🌧️
Solution: Keep your seedlings in a well-ventilated space, and ensure the soil is well-draining. Remove any infected leaves or branches immediately to prevent the spread of disease. If you’re dealing with fungal growth, a mild fungicide can help protect your seedlings. 🌿
🐛 Problem 4: Pests Infesting Ash Tree Seedlings 🐛
Cause: Pests like aphids or beetles are attracted to ash tree seedlings, especially when they are young and tender. 🐜
Solution: Regularly inspect your seedlings for pests. If you find any, gently wash them off with water or use insecticidal soap. Neem oil is also a great, eco-friendly option to protect your seedlings from harmful pests. 🌸
🌧️ Problem 5: Overwatering or Underwatering 🌧️
Cause: Ash trees are sensitive to water levels. Overwatering can lead to root rot, while underwatering can stress your seedlings. 🌊
Solution: Ensure the soil stays consistently moist but not soggy. When watering, check that the water drains well. A simple test: stick your finger in the soil—if it feels dry an inch down, it’s time to water! If it’s wet, hold off for a day or two. 🌿
🌳 Problem 6: Transplant Shock 🌳
Cause: Moving your ash seedlings from pots to the ground too quickly can cause transplant shock, leading to wilting or stunted growth. 🌱
Solution: Gradually acclimate your seedlings to outdoor conditions by hardening them off. Start by placing them outdoors for a few hours each day, increasing the time over a week or two before planting them in the ground. 🏡
Final Tips 🌟
Growing ash trees from seed can come with its challenges, but with the right approach, you’ll soon have a healthy, thriving tree in your backyard. Always keep an eye on your seedlings, provide the proper care, and be patient as they grow into strong trees. 🌳
If you encounter any other issues or need further help, don’t hesitate to revisit these troubleshooting tips and get back on track. Happy planting! 🌿😊
🌟 Final Thoughts 🌟
Growing ash tree seeds is an incredibly rewarding experience, offering both environmental benefits and the satisfaction of nurturing a tree from seed to maturity. By following the steps outlined in this guide, from collecting and stratifying the seeds to troubleshooting common issues along the way, you now have the tools and knowledge to successfully grow your own ash trees. 🌳✨
Remember, patience is key! Whether you’re growing a single tree in your backyard or starting a small ash grove, the process may take time, but the results are well worth the effort. By caring for your seedlings, providing the right conditions, and tackling any issues head-on, you’ll watch your ash trees grow strong and healthy.
Now that you’re equipped with the right know-how, it’s time to get started. Don’t hesitate to share your progress, ask questions, or even try planting more seeds as your confidence grows. 🌱 Keep nurturing your passion for nature and watch as your ash trees thrive—one seed at a time! 🌿🌍
Happy planting, and may your ash trees grow tall and strong! 😊🌳