
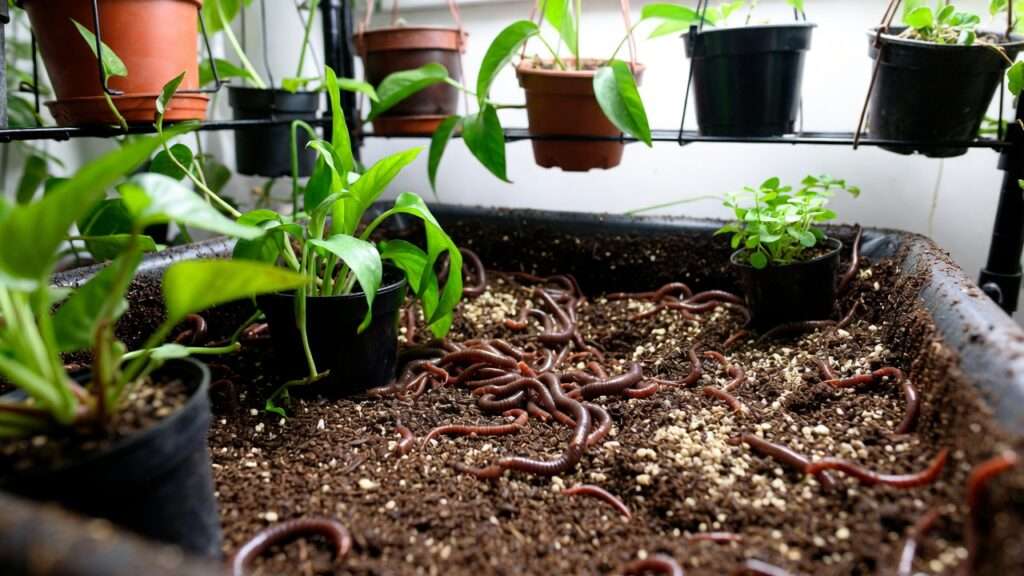
That unmistakable sour, rotten-egg whiff wafting from your worm bin? 😷 It’s the #1 reason many beginners abandon vermicomposting altogether—especially when trying to keep things discreet indoors for apartment living or houseplant enthusiasts. But here’s the reassuring truth: a properly managed worm bin should smell pleasantly earthy, like fresh forest soil after a light rain, not like a forgotten garbage can.
Avoiding worm bin smells is entirely achievable with the right balance of air, moisture, food, and bedding. In fact, thousands of indoor gardeners successfully maintain odor-free systems year-round, turning kitchen scraps into nutrient-rich worm castings (also called vermicast or black gold) that supercharge houseplants, vegetable gardens, and even tree root zones.
As someone who has maintained multiple worm bins for over a decade—indoors, in garages, and even during humid summers—I’ve troubleshooted every common odor issue imaginable. Backed by insights from university extension resources (like Cornell and Oregon State), experienced vermicomposters, and hands-on experimentation, this comprehensive guide goes beyond basic tips. You’ll get the science behind why smells develop, a detailed diagnostic chart, prevention strategies that actually work, quick-fix protocols, advanced pro hacks, and ways to integrate your fresh castings into plant and tree care routines.
By the end, you’ll have everything needed to enjoy guilt-free, smell-free vermicomposting that benefits your green thumb and the planet. Let’s dive in! 🌿
Why Does Your Worm Bin Smell? Understanding the Science Behind Odors 🧪
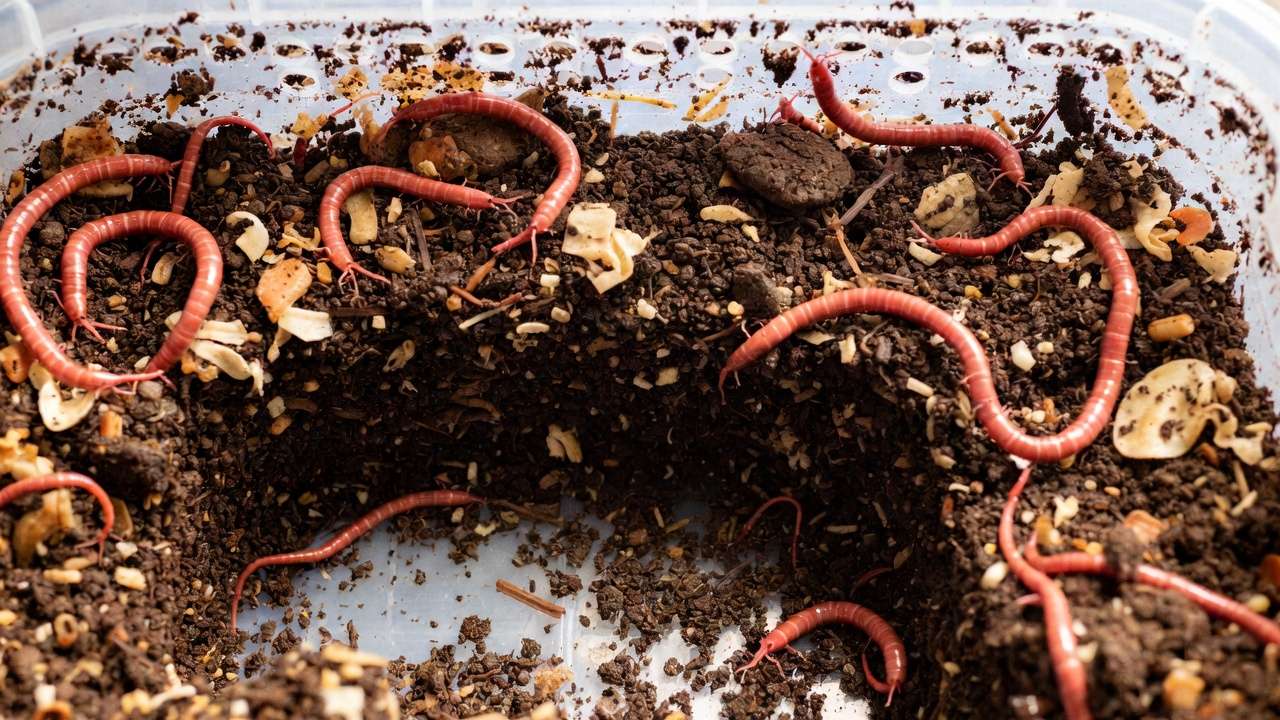
At its core, vermicomposting is an aerobic process—meaning it relies on oxygen-loving microorganisms and red wiggler worms (Eisenia fetida) to break down organic matter efficiently and without foul byproducts. When things go wrong, the environment shifts to anaerobic conditions, where oxygen-starved bacteria take over and produce smelly gases like hydrogen sulfide (rotten eggs), ammonia (sharp, urine-like), or volatile fatty acids (vinegar/sour notes).
The Role of Aerobic vs. Anaerobic Decomposition
Good aerobic bacteria and worms thrive when oxygen circulates freely. They convert scraps into stable, odorless humus. Anaerobic bacteria, however, produce methane, hydrogen sulfide, and other pungent compounds as survival byproducts. The key trigger? Imbalance that reduces airflow or creates excess moisture, leading to compacted, soggy material.
The Ideal Worm Bin Conditions (The Goldilocks Zone) ✨
Worms are surprisingly forgiving, but they perform best within these ranges:
- Temperature: 55–77°F (13–25°C) — Avoid extremes; worms slow down or die outside 40–85°F.
- Moisture: Like a wrung-out sponge — 60–80% moisture. Too wet squeezes out air; too dry stresses worms.
- pH: Slightly acidic to neutral (6.0–7.5) — Worms dislike highly acidic (below 5.5) or alkaline conditions.
- Carbon:Nitrogen balance: Aim for 25–30:1 overall — Plenty of carbon-rich bedding (browns) to balance nitrogen-rich food scraps (greens).
What a Healthy Worm Bin Should Smell Like
Open the lid: You should get a mild, sweet-earthy aroma—similar to potting soil or a woodland floor. Any sharp, rotten, or ammonia scent signals an issue that needs immediate attention.
Top 7 Causes of Smelly Worm Bins (And How to Spot Them) 🚨
Use this quick-reference table to diagnose:
| Smell Type | Likely Cause | First Action to Take |
|---|---|---|
| Rotten eggs / sulfur | Anaerobic conditions (too wet, compacted) | Add dry bedding, aerate gently |
| Ammonia / sharp urine | Excess nitrogen (overfeeding, too many greens) | Stop feeding, add carbon bedding |
| Vinegar / sour | Acidic imbalance or rotting fruits/veggies | Add crushed eggshells, more bedding |
| Garbage / putrid | Overfeeding + poor aeration | Remove uneaten food, fluff bin |
| Fecal / poop-like | Overfeeding, not enough worms processing | Reduce food, ensure worm population |
Now, let’s break down the culprits:
- Overfeeding (Most Common Culprit) Worms can only eat about half their body weight per day. Pile on too much, and uneaten food rots anaerobically. Signs: Food mound visible after 3–4 days.
- Too Much Moisture / Poor Drainage 💧 Excess liquid (leachate) displaces oxygen. Common from watery scraps like melon rinds or over-spraying.
- Insufficient Bedding or Carbon Materials Bedding absorbs moisture, provides carbon, and creates air pockets. Without enough, everything compacts.
- Wrong Foods (Meat, Dairy, Oily, or Acidic Items) These rot slowly, attract pests, and create rancid odors. Even broccoli or onions can smell funky if overdone.
- Poor Aeration / Compacted Material No fluffing = no oxygen flow. Worms tunnel naturally, but heavy feeding compacts faster.
- Extreme Temperatures or pH Imbalance 🌡️ Heat speeds anaerobic rot; cold slows worms, leaving food to ferment. Low pH from citrus overload kills beneficial bacteria.
- Infestations (Fruit Flies, Mites) or Diseased Worms Fruit flies indicate overripe fruit; mites thrive in wet conditions. Bad smells often accompany these.

Essential Tips for Avoiding Worm Bin Smells from Day One 🛡️
Prevention beats cure—here’s how to set up for success.
Choose the Right Bin Setup for Odor Control
Opt for bins with excellent ventilation:
- Stacked trays (e.g., Worm Factory 360) allow worms to migrate up, leaving castings below.
- DIY plastic totes with drilled holes (1/8–1/4 inch) on sides and lid.
- Flow-through designs for continuous harvesting. Place indoors in a dark, stable spot (under sink, closet, or laundry room). Use opaque bins to keep worms happy.
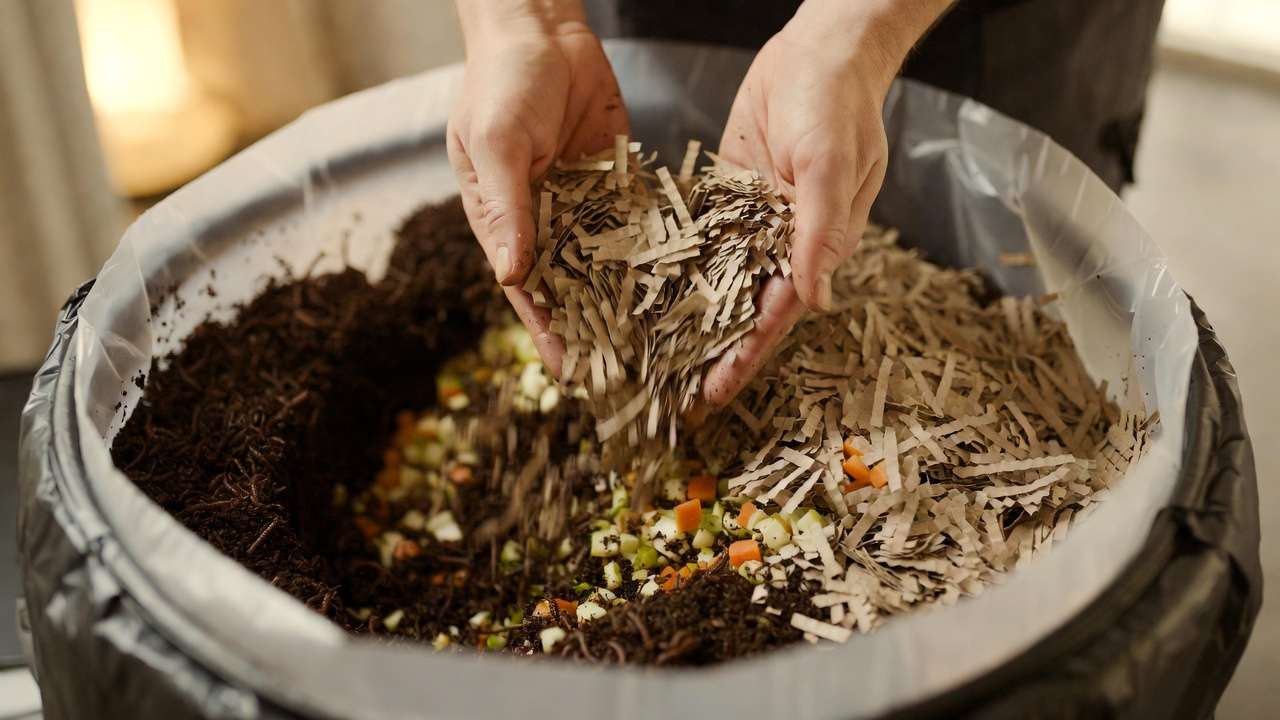
Perfect Bedding Recipe for Odor Absorption
Start with 4–6 inches of moistened:
- Shredded cardboard (best odor eater)
- Coconut coir (holds moisture without sogginess)
- Aged leaves, shredded office paper, or peat moss Refresh monthly or as needed—aim for 50–70% bedding by volume.
Smart Feeding Guidelines (The #1 Prevention Strategy)
- Feed little and often: Start with ¼–½ lb scraps per lb of worms weekly.
- Bury food 2–3 inches deep in pockets.
- Chop scraps small for faster processing.
- Safe foods: Veggie peels, fruit scraps (no excess citrus), coffee grounds, tea bags, crushed eggshells.
- Limit/avoid: Meat, dairy, oils, large citrus, onions/garlic in bulk.
Maintain Optimal Moisture and Aeration
- Squeeze test: Bedding should release 1–2 drops when squeezed.
- Add dry bedding if wet; mist lightly if dry.
- Gently fluff/aerate weekly with a hand fork—don’t disturb worms too much.
Monitor and Balance pH Naturally
Sprinkle crushed eggshells or a pinch of garden lime if acidic (test with cheap pH strips). More bedding usually self-corrects.
Temperature Management for Year-Round Freshness
Keep bins away from heaters/AC vents. Insulate with blankets in winter if below 55°F.
Quick Fixes: What to Do If Your Bin Already Smells 😓
Don’t panic—even the stinkiest worm bin can usually be rescued in 3–7 days with a systematic reset. Follow this emergency protocol step by step:
- Stop Feeding Immediately No new food for at least 5–7 days (or until the smell disappears). This gives worms time to catch up and stops adding fuel to anaerobic pockets.
- Add a Thick Layer of Dry Bedding Shredded cardboard is your best friend here—add 2–4 inches on top and gently mix it into the top 4–6 inches of material. Coconut coir or torn newspaper work too. The goal: soak up excess moisture and reintroduce carbon to balance the system.
- Gently Aerate the Bin Use a hand trowel, chopstick, or small garden fork to fluff and turn the material lightly. Avoid aggressive digging that could stress or injure worms. Do this every 2–3 days during the reset. You’ll likely see (and smell) improvement after the first aeration.
- Remove Any Obvious Rotten Pockets If you spot slimy, black, or foul-smelling clumps of uneaten food, scoop them out and discard (or bury them deeply in an outdoor compost pile). Don’t compost them back in the bin right away.
- Optional Boosters for Faster Recovery
- Sprinkle a light dusting of bokashi bran (if you have it) to encourage beneficial microbes.
- Add a handful of crushed eggshells or a very small pinch of dolomite lime/garden lime to neutralize acidity.
- Mist lightly with dechlorinated water only if the bin feels bone-dry after adding bedding.
- Monitor Daily & Resume Feeding Slowly Sniff test every day. Once it returns to earthy, start feeding again—but at half the usual amount for the first week.
When to Start Over (Rare but Honest Advice) If after 10–14 days the smell remains intense, worms are mostly gone, or you see massive fruit fly/mite infestations, it’s often faster to harvest any usable castings, rinse surviving worms in dechlorinated water, and restart the bin with fresh bedding. Most people never reach this point when following prevention steps.
Advanced Pro Tips from Experienced Vermicomposters 🌟
After years of trial and error (and chatting with hundreds of fellow worm farmers in online communities), here are the tweaks that take odor control from good to nearly perfect:
- Pre-compost Tricky Scraps Let citrus peels, onion scraps, or broccoli stems sit in a small bokashi bucket for 1–2 weeks first. This kickstarts breakdown and reduces stink potential.
- Use a “Trap Tray” or Sacrificial Layer Place a thin layer of fresh bedding + buried food scraps on top every feeding. Worms migrate upward to eat, leaving lower layers to finish curing into castings—naturally separating odor sources from finished product.
- Fruit Fly Defense Arsenal 🍎
- Cover food scraps completely with bedding.
- Place a small jar of apple cider vinegar + drop of dish soap near (but not in) the bin as a trap.
- Add a piece of banana peel on top occasionally to lure flies away from the main pile.
- Seasonal Adjustments Summer: Feed even less, aerate more frequently, place bin in coolest indoor spot. Winter: Insulate sides with old towels or bubble wrap (leave lid exposed for air), move closer to a heat source if below 55°F.
- My Personal Favorite Hack After 12+ years, I’ve found that keeping the bedding-to-food ratio at 3:1 or higher eliminates 80–90% of odor complaints. When in doubt… add more cardboard! 📦
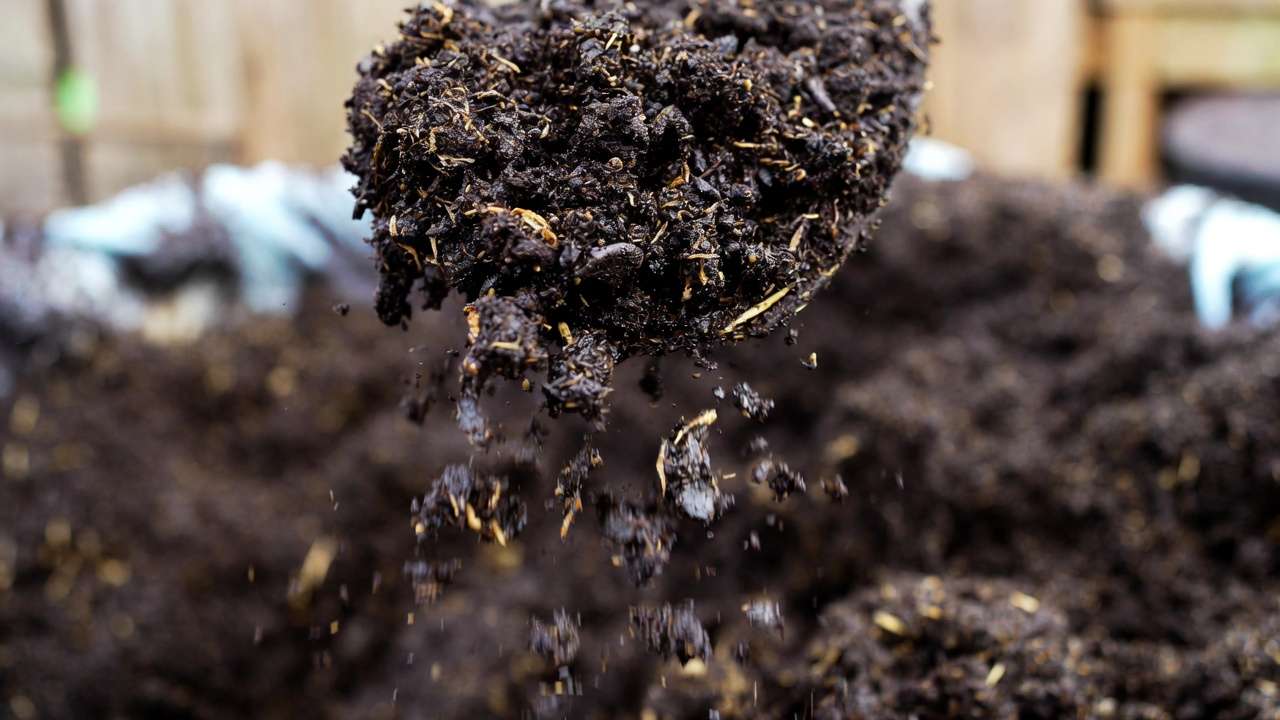
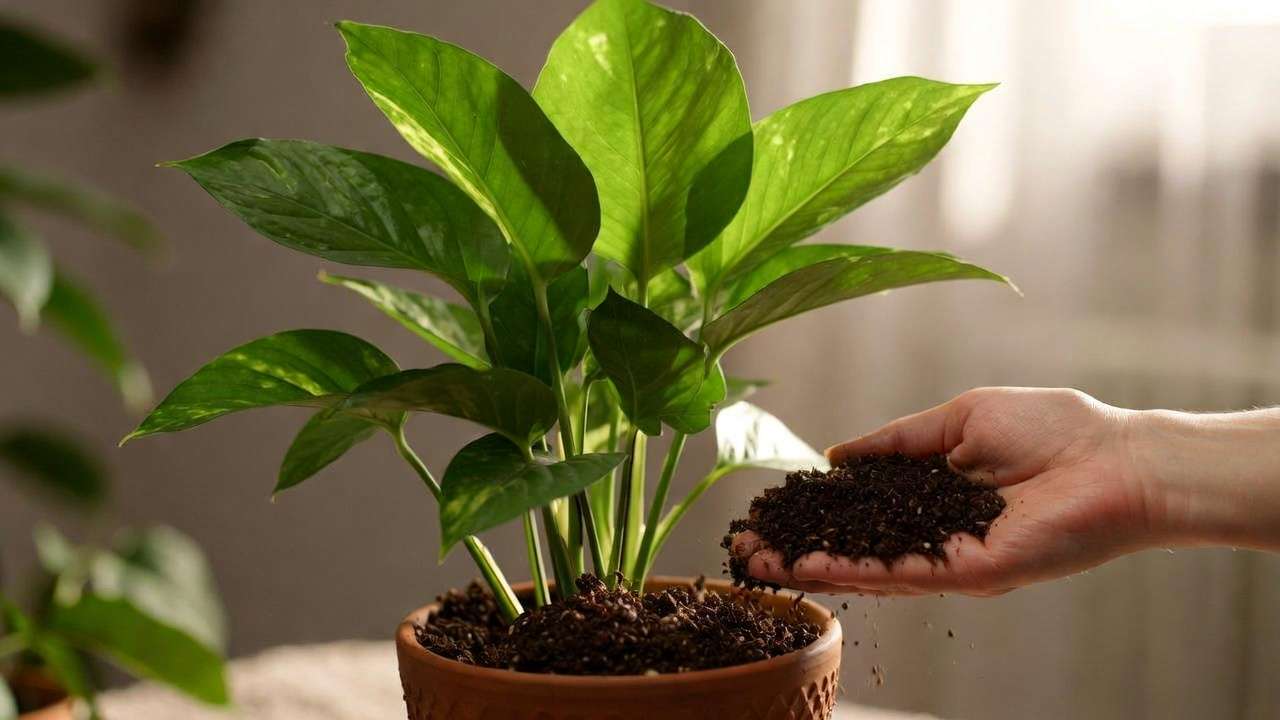
Harvesting Odor-Free Castings & Using Them in Your Garden 🪴
Once your bin is consistently fresh and worms have processed most material, it’s time to harvest:
- When to Harvest Bedding looks mostly like dark, crumbly soil and food scraps are scarce.
- Easy Harvest Methods
- Light method: Shine a bright light; worms move down → scoop top castings.
- Tray migration: Add fresh food/bedding to a new tray on top; worms migrate up over 2–4 weeks → remove bottom tray of finished castings.
- Screening: Dump contents on a tarp, let worms burrow down, collect castings from top.
- Making Worm Casting Tea (Odor-Free Version)
- Fill a bucket 1/3 with finished castings.
- Add dechlorinated water (5–10 parts water to 1 part castings).
- Stir/aerate with an aquarium pump for 24–48 hours.
- Strain through cheesecloth.
- Dilute 1:10 and use as foliar spray or soil drench—smells pleasantly earthy!
- Application Tips for Plants & Trees
- Houseplants: Mix 10–20% castings into potting soil or top-dress ½ inch every 2–3 months.
- Vegetable beds: Side-dress around plants at 1–2 cups per square foot.
- Trees: Spread 1–2 inches of castings in the drip line (root zone), then mulch over top—great for fruit trees and ornamentals.
Common Myths About Worm Bin Smells Debunked ❌
- Myth: “All worm bins are supposed to smell bad.” False. A healthy bin is nearly odorless or pleasantly earthy.
- Myth: “Adding baking soda fixes everything.” It can spike pH too high and harm worms. Use eggshells or lime sparingly instead.
- Myth: “Worms like it wet and sloppy.” They prefer moist (not soggy). Excess water is one of the fastest ways to create stink.
- Myth: “You can just ignore the smell and it’ll go away.” Anaerobic conditions worsen quickly—address early.
Frequently Asked Questions (FAQs) ❓
Q: Why does my bin smell like ammonia even with good bedding? A: Usually excess nitrogen from overfeeding or too many fresh greens. Pause feeding and add 2–3x more carbon bedding.
Q: Can I vermicompost indoors without any smell at all? A: Yes—thousands do it successfully in apartments. Strict feeding rules, ample bedding, and regular aeration make it practically odorless.
Q: How do I stop fruit flies from making the smell worse? A: Bury food deeply, cover with extra bedding, and use vinegar traps nearby. Avoid leaving the lid off for long.
Q: My bin smells after vacation—help! A: Common from overfeeding before leaving. Follow the quick-fix protocol above; most recover fully.
Q: Are red wigglers the only worms that don’t smell? A: They’re the best choice for indoor bins due to fast processing and tolerance. European nightcrawlers can work but often need more space and produce more leachate.
Q: How often should I check my bin to prevent smells? A: Lift the lid and sniff every 3–4 days when starting out. Once dialed in, weekly is usually enough.
Conclusion + Call to Action 🌿🪱
Avoiding worm bin smells comes down to one core principle: balance. Give your worms enough air, the right amount of food, plenty of carbon-rich bedding, and consistent gentle care—and they’ll reward you with silent, efficient composting and the richest soil amendment nature provides.
Start small if you’re new, observe your bin like you would your favorite houseplants, and don’t be afraid to adjust. Soon, that earthy aroma will become your favorite sign that kitchen waste is becoming black gold for your garden.
Have you battled worm bin odors before? What fixed it for you? Drop a comment below—I read and reply to every one! 🌱 If this guide helped, share it with a fellow plant lover, and subscribe for more sustainable plant care tips, tree maintenance guides, and eco-friendly gardening hacks.
Happy vermicomposting—and may your bin always smell like fresh forest floor! ✨


