
Picture this: a crisp autumn morning, sunlight filtering through your backyard, and the satisfaction of biting into a juicy apple you grew yourself from a bare root apple tree. 🌞 Sounds dreamy, right? Planting a bare root apple tree is a rewarding journey that transforms your garden into a fruitful orchard. Whether you’re a novice gardener or a seasoned grower, this guide will walk you through every step to ensure your tree thrives. From choosing the perfect variety to long-term care, you’ll learn expert techniques to cultivate a healthy, productive apple tree. Backed by horticultural expertise and trusted resources like university extension programs, this comprehensive guide is your key to orchard success. Let’s dig in! 🌿
1. What Is a Bare Root Apple Tree? 🌿
1.1 Definition and Benefits
A bare root apple tree is a dormant tree sold without soil around its roots, typically shipped with roots wrapped in moist material. These trees are dug up during their dormant phase (late fall to early spring) and are ready for planting in your garden. Unlike potted or container-grown trees, bare root trees are lightweight, easier to ship, and often more affordable, making them a favorite among home gardeners and orchard enthusiasts.
Why choose bare root?
- Cost-effective: Bare root trees are typically 20-50% cheaper than potted counterparts.
- Wider variety: Nurseries offer a broader selection of heirloom and specialty apple varieties.
- Better root establishment: When planted correctly, bare root trees adapt quickly to your soil, developing strong root systems.
- Eco-friendly: Less packaging and no plastic pots reduce environmental impact.
Compared to container-grown trees, bare root trees require careful handling but reward growers with vigorous growth when planted during the dormant season.
1.2 When to Buy and Plant Bare Root Apple Trees
Timing is critical for bare root apple trees. The ideal planting window is late winter to early spring, when the tree is still dormant but the soil is workable. This typically falls between February and April in most regions, depending on your USDA hardiness zone. For example:
- Zones 4-6: Plant in early spring (March-April) to avoid frost damage.
- Zones 7-9: Late winter (January-February) works well in milder climates.
Purchase from reputable sources like local nurseries, garden centers, or trusted online suppliers such as Stark Bro’s or Fedco Trees. Avoid buying trees that have been stored improperly or show signs of drying out. Pro tip: Order early (late fall or winter) to secure your preferred varieties, as popular ones sell out quickly! 🛒
2. Choosing the Right Bare Root Apple Tree 🍏
2.1 Selecting the Best Variety
With hundreds of apple varieties available, choosing the right one depends on your climate, taste preferences, and garden goals. Here are some popular options:
- Honeycrisp: Sweet, crisp, and great for eating fresh; best in zones 4-7.
- Granny Smith: Tart and ideal for baking; thrives in zones 5-8.
- Fuji: Sweet and juicy, perfect for snacking or cider; suited for zones 5-9.
- Liberty: Disease-resistant and easy to grow; great for organic gardeners in zones 4-8.
Consider your needs: Are you growing apples for fresh eating, cooking, or cider? Dwarf trees (8-10 feet tall) are ideal for small spaces, while semi-dwarf (12-15 feet) and standard (20-30 feet) trees suit larger yards or orchards. Check your hardiness zone and select varieties that match your climate for optimal growth.
2.2 Understanding Pollination Requirements
Most apple trees require cross-pollination to produce fruit, meaning you’ll need at least two compatible varieties that bloom at the same time. For example, a Honeycrisp can be pollinated by a Fuji or Gala but not another Honeycrisp. Some varieties, like Golden Delicious, are self-pollinating, but even these produce better yields with a pollinator nearby.
Tips for pollination success:
- Plant trees within 50-100 feet of each other to attract pollinators like bees. 🐝
- Check bloom times (early, mid, or late season) to ensure compatibility.
- If space is limited, consider grafting multiple varieties onto a single tree or planting pollinator-friendly flowers (e.g., clover, lavender) to attract bees.
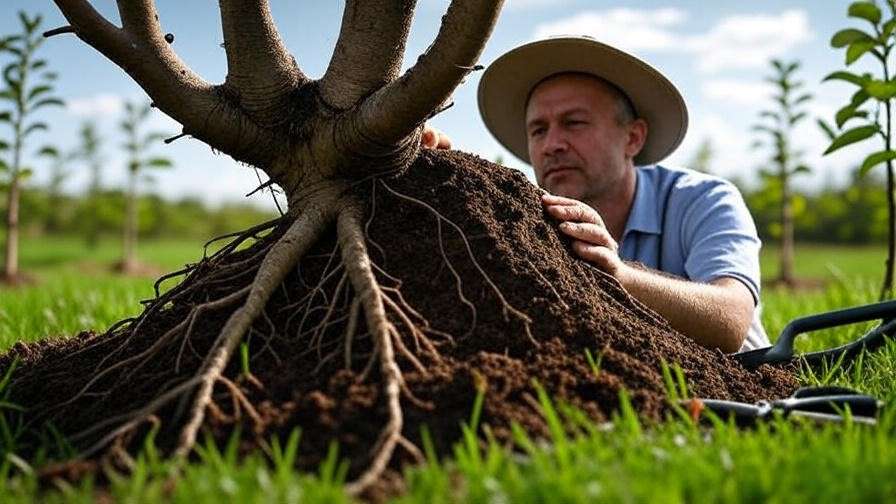
2.3 Inspecting Your Bare Root Tree
When your bare root apple tree arrives, inspect it carefully:
- Healthy roots: Look for moist, pliable roots with no signs of rot or brittleness.
- Sturdy trunk: Ensure the trunk is straight, with no cracks or damage to the bark.
- Graft union: The swollen area where the rootstock meets the scion should be intact.
Expert Tip: Soak the roots in a bucket of water for 6-12 hours before planting to rehydrate them and promote successful establishment. Avoid soaking for more than 24 hours to prevent root damage.
3. Preparing to Plant Your Bare Root Apple Tree 🌞
3.1 Choosing the Perfect Planting Site
A thriving apple tree starts with the right location. Here’s what to prioritize:
- Sunlight: At least 6-8 hours of direct sunlight daily for optimal fruit production.
- Soil type: Well-draining, loamy soil with a pH of 6.0-7.0 is ideal. Avoid heavy clay or sandy soils.
- Space: Ensure enough room for the tree’s mature size (e.g., 8-10 feet for dwarf, 20-30 feet for standard). Allow 15-20 feet between trees for air circulation and growth.
Avoid low-lying areas prone to frost pockets or waterlogging, as these can harm your tree.
3.2 Soil Preparation and Testing
Healthy soil is the foundation of a productive apple tree. Start by testing your soil’s pH and nutrient levels using a DIY kit (available at garden centers) or a professional lab through your local extension service. Aim for a pH of 6.0-7.0; if it’s too acidic, add lime, or if too alkaline, incorporate sulfur.
Soil amendments:
- Mix in compost or well-rotted manure to improve soil structure and fertility.
- Add organic matter (e.g., leaf mold or peat moss) to enhance drainage in clay soils.
- For nutrient-deficient soils, consider a balanced fertilizer (e.g., 10-10-10) after planting, but avoid over-fertilizing young trees.
Drainage tip: Dig a test hole, fill it with water, and ensure it drains within 12 hours. Poor drainage can lead to root rot, a common issue for apple trees.
3.3 Gathering Tools and Materials
Before planting, gather these essentials:
- Tools: Shovel, pruning shears, stakes, and tree ties.
- Materials: Compost, organic mulch (e.g., wood chips or bark), and a root stimulator (optional).
- Optional boost: Mycorrhizal fungi powder, applied to roots during planting, can enhance nutrient uptake and root growth.
Having everything ready ensures a smooth planting process and sets your tree up for success.
4. Step-by-Step Guide to Planting a Bare Root Apple Tree 🌱
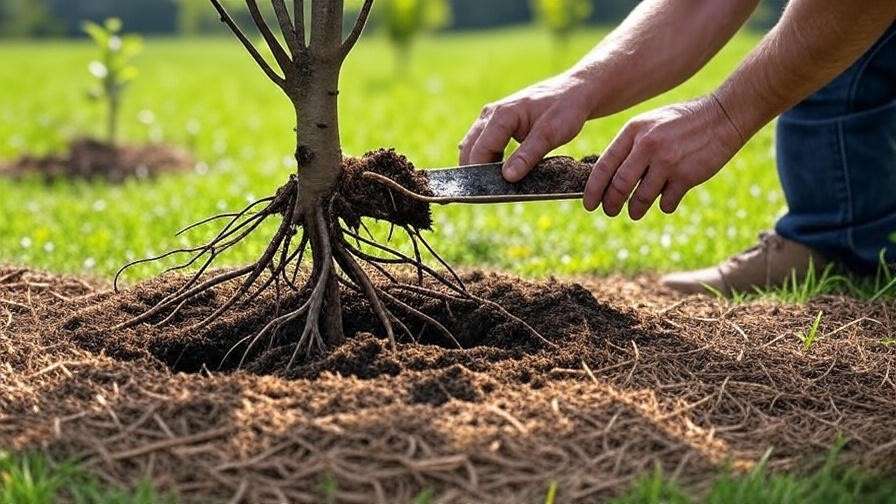
4.1 Digging the Perfect Hole
The planting hole is critical for root development:
- Size: Dig a hole 2-3 times wider than the root spread (about 2-3 feet wide) and as deep as the longest root (typically 12-18 inches).
- Shape: Roughen the sides with a shovel to encourage roots to penetrate the soil. Avoid smooth, glazed edges.
- Mound: Create a small cone of soil in the center of the hole to support the roots and prevent air pockets.
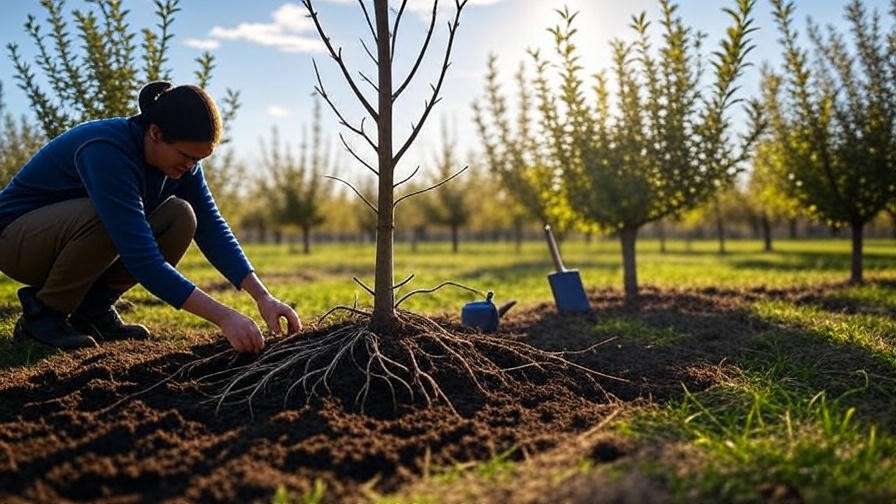
4.2 Positioning and Planting
- Spread the roots: Gently fan out the roots over the soil mound, ensuring they’re not crowded or bent.
- Graft union: Position the tree so the graft union (the knobby area where the scion meets the rootstock) is 2-4 inches above the soil line to prevent rot.
- Backfill: Fill the hole with a mix of native soil and compost, tamping gently to eliminate air pockets. Avoid compacting too tightly, as this can restrict root growth.
4.3 Staking and Watering
- Staking: For dwarf trees or windy areas, insert one or two stakes and secure the tree with soft ties to prevent movement. Remove stakes after 1-2 years once the tree is established.
- Watering: Water thoroughly (about 5-10 gallons) to settle the soil and hydrate the roots.
- Mulching: Apply 2-4 inches of organic mulch around the base, keeping it 2 inches away from the trunk to prevent rot. Mulch retains moisture and suppresses weeds.
Expert Tip: Water slowly to ensure deep penetration, and check soil moisture regularly during the first year.
5. Caring for Your Bare Root Apple Tree Post-Planting 🌼
5.1 Watering Schedule
Proper watering is essential for your bare root apple tree to establish strong roots in its first year. Water deeply 1-2 times per week, delivering about 5-10 gallons per session, depending on weather and soil conditions. In hot, dry climates, you may need to water more frequently, while in rainy regions, reduce watering to avoid soggy soil.
Signs to watch for:
- Overwatering: Yellowing leaves, soggy soil, or fungal growth near the base.
- Underwatering: Wilting leaves, dry soil, or slow growth.
Use a moisture meter or dig 2-3 inches into the soil to check for dampness. As the tree matures, adjust to less frequent but deeper watering to encourage deep root growth.
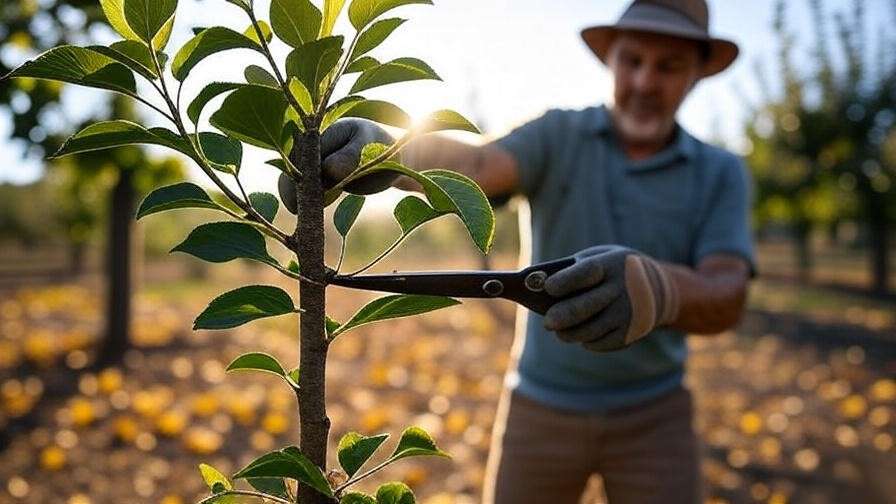
5.2 Pruning Basics
Pruning shapes your apple tree, promotes airflow, and boosts fruit production. The best time to prune is late winter or early spring, before buds break but after the risk of hard frost.
How to prune a young bare root apple tree:
- First year: Trim the central leader (main vertical stem) to 30-36 inches to encourage branching. Remove any damaged or crossing branches.
- Structure: Aim for an open-center or modified central leader shape to allow sunlight to reach all branches.
- Tools: Use clean, sharp pruning shears to make clean cuts at a 45-degree angle just above a bud.
Expert Tip: Sterilize pruning tools with rubbing alcohol between cuts to prevent disease spread. Avoid heavy pruning in the first year to minimize stress on the tree.
5.3 Fertilizing and Nutrient Management
Avoid fertilizing immediately after planting, as bare root trees are sensitive to nutrient overload. In the second year, apply a balanced fertilizer (e.g., 10-10-10 or organic compost) in early spring, just as buds begin to swell.
Fertilizing tips:
- Organic options: Compost, well-rotted manure, or fish emulsion provide slow-release nutrients.
- Synthetic fertilizers: Use sparingly and follow package instructions to avoid burning roots.
- Nutrient deficiencies: Yellow leaves may indicate nitrogen deficiency, while poor fruit set could signal low phosphorus. Conduct a soil test every 2-3 years to monitor nutrient levels.
Pro Tip: Spread fertilizer in a ring around the tree’s drip line (the outer edge of the canopy), not directly against the trunk, to reach the feeder roots.
6. Common Challenges and How to Overcome Them 🐛
6.1 Pests and Diseases
Apple trees face several pests and diseases, but proactive management keeps them healthy.
Common pests:
- Aphids: Small sap-sucking insects that curl leaves. Control with neem oil or introduce ladybugs, a natural predator. 🐞
- Codling moths: Larvae cause wormy apples. Use pheromone traps or organic sprays like spinosad.
- Spider mites: Tiny pests that create webbing on leaves. Spray with water or insecticidal soap to dislodge them.
Common diseases:
- Apple scab: Dark, velvety spots on leaves and fruit. Choose resistant varieties (e.g., Liberty) and apply sulfur-based fungicides early in the season.
- Fire blight: Bacterial disease causing blackened, wilted shoots. Prune affected branches 12 inches below symptoms and sterilize tools.
- Powdery mildew: White, powdery coating on leaves. Improve airflow through pruning and apply organic fungicides if needed.
Prevention: Maintain good sanitation by removing fallen leaves and fruit, which can harbor pests and pathogens. Companion planting with garlic or chives can deter pests naturally.
6.2 Transplant Shock and Slow Establishment
Transplant shock is common with bare root apple trees, especially if roots dry out or planting is delayed. Signs include wilting leaves, stunted growth, or delayed leaf-out.
Solutions:
- Consistent watering: Keep soil moist but not waterlogged during the first year.
- Root stimulators: Products containing mycorrhizal fungi or seaweed extract can promote root growth.
- Shade: Temporarily shield the tree from intense sun or wind with a shade cloth for the first few weeks.
Expert Insight: Be patient—some trees take 1-2 years to fully establish. If no growth occurs by late spring, scratch the bark gently; green tissue indicates the tree is still alive. Contact your nursery for advice if growth doesn’t appear.
6.3 Environmental Stressors
Apple trees can face stress from weather extremes:
- Frost: Protect young trees from late spring frosts by covering them with frost cloth or burlap.
- Heatwaves: Mulch heavily and water deeply to keep roots cool and hydrated.
- Wind: Stake young trees in windy areas to prevent uprooting or leaning.
Winter care: Wrap the trunk with tree wrap or a plastic guard to prevent sunscald (bark cracking from temperature fluctuations) and rodent damage. In drought-prone areas, install a drip irrigation system to ensure consistent moisture.
7. Long-Term Care for a Thriving Apple Orchard 🌳
7.1 Annual Maintenance Checklist
To keep your apple tree healthy and productive, follow this annual care plan:
- Early spring: Prune to shape the tree and remove dead or crossing branches. Apply fertilizer and check for pest activity.
- Late spring: Thin small fruit to 1-2 per cluster to improve fruit size and prevent branch breakage. Monitor for pests and diseases.
- Summer: Water consistently, especially during dry spells. Add mulch to retain moisture.
- Fall: Clean up fallen leaves and fruit to prevent pest overwintering. Inspect for structural issues like weak branches.
- Winter: Wrap the trunk and check stakes or ties for stability.
Pro Tip: Keep a garden journal to track pruning, fertilizing, and pest control dates for better long-term results.
7.2 Harvesting Your Apples
Knowing when and how to harvest ensures the best flavor and quality:
- When to harvest: Apples are ready when they detach easily with a gentle twist, have vibrant color, and taste sweet or tart (depending on the variety). Most ripen between late summer and fall.
- How to pick: Hold the apple gently and twist upward to avoid damaging the spur (the fruit-bearing branch).
- Storage: Store apples in a cool (32-40°F), humid place like a refrigerator or root cellar. Wrap each apple in newspaper to prevent bruising and extend shelf life up to 6 months.

7.3 Planning for Future Growth
Once your bare root apple tree thrives, consider expanding your orchard:
- Add more trees: Plant additional varieties for cross-pollination and extended harvest seasons.
- Grafting: Experiment with grafting to grow multiple apple varieties on a single tree, ideal for small spaces.
- Sustainable practices: Incorporate composting, rainwater harvesting, and pollinator-friendly plants (e.g., bee balm, lavender) to create a thriving ecosystem.
Expert Insight: According to the University of Minnesota Extension, integrating native plants around your orchard can boost pollinator activity by up to 30%, improving fruit set.
8. FAQs About Bare Root Apple Trees ❓
- Q1: How long does it take for a bare root apple tree to bear fruit?
A: Most bare root apple trees produce fruit in 2-5 years, depending on the variety and size. Dwarf trees fruit sooner (2-3 years), while standard trees may take 4-5 years. - Q2: Can I plant a bare root apple tree in a container?
A: Yes, dwarf varieties are ideal for containers. Use a large pot (at least 20 gallons) with drainage holes and a well-draining potting mix. - Q3: What if my bare root tree doesn’t leaf out in spring?
A: Check for signs of life by scratching the bark; green tissue indicates viability. If no growth occurs by late spring, contact your nursery for a replacement or refund. - Q4: Do I need two apple trees for fruit production?
A: Most varieties require a pollinator, but self-fertile options like Golden Delicious can produce alone. Planting a second tree improves yields for all varieties.
9. Expert Tips for Success 🌟
- Tip 1: Choose disease-resistant varieties like Liberty or Enterprise to minimize maintenance and chemical use.
- Tip 2: Plant pollinator-attracting flowers like lavender or clover near your tree to boost bee activity and fruit production. 🐝
- Tip 3: Use a drip irrigation system for consistent watering, especially in dry climates, to save time and water.
- Expert Insight: Dr. Emily Hoover, a horticulturist at the University of Minnesota, notes that bare root apple trees planted in well-prepared soil can establish 20% faster than container-grown trees when proper care is followed.
Conclusion 🌈
Planting a bare root apple tree is a cost-effective, rewarding way to grow your own fruit and create a sustainable backyard orchard. By choosing the right variety, preparing the soil, and following proper planting and care techniques, you’ll enjoy crisp, homegrown apples for years to come. This guide has equipped you with actionable steps, from selecting a healthy tree to harvesting your first crop. Start your orchard journey today, and share your success stories or questions in the comments below! Growing apples isn’t just gardening—it’s a legacy that nourishes your family and the planet. 🌍


