
Bitter gourd, also known as bitter melon, is a popular vegetable in many cuisines and is known for its health benefits. In this article, we will guide you through the process of planting and transplanting bitter gourd seedlings, providing you with all the information you need to successfully grow this nutritious and versatile vegetable in your garden. Whether you are a beginner or an experienced gardener, this step-by-step guide will help you cultivate healthy and productive bitter gourd plants.
Understanding Bitter Gourd
A. Botanical background and varieties
Bitter gourd, or Momordica charantia, is a vine plant that belongs to the Cucurbitaceae family. It is commonly grown in tropical and subtropical regions and is known for its unique bitter taste. There are several varieties of bitter gourd, with differences in shape, size, and bitterness. Some popular varieties include Indian, Chinese, and hybrid varieties, each with their own distinct characteristics.
B. Nutritional and medicinal benefits
Bitter gourd is a highly nutritious vegetable, rich in vitamins, minerals, and antioxidants. It is low in calories and high in fiber, making it a great addition to a healthy diet. Bitter gourd also has a long history of use in traditional medicine, with potential benefits for managing blood sugar levels, improving digestion, and boosting the immune system. Cultivating Bitter Gourd
C. Growth requirements: climate, soil, and water
Bitter gourd is a warm-weather vegetable and thrives in tropical and subtropical climates. It requires temperatures of around 70-90°F (21-32°C) for optimal growth. Bitter gourd plants prefer well-draining, sandy or loamy soil with a slightly acidic pH level. They also require regular watering, especially during the growing season, but it’s important to avoid waterlogged conditions that can lead to root rot. Additionally, providing a trellis or support for the vines can help promote healthy growth and improve air circulation. Overall, bitter gourd plants require a sunny, warm environment with well-drained soil and regular watering to thrive.
Preparing for Planting
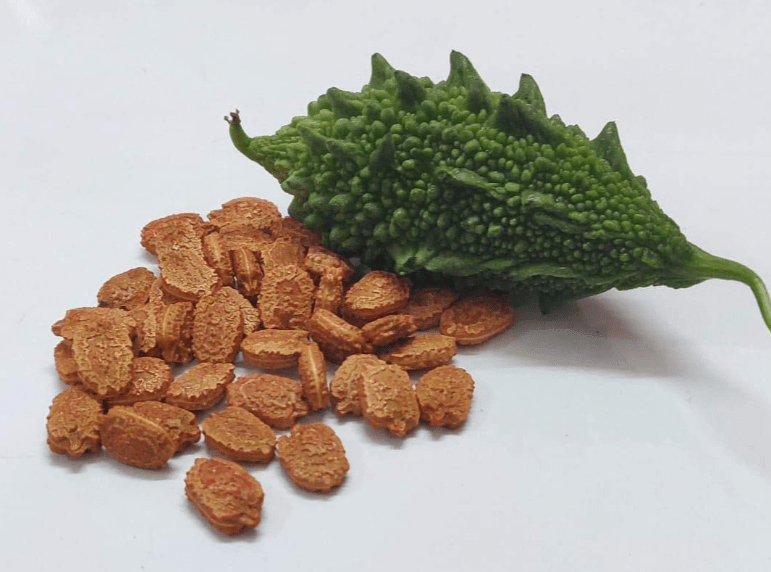
A. Selecting seeds: quality and sourcing
When selecting bitter gourd seeds, it’s important to choose high-quality seeds from a reputable source. Look for seeds that are fresh, disease-resistant, and suited to your specific growing region. It’s best to purchase seeds from a trusted supplier or nursery to ensure the quality and authenticity of the seeds. Additionally, consider selecting seeds from bitter gourd varieties that are known to perform well in your local climate and soil conditions. By choosing the right seeds, you can set yourself up for success when planting and growing bitter gourds.
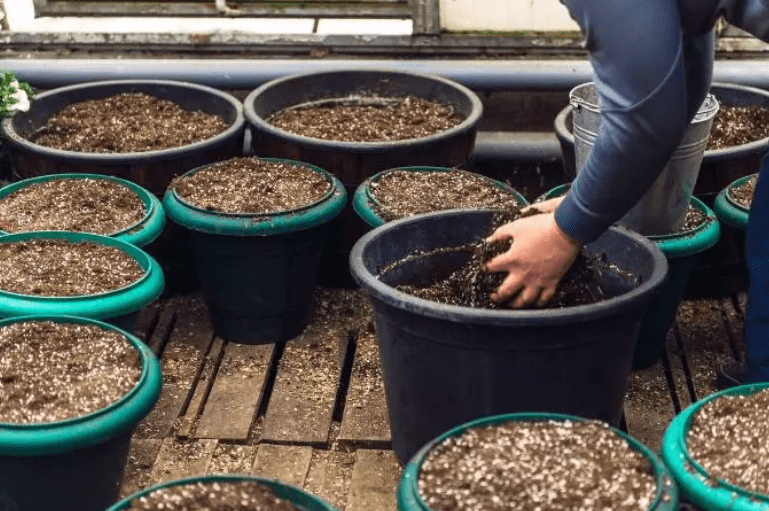
B. Preparing soil: composition, pH, and fertilization
When preparing soil for planting bitter gourds, it’s important to consider the composition, pH, and fertilization needs. Bitter gourd plants thrive in well-draining soil with a pH level between 6.0 and 7.0. Prior to planting, it’s recommended to amend the soil with organic matter, such as compost or well-rotted manure, to improve its structure and fertility. Additionally, a balanced fertilizer high in phosphorus and potassium can be applied to the soil to provide essential nutrients for the plants. Testing the soil for its pH levels and fertility can help determine the specific amendments needed to create an optimal growing environment for bitter gourds. By preparing the soil accordingly, you can create the ideal conditions for successful bitter gourd growth.

C. Choosing containers or seed trays
When choosing containers or seed trays for planting bitter gourds, it’s important to select options that provide adequate space for root growth and drainage. Bitter gourd plants have deep roots, so it’s best to use containers that are at least 12 inches deep. Additionally, ensure that the containers have drainage holes to prevent waterlogging, which can lead to root rot. Seed trays with individual cells can also be used for starting bitter gourd seeds indoors before transplanting them to larger containers or the garden. The size and depth of the containers or seed trays are important factors to consider when selecting the appropriate vessels for growing bitter gourd.
D. Setting up a suitable environment: temperature, light, and humidity
When setting up a suitable environment for growing bitter gourds, it’s important to consider temperature, light, and humidity. Bitter gourd plants thrive in warm temperatures, ideally between 75-85°F during the day and 60-70°F at night. They require plenty of sunlight, so choose a location that receives at least 6-8 hours of direct sunlight each day. If growing indoors, supplemental grow lights can be used to provide adequate light. Bitter gourd plants also prefer high humidity, around 80-90%, so it’s important to provide a humid environment, especially during the germination and early growth stages. Maintaining these environmental factors is crucial for the successful growth of bitter gourd plants.
Planting Bitter Gourd Seeds
A. When to plant: optimal timing
Bitter gourd seeds can be planted once temperatures reach around 70°F or higher. This is typically in the late spring or early summer, depending on your location. It’s important to wait until the risk of frost has passed before planting bitter gourd seeds, as they are sensitive to cold temperatures. In regions with a shorter growing season, starting seeds indoors and transplanting them outdoors once the weather warms up can be a good option. Overall, the optimal timing for planting bitter gourd seeds is when the weather is consistently warm and there is no longer a risk of frost.
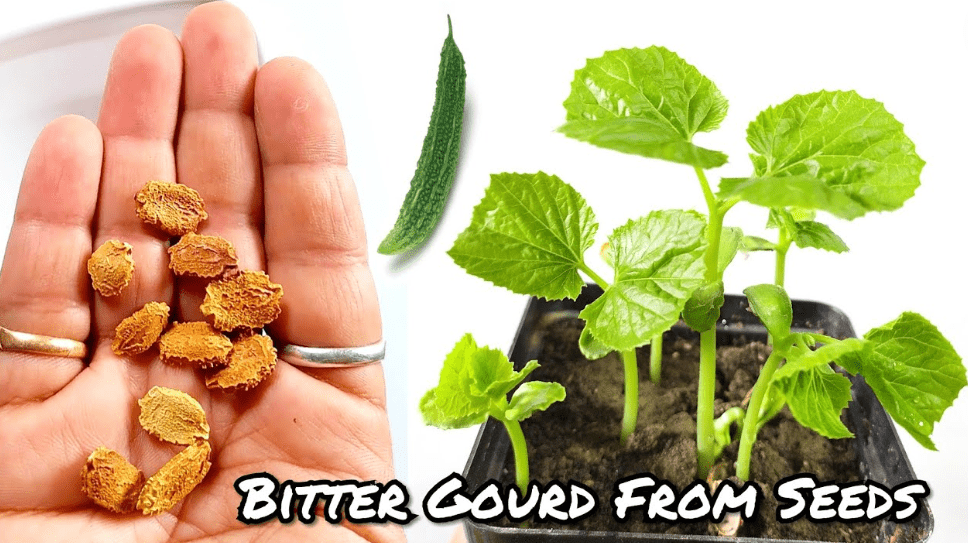
B. Seed treatment: soaking and germination
Before planting bitter gourd seeds, it can be beneficial to soak them in water for 24 hours. This can help to soften the tough outer seed coat and improve germination rates. After soaking, the seeds can be planted directly in the soil or started indoors in seed trays. Germination typically takes around 7-14 days, and once the seedlings have developed their first true leaves, they can be transplanted into the garden. Soaking the seeds can help to kickstart the germination process and give your bitter gourd plants a strong start.
C. Planting process: depth, spacing, and watering
When planting bitter gourd seeds, it’s recommended to plant them at a depth of about 1 inch in the soil. Make sure to space the seeds approximately 12-18 inches apart to allow for proper growth and airflow.
After planting, be sure to water the seeds consistently to keep the soil moist but not waterlogged. Bitter gourd plants thrive in well-draining soil and require regular watering, especially during dry periods.
By following these planting guidelines, you can help your bitter gourd plants establish strong roots and produce a successful harvest.
Caring for Seedlings
A. Watering schedule and techniques
When caring for bitter gourd seedlings, it’s important to establish a regular watering schedule. Water the seedlings deeply, allowing the soil to dry out slightly between waterings to encourage healthy root growth. Avoid overwatering, as this can lead to root rot and other plant issues. It’s also helpful to use a watering technique that delivers water directly to the soil, such as drip irrigation or a soaker hose, to minimize moisture on the leaves and reduce the risk of fungal diseases. By maintaining a consistent watering schedule and using proper techniques, you can support the growth and development of your bitter gourd seedlings.
B. Lighting requirements: natural vs. artificial
The bitter gourd plant requires abundant sunlight for healthy growth and fruit production. If growing indoors, it’s important to provide artificial lighting that mimics the intensity and spectrum of natural sunlight. This can be achieved with the use of grow lights, particularly those that emit full-spectrum or daylight-balanced light. When growing outdoors, make sure to place the seedlings in a sunny location where they can receive at least 6-8 hours of direct sunlight each day. By meeting the plant’s lighting requirements, you can promote strong and vigorous growth in your bitter gourd seedlings.
C. Fertilization: type and frequency
Bitter gourd plants benefit from regular fertilization to support their growth and fruit production. When choosing a fertilizer, look for one that is specifically formulated for vegetables or fruits, as these will provide the necessary nutrients for the plant’s needs. It’s important to follow the instructions on the fertilizer packaging for the correct application rate and frequency. Generally, fertilizing bitter gourd plants every 2-3 weeks during the growing season is recommended. Additionally, incorporating organic matter such as compost into the soil can also help provide essential nutrients for the plants. By providing the right type and frequency of fertilization, you can ensure that your bitter gourd plants have the nutrients they need to thrive and produce a bountiful harvest.
D. Monitoring for pests and diseases
It is important to regularly monitor bitter gourd plants for pests and diseases in order to prevent potential damage to the plants. Keep an eye out for common pests such as aphids, whiteflies, and spider mites, as well as diseases like powdery mildew and bacterial wilt. Inspecting the plants regularly and addressing any pest or disease issues promptly can help to mitigate potential damage and ensure the health of the plants. Additionally, practicing good garden hygiene, such as removing any affected plant material and maintaining proper spacing between plants, can also help to prevent the spread of pests and diseases. By staying proactive and vigilant in monitoring for pests and diseases, you can help to protect your bitter gourd plants and encourage a successful growing season.
D. Tips for promoting healthy growth
Promoting healthy growth in bitter gourd plants can be done through several key practices. First, ensure that the plants are receiving adequate sunlight, as bitter gourd plants thrive in full sun. Additionally, providing a well-draining soil and regular watering can help to promote healthy growth. It is also important to provide support for the vines as they grow, such as trellises or stakes, to encourage upward growth and prevent the plants from becoming tangled or damaged. Fertilizing the plants with a balanced fertilizer, following the instructions on the label, can also help to promote healthy growth. Finally, regular pruning of the plants can encourage bushier growth and higher fruit production. By implementing these tips and practices, you can help to promote healthy growth in your bitter gourd plants.
Preparing for Transplanting
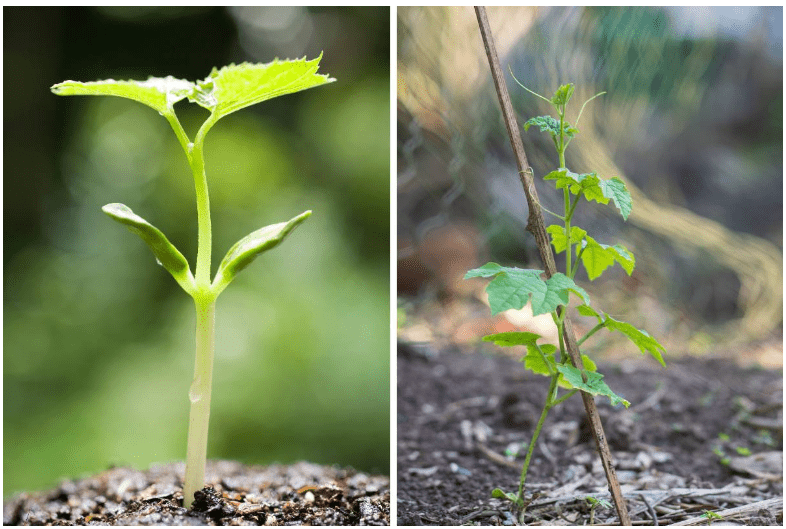
A. Signs that seedlings are ready for transplant
Signs that seedlings are ready for transplanting include having at least two to three sets of true leaves, a sturdy stem, and a well-established root system. It’s important to wait until the seedlings are strong enough to handle the stress of transplanting and have acclimated to outdoor conditions before moving them to the garden. This will help ensure a successful transition and promote healthy growth in the garden.
B. Hardening off seedlings: process and importance
Hardening off seedlings is the process of gradually acclimating them to outdoor conditions before transplanting them into the garden. This is important because it helps to prevent transplant shock and allows the seedlings to adjust to the changes in temperature, sunlight, and wind. To harden off seedlings, gradually expose them to outdoor conditions for a few hours each day, increasing the time and intensity of exposure over the course of a week or two. This will help prepare the seedlings for the transition to the garden and promote their overall health and resilience.
C. Choosing the right location: garden or larger containers
When it comes to choosing the right location for your plants, whether it be in the garden or in larger containers, there are a few key factors to consider. In the garden, you’ll want to look for an area with ample sunlight, good drainage, and protection from strong winds. If you’re opting for larger containers, make sure they are placed in a spot that also receives plenty of sunlight and offers enough space for the plants to grow. Consider the specific needs of the plants you’re growing and choose a location that meets those requirements for a successful and healthy garden.
D. Soil preparation in the new location
When preparing the soil in a new location for your seedlings, it’s important to ensure that the soil is well-draining, has the right pH levels, and is rich in nutrients. Start by clearing the area of any debris and weeds, then loosen the soil to a depth of about 12 inches. Add organic matter such as compost or aged manure to improve soil structure and fertility. Test the soil’s pH levels and make any necessary adjustments by adding lime to raise the pH or sulfur to lower it. This will help create an optimal growing environment for your seedlings and promote their overall health and resilience in the new location.
Transplanting Bitter Gourd Seedlings
A. Step-by-step transplanting process
When transplanting bitter gourd seedlings, start by choosing a suitable location with well-draining soil and full sunlight. Dig a hole that is slightly larger than the root ball of the seedling and carefully remove the seedling from its original container, being gentle so as not to damage the roots. Place the seedling into the hole and backfill with soil, gently firming it around the base of the plant. Water the transplanted seedling thoroughly to help it establish in its new location. It’s important to keep the soil consistently moist in the days following the transplant to help the seedling adjust to its new environment. As the plant continues to grow, provide support for the vines to climb and continue to water and fertilize as needed to promote healthy growth and fruit production.
B. Post-Transplant Care
After transplanting the bitter gourd seedling, it’s important to continue caring for it to ensure it thrives in its new location. Here are some post-transplant care tips:
- Water the seedling regularly to keep the soil consistently moist, especially in the days following the transplant.
- Provide support for the vines to climb as the plant grows. This can be done using trellises or other support structures.
- Fertilize the plant as needed to promote healthy growth and fruit production. You can use a balanced fertilizer according to the manufacturer’s instructions.
- Monitor the plant for any signs of stress or disease and take appropriate action if needed.
By following these post-transplant care tips, you can help your bitter gourd seedling adjust to its new environment and thrive in its new location.
Troubleshooting Common Issues
A. Common problems with bitter gourd seedlings
Common problems with bitter gourd seedlings may include pests such as aphids or whiteflies, as well as diseases like powdery mildew or bacterial wilt. To prevent these issues, regularly inspect the plant for any signs of infestation or disease, and take prompt action to address them. This may include using organic pest control methods or disease-resistant varieties, as well as proper sanitation practices to prevent the spread of disease. By staying vigilant and addressing any issues early on, you can help your bitter gourd plant stay healthy and productive.
B. Solutions for nutrient deficiencies, pests, and diseases
To address nutrient deficiencies, ensure that your bitter gourd plant is receiving adequate nutrients through proper fertilization and soil amendments. For pests, consider using natural pest control methods such as neem oil or insecticidal soap. For diseases, practice good hygiene and sanitation in your garden and consider using disease-resistant varieties of bitter gourd. Additionally, proper watering and providing adequate air circulation can also help prevent the development of diseases. Monitoring your plant regularly and taking action as soon as issues arise can help keep your bitter gourd plant healthy and thriving.
In conclusion, bitter gourd seedlings require careful attention and proper care from planting to transplanting in order to ensure a successful and thriving harvest. By following the steps outlined in this article, you can effectively grow bitter gourd in your garden and enjoy the nutritious benefits of this vegetable. Remember to provide adequate support for the vines as they grow and to protect the plants from pests and disease. With the right care and attention, you can enjoy a bountiful harvest of bitter gourd from your garden.