
Picture this: You’ve nurtured your bonsai for years, watching it grow stronger and more characterful with each season. Then one day, you step back and realize the structure just doesn’t feel right—branches cross awkwardly, the trunk line is hidden, or the apex looks weak. One hesitant cut later, and panic sets in: “Did I just ruin it?” 😱
If this sounds familiar, you’re not alone. Branch selection and removal in bonsai is one of the most intimidating yet transformative steps in the art. It’s where raw potential becomes refined beauty—or where mistakes become hard lessons. The good news? With the right principles and a systematic approach, you can make confident, intelligent decisions that dramatically improve your tree’s design.
In this in-depth guide (drawn from decades of hands-on experience, classic Japanese bonsai texts, and techniques shared by masters worldwide), we’ll walk you through everything you need to know about branch selection and removal in bonsai. From understanding structural vs. maintenance pruning to avoiding common pitfalls like inverse taper or poor balance, this article aims to be your go-to resource—more comprehensive and practical than most out there. Let’s turn those tough pruning decisions into opportunities for stunning bonsai artistry! 🌟
Understanding the Two Types of Pruning in Bonsai ✂️🌱
Bonsai pruning isn’t one-size-fits-all. Knowing when and why you’re cutting makes all the difference.
Maintenance Pruning (Refining the Canopy)
This is the lighter, ongoing work most people think of first.
- Goal: Maintain shape, encourage dense ramification (fine twigging), promote back-budding, and control vigor.
- Techniques: Pinching new shoots (candles in pines), finger-pruning tips, or shearing foliage pads during the growing season.
- Timing: Active growth periods—spring through summer for most species.
- Impact on branches: Minimal structural change; you’re mostly working on current-year growth.
Maintenance pruning keeps a refined bonsai looking polished, but it won’t fix foundational issues like heavy branches blocking the view or poor branch placement.
Structural Pruning (Branch Selection & Major Removal)
This is the big work—the part that truly shapes your bonsai’s future.
- Goal: Establish or improve the tree’s basic architecture: strong trunk line, balanced branch placement, good taper, exposed nebari (surface roots), and harmonious proportions.
- Timing: Usually late winter or early spring during dormancy (before buds swell) for deciduous and most conifers. Some species (like ficus or tropicals) tolerate year-round structural work.
- Irreversibility factor: Removing a major branch can’t be undone easily. That’s why thoughtful branch selection and removal in bonsai is so critical ⚠️. A single poor choice can create inverse taper, weak movement, or unbalanced energy distribution for years.
(Diagram showing common branches to remove during structural pruning—courtesy of Bonsai Empire principles. Notice how many problem branches block the trunk or create clutter!)
Core Principles of Branch Selection in Bonsai 🎯
Great bonsai follow time-tested rules inspired by nature and refined over centuries. Here are the fundamentals to guide every cut:
1. Prioritize the Front View & Trunk Line Visibility
- Always design around your chosen front.
- Remove or shorten branches that hide the lower trunk or nebari—exposing 1/3 to 1/2 of the trunk height is ideal for most styles.
- Eliminate “eye-pokers” (branches growing straight toward the viewer) as they disrupt flow 👀.
2. Avoid Problematic Branch Patterns
Certain arrangements almost always look unnatural or cause long-term issues:
- Bar branches — two branches directly opposite each other at the same height.
- Parallel branches — multiple branches running in the same direction.
- Whorled branches — several branches emerging from the same spot (leads to inverse taper over time) ❌.
- Crossing/rubbing branches — they damage bark and look messy.
- Spoke-wheel pattern — branches radiating evenly like bicycle spokes (lacks natural asymmetry).
3. Follow Natural Branch Placement Rules
- First (lowest) primary branch usually starts at about 1/3 up the trunk height.
- Branches should alternate sides and stagger in height—no perfect symmetry.
- Place branches on the outside of curves to emphasize trunk movement.
- Thicker branches belong lower; finer twigs higher up (creates pleasing taper).
4. Consider Future Development & Apex
- Keep temporary “sacrifice branches” if you need to thicken the trunk or a specific section.
- Always cut back to a bud facing the direction you want new growth to go ➡️.
- Protect and strengthen the apex—never let lower branches overpower it.

(Real example: A young deciduous bonsai marked with tags for keepers vs. removals—perfect for planning structural pruning!)
Step-by-Step Guide: How to Select & Remove Branches 🛠️
Follow this process every time you tackle major structural work:
- Step back and visualize — Turn the tree, view from multiple angles, even sketch or photograph your ideal design.
- Identify primary branches — Choose left, right, back, and apex leaders.
- Mark decisions — Use colored tags, string, or chalk to label keepers vs. removals (orange for remove is popular!).
- Work bottom to top — Start low so you don’t accidentally remove something needed higher up.
- Cut properly — Use sharp concave cutters for flush removal without stubs. Angle cuts slightly downward to shed water.
- Seal large wounds — Apply cut paste or wound sealant to prevent drying and infection.
- Aftercare — Reduce watering slightly for 2–4 weeks, keep out of intense sun/wind, and fertilize lightly once recovery starts.
Common Mistakes in Branch Selection & Removal (And How to Avoid Them) 🚫
Even experienced bonsai artists occasionally slip up—here are the most frequent errors and practical fixes to keep your tree thriving:
- Removing too much at once → Severe defoliation or heavy branch loss shocks the tree, leading to dieback or weakened vigor. Fix: Limit structural pruning to 20–30% foliage removal per session. Spread major work over 2–3 years if needed.
- Leaving stubs or making flush cuts → Stubs die back and look ugly; flush cuts (cutting into the branch collar) heal poorly and invite rot. Fix: Use concave cutters to create a slight hollow that heals smoothly into the trunk.
- Ignoring species differences → Cutting old wood on pines can cause long-lasting scars; maples love hard pruning but junipers hate it on thick branches. Fix: Research your species first (more on this below).
- Over-pruning the apex → Weakening the top lets lower branches dominate, ruining taper and balance. Fix: Always protect the leader/apex—prune lower branches more aggressively.
- Creating inverse taper → Allowing multiple thick branches to emerge from one spot thickens that area more than the trunk below. Fix: Remove all but one branch at any node; favor single-branch exits.
- Pruning at the wrong time → Summer cuts on maples bleed sap heavily; winter cuts on pines risk frost damage to fresh wounds. Fix: Stick to dormant season for most structural work; use species-specific timing.
(Classic diagram from Bonsai Empire showing 15 common branches to remove—perfect visual reference for spotting problems like bar branches, water sprouts, and trunk blockers!)
(Another helpful illustration highlighting branches to avoid—use this as your checklist before any major prune.)
Species-Specific Tips for Branch Selection 🌲🍁
Different trees respond uniquely—tailor your approach:
- Conifers (Juniper, Pine, Spruce, etc.)
- Avoid heavy cuts on old wood (heals slowly, scars badly).
- Focus on pinching candles in spring to control vigor.
- Remove branches in small stages over years.
- Keep sacrifice branches longer for thickening if desired.
- Deciduous (Japanese Maple, Chinese Elm, Beech, Hornbeam)
- Excellent back-budding—great for hard pruning and ramification.
- Can handle removing large branches in late winter.
- Cut to outward-facing buds to direct growth.
- Prune aggressively to build fine twig structure.
- Flowering/Fruiting (Azalea, Crabapple, Wisteria, etc.)
- Preserve last year’s wood for flowers/fruit.
- Structural pruning in late winter; maintenance after flowering.
- Avoid removing too many potential bloom sites.
- Tropicals/Subtropicals (Ficus, Serissa, Jade, Bougainvillea)
- Year-round pruning possible due to continuous growth.
- Fast recovery—ideal for beginners practicing branch decisions.
- Heavy cuts stimulate back-budding; reduce water after big prunes.

(Stunning before-and-after of a garden juniper turned bonsai—see how strategic branch removal reveals the trunk and creates elegant movement!)
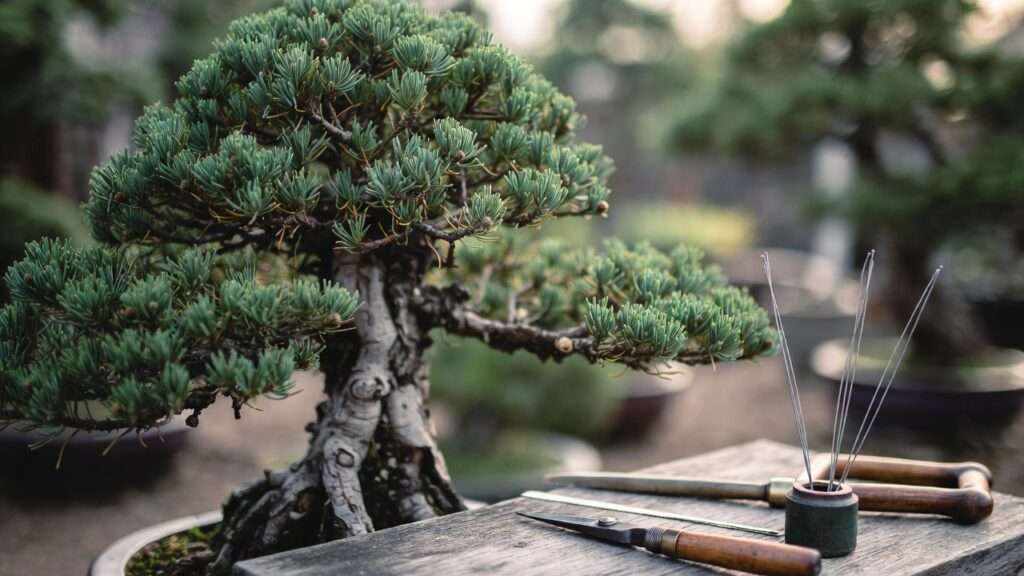
Tools You Need for Clean, Professional Cuts 🔧
Invest in quality—sharp tools mean cleaner cuts and faster healing:
- Concave Branch Cutters — The #1 essential for flush removal of medium-to-thick branches without leaving bumps.
- Knob Cutters — Perfect for spherical swellings or small stubs near the trunk.
- Twig/Leaf Shears — For fine maintenance pruning and detailed work.
- Wire Cutters — Often needed post-pruning if wiring follows.
- Pruning Saw — For very thick sacrifice branches.
- Cut Paste/Wound Sealant — Protects large wounds (especially on conifers).

(Essential bonsai tool sets featuring concave cutters, knob cutters, and more—sharpened and ready for precise branch removal!)
After Pruning: Healing, Recovery & Refinement 🌱⏳
Post-structural prune care is crucial:
- Wound healing — Small cuts callus in weeks; large ones take 1–3 years to fully close.
- Watering — Reduce slightly for 2–4 weeks to avoid rot; resume normal once buds swell.
- Fertilizing — Hold off 4–6 weeks, then use balanced organic fertilizer to rebuild energy.
- Sun & protection — Shade for 1–2 months if defoliated heavily; guard against wind/frost.
- Wiring new growth — Wait until shoots harden (late spring/summer) to set branches.
- Monitor — Watch for dieback; remove dead tips promptly to redirect energy.
Real-World Examples & Case Studies 📸
Seeing theory in action helps everything click. Here are three practical before-and-after scenarios drawn from common bonsai journeys:
- Young Juniper – Removing Clutter to Reveal Movement
- Before: Dense foliage hiding the lower trunk, multiple branches emerging from the same spot on the first bend, eye-poking straight branch in front.
- Decision process: Removed the front eye-poker, eliminated one of the whorled branches at the bend (kept the strongest outward-facing one), shortened heavy lower branch to balance energy.
- After: Clean trunk line exposed, elegant S-curve emphasized, better nebari visibility. The tree now looks twice as old and refined. (Imagine the transformation: heavy, bushy mass → graceful, airy bonsai with clear structure!)
- Mature Japanese Maple – Fixing Inverse Taper & Weak Apex
- Before: Thick lower branches opposite each other created a bulge below the trunk; apex was thin and overpowered by vigorous lower growth.
- Decision process: Removed one bar branch completely, reduced the opposite branch by 60%, sacrificed a thick lower shoot to redirect energy upward, wired remaining branches outward.
- After: Taper dramatically improved, apex strengthened over two seasons, delicate ramification started developing higher up. A near-ruined tree became show-worthy.
- Ficus Recovery Project – Turning a Mistake into Strength
- Before: Over-pruned apex two years prior left the top weak; long water sprouts shot straight up from old cuts.
- Decision process: Kept one strong water sprout as new leader, removed the rest, cut back heavy side branches to balance, used clip-and-grow to rebuild pads.
- After: New apex developed beautifully, old scars mostly healed, tree regained proportion within 18 months. Proof that even big mistakes can be corrected with patience.
These examples show that branch selection and removal in bonsai is as much about vision and long-term planning as it is about the cut itself.
Expert Insights & Pro Tips from Bonsai Masters 💡
Over years of workshops, books, and conversations with respected artists, a few golden rules stand out:
- “Always ask: Does this branch improve or detract from the design in 5–10 years?” – Think future silhouette, not just today’s look.
- “Negative space is as important as branches.” – Embrace open areas; they give the tree elegance and let the trunk and nebari shine.
- “Cut to a bud that points where you want energy to go.” – Directional pruning is your secret weapon for controlling movement without heavy wiring.
- “Keep ‘ugly duckling’ branches temporarily if they feed the trunk or divert vigor from problem areas.” – Sacrifice branches aren’t permanent; remove them once they’ve served their purpose.
- “Step back after every major cut—walk away for 10 minutes.” – Fresh eyes often reveal adjustments you missed in the heat of the moment.
Frequently Asked Questions (FAQs) ❓
Q: How do I know if a branch is worth keeping? A: Ask: Does it contribute to taper, movement, balance, or ramification? If it blocks the trunk, creates symmetry, crosses others, or grows inward/upward awkwardly—consider removal.
Q: Can I remove large branches in summer? A: Only for tropicals or species that back-bud strongly (ficus, elm). For most temperate trees, stick to dormant season to minimize stress and sap bleeding.
Q: What if I cut the wrong branch? A: Don’t panic! Many bonsai recover beautifully. Redirect energy with directional pruning, use sacrifice branches to rebuild, and give the tree time—often 1–3 seasons corrects the mistake.
Q: How much can I safely prune at once? A: Never remove more than ~30% of foliage in one structural session on conifers; up to 50% is often safe on vigorous deciduous/tropicals. When in doubt, prune less and observe.
Q: Clip-and-grow vs. wiring—which works better for branch placement? A: Both complement each other. Clip-and-grow builds natural movement over time; wiring gives precise control faster. Most pros use both depending on the stage and species.
Conclusion: Build Confidence in Your Bonsai Journey 🌟
Mastering branch selection and removal in bonsai is the single biggest leap from beginner to intermediate (and beyond). It’s intimidating because the cuts are permanent—but that’s exactly why thoughtful, principle-based decisions create breathtaking results.
Start small: Practice on less valuable material, sketch your plans, use tags to mark branches, and always step back to evaluate. Over time, you’ll develop an eye for what “feels right” in a bonsai’s structure. The tree will reward your patience with stronger taper, better balance, and that elusive sense of age and character.
Now it’s your turn—grab your concave cutters, take a deep breath, and give your bonsai the structure it deserves. Share your before-and-after photos in the comments or tag us when you apply these techniques—we love seeing your progress! 🌳✨
Happy pruning, and may your trees always grow with grace.


