
Celery seedlings can be a bit tricky to germinate and grow, but with the right tips and techniques, you can ensure a successful crop. In this post, we’ll cover everything you need to know about planting, watering, and caring for your celery seedlings to help them thrive. Whether you’re a seasoned gardener or a beginner, these tips will help you achieve successful germination and growth for your celery seedlings.
Understanding Celery Seedlings
A. Description of celery seedlings
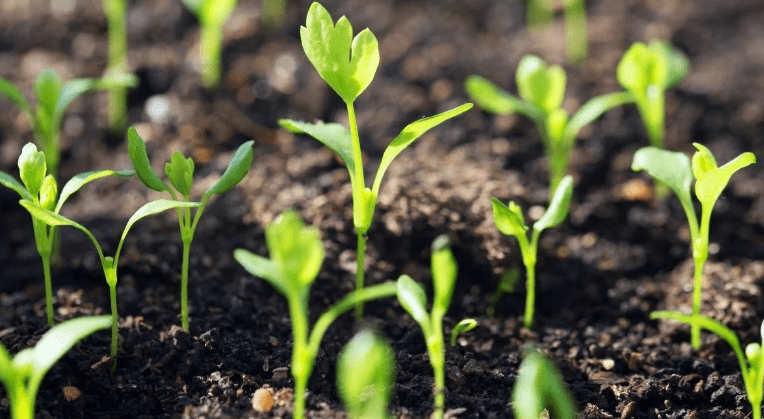
Celery seedlings are the early stage of celery plants, typically characterized by small, delicate green leaves and thin, delicate stems. They require careful attention and specific growing conditions to ensure successful germination and growth.
B. Different types of celery varieties
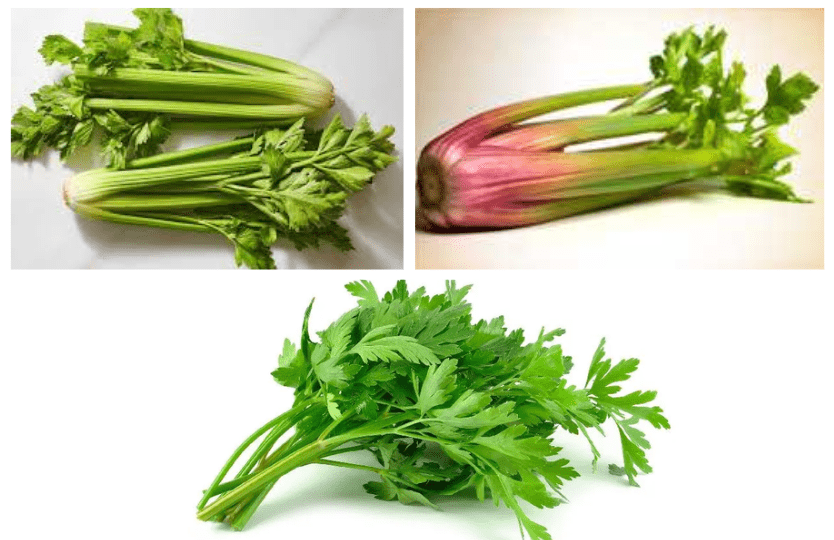
There are several different varieties of celery, including standard green celery, red celery, and leaf celery. Each variety has its own unique flavor, texture, and growing requirements, so it’s important to choose the right variety for your growing conditions and culinary preferences.
Preparing for Germination
A. Choosing the Right Seeds
When choosing celery seeds for your garden, it’s important to consider the type of celery that will thrive in your specific growing conditions. Self-blanching varieties are easier to grow and are more compact, making them a great option for home gardeners. Green varieties are the most common and have a strong flavor, while red celery varieties have a slightly stronger taste and a vibrant color. It’s also important to research which varieties are best suited for your climate and soil type. By selecting the right seeds for your garden, you can ensure that your celery seedlings have the best chance for success from the start.
1. Importance of high-quality seeds
It is important to choose high-quality seeds for your celery garden as they will give you the best chance of successful germination and healthy plant growth. High-quality seeds are more likely to be disease-resistant, have a higher germination rate, and produce stronger, healthier plants. Investing in good quality seeds can make a big difference in the success of your celery crop. It’s also a good idea to buy your seeds from a reputable supplier to ensure that you are getting the best quality seeds available.
2. Seed types: heirloom vs. hybrid
When choosing seeds for your celery garden, it’s important to consider whether to go with heirloom or hybrid varieties. Heirloom seeds are open-pollinated and have been passed down through generations, offering unique flavors and traits. Hybrid seeds, on the other hand, are the result of cross-pollination and are often bred for specific traits such as disease resistance or higher yields.
Both heirloom and hybrid seeds have their own advantages, so it’s important to consider your specific needs and preferences when making your selection. Additionally, it’s important to research which varieties are best suited for your climate and soil type to ensure the best chance of success for your celery crop.
B. Timing for Planting
Timing for planting celery seeds is important for a successful harvest. Celery is a cool-season crop and should be started indoors about 10-12 weeks before the last expected frost date in your area. Once the seedlings are about 2-3 inches tall and have at least 3-4 leaves, they can be transplanted outdoors. In cooler climates, celery can also be directly sown outdoors in early spring. It’s important to provide consistent moisture and avoid extreme heat for optimal growth. Additionally, celery can be grown as a fall crop in some regions by starting seeds indoors in mid-summer for a late season harvest. By timing your planting correctly, you can ensure a bountiful celery harvest.
1.Indoor vs. outdoor starting
Indoor starting of celery allows for a longer growing season and more control over the seedlings’ environment. By starting the seeds indoors, you can ensure that the plants are strong and healthy before transplanting them outdoors. On the other hand, direct sowing outdoors in early spring can be a good option for cooler climates where celery can thrive in the natural outdoor conditions. Ultimately, the choice between indoor and outdoor starting will depend on your specific climate and growing conditions. Both methods can be successful with proper care and attention to the plants’ needs.
Germination Process
A. Seed Preparation
To ensure successful germination, it’s important to properly prepare the celery seeds before planting. This can include scarifying the seeds to break their tough outer coating and soak them in water for a few hours or overnight to help speed up the germination process. This will help the seeds absorb water and nutrients more easily, leading to quicker and more successful germination. Properly preparing the seeds can help set the stage for healthy and strong seedlings.
1.Pre-sprouting techniques
Pre-sprouting, also known as pre-germination, is a method of starting seeds before planting them in soil. This can be done by placing the seeds on a damp paper towel or in a small container with moist soil and keeping them in a warm, dark place until they begin to sprout. This can help to speed up the germination process and give you a head start on growing healthy seedlings. Pre-sprouting can be particularly helpful for seeds that have a hard outer shell, like celery seeds, as it can help them to break through and start growing more easily. It’s a good option for gardeners who want to ensure a high germination rate and get their plants off to a strong start.
B. Soil and Containers
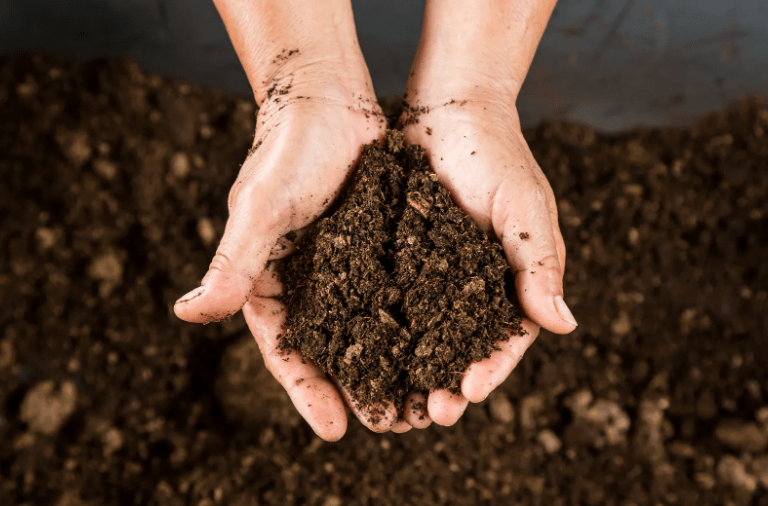
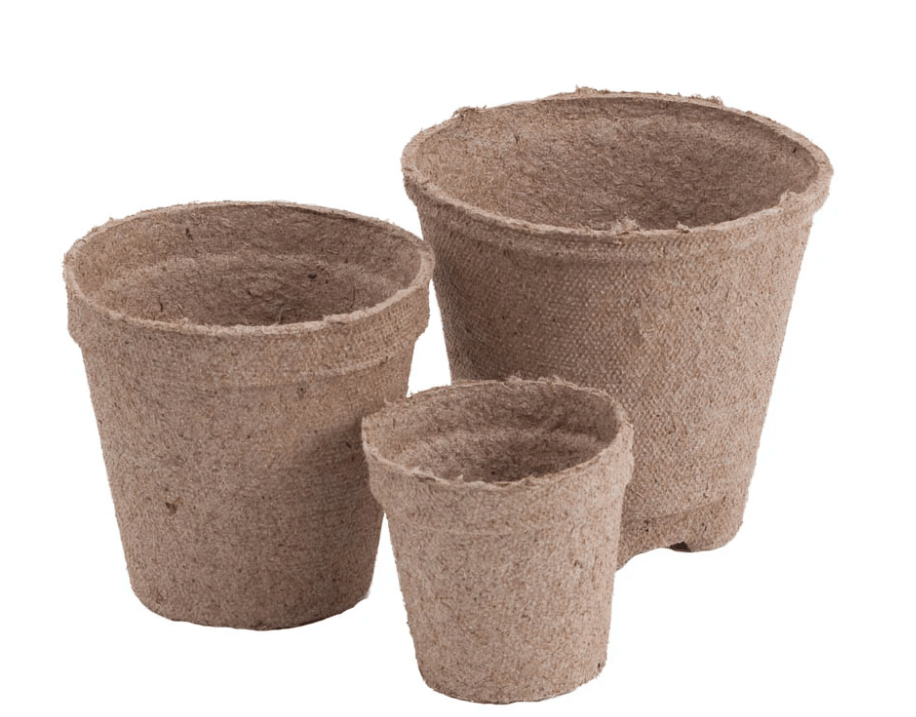
When it comes to growing celery seedlings, it’s important to start with the right soil and containers. Choose a high-quality potting mix with good drainage to ensure that your seedlings have the best chance of success. You can also use peat pots or seed-starting trays to give your seedlings plenty of room to grow and develop strong roots. Make sure to keep the soil consistently moist but not waterlogged, and provide plenty of sunlight or artificial light to help your seedlings thrive. With the right soil and containers, you can give your celery seedlings the best possible start on their journey to becoming healthy, productive plants.
1. Ideal soil mix for celery seedlings
Ideal soil mix for celery seedlings is a mixture of equal parts of peat moss, perlite, and vermiculite, which provides good aeration and moisture retention for the roots. It’s also important to use containers that are at least 3-4 inches deep to accommodate the long taproots of celery seedlings. Additionally, using organic fertilizers or compost in the soil mix can provide essential nutrients for healthy growth. Overall, the right soil mix and containers can make a significant difference in the success of growing celery seedlings.
2.Choosing the right containers
Choosing the right containers for your celery seedlings is crucial for their healthy growth.Peat pots or seed-starting trays are great options as they provide ample room for the seedlings to develop strong roots. It’s important to ensure that the containers are at least 3-4 inches deep to accommodate the long taproots of celery seedlings. This will allow the seedlings to establish a strong foundation for healthy growth. Keeping the soil consistently moist but not waterlogged and providing plenty of sunlight or artificial light will also help your seedlings thrive and develop into healthy, productive plants.
C. Planting the Seeds
When planting celery seeds, it’s important to use a soil mix that provides essential nutrients for healthy growth. Organic fertilizers or compost can be added to the soil mix to ensure that the seedlings have everything they need to thrive. Choosing the right containers, such as peat pots or seed-starting trays, is also crucial for the healthy development of celery seedlings. These containers should be at least 3-4 inches deep to accommodate the long taproots of celery seedlings, allowing them to establish a strong foundation for growth. Additionally, keeping the soil consistently moist but not waterlogged and providing plenty of sunlight or artificial light will help the seedlings thrive and develop into healthy, productive plants.
1. Depth and spacing of seeds
Depth and spacing of seeds are also important factors to consider when planting celery seeds. The seeds should be planted at a depth of about 1/8 inch in the soil and spaced about 1-2 inches apart. This will allow for sufficient room for the seedlings to grow without overcrowding each other. Taking these factors into consideration when planting celery seeds will help ensure the healthy development of the seedlings into strong, productive plants.
D. Optimal Conditions for Germination
Optimal conditions for germination of celery seeds include a temperature range of 60-70°F and consistent moisture in the soil. It is important to keep the soil evenly moist but not waterlogged to encourage germination. Additionally, providing a warm and sunny location or using artificial light will support the germination process. By maintaining these optimal conditions, you can expect to see successful germination and healthy seedling growth.
Care for Celery Seedlings
A. Light Requirements
Celery seedlings require plenty of light to grow and thrive. Once the seeds have germinated, it is important to provide them with at least 6-8 hours of direct sunlight each day. If natural sunlight is not available, you can use artificial grow lights to meet their light requirements. This will help the seedlings develop strong, healthy stems and leaves. It is also important to monitor the seedlings for any signs of stretching or legginess, as this may indicate a lack of light. Providing adequate light will ensure that the celery seedlings grow into healthy, productive plants.
B. Watering Techniques
Celery seedlings need to be watered consistently to support their growth. It is important to keep the soil evenly moist, but not waterlogged. Water the seedlings at the base of the plant, taking care to avoid getting the leaves wet to prevent the risk of disease. The soil should be kept constantly damp, but not saturated, to prevent the roots from rotting. It is best to water the seedlings in the morning to allow excess moisture to evaporate during the day. As the seedlings grow, you can gradually increase the amount of water given, but be sure to always check the soil moisture before watering to avoid overwatering. Proper watering techniques will support the healthy development of the celery seedlings.
C. Feeding and Fertilization
Feeding and Fertilization are important steps in ensuring the healthy growth of celery seedlings. Once the seedlings have developed their second set of leaves, it is time to start fertilizing them. You can use a balanced liquid fertilizer and apply it every two weeks to provide the seedlings with the nutrients they need to grow. It is important to follow the instructions on the fertilizer package to avoid over-fertilizing the seedlings, which can negatively impact their growth. Additionally, as the seedlings continue to grow, you can consider adding compost or organic matter to the soil to provide natural nutrients. This will help support the overall health and vigor of the celery seedlings. Overall, proper feeding and fertilization will contribute to strong, healthy celery seedlings that are ready to be transplanted into the garden for continued growth.
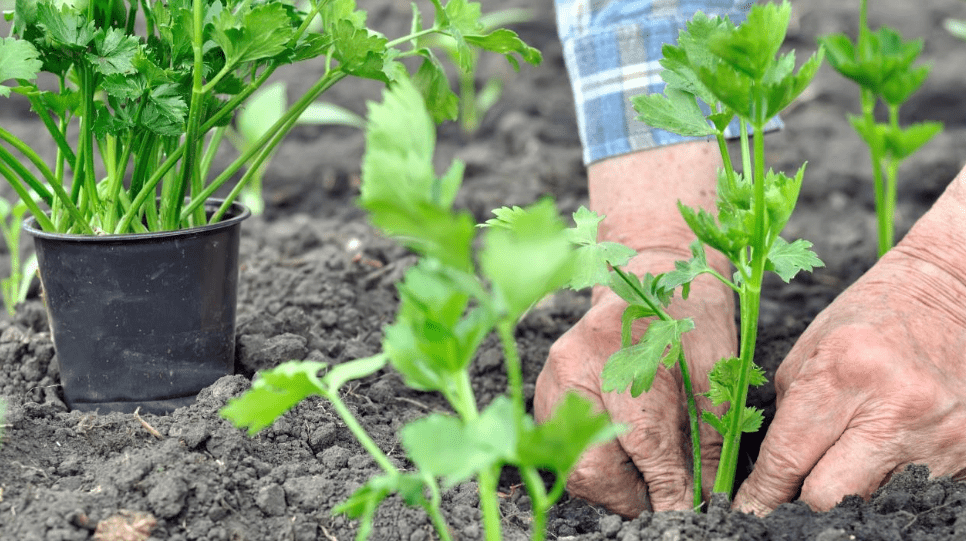
D. Thinning and Transplanting
Thinning and transplanting are important steps in the growth process of celery seedlings. Once the seedlings have developed their second set of leaves, it is time to start thinning them out to ensure that the strongest and healthiest plants have enough space to grow. You can do this by gently removing the weaker seedlings, leaving about 2-3 inches of space between the remaining plants.
Once the seedlings are thinned, they can be transplanted into larger containers or into the garden. When transplanting, be sure to carefully dig up the seedlings, taking care not to damage their delicate roots. Plant them in well-drained, nutrient-rich soil with plenty of sunlight. Water them thoroughly after transplanting to help them establish their roots in their new location.
Overall, thinning and transplanting are essential for promoting the healthy growth of celery seedlings and ensuring they have the space and nutrients they need to thrive. With proper care, your celery seedlings will continue to grow and develop into strong, healthy plants.
Common Issues and Solutions
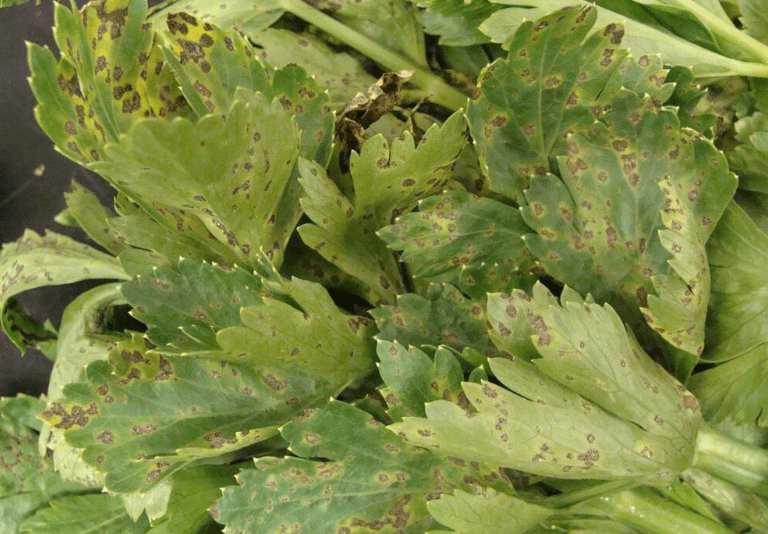
A. Pests and Diseases
Some common pests and diseases that may affect celery seedlings include aphids, snails, and fungal diseases like blight and damping off. To prevent and manage these issues, it’s important to keep the garden clean and free of debris that can harbor pests and diseases. You can also use organic pest control methods, such as neem oil or insecticidal soap, to manage pest infestations. Additionally, providing proper air circulation and avoiding overwatering can help prevent fungal diseases. If you notice signs of pests or diseases on your celery seedlings, take prompt action to address the issue and protect the health of your plants.
B. Environmental Stress
Environmental stress can affect celery seedlings in various ways, such as extreme temperatures, lack of sunlight, or poor soil quality. To address these issues, it’s important to provide the right growing conditions for celery seedlings, including adequate sunlight, well-draining soil, and proper watering. Using mulch can also help regulate soil temperature and moisture levels. Additionally, you can consider using shade cloth or row covers to protect seedlings from extreme temperatures. It’s important to monitor the environment and make adjustments as needed to ensure the health and growth of your celery seedlings.
C. Nutrient Deficiencies
Nutrient deficiencies can have a significant impact on the growth and productivity of plants, including celery seedlings. Common deficiencies that can affect celery seedlings include nitrogen, phosphorus, and potassium. To address these deficiencies, it’s important to use a balanced fertilizer that provides the necessary nutrients for healthy growth. Additionally, testing the soil to identify any specific deficiencies can help guide the application of targeted fertilizers or soil amendments. It’s important to monitor the health of the celery seedlings and make adjustments as needed to ensure they are receiving the essential nutrients for optimal growth.
Transplanting Celery Seedlings
A. Preparing the Garden Bed
Transplanting celery seedlings can be a delicate process that requires careful preparation of the garden bed. Before transplanting, it’s important to ensure that the garden bed is well-prepared with nutrient-rich soil. This includes tilling the soil to loosen it and incorporating organic matter to improve its structure and fertility. It’s also important to ensure that the soil is well-drained to prevent waterlogging, which can hinder the growth of the celery seedlings. Once the garden bed is prepared, the celery seedlings can be carefully transplanted, taking care not to damage the roots. It’s important to water the transplanted seedlings immediately after planting to help them establish in their new location. Proper preparation of the garden bed can help ensure the successful transplanting of celery seedlings and promote their healthy growth.
B. Hardening Off Seedlings
Hardening off seedlings is an important step in the process of transplanting them into the garden. This involves gradually acclimating the seedlings to outdoor conditions, such as sunlight, wind, and temperature fluctuations, before planting them in the garden. This can help prevent transplant shock and improve the overall health and success of the seedlings. To harden off seedlings, gradually increase their exposure to outdoor conditions over the course of 7-10 days, starting with a few hours of outdoor exposure and gradually increasing the time each day. This process toughens up the seedlings and prepares them for life in the garden, ultimately increasing their chances of successful growth after transplanting.
Harvesting Celery
A. When to Harvest
Celery should be harvested when the stalks are 8-10 inches tall and the plant is well-established. Typically, this occurs about 3-4 months after planting. To harvest, simply cut the stalks at the base using a sharp knife or scissors, being careful not to damage the rest of the plant. It’s best to harvest in the morning when the stalks are crisp and full of moisture. Once harvested, celery can be stored in the refrigerator for up to two weeks. It’s important to harvest celery before it becomes overripe, as the flavor can become bitter and the texture can become tough.
In conclusion, successful germination and growth of celery seedlings require careful attention to detail and consistent care. From planting to watering and caring for the seedlings, following the best practices will ensure a healthy and thriving crop. By providing the right conditions and nurturing the seedlings, you can enjoy a bountiful harvest of delicious celery. Remember to be patient and attentive to the needs of your seedlings, and you will be rewarded with a successful crop.