
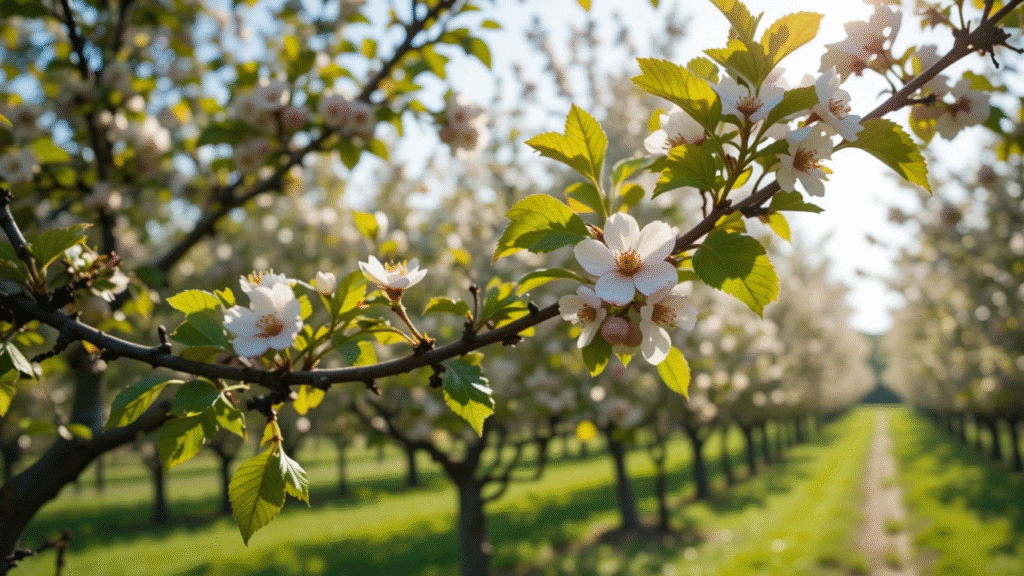
🌸 Dreaming of a cherry tree that yields juicy, delicious fruit year after year? Whether you’re a backyard gardener or a budding orchardist, mastering the art of grafting can unlock the full potential of your cherry trees. In this guide, we’ll dive into Cherry Tree Grafting: What You Need to Know to grow healthier trees, boost your harvest, and preserve your favorite varieties. 🍒 From when and how to graft, to the tools you’ll need and tips for success, this article is packed with practical insights to help you build a deeper connection with your plants—and enjoy the fruits of your labor! 🌱
🍒🌳 What Is Cherry Tree Grafting? 🌳🍒
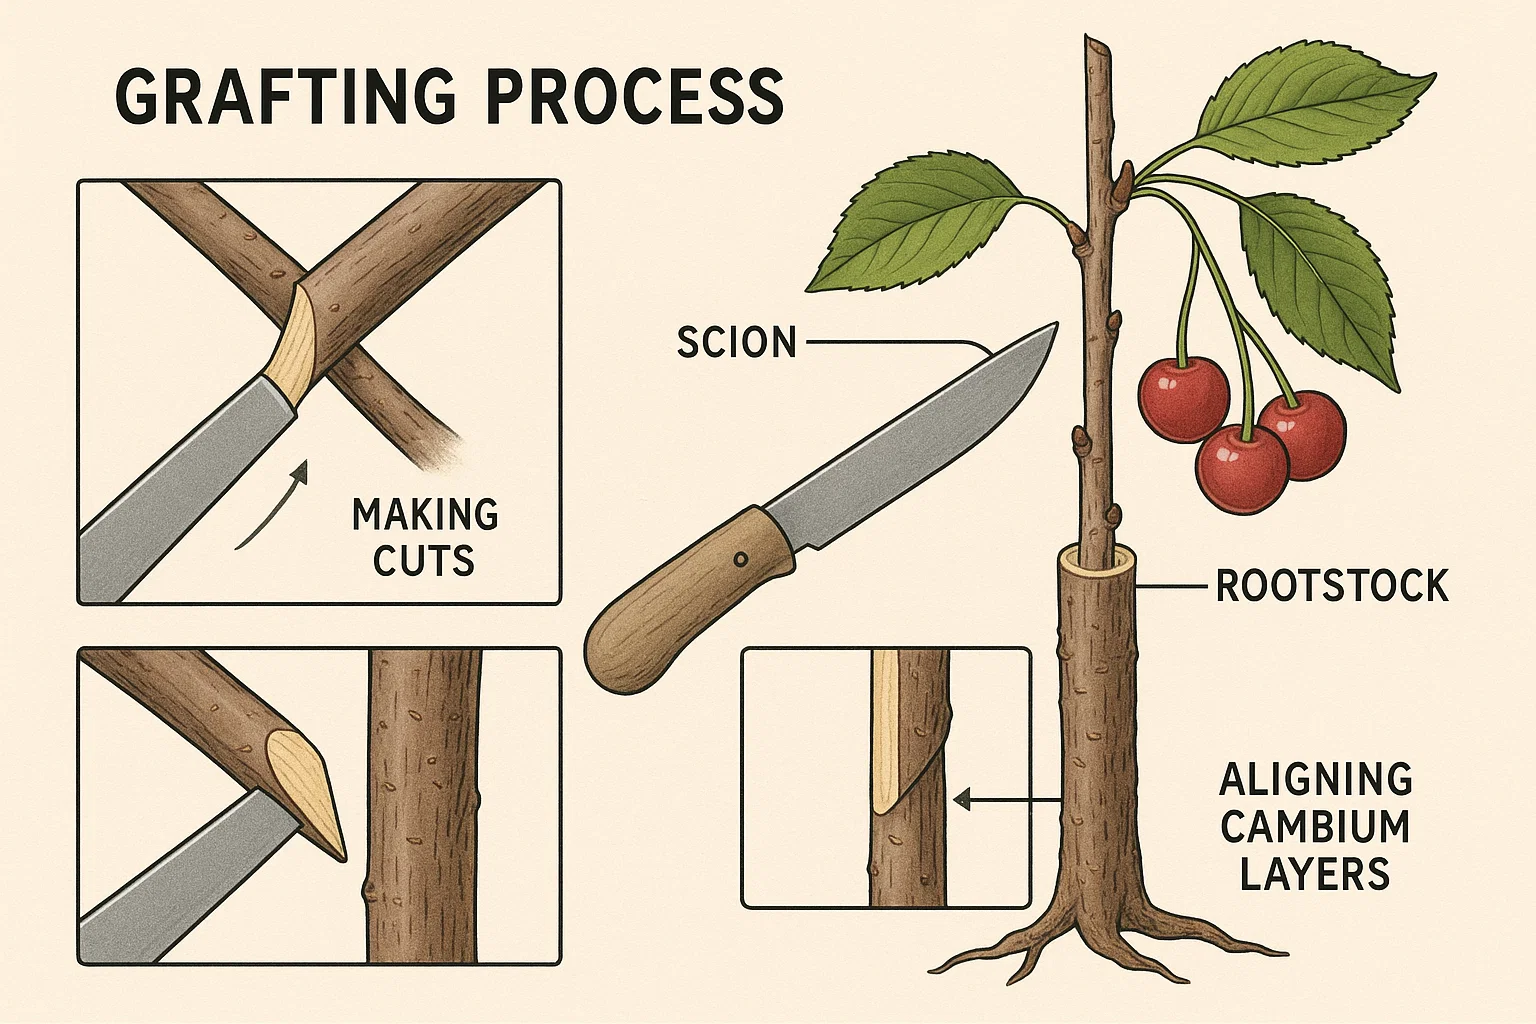
Cherry tree grafting is a technique where you join a branch (called a scion) from one cherry tree to the root of another tree (called a rootstock) so they grow together as one. 🌱🪄💕
This method is used to grow stronger, healthier trees that produce better fruit. 🍒💪 It lets you keep the exact traits of your favorite cherry variety—like taste, size, or color—without growing it from seed. 🌸🌈
Think of it like giving your favorite cherry tree a stronger base to stand on! 💪✨
🌟 Grafting also helps you: 🌟
🍒⏱️ Get fruit faster ⏱️🍒
🦠🚫 Fight off diseases 🚫🦠
🌿🪴 Save space by combining trees 🪴🌿
It’s a simple and smart way to grow better cherries, right in your own garden! 🏡💚🍒
🍒🕰️ Best Time to Graft Cherry Trees 🕰️🍒
When it comes to cherry tree grafting, timing can make or break your success. Choosing the right moment ensures the tree heals quickly and the graft takes hold properly. 🌱✨
The best time to graft cherry trees is in early spring, just before or as the tree begins to come out of dormancy. This is when the sap starts flowing, which helps the tissues of the rootstock and scion bond and grow together. 💧🌳
✅🌿 Ideal Grafting Window: 🌿✅
- Late winter to early spring (around February to April, depending on your climate)
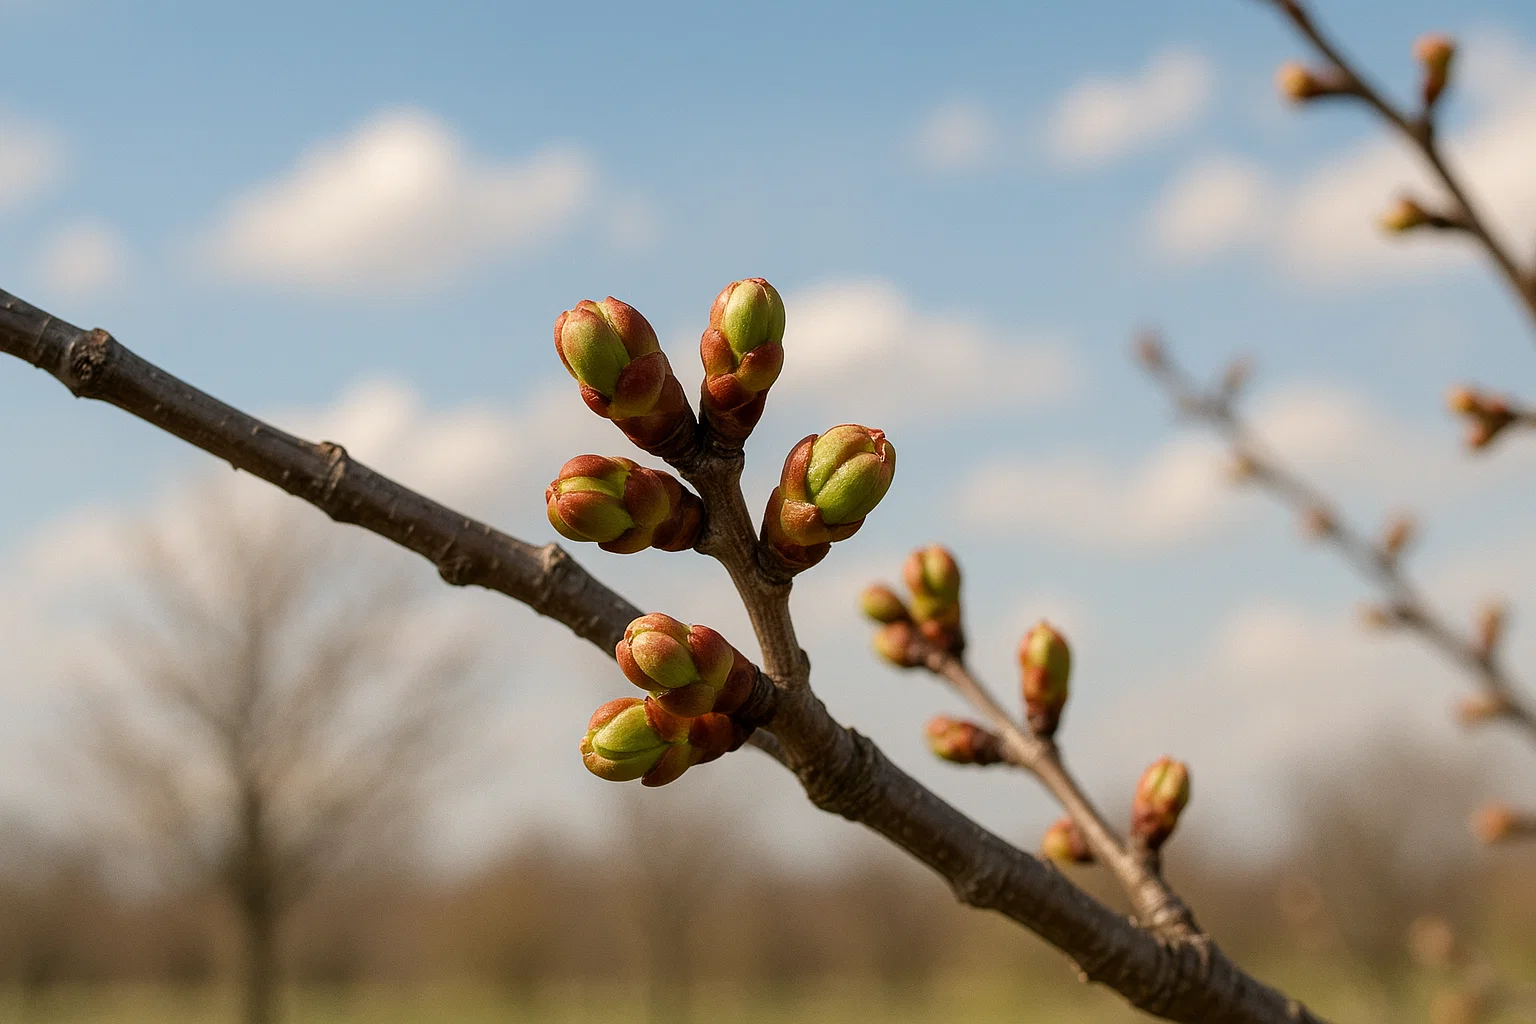
- When buds begin to swell, but haven’t opened yet
- Temperatures stay above freezing, with no harsh frost
- Dry, mild days are perfect for clean cuts and quicker healing 🌤️
In warmer zones, grafting may start in late February, while colder regions may need to wait until March or early April. Always observe your tree—bud development is a great natural cue. 👀🌸
🚫⚠️ Avoid grafting during: ⚠️🚫
- Freezing cold weather ❄️
- Very hot or dry periods 🔥
- Times of high stress or drought
Choosing the right time sets your grafts up for success—leading to healthier trees and sweet, juicy cherries down the road! For the best tips on timing and technique, check out Cherry Tree Grafting: What You Need to Know.🍒💪🌳
🍒🧰 Tools and Materials You’ll Need for Cherry Tree Grafting 🧰🍒
Before you start grafting, having the right tools and materials ready makes the process smoother and increases your chances of success. 🧑🌾✨ Here’s what you’ll need:
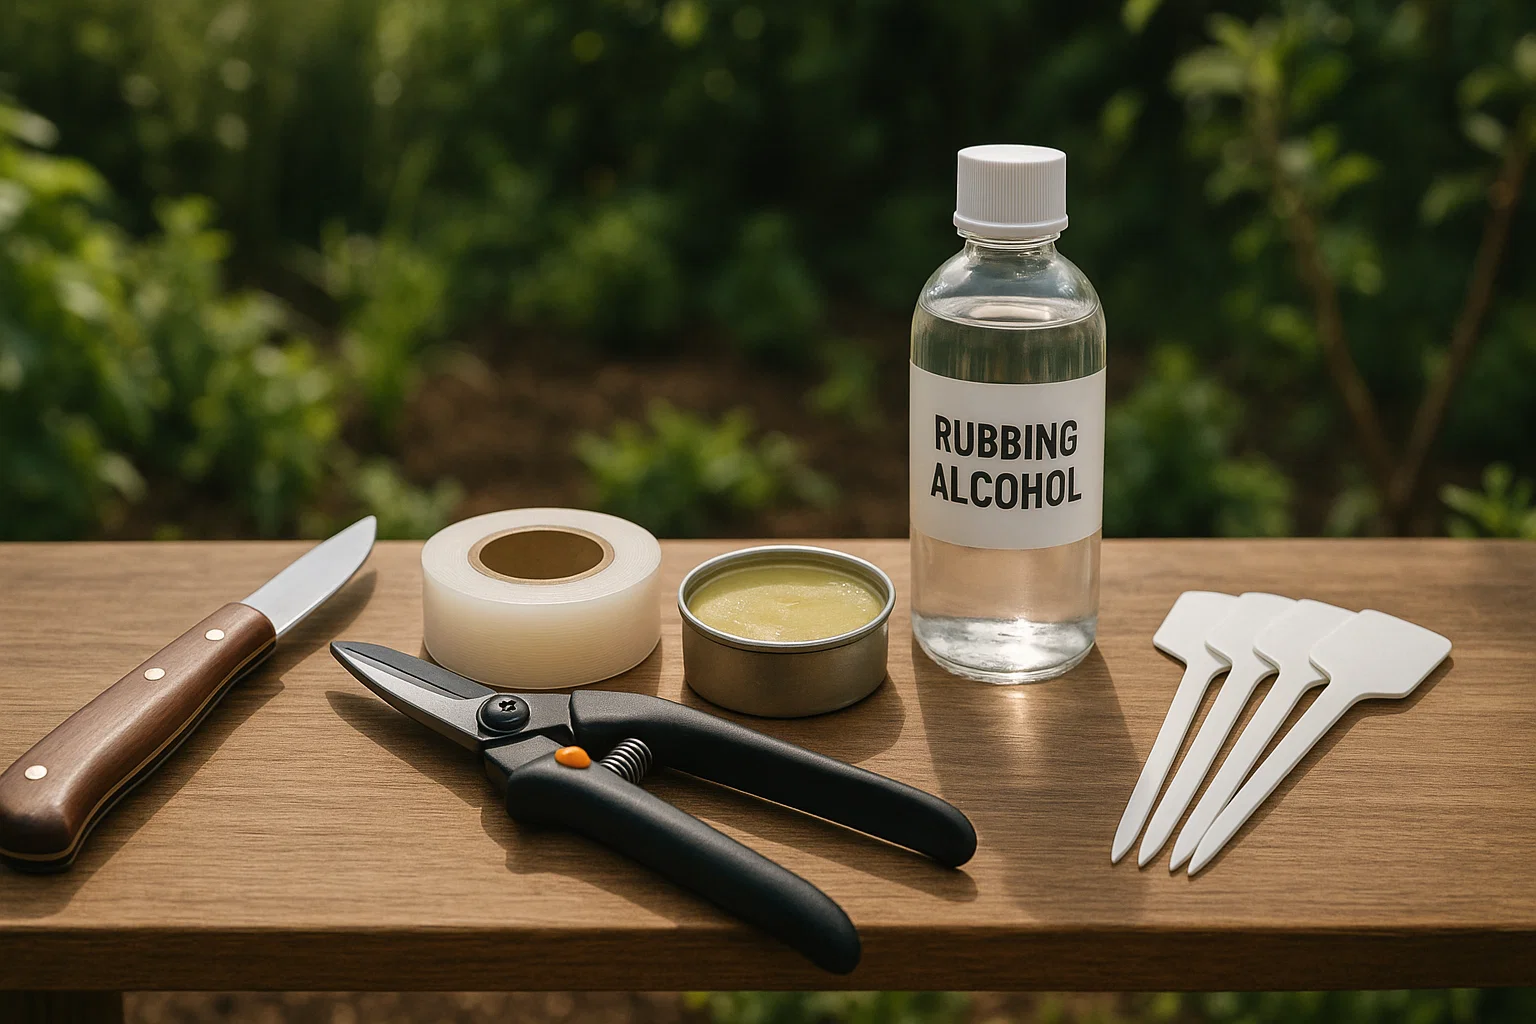
🛠️🔪 Essential Tools: 🔪🛠️
- Grafting knife or a sharp, clean utility knife 🔪
For making precise cuts on the scion and rootstock. - Pruning shears ✂️
To trim branches and clean up the graft area. - Grafting tape or parafilm 🎀
Wraps and secures the graft, holding it in place while it heals. - Grafting wax or sealant 🕯️
Seals the cut surfaces to prevent moisture loss and infection. - Rubbing alcohol or disinfectant 🧼
Keeps tools sterile to avoid spreading disease between cuts.
🏷️🔄 Optional but Helpful: 🔄🏷️
- Plant labels or tags 🏷️
To mark graft types and dates for future tracking. - Rubber bands or clips 🔄
For extra support if grafts need reinforcement.
💡 Tip: Keep your tools sharp and clean. A clean cut helps the scion and rootstock bond more easily—and reduces the risk of failure! 💚
With the right gear in hand, you’re all set to graft like a pro! 🌳👍🍒
✂️ 6. Common Grafting Techniques for Cherry Trees 🍒
There are several grafting methods you can use for cherry trees, depending on the size of the branches and the time of year. Each has its own benefits, but all aim to create a strong, healthy connection between the scion and rootstock. 🌱🔗
Here are the most common techniques:
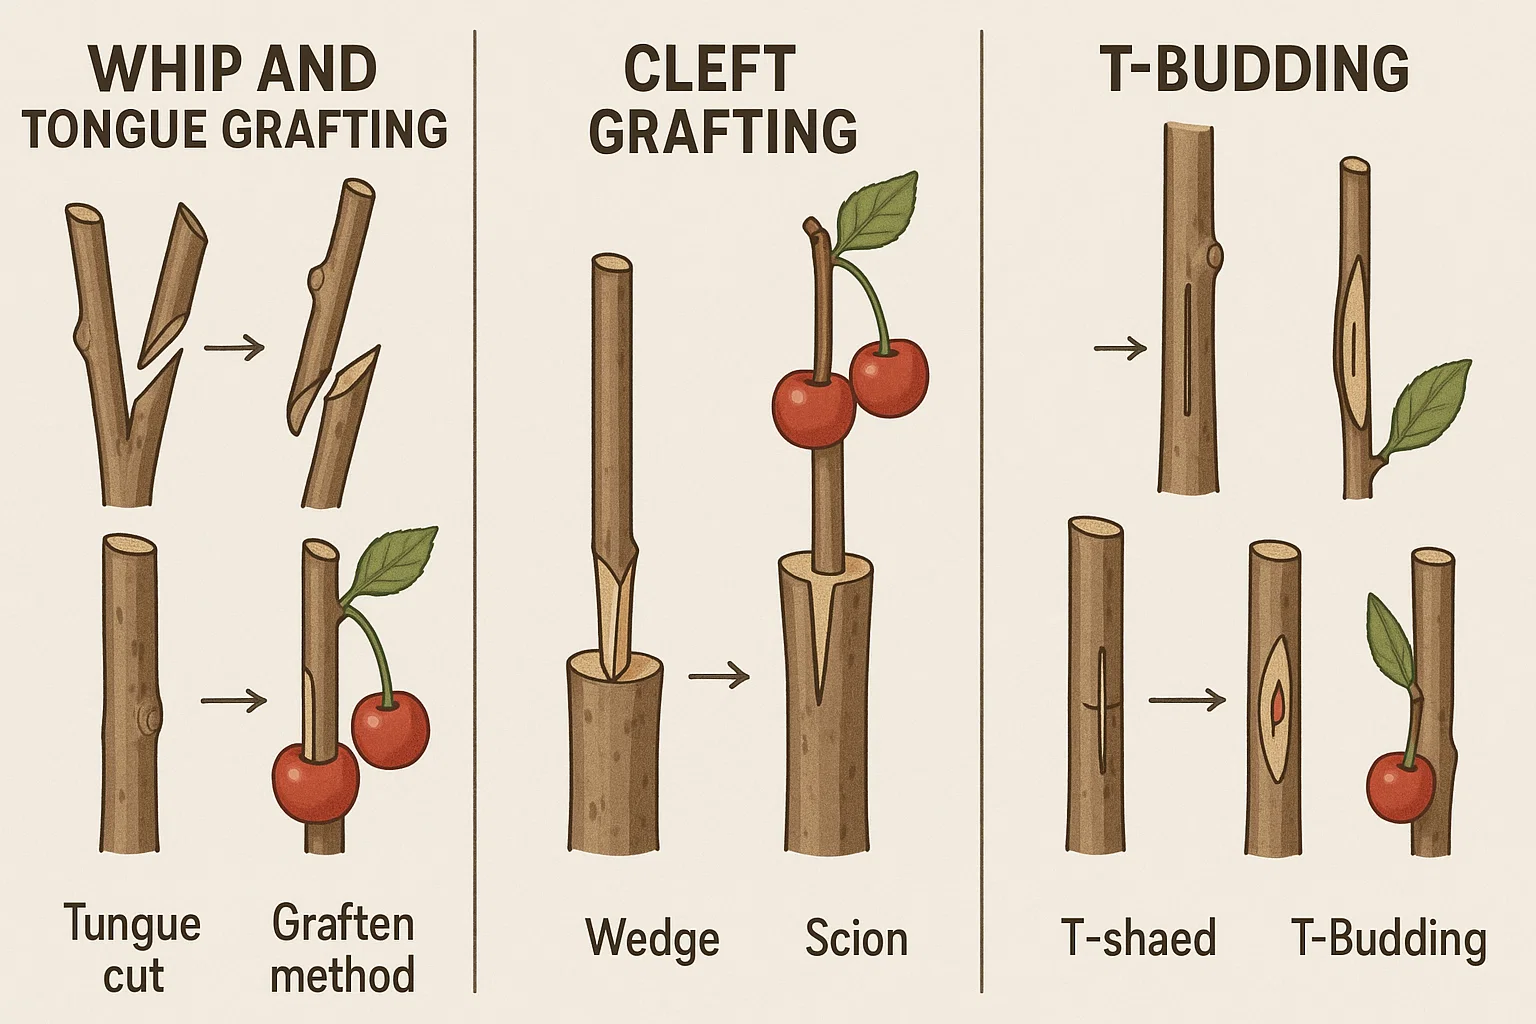
🌿 Whip and Tongue Grafting
- Best for young trees with similar-sized stems
- Involves making matching slanted cuts on both scion and rootstock, with a small “tongue” cut for a tight fit
- Creates a strong, secure union
- Done in early spring before bud break
👍 Great for beginners with sharp tools!
🌳 Cleft Grafting
- Ideal when attaching a small scion to a larger rootstock
- A split is made in the center of the rootstock, and the wedge-shaped scion is inserted
- Done in late winter to early spring
💪 Strong and reliable for older or established trees
🌸 T-Budding (or Chip Budding)
- Performed in late summer when bark “slips” easily
- A bud from the scion is inserted into a T-shaped cut in the bark of the rootstock
- Only requires a single bud, not a full twig
🎯 Great for adding new varieties to a mature tree
Each method has its time and place, but all can lead to a productive cherry tree when done correctly. 🍒✨ Start with the method that suits your tree size and season, and practice for better results! For more detailed guidance, refer to Cherry Tree Grafting: What You Need to Know to enhance your grafting technique. 🌳💚
🪴🍒 Step-by-Step Guide to Grafting a Cherry Tree 🍒🪴
Grafting might seem tricky at first, but once you understand the process, it becomes an exciting and rewarding way to grow your favorite cherry varieties. 🌸 This step-by-step guide walks you through everything you need to do—from preparing your tools to caring for your graft afterward. Let’s get started! 🌳✨
✅🧰 Step 1: Gather Your Tools and Materials 🧰✅
Before you begin, make sure you have all the essentials ready. Being organized will help everything go smoothly. Here’s what you need:
- Sharp grafting knife or utility blade 🔪
- Clean pruning shears ✂️
- Grafting tape or parafilm 🎀
- Grafting wax or tree sealant 🕯️
- Rubbing alcohol or disinfectant 🧼
- Labels or tags 🏷️
Sterilize your tools before making any cuts to prevent spreading disease.
✅🌿 Step 2: Select Healthy Scion and Rootstock 🌿✅
Choose a scion from a cherry tree that has the fruit qualities you want (taste, size, color). Pick one-year-old wood with 2–4 buds.
Select a compatible rootstock, which is the base tree that supports the scion. It should be healthy, disease-free, and ideally of similar diameter to the scion.
🌿 Tip: The closer in size the scion and rootstock are, the better the graft union will heal!
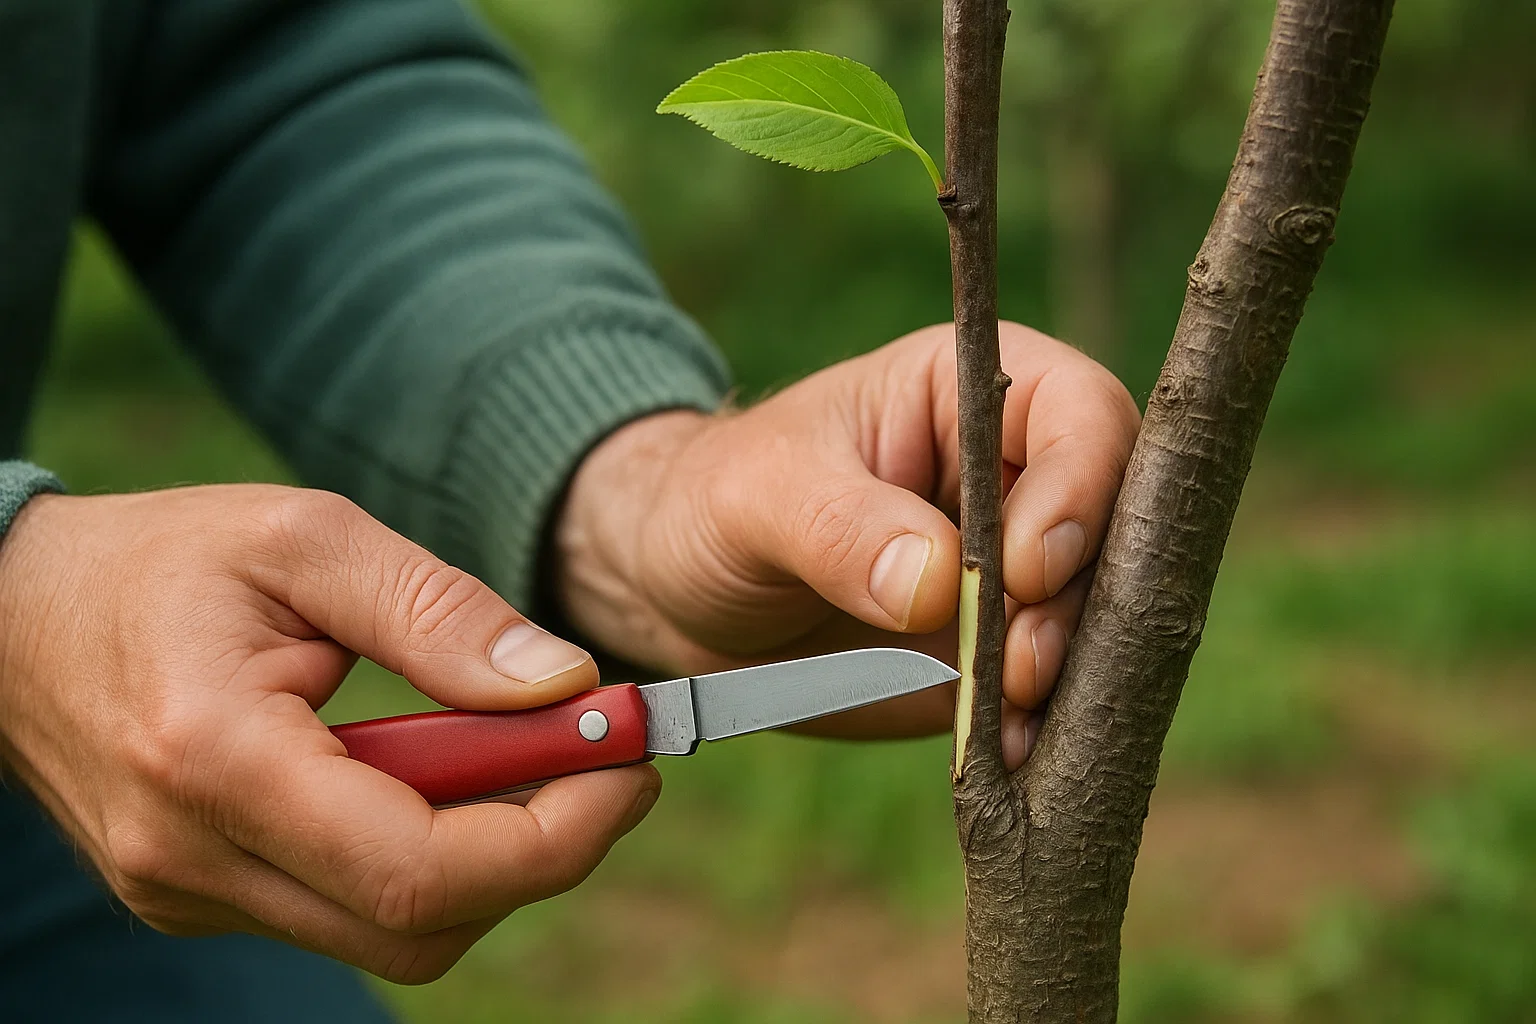
✅✂️ Step 3: Make Clean, Matching Cuts ✂️✅
Depending on the grafting technique you’re using (like whip and tongue or cleft grafting), make matching cuts on both the scion and rootstock. The goal is to have the cambium layers (the green layer just beneath the bark) of both pieces line up as closely as possible.
Clean, smooth cuts ensure better contact and faster healing. 🩹💚
✅🌱 Step 4: Join the Scion and Rootstock 🌱✅
Carefully fit the scion into the rootstock cut. Take your time here—proper alignment is the key to a successful graft.
🌱 Align the cambium layers on at least one side of the graft. Even if the pieces aren’t perfectly matched, this layer must connect to allow nutrient flow and growth.
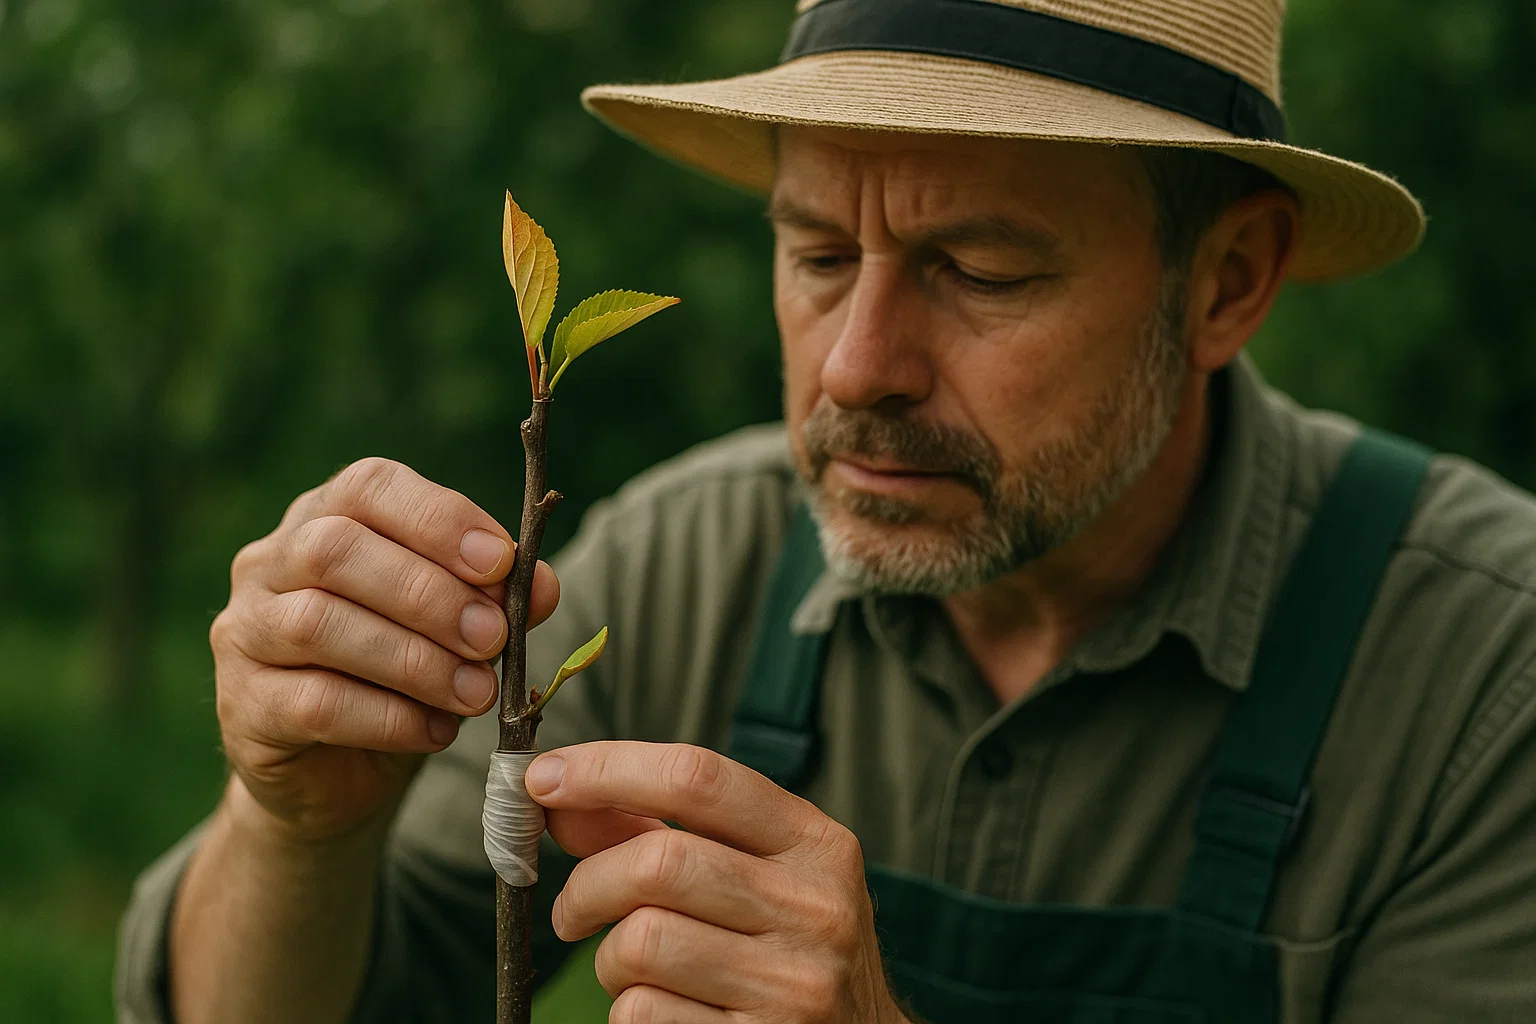
✅🎀 Step 5: Secure the Graft 🎀✅
Once aligned, tightly wrap the graft joint with grafting tape or parafilm to hold it in place and protect it from moisture loss and air exposure. Then, cover any exposed areas with grafting wax or sealant to prevent infection.
🎀 This keeps the graft clean, secure, and hydrated while it heals.
✅🏷️ Step 6: Label and Track Your Graft 🏷️✅
Use a plant tag or label to note the variety name and date of grafting. This helps with future care and comparison.
🏷️ Keeping records is especially helpful if you’re experimenting with multiple grafts or different varieties.
✅💧 Step 7: Aftercare and Monitoring 💧✅
- Water your tree regularly, especially in the first few weeks, but don’t overwater. 💧
- Check the graft site every few days for signs of growth or any problems like mold or drying out.
- Remove any shoots or suckers that grow below the graft—they can take energy away from the healing graft.
- After a few months, once the graft has taken and growth is strong, you can gently remove the tape.
🌸 New bud growth from the scion is a sign your graft is successful!
With a little practice and patience, you’ll be well on your way to growing healthy, fruit-producing cherry trees. 🍒🌳 Grafting isn’t just a technique—it’s a way to build a lasting connection with your plants and enjoy the sweet rewards for years to come! 💚
🍒🌳 Aftercare and Monitoring 🍒🌳
After grafting your cherry tree, proper care is crucial to ensure the graft heals well and grows into a strong, productive branch. 🩹🌳 Many grafts fail not because of poor technique, but due to neglect during the healing phase. Here’s how to give your new graft the best chance of success! ✨
✅💧 Keep the Tree Well-Watered 💧✅
Water regularly, especially during dry spells. 💧
Don’t overwater, as soggy soil can stress the root system.
Maintain even moisture in the soil to help the graft heal.
✅🛡️ Protect the Graft Site 🛡️✅
Make sure the graft remains secure and covered.
Leave the grafting tape or parafilm on for 4–8 weeks unless it’s cutting into the bark.
Check for tightness or cracking and rewrap gently if needed.
Shield young grafts from strong wind or direct sunlight if possible. 🌬️🌞
✅🌱 Watch for New Growth 🌱✅
Successful grafts will begin to bud and grow leaves within a few weeks. 🌱
Don’t panic if you don’t see immediate growth—it can take time, especially in cool weather.
✅✂️ Remove Competing Growth ✂️✅
Trim off any suckers or shoots that grow below the graft. ✂️
These can steal energy from the grafted scion and weaken its development.
✅🔍 Inspect for Problems 🔍✅
Check the graft site every few days for signs of:
- Mold or rot
- Cracked or dry tissue
- Insect damage or disease 🐛🦠
Catch and treat issues early to prevent graft failure.
✅🕒 6. Remove Grafting Tape (When Ready) 🕒✅
Once the graft is firmly healed and new growth is established, gently remove the tape to avoid girdling the branch.
🕒 This is usually done 6–10 weeks after grafting, depending on growth speed.
✅🪵 7. Support the New Growth 🪵✅
If the graft is tall or exposed to wind, add a small stake or tie for extra support until the wood hardens. 🌬️🪵
With consistent care and a watchful eye, your grafted cherry tree will soon thrive and reward you with strong growth—and in time, delicious fruit! For comprehensive advice on the grafting process, explore Cherry Tree Grafting: What You Need to Know. 🍒🌸 Keep nurturing it, and you’ll enjoy the results for seasons to come. 💚
🍒🔧 Troubleshooting Common Problems in Cherry Tree Grafting 🔧🍒
Even with careful grafting and aftercare, problems can sometimes pop up. But don’t worry—most issues have simple fixes! 🛠️🌳 Here’s how to identify and handle the most common cherry tree grafting problems so your tree stays on the path to healthy growth. 🌱✨
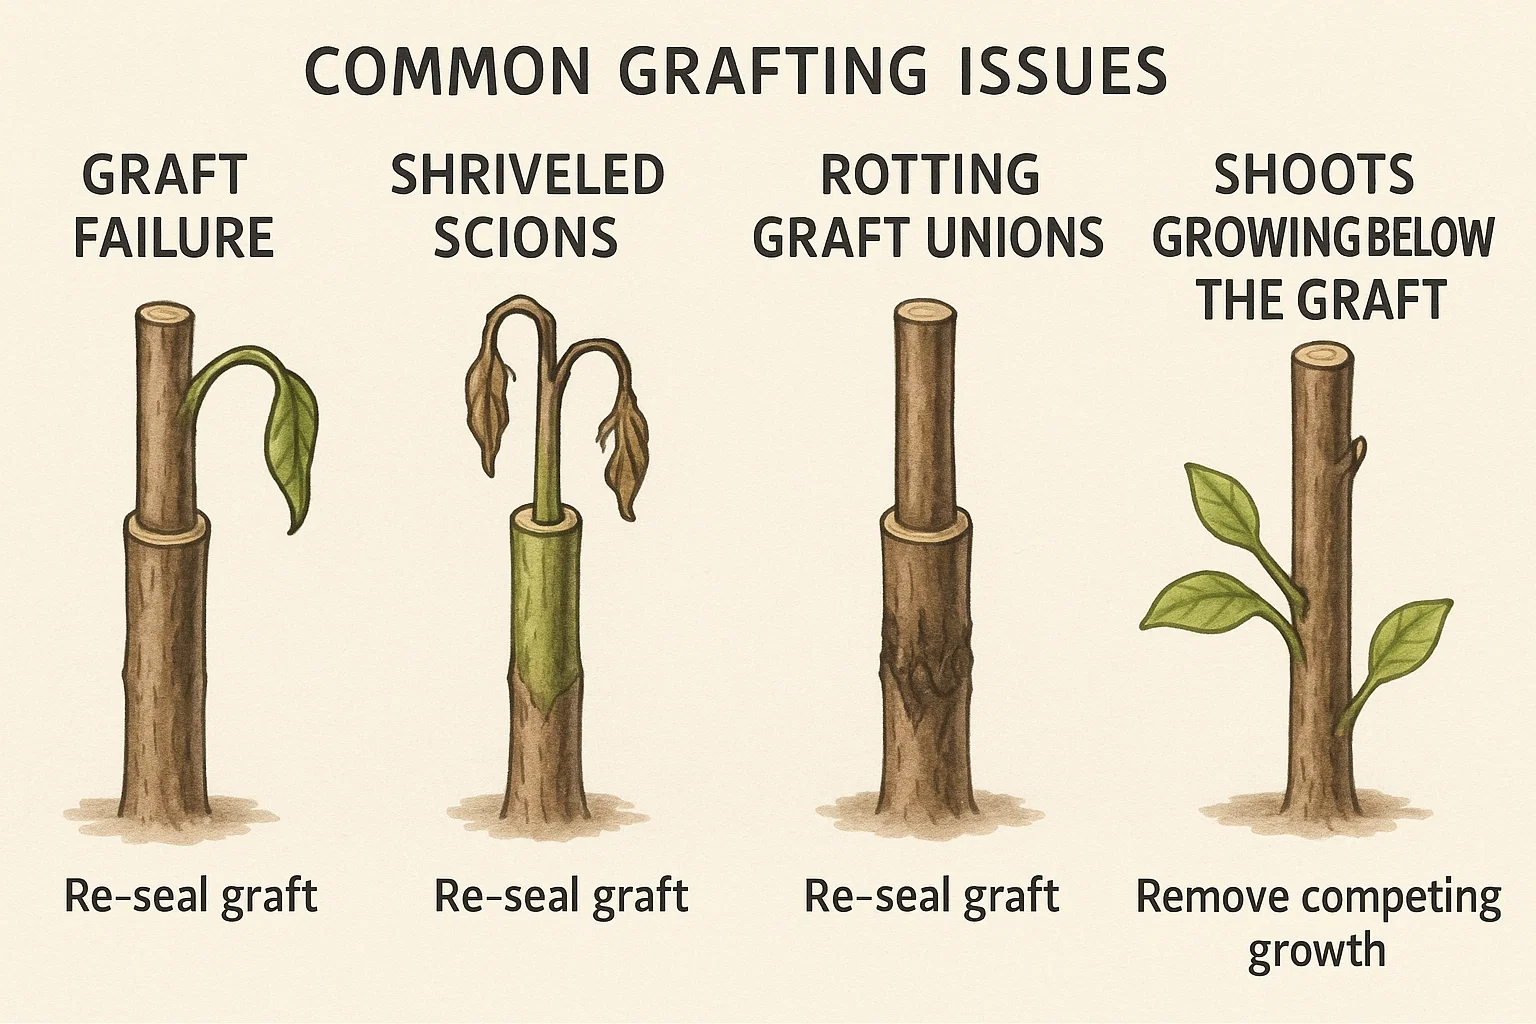
❌🌿 1. Graft Fails to Take (No Budding or Growth) 🌿❌
Cause: Poor cambium contact, dried-out scion, or grafting done too late
🛠️ Fix:
- Try again with fresh, healthy scion wood 🍒
- Graft earlier in the season 📅
- Use a more secure wrapping method to hold the graft tightly 🎀
💡 Tip: Always align the cambium layer carefully!
❌🍂 2. Scion Dries Out or Shrivels 🍂❌
Cause: Lack of moisture, exposed cuts, or poor sealing
🛠️ Fix:
- Reseal graft ends with grafting wax 🕯️
- Wrap tightly with parafilm to lock in moisture 💧
- Provide light shade in hot weather 🌞⛱️
❌🦠 3. Graft Union Rotting or Molding 🦠❌
Cause: Excess moisture, poor airflow, or contaminated tools
🛠️ Fix:
- Remove wrapping temporarily to dry the area 🌬️
- Cut away rotted parts if possible and rewrap cleanly ✂️
- Always sterilize tools before use 🧼🧽
❌🌱 4. Shoots Growing Below the Graft 🌱❌
Cause: Rootstock trying to take over
🛠️ Fix:
- Prune all suckers or shoots from below the graft ✂️
- Keep the area around the base clear and regularly check for regrowth 🚫
❌🎀 5. Tape Cutting Into the Bark 🎀❌
Cause: Leaving tape on too long after graft heals
🛠️ Fix:
- Remove tape gently once the graft is well-established (usually after 6–10 weeks) 🕒
- Switch to looser wrapping or breathable materials if needed 🌬️
❌💨 6. Weak or Bending Graft Union 💨❌
Cause: Wind damage or top-heavy growth
🛠️ Fix:
- Stake the grafted area for support 🪵
- Prune excess growth until the graft thickens and strengthens ✂️💪
✅🌸 Stay Positive & Be Patient! 🌸✅
Not every graft will succeed, and that’s okay! 😊 Even experienced gardeners need a few tries. Track what works and keep practicing. With time, you’ll master cherry tree grafting and enjoy stronger trees and sweeter harvests. 🍒🌸💪
Need help identifying a specific issue you’re facing? Feel free to ask! 🤔📩
🌟 Final Thoughts on Cherry Tree Grafting 🍒
Grafting cherry trees is more than just a gardening technique—it’s a blend of science, patience, and a bit of love. ❤️🌳 Whether you’re hoping for better fruit, disease resistance, or simply want to preserve a favorite variety, grafting gives you the power to shape your tree’s future.
📘 What You’ve Learned
By now, you’ve learned the essentials of “Cherry Tree Grafting: What You Need to Know”—from choosing the right tools and timing, to step-by-step instructions and how to troubleshoot common issues. 🛠️🌿
🌼 Remember:
- 🌸 Start with healthy materials
- ✂️ Make clean, careful cuts
- 🎀 Wrap and seal properly
- 👀 Monitor and care for your graft consistently
💪 Keep Practicing
Don’t worry if your first few grafts aren’t perfect—each one is a learning opportunity. With practice and attention, you’ll gain confidence and start seeing the rewarding results: healthy trees and baskets of juicy cherries! For expert tips and techniques, check out Cherry Tree Grafting: What You Need to Know to refine your grafting skills. 🍒🥰
So get out there, connect with your trees, and start grafting. Happy growing! 🌱💚🌞