
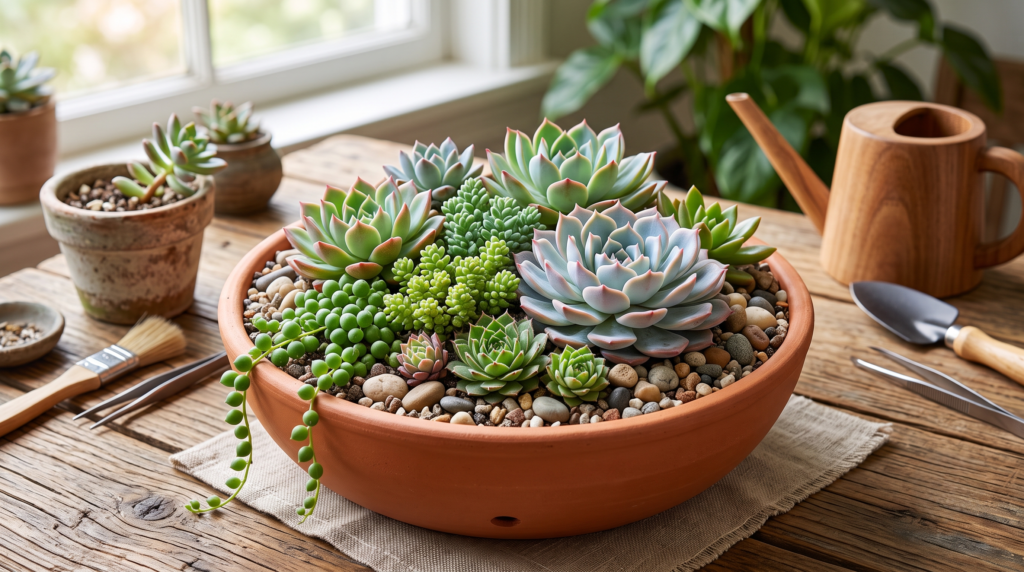
We have all been there. You are scrolling through Instagram or Pinterest, and a gorgeous, lush, perfectly arranged succulent bowl catches your eye. Inspired, you head to the local nursery, buy a handful of adorable desert plants, and pack them tightly into a beautiful ceramic bowl. It looks like a masterpiece on day one. But a month later? Your prized arrangement has transformed into a mushy, yellowing graveyard.
If this sounds familiar, you are not alone. The truth is, creating succulent dish gardens is incredibly popular, but much of the inspiration we see online ignores the fundamental rules of plant care. As a plant care specialist who has spent years rehabilitating dying indoor gardens, I can assure you: building a stunning arrangement doesn’t have to be a gamble.
Early in my plant journey, I lost count of how many expensive Echeverias and Haworthias I accidentally drowned because I focused entirely on aesthetics rather than plant biology. Once I mastered the science of drainage, soil composition, and plant compatibility, everything changed.
This guide is your ultimate, step-by-step roadmap to building a stunning succulent arrangement that won’t just survive its first month—it will actively thrive for years. Let’s dig in! 🧤
Why Most Succulent Dish Gardens Fail (And How to Avoid It) 🥀
Before we start building, we need to talk about why so many succulent arrangements fail. Understanding the primary causes of succulent death is the fastest way to become an expert indoor gardener. By avoiding these two massive pitfalls, you are already halfway to success.
The Drainage Myth 🛑
The number one killer of indoor succulents is root rot, a fungal disease caused by roots sitting in waterlogged soil. To combat this, a persistent myth continues to circulate in the DIY gardening community: “If your pot doesn’t have a drainage hole, just put an inch of gravel at the bottom!”
Do not do this.
Adding gravel to the bottom of a hole-less pot does not create drainage; it creates what soil scientists call a perched water table. Water naturally moves down through the soil, but when it hits the vastly different texture of the gravel, capillary action causes the water to pool directly above the rocks—right where your succulent’s delicate roots sit. This essentially creates a swamp at the bottom of your dish.
The Expert Fix: Always use a container with at least one drainage hole. If you absolutely must use a decorative bowl without one, you will need a diamond-tipped drill bit to drill your own hole. Drainage is non-negotiable for desert plants.
The Plant Compatibility Trap 👯♀️
The second biggest mistake is treating all cute, fleshy plants as if they are exactly the same. Mixing a moisture-loving tropical succulent (like certain trailing varieties or ferns mistakenly sold alongside succulents) with a hard-core desert cactus in the same bowl is a recipe for disaster.
If you water the bowl enough to keep the moisture-lover happy, the cactus will rot. If you withhold water to protect the cactus, the moisture-lover will shrivel and die.
The Expert Fix: Only group plants that share identical lighting and watering needs. We will cover exactly how to pair plants later in this guide.
Essential Materials: Gathering Your Supplies 🛠️
Preparation is everything. Before you unpot a single plant, gather your materials. Having the right tools and supplies on hand ensures a stress-free planting process and a professional-looking final result.

The Perfect Container 🪴
When it comes to succulent dish gardens, the shape and material of your pot matter just as much as its appearance.
-
Shape: Succulents generally have shallow, fibrous root systems. They do not need deep pots. In fact, deep pots hold onto excess moisture at the bottom for too long. A wide, shallow bowl (usually 2 to 4 inches deep) is the optimal choice for a dish garden.
-
Material:
| Container Material | Pros | Cons | Best For |
| Terracotta / Clay | Highly breathable, wicks moisture away from soil, prevents rot. | Heavy, can dry out too fast in very hot climates. | Beginners (Highly Recommended) |
| Glazed Ceramic | Beautiful, comes in many colors, retains some moisture. | Non-porous (traps water), requires careful watering habits. | Intermediate Gardeners |
| Glass (Terrariums) | Visually striking. | Creates a humid greenhouse effect. Toxic to desert succulents. | Do NOT use for succulents. |
Expert Tip: If you find a beautiful ceramic bowl at a thrift store, flip it over and use a masonry or glass drill bit to carefully drill a 1/2-inch hole in the center. Problem solved!
The “Fail-Proof” Soil Recipe 🪨
Standard potting soil is designed to retain moisture for houseplants and vegetables. Using it straight out of the bag will quickly suffocate your succulents. Even commercial “Cactus & Succulent Soil” found at big-box stores is often too rich and organic.
To create an environment where your dish garden will thrive, you need a highly porous, gritty mix. Here is my go-to fail-proof recipe:
-
50% High-Quality Organic Matter: Use a premium commercial succulent soil as your base. (Remove any large chunks of bark or twigs).
-
50% Inorganic Gritty Amendment: This is the secret ingredient. Mix your base soil with equal parts Pumice, Perlite, or Crushed Poultry Grit (granite).
This 1:1 ratio ensures that when you water your dish garden, the water rushes through the soil, soaking the roots briefly before draining out completely. It also allows crucial airflow to reach the root system.
Tools of the Trade 🧤
Working with small plants in a tight space requires a little finesse. While you can use your hands, these tools make the job much cleaner and easier:
-
A Soft Makeup or Paint Brush: Essential for brushing stray soil out of the tight rosettes of your plants without damaging their powdery coating (farina).
-
Long Tweezers or Chopsticks: Perfect for guiding delicate roots into the soil and placing small filler plants into tight gaps.
-
A Small Squeeze Bottle or Watering Can with a Narrow Spout: Allows you to direct water perfectly to the soil, avoiding the leaves.
-
Thick Gloves: A must-have if you plan on incorporating any cacti with spines into your design.
Selecting Your Plants: The Art & Science of Design 🎨🌵
Now for the fun part: choosing the succulents that will make up your dish garden! When standing in a greenhouse surrounded by hundreds of adorable plants, it is tempting to just grab whatever catches your eye. However, the secret to a long-lasting arrangement lies in balancing botanical science with artistic design.

Rule #1: Match Lighting and Watering Needs ☀️💧
As mentioned earlier, plant compatibility is the bedrock of a healthy dish garden. Succulents generally fall into two broad categories based on their light and water preferences. You must choose plants from the same category for your arrangement.
-
Group 1: The Sun-Lovers (High Light, Low Water) These succulents crave bright, direct sunlight and have thick, fleshy leaves to store water for long periods. If they don’t get enough light, they will stretch and lose their vibrant colors.
-
Best choices: Echeveria, Graptopetalum, Sedum, Pachyphytum, and most Cacti.
-
-
Group 2: The Shade-Tolerant (Bright Indirect Light, Moderate Water) These varieties naturally grow under the canopy of larger plants in the wild. They prefer bright but filtered light and generally tolerate slightly more frequent watering. Direct afternoon sun will scorch their leaves.
-
Best choices: Haworthia (Zebra plants), Gasteria, Sansevieria (Snake plants), and Aloe.
-
Rule #2: The Thriller, Filler, Spiller Method 🌿
To create a visually striking arrangement with depth and dimension, landscape designers use the “Thriller, Filler, Spiller” formula. This works perfectly for tabletop dish gardens!
-
The Thriller (The Focal Point): Choose one standout plant to be the star of the show. This is usually the tallest plant, or one with a bold, eye-catching color and dramatic rosette shape. A large, pink Echeveria or a striking Aeonium makes a perfect thriller.
-
The Filler (The Supporting Cast): These are smaller, clustering succulents that will fill the bare soil around your thriller. They add texture and contrast without stealing the spotlight. Sempervivum (Hens and Chicks) or tightly clustered Sedum are excellent fillers.
-
The Spiller (The Trailing Edge): To soften the hard edges of your container and add movement, use trailing plants that will drape over the sides. A String of Pearls or String of Bananas is perfect for this role.
Expert Insight: Foolproof Plant Pairings
The Pastel Dream (Full Sun): Echeveria ‘Lola’ (Thriller) + Graptosedum ‘California Sunset’ (Filler) + Sedum morganianum / Burro’s Tail (Spiller).
The Low-Light Texture Bowl (Indirect Light): Haworthia fasciata (Thriller) + Gasteria ‘Little Warty’ (Filler) + Ceropegia woodii / String of Hearts (Spiller).
Step-by-Step Guide: Creating Succulent Dish Gardens 👩🌾
With your materials gathered and your perfectly matched plants in hand, it is time to get your hands dirty. Follow these exact steps to assemble a professional-tier dish garden.
Step 1: Prep the Container and Soil 🧱
Start by placing a small piece of mesh screen (a piece of drywall tape or a coffee filter works well, too) over the drainage hole of your container. This prevents your gritty soil mix from falling out every time you water. Next, fill the bottom third of your bowl with the “Fail-Proof” 50/50 soil mix we discussed earlier.
Step 2: The Dry Run (Layout Planning) 📐
Before you take any plants out of their plastic nursery pots, arrange them inside your bowl. This “dry run” allows you to experiment with different layouts without stressing the plants’ roots. Play with the angles—sometimes tilting a rosette slightly outward makes the arrangement look fuller.
Step 3: Unpotting and Root Inspection 🔍
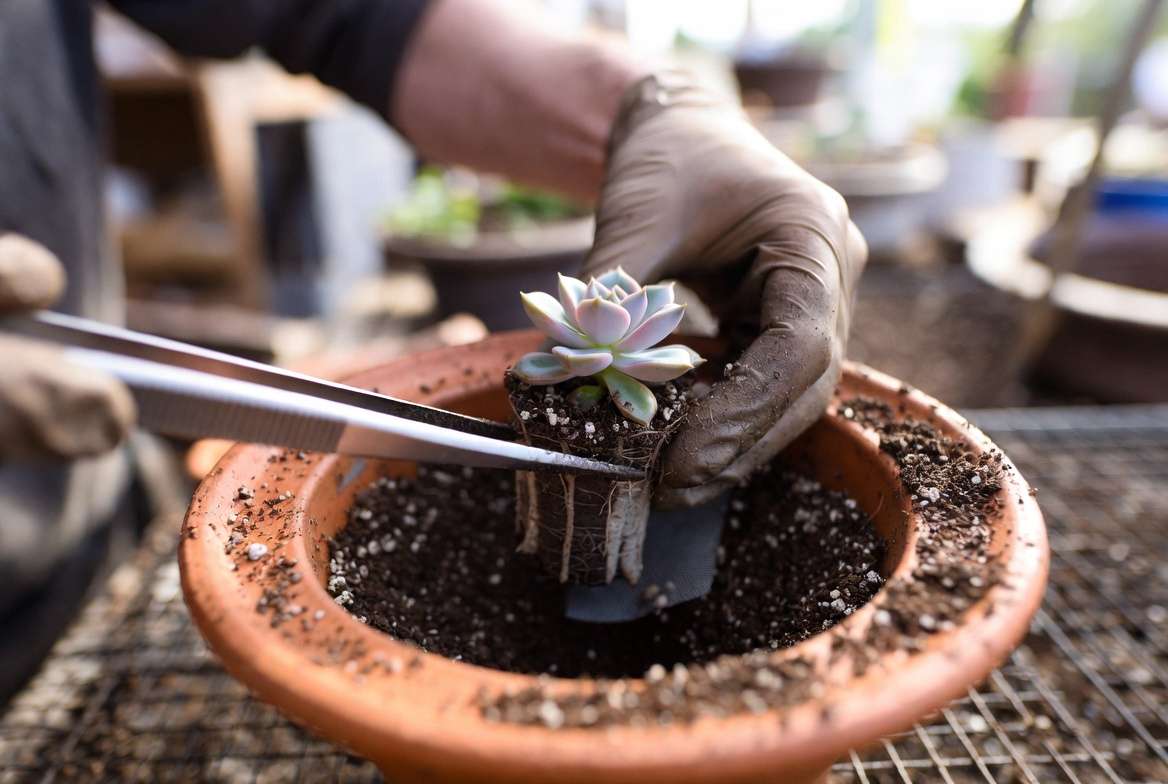
Once you are happy with the design, remove the plants from their nursery pots. Gently massage the root ball to loosen the dense peat moss they are usually sold in. Removing this old, water-retentive nursery soil is crucial; if you leave it, it will trap moisture and cause root rot, even if your new soil is gritty.
-
Tip: Inspect the roots and under the leaves for any white, cotton-like fuzz. This is a sign of mealybugs. If you spot them, treat the plant with isopropyl alcohol before introducing it to your clean garden!
Step 4: Planting from Center to Edge 🤲
Place your “Thriller” plant first, usually slightly off-center for a more natural, asymmetrical look. Once the thriller is anchored with a little soil, work your way outward, adding the “Fillers.” Use your chopsticks or long tweezers to tuck the roots into tight spaces. Finally, plant your trailing “Spillers” right near the rim so they can gracefully cascade over the edge.
Step 5: Adding Top Dressing ✨
Once all the plants are snug and the bowl is filled with soil, it is time for the finishing touch: top dressing. Add a thin layer of decorative gravel, polished pebbles, or coarse sand over the exposed soil. This serves three vital purposes:
-
It gives the dish garden a polished, finished, professional look.
-
It weighs down the lightweight perlite in your soil, preventing it from floating to the surface during watering.
-
It keeps the fleshy bottom leaves of your succulents elevated and dry, preventing rot.
The Golden Rules of Dish Garden Aftercare 🌱
You have successfully created a beautiful succulent dish garden! Now, how do you keep it looking like a Pinterest dream? The aftercare for succulents is entirely different from standard tropical houseplants.
The “Soak and Dry” Watering Method 🚿
Put down the spray bottle. Misting succulents increases humidity, which they hate, and encourages shallow, weak root systems. Instead, you must use the Soak and Dry method:
-
Wait until the soil in your dish garden is 100% bone dry from top to bottom. (You can test this by gently inserting a wooden skewer into the soil; if it comes out dry, it is time).
-
Bring the dish to a sink and pour water over the soil until it streams freely out of the drainage hole.
-
Let all excess water drain completely before putting the dish back on its saucer.
-
Do not water again until the soil is completely dry. In summer, this might be every 10 to 14 days. In winter (when plants go dormant), it might be once a month.
Nailing the Lighting 🌞
Succulents need abundant light to maintain their compact shapes. Place your dish garden in the brightest window you have—usually a South-facing or West-facing window. If you notice the edges of your succulents turning beautiful shades of pink, red, or purple, congratulations! This is called sun stress (a positive biological reaction to strong light, similar to a tan) and it means your plants are thriving.
Pruning and Maintenance ✂️
It is perfectly natural for the lowest, oldest leaves on a succulent rosette to shrivel and dry up. Simply use your tweezers to pluck these crispy leaves away to maintain a clean look and prevent bugs from hiding in the debris. During the active growing season (Spring and Summer), you can apply a succulent-specific fertilizer diluted to half-strength once a month.
Troubleshooting Common Succulent Garden Issues 🚑
Even experts run into hiccups. Here is how to diagnose and fix the three most common problems your dish garden might face:
-
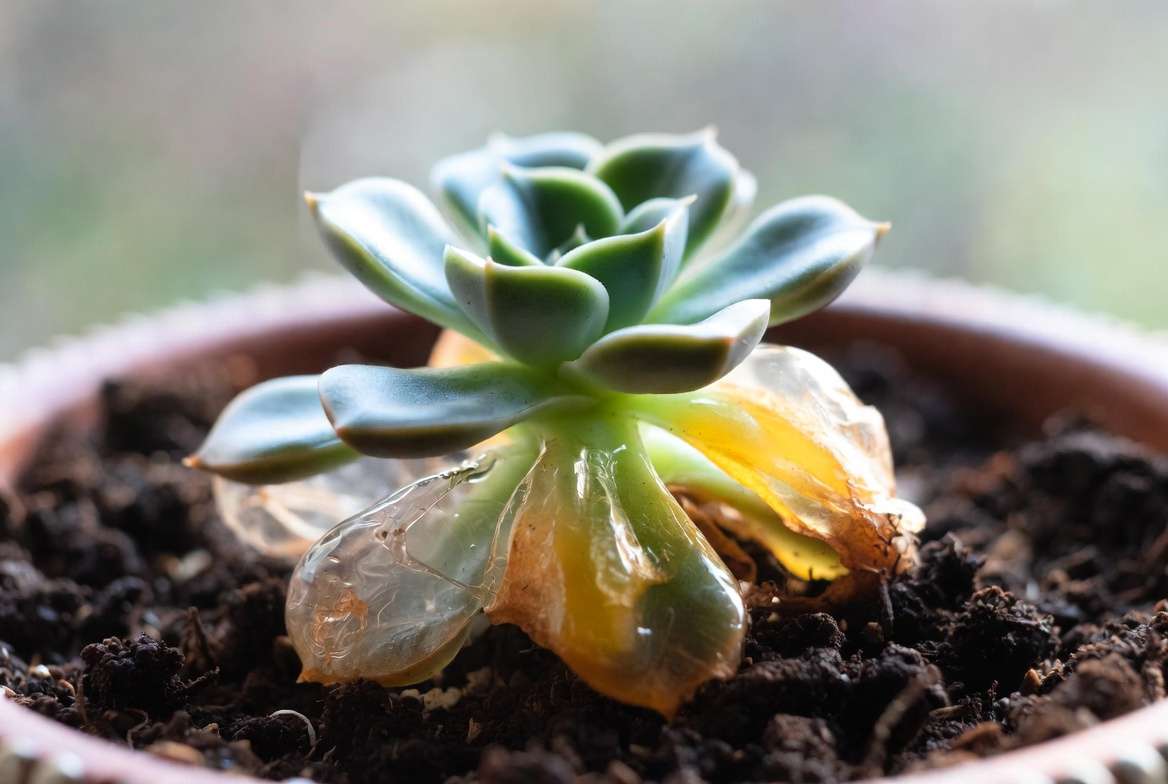
Symptom: Mushy, Translucent, or Yellowing Leaves 💧
-
Diagnosis: Overwatering / Root Rot.
-
Cure: Stop watering immediately. If the stem is black and mushy, the plant is rotting. You must pull it out of the arrangement to save the others. If the rot is severe, take stem cuttings from the healthy top portion to propagate a new plant.
-
-
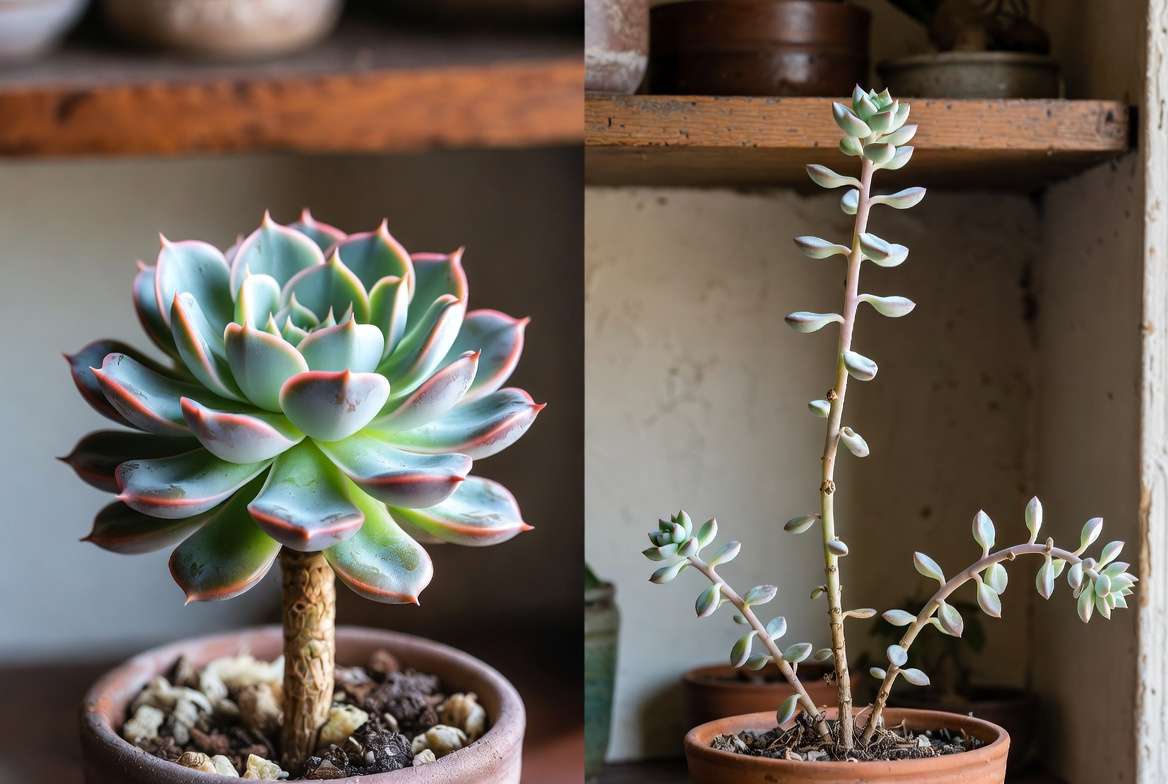
Symptom: Tall, Stretched-Out Plants with Downward Pointing Leaves (Etiolation) 🦒
-
Diagnosis: Lack of adequate sunlight.
-
Cure: Move the garden to a much brighter location or invest in an LED grow light. You cannot shrink a stretched plant, but you can “behead” it (cut off the compact top, let it callous, and replant it) to start over.
-
-
Symptom: Crispy, Wrinkled, Papery Leaves 🏜️
-
Diagnosis: Underwatering.
-
Cure: Give the garden a thorough, deep soak. The leaves should plump back up within 24 to 48 hours.
-
Frequently Asked Questions (FAQs) 🤔
How many succulents should I put in one dish? While it depends on the size of your bowl, a good design rule of thumb is to use odd numbers (3, 5, or 7 plants). Pack them just tightly enough to look full, but leave about a half-inch of space between plants so they have room to grow over the next year.
Can I create a succulent dish garden without drainage holes? While highly discouraged for beginners, it is possible if you use the “cachepot” method. Plant your succulents in a cheap plastic nursery pot with drainage holes, and drop that plastic pot inside your decorative, hole-less bowl. When it is time to water, simply remove the plastic pot, water it in the sink, let it drain, and put it back.
How long do succulent arrangements last? A well-made, properly cared-for succulent dish garden can look beautiful for 1 to 2 years. Eventually, the plants will outgrow the container or the soil will become depleted of nutrients, at which point you will get the joy of deconstructing it and potting up your larger, healthier plants!
Conclusion: Bring Your Indoor Garden to Life 🌸
Creating succulent dish gardens is a deeply rewarding way to bring a slice of the desert into your home. By abandoning the “gravel at the bottom” myth, utilizing a gritty soil mix, choosing compatible plant companions, and mastering the soak-and-dry watering method, you are setting yourself up for guaranteed success.
Remember, plant care is a continuous journey of observation and learning. Don’t be afraid to experiment with different textures, colors, and containers to find a style that fits your space perfectly. With the knowledge you have gained today, you are more than ready to craft a fail-proof arrangement that will thrive, grow, and bring you joy for years to come. Happy planting! 🌵💚











