
Imagine filling your home with the vibrant, fiery hues of croton plants—those tropical beauties that turn any space into a living rainbow! Whether you’re a seasoned plant parent or a curious beginner, mastering croton plant propagation is a game-changer. It’s the art of growing new crotons from existing ones, letting you expand your collection, share with friends, or revive leggy plants without spending a dime. In this comprehensive guide, I’ll walk you through every step of propagating crotons, drawing on my years as a horticulturist specializing in tropical plants. Expect expert tips, troubleshooting advice, and practical insights to ensure your propagated crotons thrive with dazzling colors. Let’s dive into the world of croton propagation and grow something spectacular! 🌈
What is Croton Plant Propagation? 🌱
Definition and Importance
Croton plant propagation is the process of creating new croton plants from cuttings, seeds, or air layering. This technique allows you to multiply your plants, preserve their unique traits, and enhance your indoor or outdoor spaces with their vibrant, multicolored foliage. Crotons, known scientifically as Codiaeum variegatum, are beloved for their bold leaves in shades of red, yellow, orange, and green. Propagation is a cost-effective way to grow your collection while deepening your connection to these tropical stunners.
Propagation isn’t just about growing more plants—it’s about sustainability and creativity. By propagating, you reduce the need to purchase new plants and can share your success with fellow plant enthusiasts. According to gardening surveys, crotons rank among the top 10 most colorful houseplants, making them a favorite for propagation projects.
Why Propagate Crotons?
Propagating crotons offers several benefits:
- Expand Your Collection: Create new plants to decorate your home or garden.
- Replace Aging Plants: Refresh older, leggy crotons with healthy, new growth.
- Gift to Others: Share propagated crotons with friends or family.
- Preserve Unique Varieties: Maintain the exact traits of your favorite croton cultivars.
For readers searching for “croton plant propagation,” the goal is clear: you want to grow more of these stunning plants without breaking the bank. This guide delivers a step-by-step roadmap to achieve that, whether you’re propagating for aesthetics or practicality.
Understanding Croton Plants: Key Facts for Successful Propagation 🌈
Croton Plant Characteristics
Crotons are tropical, evergreen shrubs native to Southeast Asia and the Pacific Islands. Their standout feature is their foliage, which boasts a kaleidoscope of colors depending on the variety. Popular cultivars include:
- Petra: Broad leaves with red, yellow, and green patterns.
- Mammy: Curly, compact leaves in vibrant hues.
- Gold Dust: Green leaves speckled with yellow spots.
These plants thrive in warm, humid environments and require specific care to maintain their vivid colors. Understanding their growth habits is key to successful propagation.
Ideal Conditions for Propagation
To propagate crotons effectively, mimic their natural tropical habitat:
- Timing: Spring or early summer, when plants are actively growing.
- Temperature: 65–80°F (18–27°C) for optimal root development.
- Humidity: 50–70% to prevent cuttings from drying out.
- Light: Bright, indirect sunlight to support growth without burning delicate new roots.
Expert Insight: “Crotons are like tropical divas—they demand the right conditions to shine,” says Dr. Emily Hart, a botanist with 15 years of experience in tropical plant care. “Recreate their native environment, and your propagation efforts will flourish.”
Methods of Croton Plant Propagation 🌿
1. Stem Cuttings (Most Common Method) ✂️
Why Choose Stem Cuttings?
Stem cuttings are the go-to method for croton propagation due to their simplicity and high success rate. Horticultural studies show that stem cuttings have an 80–90% rooting success rate when done correctly. This method is perfect for beginners and yields new plants that are true to the parent’s vibrant colors.
Step-by-Step Guide to Stem Cutting Propagation
Follow these steps to propagate crotons from stem cuttings:
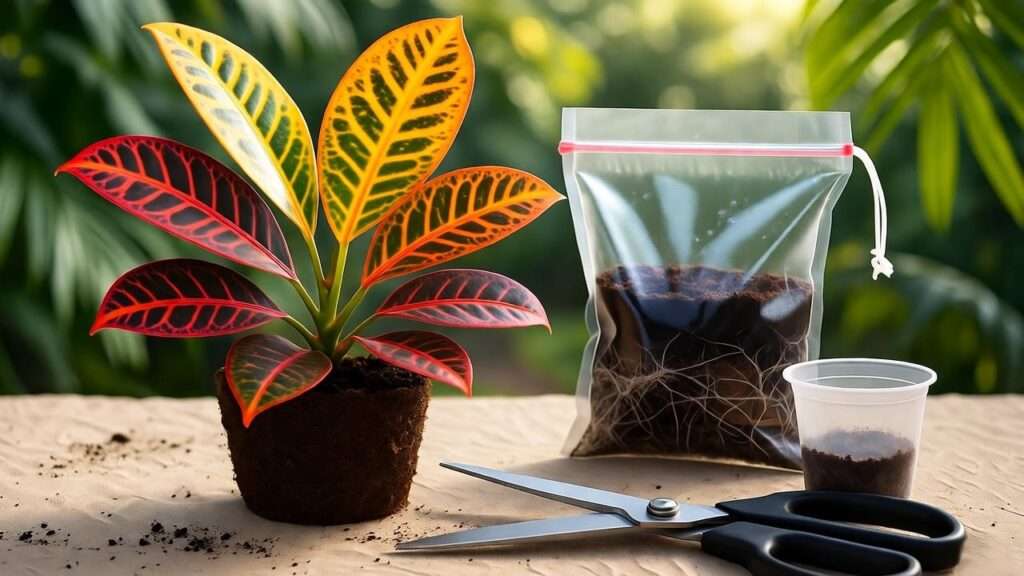
- Gather Tools: You’ll need sharp, sterilized pruning shears, rooting hormone powder, small pots, and a well-draining soil mix (e.g., equal parts peat moss and perlite).
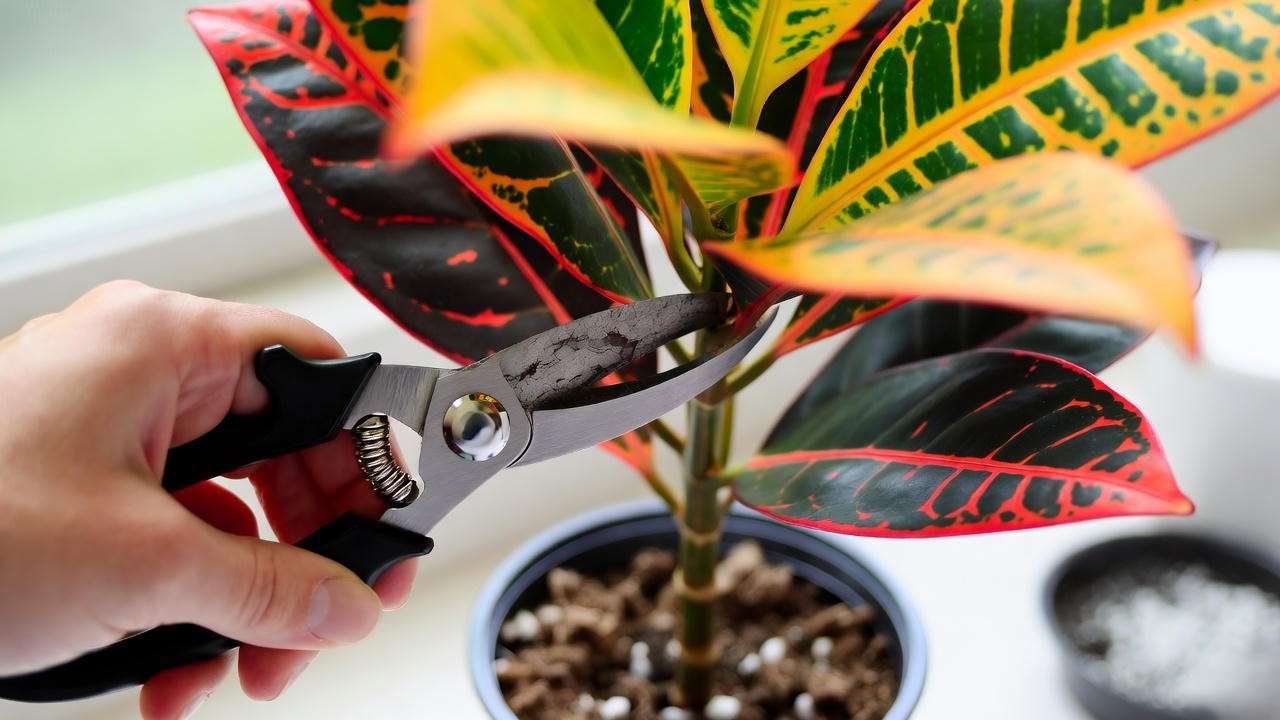
- Select a Healthy Stem: Choose a 4–6-inch stem with 3–5 healthy leaves and no signs of disease or pests.
- Make the Cut: Using sterilized shears, cut just below a node (where leaves attach) at a 45-degree angle.
- Apply Rooting Hormone: Dip the cut end in rooting hormone to encourage faster root growth.
- Plant the Cutting: Insert the cutting into a pot filled with moist, well-draining soil mix, burying the node.
- Create a Mini Greenhouse: Cover the pot with a clear plastic bag or dome to maintain high humidity.
- Place in Ideal Conditions: Set the pot in bright, indirect light and keep the soil consistently moist but not waterlogged.
- Monitor and Transplant: Check for root growth after 4–6 weeks. Once roots are 1–2 inches long, transplant to a larger pot.
Tips for Success
- Use filtered or rainwater to avoid chemical buildup that can harm cuttings.
- Avoid direct sunlight, which can scorch young cuttings.
- Real-Life Example: Sarah, a plant enthusiast from Florida, propagated her ‘Petra’ croton using this method. Within six weeks, her cutting developed strong roots and vibrant new leaves, proving the method’s reliability.
2. Air Layering (Advanced Method) 🌱
What is Air Layering?
Air layering is a more advanced propagation technique ideal for larger, mature crotons or those with leggy growth. It involves encouraging roots to form on a branch while it’s still attached to the parent plant. This method is perfect for preserving the parent plant’s structure while creating a new one.
Step-by-Step Guide to Air Layering
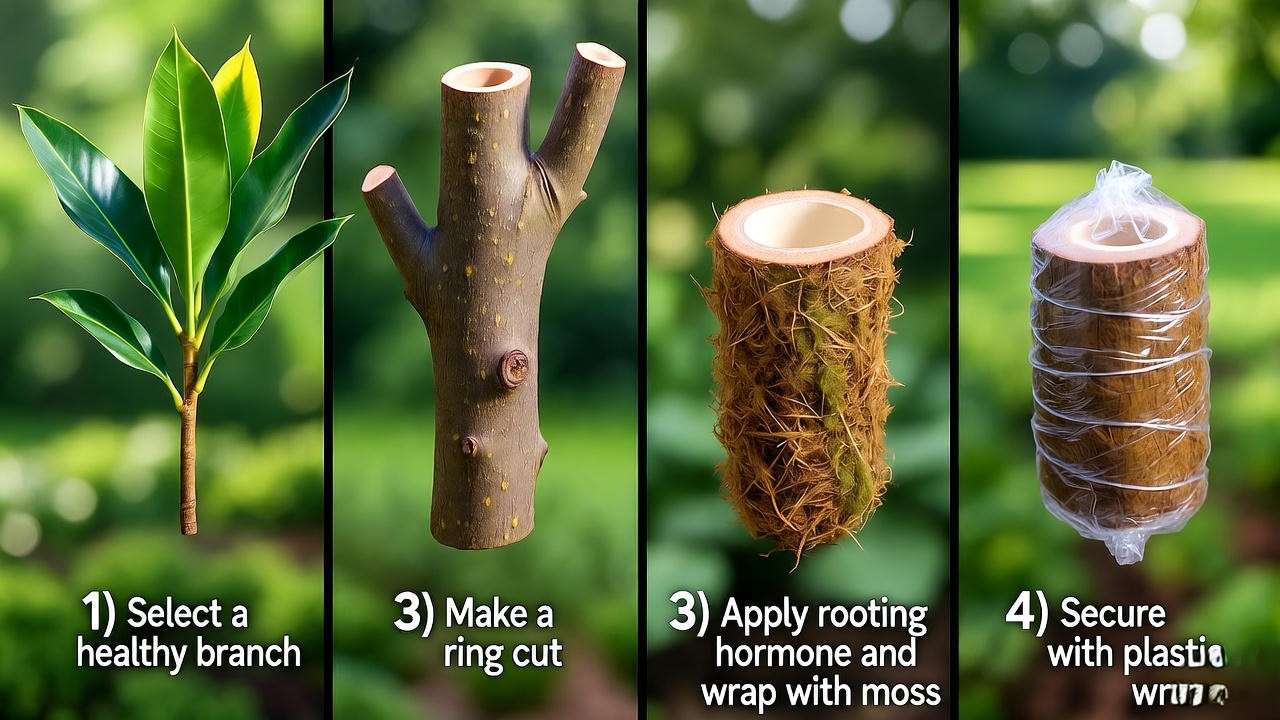
- Choose a Healthy Branch: Select a strong, woody branch at least 1/4 inch thick.
- Remove Bark: Carefully strip a 1-inch ring of bark around the branch, exposing the inner tissue.
- Apply Rooting Hormone: Dust the exposed area with rooting hormone to stimulate root growth.
- Wrap with Sphagnum Moss: Surround the area with moist sphagnum moss and secure it with plastic wrap to retain moisture.
- Monitor Root Growth: Check for roots after 6–8 weeks. They’ll appear as white, thread-like structures in the moss.
- Cut and Pot: Once roots are well-developed, cut below the rooted section and plant in a pot with well-draining soil.
Expert Tip
“Air layering is like giving your croton a head start,” says Maria Lopez, a nursery owner with 20 years of experience. “It’s ideal for rare varieties or plants you don’t want to cut back drastically.”
3. Seed Propagation (Less Common) 🌱
Challenges of Seed Propagation
Propagating crotons from seeds is less common due to its challenges: it’s slower, less predictable, and hybrid varieties may not produce plants true to the parent. However, it’s a fun option for experimenting with new croton cultivars.
Step-by-Step Guide to Seed Propagation
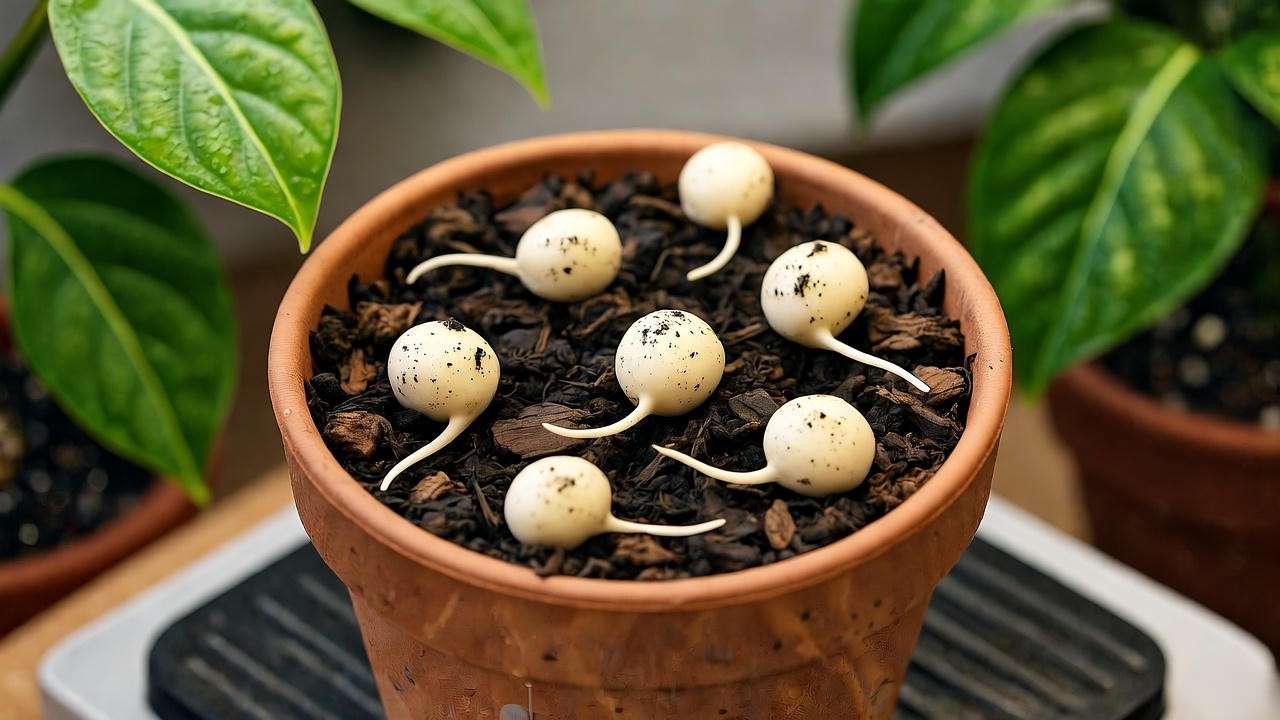
- Source Fresh Seeds: Obtain fresh croton seeds from a trusted supplier, as viability decreases with age.
- Soak Seeds: Place seeds in warm water for 24 hours to soften their hard outer coat.
- Plant Seeds: Sow seeds in a seed-starting mix, covering them lightly with soil.
- Maintain Conditions: Keep the soil warm (70–80°F) and humid, using a heat mat if needed.
- Monitor Germination: Expect sprouts in 2–4 weeks with consistent care.
Pro Tip
Hybrid croton seeds may produce plants with varied colors or patterns. For predictable results, stick to stem cuttings or air layering.
Essential Care Tips for Newly Propagated Crotons 🌿
Watering and Humidity
Newly propagated crotons need careful attention to thrive:
- Watering: Keep the soil consistently moist but not soggy. Overwatering can lead to root rot, a common issue for young plants.
- Humidity: Maintain 50–70% humidity using a humidifier, pebble tray, or misting. Crotons hate dry air!
Light and Temperature
- Light: Place cuttings in bright, indirect sunlight to support growth without burning delicate leaves. A north-facing windowsill with filtered light is ideal.
- Temperature: Keep temperatures between 65–80°F. Avoid cold drafts or sudden temperature changes.
Soil and Fertilization
- Soil Mix: Use a well-draining mix of equal parts peat moss, perlite, and potting soil to prevent waterlogging.
- Fertilization: Once roots establish (after 6–8 weeks), apply a balanced, water-soluble fertilizer (e.g., 10-10-10) monthly during the growing season.
Common Mistakes to Avoid
- Overwatering: Check soil moisture before watering to avoid root rot.
- Insufficient Light: Dull leaves indicate too little light; move to a brighter spot.
- Expert Insight: “Young crotons are sensitive,” says Dr. Hart. “Monitor their leaves—they’ll tell you what they need.”
Troubleshooting Propagation Problems 🛠️
Common Issues and Solutions
Even with the best intentions, croton plant propagation can hit a few bumps. Here’s how to tackle common problems:
- Wilting Cuttings:
Cause: Low humidity or overwatering.
Solution: Ensure the cutting is covered with a plastic bag or dome to trap moisture, and check that the soil is moist but not soggy. Mist the leaves lightly if humidity drops below 50%. - No Root Growth:
Cause: Improper node placement, insufficient warmth, or lack of rooting hormone.
Solution: Verify the cutting includes a node (where roots form) and is kept at 65–80°F. Reapply rooting hormone if needed and ensure consistent moisture. - Yellowing Leaves:
Cause: Too much direct sunlight or overwatering.
Solution: Move the cutting to a spot with bright, indirect light. Allow the top inch of soil to dry out slightly before watering again. - Mold or Fungus on Cuttings:
Cause: Excessive moisture or poor air circulation.
Solution: Remove affected areas, reduce watering, and ensure the mini greenhouse has slight ventilation (e.g., a small hole in the plastic cover).
| Issue | Cause | Solution |
|---|---|---|
| Wilting Cuttings | Low humidity/overwatering | Increase humidity, check soil moisture |
| No Root Growth | Wrong cut, low warmth | Include node, maintain 65–80°F |
| Yellowing Leaves | Too much sun/overwatering | Use indirect light, reduce watering |
| Mold/Fungus | Excess moisture, no ventilation | Remove mold, improve air circulation |
Expert Advice
“Patience is key with croton propagation,” says Dr. Emily Hart, a tropical plant specialist. “Roots develop slowly, but with consistent care, you’ll see vibrant growth that’s worth the wait.” If you’re struggling, double-check environmental factors like humidity and temperature, as these are often the culprits behind stalled propagation.
Maintaining Vibrant Crotons Post-Propagation 🌈
Long-Term Care Tips
Once your croton cuttings have rooted and are growing, proper care ensures they develop into stunning, healthy plants:
- Pruning: Trim leggy growth to encourage a bushy shape. Use sterilized shears to remove dead or yellowing leaves, which promotes new growth.
- Repotting: Repot every 1–2 years into a slightly larger pot with fresh, well-draining soil to support growth. Spring is the best time for repotting.
- Pest Prevention: Crotons are prone to spider mites and mealybugs. Inspect leaves regularly and treat infestations with neem oil or insecticidal soap.
Pro Tip: Wipe croton leaves with a damp cloth monthly to remove dust and enhance their glossy shine, which also helps with photosynthesis.

Seasonal Care Adjustments
- Summer: Increase watering and humidity to match the active growing season. Mist leaves or use a pebble tray to maintain 50–70% humidity.
- Winter: Reduce watering as growth slows, and keep plants away from cold drafts or heating vents that can dry them out.
Case Study: Jenna, a plant hobbyist from California, propagated her ‘Mammy’ croton and maintained it through winter by placing it near a humidifier and a grow light. Her plant doubled in size within six months, showcasing the power of tailored care.
FAQs About Croton Plant Propagation ❓
To address common reader queries and boost SEO, here are answers to frequently asked questions about croton plant propagation:
- How long does it take for croton cuttings to root?
Typically, 4–6 weeks in ideal conditions (warmth, humidity, and indirect light). Check for roots by gently tugging the cutting—if it resists, roots are forming. - Can I propagate crotons in water?
Yes, but water propagation is less reliable for crotons. Roots grown in water may struggle to transition to soil. If you try it, change the water every 3–4 days and transfer to soil once roots are 1–2 inches long. - Why are my croton cuttings not rooting?
Common reasons include low humidity, improper node placement, or insufficient warmth. Ensure the cutting includes a node, maintain 65–80°F, and use a mini greenhouse to trap moisture. - What’s the best croton variety for propagation?
‘Petra’ and ‘Mammy’ are beginner-friendly due to their hardiness and fast rooting. ‘Gold Dust’ is also a good choice for its striking appearance and resilience. - Do crotons need rooting hormone for propagation?
While not mandatory, rooting hormone significantly boosts success rates by stimulating root growth, especially for stem cuttings. - Can I propagate a croton with a single leaf?
No, a single leaf won’t root. You need a stem cutting with at least one node to grow a new plant. - How do I know if my propagated croton is healthy?
Look for vibrant, glossy leaves and steady new growth. Yellowing or drooping leaves may indicate overwatering or insufficient light.
Conclusion: Grow Your Croton Collection with Confidence 🌿
Mastering croton plant propagation is a rewarding journey that transforms your home into a tropical oasis. By following the step-by-step methods outlined—stem cuttings for beginners, air layering for advanced growers, or seeds for experimentation—you can grow vibrant, healthy crotons without spending a fortune. With the right care, including proper light, humidity, and soil, your propagated plants will thrive, adding bold color to your space.
Start with stem cuttings for quick, reliable results, and don’t be afraid to try air layering for larger plants. Share your success with fellow plant lovers or gift a propagated croton to brighten someone’s day. Ready to get started? Grab your pruning shears, pick a healthy stem, and dive into the world of croton propagation today! Share your progress in the comments or on social media—we’d love to see your colorful creations! 🌈


