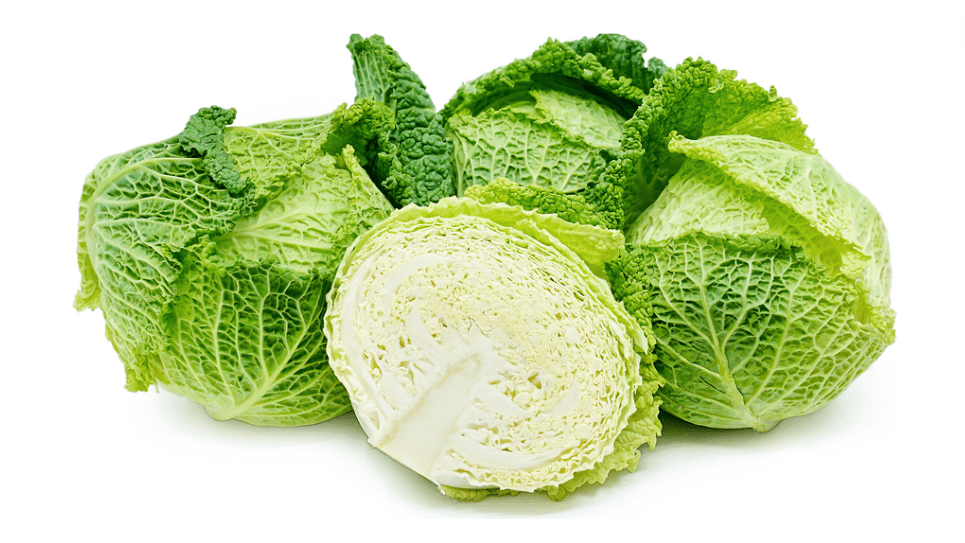
Curly Cabbage: A Gardener's Guide to Growing and Harvesting
Curly cabbage, also known as savoy cabbage, is a delicious and versatile vegetable that can be easily grown in your own garden. In this post, we will guide you through the process of growing and harvesting curly cabbage, from planting to harvest. Whether you’re a seasoned gardener or just starting out, this comprehensive guide will help you produce a bountiful harvest of this nutritious and flavorful vegetable. So let’s dive in and learn how to grow and harvest curly cabbage in your garden.
Table of Contents
ToggleUnderstanding Curly Cabbage
A. Description and characteristics of curly cabbage
Curly cabbage, also known as savoy cabbage, is a leafy green vegetable with crinkled, ruffled leaves that form a dense head. It is a member of the brassica family, which includes broccoli, cauliflower, and Brussels sprouts. Curly cabbage has a mild, slightly peppery flavor and is packed with nutrients, including vitamins C, K, and fiber. It is a cool-season crop, meaning it thrives in cooler temperatures and can withstand frost, making it an ideal vegetable to grow in early spring or fall.
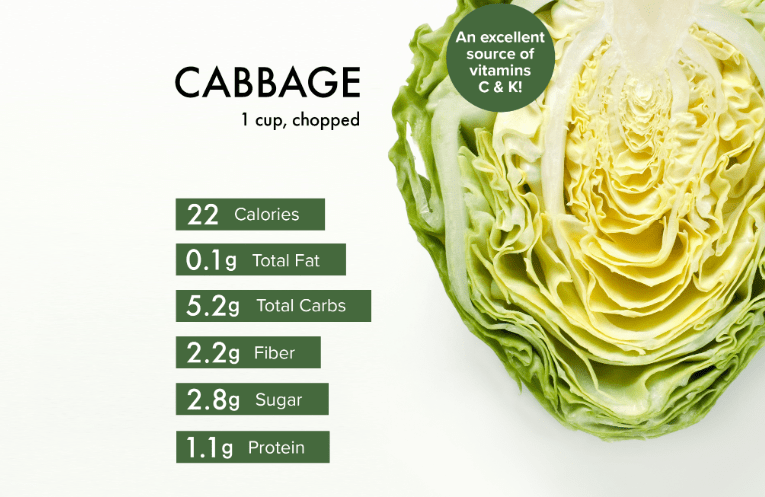
B. Nutritional benefits and culinary uses
Curly cabbage is a nutrient-dense vegetable and is a great source of vitamin C, vitamin K, and fiber. It also contains antioxidants and other beneficial nutrients. In terms of culinary uses, curly cabbage can be enjoyed raw in salads, coleslaw, or as a crunchy addition to sandwiches and wraps. It can also be cooked by sautéing, steaming, boiling, or even roasting. It’s a versatile vegetable that can be used in a variety of dishes, from stir-fries to soups and stews.
C. Differences between curly cabbage and other cabbage varieties
Curly cabbage, also known as Savoy cabbage, has a more textured and crinkled leaf compared to other cabbage varieties. It also has a milder and slightly sweeter flavor compared to regular green cabbage. In terms of appearance, regular green cabbage has smooth, round leaves while Napa cabbage has long, oblong-shaped leaves. Curly cabbage tends to be more tender and delicate, making it a great option for fresh salads and slaws, while other cabbage varieties are better suited for cooking and braising. Each variety of cabbage also has its own unique nutritional profile and taste, so it’s worth experimenting with different types to discover which one you prefer for specific dishes.
Preparing to Grow Curly Cabbage
A. Selecting the right variety
When selecting a variety of curly cabbage to grow, it’s important to consider the climate and growing conditions in your area. Some varieties are better suited for cooler temperatures, while others may be more resistant to pests and diseases. It’s also important to consider the size and shape of the cabbage heads, as well as the flavor and texture of the leaves. Taking these factors into account will help you choose the right variety for your garden or farm.
B. Choosing the ideal planting location
Curly cabbage thrives in well-drained, nutrient-rich soil and requires full sun for optimal growth. When choosing a planting location, look for an area with good air circulation to prevent disease and ensure the plants have enough space to spread out. It’s also important to consider the proximity to other plants and potential pests, as well as any potential shading from nearby structures or trees. Additionally, consider the convenience of the location for watering and maintenance. By selecting the ideal planting location, you can set your curly cabbage up for success.
C. Soil preparation and testing
Before planting curly cabbage, it’s important to prepare the soil and test its nutrient levels. Start by removing any weeds and debris from the planting area. Then, work the soil to a depth of at least 6 inches, breaking up any large clumps and creating a fine, even texture.
Next, consider conducting a soil test to determine the pH level and nutrient content of the soil. This can be done through a local agricultural extension office or with at-home testing kits. Based on the results, you may need to make adjustments to the soil by adding organic matter, such as compost or well-rotted manure, and possibly adding specific nutrients to ensure the soil is in optimal condition for curly cabbage.
By properly preparing and testing the soil, you can provide the best possible growing environment for your curly cabbage plants.
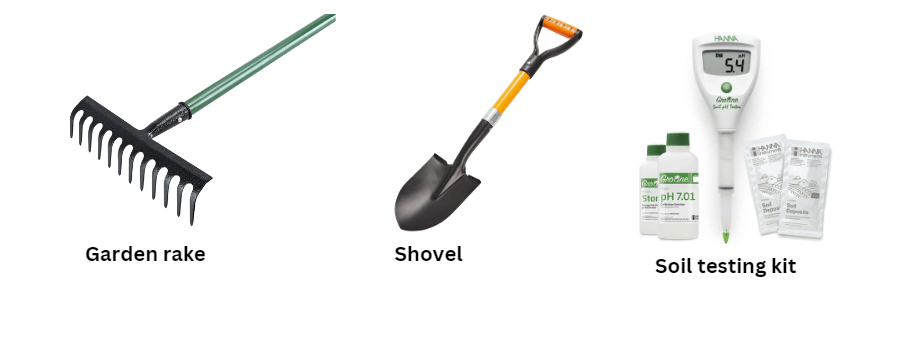
D. Necessary tools and materials
Necessary tools and materials for soil preparation may include a garden rake, shovel, and a soil testing kit. Additionally, you may need to purchase compost, manure, or specific fertilizers based on the results of your soil test. Remember to wear appropriate gardening gloves and clothing to protect yourself while working in the garden. These steps and materials are essential for ensuring that your curly cabbage plants have a healthy and nutrient-rich environment to grow in.
Planting Curly Cabbage
A. Starting seeds indoors vs. direct sowing
Starting seeds indoors can give you better control over temperature, light, and moisture levels, leading to stronger and more uniform seedlings. Direct sowing, on the other hand, can be simpler and may result in less transplant shock for the plants. Both methods have their advantages and disadvantages, so it’s important to consider your specific growing conditions and preferences before deciding which method to use for planting curly cabbage.
B. Germination requirements (temperature, moisture)
Curly cabbage seeds germinate best at temperatures between 65-75°F and require consistently moist soil to ensure successful germination. It’s important to keep the soil evenly moist, but not waterlogged, to provide the ideal environment for the seeds to sprout. Monitoring the temperature and moisture levels will help ensure that your curly cabbage seeds germinate and grow successfully.
C. Transplanting seedlings to the garden
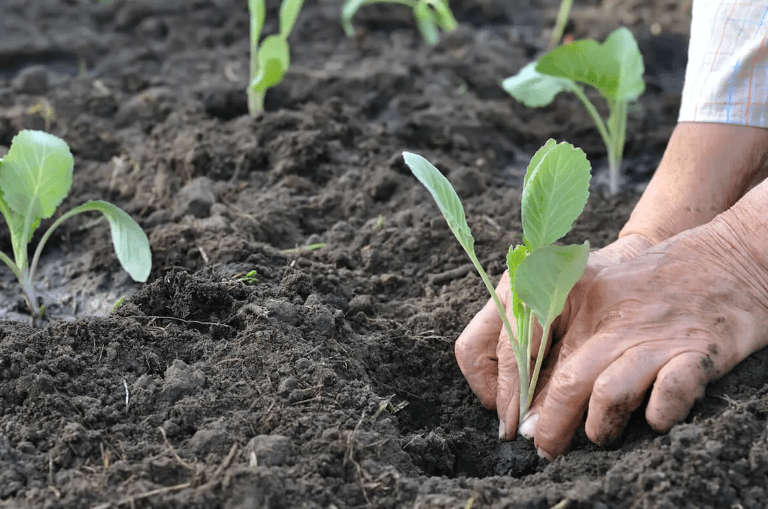
When it comes to transplanting curly cabbage seedlings to the garden, it’s important to wait until they have developed a strong root system and have at least 3-4 true leaves. This typically takes about 4-6 weeks after sowing the seeds indoors. Before transplanting, it’s a good idea to harden off the seedlings by gradually exposing them to outdoor conditions for a week or so. When planting, make sure to space the seedlings about 18-24 inches apart to allow for proper growth and air circulation. Water the seedlings well after transplanting and continue to keep the soil evenly moist as they establish themselves in the garden.
D. Spacing and depth guidelines
When planting curly cabbage seedlings in the garden, it’s important to space them about 18-24 inches apart to allow for proper growth and air circulation. As for depth, plant the seedlings at the same depth as they were in their original containers, making sure to cover the roots and lower stems with soil. It’s important to water the seedlings well after transplanting and continue to keep the soil evenly moist as they establish themselves in the garden.
Care and Maintenance
A. Watering needs and techniques
When it comes to watering curly cabbage seedlings, it’s important to keep the soil evenly moist. It’s best to water the seedlings at the base, avoiding wetting the leaves to prevent disease. Be sure to check the soil regularly to ensure it doesn’t dry out, especially during hot and dry periods. Proper watering is crucial for the healthy growth and development of the cabbage plants.
B. Fertilizing schedules and types
Curly cabbage seedlings benefit from a balanced fertilizer that is high in nitrogen. It’s best to fertilize the seedlings about once a month, starting two weeks after transplanting. Be sure to follow the instructions on the fertilizer package for the proper application rate. Over-fertilizing can damage the plants, so it’s important to use the appropriate amount. Additionally, be sure to water the seedlings before and after fertilizing to prevent root burn.
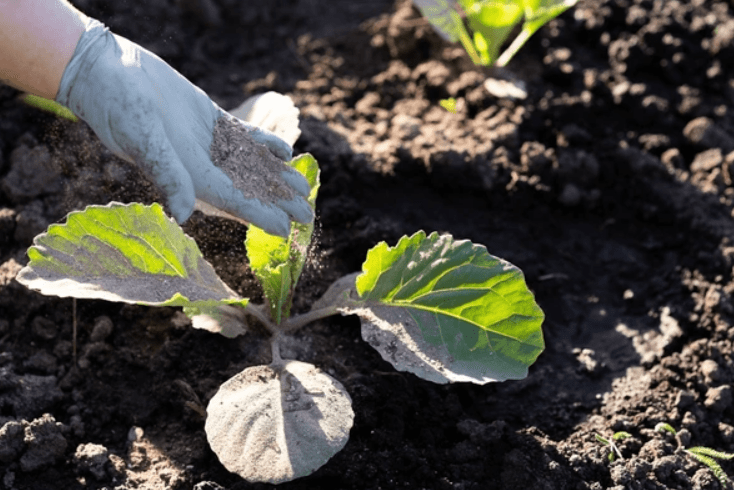
C. Mulching for moisture retention and weed control
Mulching can be an effective way to retain moisture and control weeds in your garden. Organic mulches, such as straw, grass clippings, or wood chips, can help maintain soil moisture by reducing evaporation. They also suppress weed growth by blocking sunlight and preventing weed seeds from germinating. Apply a layer of mulch around your plants, making sure to leave a small space around the stems to prevent rot. Replenish the mulch as needed to maintain its effectiveness throughout the growing season.
D. Pruning and thinning practices
Pruning and thinning practices are important for maintaining the health and vigor of your plants. Regular pruning helps to remove dead or diseased branches, promote air circulation, and shape the plant for better growth. Thinning, on the other hand, involves selectively removing excess branches, buds, or fruits to prevent overcrowding and improve the overall quality of the plant. Both practices help to encourage new growth and ensure that the plant’s energy is directed towards producing healthy and abundant flowers, fruits, or foliage. It’s important to use sharp, clean tools and to prune or thin at the appropriate times for each specific plant species.
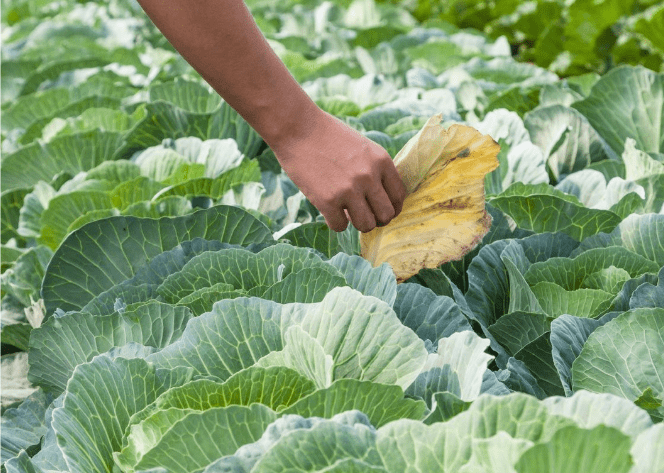
E. Pest and disease management (common issues and organic solutions)
Pest and disease management is crucial for maintaining the health and productivity of your plants. Common issues that gardeners may encounter include aphids, fungal diseases, and caterpillars. When dealing with these problems, it’s important to consider organic solutions to minimize harm to the environment and beneficial insects.
For aphids, you can try spraying the plants with a mixture of water and mild dish soap, or introducing natural predators such as ladybugs to control the infestation. Fungal diseases can often be managed by improving air circulation around the plants, avoiding overhead watering, and using organic fungicides such as neem oil or copper sprays.
To control caterpillars, you can hand pick them off the plants, or introduce natural predators such as birds, or use Bacillus thuringiensis (Bt) which is a natural bacteria that specifically targets caterpillars.
It’s important to regularly monitor your plants for signs of pests or disease, and to take proactive measures to prevent infestations from spreading. By using organic and environmentally-friendly solutions, you can effectively manage pest and disease issues while minimizing harm to the ecosystem.

Harvesting Curly Cabbage
A. Signs that curly cabbage is ready for harvest
Signs that curly cabbage is ready for harvest are when the heads feel firm and compact when squeezed, and when the leaves start to form a tight, rounded shape. You can also check the size of the head, as most varieties are ready for harvest when they reach a diameter of about 6-8 inches. It’s important to harvest curly cabbage before the heads start to split or become too loose, as this can affect the flavor and quality of the cabbage. When harvesting, use a sharp knife to cut the head off at the base of the plant, leaving a few outer leaves attached to protect the head during storage.
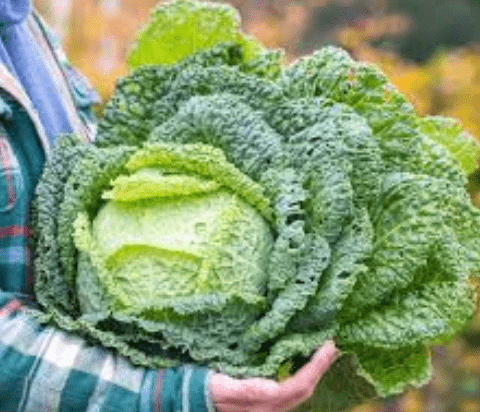
B. Proper harvesting techniques
Proper harvesting techniques for curly cabbage include using a sharp knife to cut the head off at the base of the plant, leaving a few outer leaves attached to protect the head during storage. It’s important to handle the heads carefully to avoid damaging the leaves and to ensure that they stay fresh for longer. Additionally, make sure to harvest in the morning when the heads are at their peak freshness and to store them in a cool, dark place to maintain their quality. By following these techniques, you can effectively harvest curly cabbage while preserving its flavor and nutritional value.
C. Post-harvest handling and storage
Post-harvest handling and storage are crucial steps in preserving the quality of curly cabbage. After harvesting, it is important to remove any damaged or diseased leaves and then store the heads in a cool, dark place to maintain their freshness. It’s best to keep the heads in a humid environment, such as a refrigerator, to prevent them from drying out. If storing for a longer period of time, consider wrapping the heads in plastic to maintain moisture. By following these post-harvest handling and storage techniques, you can extend the shelf life of curly cabbage and ensure that it stays fresh and tasty.
D. Extending the harvest season
Extending the harvest season for curly cabbage can be achieved by planting multiple crops at different times throughout the growing season. This staggered planting method allows for a continuous supply of fresh cabbage over an extended period of time. Additionally, protecting the cabbage plants from extreme temperatures and weather conditions with the use of row covers or hoop houses can help to prolong the harvest season. Lastly, regular maintenance and care of the cabbage plants, such as proper watering and fertilization, can also contribute to a longer harvest season. By implementing these strategies, you can enjoy a prolonged and abundant supply of curly cabbage throughout the growing season.
Common Problems and Solutions
A. Identifying and addressing common growth problems
Identifying and addressing common growth problems in Curled Kale is essential for ensuring a successful harvest. Some common problems include pests such as aphids, cabbage worms, and slugs, as well as diseases like clubroot and powdery mildew. To address these issues, regularly inspect the plants for any signs of infestation or disease and take appropriate measures such as using organic pest control methods or applying fungicides. Additionally, providing proper spacing between plants, adequate sunlight, and well-drained soil can help prevent common growth problems. Maintaining good garden hygiene by removing any debris or diseased plants can also help to prevent the spread of pests and diseases. By addressing these common growth problems, you can promote healthy and thriving curly cabbage plants for a bountiful harvest.
B. Preventing and treating pests and diseases
Preventing and treating pests and diseases is crucial for the successful growth of curly cabbage. By identifying and addressing these issues early on, you can ensure that your plants have the best chance of thriving and producing a plentiful harvest.
Companion Planting and Crop Rotation
A. Best companion plants for curly cabbage
Some of the best companion plants for Curled Kale include aromatic herbs like rosemary, thyme, and sage, as well as other brassicas like kale, broccoli, and cauliflower. These companion plants can help deter pests and attract beneficial insects, while also providing a variety of nutrients to the soil. Additionally, practicing crop rotation by alternating the location of your Crinkled Cabbage plants with other non-brassica crops can help prevent the build-up of pests and diseases in the soil. By incorporating companion planting and crop rotation into your gardening practices, you can support the healthy growth of your curly cabbage plants.
B. Benefits of crop rotation
Crop rotation offers several benefits for the health and productivity of your plants. By rotating crops, you can help prevent the depletion of specific nutrients in the soil, reduce the risk of pests and diseases, and improve overall soil structure and fertility. Additionally, different types of crops have varying root structures and nutrient needs, so rotating crops can help ensure a more balanced and diverse soil ecosystem. This can ultimately lead to higher yields and healthier plants. By consistently practicing crop rotation, you can maintain the long-term health and productivity of your garden.
Culinary Uses and Recipes
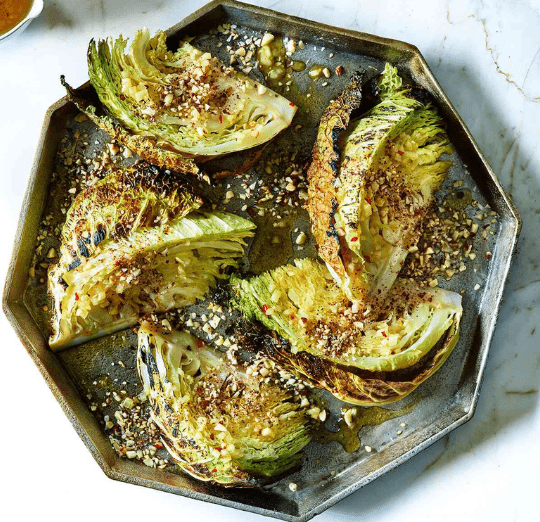
Curly cabbage is a versatile vegetable with various culinary uses and recipes. It can be used in salads, stir-fries, soups, and even as a wrap for fillings. When cooking with curly cabbage, it’s important to properly prepare and cook it to retain its nutrients and flavor. One popular dish is braised curly cabbage, which involves sautéing the cabbage with onions, garlic, and spices until tender. Another option is to use it in a coleslaw or as a crunchy topping for tacos or sandwiches. Additionally, Crinkled Cabbage can be pickled or fermented for a tangy and probiotic-rich side dish. Overall, Curled Kale adds a delicious and nutritious element to your meals.
In conclusion, growing and harvesting Crinkled Cabbage can be a rewarding and enjoyable experience for any gardener. By following the tips and advice provided in this guide, you can ensure a successful and bountiful harvest of this delicious and nutritious vegetable. Remember to provide your cabbage plants with the proper care and attention they need, and you’ll be enjoying fresh, homegrown curly cabbage in no time. Happy gardening!
Frequently Asked Questions (FAQs)
Curly cabbage is a type of cabbage that has a tight, curly head of leaves. It is a popular vegetable in many cuisines and is known for its crisp texture and slightly peppery flavor.How do I grow curly cabbage?
Curly cabbage can be grown from seeds or seedlings in well-drained, fertile soil. It requires full sun and regular watering. Plant the seeds or seedlings in rows and keep the soil moist as the cabbage grows.
Curly cabbage is typically ready to harvest 70-90 days after planting. You can harvest it when the head feels firm and reaches a desirable size, usually 6-8 inches in diameter.
Look for firm, compact heads with vibrant green leaves. The outer leaves may start to turn yellow, which is a sign that the cabbage is ready to be harvested.
Yes, curly cabbage can be grown in containers as long as the container is large enough to accommodate the growing plant and has good drainage. Make sure to water the cabbage regularly and provide it with plenty of sunlight.
Common pests that affect curly cabbage include aphids, cabbage worms, and slugs. Diseases such as clubroot and black rot can also affect the plant. Using insecticidal soap and practicing crop rotation can help prevent and manage these issues.
Yes, the leaves of curly cabbage are edible and can be used in salads, stir-fries, and other dishes. They have a slightly peppery flavor and can add texture and color to meals.
Curly cabbage can be stored in the refrigerator for up to 2 weeks. Keep it in a plastic bag or wrap it in a damp paper towel to help retain its freshness.
