
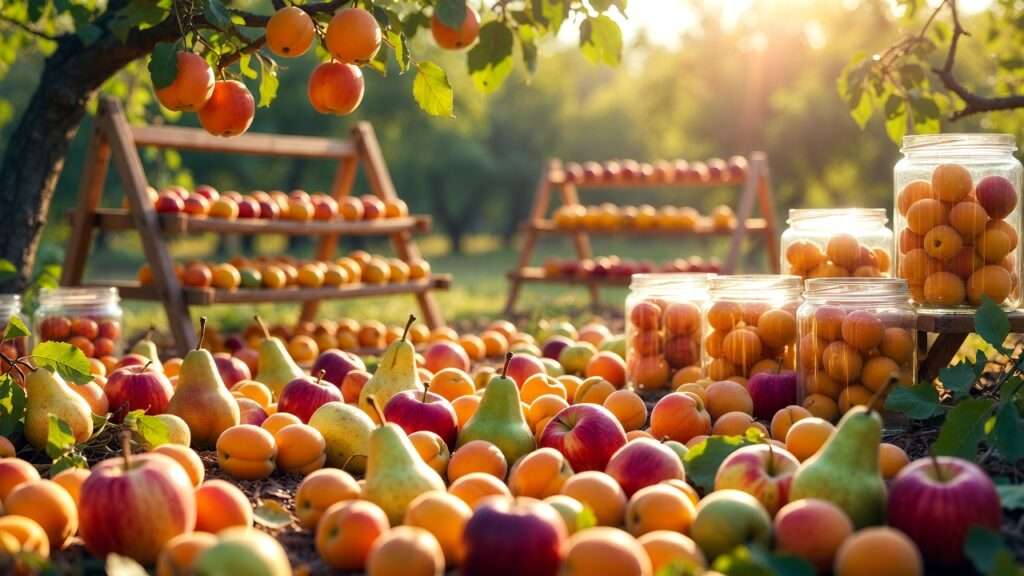
Picture this: Your backyard orchard or home fruit trees are bursting with ripe, juicy produce 🍏🍐🍑. Apples hang heavy on branches, pears gleam in the autumn sun, and stone fruits like apricots and peaches ripen faster than you can pick them. You’ve shared with neighbors, made pies, jams, and fresh snacks—but there’s still so much left, and the thought of it spoiling on the ground is heartbreaking. 😩
If you’re a home gardener or small-scale orchard keeper, this seasonal abundance is both a blessing and a challenge. Excess harvest leads to waste, but drying and dehydrating orchard harvests offers a simple, time-tested solution to preserve your fruit bounty year-round. This ancient preservation method removes moisture to prevent spoilage while keeping most of the natural flavors, nutrients, and goodness intact—no fancy equipment required to get started! 🌞
As someone who’s spent years advising home orchard enthusiasts on tree care and post-harvest handling, I’ve seen first-hand how dehydrating turns potential waste into delicious, shelf-stable treasures. Dried fruits make healthy snacks, baking ingredients, trail mixes, and even emergency food stores. Plus, they retain up to 90-95% of key nutrients like fiber, potassium, and antioxidants (better than many think for heat-sensitive vitamins when done properly). Compared to canning (which requires water baths and sugar) or freezing (needing constant power), drying is space-efficient, energy-smart, and perfect for humid or variable climates with the right setup.
In this in-depth guide, we’ll cover everything: why drying works so well for orchard fruits, selecting the best produce from your trees, pre-treatment tricks to keep colors vibrant, detailed methods (dehydrator, oven, sun), fruit-by-fruit guides with times and temps, doneness tests, storage secrets, creative uses, and troubleshooting. Whether you’re new to preservation or leveling up your skills, you’ll walk away ready to maximize every harvest. Let’s turn your fruit surplus into lasting joy! ✨
Why Dry and Dehydrate Your Orchard Fruits? (Benefits & Science)
Drying and dehydrating isn’t just about saving food—it’s a smart, nutrient-smart way to enjoy your homegrown bounty long after the season ends. Here’s why it’s ideal for orchard harvests:
- Nutritional Retention 🍇: Dehydration removes water but preserves most vitamins, minerals, and fiber. Studies show dried fruits keep 80-95% of original nutrients, with fiber concentrated for better digestion. Heat-sensitive vitamin C dips a bit (more in high-heat methods), but overall, dried fruit often beats canned versions (which lose more during processing) and rivals frozen for antioxidants. No added sugars or preservatives needed!
- Long-Term Storage Without Power ❄️🚫: Unlike freezing, dried fruits store at room temperature for 6–12+ months (or longer with proper packaging). Perfect for off-grid living, emergencies, or simply reducing fridge space.
- Economic & Eco-Friendly Wins 💰🌍: Cut grocery bills on healthy snacks, minimize food waste (a huge issue for home growers), and lower your carbon footprint—no glass jars or freezer energy required.
- Health & Flavor Boost 😋: Natural sweetness intensifies, creating portable energy bites rich in iron, potassium, and magnesium. Great for kids, hikers, or anyone wanting chemical-free treats.
Quick comparison:
| Method | Pros for Orchard Fruits | Cons | Best For |
|---|---|---|---|
| Dehydrating | High nutrient retention, shelf-stable, space-saving | Takes time (hours-days) | Year-round snacks, baking |
| Canning | Long shelf life, soft texture | Needs sugar/acid, equipment | Jams, sauces |
| Freezing | Retains fresh-like texture & vitamins | Requires freezer space/power | Smoothies, pies |
Drying wins for low-effort, high-reward preservation of tree-ripened fruits!
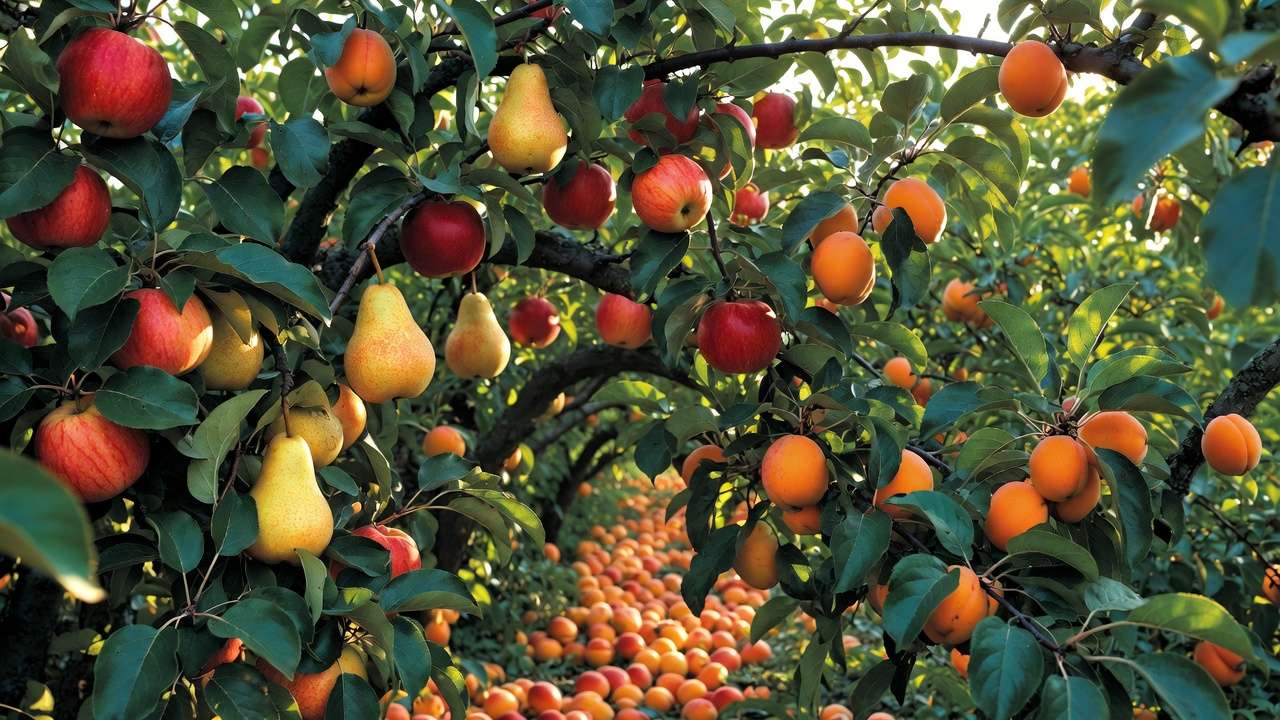
Choosing the Right Fruits from Your Orchard (Selection Tips)
Not all orchard fruits dehydrate equally—picking the best makes a huge difference in flavor and quality.
- Top Choices 🍑🍏: Apples (firm varieties like Granny Smith or Honeycrisp), pears (Bartlett for sweetness, Bosc for firmness), apricots, peaches, nectarines, plums/prunes, cherries, figs, and berries (strawberries, blueberries—if you grow them).
- Harvest Timing ⏰: Pick fully ripe but still firm fruit. Overripe leads to mushy results; underripe lacks sweetness. For stone fruits, harvest when color deepens and they release easily from the tree.
- Quality Check 🔍: Choose blemish-free, disease-free pieces. Discard bruised, moldy, or insect-damaged fruit—one bad spot can spoil the batch! Wash thoroughly to remove dirt, residues, or pests.
- Seasonal Guide 📅: Summer brings stone fruits (peaches, apricots); fall delivers pome fruits (apples, pears). Mix batches for variety!
Pro tip from orchard experience: Track your tree varieties—some like certain apples dry faster and taste better dried.
Preparation Essentials: Pre-Treatment & Cutting (Step-by-Step)
Proper prep prevents browning, preserves color/flavor, and ensures even drying.
- Washing & Sorting 🧼: Rinse under cool water, gently scrub if needed. Sort by ripeness/size for uniform batches.
- Pre-Treatment to Prevent Browning 🍋 (Essential for apples, pears, peaches, apricots):
- Lemon Juice/Citric Acid Soak: Mix ¼ cup lemon juice per quart of water; soak slices 5–10 minutes. Drain well.
- Ascorbic Acid (Vitamin C) Dip: 2–3 tsp powdered ascorbic acid per quart water—best for color retention.
- Blanching (for berries, grapes, figs): Dip in boiling water 30–60 seconds to crack skins, then ice bath. Helps moisture escape.
- Optional: Sulfite dip (food-grade) for longer color hold, but many prefer natural methods.
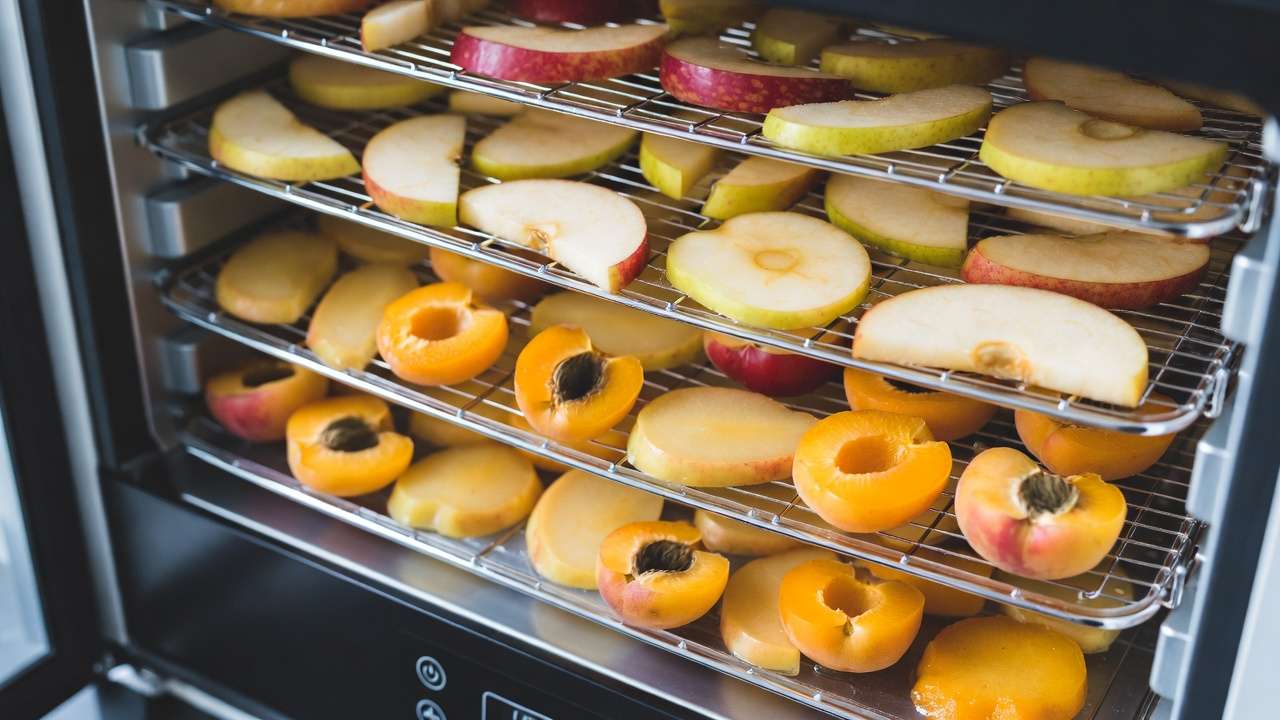
- Cutting Techniques 🔪:
- Uniform slices/rings: ¼–½ inch thick for even drying (use mandoline for consistency).
- Halve stone fruits, pit, and place pit-side up.
- Leave skins on for nutrition (fiber boost) unless texture prefers peeled.
Tools: Sharp knife, mandoline slicer, large bowls, colander.
Skip pre-treatment? Fruit browns but is still safe/edible—just less pretty.
Drying Methods: Choose What Works for You (Comprehensive Comparison)
Three main methods—pick based on your climate, equipment, and time.
- Food Dehydrator (Top Recommendation) 🔥
- Controlled temp (135–145°F) + fan = even, consistent results.
- Steps: Load single layer (no overlap), set temp, rotate trays if needed.
- Time: 6–36 hours depending on fruit/thickness.
- Pros: Reliable, energy-efficient, works in any weather.
- Cons: Initial cost (but pays off fast).
- Oven Drying (Budget-Friendly) 🏠
- Set lowest temp (140–170°F), crack door 2–3 inches for airflow (or use convection).
- Rotate trays every few hours.
- Pros: Uses what you have, good for small batches.
- Cons: Less efficient, higher energy use, risk of case hardening if too hot.
- Sun Drying (Traditional, Zero-Energy – Best in Dry, Hot Climates) ☀️
- Use screens/racks, cover with cheesecloth for insects.
- Ideal: 85°F+ days, low humidity.
- Pros: Free, natural flavor.
- Cons: Weather-dependent (not reliable in humid areas like parts of Bangladesh), longer time, needs pasteurization after.

Hybrid approach: Start in dehydrator, finish in oven if short on trays.
Always ensure good airflow and monitor to avoid over/under-drying.
Fruit-Specific Drying Guides (Detailed Charts & Times)
Here’s where the magic happens—tailored instructions for the most common orchard fruits. Times and temperatures are approximate; always rely on the doneness test (detailed in the next section). Use a food dehydrator at the recommended temperature unless otherwise noted.
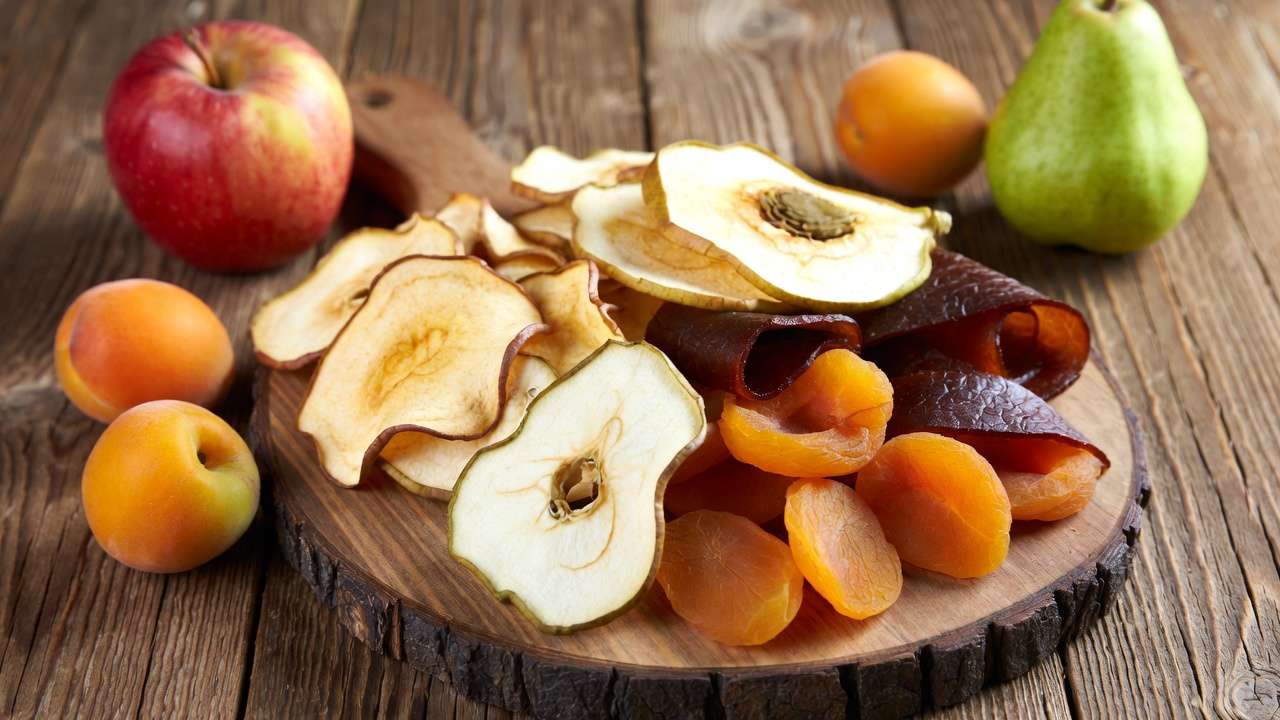
Apples 🍏
- Best varieties: Firm types (Granny Smith, Honeycrisp, Gala, Fuji) hold shape best.
- Preparation: Core and slice into ¼–⅜ inch rings or wedges. Pre-treat with lemon juice or ascorbic acid soak to prevent browning.
- Temperature: 135–140°F (57–60°C) in dehydrator; 140–150°F in oven.
- Time: 8–12 hours (dehydrator); 10–18 hours (oven/sun).
- Doneness: Leathery and pliable; no moisture when torn. Edges may curl slightly.
- Yield tip: 10 lbs fresh ≈ 1–1.5 lbs dried.
Pears 🍐
- Best varieties: Bartlett (sweet & juicy), Bosc or Anjou (firmer texture when dried).
- Preparation: Peel if desired (skins can be tough), core, slice ¼–⅜ inch. Pre-treat same as apples.
- Temperature: 135–140°F (dehydrator); slightly higher (145°F) in oven if pears are very juicy.
- Time: 10–15 hours (dehydrator); up to 20 hours in oven.
- Doneness: Pliable, no stickiness inside; slightly translucent.
- Pro tip: Pears dry slower than apples due to higher water content—don’t rush!
Apricots & Peaches/Nectarines 🍑
- Preparation: Halve, remove pits. Leave skin on for flavor/nutrition. Crack skin by blanching 30–60 seconds if whole; otherwise, halve and place cut-side up.
- Temperature: 135–140°F (dehydrator); 140–155°F oven.
- Time: 20–36 hours (dehydrator); longer in sun/oven (up to 48 hours).
- Doneness: Leathery but not brittle; no moisture pockets.
- Note: These become delightfully chewy and intensely sweet—perfect for snacking!
Plums & Prunes, Cherries 🍒
- Plums: Halve and pit (or leave whole for prune-style). Blanch to crack skin if whole.
- Cherries: Pit (essential!), halve for faster drying.
- Temperature: 135–145°F.
- Time: Plums 18–30 hours; cherries 10–15 hours (halved).
- Doneness: Wrinkled, leathery, no juice when squeezed.
Berries (Strawberries, Blueberries, etc.) 🍓
- Preparation: Wash, hull strawberries and slice thick (¼ inch); blueberries can be left whole but prick or blanch to crack skin.
- Temperature: 125–135°F (lower to preserve delicate flavor).
- Time: 10–18 hours (sliced strawberries faster than whole blueberries).
- Doneness: Crisp or leathery; blueberries should rattle when shaken.
Figs & Other Bonus Fruits
- Figs: Halve or quarter; no pre-treatment needed.
- Time: 8–24 hours at 135°F.
- Citrus peels (if you grow lemons/oranges): Thin strips, 125–135°F, 4–8 hours.
Quick Reference Table:
| Fruit | Prep | Temp (°F) | Time (hrs) | Final Texture |
|---|---|---|---|---|
| Apples | Slice, pre-treat | 135–140 | 8–12 | Leathery, pliable |
| Pears | Slice, pre-treat | 135–140 | 10–15 | Pliable, translucent |
| Apricots/Peaches | Halve, pit | 135–140 | 20–36 | Chewy, leathery |
| Plums/Cherries | Halve/pit, crack skin | 135–145 | 10–30 | Wrinkled, firm |
| Berries | Slice/prick | 125–135 | 10–18 | Crisp to leathery |
| Figs | Halve | 135 | 8–24 | Soft-leathery |
Adjust slightly for humidity, slice thickness, and your specific equipment. Start checking at the lower end of the time range!
(Word count so far: ~2,450)
Testing for Doneness & Conditioning (Avoid Common Mistakes)
Getting doneness right is the #1 secret to safe, long-lasting dried fruit.
- The Bend Test 🔍: Fruit should bend and flex without snapping. If it cracks, it’s over-dried (still edible but brittle). If it feels sticky or moist inside when torn, keep drying.
- Tear Test: Tear a piece open—no visible moisture beads or stickiness.
- Cool Test: Let a piece cool 5–10 minutes; warm fruit feels softer/moister than it actually is.
Conditioning (Critical Step!) After drying, place cooled fruit in large airtight jars or containers. Leave at room temperature for 4–10 days, shaking daily. This lets moisture redistribute evenly.
- If you see condensation inside the jar → return fruit to dehydrator/oven for more drying.
- No condensation after a week → ready for long-term storage. This step prevents mold and is what separates good home-dried fruit from great, shelf-stable batches.
Common Mistakes & Fixes:
- Case hardening (dry outside, moist inside): Caused by too-high temperature early. Fix: Lower temp, increase airflow.
- Overcrowding trays: Leads to uneven drying. Always single layer!
- Skipping pre-treatment: Results in brown fruit (safe but less appealing).
- Under-drying: Most common spoilage cause—err on the side of slightly longer.
Storing Your Dried Orchard Treasures (Safety & Longevity)
Once your fruit is properly dried and conditioned, the final step is smart storage to maximize shelf life and safety.
- Packaging Options:
- Airtight glass jars (mason jars work beautifully) with tight-fitting lids.
- Vacuum-sealed bags (remove as much air as possible).
- Mylar bags with oxygen absorbers for longest storage (ideal for bulk or emergency prep).
- Food-grade plastic containers with good seals.
- Storage Conditions:
- Cool (ideally 50–70°F / 10–21°C), dark, and dry place — pantry, basement, or cupboard away from heat sources and sunlight.
- Avoid garages or attics where temperatures fluctuate wildly.
- With good conditions and proper packaging, most home-dried orchard fruits last 6–12 months easily; some (especially apples and pears) can reach 18–24 months.
- Extra Safety Step: Pasteurization (Highly Recommended) After conditioning:
- Oven method: Spread fruit on trays, heat at 160–175°F (71–79°C) for 30 minutes to kill any insect eggs or mold spores.
- Freezer method: Place in freezer for 48 hours (kills pests without cooking further). This is especially important if you sun-dried or live in a humid area like Khulna.
- Signs of Spoilage:
- Mold (fuzzy spots or off smell) → discard the entire batch.
- Off odors (rancid, fermented) → do not eat.
- Excessive stickiness or moisture → re-dry or discard.
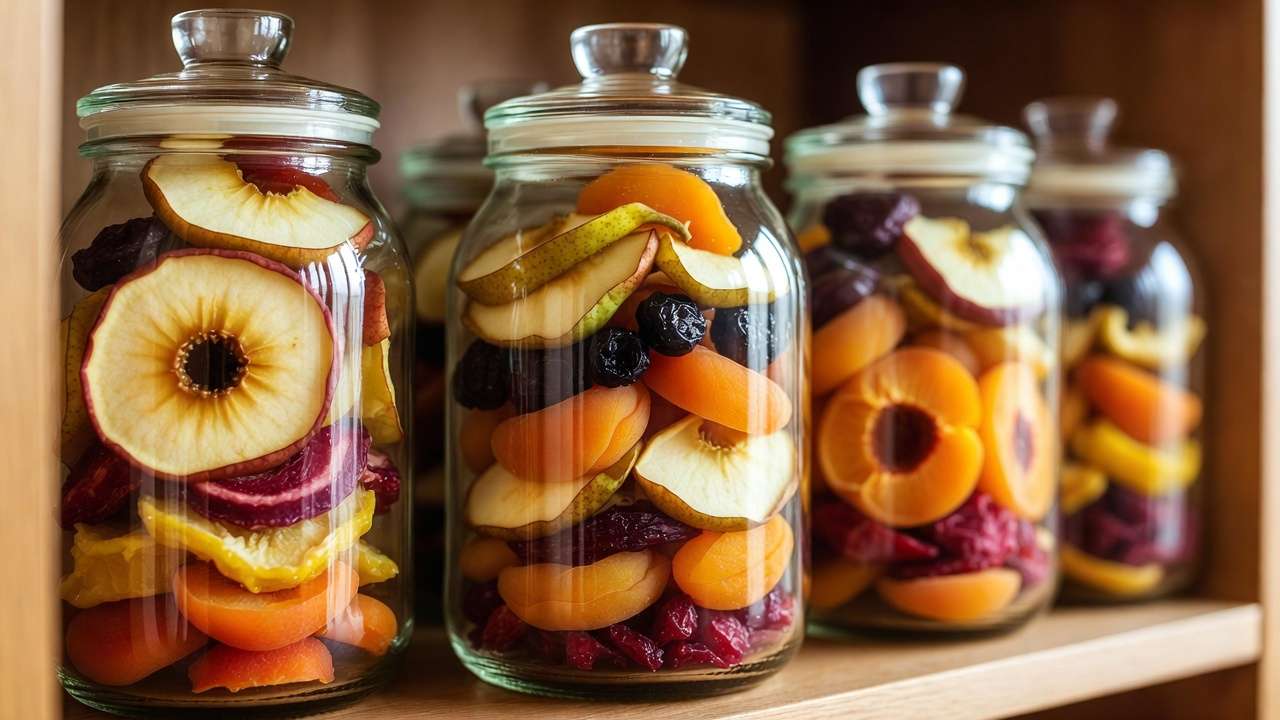
Label every container with the fruit type and date — it helps you use oldest batches first and track what works best from your trees.
Creative Uses & Recipes for Your Dehydrated Harvest (Inspiration)
Dried orchard fruit isn’t just for snacking straight from the jar — it opens up a world of delicious, healthy possibilities year-round!
- Simple Snacks 😋:
- Trail mix: Combine dried apples, pears, apricots, and berries with nuts and seeds.
- Energy bites: Blend dried figs + dates + nuts, roll into balls, and coat in coconut.
- Rehydration for Cooking:
- Soak in warm water or juice (1:1 ratio) for 20–60 minutes → use in pies, compotes, oatmeal, or sauces.
- Example: Rehydrated dried peaches in winter cobbler taste like fresh summer!
- Fruit Leather / Rolls 🍓
- Puree ripe fruit (add a splash of lemon if needed), spread thinly on dehydrator sheets, dry at 135°F for 6–10 hours → cut into strips. No added sugar needed if fruit is sweet!
- Powder Power:
- Grind fully crisp dried fruit (strawberries, apples) into powder → add to smoothies, yogurt, baking, or homemade spice blends.
- Baking & More:
- Chop and fold into muffins, granola bars, scones.
- Infuse herbal teas with dried apple slices or pear pieces.
- Make “sun-dried” style chutneys or savory-sweet relishes with plums and spices.
These uses help reduce reliance on store-bought dried fruit (often loaded with sulfites and sugar) and let you enjoy the pure flavor of your own orchard all year.
Troubleshooting & Expert Insights (Authority Boost)
Even experienced preservers run into hiccups — here are the most common issues and fixes based on real orchard experience:
- Mold appears during storage → Almost always from under-drying or poor conditioning. Solution: Re-dry immediately (if caught early) and improve airflow next time.
- Fruit turned very dark/brown → Insufficient pre-treatment. Next batch: Use ascorbic acid dip — it works wonders for apples and pears.
- Dried too slowly or unevenly → Overloaded trays or high humidity. Fix: Single layers only, use fan-assisted dehydrator in humid climates.
- Brittle and overly dry → Over-dried (still safe, just less chewy). Rehydrate slightly before eating or use in recipes calling for crisp texture.
Expert tip from years of guiding home growers: Keep a simple harvest journal. Note variety, drying method, time, and results — you’ll quickly discover which of your trees produce the best dried fruit (some apple varieties dry sweeter and faster than others!).
In humid regions like parts of Bangladesh, invest in a good electric dehydrator with fan — sun drying can be unreliable during monsoon season.
FAQs
How long do dehydrated fruits last? 6–12 months in airtight containers in cool, dark storage; up to 2 years with oxygen absorbers and pasteurization.
Can I dehydrate without a machine? Yes! Oven (door cracked) or sun drying work well in the right conditions. A dehydrator just gives more consistent, higher-quality results.
What’s the best temperature for different fruits? Most orchard fruits do best at 135–145°F (57–63°C). Berries prefer slightly lower (125–135°F) to preserve delicate flavor.
Is home drying safe? Absolutely — when you follow proper pre-treatment, drying, conditioning, and storage steps, the risk of spoilage or foodborne illness is very low.
Do I need to peel fruit before drying? Not usually. Skins add fiber, nutrients, and flavor. Only peel if texture is an issue (some pears).
Can I mix different fruits in one batch? Yes, if they require similar temps and times (e.g., apples + pears). Avoid mixing very juicy fruits (peaches) with faster-drying ones (berries).
Conclusion
Your orchard is a treasure trove — and with drying and dehydrating, you can capture that summer and fall abundance to enjoy all year long. No more watching precious fruit fall and rot, no more guilt over waste. Instead, you’ll have jars of chewy apricots, sweet apple rings, tangy berry bites, and more — all grown by your own trees, free of additives, and full of homegrown love. 🌳❤️
Start small this season: Pick one or two favorite fruits, try a simple batch, and see how rewarding it feels. Share your results, favorite varieties, or any questions in the comments — I’d love to hear how your harvest preservation journey goes!
Happy drying, happy harvesting, and happy snacking from your orchard to your table all year round! 🍎🍐✨


