

Picture this: you’re savoring a sweet, juicy fig plucked straight from a tree you grew from a single cutting, all without spending a dime on nursery plants! Propagating fig tree cuttings is not only a budget-friendly way to expand your garden but also a deeply rewarding journey that connects you to nature. Whether you’re a beginner gardener or a seasoned green thumb, this comprehensive guide will walk you through every step of successfully propagating fig trees, ensuring you avoid common pitfalls and grow thriving plants. Backed by over a decade of horticultural expertise and trusted agricultural research, this article delivers practical, actionable advice to help you cultivate your own fig trees with confidence. Ready to grow your own food and preserve heirloom varieties? Let’s dive in! 🌿
1. Understanding Fig Tree Propagation 🌿
1.1 What Are Fig Tree Cuttings?
Fig tree cuttings are sections of a fig tree’s stem (Ficus carica) used to grow new, genetically identical plants. These cuttings, typically 6-12 inches long, contain nodes where roots and leaves can develop. Figs are ideal for propagation due to their resilience and adaptability across various climates (USDA zones 6-9). Unlike seed propagation, which can produce unpredictable results, cuttings ensure your new tree mirrors the parent plant’s traits—perfect for preserving flavors or unique characteristics of heirloom varieties like ‘Brown Turkey’ or ‘Celeste.’
Why it’s valuable: Propagation allows you to multiply your fig trees for free, share with friends, or create a small orchard without buying saplings. It’s a sustainable practice that reduces reliance on commercial nurseries and fosters a deeper connection to your garden.
1.2 Why Propagate Fig Trees?
Propagating fig trees offers multiple benefits:
- Economic: Save money by growing new trees instead of purchasing them (nursery saplings can cost $20-$50 each).
- Environmental: Reduce the carbon footprint associated with commercial plant production and transport.
- Emotional: There’s a unique joy in nurturing a cutting into a fruit-bearing tree, especially if it’s from a family heirloom or a neighbor’s prized fig tree.
Example: Imagine propagating a cutting from your grandmother’s fig tree, preserving its legacy for future generations. This personal connection makes propagation more than just gardening—it’s storytelling through plants.
2. Preparing for Propagation 🛠️
2.1 Best Time to Take Fig Tree Cuttings ⏰
Timing is critical for successful propagation. The best periods are:
- Late winter to early spring (dormant season): Hardwood cuttings taken when the tree is dormant have a higher success rate due to stored energy in the stems.
- Early summer (softwood cuttings): Younger, green stems root faster but require more care to prevent wilting.
Why it matters: Aligning with the tree’s natural growth cycle maximizes rooting success. For example, in USDA zones 6-7, late February to early March is ideal for hardwood cuttings, while zones 8-9 may allow summer propagation. Adjust for your local climate to optimize results.
Tip: Check your local frost dates to avoid taking cuttings during extreme cold or heat, which can stress the plant.
2.2 Tools and Materials Needed 🧰
To propagate fig tree cuttings, gather these essentials:
- Clean, sharp pruning shears: Ensure precise cuts and sterilize with rubbing alcohol to prevent disease.
- Rooting hormone: Powder or gel to stimulate root growth (optional but recommended).
- Pots: 4-6 inch pots with drainage holes.
- Soil mix: A well-draining blend, such as 50% perlite and 50% peat moss or coconut coir.
- Optional tools: Misting bottle, heat mat, or humidity dome to maintain moisture and warmth.
Pro tip: Invest in a high-quality soil mix to avoid waterlogging, which is a common cause of cutting failure.
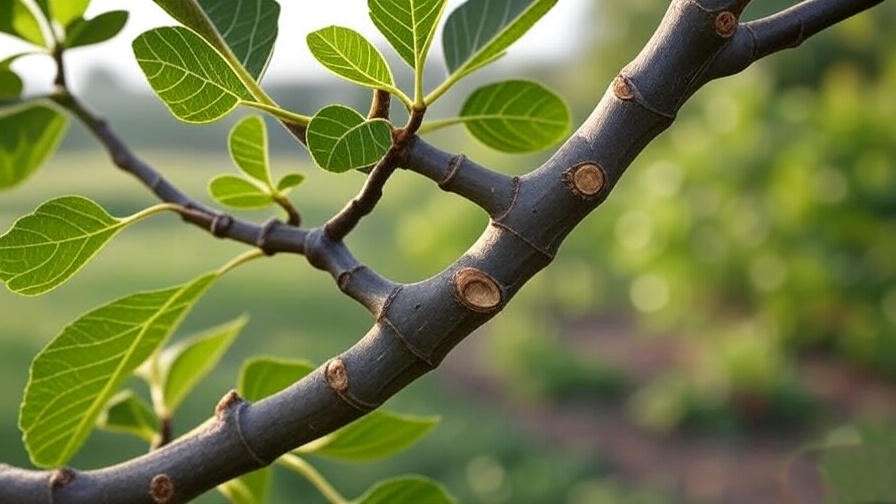
2.3 Choosing the Right Fig Tree Cutting 🌱
Not all cuttings are created equal. Here’s how to select the best:
- Healthy branches: Choose stems from a vigorous, disease-free tree. Look for firm, green (for softwood) or woody (for hardwood) stems.
- Size: Cuttings should be 6-12 inches long with 3-5 nodes (the bumps where leaves or roots can grow).
- Age: Hardwood cuttings (from last season’s growth) are sturdier, while softwood cuttings (new growth) root faster but are more delicate.
Expert insight: Inspect the parent tree for signs of pests or disease, such as discolored leaves or sticky residue. A healthy cutting from a healthy tree is the foundation of successful propagation.
3. Step-by-Step Guide to Propagating Fig Tree Cuttings 🌲
3.1 Step 1: Taking the Cutting ✂️
- How to cut: Use sharp shears to make a 45-degree angle cut just below a node. This increases the surface area for root growth.
- Length and thickness: Aim for 6-12 inches long and pencil-thick (about ¼-½ inch in diameter).
- Visual guide: Imagine slicing just below a node, leaving 3-5 nodes above for potential leaf growth.
Example: For a ‘Celeste’ fig tree, select a straight, healthy branch from the previous season’s growth, cutting just below a node to maximize rooting potential.
3.2 Step 2: Preparing the Cutting 🧪
- Remove lower leaves: Strip leaves from the bottom half of the cutting to reduce moisture loss and prevent rot.
- Apply rooting hormone: Dip the cut end in rooting hormone powder or gel to encourage faster root development. While optional, studies show it can increase success rates by 10-15%.
- Hydration tip: Soak the cutting in water for 1-2 hours before planting to boost moisture levels.
Pro tip: If using rooting hormone, tap off excess to avoid clumping, which can hinder root formation.
3.3 Step 3: Planting the Cutting 🌍
- Potting process: Fill a pot with your well-draining soil mix. Insert the cutting 2-3 inches deep, ensuring at least two nodes are buried.
- Watering: Water thoroughly until water drains from the bottom, then maintain consistent moisture without soaking.
- Mini-greenhouse: Cover the pot with a clear plastic bag or humidity dome to trap moisture, mimicking greenhouse conditions.
Example: A 6-inch pot with a 50/50 perlite-peat mix provides the perfect balance of drainage and moisture retention for fig cuttings.

3.4 Step 4: Caring for the Cutting During Rooting 🌞
- Light: Place in indirect sunlight or under grow lights for 6-8 hours daily. Direct sun can scorch delicate cuttings.
- Temperature: Maintain 65-75°F (18-24°C) for optimal rooting. A heat mat can help in cooler climates.
- Watering schedule: Mist the cutting and soil daily to keep humidity high, but check soil weekly to avoid overwatering.
- Timeline: Expect roots to form in 4-8 weeks, depending on conditions and cutting type.
Expert insight: Patience is key—resist the urge to tug on cuttings to check for roots, as this can damage fragile new growth.
4. Troubleshooting Common Issues 🐞
4.1 Why Isn’t My Cutting Rooting?
If your cutting isn’t rooting, consider these culprits:
- Overwatering: Soggy soil suffocates roots. Ensure proper drainage and reduce watering frequency.
- Poor drainage: Switch to a lighter soil mix (e.g., add more perlite).
- Low humidity: Increase humidity with a dome or daily misting.
Solution: Check soil moisture with a finger test—if it’s wet beyond the top inch, let it dry out slightly before watering again.
4.2 Dealing with Wilting or Yellowing Cuttings 🍂
- Causes: Too much sun, insufficient water, or nutrient deficiencies in the soil.
- Fixes: Move to a shadier spot, adjust watering, or add a diluted liquid fertilizer (e.g., 1/4 strength balanced NPK) after roots form.
- Tool tip: A moisture meter ($10-$20) can help you monitor soil conditions accurately.
Expert insight: Yellowing often signals overwatering or fungal issues. If you spot mold, remove affected areas and improve air circulation.
5. Transplanting Rooted Cuttings 🌴
5.1 When to Transplant
Your cutting is ready to transplant when:
- Roots are visible through the pot’s drainage holes.
- The cutting has 2-3 new leaves, indicating established roots.
- Typically, this occurs 8-12 weeks after planting.
Tip: Gently tug the cutting—if there’s resistance, roots are likely established.
5.2 How to Transplant Successfully
- Choose the right pot or garden spot: Use a 1-gallon pot or a well-draining garden bed with loamy soil.
- Hardening off: Gradually expose the cutting to outdoor conditions over 7-10 days to prevent shock. Start with 1-2 hours of morning sun, increasing daily.
- Transplanting checklist:
- Dig a hole twice the root ball’s width.
- Place the cutting at the same depth as in the pot.
- Water thoroughly and mulch to retain moisture.
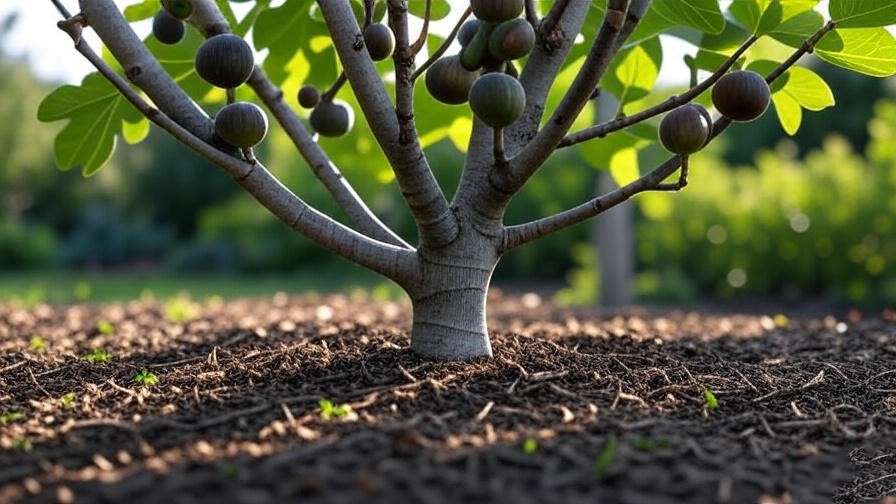
Example: Transplanting a rooted ‘Brown Turkey’ cutting to a sunny garden spot with well-draining soil ensures healthy growth.

6. Long-Term Care for Your New Fig Tree 🌞
6.1 Watering and Fertilizing
Once your fig tree cutting has rooted and been transplanted, proper care ensures it thrives.
- Watering schedule: Water deeply but infrequently, about once a week, allowing the top inch of soil to dry out between sessions. Young fig trees need consistent moisture, but overwatering can lead to root rot. In hot climates, increase frequency slightly during summer.
- Fertilizing: Apply a balanced fertilizer (e.g., 10-10-10 NPK) every 4-6 weeks during the growing season (spring to early fall). Start with a half-strength dose for newly transplanted trees to avoid root burn. Organic options like compost or fish emulsion work well for sustainable gardening.
- Tip: Test soil pH (ideal range: 6.0-6.5) to ensure nutrient availability. Adjust with lime if too acidic or sulfur if too alkaline.
Example: A young fig tree in a Mediterranean climate might need 1-2 gallons of water weekly in summer, paired with a monthly dose of organic fertilizer to promote steady growth.
6.2 Pruning and Training
Pruning shapes your fig tree and boosts fruit production.
- When to prune: Late winter, before new growth begins, is ideal. This minimizes stress and encourages vigorous spring growth.
- How to prune:
- Remove dead or damaged branches.
- Thin crowded areas to improve air circulation and light penetration.
- For bushy growth, cut back the main stem to 2-3 feet; for a single trunk, remove lower side branches.
- Training: Use stakes or ties to guide young trees, especially if aiming for a specific shape (e.g., espalier for space-saving).
Expert insight: Pruning stimulates fruiting wood, so focus on cutting back older branches to encourage new shoots, which produce figs. A well-pruned tree can yield 10-20 pounds of fruit annually once mature.
6.3 Protecting Your Fig Tree
Fig trees are hardy but need protection in certain conditions.
- Winter care: In colder climates (USDA zones 6-7), mulch around the base with straw or wood chips (3-4 inches thick) to insulate roots. Wrap young trees in burlap or frost cloth during freezes to prevent branch dieback.
- Pest management: Common pests include aphids, scale, and spider mites. Use organic solutions like neem oil spray (1 tsp per quart of water) or introduce beneficial insects like ladybugs.
- Disease prevention: Watch for root rot (caused by overwatering) or leaf spot (fungal). Ensure good drainage and remove affected leaves promptly.
Example: A DIY neem oil spray (1 tsp neem oil, 1/2 tsp dish soap, 1 quart water) applied every 7-10 days can deter aphids without harming pollinators.
7. Expert Tips for Maximizing Success 🚀
To elevate your propagation game, try these expert-backed strategies:
- Use bottom heat: A heat mat set to 70°F (21°C) can speed up rooting by 20-30%, especially for hardwood cuttings in cooler climates.
- Take multiple cuttings: Plant 3-5 cuttings per batch to increase your chances of success. Not all will root, but this hedges your bets.
- Keep a propagation journal: Record cutting type, rooting hormone use, soil mix, and environmental conditions to identify what works best in your climate.
- Experiment with varieties: Some fig varieties, like ‘Black Mission’ or ‘Kadota,’ root more readily than others. Test different types to find your favorite.
Expert insight: Horticulturists scaling up for small orchards often propagate dozens of cuttings simultaneously, using misting systems to maintain consistent humidity. For home gardeners, a simple plastic bag over a pot can achieve similar results on a smaller scale.

8. FAQs About Fig Tree Cuttings ❓
Here are answers to common questions to guide your propagation journey:
- Q1: How long does it take for fig tree cuttings to root?
- A: Typically 4-8 weeks, depending on cutting type, season, and conditions. Softwood cuttings may root faster (4-6 weeks), while hardwood takes longer (6-8 weeks).
- Q2: Can I propagate fig cuttings in water?
- A: Yes, but water propagation is less reliable for figs, as roots may be weaker and prone to rot. Soil propagation with a well-draining mix is preferred for stronger root systems.
- Q3: What are the best fig varieties for cuttings?
- A: ‘Brown Turkey,’ ‘Celeste,’ and ‘Black Mission’ are beginner-friendly due to their hardiness and high rooting success rates.
- Q4: Do I need rooting hormone for fig cuttings?
- A: It’s optional but boosts success rates by 10-15%, especially for hardwood cuttings or less vigorous trees.
- Q5: Can I propagate fig cuttings year-round?
- A: Late winter and early summer are best, but with controlled conditions (e.g., heat mats, grow lights), propagation is possible year-round in milder climates.
9. Conclusion 🌟
Propagating fig tree cuttings is a simple yet rewarding way to grow your own fruit trees, save money, and connect with nature. By following this step-by-step guide, you’ll master the art of taking, planting, and caring for cuttings, transforming a small stem into a thriving fig tree that could bear fruit for decades. From selecting the perfect cutting to transplanting and long-term care, every stage is an opportunity to hone your gardening skills and create a sustainable legacy.
Ready to start? Grab your shears, pick a healthy branch, and begin your propagation journey today! Share your progress with fellow gardeners on platforms like X using #FigTreePropagation, and download our free propagation checklist (linked below) to stay on track. Happy growing up! 🌳


