
Imagine stepping into your garden and being greeted by a tiny, living forest — a cluster of miniature trees rising together in harmonious layers, evoking the serene depth of an ancient woodland, all contained in a single shallow tray. This captivating scene isn’t a far-off dream; it’s the art of forest bonsai planting techniques, also known as yose-ue in traditional Japanese bonsai. Whether you’re a beginner drawn to the magic of group plantings or an experienced enthusiast seeking to elevate your collection, mastering these techniques transforms individual trees into a breathtaking miniature landscape that tells a story of nature’s quiet grandeur.
In this comprehensive guide, we’ll dive deep into proven forest bonsai planting techniques to help you create a realistic, thriving bonsai grove. You’ll learn species selection, composition principles for depth and perspective, detailed step-by-step planting, aftercare, and advanced tips that go beyond basic tutorials. By the end, you’ll have the confidence and knowledge to craft your own woodland masterpiece — solving the common frustrations of awkward spacing, poor depth illusion, or trees that simply don’t “feel” like a natural forest.
What Is Forest Bonsai (Yose-ue Style)?
Forest bonsai, or yose-ue (group planting), recreates the illusion of a natural woodland using multiple trees of the same species planted closely in a wide, shallow container. Unlike a single specimen bonsai, the focus here is on collective harmony: varying trunk thicknesses, heights, and subtle angles create layers of depth, mimicking how trees grow in wild forests — dominant elders in the foreground, younger saplings receding into the background.
This style emphasizes realism over symmetry. No two trunks align perfectly, and the overall composition avoids artificial evenness. The result? A dynamic scene that draws the eye deeper into the “landscape,” making a small pot feel vast and immersive.
Why pursue forest bonsai? It offers therapeutic satisfaction, showcases seasonal changes dramatically (think autumn maples in fiery reds or pine mists in winter), and allows creativity in storytelling — perhaps evoking a misty mountain grove or a sun-dappled glade.
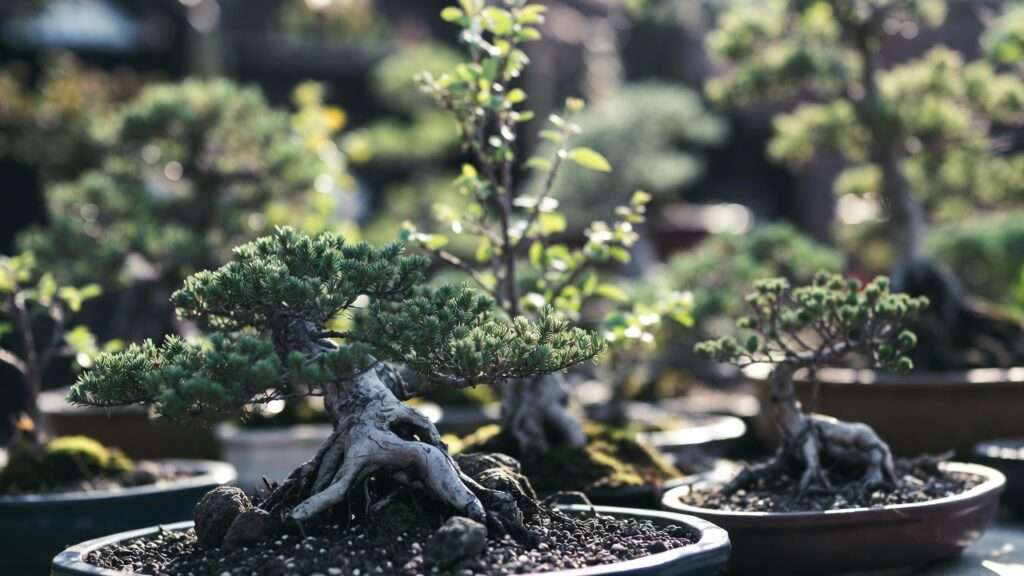
(Here’s an inspiring example of a mature yose-ue forest bonsai with layered depth and natural trunk variation 🌲)
Choosing the Right Trees for Your Forest Bonsai
The foundation of successful forest bonsai planting techniques lies in material selection. All trees in a true yose-ue must be the same species to maintain botanical harmony and consistent care needs.
Top recommended species for stunning forests:
- Japanese Maple (Acer palmatum) — Delicate leaves, brilliant fall color, excellent for depth with fine branching. Ideal for beginners due to forgiving growth.
- Chinese Elm (Ulmus parvifolia) — Fast-growing, small leaves, resilient to pruning and wiring. Great for dense canopies.
- Trident Maple (Acer buergerianum) — Sturdy trunks, vibrant autumn hues, strong radial roots for close planting.
- Junipers (Juniperus spp.) — Evergreen texture, rugged character, perfect for rocky or mountainous themes.
- Ficus (Ficus retusa or microcarpa) — Indoor-friendly, vigorous, small leaves for realistic scale.
- Pines (e.g., Black Pine or Scots Pine) — Classic for traditional forests, but slower and more demanding.
Avoid mixing species in one pot — differing growth rates, watering needs, and aesthetics disrupt unity.
Key selection criteria:
- Use an odd number of trees (5, 7, 9, 11+) for natural asymmetry.
- Vary trunk caliper and height dramatically: 1-2 dominant “parent” trees (thickest, tallest), medium supports, and smaller “understory” trees for background depth.
- Source young nursery stock, pre-bonsai, or seedlings — mature singles work but require heavy root work.
- Ensure healthy roots and no major defects; minor flaws add character in a group.
Pro tip: Start with 2-3x more trees than needed — extras allow perfect composition tweaks.
Essential Tools and Materials
Gather these before starting:
- Wide, shallow bonsai pot (oval or rectangular, unglazed earth tones for natural look)
- Bonsai soil mix (e.g., 50% Akadama, 25% pumice, 25% lava rock for drainage and aeration)
- Aluminum or copper bonsai wire (various gauges)
- Mesh screens and wire for drainage holes
- Root hook, concave cutters, shears, chopstick
- Sphagnum moss or akadama for top dressing
- Optional: Landscape accents like small rocks or deadwood for added realism
Step-by-Step Forest Bonsai Planting Techniques
Timing is crucial — perform major planting in early spring as buds swell, when trees recover fastest from root disturbance.
Step 1: Prepare the Container Cover drainage holes with mesh secured by wire. Thread thick anchor wires (4-5mm) across the pot bottom in a grid pattern — these secure trees later. Add a thin base layer (1-2 cm) of soil.
Step 2: Design the Composition (Dry Run) Without soil, arrange trees on the pot. Position the tallest, thickest tree slightly off-center (about 1/3 from one side) as the focal point. Angle trunks subtly outward for natural spread. Create triangular groupings: front large trees, mid-medium, back small for perspective. Avoid straight lines or even spacing — cluster some close for density, leave gaps for “clearings.”
Step 3: Root Preparation Bare-root each tree: Gently wash soil away, prune long/tap roots flat, leaving radial roots. Cut one side aggressively on some trees to allow tight clustering. Keep roots moist with damp towels.
Step 4: Secure and Plant Place trees per your dry run. Use anchor wires to tie trunks firmly to the pot bottom — wrap around base multiple times for stability. Position roots horizontally to encourage spreading. Fill with soil using chopstick to work it between roots, eliminating air pockets. Build subtle soil contours for terrain realism.
Step 5: Final Touches Prune lower branches on main trees (jin if needed for age illusion). Add moss or fine gravel for ground cover. Water thoroughly from bottom to settle soil.
(Close-up of root anchoring and initial planting layout — notice the wire grid and varied trunk angles! 🌿)
Step 6: Aftercare and Maintenance Place in semi-shade for 4-6 weeks. Water when top soil dries slightly; fertilize lightly after 1 month. Mist foliage for humidity. Repot every 2-3 years, thinning roots carefully.
This process alone can yield a cohesive forest in 1-2 seasons, but refinement continues…
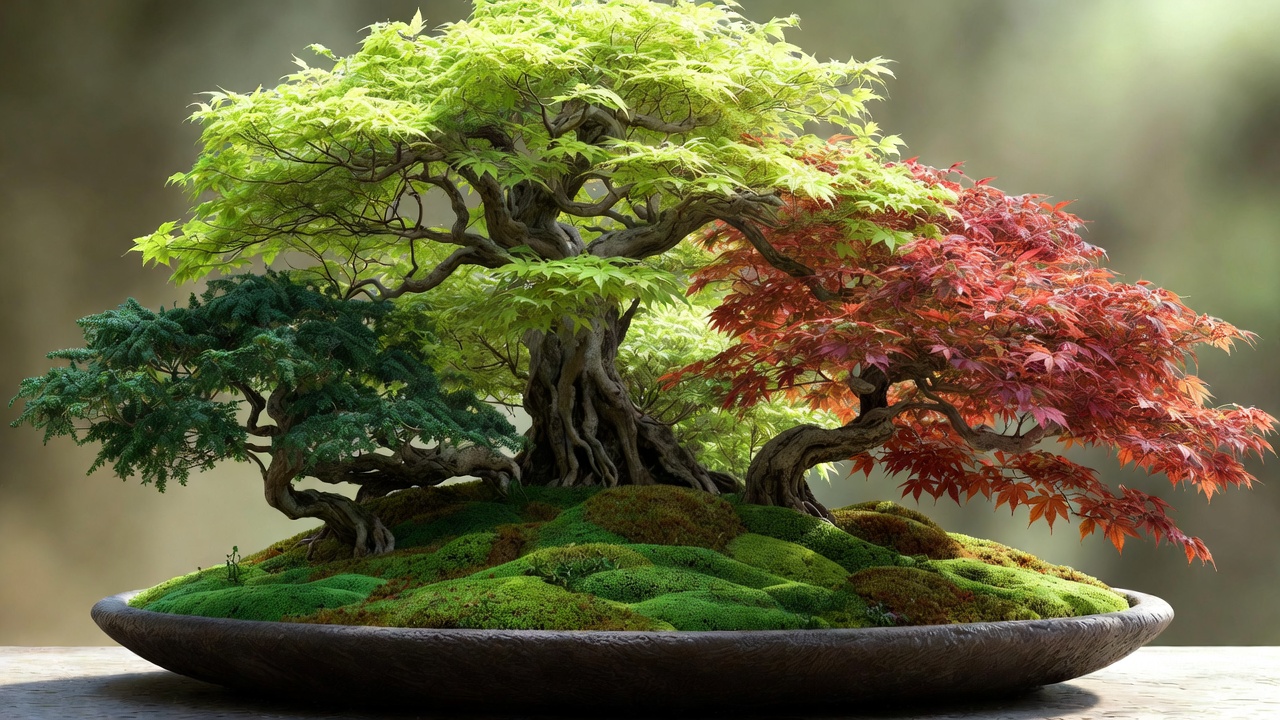
Here’s an inspiring example of a mature yose-ue forest bonsai featuring Trident Maple (Acer buergerianum) with rich autumn foliage and deep layering — notice how the trunks create natural perspective and harmony.
Advanced Composition Principles for Realistic Depth and Perspective
To elevate your forest from “nice group” to “breathtaking miniature woodland,” focus on optical illusions that mimic real forests.
- Rule of Thirds & Focal Point: Place the dominant tree at one of the imaginary thirds intersections. This draws the eye naturally and prevents a centered, static feel.
- Triangular Canopy Layers: Design three visual planes — foreground (tallest trees with thick trunks), midground (medium height, thinner), background (shortest, thinnest saplings). Overlap branches slightly to reinforce depth.
- Negative Space & Clearings: Intentionally leave open areas for “forest glades.” These breathe life into the composition and prevent a crowded look.
- Trunk Movement & Nebari Spread: Angle trunks slightly outward from the center (like real trees competing for light). Expose nebari (surface roots) on front trees for age and stability illusion.
- Branch Direction: Direct branches away from the viewer on background trees (to push them back) and toward the viewer on foreground ones (to pull them forward).
Many beginners stop at basic clustering — these principles separate amateur attempts from professional-grade forests.
(Example of a dry run composition: Trees arranged without soil to test balance, angles, and spacing before committing.)

(Another view showing soil being added during planting — copper wires securely anchoring multiple trunks for long-term stability.)
Common Mistakes in Forest Bonsai Planting & How to Avoid Them
Even experienced bonsai artists make errors in group plantings. Here are the most frequent pitfalls and expert fixes:
- Even Spacing / Soldiers in a Row — Trees planted in straight lines or uniform distances look artificial. Fix: Cluster 2-3 trees tightly, then space others irregularly. Use the “forest floor” view — imagine walking through it.
- All Trees Same Height/Caliper — No depth or hierarchy. Fix: Aim for 60-70% height reduction from front to back. Use caliper ratios like 3:2:1 for dominant : support : background trees.
- Overcrowding Roots — Poor drainage, rot risk. Fix: Aggressively comb and fan roots horizontally. Remove up to 1/3 of root mass on smaller trees.
- Flat Soil Surface — Lacks terrain realism. Fix: Build gentle mounds and depressions with extra soil/akadama. Slope slightly from back to front.
- Ignoring Seasonal Timing — Planting in summer stresses trees. Fix: Stick to early spring (pre-bud break) or late fall for deciduous; conifers tolerate wider windows.
- Neglecting Wire Removal — Wires cut into bark over time. Fix: Check every 6-12 months; re-anchor if needed during repotting.
Seasonal Care & Long-Term Refinement for Your Bonsai Grove
Spring 🌸: After planting, keep in dappled shade 4-6 weeks. Pinch new growth on maples/elm to encourage ramification. Fertilize weakly once established.
Summer ☀️: Full morning sun, afternoon shade for most species. Water daily (more in heat). Defoliate maples mid-summer for finer leaves.
Autumn 🍂: Reduce nitrogen fertilizer; increase potassium for hardiness and color. Enjoy peak foliage displays — forests shine here!
Winter ❄️: Protect from freezing winds (cold frame or unheated greenhouse for tender species). Minimal watering; check for desiccation.
Long-term styling (Years 2+):
- Annual pruning for canopy density.
- Wiring young branches for gentle curves.
- Jin/shari on select trunks for aged look.
- Gradual nebari development by surface root exposure.
- Repot every 2-4 years, refreshing soil and thinning roots.
With patience, your forest can mature over 5-10 years into a true showpiece.
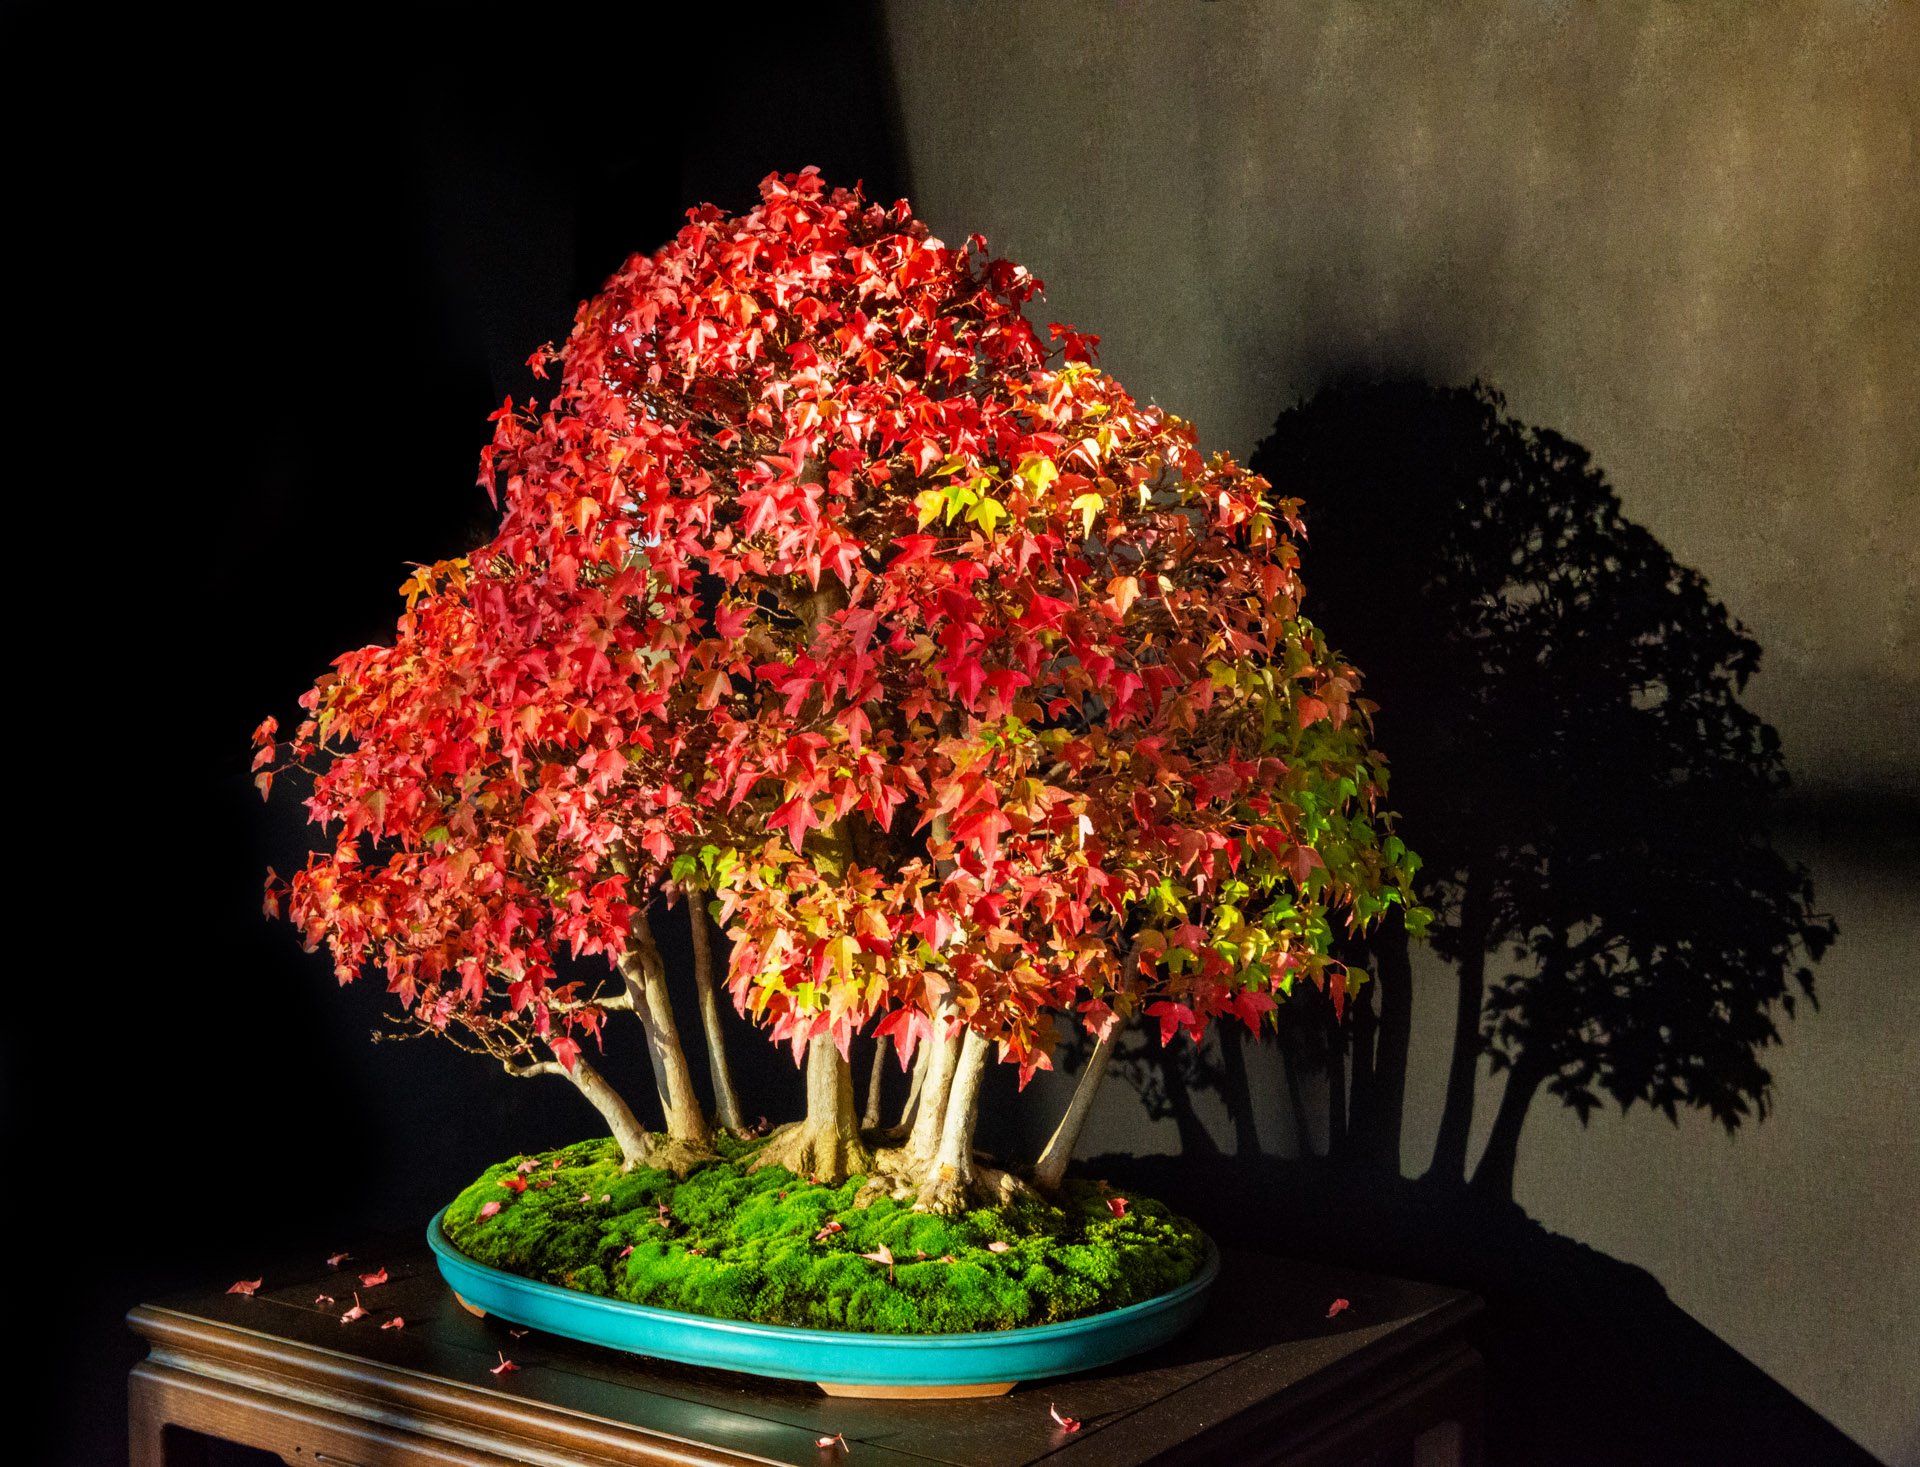
(Completed forest planting with moss top-dressing, subtle mounding, and natural ground cover for realism.)

(Another beautiful example of a finished yose-ue with lush moss and integrated landscape elements.)
Evergreen Forest Option: Japanese Black Pine Yose-ue
For year-round interest, Japanese Black Pine (Pinus thunbergii) makes dramatic forests. Use candle-pruning techniques: pinch spring candles to 1/3, remove all in fall for density.
(Example of a classic Japanese Black Pine bonsai — imagine this multiplied into a grove for timeless evergreen beauty.)
:max_bytes(150000):strip_icc()/how-to-grow-and-care-for-japanese-black-pine-5075111-05-c35d18fe7edd4bf8a069b9fd87cfa182.JPG)
Troubleshooting & FAQs
Q: My trees are leaning after planting — what now? A: Re-secure wires tighter or add small stakes temporarily. Gravity and wind can shift fresh plantings.
Q: How many trees for a beginner forest? A: Start with 5-7 for manageability and strong visual impact.
Q: Can I use collected yamadori material? A: Yes — wild trees add character, but ensure vigorous roots and quarantine for pests.
Q: Indoor forest possible? A: Yes with Ficus or Serissa, but provide strong grow lights and high humidity.
Q: How to create “age” quickly? A: Use thicker collected trunks for anchors, wire young ones into movement, add deadwood features.
Final Thoughts
Mastering forest bonsai planting techniques rewards you with one of bonsai’s most poetic expressions — a living, breathing woodland in miniature. It demands observation of nature, patience, and refinement over seasons, but the payoff is profound: a tiny forest that captures the soul of wild landscapes right on your shelf or bench.
Start small, observe real forests for inspiration, and enjoy the journey. Your first grove may not be perfect — but with these detailed techniques, it’ll be far more successful than most first attempts.
Ready to plant yours? Share your progress or ask questions in the comments — happy bonsai-ing! 🌲💚


