
Imagine stepping into your kitchen in the dead of winter and popping open a jar of golden peaches that burst with the same juicy, sun-ripened sweetness as the day you picked them from your backyard tree. Or pulling a bag of perfectly frozen cherries from the freezer for a smoothie that tastes like midsummer. That’s not a dream—it’s the rewarding reality of mastering freezing and canning orchard fruit! ❄️🫙
As a dedicated tree care specialist and home preservation enthusiast with over a decade of experience tending orchards, harvesting at peak ripeness, and preserving surplus from apples to plums, I’ve seen firsthand how these methods transform seasonal abundance into year-round joy. Drawing from trusted, science-based resources like the National Center for Home Food Preservation (NCHFP), USDA guidelines, and university extension services (such as Penn State, University of Georgia, and others), this ultimate guide equips you with safe, step-by-step techniques to lock in nutrition, flavor, and quality while minimizing waste and maximizing self-sufficiency.
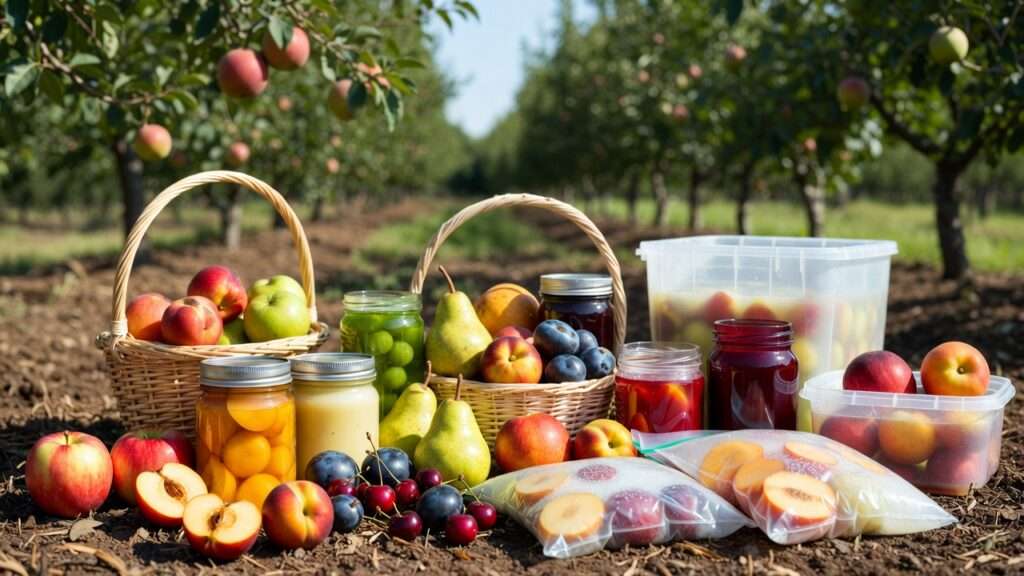
Whether you’re harvesting from your own home orchard, participating in local u-pick adventures, or simply buying in bulk during peak season, preserving orchard fruits like apples 🍏, peaches 🍑, pears 🍐, cherries 🍒, plums 🍑, and more helps you enjoy homegrown goodness long after harvest. You’ll reduce food waste, cut costs on store-bought preserves, boost food security, and savor additive-free treats packed with vitamins and antioxidants. Let’s dive in and turn your orchard bounty into pantry treasures! 🌳✨
Why Preserve Orchard Fruits? Benefits and Basics 🌳🍐
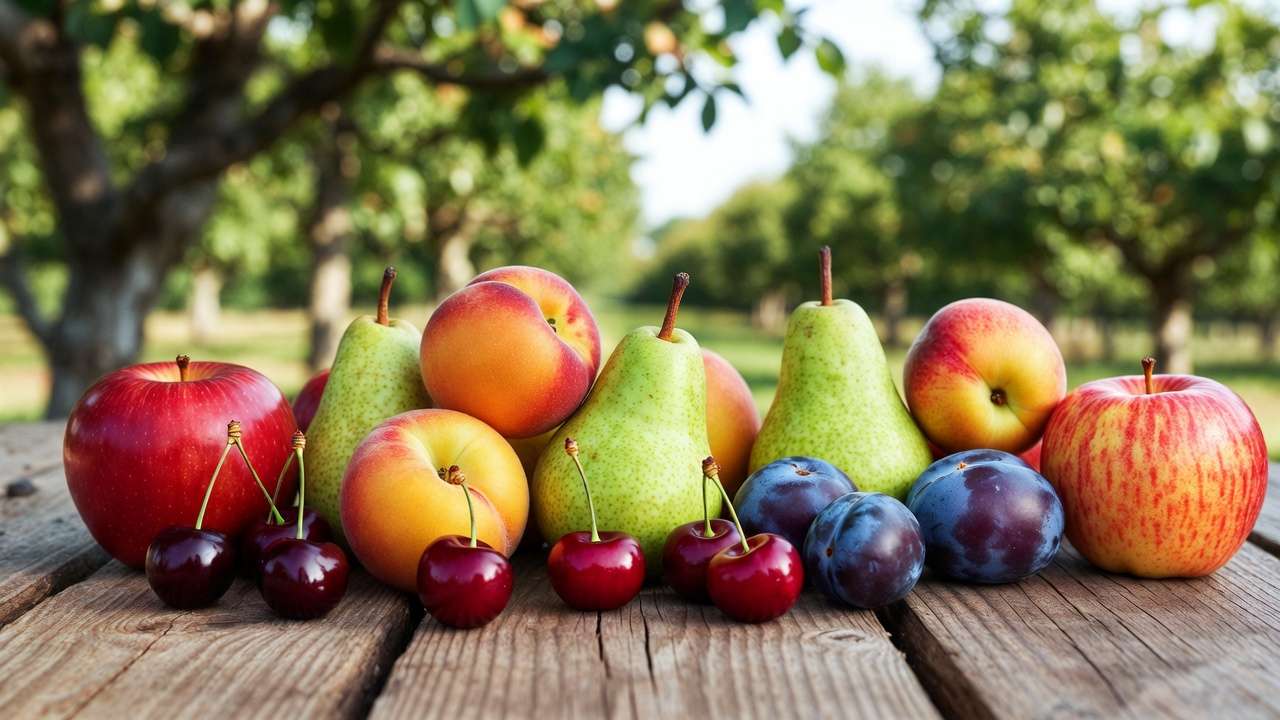
Preserving your harvest isn’t just practical—it’s empowering. Fresh orchard fruits are at their nutritional peak right after picking, loaded with fiber, vitamins (like C and A), and antioxidants. Proper freezing and canning retain much of that goodness far better than weeks in the fridge or store-bought versions often loaded with sugars or preservatives.
Key benefits include:
- Superior flavor and nutrition — Home-preserved fruits often outshine commercial options because you control ripeness and ingredients.
- Cost savings and waste reduction — Turn surplus from heavy-bearing trees into shelf-stable or freezer-ready delights, avoiding spoilage.
- Food security and self-sufficiency — Stock your pantry for off-seasons, emergencies, or simply enjoying local eating year-round.
- Versatility — Use frozen fruits in smoothies, pies, and sauces; canned fruits for snacking, baking, or desserts.
Freezing vs. Canning: Quick Comparison ❄️🆚🫙 Freezing is fast, convenient, and excellent for maintaining fresh-like texture and color—ideal for berries, soft fruits, and quick-use items like smoothies or baking. It requires minimal equipment but needs consistent freezer power (0°F/-18°C or below) and lasts 8–12 months for best quality.
Canning creates shelf-stable jars (no electricity needed!) with a longer storage life (1–2+ years) and is perfect for firm fruits like peaches, pears, and apples used in pies, toppings, or straight-from-the-jar eating. It involves more steps and equipment but rewards with that classic preserved taste.
Many experts note freezing often retains slightly more heat-sensitive nutrients (like vitamin C), while canning enhances bioavailability in some cases (e.g., lycopene in processed forms). Both are safe when following tested recipes—choose based on your fruit type, storage space, and how you plan to use them!
Choosing the Right Preservation Method for Your Orchard Fruits 🧐🍒
Not every fruit preserves the same way. Here’s a quick decision guide:
- Freeze when: You want quick prep, vibrant color/texture (great for smoothies, cobblers, or eating semi-thawed), or have limited canning gear. Best for cherries, berries, softer plums, and sliced apples/peaches for pies.
- Can when: You need pantry-stable results, love traditional flavors (syrup-packed peaches are legendary!), or want to avoid freezer burn risks. Ideal for firm peaches, pears, apples (sauce/pie filling), and whole cherries/plums.
Quick Comparison Table (visualize this in your article):
| Factor | Freezing | Canning (Water Bath) |
|---|---|---|
| Time to Prep | Quick (30–60 min/batch) | Longer (1–3 hours/batch) |
| Equipment Needed | Freezer bags, trays, optional sealer | Water bath canner, jars, lids |
| Shelf Life | 8–12 months best quality | 1–2+ years |
| Texture After Thaw | Softer/mushier for some | Firm, syrupy |
| Best For | Smoothies, baking, fresh eating | Snacking, pies, desserts |
Consider your end use: Baking? Freeze slices. Pantry staple? Can halves in syrup. Hybrid approach? Freeze excess then can pie fillings later! 🚀
Essential Tools and Safety Essentials 🛠️🔒
Safety comes first—always follow tested recipes from NCHFP or USDA to prevent spoilage or risks like botulism (rare but serious in improper low-acid canning; fruits are naturally high-acid and safe for water bath).
For Freezing:
- Freezer-safe bags/containers (zip-top or vacuum-seal for best air removal)
- Baking sheets for tray (IQF) freezing
- Optional: Vacuum sealer, permanent marker for labeling
For Canning:
- Boiling water bath canner (large pot with rack)
- Mason jars (pints/quarts), new lids, bands
- Jar lifter, funnel, bubble remover/headspace tool
- Clean towels, timer
Core Safety Rules:
- Use only tested recipes (avoid random online ones).
- Adjust for altitude (add time: e.g., +5 min at 1,001–3,000 ft).
- Maintain proper headspace (½ inch typical for fruits).
- Check seals after cooling—lids should not flex.
- Store in cool, dark place; discard if signs of spoilage appear.
Hygiene is key: Wash hands, sanitize equipment, and work with clean produce. 🌟
Preparing Your Orchard Fruits for Preservation 🍏✂️
Success starts at harvest:
- Pick at peak ripeness—firm but yielding slightly for most fruits.
- Sort: Choose unblemished, discard bruised/overripe.
- Wash gently in cool water; avoid soaking to prevent nutrient loss.
Prevent Browning (crucial for apples, pears, peaches, apricots):
- Soak slices in ascorbic acid solution (1 tsp pure ascorbic acid per gallon cold water, 10 min soak) — most effective!
- Alternative: ½ cup bottled lemon juice per 2 quarts water (less potent but adds flavor).
- Commercial anti-darkening products work too.
Syrup Packs (for better texture/flavor in freezing or canning):
- Light (20% sugar): 1¾ cups sugar + 5¾ cups water (mild sweetness).
- Medium (40%): 2¾ cups sugar + 5¼ cups water (classic for peaches).
- Heavy (50%): 4¼ cups sugar + 4 cups water (for very tart fruits).
Dissolve sugar in hot water, cool before using. Low-sugar? Use unsweetened packs or natural juice. 🍯
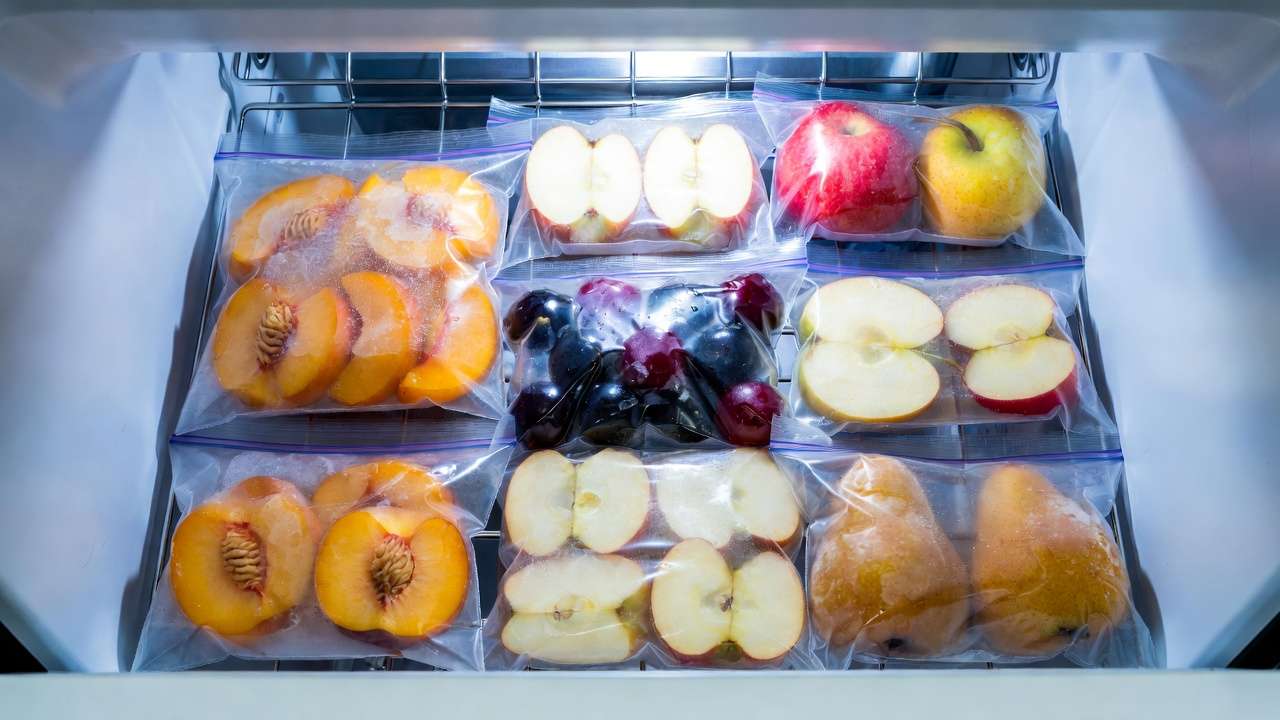
Freezing Orchard Fruits: Step-by-Step Mastery ❄️🍑
Freezing is often the easiest entry point into home preservation because it requires less time and equipment while delivering excellent results for most orchard fruits. The goal is to freeze fruits as quickly as possible to form small ice crystals that preserve cell structure, texture, and flavor.
General Freezing Techniques
- Prepare the fruit — Wash, peel (if needed), pit, and slice to desired size.
- Prevent browning — Use an ascorbic acid dip, lemon juice soak, or commercial product as described earlier.
- Choose your pack:
- Dry pack — No sugar or liquid; best for berries, cherries, or when you want flexibility later.
- Sugar pack — Mix fruit with sugar (¼–½ cup per quart) to draw out juice and protect flavor.
- Syrup pack — Cover fruit with cooled syrup (light for mild sweetness, medium for most orchard fruits).
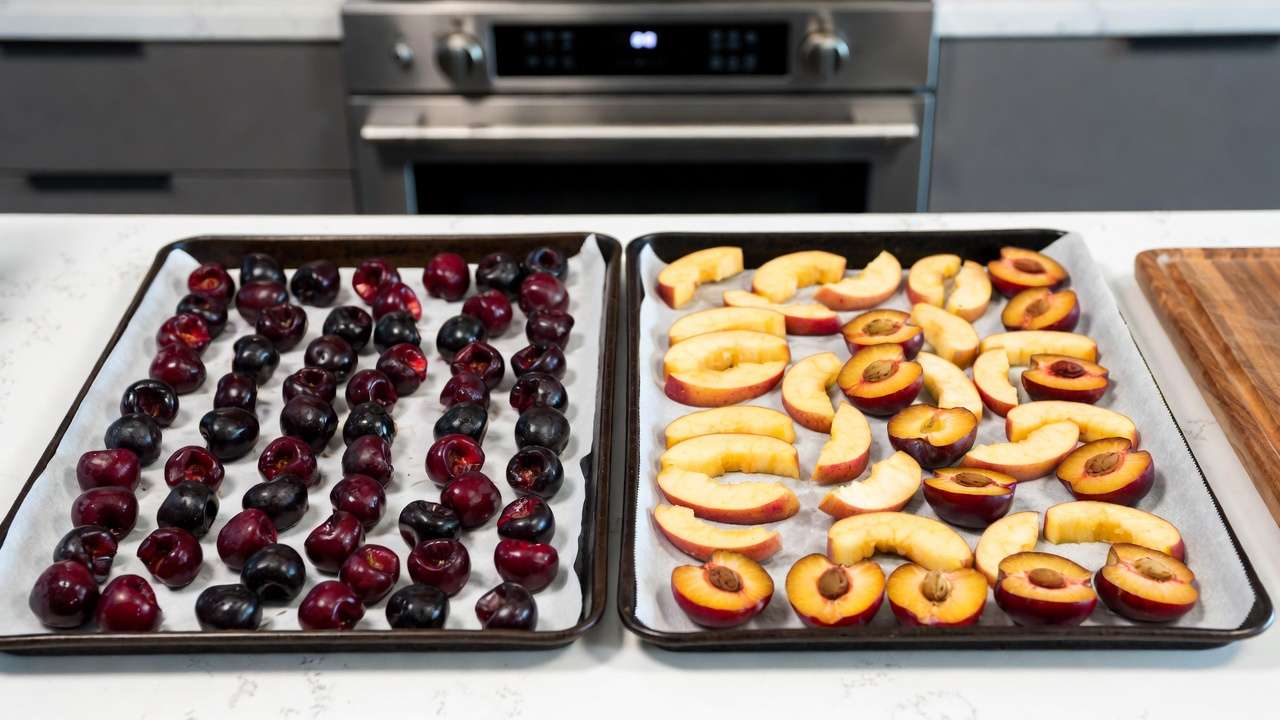
- Tray freeze (IQF – Individually Quick Frozen) — Spread prepared fruit in a single layer on parchment-lined baking sheets. Freeze 2–4 hours until firm, then transfer to freezer bags or containers. This prevents clumping so you can scoop out just what you need! 🍒✨
- Pack and seal — Remove as much air as possible (use a straw to suck air out of zip bags or a vacuum sealer). Leave ½–1 inch headspace for expansion.
- Label clearly — Include fruit type, date, and pack method (e.g., “Peaches – Medium Syrup – 8/2025”).
- Freeze at 0°F (-18°C) or below — Most home freezers maintain this; check with a thermometer.
Storage & Quality Timeline:
- Best quality: 8–12 months
- Safe to eat longer, but flavor and texture decline after 18 months
Fruit-Specific Freezing Guides
- Apples 🍏 — Peel, core, slice into ¼–½ inch pieces. Treat with ascorbic acid soak. Best in syrup pack or sugar pack for pie filling. Dry pack works if destined for baking. Excellent for apple pies, crisps, or sauce later.
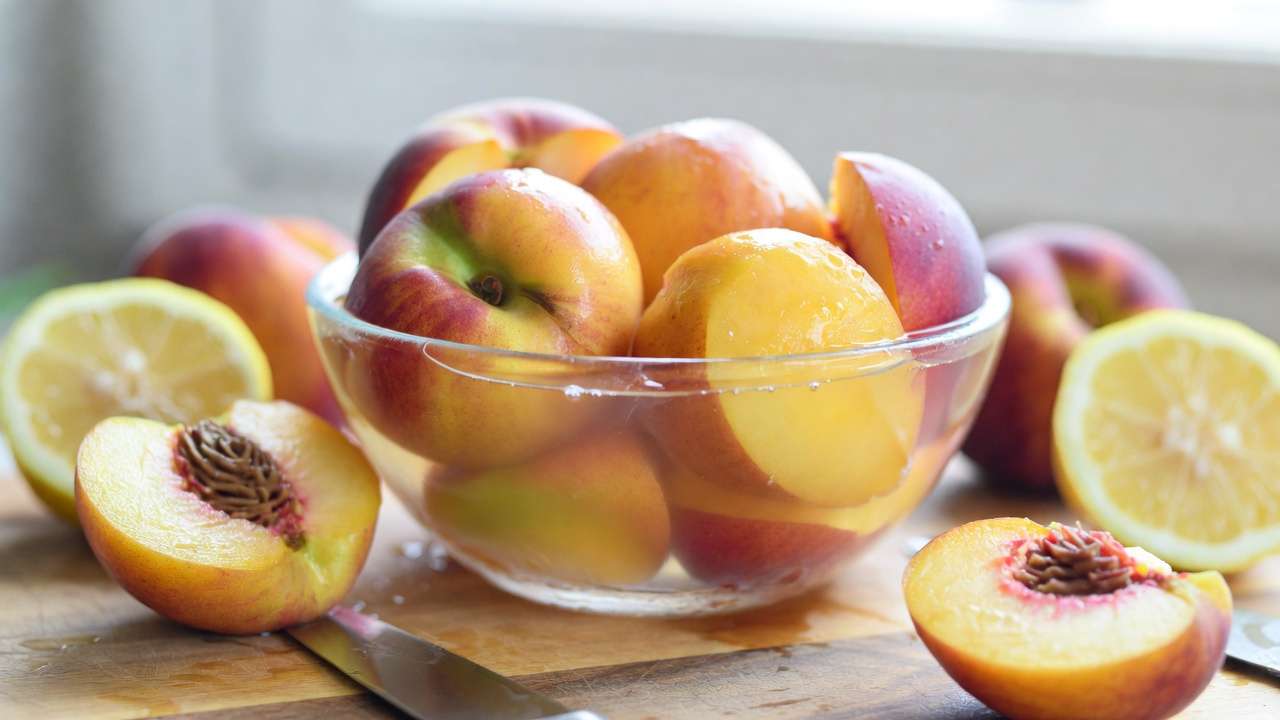
- Peaches & Nectarines 🍑 — Blanch 30–60 seconds in boiling water, then ice bath to slip skins off easily. Halve or slice, pit, treat for browning. Syrup pack is the gold standard—peaches retain plumpness and flavor beautifully. Many orchard growers swear by this method for the “fresh-picked” taste in January!
- Pears 🍐 — Peel, core, halve or slice. Ascorbic soak essential (pears brown quickly). Syrup pack preferred; they soften more than peaches when frozen but stay delicious for desserts.
- Cherries 🍒 — Stem, pit (use a cherry pitter for speed), wash. Tray freeze whole or halved (no pack needed for tart cherries; sweet cherries benefit from light syrup). Perfect for smoothies, clafoutis, or pie.
- Plums 🍑 — Wash, halve, pit (skins usually stay on). Tray freeze or sugar pack. Great for sauces, jams, or eating semi-thawed.
- Bonus: Apricots, Quince, Persimmons — Apricots: halve, pit, ascorbic dip, syrup pack. Quince: cook first (they’re rock-hard raw), then freeze purée for membrillo or jelly. Persimmons: freeze whole (Fuyu) or purée pulp (Hachiya) after ripening.
Pro tip: Freeze in meal-sized portions (2–4 cups) so you’re not thawing an entire batch every time! 🍓
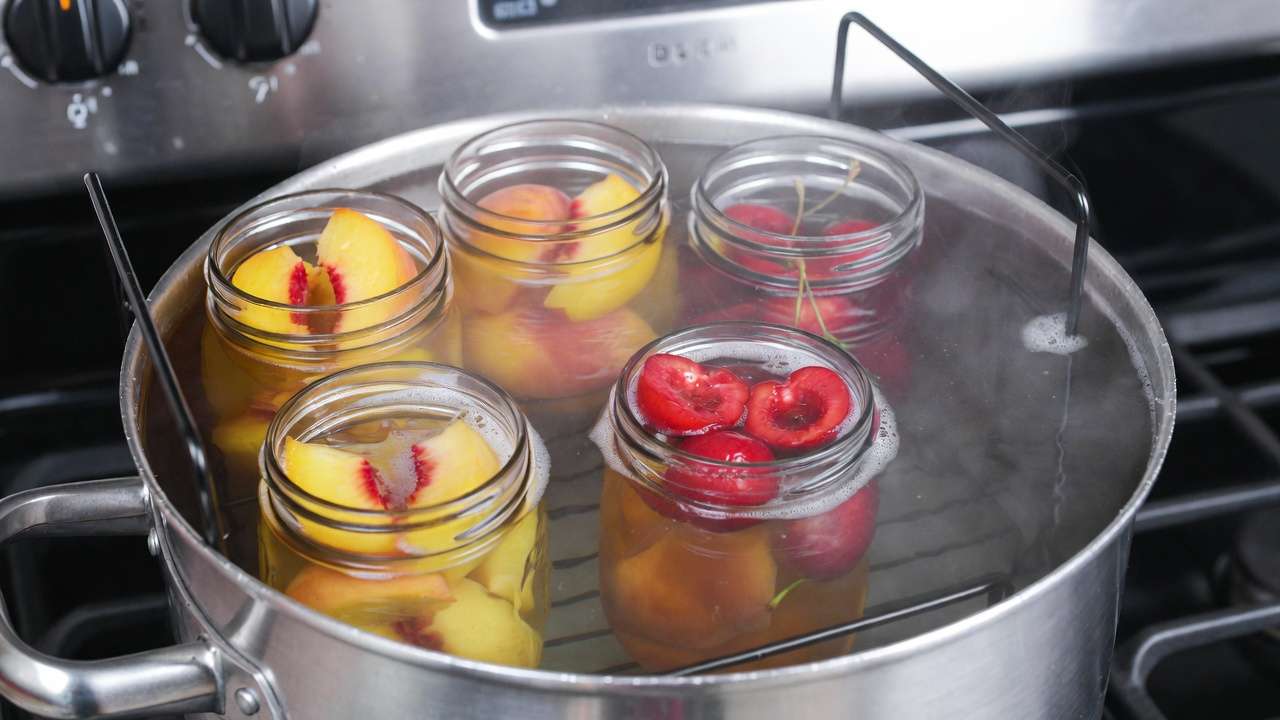
Canning Orchard Fruits: Safe & Delicious Results 🫙🍎
Water bath canning is perfect for high-acid orchard fruits (pH < 4.6), making them shelf-stable without a pressure canner. Always use recipes from the National Center for Home Food Preservation or USDA for tested safety.
Water Bath Canning Basics
- Prep jars — Wash in hot soapy water or dishwasher; keep hot (simmer in canner or hot water).
- Choose pack style:
- Hot pack — Simmer fruit in syrup or juice briefly, pack hot into jars (better flavor, fewer air pockets).
- Raw pack — Pack cold fruit, add hot syrup (simpler but more floating fruit).
- Fill jars — Use funnel, leave ½ inch headspace for most fruits.
- Remove air bubbles — Slide non-metallic tool around inside to release trapped air.
- Wipe rims — Clean with damp cloth for perfect seals.
- Apply lids & bands — Finger-tight bands only.
- Process — Submerge jars in boiling water (cover by 1–2 inches), start timer when water returns to boil.
- Cool & check seals — Remove jars, cool undisturbed 12–24 hours. Press lids—should not flex. Remove bands, store.
Altitude Adjustments (critical!):
- 0–1,000 ft: standard times
- 1,001–3,000 ft: add 5 min
- 3,001–6,000 ft: add 10 min
- Higher: add 15 min
Fruit-Specific Canning Recipes & Tips
- Apples 🍏 — Sliced apples in light/medium syrup (20–25 min pints/quarts). Apple sauce: cook, purée, hot pack (15–20 min). Pie filling: thickened with Clear Jel (follow NCHFP recipe exactly).
- Peaches 🍑 — Hot pack peeled halves/slices in medium syrup (20–25 min pints/quarts). Classic crowd-pleaser—many families can dozens of quarts each summer!
- Pears 🍐 — Halves or quarters in light/medium syrup (20–25 min). Often considered better canned than frozen due to firmer texture.
- Cherries 🍒 — Pitted sweet or tart in light/medium syrup (hot pack preferred, 15 min pints, 20 min quarts).
- Plums 🍑 — Whole (pricked) or halved/pitted in light syrup (20 min pints/quarts). Great for snacking or plum dumplings.
Low-sugar variation: Use unsweetened apple juice or very light syrup—still safe and delicious. Spiced peaches or pears? Add cinnamon sticks, cloves, or vanilla bean for gourmet flair! 🌿
Advanced Tips, Troubleshooting, and Creative Uses ✨🥧
Now that you’ve mastered the core techniques, let’s level up your preservation game with pro-level advice, solutions to common hiccups, and inspiring ways to enjoy your preserved orchard bounty.
Advanced Tips & Flavor Boosters
- Hybrid preservation — Freeze large batches of prepared fruit (e.g., sliced peaches), then thaw and can smaller jars of pie filling or spiced compote when you have time. This is perfect during chaotic harvest seasons!
- Low- or no-sugar options — Replace part or all of the sugar with unsweetened apple juice, white grape juice, or stevia blends. For freezing, dry packs shine here. For canning, stick to tested low-sugar recipes from NCHFP to ensure safe acidity.
- Gourmet infusions — Add a cinnamon stick, a few whole cloves, a vanilla bean pod, or a sprig of fresh mint/rosemary to syrup before heating. Remove before packing (or leave in for extra flavor—remove before eating). Spiced canned pears or peaches become instant holiday gifts! 🎁
- Batch efficiency — Set up an assembly line: one person washes/peels, another slices/dips, another packs. During peak harvest, invite friends or family for a “canning party”—it’s fun, social, and gets the work done faster.
- Label like a pro — Beyond date and contents, note variety (e.g., “Honeycrisp apples”), pack type, and intended use (“Best for pie”). Use waterproof labels or a permanent marker.
Troubleshooting Common Issues
- Browning despite treatment — Ascorbic acid is king; lemon juice is weaker. If browning occurs, the soak may have been too short or fruit too ripe. Use fresher fruit next time and double ascorbic strength if needed.
- Mushy or watery thawed fruit — Overripe fruit or slow freezing (large clumps instead of IQF) causes this. Always tray-freeze first for best texture.
- Floating fruit in canned jars — Raw pack is more prone; hot pack reduces floating. Pack jars tightly and process promptly.
- Failed seals (lids pop when pressed) — Rims weren’t clean, headspace incorrect, bands too tight/loose, or processing time too short. Reprocess within 24 hours with new lids or refrigerate and use soon.
- Freezer burn (dry, discolored patches) — Air exposure. Double-bag or use vacuum sealing. Keep freezer full (air circulates less in a packed freezer).
- Cloudy syrup or sediment — Normal starch release in apples/pears. Safe to eat; strain if desired for clearer appearance.
Creative Uses for Your Preserved Fruits
- From freezer:
- Blend frozen cherries/peaches into smoothies or sorbet—no added sugar needed.
- Bake straight-from-frozen slices into pies, crisps, or cobblers (add 5–10 min baking time).
- Make quick freezer jam by simmering with pectin and sugar.
- From canned jars:
- Drain and top yogurt, oatmeal, or ice cream.
- Layer in trifles, parfaits, or upside-down cakes.
- Reduce syrup on stovetop for a luscious fruit sauce over pancakes or pork.
- Turn applesauce into muffins, quick breads, or baby food.
- Versatile bonus ideas:
- Homemade fruit leather from puréed frozen/thawed fruit.
- Infuse vinegar with canned plums for shrub cocktails.
- Create orchard-fruit chutneys or salsas by combining canned peaches with onions, peppers, and spices.
These methods turn preservation from chore into creative outlet—your pantry becomes a treasure chest of flavor! 🌈
Expert Insights from Orchard Pros 🌿👨🌾
Having worked with home orchardists and small-scale growers for years, here are real-world gems I’ve collected:
- Timing is everything — Harvest early in the morning when temperatures are cool; fruits hold better quality.
- Variety matters — For freezing, choose freestone peaches (pits release easily) like Elberta or Redhaven. For canning, clingstone varieties hold shape better. Firm, late-season pears (Bartlett, Bosc) can beautifully.
- Sustainability bonus — Preserving at home slashes food miles and packaging waste. Many of my clients now eat “orchard-to-table” year-round, reducing reliance on imported fruit.
- Community power — Join or start a local preserving club. Sharing equipment (pressure canners, large water-bath setups) and swapping jars builds knowledge and friendship.
One of my favorite memories: helping a family can 80 quarts of peaches from their two backyard trees—enough to share with neighbors and enjoy through the following spring. Moments like that remind me why preservation matters. 💛
Frequently Asked Questions (FAQs) ❓🍇
Can I freeze orchard fruits without any sugar? Yes! Dry pack or unsweetened juice pack works well, especially for baking or smoothies. Texture may be slightly softer, but flavor stays bright.
Is water-bath canning safe for all orchard fruits? Yes—apples, peaches, pears, cherries, plums, apricots, and most others are naturally high-acid (pH < 4.6) and safe for water-bath processing when using tested recipes. Never water-bath low-acid foods like figs without added acid.
How long do frozen and canned fruits really last? Frozen: Best quality 8–12 months; safe indefinitely if kept at 0°F, though flavor fades. Canned: 1–2 years for peak quality; many remain safe and tasty 3–5+ years if seals are intact and storage is cool/dark.
What are the easiest fruits for beginners? Cherries (just pit and tray-freeze), peaches (blanch-and-peel is satisfying), and berries if you have them in your orchard mix.
My jars didn’t seal—what now? Refrigerate and use within a few weeks, or reprocess with new lids within 24 hours. Never reprocess after that window for safety.
Can I reuse canning lids? No—single-use lids only. Bands can be reused if rust-free.
Conclusion: Enjoy Your Orchard Bounty All Year Long! 🎉🌟
You’ve now got the complete roadmap to transform fleeting summer and fall harvests into months of delicious, home-preserved orchard fruit. Whether you lean toward the speed of freezing, the romance of shelf-stable canning jars, or a mix of both, these methods are safe, rewarding, and deeply satisfying.
Start small—maybe a few pints of peaches or a bag of frozen cherries—and build confidence. Each jar you seal or bag you fill is a victory against waste and a promise of future flavor. Your trees worked hard to produce this bounty; now you get to make it last.


