
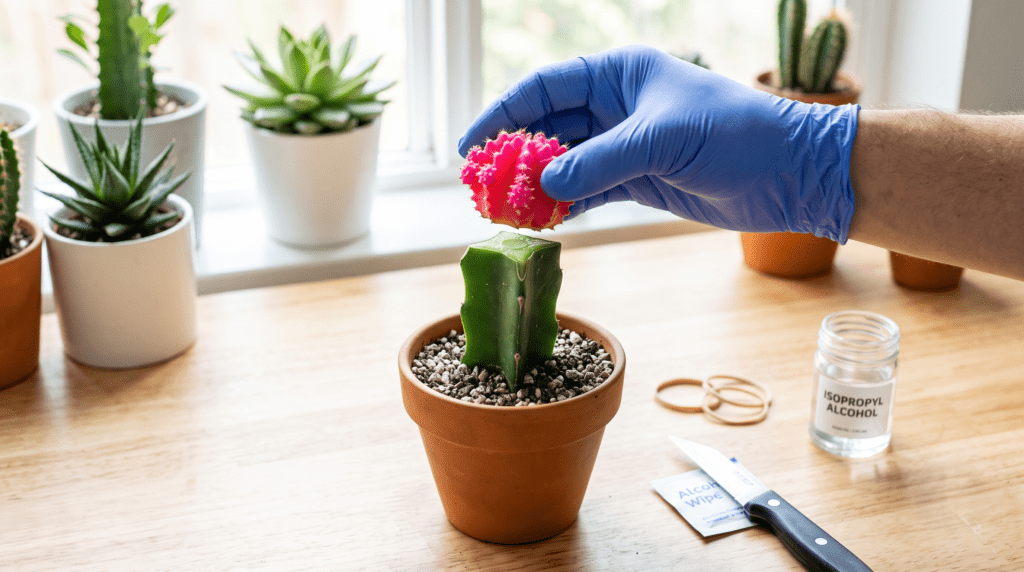
Have you ever walked past a nursery display or scrolled through your favorite gardening feeds and been completely captivated by those neon-bright, lollipop-shaped succulents? You are certainly not alone. The moon cactus is an undeniable showstopper. Yet, if you are like most passionate indoor gardeners, you have probably brought one of these vibrant beauties home only to watch it collapse into a mushy heap or separate from its base after just a few months. It is a heartbreaking, frustrating, and incredibly common experience.
Fortunately, having the science of grafting moon cacti explained is the ultimate secret to saving your failing plant—or even playing botanical architect to create your very own from scratch.
To the untrained eye, a moon cactus looks like a single, bizarrely colored desert plant. The big reveal, however, is that a moon cactus is not actually one plant at all. It is a Frankenstein-like fusion of two entirely different cacti species forced to live together. When you understand the delicate, symbiotic relationship between the top and the bottom, you unlock the ability to keep them thriving for years. Whether you are looking to rescue a dying plant, improve your indoor soil health practices, or capture the perfect, vibrant photo for your next viral gardening pin, mastering this botanical technique is a game-changer. Let’s dive into the fascinating world of succulent grafting.
2. What Exactly Is a Moon Cactus? Demystifying the Anatomy 🧬
To successfully grow, care for, or graft one of these plants, you first need to understand its unique anatomy. A moon cactus relies on a fascinating biological partnership.
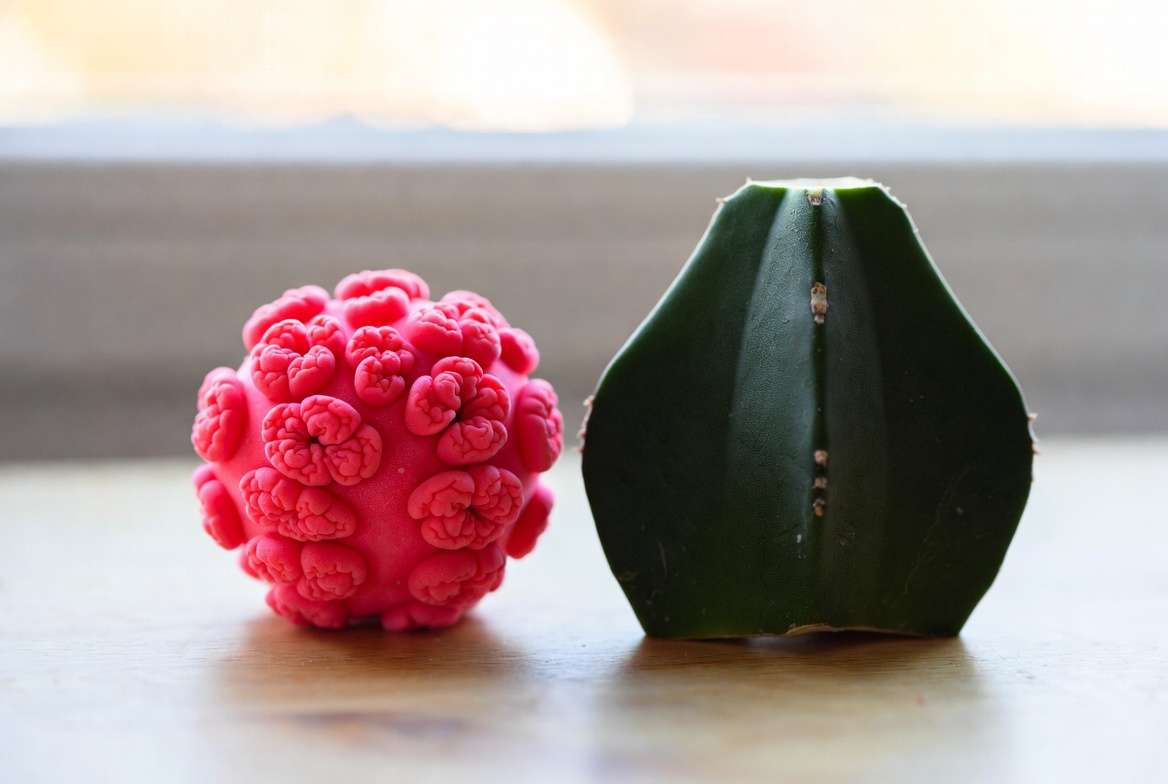
The Scion (The Neon Top)
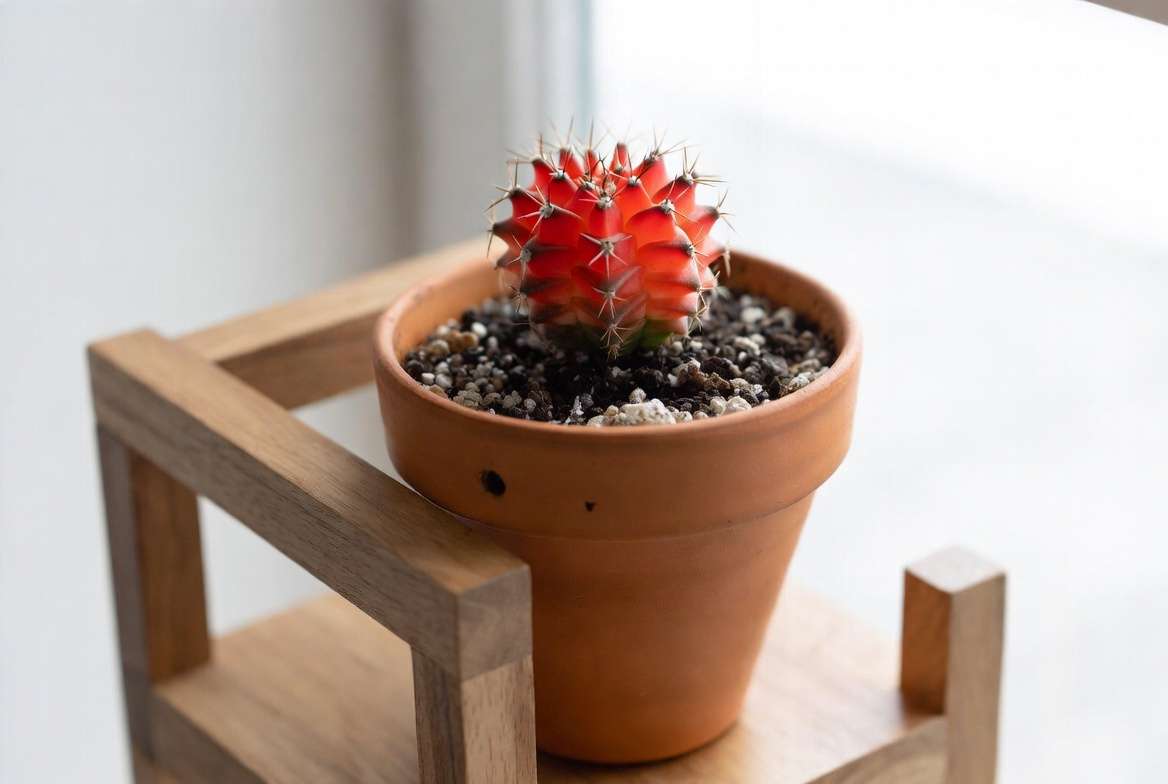
The colorful, star-shaped ball sitting at the very top is known as the scion. Botanically, this is a mutant variety of a cactus called Gymnocalycium mihanovichii. In nature, this mutation causes the plant to completely lack chlorophyll—the essential green pigment that allows plants to absorb sunlight and convert it into food through photosynthesis.
Because it cannot produce its own food, a purely red, pink, yellow, or bright orange Gymnocalycium mihanovichii would die shortly after sprouting from a seed. It is essentially a beautiful parasite that requires a host to survive.
The Rootstock (The Green Base)
Enter the life-support system. The green, triangular stem at the bottom is the rootstock. Most commercially grown moon cacti use Hylocereus undatus (widely known as the dragon fruit cactus) as the base.
This specific base is chosen because it is incredibly vigorous, fast-growing, and packed with chlorophyll. The green rootstock does all the heavy lifting, photosynthesizing enough food and pumping enough water upward to sustain both itself and the neon top. Through the art of grafting, the vascular systems—the internal “veins” of the plants—are fused together, allowing sap and nutrients to flow seamlessly from the roots of the host to the colorful scion.
3. Why Do Moon Cacti Die So Fast? (The 1-3 Year Lifespan) 🥀
If you have ever felt guilty about a moon cactus dying on your watch, let yourself off the hook. Commercially produced moon cacti generally have a surprisingly short lifespan of just one to three years. Understanding why they fail is the first step to preventing it.
The Growth Rate Mismatch
The most common natural cause of death is the incompatibility of their growth rates. The dragon fruit rootstock is a vigorous, climbing jungle cactus that wants to grow several feet a year. Meanwhile, the mutant top is a slow-growing desert species. Over time, the rootstock will either outgrow the scion—literally pushing it off and breaking the graft union—or the rootstock will exhaust itself trying to support the parasitic top and suddenly collapse.
Poor Soil Health and The Overwatering Trap
A thriving plant starts from the ground up, and poor soil health is a silent killer in the succulent world. Many big-box stores sell moon cacti in dense, peat-heavy soil plugs designed for greenhouse transport, not long-term home care. This dense soil holds onto moisture for far too long. Because the rootstock is highly susceptible to root rot, overwatering in poorly draining soil accounts for the vast majority of premature moon cactus deaths.
The False “Desert” Myth
Because it looks like a quintessential desert cactus, owners intuitively place them in baking, direct sunlight. This is a fatal mistake. The neon top lacks the protective green pigments that naturally shield plant tissues from intense UV rays. If left in a hot, direct, south-facing window, the vibrant colors will suffer severe photobleaching (sunburn), turning pale, scarred, and eventually rotting.
4. The Expert’s Toolkit: What You Need for a Successful Graft 🛠️
Whether you are re-grafting a top that has popped off its base, or replacing a rotting rootstock with a fresh one, preparation is everything. Grafting is essentially plant surgery, and you need a sterile, well-prepared operating room.
-
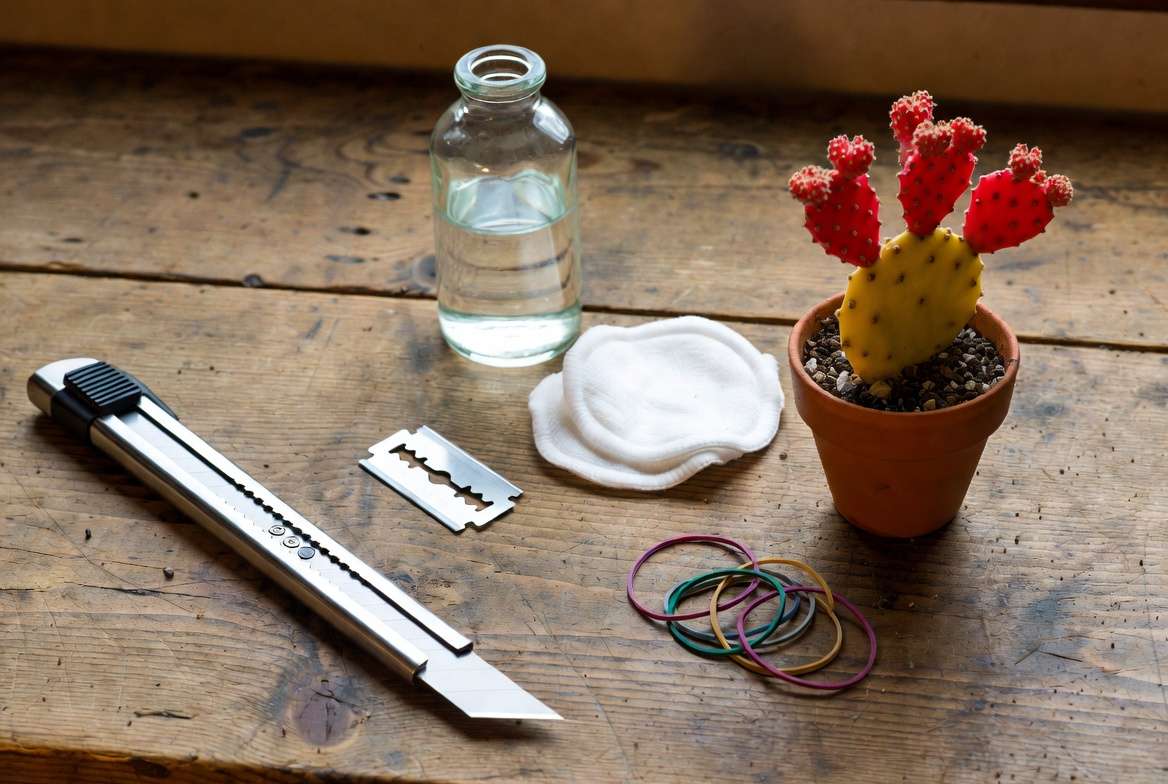
A Razor-Sharp, Non-Serrated Blade: A sterile utility knife, scalpel, or a brand-new razor blade is non-negotiable. You need perfectly smooth, clean cuts. Serrated kitchen knives will tear the delicate plant tissue, leading to scar tissue that prevents the plants from fusing.
-
Sterilizing Agent: 70% isopropyl alcohol or hydrogen peroxide to wipe down your blade before the process and between every single cut. This prevents introducing fungal spores or bacteria into the fresh wounds.
-
A Healthy Scion: Choose a plump, firm top piece that shows no signs of rot, shriveling, or soft spots.
-
A Robust Rootstock: A healthy, rooted cutting of Hylocereus undatus (dragon fruit cactus) or Myrtillocactus geometrizans (blue myrtle cactus). Ensure it is well-watered a few days prior so it is bursting with sap.
-
Securing Materials: You will need tools to hold the two pieces together under gentle pressure while they heal. Standard office rubber bands are the most popular choice, though specialized grafting tape or weighted string can also work beautifully.
-
Thick Gloves or Tongs: To protect your hands from spines while handling the cacti.
5. Step-by-Step Guide: How to Graft a Moon Cactus 🪴
Now that your operating room is prepped and your tools are sanitized, it is time for the main event. Plant diagnostics start right here—you must ensure both pieces of plant material are firm, healthy, and entirely free of mushy, discolored tissue before you begin.
Step 1: Prep and Sterilize 🧼
Begin by wiping down your blade with isopropyl alcohol. You must do this before making your first cut, and you absolutely must do it again between every subsequent cut. Cacti are incredibly susceptible to bacterial and fungal infections when their internal flesh is exposed. A perfectly sterile environment is your first line of defense.
Step 2: Slicing the Rootstock 🔪
Take your healthy green base (the rootstock) and make a single, swift, perfectly horizontal cut across the top, removing the tip. Aim to cut off at least an inch or two to expose a wide ring of fleshy tissue.
The Expert Secret (Beveling): This is where amateurs fail and experts succeed. Once you have a flat top, take your blade and slice the outer green edges of the cactus downward at a 45-degree angle, creating a beveled edge (like a chamfered pencil). Why? As the cut flesh of the cactus heals, it shrinks and pulls inward. If you leave the edges flat, the drying skin will push upward and literally pop your carefully placed scion right off the base. Beveling prevents this structural failure.
Step 3: Prepping the Scion 🎀
Wipe your blade again. Now, take your colorful Gymnocalycium mihanovichii and slice horizontally across its bottom. If you are rescuing a rotting plant, ensure you cut high enough to remove all the brown or orange mushy tissue. You must cut until you see nothing but clean, vibrant, healthy plant flesh. Even a millimeter of rot left behind will spread and destroy your new graft.
Step 4: The Crucial Match (Aligning the Vascular Bundles) 🔬
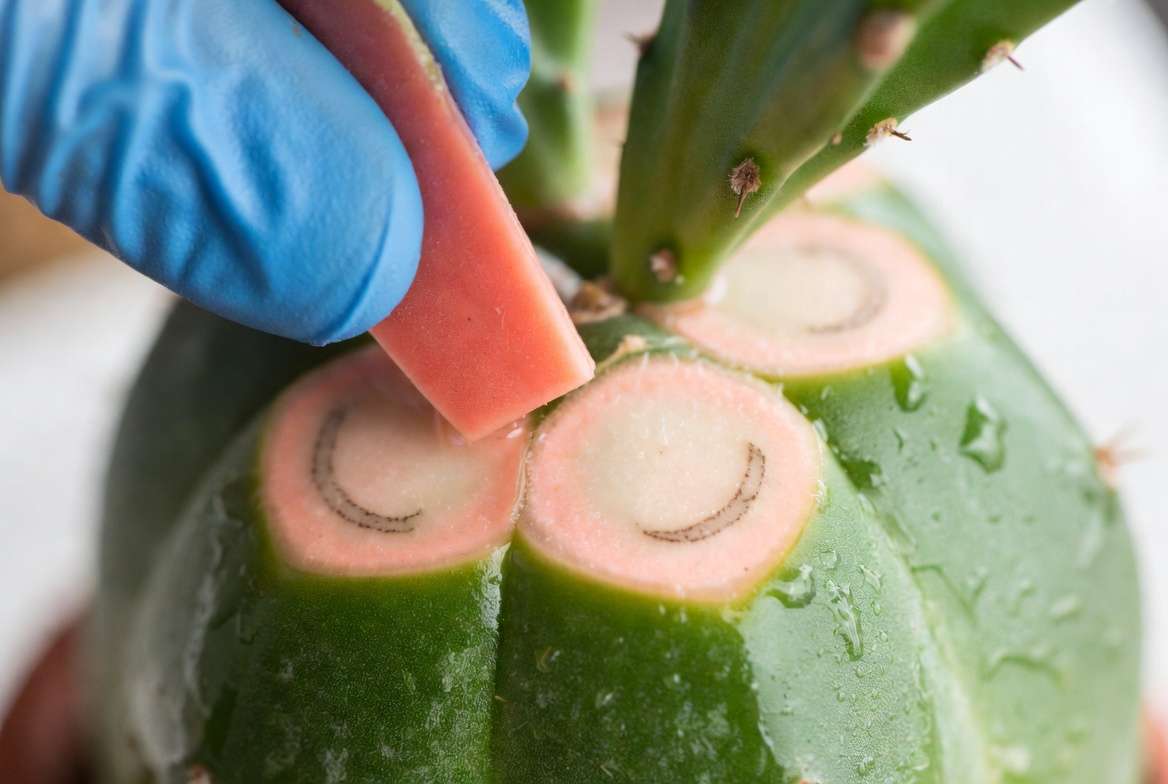
This is the most critical botanical step in the entire process. Look at the freshly cut, flat surfaces of both the top and bottom pieces. In the dead center of each, you will see a faint, circular ring. This is the vascular cambium—the botanical equivalent of blood vessels. It is responsible for transporting water and nutrients.
For the graft to take, the vascular ring of the scion must intersect with the vascular ring of the rootstock. They do not need to align perfectly like a bullseye (in fact, they are usually different sizes), but their rings must cross over each other in at least one or two places. If you place them so they miss each other entirely, the top will starve and die.
Step 5: Securing the Graft 🩹
Gently press the scion down onto the rootstock, being careful not to trap any air bubbles between the two flat surfaces. The sap acts as a natural glue, but it needs help while the tissues fuse.
Take a clean rubber band and stretch it over the top of the scion, pulling it straight down and hooking it under the bottom of the rootstock’s pot. Add a second rubber band, crossing it over the first in an “X” shape to ensure even, balanced, downward pressure. The bands should be snug enough to hold the scion firmly in place, but not so tight that they slice into the delicate, colorful flesh.
Step 6: The Healing Phase 🕰️
Place your newly grafted patient in a warm, dry environment that receives only gentle, indirect light. Absolutely no direct sun, and absolutely no water for the first two weeks. The plants need to direct all their energy into fusing their vascular tissues, not pulling up moisture. After 14 to 21 days, the tissues should be bonded. Carefully snip the rubber bands. If the top stays put and looks plump, congratulations—you have successfully grafted a moon cactus! 🎉
6. Long-Term Moon Cactus Care: Keeping the Graft Alive 💧
Once the graft is secure, the challenge shifts to maintenance. These plants are incredibly photogenic, making them brilliant, eye-catching subjects for highly shareable visual gardening content. But to keep those neon colors popping for the camera, you need to master a very specific care routine.
The “Soak and Dry” Watering Rule 🚿
When it comes to watering, forget the calendar. Root rot is the enemy here. You must practice the “soak and dry” method. Wait until the soil is 100% dry all the way to the bottom of the pot. When you do water, soak the soil thoroughly until water runs out the drainage holes, then empty the saucer. Never let the pot sit in standing water. In the winter months, when the plant goes dormant, you may only need to water it once every month or two.
Finding the Sweet Spot for Light ☀️
As mentioned earlier, direct sunlight is a death sentence for the chlorophyll-lacking scion. However, too little light will cause the vibrant reds, pinks, and yellows to fade into a dull, muddy pastel. The sweet spot is bright, indirect light. A spot near an east-facing window, or pulled a few feet back from a south-facing window, provides the perfect balance of illumination without the scorching UV intensity.
Soil Health and Proper Potting 🪨
A crucial aspect of plant diagnostics is assessing the soil environment. Most standard indoor potting soils are entirely wrong for moon cacti. You need a fast-draining, gritty cactus and succulent mix.
To optimize soil health, consider amending commercial cactus soil with extra pumice, perlite, or coarse horticultural sand to ensure maximum aeration. The roots of the dragon fruit base need to breathe. A highly porous soil structure prevents the anaerobic conditions that invite fungal pathogens. Furthermore, always use a pot with a drainage hole—unglazed terracotta is excellent because it wicks away excess moisture through its porous walls.
7. Frequently Asked Questions (FAQs) 🤔
To round out your expertise, here are the most common questions indoor gardeners ask when dealing with moon cacti:
Can a moon cactus top grow roots and live on its own?
No. Because the colorful scion (Gymnocalycium mihanovichii) completely lacks chlorophyll, it cannot photosynthesize. Even if it managed to push out tiny roots, it has no way to feed itself. It will inevitably shrivel and die without a green host plant beneath it. (Note: There are very dark purple/brown varieties of Gymnocalycium that have enough underlying chlorophyll to survive on their own, but the neon red, pink, and yellow ones cannot).
What happens if the colorful top dies, but the green base lives?
Do not throw the base away! The rootstock (Hylocereus undatus) is a magnificent plant in its own right. If the top dies, simply cleanly slice it off. The green base will eventually push out new branches (called “pups”) from its areoles. Over time, it will grow into a large, trailing, wildly architectural jungle cactus that—if given enough light and space—can even produce massive, beautiful white nocturnal blooms and edible dragon fruit! 🐉🌺
When is the best time of year to graft?
Timing is everything. The highest success rate for grafting occurs when both plants are actively pushing out new growth. For most climates, this means late spring or early summer. Grafting during the winter dormancy period drastically reduces your chances of success, as the plants’ internal vascular systems are sluggish and sap production is low.
Final Thoughts on Your Neon Masterpiece ✨
Understanding exactly how grafting moon cacti explained fits into your broader indoor gardening knowledge transforms you from a casual plant owner into a confident horticulturist. It is a brilliant entry point into the wider world of plant propagation and tissue manipulation. By keeping your tools sterile, mastering the cambium match, and providing the perfect fast-draining environment, you can enjoy these bizarre, beautiful, glowing little oddities for years to come. Happy grafting! 🌵💚











