
Imagine this: It’s a scorching afternoon in Gaurnadi, Barisal Division, where the sun beats down relentlessly on your precious vegetable patch, fruit trees, and flower beds. You’re tired of hauling heavy watering cans or dragging hoses that leave puddles everywhere except where the plants need it most. Your tomatoes are wilting, your mango tree’s leaves are yellowing at the edges, and weeds are thriving from all that surface water. Sound familiar? 😩
The good news? You can solve all these problems with a simple drip irrigation system that delivers water directly to the roots—efficiently, consistently, and with minimal effort. In this complete step-by-step DIY guide, I’ll walk you through building an affordable, beginner-friendly drip irrigation setup tailored for home gardens, including vegetables, potted plants, and especially trees common in tropical climates like Bangladesh.
As a plant care expert who’s helped countless gardeners in humid, hot regions set up sustainable watering solutions, I’ve seen drip systems cut water use by 50-70%, boost plant health, slash weeding time, and prevent diseases from wet foliage. This isn’t just theory—it’s proven by university extensions (like USU and Rain Bird research) and real backyard results. Ready to transform your garden? Let’s dive in! 🚀
Why Choose Drip Irrigation for Your Home Garden? 🤔💚
Drip irrigation stands out as one of the smartest upgrades for any home gardener, especially in water-conscious areas like Barisal where dry spells mix with heavy rains.
Key Benefits 🌟
- Superior Water Efficiency: Delivers water straight to the root zone with up to 90-95% efficiency, reducing evaporation, runoff, and waste. Studies show savings of 30-70% compared to sprinklers or hand watering.
- Healthier Plants and Trees: Consistent moisture promotes deeper roots, drought resistance, and faster growth. No more wet leaves leading to fungal diseases like powdery mildew on veggies or leaf spot on fruit trees.
- Weed Reduction: Only the root areas get watered, starving weeds in paths and between rows.
- Time and Labor Savings: Set it and (almost) forget it—add a timer for automation, perfect for busy gardeners.
- Customizable for Your Needs: Works brilliantly for raised beds of brinjal (eggplant) and okra, potted herbs, or deep-rooted mango, guava, and jackfruit trees.
Who It’s Perfect For 👩🌾 Busy homeowners in small yards, tree owners fighting summer heat stress, or anyone tired of inconsistent watering. In tropical climates, it prevents overwatering during monsoons while ensuring survival in dry periods.
Quick Comparison Table (vs. Other Methods)
| Method | Water Efficiency | Disease Risk | Weed Growth | Setup Effort | Best For |
|---|---|---|---|---|---|
| Hand Watering | Low | Medium | High | High | Small pots |
| Sprinklers | Medium | High | High | Medium | Lawns |
| Soaker Hoses | Medium-High | Low | Medium | Low | Rows |
| Drip Irrigation | High (90%+) | Low | Low | Medium | Gardens, Trees, Pots |
Switching to drip means healthier plants with less hassle—exactly what your garden craves!
Materials You’ll Need (Shopping List with Budget Tips) 🛒
Building a simple system doesn’t require breaking the bank. For a basic 200-500 sq ft garden (common in home setups), expect BDT 2,000–8,000 total, depending on scale.
Essential Components (with why they matter & approx. costs in BDT):
- Backflow Preventer — Prevents dirty garden water from contaminating your home supply (mandatory for safety) — ~200-500
- Timer (optional but recommended) — Automates watering cycles — ~1,000-3,000
- Filter (screen or disc) — Stops clogs from sediment, crucial in well or pond water common in Barisal — ~300-800
- Pressure Regulator (25-30 PSI) — Keeps flow even; too high pressure pops fittings — ~400-1,000
- 1/2-inch Mainline Tubing (polyethylene, black) — Carries water from source to zones (200 ft max per run) — ~10-20 per meter
- Emitters/Drippers (1-4 GPH; pressure-compensating for uneven terrain) — Deliver precise water; use 1-2 per plant, higher for trees — ~5-20 each
- 1/4-inch Distribution Tubing (“spaghetti” line) — For precise placement around plants/trees — ~5-15 per meter
- Fittings — Tees, elbows, couplers, goosenecks, end caps, hole punch tool — ~500-1,500 total
- Stakes/Clips — Secure lines to ground — ~200-500
Budget Hacks:
- Start ultra-cheap: Use recycled plastic bottles with tiny holes for gravity-fed drips (great for testing!).
- Buy kits from local hardware shops in Barisal or online (e.g., Daraz equivalents) for bundled savings.
- Prioritize filter + regulator—they prevent most failures.
Where to source: Local plumbing/hardware stores in Barisal town, or agricultural suppliers for bulk tubing/emitters.
Planning Your Simple Drip Irrigation System (Design Smart, Avoid Headaches) 📐
Good planning = zero regrets!
Step 1: Assess Your Garden 🌳
- Sketch a map: Divide into zones (e.g., veggie rows, fruit trees, pots).
- Test water source: Fill a 10-liter bucket from your tap—time it to calculate flow rate (e.g., 20 liters/min = good for small systems).
- Note plant needs: Veggies like frequent shallow water; trees need deep, infrequent soaks. In hot/humid Bangladesh, aim for shorter, more frequent cycles.
Step 2: Choose System Type
- Hose-connected (easiest for most).
- Gravity-fed (bucket elevated 3-6 ft) for no-pressure areas.
- Above-ground (simple) vs. buried (neater but harder).
Step 3: Follow the “200/200 Rule” — Max 200 ft or 200 GPH on 1/2-inch tubing to avoid uneven flow (expert tip from irrigation pros).
Sketch your layout—mainline along paths, branches to plants. This prevents overbuying or rework!
Step-by-Step: How to Build & Install Your Simple Drip Irrigation System (Core How-To) 🛠️
Now comes the fun part—actually building it! This process usually takes 2–5 hours for a small-to-medium home garden, and you can do it over a weekend. No special skills required—just follow along carefully.
Preparation Gather these basic tools:
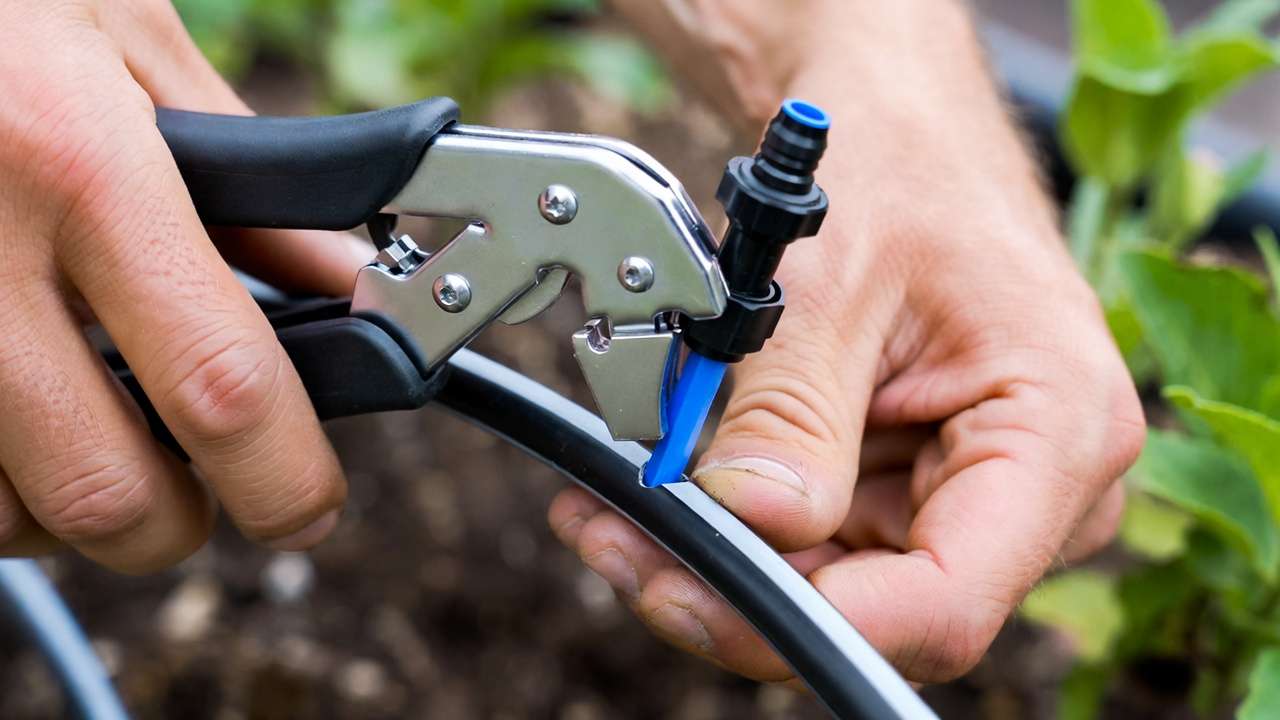
- Sharp scissors or utility knife
- Hole punch tool (usually comes with emitter kits)
- Measuring tape
- Shovel or trowel (for minor digging if desired)
- Bucket (for flushing the system)
Pro tip: Lay everything out on a table first so you can see what goes where. It prevents the classic “I’m missing one fitting” moment! 😅
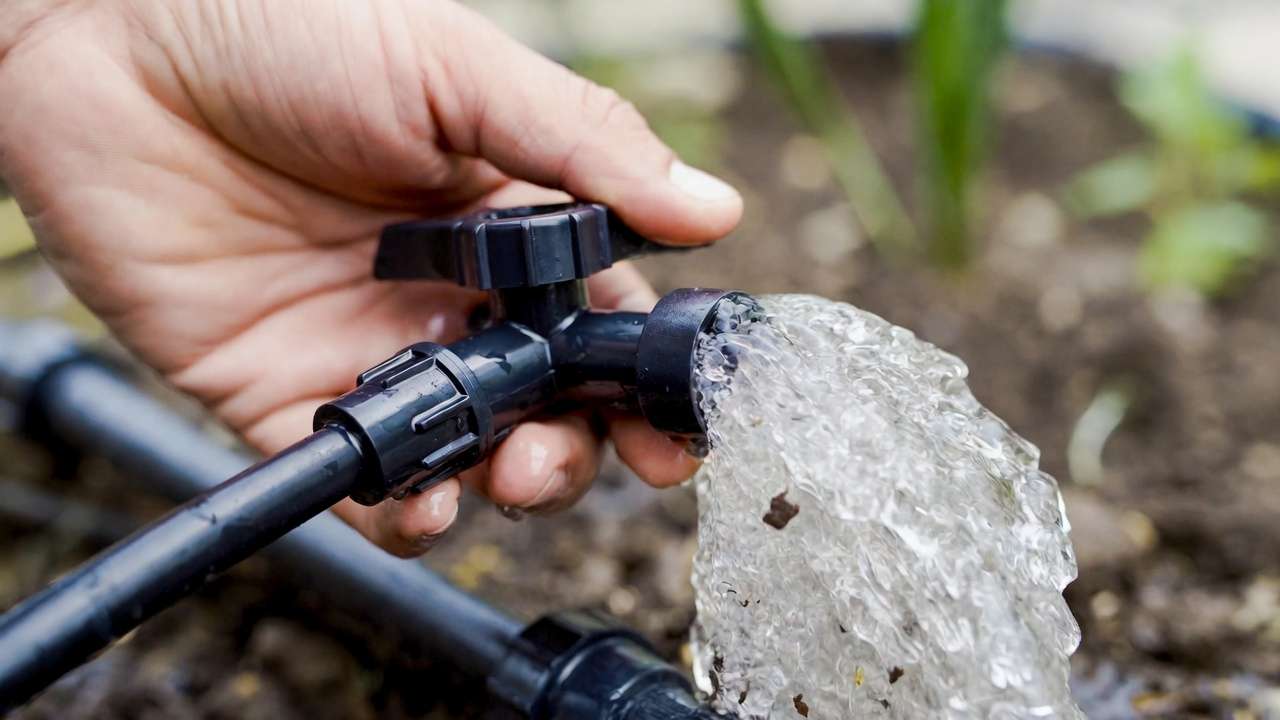
Step 1: Connect to Water Source 🔌
- Turn off the water at the tap.
- Screw the backflow preventer directly onto your outdoor faucet (or hose bib). This is non-negotiable for health and legal reasons.
- Attach the timer (if using) next. Set it to water early morning (4–7 AM) to minimize evaporation and fungal risk in humid Barisal weather.
- Add the filter after the timer.
- Finish with the pressure regulator (25–30 PSI is ideal for most home systems).
- Connect your 1/2-inch mainline tubing to the end of the pressure regulator using the proper adapter/fitting.
Tighten by hand + ¼ turn with pliers—don’t overtighten plastic fittings!
Step 2: Lay the Mainline
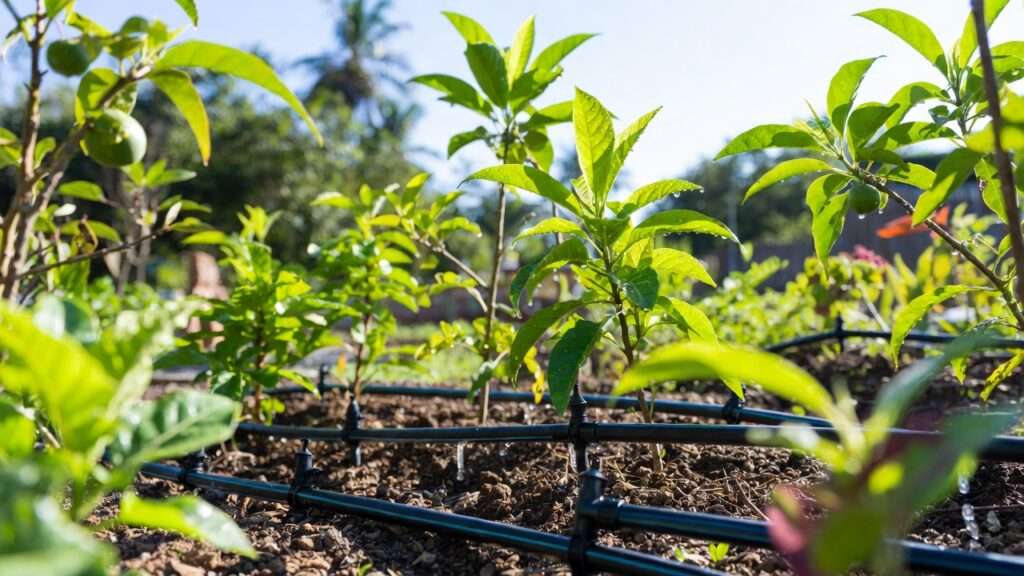
- Run the 1/2-inch black poly tubing along the edge of your garden beds, around trees, or in straight lines down rows.
- Keep it close to plants but out of main walkways.
- Use landscape staples or U-shaped garden stakes every 1–1.5 meters to hold it in place.
- At corners or branches, use elbow fittings or tee fittings as needed.
- Leave the far end open for now (you’ll cap it later).
Expert note: In hot climates, running the mainline in the shade of plants or covering it lightly with mulch helps prevent heat expansion and cracking.
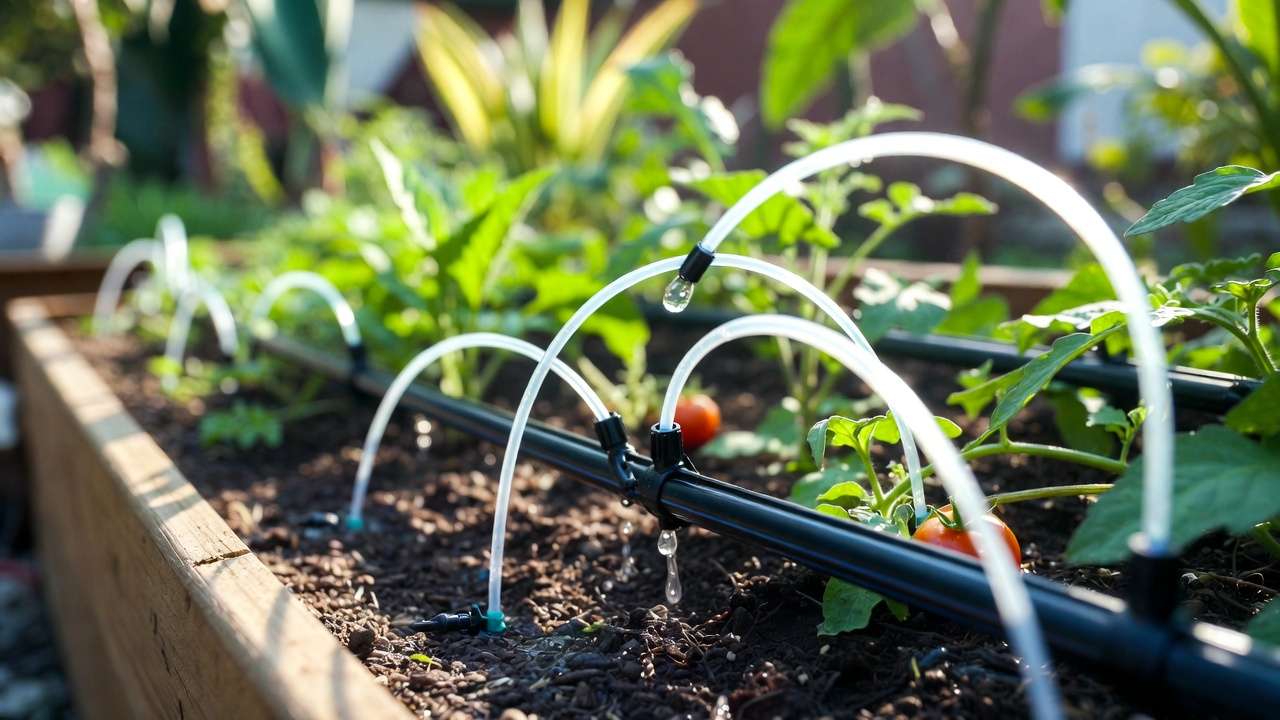
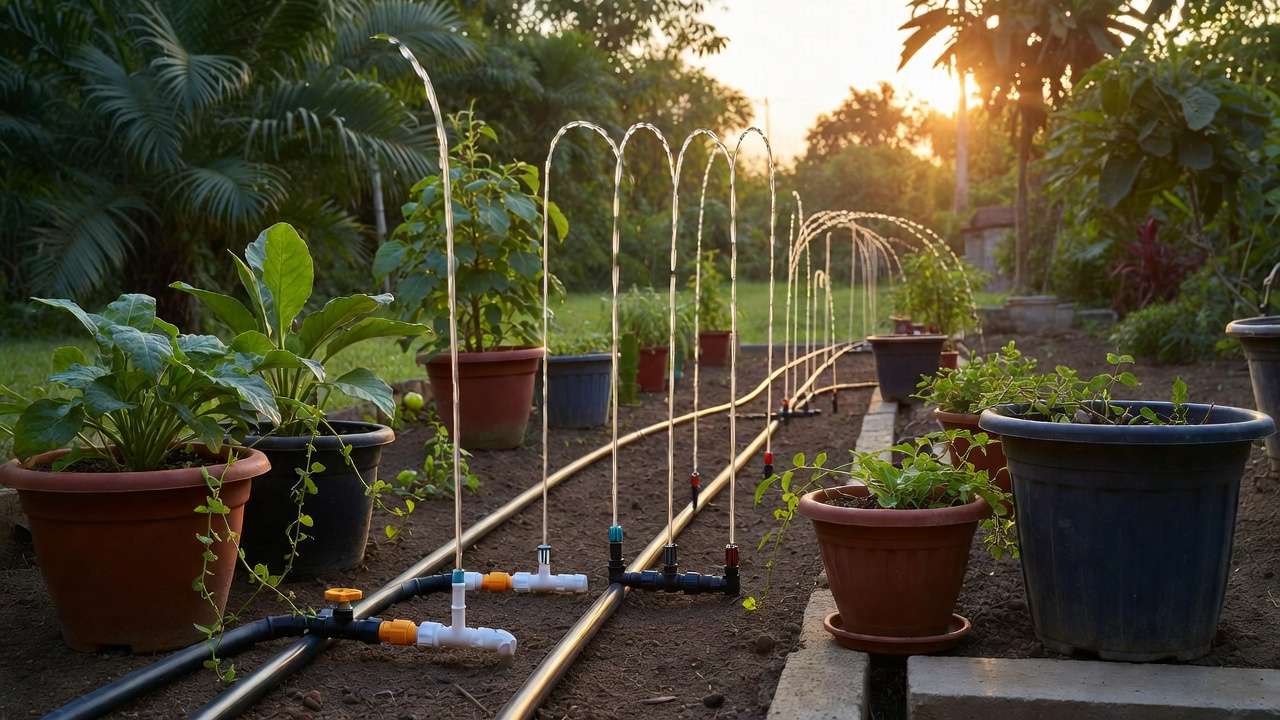
Step 3: Add Branch Lines & Emitters 🌿 This is where the magic happens—customizing water delivery.
- Use the hole punch to make small holes in the mainline exactly where you want water to go.
- Insert pressure-compensating drippers (1–2 GPH for most vegetables and flowers; 2–4 GPH for young trees; 4–8 GPH for mature fruit trees).
- Placement rule: Put 1–2 emitters per small plant, spaced 15–30 cm apart for row crops like spinach, coriander, or chilli.
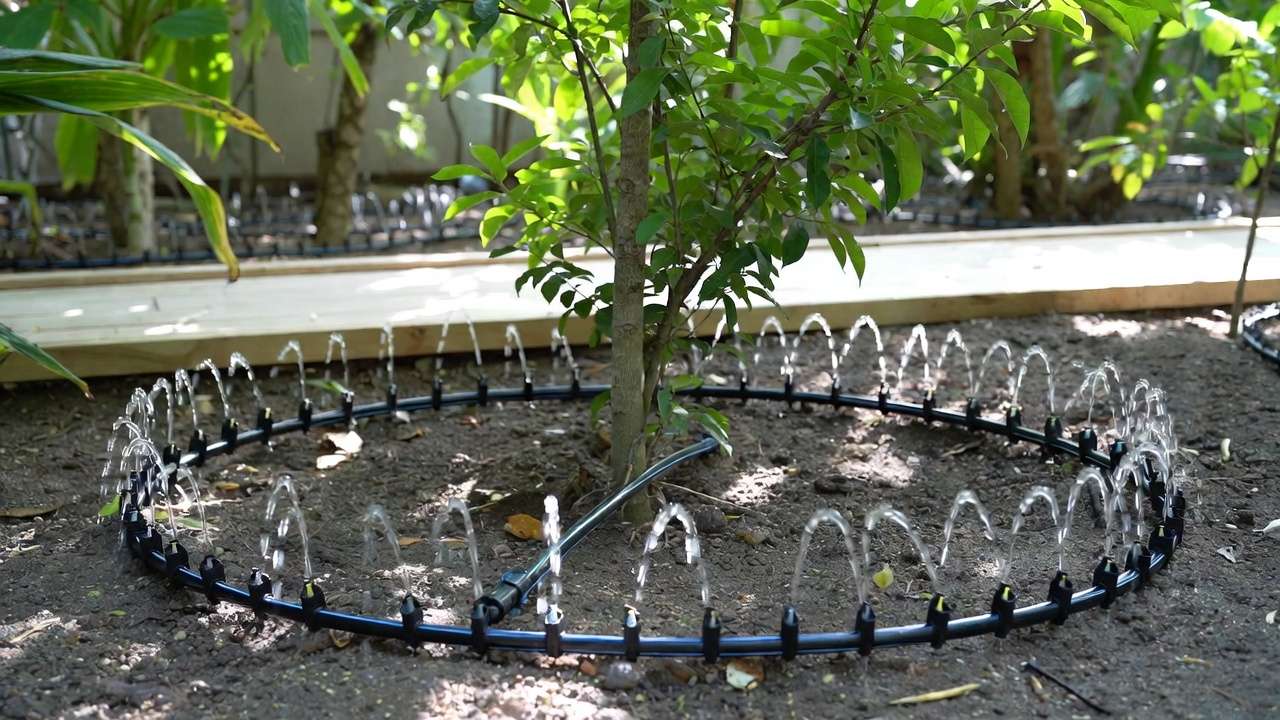
- For trees: Create a “drip ring” by running 1/4-inch tubing in a circle around the drip line (outer edge of the canopy), placing emitters every 30–60 cm. Mature mango or jackfruit trees may need 8–12 emitters total.
- For pots or precise spots: Attach 1/4-inch “spaghetti” tubing to an emitter, then run it to the base of the plant and stake it down.
- Push fittings firmly—they should click or seat snugly.
Real-world tip from Bangladesh gardeners: During the dry season (Nov–Mar), place emitters slightly upslope from the plant stem so water slowly migrates downward to roots instead of pooling.
Step 4: Secure & Cap Ends
- Install end caps or flush valves at the end of every mainline and branch.
- Flush valves are great—you open them to flush debris once a month.
- Secure all tubing with additional stakes so nothing moves when you walk through the garden.
Step 5: Test & Adjust
- Turn the water on slowly. Watch for leaks at every connection—tighten or replace as needed.
- Let the system run for 20–30 minutes.
- Walk the lines and check:
- Each emitter should drip steadily (not spray).
- Wetting pattern should be a circle 20–40 cm wide around each emitter.
- Dig down 10–15 cm near a few emitters after running. The soil should be moist but not soggy. Adjust run time or emitter flow if needed.
Congratulations—you now have a working simple drip irrigation system! 🎉
Customizing for Plants & Trees (Make It Work for Your Garden) 🌴🍅
One of the biggest advantages of a DIY drip system is how easily you can adapt it to different plants. What works for a row of spinach won’t be ideal for a mature jackfruit tree. Here’s how to fine-tune your setup for maximum health and yield—especially in the warm, humid conditions of Gaurnadi and greater Barisal.
Vegetables & Annual Flowers
- Emitter placement: Space 1–2 GPH drippers every 20–30 cm along rows (e.g., for brinjal, okra, chilli, tomato, or marigold).
- Run time: 20–40 minutes, 3–5 times per week in dry season; reduce during monsoon.
- Pro tip: Run two parallel lines 15–20 cm apart for wider beds so roots on both sides get moisture. Mulch heavily over the lines to keep soil cool and retain water longer.
Fruit Trees & Shade Trees (Mango, Guava, Papaya, Jackfruit, Coconut)
- Young trees (1–3 years): 4–6 emitters of 2–4 GPH arranged in a circle 30–50 cm from the trunk.
- Mature trees (4+ years): Create a full drip ring using 1/4-inch tubing looped around the outer drip line (canopy edge). Use 8–16 emitters of 4–8 GPH total.
- Deep watering strategy: Run longer cycles (60–120 minutes) but less frequently (1–2 times per week in dry months). This encourages deep roots—critical for storm resistance during cyclones.
- Special note for Barisal region: Many local mango and guava orchards suffer from shallow root systems due to frequent surface watering. A properly placed drip ring can dramatically improve fruit size and quality while reducing fruit drop from water stress.
Potted Plants, Herbs & Raised Beds
- Use 1/4-inch spaghetti tubing with individual adjustable drippers (0.5–2 GPH).
- One emitter per small pot; two for larger containers (>30 cm diameter).
- Place the emitter near the stem but not touching it to avoid rot.
- Great for tulsi, pudina (mint), dhania (coriander), or even balcony chilli plants.
Tropical Climate Adjustments (Bangladesh-Specific Tips)
- Short, frequent cycles prevent waterlogging during rainy months.
- Elevate gravity-fed buckets/tanks during monsoon to avoid overflow.
- Use UV-resistant black tubing—it lasts longer under intense sun.
- Add shade cloth or mulch over exposed lines to reduce algae growth inside tubing.
Maintenance & Troubleshooting (Long-Term Success) 🔧
A drip system is low-maintenance, but a little care goes a long way toward years of trouble-free operation.
Routine Care
- Flush the entire system monthly: Open end caps/flush valves and run water for 2–3 minutes to clear sediment.
- Clean or replace the filter every 1–2 months (more often if using pond/river water).
- Inspect emitters weekly at first—watch for clogs (white mineral buildup) or uneven dripping.
- Check pressure regulator and timer batteries seasonally.
Winterizing / Off-Season Shutdown
- In Barisal, there’s no hard freeze, but drain lines before long dry spells or repairs.
- Disconnect from faucet and store timer indoors if possible.
Common Mistakes to Avoid (Top 10 Expert Warnings) ❌
- Skipping the filter → clogs within weeks
- No pressure regulator → fittings burst or emitters spray instead of drip
- Too many emitters on one line → uneven watering (follow 200 GPH / 200 ft rule)
- Placing emitters too close to trunk → root rot
- Not flushing before capping ends → debris trapped forever
- Ignoring algae growth in clear tubing → switch to black/opaque
- Overwatering → yellow leaves, fungal issues (always check soil moisture 10–15 cm deep)
- Using non-pressure-compensating emitters on slopes → upper plants dry out
- Leaving system on during heavy rain → water waste & disease
- Never testing wetting pattern → assuming it’s working
Quick Fixes
- Clogged emitter? Gently squeeze or soak in vinegar solution.
- Leak at fitting? Cut out damaged section and splice with coupler.
- Uneven flow? Add inline pressure-compensating emitters or reduce total length per zone.
Advanced Upgrades & Pro Tips (Take It Further) 📈
Once your basic system is running smoothly, consider these upgrades:
- Fertigation — Add a liquid fertilizer injector after the filter to feed nutrients while watering (great for high-value veggies).
- Rain sensor — Prevents watering during monsoons (simple models ~BDT 1,500–3,000).
- Smart timer — Wi-Fi models let you control from your phone (useful during travel).
- Mulch integration — Cover lines with 5–10 cm organic mulch (rice straw, dried water hyacinth) → 20–30% extra water savings.
- Scaling up — Split into 2–3 zones with valves for larger gardens or orchards.
Expert insight: In tropical lowlands like Barisal Division, combining drip with raised beds and heavy mulching creates near-drought-proof gardens—even when tube wells run low in peak dry season.
FAQs (Answering Your Most Common Questions) ❓
How much does a simple DIY drip system cost? BDT 2,000–8,000 for 200–500 sq ft, depending on quality and extras like timer/filter.
How long should I run the system? Start with 20–40 min for veggies, 60–120 min for trees. Adjust based on soil type, weather, and digging test (aim for moist—not saturated—soil 15 cm deep).
Can I use drip irrigation for fruit trees? Yes—absolutely one of the best uses! Deep, infrequent watering builds strong roots and improves fruit quality.
What if I have low water pressure? Use gravity-fed (elevated tank) or low-flow emitters (0.5–1 GPH). Avoid long runs on one line.
Is drip better than soaker hoses? Usually yes—drip gives precise control, less evaporation, easier repairs, and better performance on uneven ground.
Conclusion (Your Garden’s New Best Friend) 🎉
Building a simple drip irrigation system is one of the highest-ROI projects any home gardener can do. You’ll save hours of labor, thousands of liters of water, and watch your plants and trees thrive like never before—even through the hottest months in Gaurnadi.
Start small: Try it on one bed of vegetables or around your favorite mango tree. Once you see the results (bigger yields, greener leaves, fewer weeds), you’ll want to expand it everywhere!
Have you built a drip system before? What plants are you watering most this season? Drop a comment below—I’d love to hear your experience and help troubleshoot if needed. Happy gardening! 🌿💚


