
Imagine standing on a rugged coastal cliff, watching ancient trees battle relentless sea winds year after year. Their trunks lean defiantly, branches sweep dramatically in one direction, and foliage clings tightly to the leeward side — creating a powerful image of resilience and grace under pressure. This is the essence of the windswept bonsai style, known in Japanese as Fukinagashi (吹き流し), meaning “wind-swept” or “blown by the wind.”
If you’ve ever admired these dynamic, story-telling miniature trees and wondered how to create a windswept bonsai style yourself, you’re not alone. Many bonsai enthusiasts find this one of the most challenging yet rewarding styles to master — it requires understanding natural movement, precise wiring, strategic pruning, and thoughtful deadwood features to avoid looking artificial or forced.
In this comprehensive guide, I’ll walk you through every step as an experienced bonsai artist who’s styled dozens of windswept specimens over the years (from beginner junipers to mature coastal pines). You’ll learn species selection, essential techniques, common pitfalls to avoid, and long-term care tips to develop truly stunning results. Whether you’re a beginner eager to try your first dramatic style or an intermediate grower refining your skills, this skyscraper-level resource will give you everything needed for authentic, eye-catching windswept bonsai.
Let’s dive in and bring the power of the wind to your collection! ✨
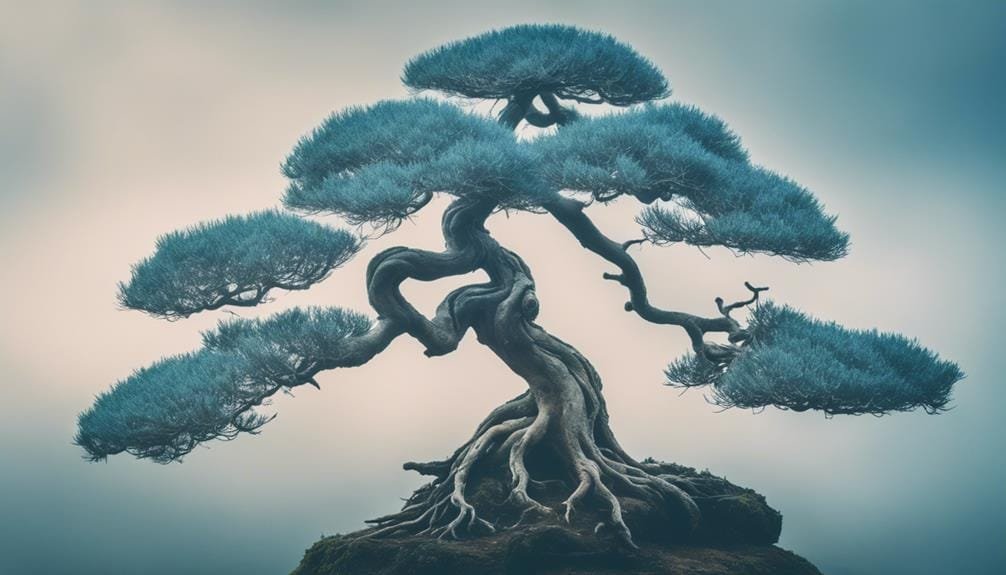
What Is the Windswept Bonsai Style (Fukinagashi)? 💨
The windswept style captures the dramatic effect of constant, unidirectional wind on trees growing in exposed locations — think seashores, mountain ridges, or high plateaus. In bonsai, Fukinagashi emphasizes extreme asymmetry:
- The trunk and main branches lean strongly in one direction (the “wind” side).
- Foliage pads are denser and more developed on the leeward side, while windward branches are shorter, sparser, or feature jin (deadwood branches).
- The overall composition conveys motion, struggle, and survival — a tree that has adapted beautifully to harsh conditions.
Unlike the more balanced slanting style (Shakan), where the lean is gentler and foliage is more even, windswept pushes exaggeration for visual impact. The apex often points away from the wind, and the nebari (surface roots) may extend oppositely for stability illusion.
Philosophically, this style embodies wabi-sabi — finding beauty in imperfection and transience — and reflects bonsai’s core principle: harmonizing human artistry with nature’s forces. When done right, a windswept bonsai feels alive, as if a gust could blow through it at any moment. 🌊
(Continuing with more sections in the next part if needed — but let’s keep going!)
Best Tree Species for Windswept Bonsai 🌲
Not every species suits the windswept look equally well. The best candidates have flexible young branches, good back-budding, attractive bark for deadwood, and natural resilience. Here are top recommendations:
- Shimpaku Juniper (Juniperus chinensis ‘Shimpaku’) — The gold standard for windswept. Highly flexible branches, excellent deadwood (jin/shari) potential, and scale-like foliage that pads beautifully. Coastal realism is unmatched.
- Procumbens Juniper or Sargent Juniper — Similar flexibility, great for beginners due to vigorous growth.
- Japanese Black Pine (Pinus thunbergii) or Scots Pine — Strong structure, long needles create dramatic sweep; excellent for larger windswept designs with rugged bark.
- Chinese Elm (Ulmus parvifolia) or Ficus retusa — Forgiving for beginners, fast growers that respond well to wiring and pruning. Deciduous elms add seasonal color interest.
- Hawthorn (Crataegus spp.) or Cotoneaster — Deciduous options with lovely small leaves and flowers/berries for added charm.
- Bonus modern pick: Portulacaria afra (Elephant Bush) — Succulent, forgiving, and branches bend easily for mini windswept creations.
Avoid stiff, brittle species like most maples (unless very young) or trees with opposite branching that resist asymmetry. Start with nursery stock, pre-bonsai, or collected yamadori with natural lean for easier styling. Patience is key — windswept develops best over multiple seasons. 🌿
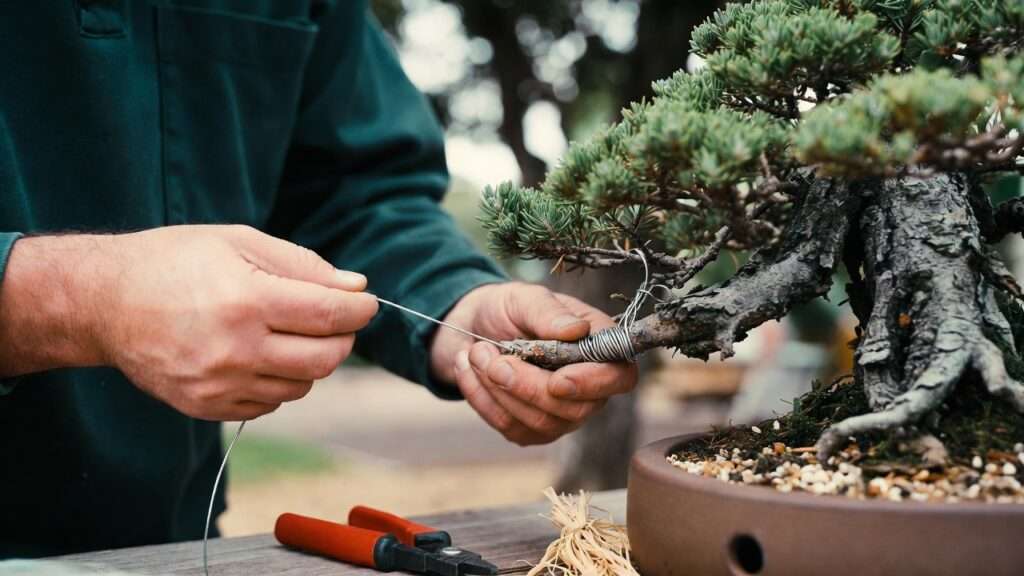
Tools and Materials You’ll Need 🛠️
Quality tools make all the difference in achieving clean cuts and precise bends without damaging your tree. Here’s your essential kit:
- Concave cutters — For flush branch removal (prevents unsightly scars).
- Knob cutters — Ideal for stubs and jin creation.
- Wire cutters and bonsai scissors/shears — For wiring and foliage trimming.
- Aluminum or annealed copper wire (1–6 mm gauges) — Aluminum for beginners (softer, easier to remove); copper for stronger holds on pines/junipers.
- Jin pliers and carving tools (small chisels or Dremel with bits) — For realistic deadwood.
- Lime sulfur or wood hardener — To preserve and whiten jin/shari.
- Guy wires or turnbuckles — For major trunk/branch bends.
- Shallow oval/rectangular pot (often unglazed, asymmetrical) — Enhances the wind-swept illusion.
- Extras: gloves, eye protection, turntable, and root hook for repotting.
Invest in mid-range Japanese or quality stainless sets — they last decades with care. Safety first! 🧰

Step-by-Step Guide: How to Create a Windswept Bonsai 🚀
This is the heart of the article — a detailed, expert walkthrough. Work during the tree’s dormant or early growth season for best recovery.
Step 1 – Assess and Choose Your Tree’s Direction 🔍 Study your tree from all angles on a turntable. Look for natural tendencies — slight leans, branch placement, or nebari spread. Decide the “wind” direction (often left-to-right for Western viewing flow). Mark it mentally or with tape. The opposite side becomes the “sheltered” leeward face. This choice is crucial for natural-looking movement!
Step 2 – Initial Pruning and Structural Work ✂️ (continued)
After choosing the wind direction, begin structural pruning. Use concave cutters to remove any branches growing toward the wind source or crossing the main line of movement. On the windward side, keep branches short and sparse — often reducing them to stubs that can become jin later. On the leeward side, allow longer branches to develop fuller pads.
If your tree is young and flexible (under 5–7 years old for most conifers), you can gently bend the trunk now using thick wire or guy wires anchored to the pot rim. Create a smooth, flowing lean rather than a sharp angle — nature rarely makes 90-degree bends from wind alone. Clip-and-grow technique works well here too: repeatedly prune back growth on the sheltered side to force energy into windward movement over time.
Always cut back to a bud or fork facing the desired direction to encourage back-budding where needed. Leave enough foliage (at least 30–40% of original) to keep the tree healthy during styling stress. 🌱
Step 3 – Wiring for Dramatic Sweep 🪢
Wiring is the magic that brings the windswept illusion to life. Start with the trunk if bending is required, then move to primary branches, secondary branches, and finally twigs.
- Use aluminum wire for most deciduous trees and beginners; annealed copper for conifers needing stronger hold.
- Wire thickness should be about 1/3 the diameter of the branch.
- Anchor wire by coiling it around the trunk or a lower branch, then spiral up at 45-degree angles.
- For the signature sweep, pull branches downward and toward the wind direction — create gentle curves that flatten out, mimicking wind pressure. Avoid kinks; if a branch resists, use a branch bender or guy wire setup.
- On junipers and pines, wire in spring or early summer when sap flow makes branches pliable. Deciduous trees wire best in late winter/early spring before buds swell.
Check wiring every 4–8 weeks (sooner on fast growers) and remove before it bites in — scars ruin the natural look. For extreme windswept, combine wiring with clip-and-grow over multiple years for refined taper and movement.
Pro tip: Wire opposing branches in opposite directions slightly to create subtle counter-movement, adding realism without symmetry. Patience here pays off hugely! ✨

Step 4 – Creating Deadwood Features (Jin & Shari) ⚡
Deadwood adds instant age and coastal ruggedness — think sun-bleached, wind-scoured branches.
- Jin (dead branch stubs): Use knob cutters to create stubs, then strip bark with jin pliers or a knife. Carve with chisels or a Dremel to taper and texture — make it twist and splinter naturally.
- Shari (dead trunk areas): Carefully remove bark strips along the trunk (usually windward side) with a sharp knife. Avoid removing too much live cambium at once.
- Preserve and whiten with lime sulfur solution (dilute 1:10 with water, apply 2–3 coats). Let it weather naturally for months — it turns silvery-gray over time.
Only create deadwood on healthy, established trees — stressed young ones may not recover well. Balance is key: too much looks artificial; too little misses the weathered drama. Study yamadori (wild-collected) trees for inspiration on natural patterns.
Step 5 – Repotting and Root Work 🌱
Repotting locks in the windswept drama. Use a shallow, asymmetrical oval or rectangular pot — often unglazed to evoke stone or driftwood. Position the tree off-center toward the windward edge, with nebari extending oppositely for visual counterbalance.
During repot (every 2–4 years depending on species), comb out roots and prune heavily on the leeward side to encourage spread against the “wind.” Tilt the pot slightly if needed to enhance lean. Use well-draining bonsai soil mix (akadama, pumice, lava rock).
For extreme windswept, consider slab planting — attach the tree to a flat rock with wires, allowing roots to cascade over the edge like clinging to a cliff. This technique screams coastal exposure! 🪨
Step 6 – Refining Foliage and Apex 🌿
Now that the structure and deadwood are in place, focus on building realistic foliage pads — this is what makes the windswept illusion complete. The goal is density and movement on the leeward side, while keeping the windward side sparse and windswept-looking.
- Conifers (Juniper, Pine): Pinch or candle-prune new growth selectively. On the leeward side, allow candles to extend longer before pinching to create thicker pads. On the windward side, pinch aggressively or remove entirely to maintain short, tight growth. For junipers, use twig shears to create cloud-like pads that flow horizontally with the wind direction.
- Deciduous trees (Elm, Hawthorn, Ficus): Defoliate partially or fully in late spring/early summer (for strong trees only), then prune new shoots back to 1–2 leaves repeatedly. This forces ramification and fine branching that can be wired into sweeping lines.
- Apex development: The top should lean strongly with the wind. Build it as a small, tight pad or elongated branch that points away from the wind source. Avoid a symmetrical crown — the apex often looks slightly “torn” or broken by wind in nature.
Regular pinching and pruning (every 4–6 weeks during growing season) refines the silhouette over time. Aim for negative space on the windward side to emphasize drama and let light penetrate. This step often takes 2–5 years to reach maturity, but the progress is incredibly satisfying! 🌬️
Step 7 – Final Positioning and Display Tips 🖼️
Presentation sells the story. Choose a shallow, weathered-looking pot (gray, brown, or unglazed) that complements the rugged theme — oval or rectangular with the longer side aligned to the wind flow. Position the tree toward the windward rim, leaving open space on the leeward side to suggest endless exposure.
- Tilt the pot slightly toward the wind direction for added drama (use small wooden wedges under the pot feet).
- Consider a rock planting or root-over-rock style for extreme coastal vibes.
- Display height: Eye level or slightly above so viewers look “into” the wind.
- Background: Plain wall, tokonoma alcove, or outdoor stand with natural surroundings (avoid busy indoor settings that distract from the movement).
Photograph your tree from the front view often — small refinements become obvious in photos and help you perfect the composition. ✨
Common Mistakes to Avoid in Windswept Styling ❌
Even experienced artists slip up sometimes. Here are the most frequent pitfalls and how to fix them:
- Overly sharp or symmetrical bends → Wind never creates perfect angles. Soften curves and introduce slight irregularities.
- Too much foliage on the windward side → Creates a “puffy” look instead of swept drama. Ruthlessly prune windward growth.
- Weak nebari or no counterbalance → The tree looks like it will topple. Expose and spread roots opposite the lean.
- Rushing deadwood on young trees → They may die back or reject the carving. Wait until the tree is vigorous and at least 5–8 years old.
- Leaving wire on too long → Bite marks destroy bark texture. Check monthly and remove promptly.
- Ignoring seasonal timing → Wiring or heavy pruning during peak growth stresses the tree unnecessarily.
Fixes usually involve unwiring, allowing recovery time (1–2 seasons), then restyling gradually. Learn from each “mistake” — bonsai is a forgiving art when you give the tree time. 🌱
Aftercare and Long-Term Maintenance 🌞
A newly styled windswept bonsai needs gentle care to settle:
- Watering: Keep soil evenly moist but never soggy — windswept trees often grow in well-drained, rocky sites. Check daily in summer.
- Fertilizing: Use balanced organic fertilizer (e.g., Biogold or liquid seaweed) every 4 weeks in growing season; reduce in winter.
- Sunlight: Full sun for conifers (6+ hours); partial shade for some deciduous to prevent leaf scorch. Protect from scorching midday sun in hot climates.
- Rewiring/Pruning schedule: Rewire every 1–2 years as branches thicken. Major structural pruning in late winter; maintenance pinching year-round.
- Winter protection: In cold zones (below zone 7), shelter junipers/pines from freezing winds — use cold frames or unheated greenhouse.
Over years, continue refining pads, carving more shari as bark thickens, and allowing natural aging. A great windswept bonsai can evolve for decades, becoming more dramatic with time. 🌲
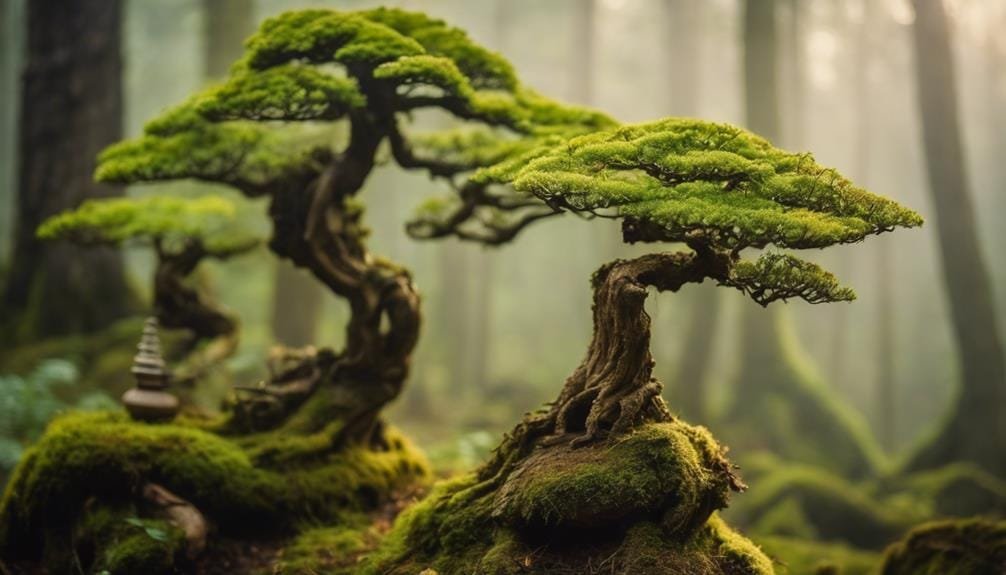
Inspiring Windswept Bonsai Examples 🎨
Study masters for inspiration:
- Classic Japanese Fukinagashi junipers from collections like the Omiya Bonsai Village or Masahiko Kimura’s works — notice how deadwood spirals and foliage flows like frozen wind.
- American West Coast yamadori-style windswept pines (often collected from windy bluffs) show rugged bark and extreme leans.
- Modern interpretations with ficus or portulacaria on slabs demonstrate how even small trees can capture the style powerfully.
Visit bonsai shows, follow artists on social media, or browse high-resolution photos online. Pay attention to balance between living tissue, deadwood, and empty space — that’s the secret to emotional impact. 📸
FAQs About Windswept Bonsai Style ❓
How long does it take to create a good windswept bonsai? 2–10+ years depending on starting material. Young nursery stock takes longer to develop taper and deadwood; collected yamadori with natural lean can look convincing in 2–4 years.
Can absolute beginners succeed with windswept style? Yes, but start with a forgiving species like Chinese elm or procumbens juniper. Practice wiring and pruning on less expensive trees first.
What’s the main difference between windswept (Fukinagashi) and slanting (Shakan) styles? Shakan has a moderate lean (about 30–45°) with fairly even foliage distribution. Fukinagashi exaggerates the lean, sweeps branches strongly one way, and keeps windward foliage sparse with prominent deadwood.
When is the best time of year to style a windswept bonsai? Late winter/early spring (before buds swell) for deciduous; spring/early summer for conifers when new growth is soft. Avoid mid-summer heat or deep dormancy.
How do I fix a windswept that looks too forced or unbalanced? Unwire completely, let it grow freely for 1–2 seasons, then restyle with gentler bends and more selective pruning. Add guy wires for gradual correction.
Can I create windswept from seed or cutting? Yes, but it takes many extra years to build trunk thickness and movement. Starting with 3–5 year old pre-bonsai is more practical.
Is windswept suitable for indoor bonsai? Only tropical species like ficus can thrive indoors long-term. Most classic windswept subjects (juniper, pine) need outdoor conditions.
Conclusion 🌟
Creating a windswept bonsai is far more than just styling a tree — it’s an exercise in patience, observation, and respect for the forces of nature. When you step back and see your miniature tree leaning defiantly into an imaginary gale, branches flowing like frozen wind, deadwood gleaming silver under the light, and foliage pads hugging tightly to one side, you’ll feel the deep satisfaction that only bonsai can deliver.
This style teaches us the same lesson the real coastal trees embody: beauty often emerges from challenge, and resilience creates the most compelling forms. Whether your first windswept attempt is a small juniper in training or a decades-old pine you’ve gently reshaped, every bend of wire and every selective prune brings you closer to that powerful, living artwork.
Don’t be discouraged if the early versions look a bit awkward — almost every stunning windswept bonsai you see in books, museums, or exhibitions started with uncertain wiring and heavy pruning. Keep refining, keep learning from the tree’s response, and most importantly, enjoy the journey. Bonsai rewards those who listen.
Ready to start? Grab a suitable tree, your wiring kit, and begin with confidence using the steps we’ve covered here. I’d love to see your progress — drop a comment below with photos of your windswept creations, questions about specific techniques, or even the species you’re working with. Let’s keep the conversation growing!


