Ever dreamed of harvesting your own walnuts straight from a tree in your backyard? 🌳 Growing a walnut tree from a nut might sound like a daunting task, but it’s an incredibly rewarding journey that anyone can embark on—even complete beginners! If you’re wondering how to grow a walnut tree from a nut, you’re in the right place. This step-by-step guide is designed to make the process simple, approachable, and fun, turning your vision of a thriving walnut tree into reality.
Why bother with this project? Beyond the satisfaction of nurturing a tree from scratch, walnut trees offer nutritious nuts, provide shade, and even boost your property’s value. Yet, many aspiring gardeners hesitate, unsure where to start or fearing they’ll fail. Don’t worry—we’ve got you covered! In this guide, we’ll walk you through every detail, solving common pain points with practical tips you won’t find everywhere. Ready to plant the seed of something amazing? Let’s dig in and grow together! 😊
🌰💚 Understanding Walnuts and Their Growing Requirements 💚🌰
Before you dive into growing a walnut tree, it’s essential to understand the basics of what walnuts need to thrive. 🌱 Whether you’re growing them for their delicious nuts or as a beautiful shade tree 🌳, knowing the right growing conditions will give your tree the best chance for success. Let’s break it down into easy-to-follow points: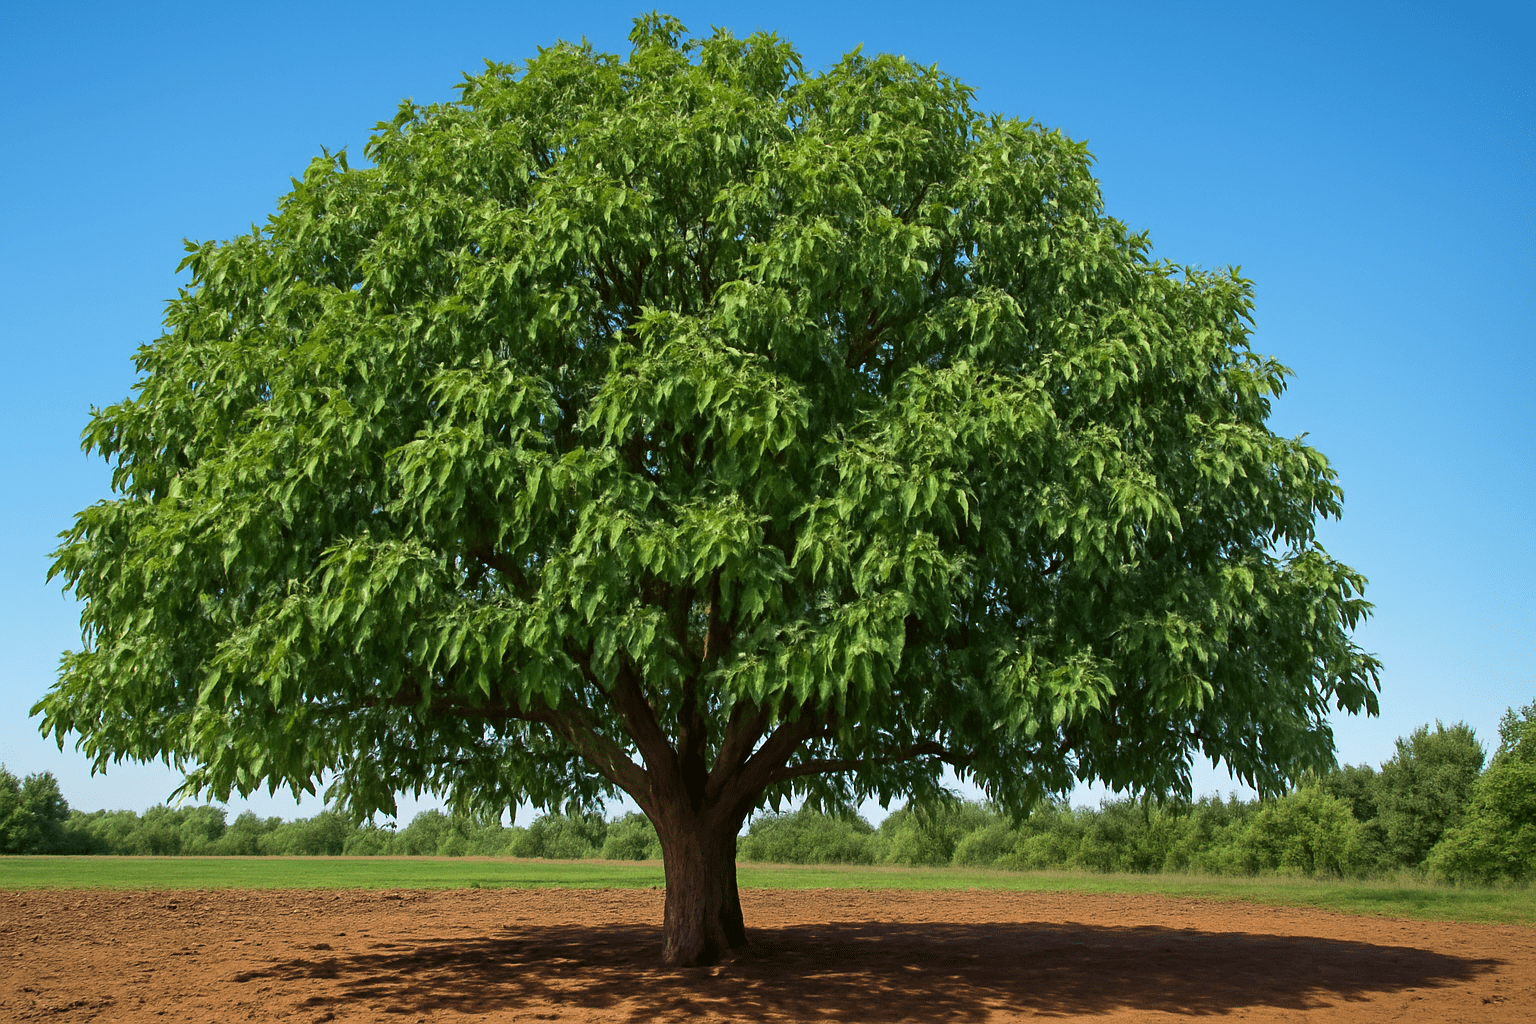
🌞🌱 Climate and Soil Needs 🌱🌞
Walnut trees are a bit picky about where they grow. 🌍 They thrive in temperate climates with distinct seasons, meaning they need a cold winter ❄️ and a warm summer 🌞 to produce the best nuts.🌿 Hardiness Zones 🌿:
Walnuts generally do best in USDA zones 4-9. That means they grow well in areas with cold winters ❄️ and mild summers ☀️.🌡️ Temperature 🌡️:
Walnuts prefer temperatures between 75-85°F (24-29°C) during the growing season. Anything too hot 🌞 or too cold 🥶 can slow their growth.🌱 Soil Type 🌱:
They love loamy soil 🌾 that drains well but still retains moisture 💧. Avoid heavy clay soils, as they don’t drain well and can lead to root rot 🦠.⚖️ Soil pH ⚖️:
Aim for a soil pH of 6 to 7 (slightly acidic to neutral). If your soil is too acidic 🍋 or alkaline 🌾, you can adjust it with organic amendments 🌿 or lime.🌳🌟 Tree Size and Spacing 🌟🌳
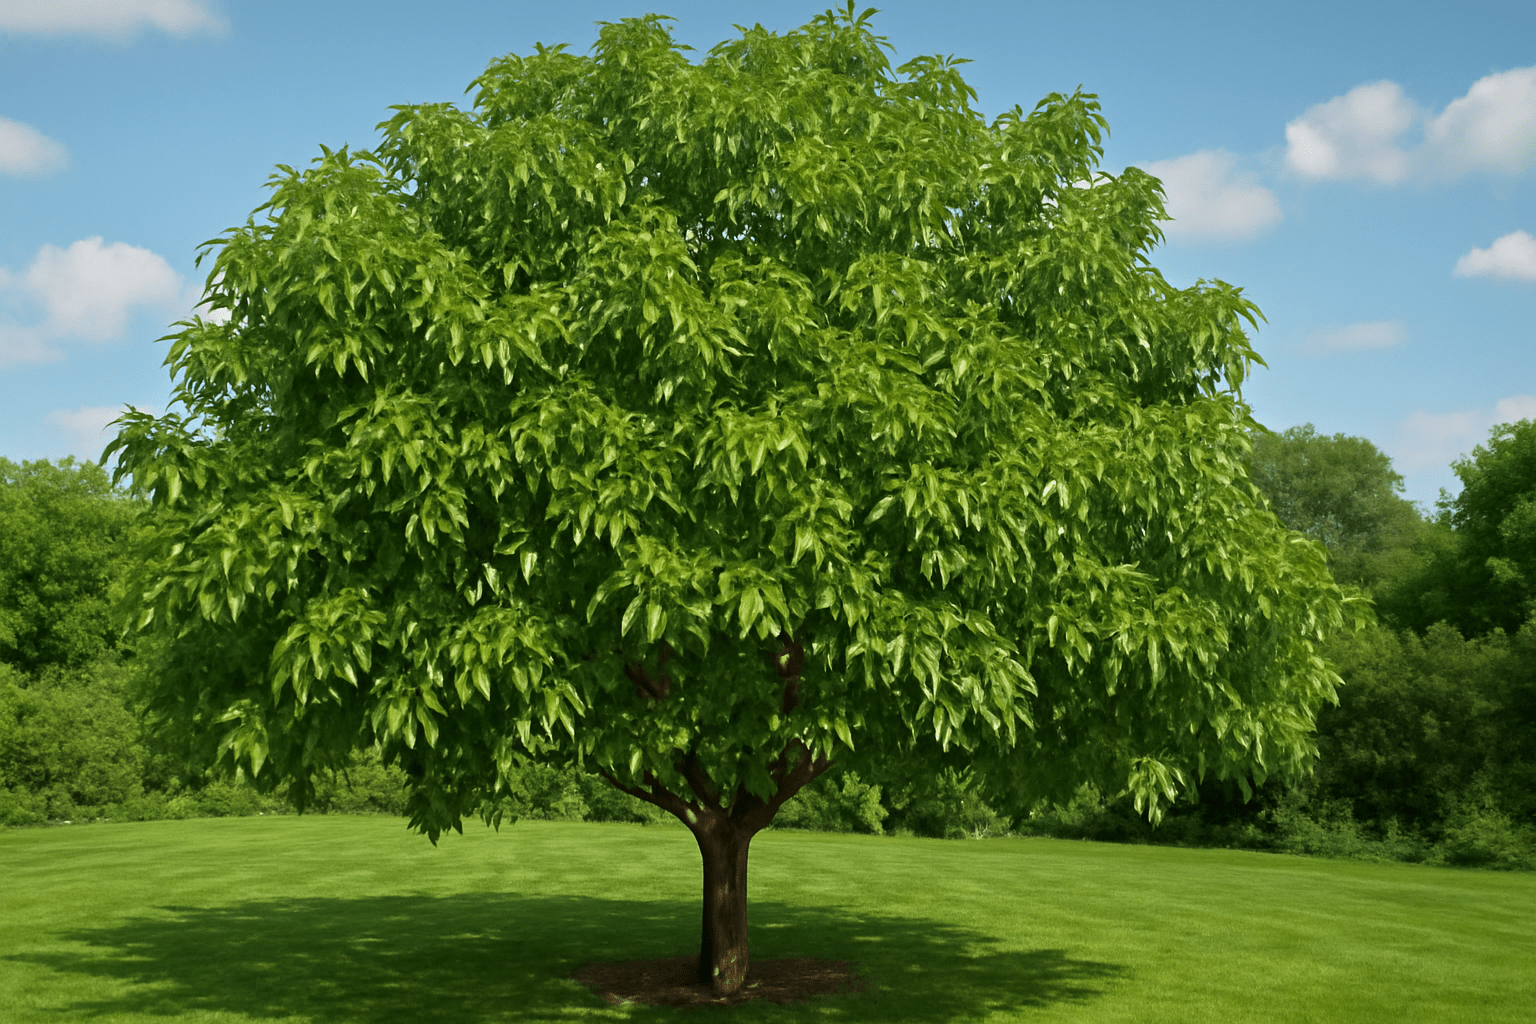
Walnut trees are large and majestic 🌳, so give them plenty of room to grow!🌳 Mature Size 🌳:
Walnut trees can grow quite tall—up to 50-75 feet (15-23 meters) 📏. Their canopy can spread 40-60 feet (12-18 meters) wide 🌳🌿, so make sure they have ample space.↔️ Spacing ↔️:
If you’re planting more than one tree, space them at least 40-50 feet apart 🚶♂️. This will allow each tree to grow to its full potential without overcrowding 🌱.🌞🌳 Ideal Growing Location 🌳🌞
Finding the right spot in your yard 🏡 is crucial for your walnut tree’s health 🌿 and future nut production 🌰.🌞 Sunlight 🌞:
Walnuts need full sunlight to grow strong 💪. Aim for a location where the tree will get at least 6 hours of direct sunlight per day 🌞.🚫 Avoid Shading 🚫:
Don’t plant your walnut tree in a shaded corner 🌳 or close to other large trees that could block the sunlight it needs 🌥️.🌱 Space for Roots 🌱:
Remember, walnut trees have deep, spreading roots 🌱. Make sure to plant them far from buildings 🏠, sidewalks 🚶♂️, and other trees 🌳. By understanding these fundamental needs 🌿, you can ensure that your walnut tree starts off on the right foot 👣. If you have the right climate 🌞, soil 🌱, and space 🌳, your walnut tree will be happy 😊 and ready to grow into a productive, beautiful tree 🌳.🌰🧑🌾Selecting and Preparing Walnut Nuts for Planting 🌱🌰
Now that you know what your walnut tree needs to thrive, it’s time to focus on selecting and preparing the walnuts for planting. The quality of the nut you start with can make a huge difference in the success of your tree, so let’s dive into the steps to ensure you’re off to a great start! 🌱🌳🧐 Choosing the Right Walnuts 🧐
Not all walnuts are created equal, and choosing the right nuts is crucial for successful germination. Here’s how to pick the best ones: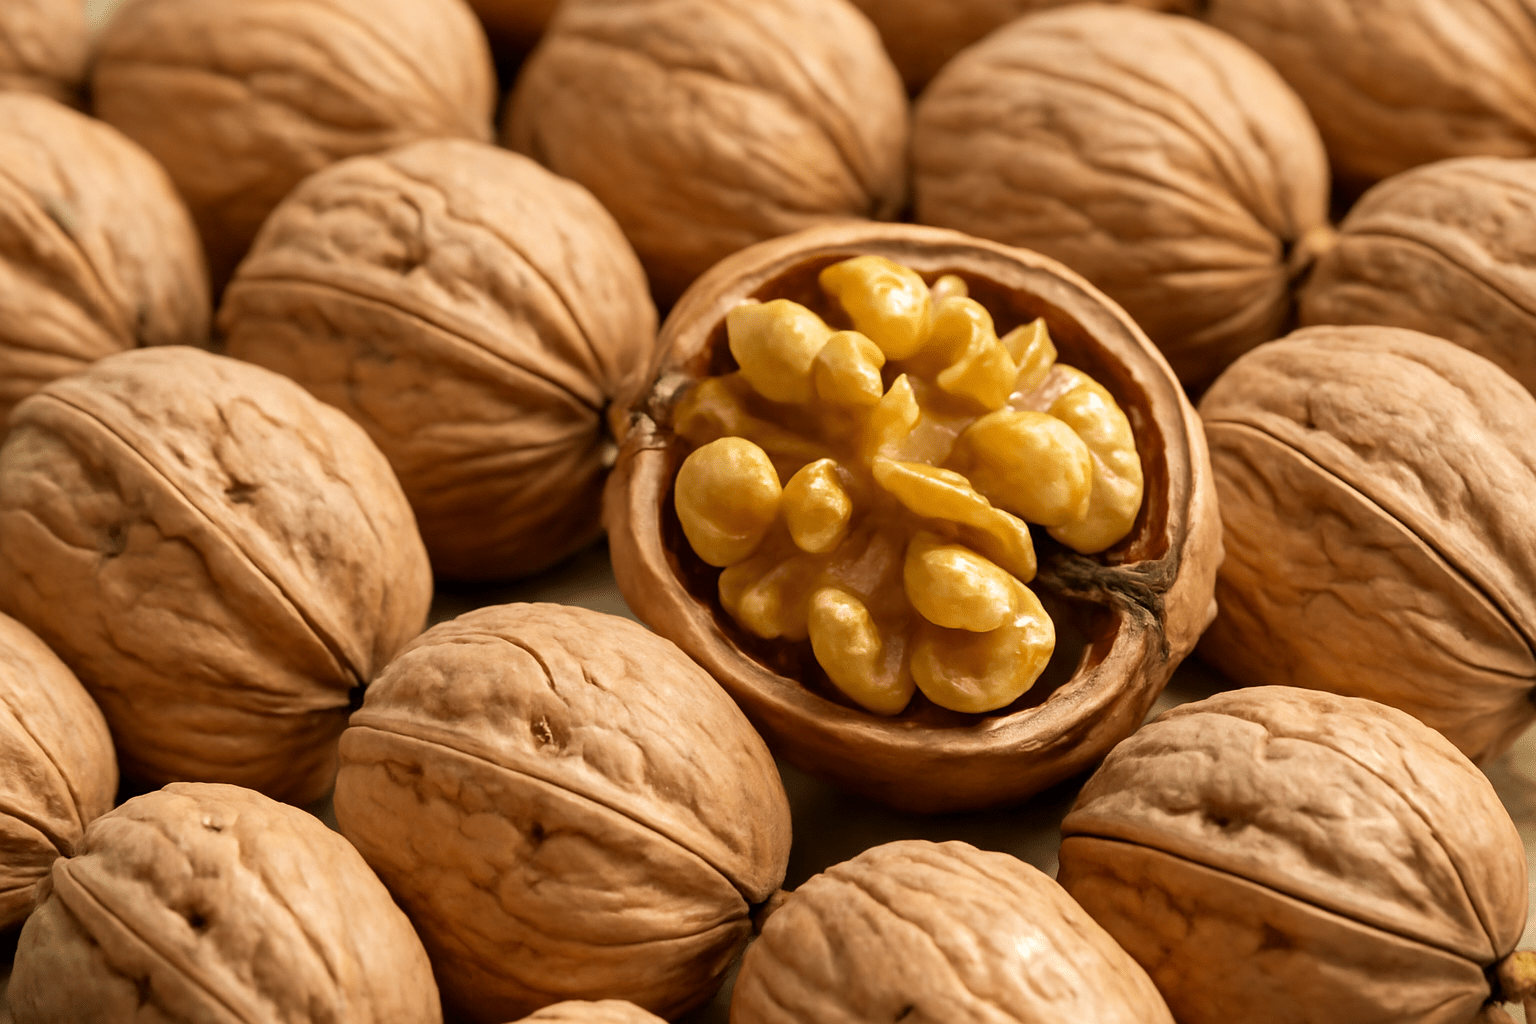
🌰 Freshness is Key 🌰:
Choose fresh, unshelled walnuts that are free from cracks or damage. The fresher the nut, the better chance it has for germinating. 🌱🌍 Local or Trusted Sources 🌍:
It’s ideal to select walnuts from a local source or one with a good reputation. This ensures the nuts are adapted to your specific climate. 🌤️🚫 Avoid Store-Bought Walnuts 🚫:
Nuts that are pre-shelled or processed for eating may not germinate well, as they’ve often been treated in ways that can affect their ability to sprout. 🌱🧊 Preparing Walnuts for Germination 🧊
Once you have your walnuts, the next step is preparing them for germination. Walnuts require a period of cold treatment (called stratification) before they will sprout. Here’s how to do it:✋ Remove the Husk ✋:
If you’ve gathered whole walnuts, carefully remove the outer green husk. You can do this by hand or by using a hammer or mallet to crack the outer layer. 💥 You don’t need to worry about the hard shell; just make sure to get rid of the soft husk surrounding it. 🌿❄️ Cold Stratification (Chilling Process) ❄️:
- Refrigerator Method: Place the nuts in a sealed plastic bag with some damp peat moss, sand, or even a paper towel. Put the bag in the fridge for 2-3 months. This simulates winter and helps the nuts break dormancy. 🧊🌰
- Outdoor Stratification: If you live in an area with cold winters, you can leave the walnuts in a shaded, damp outdoor area for the same period. Just make sure the nuts are safe from rodents! 🐭
💧 Pre-Soaking 💧:
Before planting, soak the walnuts in water for 24 hours. This helps soften the shell and promotes better germination by kickstarting the natural processes inside the nut. 🌱💧🔍 Checking for Viability 🔍
Not all nuts will sprout, so it’s a good idea to check if the walnuts are still viable before planting:🏊♂️ Float Test 🏊♂️:
Place your walnuts in a bowl of water. If they float, they’re likely not viable and should be discarded. Nuts that sink have a better chance of sprouting. 🌱 By selecting the freshest walnuts and preparing them correctly, you’ll ensure the best chances of germination. With these easy steps, you’re well on your way to growing a healthy walnut tree! 🌳🌰😊🌱🌰 Germinating Walnuts: A Simple, Proven Process 🌰🌱
Germinating walnuts is the crucial first step to growing a healthy tree 🌳. With the right preparation, you can encourage your walnuts to sprout 🌱 and take root. Don’t worry, it’s easier than it sounds! Follow these simple steps, and you’ll be well on your way to growing a thriving walnut tree 🌳😊.🧊 Cold Stratification: The Key to Germination 🧊
As mentioned earlier, walnuts need a period of cold treatment to break their dormancy and start the germination process 🌱. This mimics the natural winter conditions ❄️ that walnuts would experience in the wild. Here’s how to get it right: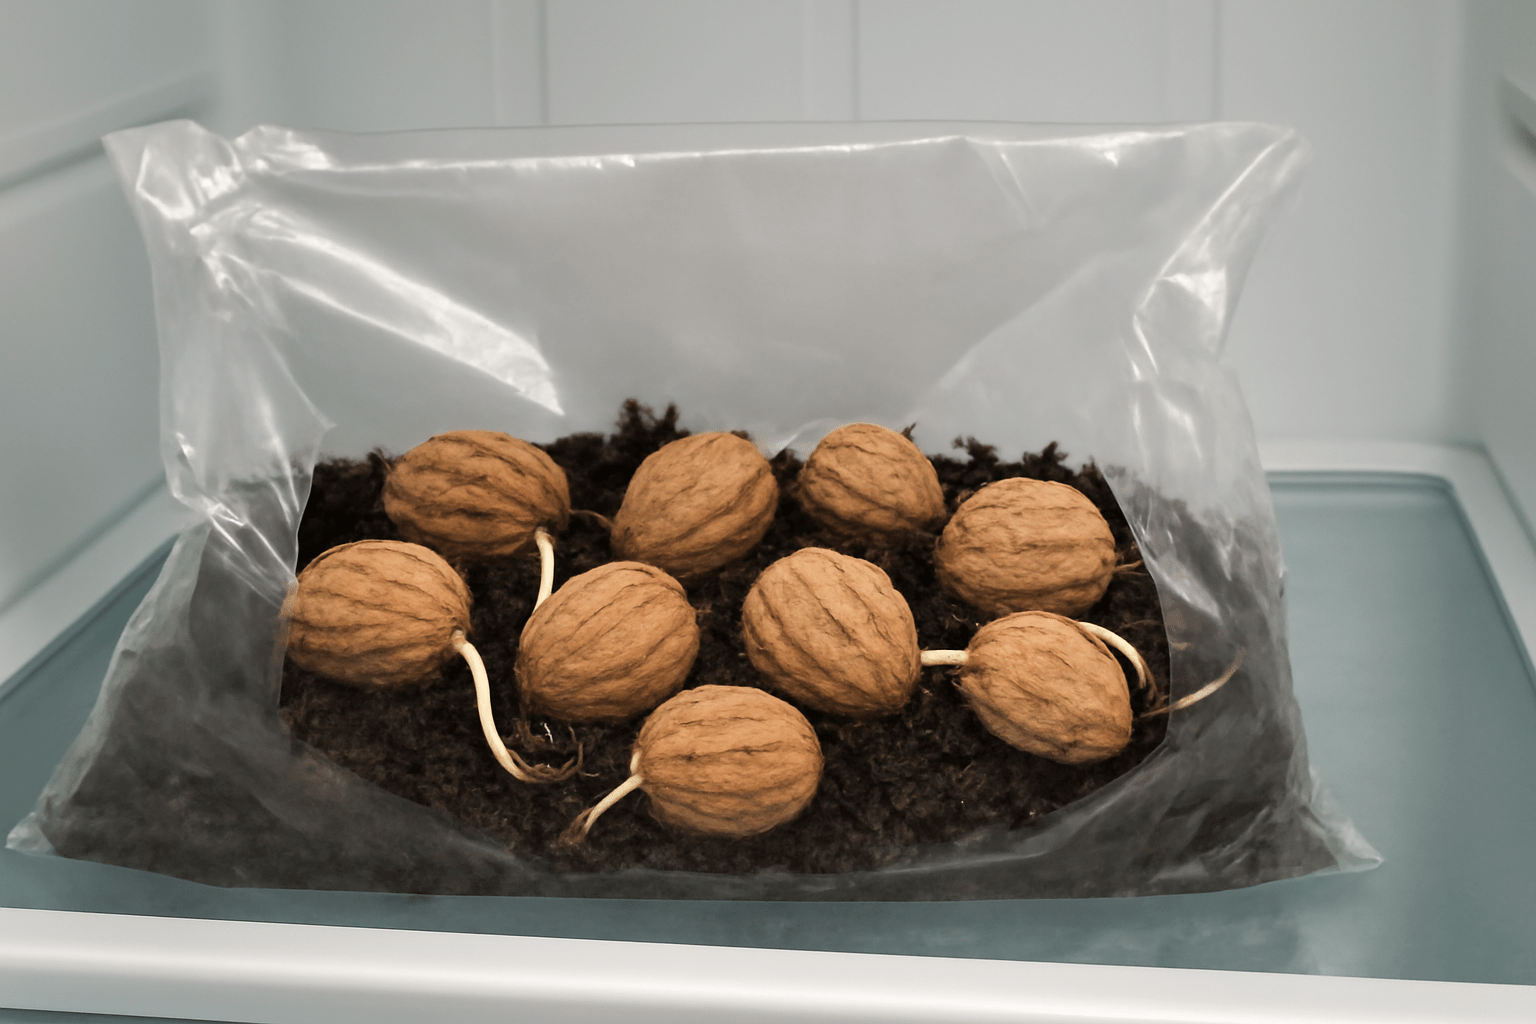
❄️ Refrigerator Stratification ❄️:
After removing the husk and pre-soaking the nuts 🌰, place them in a plastic bag 🛍️ with damp peat moss or sand 🌿. Store the bag in your fridge 🧊 for 2-3 months. During this time, check periodically to make sure the moisture level stays consistent 💧 but not too soggy 🌧️.🍃 Outdoor Stratification 🍃:
If you live in a cold climate 🏔️, you can also bury the nuts 🌰 in a shaded, damp outdoor spot 🌳. Cover them with a layer of leaves 🍂 or mulch 🌾 to keep the temperature just right. Make sure the area is secure from pests 🐭 and rodents 🐀 that might want to snack on your precious walnuts! 🌰🌡️ The Ideal Germination Temperature 🌡️
Once your walnuts have undergone stratification ❄️, it’s time to plant them 🌱. Walnuts like to germinate when the soil temperature is between 50°F to 60°F (10°C to 16°C) 🌡️. This is usually in early spring 🌸, when the ground is still cool but not frozen ❄️. If you’re planting indoors or in containers 🪴, you can control the temperature to give your walnuts the best chance for sprouting 🌱.🌱 Signs of Germination 🌱
Now, you just need to wait a bit longer ⏳, but don’t worry, you’ll know when it’s time to plant! Here’s what to look for:🌰 Cracking 🌰:
When the walnut begins to crack open 🧑🌾, that’s a sign that the seed inside is ready to sprout 🌱.🌱 Roots and Shoots 🌱:
As the walnut germinates 🌱, you’ll see small roots beginning to emerge 🌿 from the nut 🌰. This is the first sign of life! Soon, you’ll also notice a tiny shoot sprouting 🌿 out from the nut 🌰.⏳ How Long Does Germination Take? ⏳
On average, walnuts take about 3-6 weeks to germinate after proper cold stratification 🧊. During this time, be patient ⏳—germination can sometimes take a little longer 🕰️, depending on environmental conditions 🌤️. By following these steps, you’ll set the stage for a successful walnut tree 🌳. Germination may seem like a slow process 🐢, but trust us, it’s worth the wait! 🌰🌱 The next step will be planting your sprouted walnut in the ground 🌍 where it can grow into a beautiful tree 🌳! 😊🌱🌰 Planting Your Germinated Walnut Nut 🌰🌱
Now that your walnut has successfully germinated and is ready to grow 🌱, it’s time to plant it! This step is all about giving your walnut seedling the best chance to thrive in the soil 🌍. Let’s walk through the simple process of planting your germinated walnut nut in a way that ensures strong, healthy growth 🌳.⏰ Best Time to Plant Your Germinated Walnut ⏰
The best time to plant your germinated walnut nut 🌰 is in early spring 🌸, right after the last frost ❄️. At this point, the soil has started to warm up 🌞 but is still cool enough to support healthy root growth 🌱.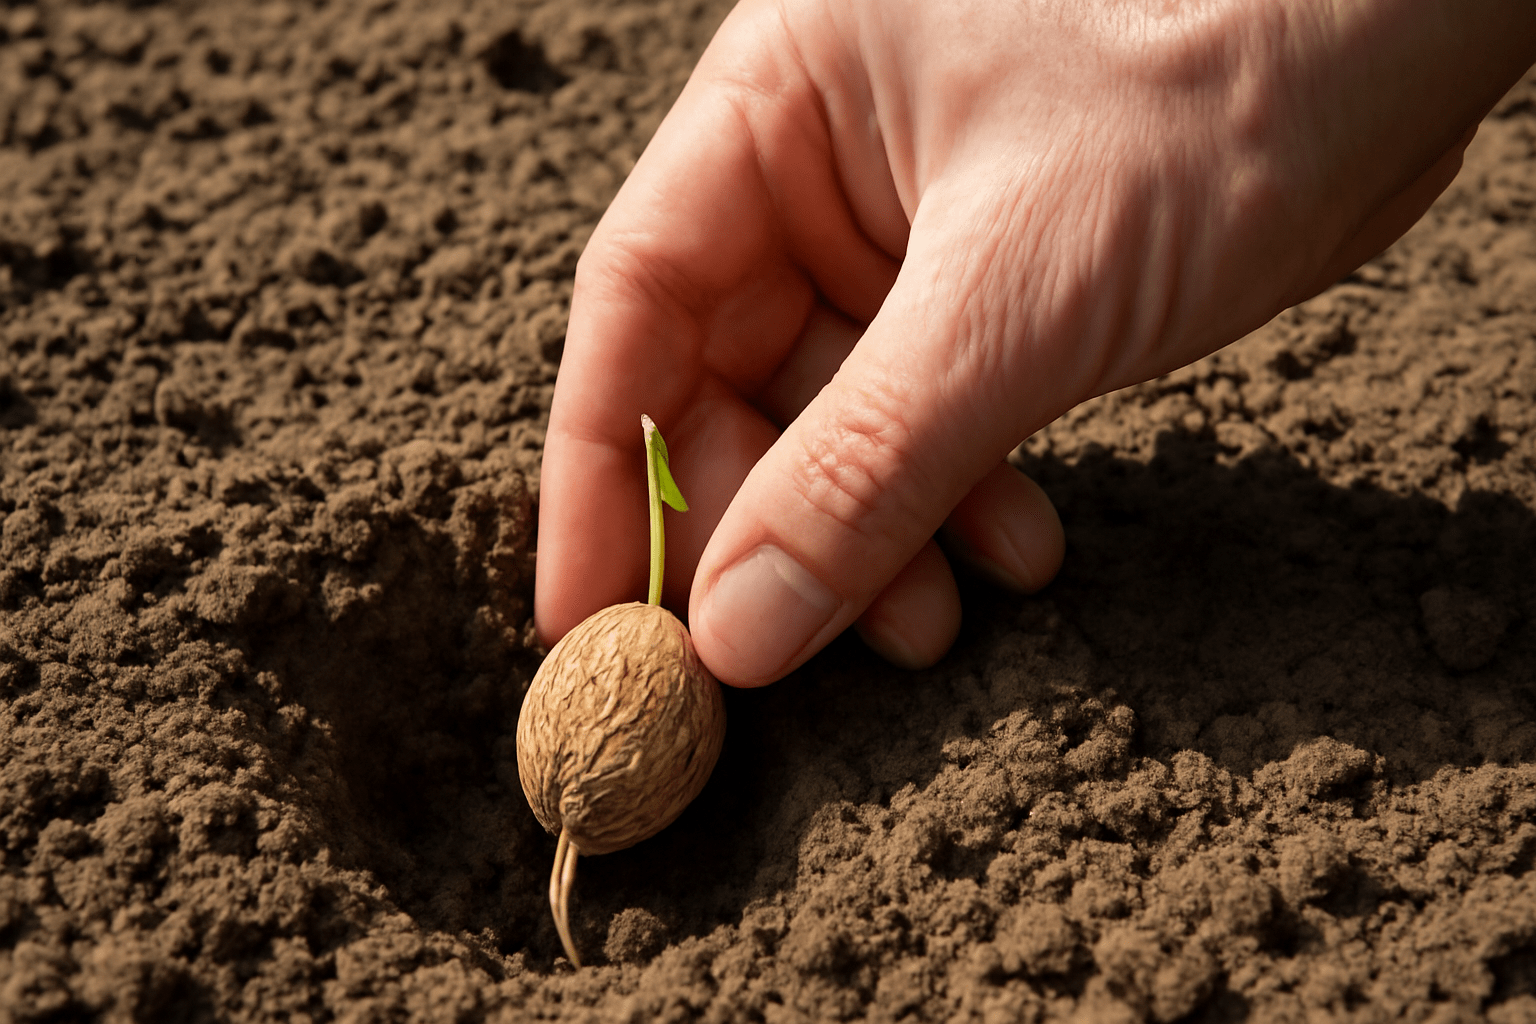
🌡️ Soil Temperature 🌡️:
Aim for a soil temperature between 50°F to 60°F (10°C to 16°C) 🌡️. This gives your walnut 🌰 the ideal environment to establish its roots 🌿.🌿 Preparing the Planting Hole 🌿
Before planting, it’s important to prepare the right hole for your germinated walnut nut 🌰. Here’s how to do it:🕳️ Dig a Hole 🕳️:
Dig a hole that’s about 4-6 inches deep (10-15 cm) 🏡. This depth is just enough to allow the walnut’s root 🌱 to grow without being buried too deep.↔️ Width ↔️:
The hole should be wide enough to accommodate the walnut’s sprouted root 🌿 without crowding it—around 8-10 inches wide (20-25 cm) is perfect 🌰.🪴 Soil 🪴:
Loosen the soil at the bottom of the hole to help the roots establish more easily 🌱. If your soil is heavy or clay-like 🏞️, consider mixing in some compost 🌾 or organic matter to improve drainage and aeration 💨.🌱 Planting the Germinated Nut 🌱
It’s time to plant your walnut! Here’s how to do it properly:🌰 Position the Walnut 🌰:
Gently place the germinated walnut nut 🌰 into the hole. Make sure the root faces down ⬇️ and the shoot (tiny stem) is facing upward ⬆️.🏞️ Cover the Nut 🏞️:
Fill the hole with soil 🌱, covering the nut completely. Make sure the nut is just beneath the surface, but don’t bury it too deep 🏡.💧 Water 💧:
After planting, water 💦 the area well. Walnuts like moist soil 💧, but make sure it’s not soggy 🌧️. Keep the soil consistently moist 💧 to encourage strong root growth, especially during the first few weeks 🌱.🏡 Choosing the Right Location 🏡
The spot where you plant your walnut tree 🌳 is crucial for its growth 🌱. Here’s what you need to consider:🌞 Full Sun 🌞:
Walnuts need full sunlight 🌞 to grow strong and healthy 🌱. Choose a location where your walnut will get at least 6 hours of direct sunlight a day 🌅.🌳 Space for Growth 🌳:
Remember, walnut trees grow large 🌳! Ensure that the area has enough space for the tree to reach its full potential, both in height ⬆️ and width ↔️. Ideally, plant your walnut at least 40-50 feet away from other trees 🌲 or structures 🏠.🌱 Well-Draining Soil 🌱:
Make sure the soil drains well 💧. Walnuts don’t like “wet feet” 💦, so avoid planting in low-lying areas where water might pool 🏞️. Now that your walnut is in the ground 🌍, all you need to do is give it some time ⏳ and care 🧑🌾. 🌱🌳 With the right conditions, your walnut tree will start to grow strong and steady 🌱, ready to face the next stages of development. 🌰😊🌳🌱 Caring for Your Walnut Tree (Year 1 and Beyond) 🌱🌳
Congratulations! 🎉 Your walnut tree 🌰 is now planted and on its way to becoming a strong, productive tree 🌳. But the journey doesn’t end there. Just like any young plant 🌱, your walnut will need some extra care in its first few years to establish itself. Let’s walk through the best ways to care for your walnut tree 🌰 and help it thrive year after year 🌿.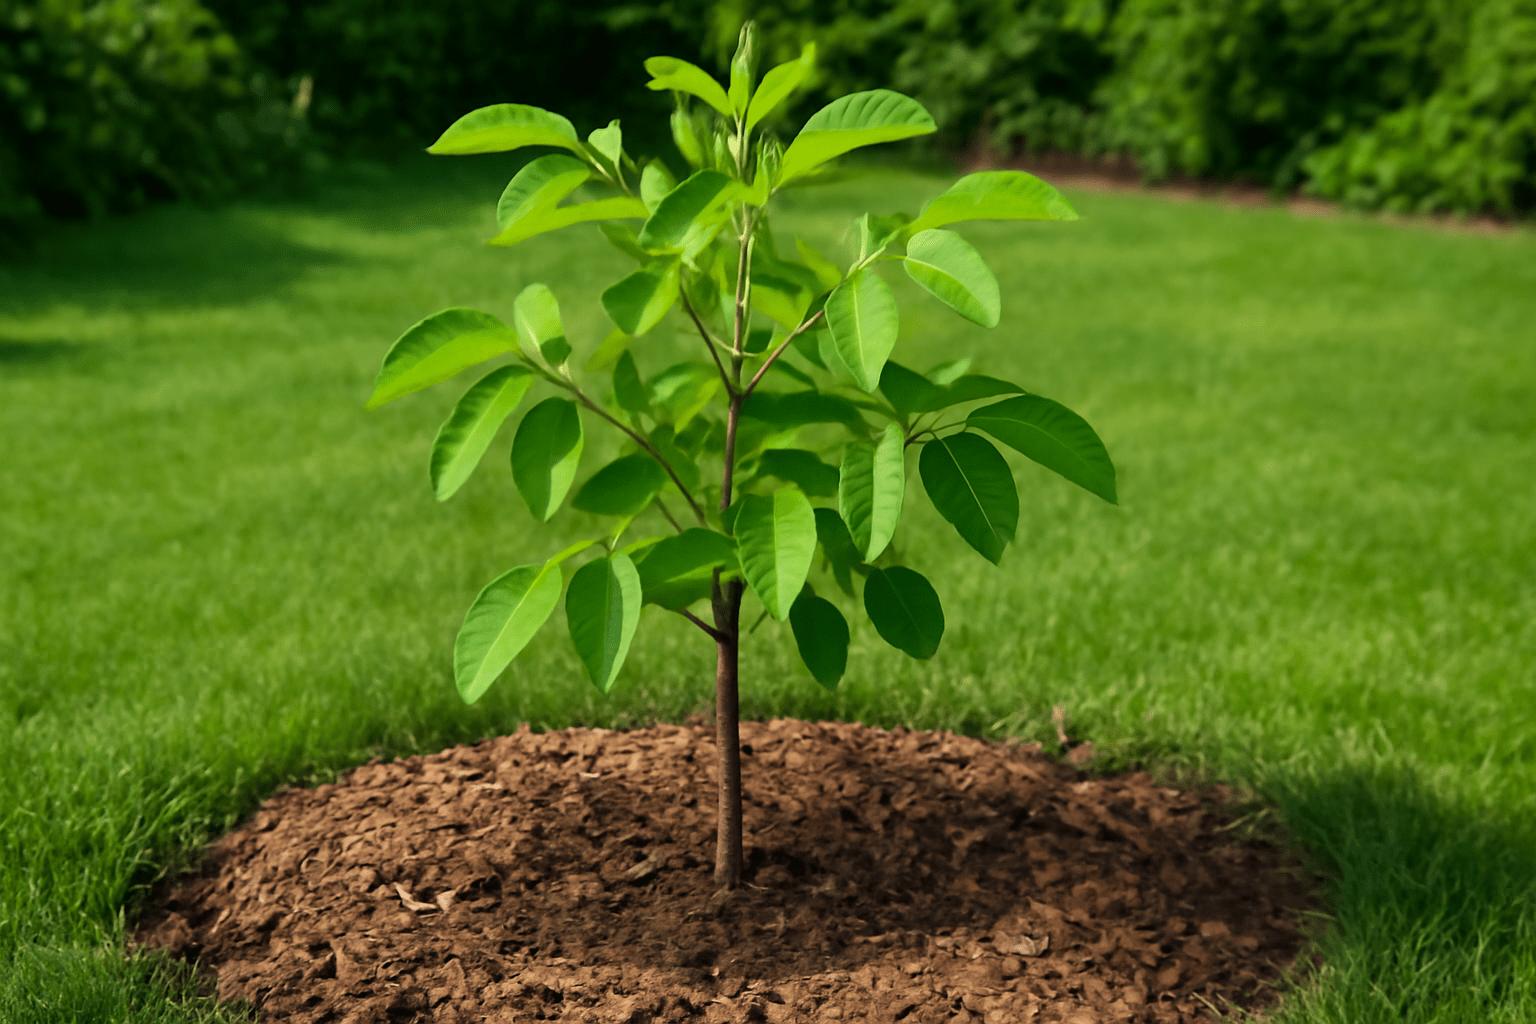
💧 Watering Your Walnut Tree 💧
Proper watering 💦 is one of the most important aspects of caring for your walnut tree 🌳, especially during the first year when the roots 🌱 are still establishing themselves.First Year Watering 🌱:
In the first year, water 💧 your walnut regularly to keep the soil consistently moist 🌾. This is crucial for root development 🌱. However, avoid overwatering 💦, as walnut trees don’t like soggy soil 🌧️.Watering Frequency 💦:
During dry spells, water 💧 your walnut tree once or twice a week 🌞. During the rainy season 🌧️, you can reduce watering. The key is to ensure the soil remains moist 🌱, not waterlogged 🌊.Deep Watering 💧:
When you water 🌊, make sure to water deeply, allowing the water to reach the roots 🌱. This encourages the roots to grow deeper into the soil 🌍, making the tree more drought-resistant as it matures 🌳.🌿 Fertilizing Your Walnut Tree 🌿
Young walnut trees 🌱 don’t require heavy fertilization, but a little boost can help them grow faster and stronger 💪, especially in nutrient-poor soil 🌾.When to Fertilize 🌱:
Start fertilizing 🌱 in early spring 🌸, just before the growing season begins 🌞.What to Use 🌱:
Use organic compost 🌾 or a balanced, slow-release fertilizer 🌱. Walnuts are heavy feeders 🍽️, so using organic matter like compost will provide them with essential nutrients while improving soil structure 🌍.Avoid Over-Fertilizing 🚫:
Too much fertilizer ⚠️, especially nitrogen 🧪, can encourage rapid, weak growth 🌱. Stick to the recommended amount on the fertilizer label 📋.🌳 Mulching Around Your Walnut Tree 🌳
Mulch is your walnut tree’s best friend 🌱, especially in the first few years 🌿. It helps conserve moisture 💧, suppress weeds 🌾, and regulate soil temperature 🌡️.Applying Mulch 🌱:
Apply a 2-4 inch layer of mulch 🌾 around the base of the tree 🌳, but avoid piling it directly against the trunk 🚫. Leave a small gap between the mulch and the trunk to prevent moisture buildup 💧 and potential rot 🦠.Best Mulch Materials 🌱:
Use organic mulch like wood chips 🌲, straw 🍂, or shredded leaves 🍁. These materials break down over time ⏳, adding valuable nutrients back into the soil 🌍.✂️ Pruning Your Walnut Tree ✂️
While young walnut trees 🌱 don’t need much pruning ✂️, some light trimming can encourage healthy growth 🌱 and shape the tree properly for the future 🌳.When to Prune 🌱:
Prune ✂️ in early spring 🌸 before new growth begins 🌱. Remove any dead, damaged, or crossing branches 🌳. Focus on shaping the tree 🌲 and creating a strong central leader (the main trunk) 🌳 for future growth.Don’t Over-Prune 🚫:
Avoid pruning too much in the first few years 🌱. Let the tree establish itself 🌳 before making major cuts ✂️. Over-pruning can stress the tree and delay growth 🐢.🐾 Protecting Your Walnut Tree 🐾
Your young walnut tree 🌳 is vulnerable to pests 🐛 and animals 🦌, so some extra protection 🛡️ is needed.Rodent Protection 🐭:
Use tree guards 🛡️ to protect the trunk from rodents 🐀 that may chew on the bark 🌳, especially in winter ❄️. These can be simple plastic or mesh wraps 🧵 that prevent damage ⚡.Deer and Other Animals 🦌:
Deer 🦌 love to munch on young trees 🌱. If deer are a problem in your area 🌍, consider using a deer repellent 🦌 or building a simple fence 🚧 around the tree 🌳 to protect it from browsing animals 🐾.Pest Control 🐛:
Keep an eye 👀 out for pests like aphids 🐜, caterpillars 🐛, and weevils 🐞. If you spot any, you can use organic pest control methods like neem oil 🌿 or insecticidal soap 🧼.🌟 Monitoring Growth and Health 🌟
As your walnut tree 🌳 grows, it’s important to keep an eye 👀 on its overall health 🏥. Look for signs of stress 😟, such as yellowing leaves 🍂 or stunted growth 🐢, which could indicate a problem with watering 💧, soil nutrients 🌱, or pests 🐛.Leaf Color 🌱:
Healthy walnut leaves 🌳 should be bright green 🍃. Yellowing or browning leaves 🍂 could be a sign of overwatering 🌧️, poor soil 🏞️, or disease 🦠.Tree Growth 🌳:
Walnut trees 🌰 are slow growers 🐢, but by year 1, you should see significant root development 🌱 and at least a few feet of growth in height 🌳. If your tree seems to be growing too slowly ⏳, consider testing your soil 🧑🌾 to ensure it’s rich in nutrients 🌱. By following these care tips 🌿, your walnut tree 🌰 will have the best possible start to a long, healthy life 🌳. With regular watering 💧, fertilizing 🌱, mulching 🍂, and some basic protection 🛡️, you’ll help your tree grow strong 💪 and productive 🍽️, eventually giving you delicious walnuts 🌰 for years to come! 🌳🌰😊🐛🌿 Dealing with Pests and Diseases 🌿🐛
Your walnut tree 🌳, like all plants 🌱, can face a few challenges as it grows. Pests 🐜 and diseases 🦠 are common threats, but with the right knowledge and care 🧑🌾, you can keep them at bay and ensure your tree stays healthy 💪. Here’s how to spot and deal with the most common pests 🐛 and diseases 🦠 that can affect your walnut tree 🌰.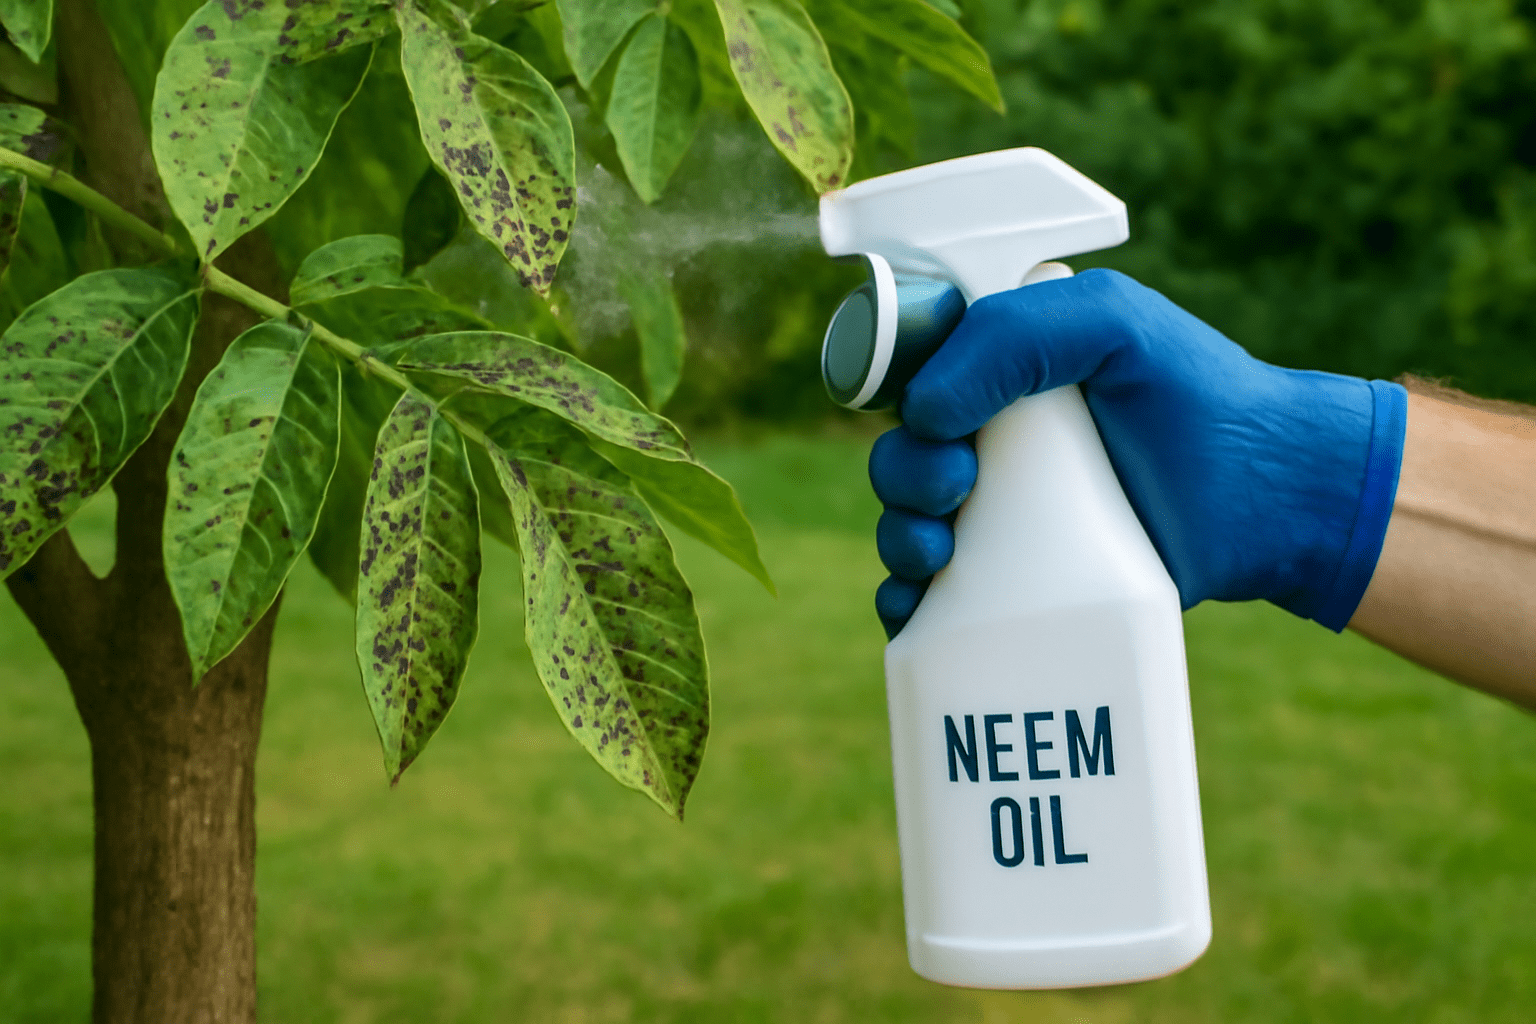
🐜 Common Walnut Tree Pests 🐜
Walnut Caterpillars 🐛:
What They Do: Walnut caterpillars 🐛 are the larvae of the walnut moth 🦋. They can defoliate your tree 🌳 by eating the leaves 🍃, especially in late spring or early summer ☀️. Signs of Damage: Look for large patches of missing leaves 🍂, especially on younger trees 🌱. How to Handle: Hand-pick caterpillars 🐛 off the tree 🌳 or use a natural insecticide 🌿 like neem oil 🌱 or insecticidal soap 🧼. You can also attract natural predators 🦉, such as birds 🦅, to help control caterpillar numbers.Aphids 🐜:
What They Do: Aphids 🐜 are small, soft-bodied insects 🦠 that suck sap 🍯 from the leaves 🍃, causing yellowing and stunted growth 🌱. They can also secrete a sticky substance called “honeydew” 🍯, which leads to mold growth 🍄. Signs of Damage: Curling leaves 🍂, sticky residue on leaves 🍃 or surrounding surfaces, and black sooty mold 🖤. How to Handle: Spray the tree 🌳 with a strong stream of water 💦 to dislodge aphids 🐜, or use organic remedies 🌱 like neem oil 🌿. Insecticidal soap 🧼 can also be effective in controlling aphids 🐜.Weevils 🐞:
What They Do: Weevils 🐞 attack the nuts 🌰 and the roots 🌱 of the tree 🌳, causing significant damage if left unchecked. The larvae 🐛 feed on the nuts 🌰, making them unfit for consumption 🍽️. Signs of Damage: Small holes in the nuts 🌰 and root damage 🌱. How to Handle: Apply beneficial nematodes 🐛 (tiny worms that kill larvae 🐛) to the soil 🌍, or use diatomaceous earth 🌿 around the base of the tree 🌳. A good strategy is to keep the area around the tree clean 🧹 and free of fallen nuts 🌰, which attract weevils 🐞.🌿 Common Walnut Tree Diseases 🌿
Walnut Blight 🌰:
What It Is: Walnut blight 🌰 is caused by a bacterial infection 🦠 that affects the tree’s leaves 🍃, twigs, and nuts 🌰. It can cause dark, sunken spots on leaves 🍂, withering, and premature nut drop 🌰. Signs of Damage: Dark, irregularly shaped spots on leaves 🍃 and nuts 🌰, with the leaves 🍂 eventually turning yellow and dropping prematurely 🍂. How to Handle: Prune ✂️ and remove affected branches 🌳. To prevent the spread of bacteria 🦠, disinfect your pruning tools 🔪 between cuts ✂️. If the disease 🦠 is severe, apply copper-based fungicides 🧴 to control the spread.Root Rot 🌱:
What It Is: Root rot 🌱 occurs when the roots 🌱 of the walnut tree 🌳 are exposed to excessive moisture 💧, causing them to decay. This often happens in poorly drained, soggy soils 🌾. Signs of Damage: Yellowing leaves 🍂, poor growth 🌱, and wilting 🌾. In severe cases, the tree 🌳 might suddenly die 💀. How to Handle: Ensure the tree 🌳 is planted in well-drained soil 🌍 and avoid overwatering 💧. If you suspect root rot 🌱, carefully dig around the tree 🌳 to check the roots 🌱. If they’re blackened and mushy 🦠, you may need to replace the tree 🌳 or treat it with a root fungicide 🧴.Anthracnose 🍂:
What It Is: Anthracnose 🍂 is a fungal disease 🦠 that causes brown or black spots on leaves 🍃 and can lead to leaf drop 🍂. It’s common during wet, humid conditions 🌧️. Signs of Damage: Brown spots 🍂 on the leaves 🍃, with a yellowish halo around the edges 🔆. Leaves 🍂 may eventually fall off prematurely 🍂. How to Handle: Rake up and dispose of fallen leaves 🍂 to prevent the disease 🦠 from spreading. Applying a fungicide 🧴 in early spring 🌸 before the tree 🌳 starts to leaf out 🍃 can help prevent the spread of anthracnose 🍂.🛡️ Preventive Measures 🛡️
While dealing with pests 🐜 and diseases 🦠 is important, preventing them 🛡️ is even better. Here’s how you can keep your walnut tree 🌳 protected:Regular Inspection 🔍:
Check your walnut tree 🌳 regularly for signs of pests 🐜 or diseases 🦠. The sooner you spot a problem 🚨, the easier it is to treat 🧑🌾.Good Air Circulation 🌬️:
Plant your walnut tree 🌳 in a location with good airflow 🌬️. Avoid overcrowding it with other plants 🌱, as this helps reduce the chances of fungal infections 🦠.Pruning ✂️:
Regular pruning ✂️ helps remove dead or diseased wood 🌳, which can become a breeding ground for pests 🐜 and pathogens 🦠.Healthy Soil 🌱:
Keeping your soil healthy and balanced with organic matter 🌿 will make your walnut tree 🌳 stronger and more resistant to pests 🐜 and diseases 🦠. Avoid over-fertilizing 🚫, as this can stress the tree 🌳 and make it more susceptible to problems 🐛. By staying vigilant 👀 and taking quick action ⚡ when needed, you can keep your walnut tree 🌳 healthy and strong 💪, free from the threat of pests 🐜 and diseases 🦠. 🌳😊 With a little care 🧑🌾 and attention 💧, your walnut tree 🌳 will continue to grow 🌱 and thrive, giving you beautiful nuts 🌰 for years to come! 🌰🌿🌰🌿 Harvesting and Enjoying Your Walnuts 🌿🌰
After all the hard work of growing and caring for your walnut tree 🌳, it’s finally time to enjoy the fruits of your labor! 🌾 Harvesting walnuts 🌰 can be a fun and rewarding process. Let’s walk through the best practices for harvesting and storing your walnuts 🌰, so you can enjoy them fresh or use them in your favorite recipes 🍽️.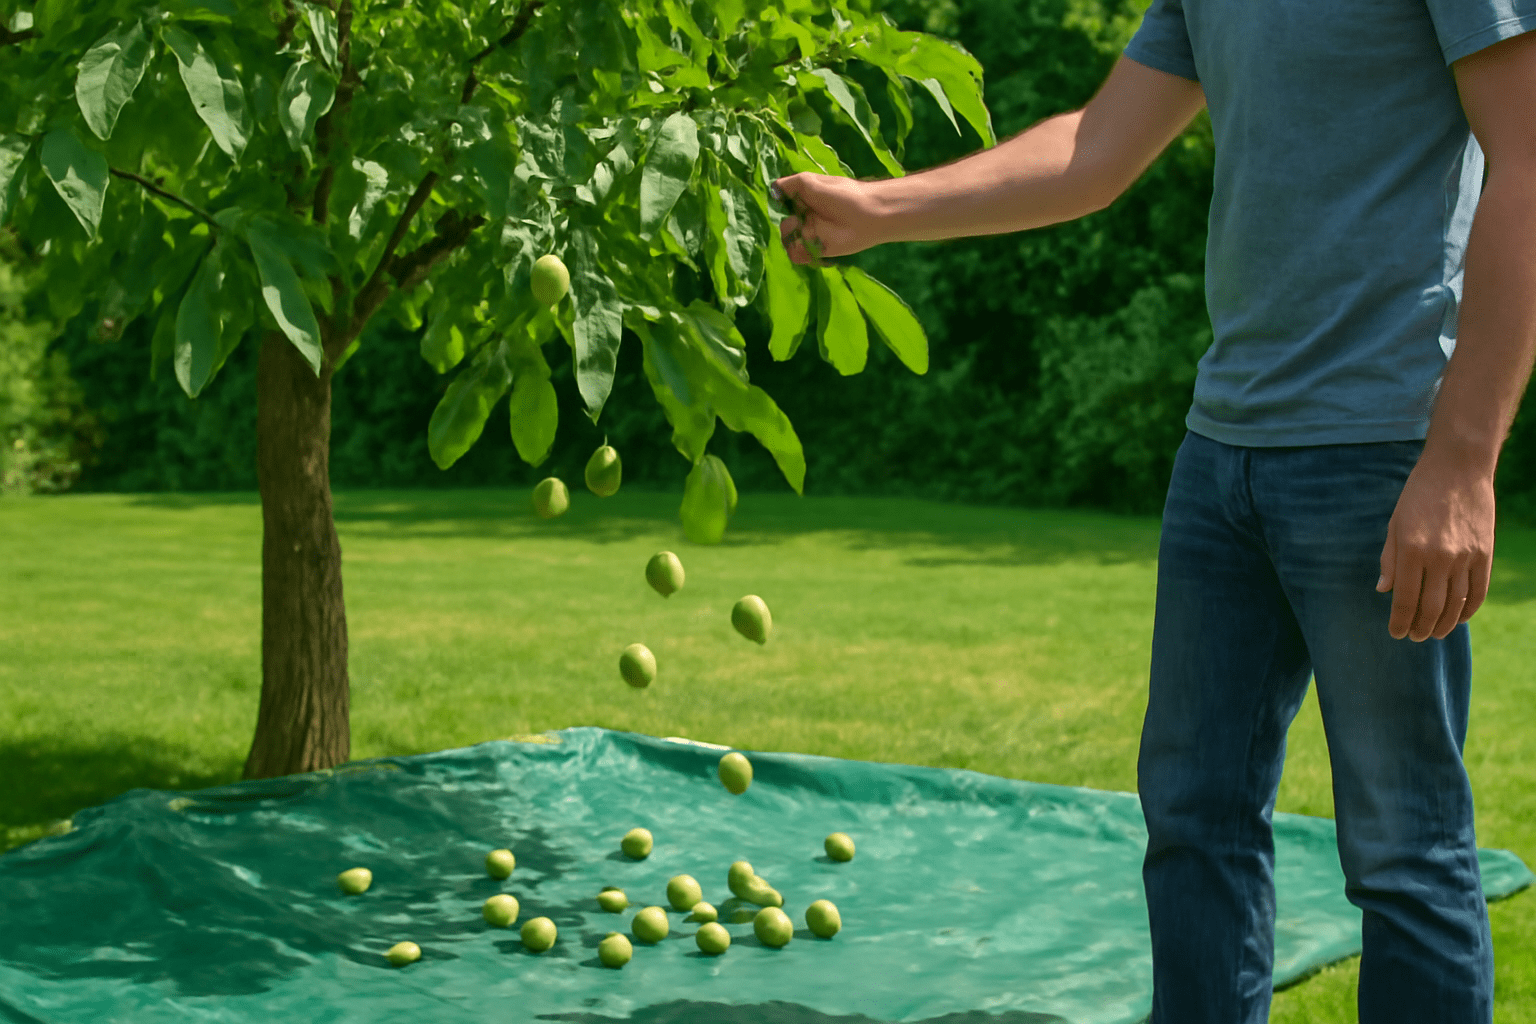
⏳ When to Harvest Walnuts ⏳
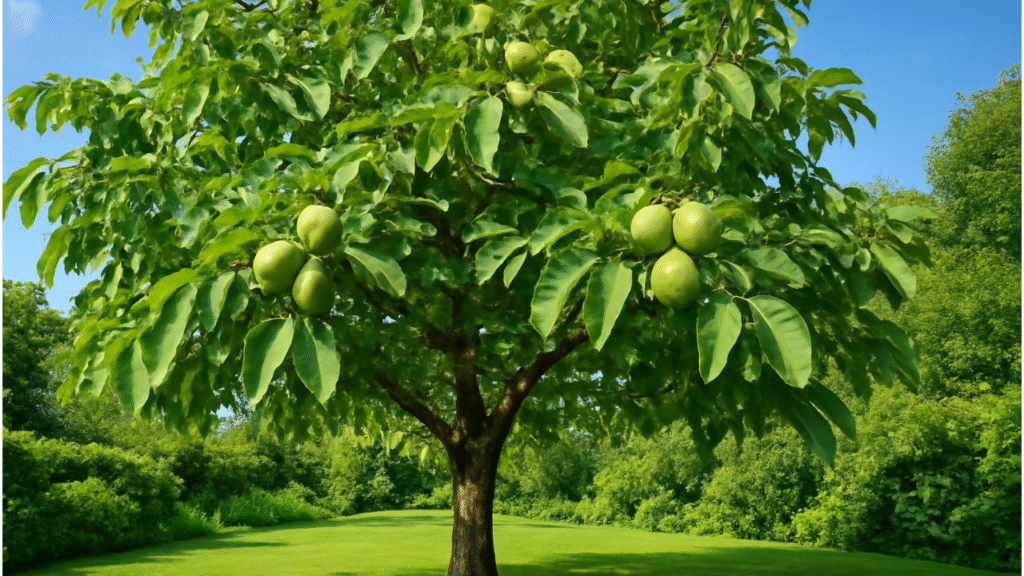
Timing is key when it comes to harvesting walnuts 🌰. You want to wait until the nuts are fully ripe, but not too long that they fall and become damaged 🌳.Signs of Ripeness 🌰:
Walnuts 🌰 are ready to harvest when the outer hull begins to split or turn brown 🍂. The nut inside should feel firm and solid 💪. When you shake the tree 🌳, you may notice some nuts starting to fall 🌰. This is a good indicator that it’s almost time to harvest! ⏳ Test a few nuts 🌰: Gently crack open a few nuts 🌰. If the nut is firm and not overly soft or moldy, it’s time to start harvesting 🌾.Best Time to Harvest 🌰:
The best time to harvest 🌰 is usually in late summer to early fall 🍁, depending on your location 🌍 and the weather 🌤️. Aim to harvest before the first frost 🌨️, as cold temperatures can damage the nuts 🌰.🌳 How to Harvest Walnuts 🌳
There are two main methods for harvesting walnuts 🌰: shaking the tree 🌳 and collecting fallen nuts 🌰.Shaking the Tree 🌳:
If you have a larger tree 🌳, you can gently shake the trunk 🌳 to encourage the nuts 🌰 to fall to the ground 🌍. You can use a tree shaker 🌲 (available at garden supply stores) for larger trees, or simply shake it by hand ✋. Catch the nuts 🌰: Lay tarps, blankets, or large sheets underneath the tree 🌳 to catch the falling nuts 🌰 and make collection easier 🌾.Collecting Fallen Nuts 🌰:
If the nuts 🌰 have already fallen on their own, simply collect them from the ground 🌍. Be sure to pick them up right away ⏳ to prevent squirrels 🐿️, rodents 🐀, or other animals 🦝 from getting to them. If you’re unable to harvest all the fallen nuts 🌰 at once, check the area every few days to gather them before they start to spoil 🦠.🏠 Removing the Husks and Drying the Nuts 🏠
After harvesting 🌰, it’s time to prepare your walnuts 🌰 for storage or use 🧑🍳.Removing the Husks 🍂:
The husk 🌿 is the soft, green outer layer of the walnut 🌰. Once the walnut 🌰 is harvested, remove the husk 🌿 as soon as possible to avoid staining the nut 🌰. You can peel the husks by hand ✋ or use a mallet 🔨 to gently crack them open. Wear gloves 🧤 to avoid getting the husk’s dark stain on your hands 🖤.Drying the Nuts 🌰:
After removing the husk 🌿, place the nuts 🌰 in a dry, well-ventilated area 🌬️ to dry them out. Spread them out on a tarp 🌾 or tray 🧑🍳, making sure they are not stacked on top of each other 🌰. Drying Time ⏳: Allow the walnuts 🌰 to dry for 2-3 weeks 🗓️. Turn them occasionally 🔄 to ensure they dry evenly 🌰. Once dry 🌞, store the walnuts 🌰 in a cool, dry place to prevent them from spoiling 🦠.🧑🍳 How to Use Your Walnuts 🧑🍳
Now comes the fun part—using your freshly harvested walnuts 🌰! Here are some ideas on how to enjoy them:Snack on Them 🍽️:
Fresh walnuts 🌰 are delicious on their own as a snack 🍴. Just crack them open and enjoy! 😋Bake with Them 🍪:
Walnuts 🌰 are perfect for baking—use them in cookies 🍪, cakes 🎂, breads 🍞, or even granola 🥣.Add to Salads and Dishes 🥗:
Toss a handful of walnuts 🌰 into salads 🥗, stir-fries 🍲, or pastas 🍝 for extra flavor and crunch 🥄.Store for Later 📦:
If you have a large harvest 🌾, you can store your walnuts 🌰 in airtight containers 🧺. Shelled walnuts 🌰 can be kept in the freezer ❄️ to maintain freshness, or you can store them unshelled for longer shelf life 🗓️.🌿 How to Store Your Walnuts 🌿
Proper storage 🏠 will ensure that your walnuts 🌰 stay fresh for months to come ⏳.In the Shell 🌰:
Store unshelled walnuts 🌰 in a cool, dry place 🌾. They can last up to 12 months if stored properly 🗓️.Shelled Walnuts 🌰:
Once you remove the shells 🥜, place the nuts 🌰 in an airtight container 🧳 and store them in the refrigerator 🧊 or freezer ❄️. Shelled walnuts 🌰 last up to 6 months in the fridge 🧊 and up to 1 year in the freezer ❄️.Avoid Moisture 💧:
Always store walnuts 🌰 in a dry area 🌬️ to prevent mold growth 🦠. Check them regularly 👀 for any signs of spoilage 🦠. Now that you know how to harvest 🌰, store 🧳, and enjoy 🍽️ your walnuts 🌰, you can reap the rewards of your hard work 🌱. Whether you use them in recipes 🍰, as a snack 🍪, or simply enjoy the process of growing 🌳 and harvesting 🌾, your walnut tree 🌳 is sure to bring years of enjoyment 🎉 and delicious harvests 🌰! 🌳😊🔧🌰 Troubleshooting Common Walnut Growing Issues 🌰🔧
Even the most experienced gardeners 🌿 run into a few bumps along the way. Growing a walnut tree 🌳 is no exception! But don’t worry—most problems are easy to troubleshoot with a little knowledge 📚 and care 🧑🌾. Let’s dive into some of the common walnut growing issues 🌰 and how to solve them.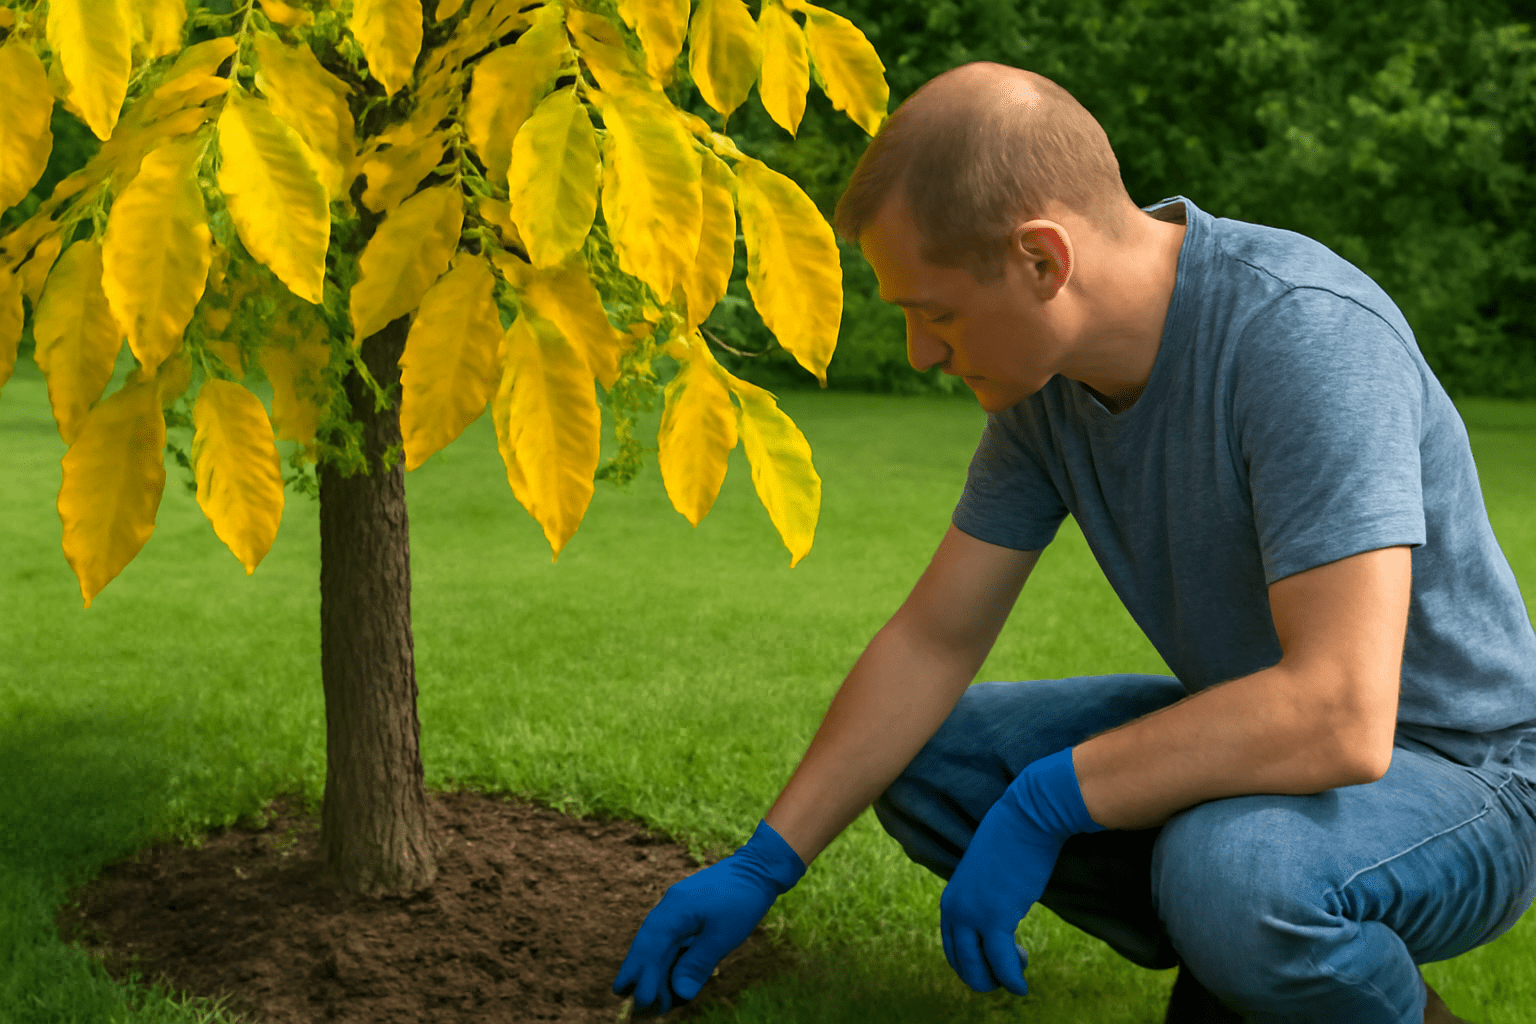
🌿 1. Why Isn’t My Walnut Tree Growing Well? 🌿
If your walnut tree 🌳 isn’t growing as expected, there could be a few reasons behind it. Here’s what to check:Improper Soil Conditions 🌱:
Walnuts 🌰 need well-draining, loamy soil 🌾 with a pH between 6 and 7. If your soil is too heavy or clay-like 🏞️, the roots 🌱 might be struggling. Solution: Improve the soil 🌱 by adding organic matter 🌿, compost 🍂, or sand 🏖️ to enhance drainage 🌬️. You can also test the pH 📊 and adjust it if needed.Insufficient Watering 💧:
While walnut trees 🌳 are drought-tolerant once established, young trees 🌱 need consistent moisture 💧, especially in the first year. Solution: Ensure your tree 🌳 is getting enough water 💦, but avoid overwatering 🚫. Water deeply 💧, once or twice a week, depending on weather conditions 🌤️.Lack of Sunlight 🌞:
Walnuts 🌰 require full sun 🌞 to grow strong and healthy 🌳. If your tree 🌳 is planted in a shaded spot 🌥️, it may not thrive 🌱. Solution: Move your tree 🌳 to a sunnier location 🌞 or trim back surrounding foliage 🌿 to increase sunlight exposure ☀️.🌾 2. Why Are My Walnut Tree Leaves Yellowing? 🌾
Yellowing leaves 🍂 are a common issue and can be caused by a variety of factors 🧐.Nutrient Deficiency 🧑🌾:
Yellowing leaves 🍂 may be a sign of nutrient deficiencies, particularly a lack of nitrogen 🟩 or iron ⚙️. Solution: Apply a balanced, slow-release fertilizer 🌿 with micronutrients 🌾, or add organic compost 🌱 to enrich the soil. You can also use iron chelates if you suspect an iron deficiency 🧪.Overwatering 💧:
When a walnut tree 🌳 receives too much water 💦, its roots 🌱 can become oxygen-starved, leading to yellow leaves 🍂 and poor growth 🌱. Solution: Check your soil 🌍 for signs of waterlogging 🌧️. Make sure the tree 🌳 has proper drainage 🌬️ and reduce watering if necessary 💦.Pests or Disease 🦠:
Yellowing leaves 🍂 could also indicate pest 🐛 or disease 🦠 problems, such as aphid infestations 🐜 or fungal infections 🦠. Solution: Inspect your tree 🌳 regularly for pests 🐜 and use natural remedies 🌱 like neem oil 🌿 or insecticidal soap 🧼. If disease is suspected, prune ✂️ and dispose of infected branches 🍂.🌱 3. Why Is My Walnut Tree Not Producing Nuts? 🌱
If your walnut tree 🌳 isn’t producing nuts 🌰, it could be due to one or more of these factors:Age of the Tree 🌳:
Walnut trees 🌰 generally start producing nuts 🌰 between 5-7 years old, although some may take longer ⏳. Solution: If your tree 🌳 is young, be patient ⏳ and give it time to mature 🌳.Lack of Pollination 🌸:
Walnuts 🌰 are monoecious (they have both male and female flowers 🌸 on the same tree), but they may still need cross-pollination 🌼 for better nut production 🌰. Solution: Consider planting more than one walnut tree 🌳 to ensure proper cross-pollination 🌼, especially if your tree 🌳 is struggling to produce nuts 🌰.Poor Growing Conditions 🌱:
Insufficient sunlight 🌞, poor soil 🌍, or a lack of nutrients 🌿 can prevent your walnut tree 🌳 from producing nuts 🌰. Solution: Ensure your walnut tree 🌳 is planted in a location with plenty of sunlight 🌞 (at least 6 hours per day), and make sure the soil 🌍 is well-draining and rich in nutrients 🌱.🦠 4. How Do I Protect My Walnut Tree From Pests? 🦠
Pests 🐜 are a common problem for walnut trees 🌳, but with the right approach, you can keep them under control 🔧.Squirrels and Rodents 🐿️:
Squirrels 🐿️ love walnuts 🌰, and they might try to snack on your hard-earned harvest 🌾. Solution: Use tree guards 🛡️ around the trunk 🌳 to prevent squirrels 🐿️ from climbing. You can also try hanging metallic tape 🪙 or squirrel-repelling scents 🦨 around the tree 🌳 to deter them.Aphids 🐜 and Walnut Caterpillars 🐛:
Aphids 🐜 can weaken your tree 🌳 by sucking out sap 🍯, while walnut caterpillars 🐛 can defoliate the tree 🌳. Solution: Spray your tree 🌳 with neem oil 🌱 or insecticidal soap 🧼 to control aphids 🐜 and caterpillars 🐛. Encourage natural predators 🦉 like ladybugs 🦋 to help keep pests in check 🐜.🌧️ 5. How Do I Prevent Walnut Tree Diseases? 🌧️
While walnut trees 🌳 are fairly resilient 💪, they can still fall victim to diseases 🦠 like walnut blight 🌰 or anthracnose 🍂. Here’s how to protect your tree 🌳:Maintain Good Hygiene 🧼:
Keep your tree 🌳 healthy by pruning ✂️ away any dead, damaged, or diseased branches 🌿. This will prevent the spread of pathogens 🦠. Solution: Always disinfect 🧴 your pruning tools ✂️ with rubbing alcohol 🧴 between cuts ✂️ to avoid transferring diseases 🦠.Proper Spacing and Airflow 🌬️:
Poor air circulation 🌬️ can promote fungal growth 🦠, leading to disease 🌱. Solution: Space your walnut tree 🌳 properly to allow for good airflow 🌬️ around the canopy 🌳. Avoid overcrowding 🌱 and trim back surrounding vegetation 🌿 to improve circulation 🌬️.Fungicide Application 🧴:
If you notice signs of disease 🦠, apply a copper-based fungicide 🧴 in early spring 🌸 before the leaves 🍃 start to bud 🌱. This can help prevent fungal infections like anthracnose 🍂 and blight 🌰. With these troubleshooting tips 🛠️, you’ll be well-equipped to handle any challenges that arise 🌳 as you grow your walnut tree 🌰. Every tree 🌳 has its quirks, but with a little attention 👀 and care 🧑🌾, you’ll be rewarded with a healthy 🌳, thriving walnut tree 🌰 for years to come! 🌰🌿😊🌟 Final Thoughts 🌟
Growing a walnut tree from a nut is a rewarding and fulfilling journey that takes time, patience, and care. 🌱 Whether you’re starting from scratch or improving an existing tree, the key to success lies in understanding your tree’s needs and providing the right environment for it to thrive. 🌳 Remember, your walnut tree isn’t just a plant—it’s an investment in the future. 🌱 Over the years, it will grow into a beautiful, productive tree that provides delicious nuts, shade, and even improves the overall health of your garden. 🌳