

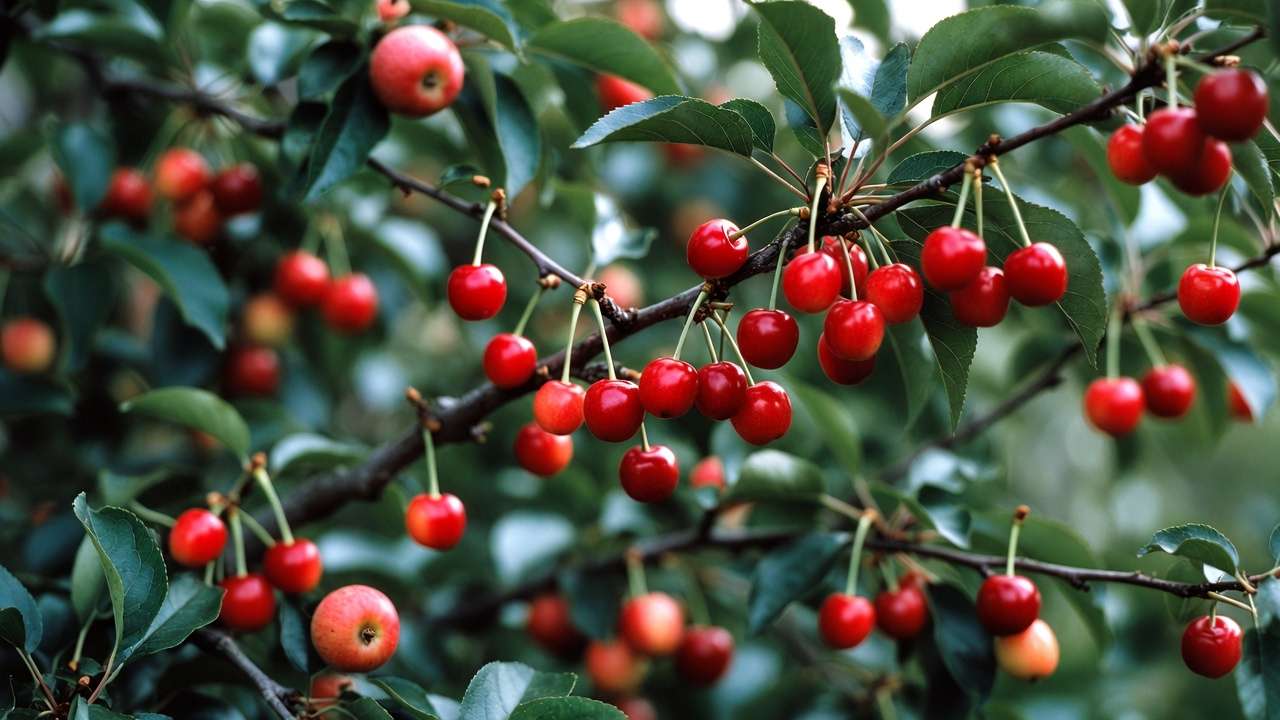
Imagine stepping into your backyard orchard in late spring, only to find clusters of beautiful blossoms on your apple, cherry, and pear trees… yet come harvest time, the branches are disappointingly sparse with fruit. 😔 This heartbreaking scene is all too common for home gardeners and small-scale orchard owners. The reason? Inefficient pollination, especially in early spring when cool temperatures, unpredictable weather, and declining honeybee populations limit traditional pollinators.
But there’s a gentle, highly effective solution buzzing right under our noses: introducing mason bees for orchard pollination. These native solitary bees, particularly the blue orchard bee (Osmia lignaria), are nature’s super-pollinators for fruit trees. Unlike honeybees, which pollinate only about 5-10% of the flowers they visit, mason bees achieve an impressive 95-99% efficiency per visit. A single female can visit up to 1,800–2,000 flowers per day and pollinate the equivalent of an entire mature tree’s worth of blossoms. In fact, just 250–300 female mason bees can fully pollinate an acre of apples or cherries — work that would require tens of thousands of honeybees! 🍎🐝
In this comprehensive guide, we’ll walk you through everything you need to know to successfully introduce and manage mason bees in your orchard. Whether you’re dealing with low fruit set, wanting a sustainable alternative to renting honeybee hives, or simply passionate about boosting biodiversity, you’ll gain practical, expert-backed steps to achieve bigger, better harvests naturally. Let’s turn those disappointing yields into abundant, juicy fruit — starting this season! 🌟
Why Mason Bees Are Game-Changers for Orchard Pollination 🐝💚
Our pollinator crisis is real: honeybee colonies face threats from pesticides, diseases, parasites, and habitat loss, leading to inconsistent pollination for early-blooming crops like apples, cherries, pears, plums, and almonds. Many fruit trees require cross-pollination, and poor weather during bloom windows can slash yields by 50% or more.

Enter mason bees — true orchard superheroes. These solitary, cavity-nesting bees are active precisely when fruit trees bloom (early spring, starting at 50–55°F / 10–13°C), flying in cool, rainy, or windy conditions that ground honeybees. Research from sources like the USDA and university extensions (e.g., Penn State, Oregon State, Utah State) shows mason bees excel at:
- Superior efficiency: They carry dry pollen on their fuzzy abdomens, brushing it off onto stigmas as they forage erratically — leading to better cross-pollination and higher fruit set.
- High daily output: One female can pollinate enough flowers for 12 lbs (5.4 kg) of cherries in a season — a task needing around 60 honeybees.
- Synergistic benefits: When used alongside honeybees, mason bees encourage honeybees to move between trees more, boosting overall orchard productivity (as seen in sweet cherry studies).
Real-world results speak volumes: Backyard growers often report 2–3× increases in fruit set, while commercial orchards using managed mason bees see consistent yields even in marginal weather. Compared to honeybees (which fly far and wide, diluting focus) or bumblebees (better for later crops), mason bees stay close to nests (within 300 feet), concentrating efforts right where you need them. 🌳❤️
Here’s a quick comparison:
- Mason bees — 95–99% pollination rate, early spring specialists, gentle (rarely sting), low-maintenance.
- Honeybees — 5–10% rate, temperature-sensitive, colony management required.
- Bumblebees — Good for tomatoes/berries, but less ideal for tree fruits.
By introducing mason bees for orchard pollination, you’re investing in reliable, eco-friendly results that support native biodiversity too! 🌿
Understanding Mason Bees: Biology and Life Cycle for Better Management 🔍
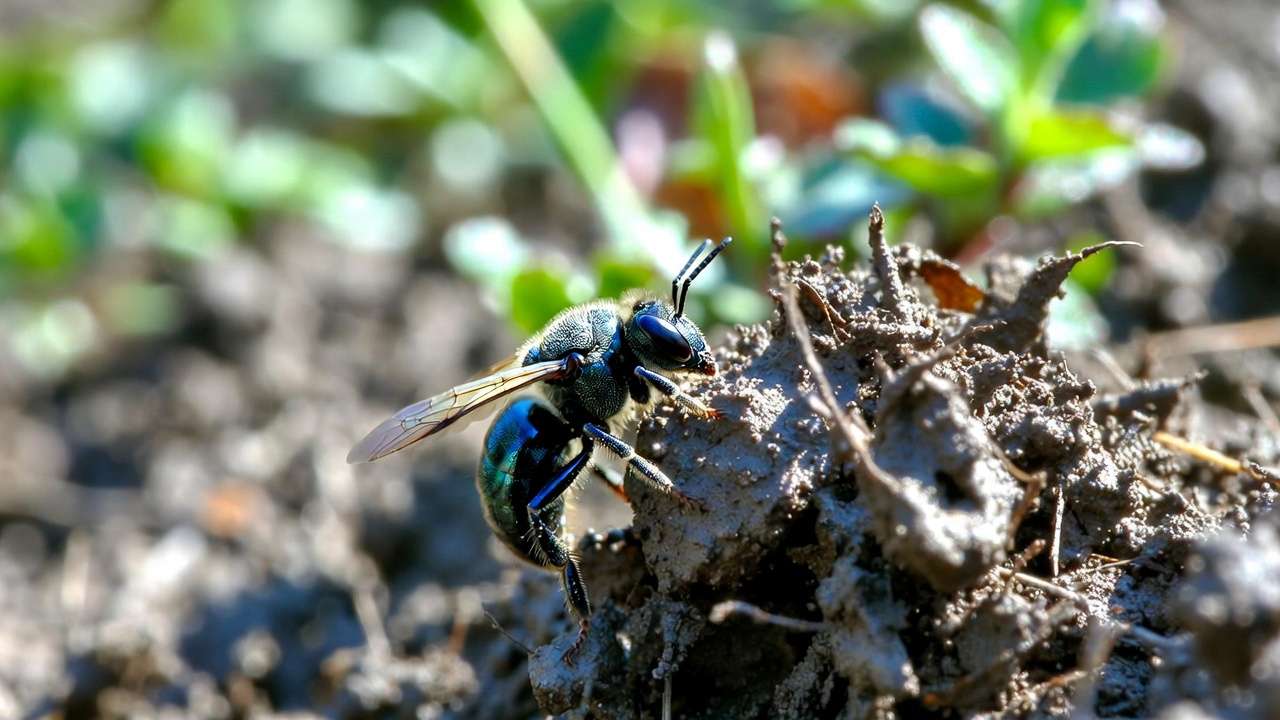
To manage mason bees effectively, grasp their unique biology. The primary species for North American orchards is the blue orchard bee (Osmia lignaria), a shiny metallic blue-black bee about the size of a housefly (females larger than males).
Their univoltine (one generation per year) life cycle aligns perfectly with spring fruit bloom:
- Winter dormancy (October–March): Adults overwinter in cocoons inside nests.
- Emergence & mating (early spring): Males emerge first (when temps hit ~55°F), wait near nests for females (1–7 days later). Mating occurs quickly.
- Nesting & egg-laying (4–8 weeks): Females build linear nests in cavities, using mud partitions. They collect pollen/nectar provisions, lay one egg per cell (females at back for protection, males at front), seal with mud. A female lays 20–40 eggs lifetime (more females early season).
- Larval development (summer): Eggs hatch in ~1 week; larvae eat provisions, grow through 5 instars, spin cocoons by late summer.
- Pre-wintering & wintering: New adults form inside cocoons; they need cool temps (fridge-like) to break diapause.
This cycle means precise timing: Release or attract bees just as your earliest trees (e.g., plums, cherries) begin blooming to maximize impact. Understanding this prevents common issues like premature emergence or poor synchronization. 📅🐛
Preparing Your Orchard: Essential Requirements Before Introduction 🌳🛠️
Before you bring home your first batch of mason bee cocoons, set the stage for success. Mason bees are low-maintenance compared to honeybees, but they do have three non-negotiable needs: abundant early-spring pollen and nectar, a reliable mud source, and safe, suitable nesting sites. Get these right, and your bees will thrive — and so will your fruit set.
1. Ensure a Strong Food Supply (Pollen & Nectar Buffet) 🍯🌸 Mason bees forage within about 300–400 feet (90–120 m) of their nesting site, so your orchard itself must provide the majority of resources. Focus on:
- Your target fruit trees: Apples, cherries, pears, plums, apricots, peaches, and almonds bloom in the perfect window (March–May in most temperate zones).
- Companion early bloomers to bridge gaps or extend forage: Redbud (Cercis canadensis), serviceberry (Amelanchier), flowering currant (Ribes sanguineum), Oregon grape (Mahonia), pussy willow (Salix discolor), dandelions, crocus, and early mustards.
- Avoid “green deserts”: If your orchard is surrounded by lawn or late-blooming crops, plant a 10–20 ft border strip of these early flowers.
Pro tip from extension services (e.g., Washington State University, UC IPM): A diverse understory increases bee retention and pollination efficiency by 20–40%.
2. Provide a Consistent, Safe Mud Source 🏗️💧 This is the #1 reason new mason bee keepers fail — no mud, no nests! Females collect wet clay or loam to build partitions between egg cells.
- Ideal spot: A sunny or partly shaded area within 10–50 feet of the nesting shelter.
- How to create one:
- Dig a shallow pit (12–18 inches deep, 2–3 ft wide) and fill with sifted clay-rich soil (avoid sandy or high-organic mixes).
- Keep it consistently moist (drip irrigation, soaker hose, or regular watering).
- Protect from birds: Cover with chicken wire or hardware cloth dome, leaving side access for bees.
- Quick DIY alternative: Place a large shallow tray or bucket filled with clay soil and keep it wet.
- Regional note for Dhaka/Bangladesh-area gardeners (humid subtropical climates): Use local red laterite or riverbank clay; avoid overly sandy alluvial soils.
3. Eliminate or Minimize Pesticide Risk ☠️🚫 Mason bees are highly sensitive to insecticides, especially during bloom and nesting.
- Stop all broad-spectrum sprays (organophosphates, neonicotinoids, pyrethroids) at least 3–4 weeks before bloom and throughout the active season.
- If disease or pest pressure is high, use targeted organic options (e.g., kaolin clay barriers, neem at low concentrations) only after bees have finished nesting.
- Create buffer zones: Keep nesting sites 100+ feet from treated areas if possible.
Once these foundations are in place, you’re ready to introduce the bees themselves!
Step-by-Step Guide: How to Introduce Mason Bees Successfully 📋🐝
There are two main paths: purchasing and releasing cocoons (fastest for reliable results) or attracting and building a wild population (slower but very sustainable). Most beginners start with purchased cocoons for quicker pollination payoffs.
Option 1: Purchase & Release High-Quality Cocoons (Recommended for Beginners)
- Choose a reputable supplier Look for vendors offering:
- Disease-free, parasite-screened cocoons (especially chalkbrood and pollen mites).
- Regionally adapted stock (e.g., Pacific Northwest, Intermountain West, or Eastern strains for better survival).
- Clear instructions and support (examples: Crown Bees, Mason Bee Central, local native bee suppliers, or university extension-recommended sources).
- Time your release perfectly
- Release when daytime highs consistently reach 50–55°F (10–13°C) and your earliest blooming tree shows color in buds (pink or white tips).
- Stagger releases every 5–7 days if you have a long bloom window (e.g., early plums to late apples) to maintain active females throughout.
- In warmer climates (like parts of South Asia or southern U.S.), aim for late February–early March; in cooler zones, mid-March–April.
- Release method
- Place unopened cocoons in a emergence box or small breathable container inside the bee house.
- Or hang “release tubes” (pre-filled nesting tubes with cocoons) directly in the shelter.
- Mist lightly if humidity is low to aid emergence.
Option 2: Attract & Encourage Wild Mason Bees (Low-Cost, Long-Term Approach)
- Install nesting materials by late winter.
- Provide mud and forage as described above.
- Be patient — it can take 1–3 seasons to build a strong local population.
- Supplement with purchased cocoons in year 1 or 2 to jump-start numbers.
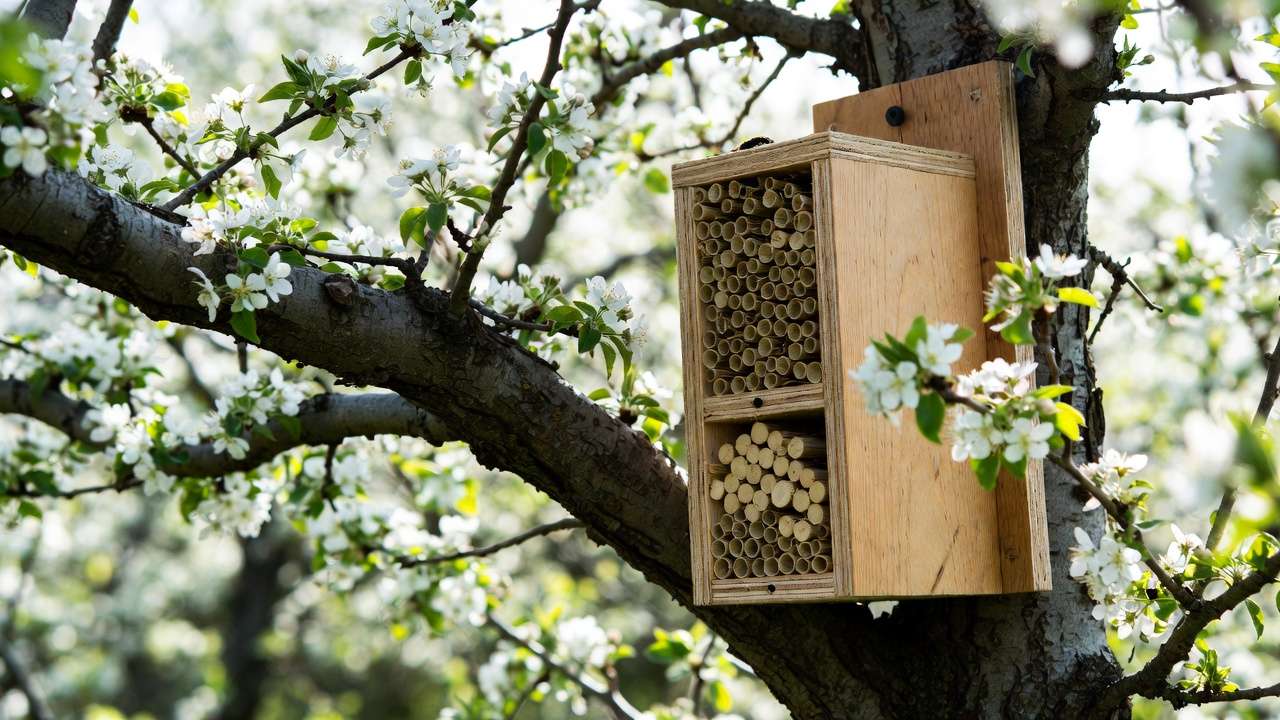
Setting Up Nesting Materials & Bee Houses 🏠🔨
- Best nesting options (ranked by ease & effectiveness):
- Reusable tray systems (e.g., wooden or plastic trays with removable inserts) — easiest to harvest, clean, and monitor.
- Cardboard or paper tubes (6–8 mm inner diameter, 6–8 inches long) inside a weatherproof box.
- Drilled wood blocks (hardwood, untreated; 5/16″ or 8 mm holes, 6″ deep) — natural look but harder to sanitize.
- Bamboo or reed bundles — affordable but less consistent.
- Bee house / shelter setup:
- Mount 5–6 feet off the ground, south- or southeast-facing for morning sun.
- Provide rain protection (overhang, slanted roof).
- Anchor securely against wind.
- Add a small landing platform or perch.
- Place near mud source and within orchard (not too far from trees).
Quick visual checklist: Shelter → tubes/trays → cocoons inside → mud nearby → flowers blooming = success formula! 🌞
Managing Mason Bees Through the Season: Pro Tips for Success 🛠️🐝
Once your mason bees are nesting and buzzing around the orchard, consistent but light-touch management keeps everything humming smoothly. The beauty of these solitary bees is that they require far less intervention than managed honeybee colonies—no feeding sugar syrup, no mite treatments like oxalic acid, no winter feeding. Still, a few seasonal checkpoints make a huge difference in survival rates, population growth, and next year’s pollination power.
Spring: Active Nesting Season (March–May / Peak Bloom Period)
- Daily/weekly checks (5–10 min):
- Watch for females carrying bright orange pollen loads on their abdomens — clear sign they’re provisioning cells.
- Ensure the mud source stays moist (especially in dry or windy spells — a quick sprinkle from a watering can does wonders).
- Look for predators: birds (woodpeckers, sparrows), wasps, or earwigs may try to raid nests.
- Quick fixes:
- Install a simple wire mesh guard or place the bee house under an eave.
- If you notice low activity after a week, double-check timing (did you release too early/late?) or add more mud options.
- Pro tip: Keep a simple log — note first emergence date, peak nesting activity, and weather. Over years, this helps fine-tune release timing for your exact microclimate in Dhaka or similar humid subtropical zones (where early March heat spikes can accelerate emergence).
Summer: Post-Nesting & Harvest Prep (June–August)
- Females finish nesting once temperatures climb consistently above 80–85°F (27–29°C) or forage dries up.
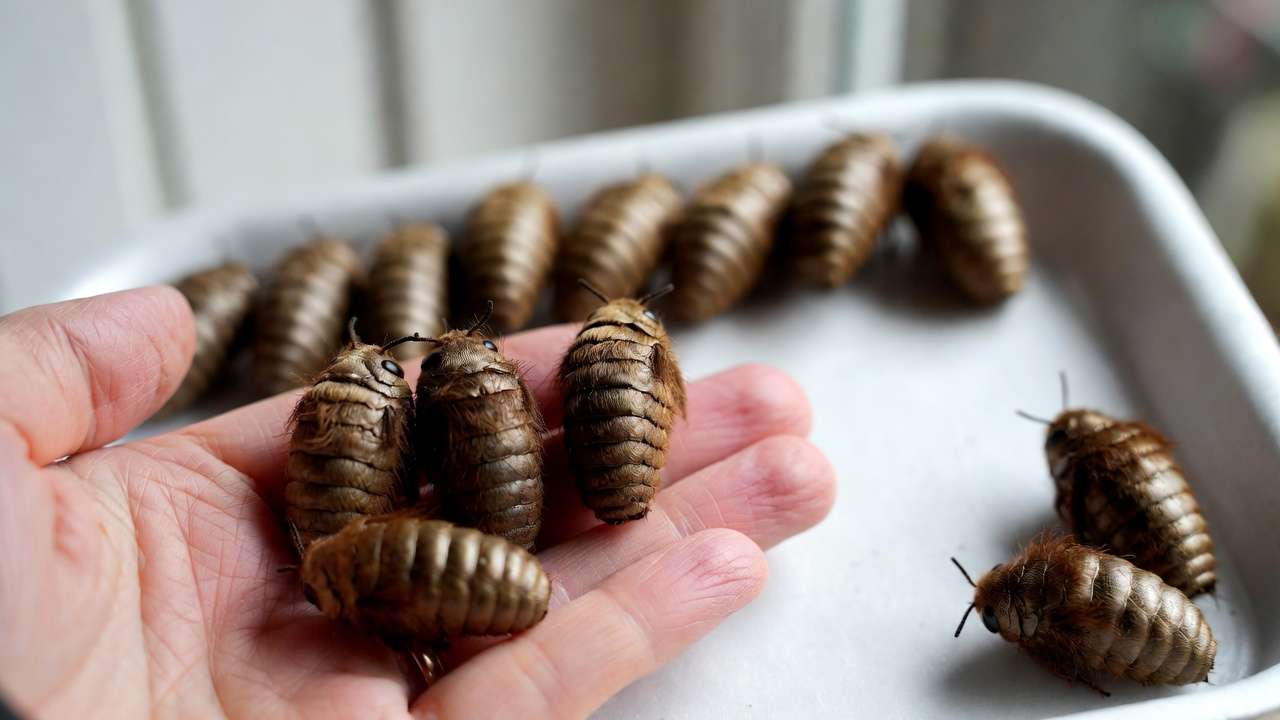
- Cocoon harvest (optional but highly recommended for beginners):
- Wait until mid-to-late summer when all nesting is complete and larvae have spun cocoons.
- Gently remove tubes/trays.
- Open trays or unroll tubes over a white surface.
- Collect intact brown cocoons (healthy ones feel firm and rattle slightly).
- Discard any chalky white (chalkbrood fungus), black-spotted (pollen mites), or empty/parasitized cells.
- Sanitation: Rinse reusable trays with a 5–10% bleach solution or boiling water, then dry thoroughly. Replace cardboard tubes annually.
- Why harvest? It dramatically reduces parasite buildup (Monodontomerus wasps, Houdini flies) and chalkbrood, boosting next-year survival from ~30–50% (wild nests) to 80–95% (managed).
Fall & Winter: Safe Overwintering (September–February)
- Store harvested cocoons in a breathable container (mesh bag or ventilated jar).
- Keep in a refrigerator (35–40°F / 2–4°C) — not freezer — to simulate natural winter. Avoid vegetable crisper (too humid).
- Ideal humidity: 60–70% (add a damp paper towel if very dry).
- Check monthly for mold or pests.
- In mild-winter areas like Dhaka (rarely below 10°C), you can leave some cocoons in sheltered outdoor nests, but harvesting + fridge storage gives far higher success.
Scaling Up Year Over Year
- Year 1: Start with 50–200 cocoons → expect 20–100 females nesting.
- Year 2–3: Harvest → double or triple your population each season if conditions are good.
- Many growers reach self-sustaining colonies of 500–1,000+ females within 3–4 years, providing full-acre pollination with minimal purchases.
Maximizing Pollination Results: Expert Strategies for Bigger Harvests 🍒📈
To squeeze every possible fruit from your trees:
- Staggered releases: Split cocoons into 2–3 batches released 7–10 days apart. This extends the active female window to cover the full bloom sequence (plums → cherries → apples → pears).
- Strategic placement: Position multiple small bee houses (2–4) around the orchard rather than one central hub — ensures even coverage.
- Combine pollinators wisely: Use mason bees for the critical early window, then let wild bees, honeybees, or bumblebees handle later crops (blueberries, squash, etc.). Studies show this “pollinator team” approach can increase overall fruit yield by an additional 15–30%.
- Track your success:
- Before: Count flowers and mark branches; estimate fruit set % the previous year.
- After: Count developing fruitlets 3–4 weeks post-bloom.
- Typical gains: 2–5× more fruit set in apples/cherries; higher fruit size uniformity and reduced “June drop.”
Backyard example: A 20-tree mixed orchard in a similar humid climate reported going from ~15% fruit set to 65–80% after introducing 150 mason bee cocoons in year one. Commercial-scale orchards using managed blue orchard bees routinely achieve 90%+ set even in cool, wet springs.
Potential Challenges and Solutions: Honest Advice from Experience ⚠️🐝
Even with the best planning, mason bee management can hit a few bumps—especially in the first 1–2 seasons. Here are the most common issues I’ve seen (and helped gardeners solve) across humid subtropical climates like Dhaka’s, where heat, humidity, and occasional heavy pre-monsoon rains add unique twists.
1. Low or No Emergence / Weak Activity 😕 Causes:
- Released too early (cocoons still in diapause) or too late (bloom already over).
- Poor overwintering storage (too warm, too dry, or moldy).
- Low-quality cocoons (high parasite load or old stock).
- Extreme weather right after release (prolonged cold snap or sudden 35°C+ heat wave).
Solutions:
- Use a emergence calendar: Track local plum/cherry bloom dates over 2–3 years; release 3–7 days before first full bloom.
- Buy from suppliers that provide emergence testing data.
- If emergence is low, don’t panic—many cocoons still develop later. Leave some in the shelter and check again in 10–14 days.
- In Dhaka’s variable February–March weather, consider a small “nursery box” indoors (55–60°F) for the first 20–30 cocoons; move them out once males appear.
2. Parasites & Predators 🕷️🦟 Common culprits:
- Pollen mites (tiny, destroy provisions).
- Chalkbrood fungus (white, mummified larvae).
- Houdini fly / Monodontomerus parasitic wasps (drill into nests).
- Birds, lizards, ants raiding open tubes.
Prevention & Control:
- Harvest and clean cocoons every summer—removes 80–90% of parasites before they multiply.
- Use 8 mm (not larger) holes; smaller diameter excludes most Houdini flies.
- Install fine-mesh “bee-proof” front screens after nesting finishes (bees already inside).
- For birds/lizards: Place houses under eaves or add a simple wire cage guard (leave 2–3 inch bee access gaps).
- In humid areas, reduce chalkbrood by ensuring good ventilation in storage (never seal cocoons airtight).
3. Mud Problems 🏗️💦
- Dries out too fast (common in March heat).
- Gets too soggy during early rains.
- Birds dig it up for their own nests.
Fixes:
- Create 2–3 mud stations at different spots.
- Use a shallow tray with clay + a bit of sand for better consistency.
- Cover loosely with palm frond or burlap during heavy rain; uncover during sunny periods.
- Keep soil slightly mounded so water doesn’t pool.
4. Regional Challenges in Humid Subtropical Climates (e.g., Bangladesh, Northern India) 🌧️🔥
- Early heat waves can shorten the active season → solution: stagger releases even more aggressively and plant extra mid-spring forage (e.g., drumstick tree/Moringa flowers if available).
- High humidity encourages fungal issues → prioritize dry, ventilated cocoon storage and tray harvesting.
- Monsoon overlap with late nesting → harvest early (by mid-May) before constant rain floods nests.
Honest take: Expect 40–70% survival your first year even with good management. By year 2–3, with harvesting and sanitation, 85–95% is realistic. Patience pays off massively.
Long-Term Benefits: Building a Sustainable Pollinator Paradise 🌿🌍
Introducing mason bees isn’t just about this year’s harvest—it’s about creating a resilient, self-sustaining ecosystem.
- Biodiversity boost: You support dozens of other native solitary bees, hoverflies, and butterflies that share the same early forage plants.
- Cost savings: After the initial cocoon purchase (~$0.30–$0.80 each depending on quantity), your colony becomes free and grows exponentially—no annual hive rental fees.
- Resilience to climate weirdness: Mason bees fly in cooler, damper conditions than honeybees, giving you insurance against late frosts or rainy bloom periods.
- Educational & emotional rewards: Watching these gentle, metallic-blue bees work inches from your face (they almost never sting—even when handled) is pure joy. Kids and neighbors love learning about them. Many families turn it into a spring ritual.
Over 3–5 years, a thriving mason bee population can become the backbone of your orchard’s pollination strategy, reducing dependence on unpredictable wild or commercial pollinators.
Frequently Asked Questions (FAQs) ❓
How many mason bees do I need for my orchard size? Rule of thumb: 200–300 female-active cocoons per mature acre (≈40–60 trees). For a backyard of 10–20 trees, start with 50–150 cocoons. Scale up as your population grows.
Do mason bees sting? Virtually never. They lack a strong defensive instinct and barbed stinger like honeybees. You can cup them gently in your hand during release with no risk.
Can I use mason bees with fully organic practices? Absolutely—they thrive in chemical-free environments. Just avoid any bloom-time sprays (even some “organic” ones can harm solitary bees).
What’s the difference between blue orchard bees and other mason bees? Blue orchard bees (Osmia lignaria) are cold-hardy, early-spring specialists perfect for temperate fruit trees. Other species (e.g., Osmia cornifrons in parts of Asia) work similarly but may have slightly different timing or temperature preferences.
How do I overwinter cocoons safely in a warm climate like Dhaka? Use refrigerator storage at 4–7°C for 90–120 days minimum. If you lack fridge space, select the coolest, shadiest outdoor spot (e.g., north-facing shaded shed) and insulate containers—but fridge method gives 20–40% higher survival.
Conclusion: Take Action This Season & Reap the Rewards! 🚀🍎
Introducing mason bees for orchard pollination is one of the highest-impact, lowest-effort changes you can make in a home or small orchard. With proper setup, a bit of seasonal TLC, and patience through the first year, these gentle native bees deliver bigger, more consistent fruit yields—naturally, sustainably, and joyfully.
Start small this February/March:
- Build or buy a simple bee house and prepare your mud station.
- Order 50–200 regionally adapted cocoons from a trusted supplier.
- Plant a few extra early-bloom companions if needed.
- Watch, learn, and celebrate your first pollen-carrying females.
By welcoming mason bees, you’re not just growing better fruit—you’re actively helping restore balance to our gardens and ecosystems, one gentle buzz at a time. 🐝❤️
Your orchard (and the planet) will thank you.


