
Imagine stepping into your backyard, picking ripe, sun-kissed apples straight from your own trees, and turning that harvest into pure, refreshing apple juice or sparkling homemade cider. No artificial flavors, no preservatives—just the honest taste of your garden’s bounty. 🍏 If you’ve ever stared at a pile of surplus apples wondering what to do with them (before they turn to waste), or dreamed of sipping something truly fresh and homemade, you’re in the right place.
Juice and cider making from homegrown apples is one of the most rewarding ways to celebrate your tree care efforts. It reduces food waste, saves money compared to store-bought drinks, and lets you customize flavors with the unique character of your apples—often more complex thanks to your soil, climate, and natural growing methods. As someone who’s nurtured apple trees for years and pressed countless batches, I’ve seen beginners go from hesitant first presses to confident home cider makers. This guide covers everything: from picking the right fruit to bottling your finished drinks. Let’s turn your homegrown apples into something special! 🌳🥃
Why Make Juice and Cider from Your Homegrown Apples?
Homegrown apples shine in homemade drinks for several reasons. Commercial juices and ciders often use blends optimized for consistency, but yours reflect your unique terroir—resulting in richer, more nuanced flavors. 🍂
- Unmatched freshness and flavor: Home-pressed juice tastes brighter and more apple-forward than pasteurized supermarket versions.
- Sustainability win: Use windfalls, imperfect fruits, or excess from a heavy harvest to avoid waste.
- Cost-effective and fun: Once you have basic tools, each batch costs pennies compared to buying organic cider. It’s a great family or solo project!
- Health perks: Natural antioxidants, vitamins, and no added sugars mean a wholesome drink.
- Customization freedom: Experiment with blends, add garden herbs, or ferment for alcoholic versions.
In my experience, the satisfaction of drinking something you grew and made yourself is unbeatable. It connects you deeper to your trees and the seasons.
Understanding the Difference: Apple Juice vs. Apple Cider 🍹 vs. 🍺
People often confuse these terms, but here’s the clear breakdown:
- Fresh apple juice: Sweet, non-alcoholic, usually filtered and pasteurized for shelf life. Clear or slightly cloudy.
- Sweet cider (often just called “cider” in many places): Unfiltered fresh-pressed juice, cloudy with natural pulp, non-alcoholic, best drunk soon after pressing.
- Hard cider: Fermented sweet cider, turning sugars into alcohol (typically 4-8% ABV), with bubbly or still options.
Quick comparison:
- Juice: Filtered, pasteurized, long storage.
- Sweet cider: Raw, fresh, short shelf life.
- Hard cider: Fermented, alcoholic, ages well.
Understanding this helps you decide your end goal—quick refreshment or a fermented project.
Selecting and Harvesting the Best Homegrown Apples for Juice & Cider
The foundation of great drinks is great apples. Homegrown ones often outperform store-bought due to ripeness and minimal handling.
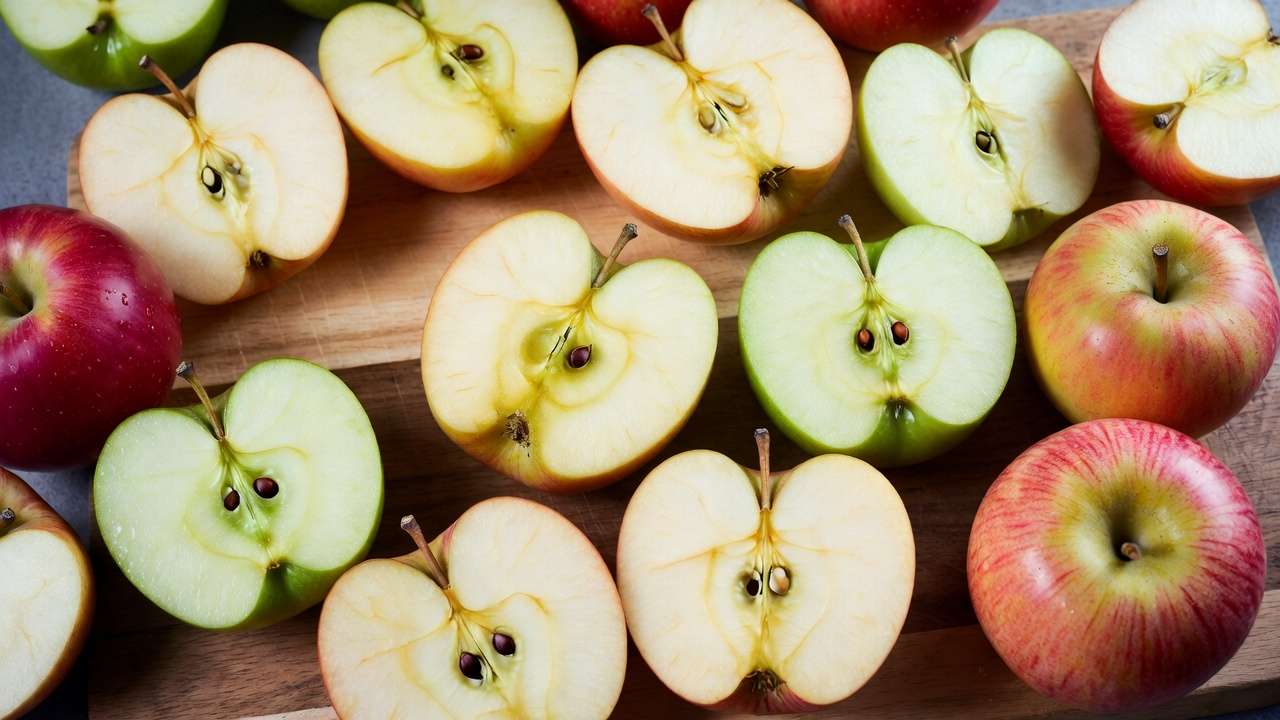
Best Apple Varieties for Homemade Drinks
For balanced flavor, blend sweet and tart types. Ideal ratio: 60-70% sweet + 30-40% tart/sharp for complex cider.
Popular choices:
- Sweet varieties (high sugar, mild): Honeycrisp (super juicy and crisp—top for juicing!), Gala, Fuji, Golden Delicious, Red Delicious. These make mellow, sweet juice.
- Tart/sharp varieties (add acidity and zing): Granny Smith, Pink Lady, Braeburn, Jonathan, McIntosh, Northern Spy. Great for balancing sweetness.
- Heirloom/special picks: Winesap, Newtown Pippin, or crabapples like Wickson for tannic depth in hard cider.
If your trees are dessert varieties (common in home gardens), blend with any tart ones you can source or grow for better results.
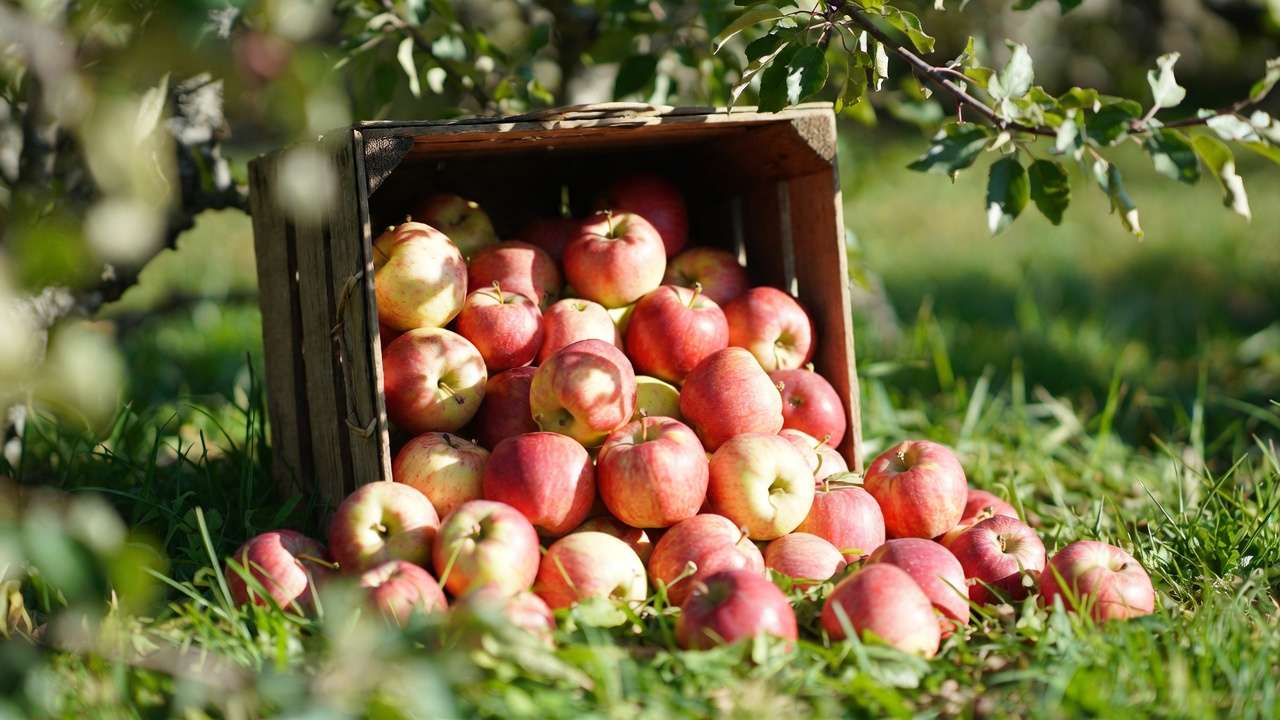
When and How to Harvest from Your Trees
Harvest at peak ripeness for maximum sugar and flavor:
- Signs: Full color, easy twist-off, brown seeds inside (for many varieties).
- Timing: Late summer to fall—wait until starch converts to sugar (simple iodine test: drop iodine on cut apple; black = starchy, yellow = ripe).
- Pro tree care tip: Thin fruits earlier in summer for larger, higher-quality apples. 🍏
- Handle windfalls carefully: Use only fresh ones; avoid ground-contact fruits for fermentation to prevent spoilage or wild bacteria.
Pick on a dry day, wash gently, and process soon for best taste.
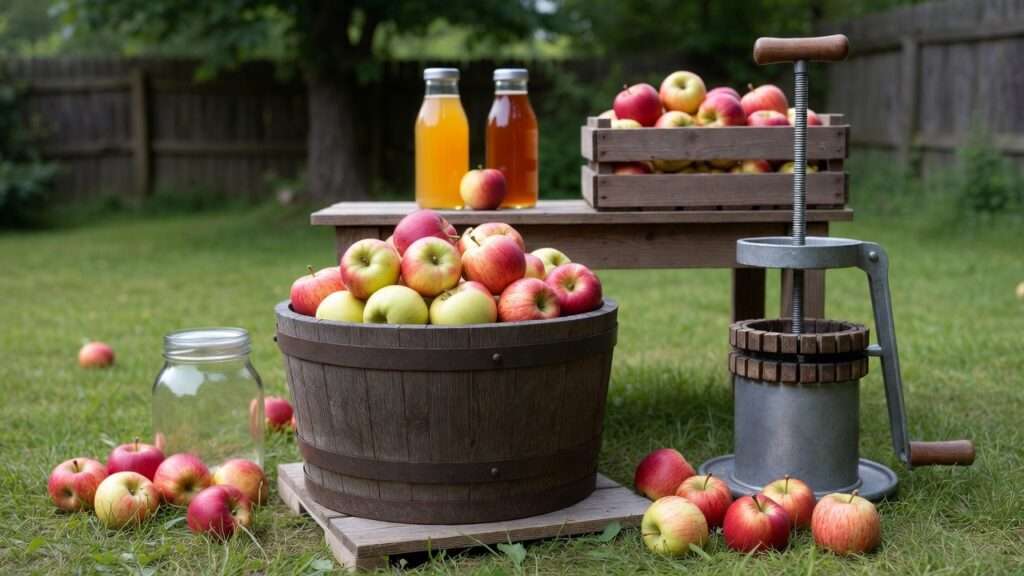
Essential Equipment for Home Juice and Cider Making
Start simple—upgrade as you go!
- Beginner setup (low-cost): Electric juicer or blender + cheesecloth/strainer for small batches. Steam juicer for easy pasteurizing.
- Intermediate: Manual fruit grinder (scratter) + basket press (e.g., wooden or ratchet style) for 5-10 gallons.
- Advanced: Hydraulic press, fermenting buckets/carboys, airlocks, hydrometer (measures sugar/alcohol), siphon.
- Sanitation must-haves: No-rinse sanitizer (like Star San), bottles, caps/corks. 🧼
Budget tip: Start with a $50-100 manual press kit. Source affordably from garden stores or online. Clean everything thoroughly—sanitation prevents off-flavors!
Step-by-Step: Making Fresh Apple Juice from Homegrown Apples
This method yields pure, delicious non-alcoholic juice.
- Wash and prepare: Rinse apples well. Core and chop (peel optional for more rustic taste).
- Extract juice: Use juicer for clear results; blender method—chop, blend with little water, strain through cheesecloth/nut milk bag.
- Filter: For clarity, strain multiple times; keep cloudy for nutrients.
- Pasteurize (for storage): Heat to 160-165°F (71-74°C) for 30 minutes, then bottle in sterilized jars.
- Flavor twists: Add cinnamon stick, ginger, or lemon during heating.
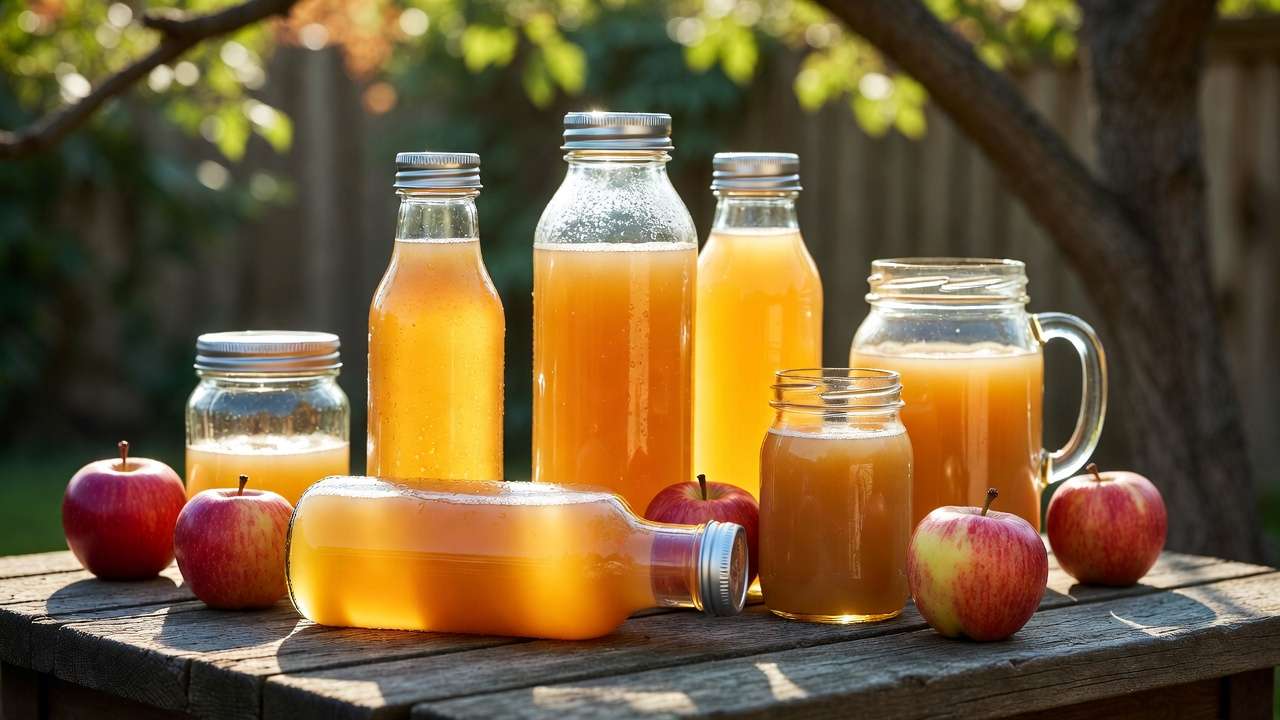
- Store: Refrigerate (1-2 weeks), freeze, or can for months.
Expect 1 gallon from 15-20 lbs apples. Enjoy chilled! 🥤
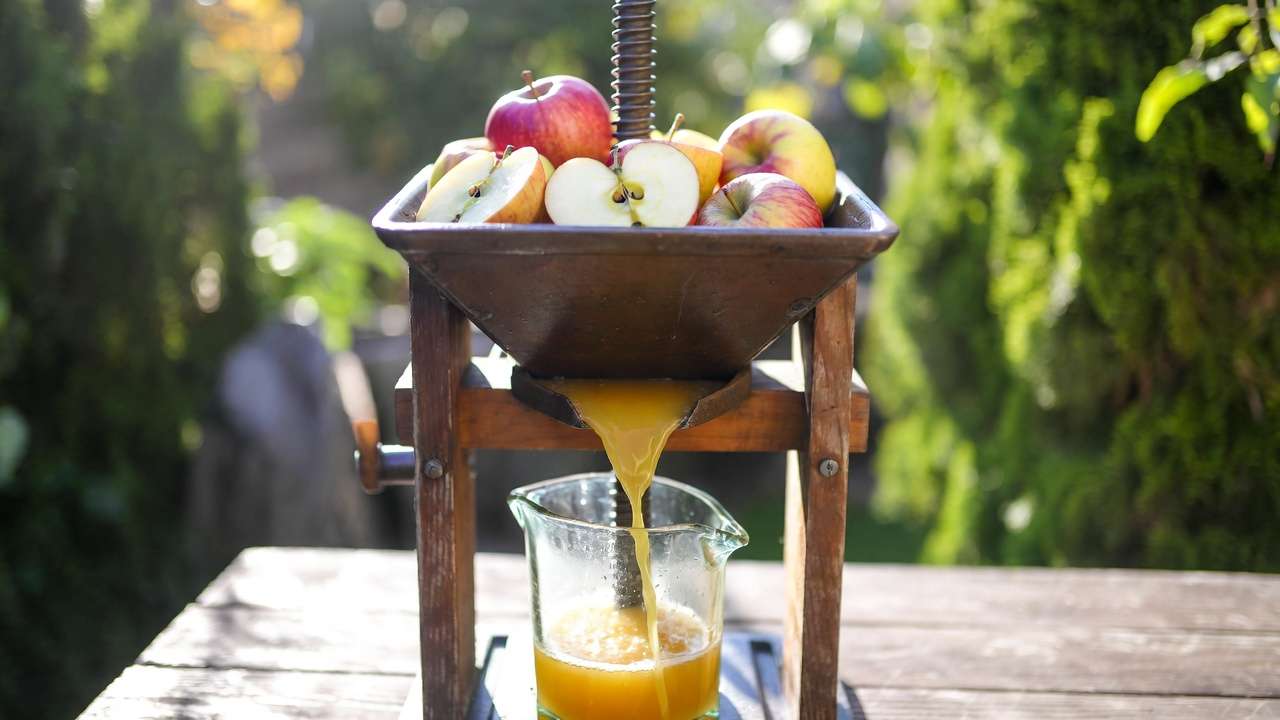
Step-by-Step: Pressing Fresh Apple Cider (Sweet/Non-Alcoholic)
Similar to juice but rustic:
- Crush/mille apples into pomace.
- Press in layers (use pressing bags for clean yield).
- Collect juice immediately—drink fresh or refrigerate short-term.
- Twist: Blend with homegrown pears for perry-like cider. 🍐
Maximum yield comes from proper crushing—don’t skip it!
Turning Fresh Juice into Hard Cider: Fermentation Guide
Now for the magic—fermenting into alcoholic cider!
Preparing the Must (Juice)
- Test: Use hydrometer for specific gravity (aim 1.040-1.060 for 5-8% ABV), pH strips (ideal 3.2-3.8).
- Add sulfites (Campden tablets): 1 per gallon to kill wild yeast—wait 24 hours.
- Optional: Pectic enzyme for clearer final product.
Choosing and Pitching Yeast
- Recommended: Cider-specific (e.g., Lalvin EC-1118), champagne, or wine yeast.
- Wild fermentation: Riskier but authentic—skip sulfites.
- Pitch at 55-65°F (13-18°C) for best flavor. ❄️
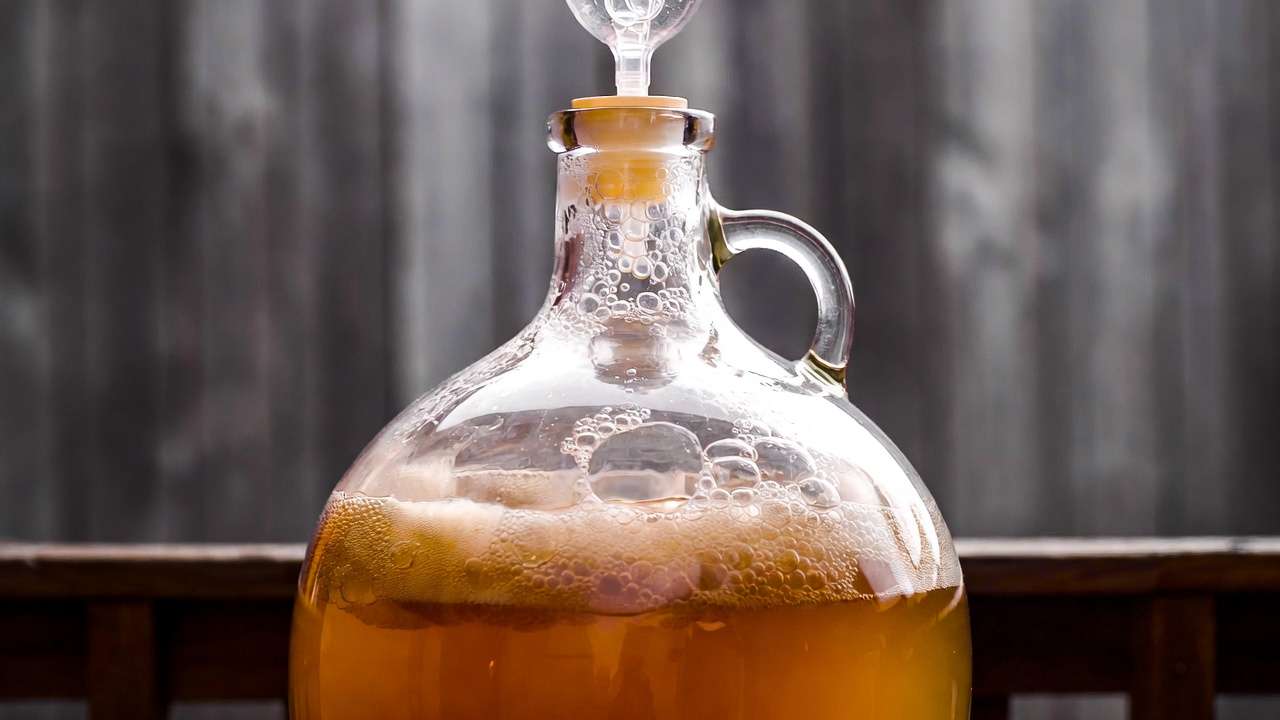
Primary and Secondary Fermentation
- Primary: 1-3 weeks in bucket with airlock—bubbling slows.
- Rack to carboy (secondary): 2-6 weeks to clear sediment.
- Monitor gravity: Stable = fermentation done.
Bottling Your Homemade Hard Cider
- Still: Bottle flat.
- Carbonated: Prime with sugar (1 oz per gallon), bottle, condition 1-2 weeks.
- Age: Months for smoother taste—patience pays off!
Troubleshooting Common Problems
Even experts hit snags—here’s how to fix:
- Cloudy cider: Use fining agents or cold crash.
- Stuck fermentation: Warm slightly, add yeast nutrient.
- Off-flavors (vinegar = acetic bacteria; sulfur = stressed yeast): Improve sanitation, control oxygen.
- Mold/spoilage: Discard if fuzzy—prevention via clean fruit/equipment.
Flavor Enhancements and Advanced Variations
- Spice it: Cinnamon, cloves, hops for craft styles.
- Back-sweeten: Add juice/sugar after fermentation (stabilize first).
- Blends: Apple-berry, spiced, or dry/semi-sweet.
Safety and Best Practices
- Keep pH low (<4.6) to prevent botulism.
- Sanitize rigorously.
- Home fermentation for personal use only—check local laws.
Storing and Enjoying Your Homemade Drinks
- Juice: Fridge 1-2 weeks, frozen months.
- Hard cider: Cool, dark place; ages like wine.
- Serve: Chilled, mulled winter-style, or in cocktails. Gift to fellow gardeners! 🎁
Frequently Asked Questions (FAQs)
- How many apples for 1 gallon? About 15-20 lbs.
- No press? Blender + strain works for small batches.
- Beginner-safe hard cider? Yes—with sanitation and patience!
- Typical alcohol content? 4-8% ABV.
- Non-alcoholic sparkling? Carbonate sweet cider with priming sugar carefully.
Final Thoughts & Expert Encouragement
You’ve now got the complete roadmap to transform your homegrown apples into pure juice or artisanal cider. Start small, note what your trees produce best, and enjoy the journey from branch to bottle. 🌟
The real joy? That first sip knowing it’s all from your efforts. What’s your favorite homegrown variety for drinks? Share below—I’d love to hear! Happy pressing! 🍻


