

Are you dreaming of growing your own stunning juniper trees, but unsure where to start?  Juniper tree seeds are a fantastic way to introduce these resilient, evergreen beauties into your garden or landscape. But planting and caring for them can seem overwhelming if you’re not sure where to begin.
In this guide, we’ll walk you through everything you need to know about juniper tree seeds, from the best planting methods to essential care tips for ensuring your trees thrive. Whether you’re a seasoned gardener or a beginner looking to enhance your outdoor space, this article will equip you with practical, step-by-step advice. Ready to turn your gardening goals into a reality? Keep reading to discover how easy it can be to grow and nurture your own juniper trees! 
What Are Juniper Trees? 
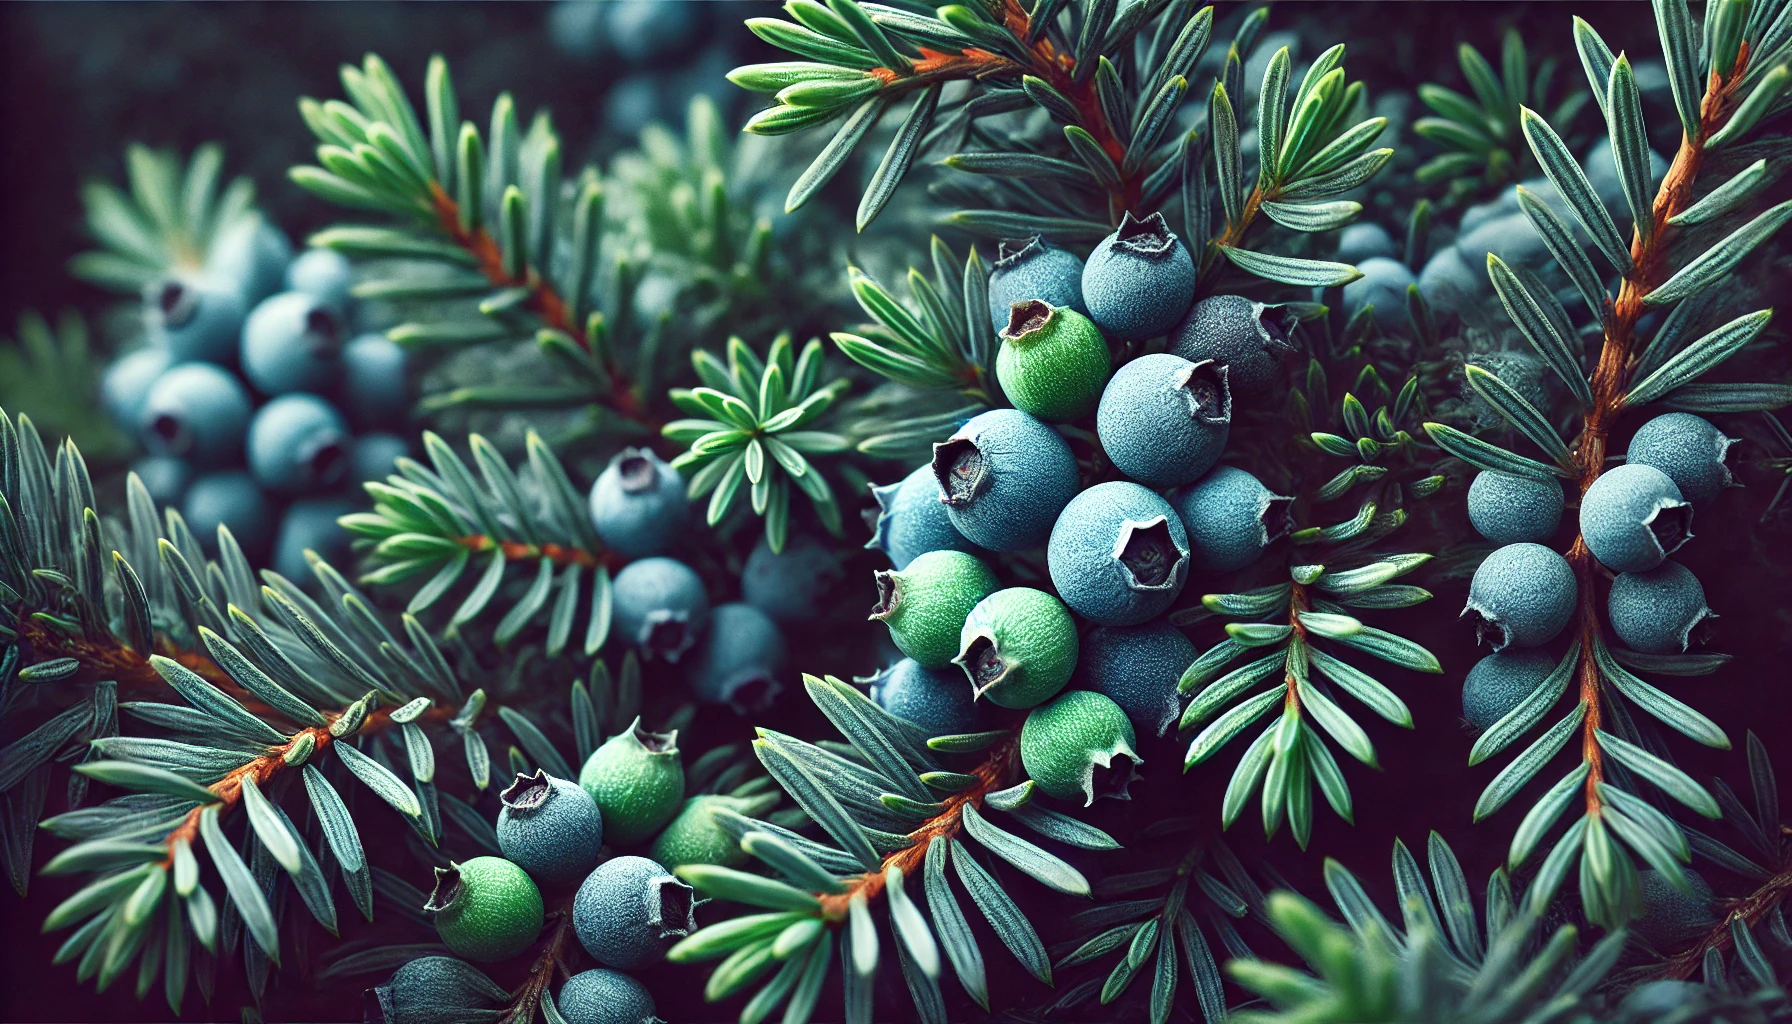
Juniper trees are evergreen conifers that belong to the Juniperus genus. These hardy trees are known for their unique needle-like leaves and aromatic berries, which are often used in flavoring gin.  Whether you’re a seasoned gardener or a beginner, junipers are easy to grow and require minimal care, making them a popular choice for landscapes worldwide.
Appearance
Juniper trees come in many shapes and sizes—from low-spreading shrubs to tall, upright trees. They have a variety of needle colors, ranging from deep green to blue-gray, and their berries mature to a purple-blue hue, adding an extra pop of color to your garden. Some varieties also feature a delightful, spicy scent when their foliage is crushed. 
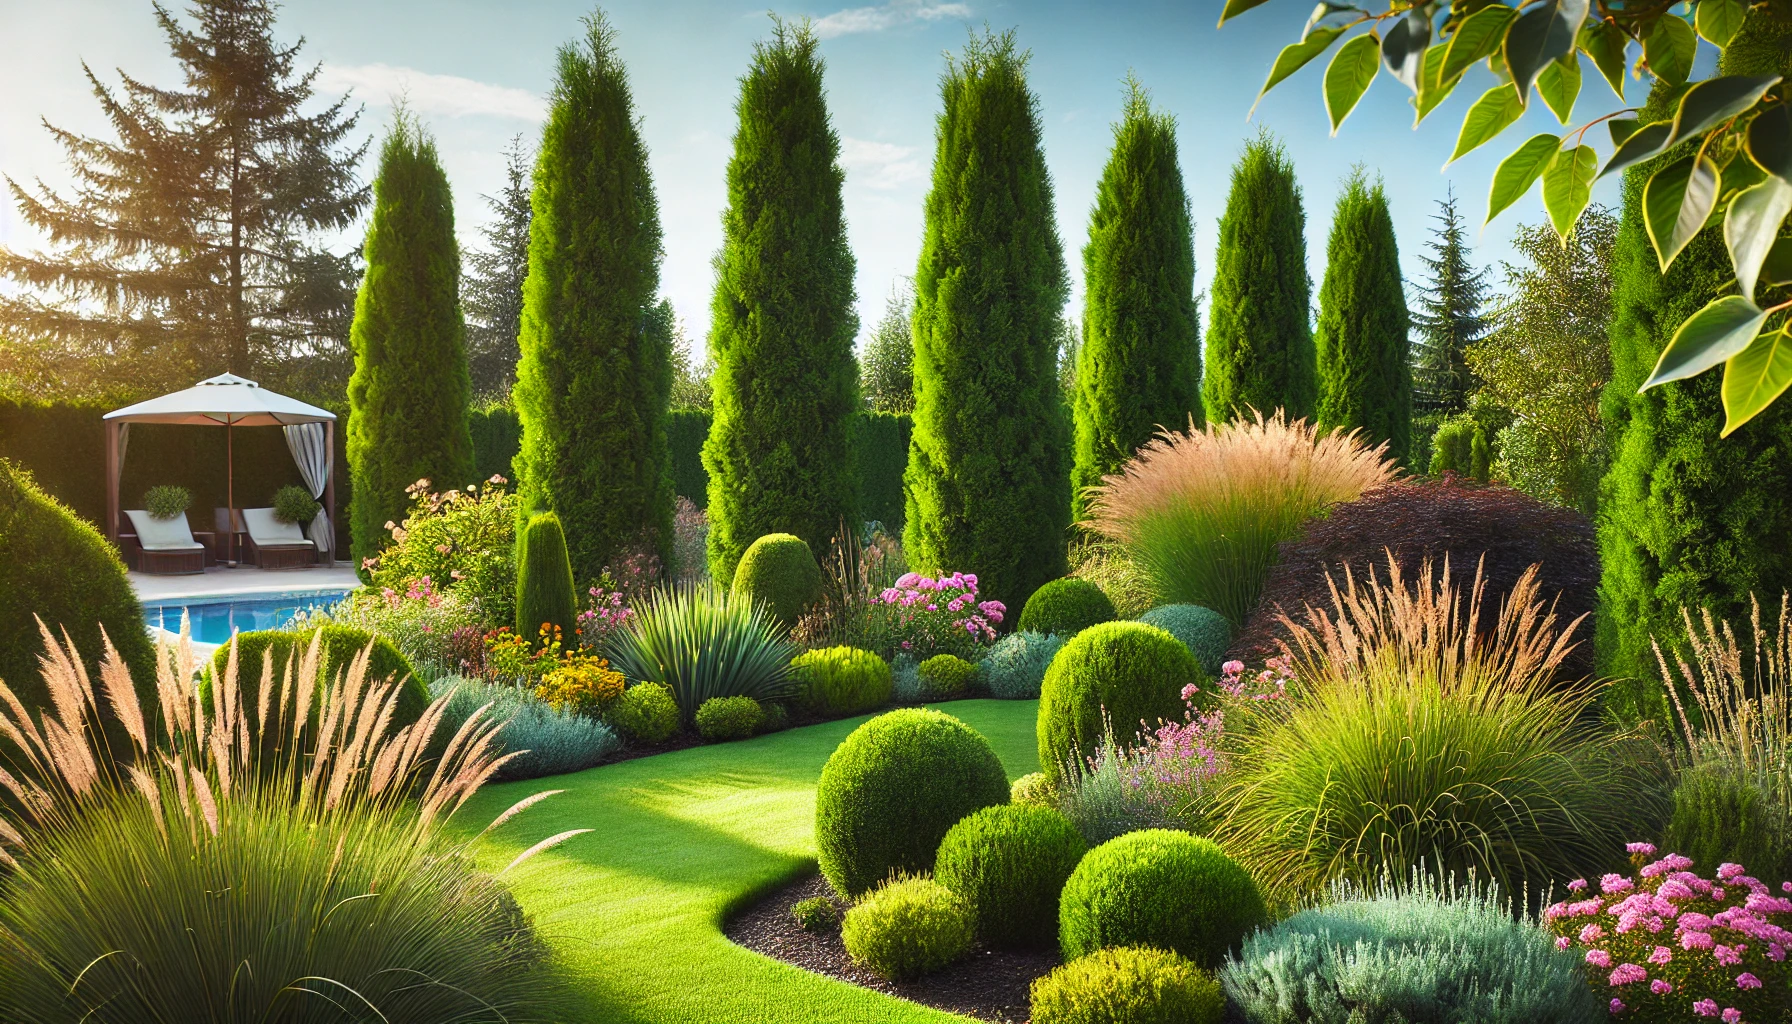
Why Grow Juniper Trees?
Junipers are incredibly versatile and low-maintenance. They thrive in different climates, from cold winters to hot summers, and can be grown in most soil types. Plus, junipers are great for creating natural hedges, privacy screens, or decorative accents in gardens. With their drought tolerance and resistance to pests, they’re perfect for areas where other plants might struggle. 
In the next section, we’ll cover the benefits of growing juniper trees and the best ways to care for them to ensure they flourish in your garden. Keep reading to learn how to make the most of these resilient, beautiful trees!
Benefits of Growing Juniper Trees from Seeds
Growing juniper trees from seeds is a rewarding and cost-effective way to introduce these hardy, evergreen beauties into your garden. Here’s why starting your juniper tree journey from seeds can be a great choice:
- Cost-Effective and Accessible

Seeds are often cheaper than purchasing mature plants or saplings. With a small investment, you can start a number of juniper trees, saving money while expanding your garden. - Full Control Over Growth
Starting from seeds allows you to control the growing environment. From seedling to fully mature tree, you can tailor soil conditions, watering schedules, and sunlight exposure to ensure optimal health and growth. - Variety and Customization
By growing junipers from seeds, you have the opportunity to grow different varieties that may not be available as pre-grown saplings. This gives you more options to select the exact type of juniper that suits your landscape. - Sustainability and Self-Sufficiency

Growing trees from seeds promotes a more sustainable approach to gardening. You’re reducing the carbon footprint associated with transporting nursery-grown trees, while also fostering your own self-sufficiency by collecting seeds and planting them yourself. - A Stronger, Healthier Tree
Seeds naturally develop into resilient trees. Starting with seeds allows you to nurture your juniper from the very beginning, leading to strong, well-rooted trees that can withstand various environmental challenges. - Educational Experience

Growing juniper trees from seeds is an excellent way to learn about the life cycle of plants and develop gardening skills. It’s a fulfilling process that teaches patience and offers a hands-on experience with nature.
In conclusion, growing juniper trees from seeds not only offers financial savings but also provides a deeper connection to the environment, making it a rewarding experience for gardeners of all skill levels. Happy planting!
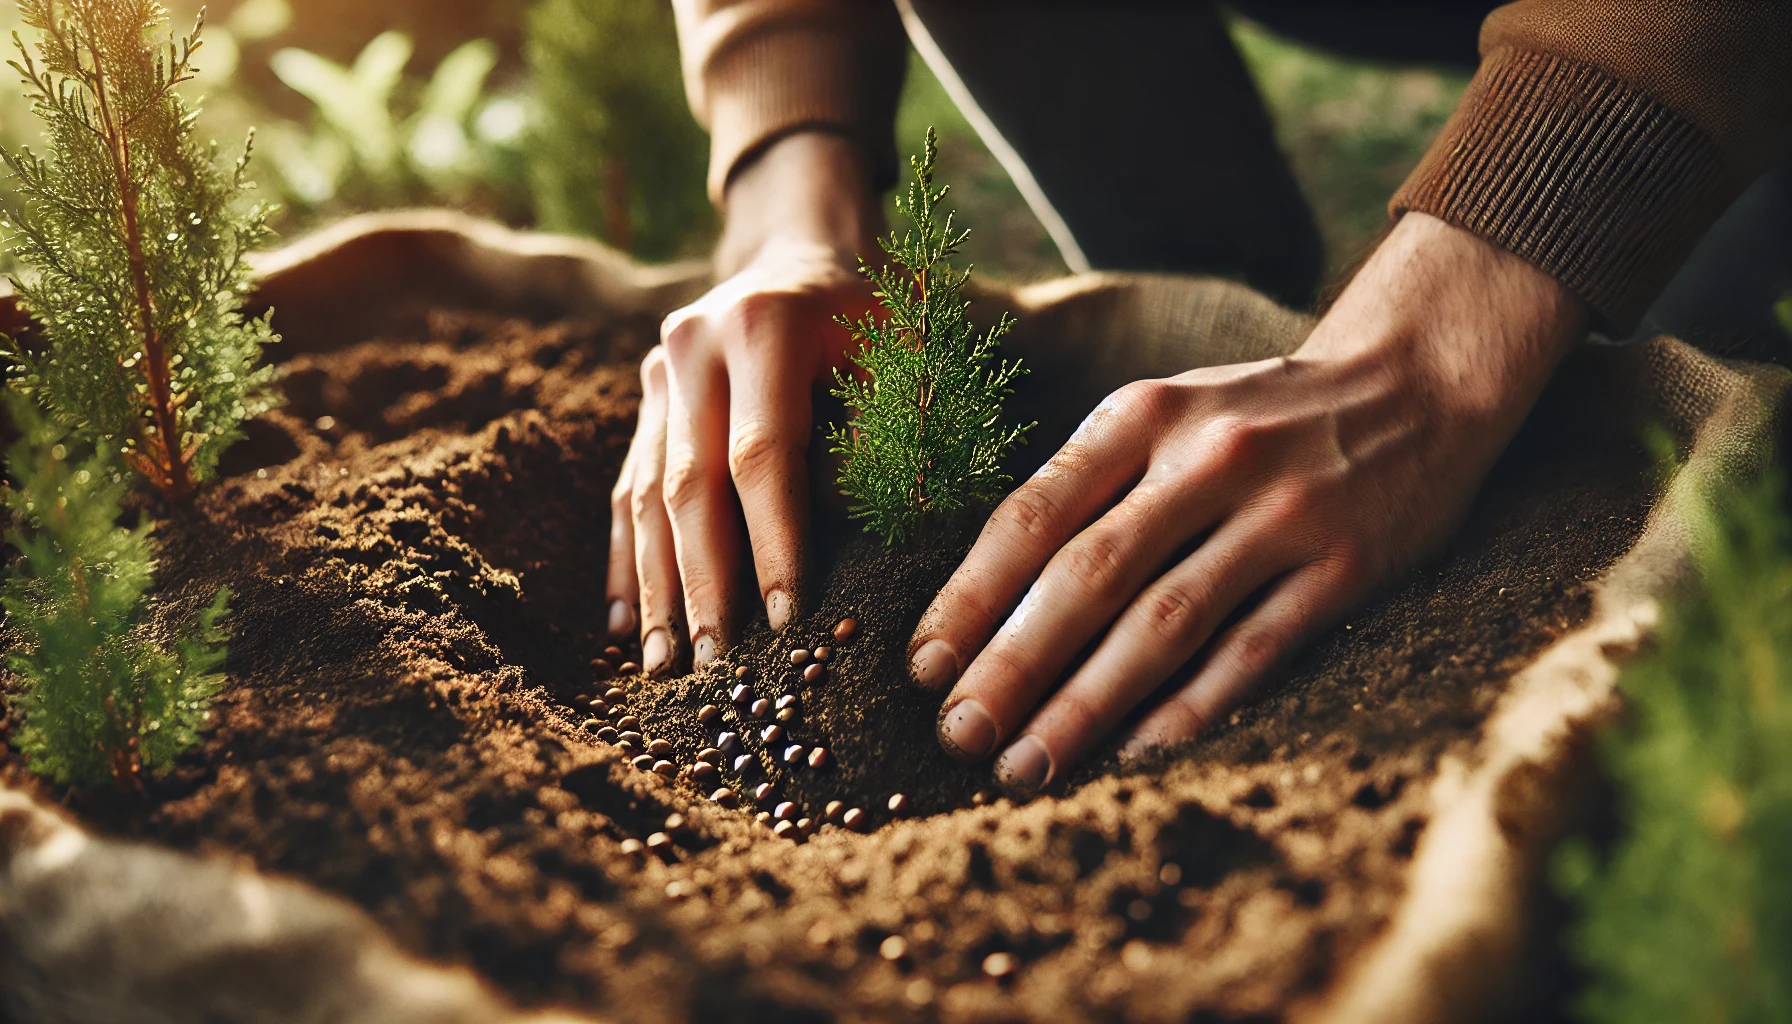
How to Collect and Prepare Juniper Tree Seeds
Collecting and preparing juniper tree seeds might seem daunting, but with a little patience and the right steps, you can ensure successful germination for your next planting season. Here’s how to do it:
Step 1: Timing Your Seed Harvest 
The best time to collect juniper tree seeds is in late autumn or early winter, when the berries are fully ripe. These berries are actually cones, typically blue or purple, and they take about two years to mature. You’ll know they’re ready when they start to soften and turn a deep color.
Step 2: Harvesting the Seeds
Gently pick the ripe juniper berries from the tree, taking care not to damage the branches. If you’re harvesting multiple berries, use pruning shears to cut them from the branches easily. Avoid unripe berries, as they may not have viable seeds inside.
Step 3: Extracting the Seeds 
Once you have your berries, it’s time to extract the seeds. Simply crush the berries by hand or use a mortar and pestle to break them apart. Be careful not to crush the seeds inside. After crushing, rinse the seeds with water to remove any pulp and debris.
Step 4: Stratifying the Seeds 
Juniper seeds require a process called cold stratification to break their dormancy and encourage germination. To do this, place the cleaned seeds in a sealed plastic bag with some moist sand or vermiculite. Store the bag in the fridge for 30 to 60 days. This cold treatment mimics winter conditions and prepares the seeds for spring planting.
Step 5: Planting the Seeds
After stratification, you’re ready to plant. Choose a well-draining soil mix and lightly bury the seeds about 1/4 inch deep. Keep the soil consistently moist but not soggy. Germination can take anywhere from a few weeks to a few months, so be patient and give the seeds time to sprout.
By following these simple steps, you’ll be well on your way to growing healthy juniper trees from seed! 

Step-by-Step Guide to Planting Juniper Tree Seeds
Planting juniper tree seeds is a rewarding process that allows you to grow a resilient and beautiful tree. Whether you’re a beginner or experienced gardener, this guide will walk you through the simple steps to successfully plant and grow juniper trees. Let’s get started!
1. Prepare Your Seeds
Juniper seeds can take some time to germinate, so patience is key. First, collect your seeds from mature juniper cones or purchase them from a reputable source.
- Cold Stratification: Juniper seeds require a period of cold to break dormancy. Place your seeds in a plastic bag with a bit of damp sand and store them in the fridge for 4–6 weeks. This process mimics winter conditions and helps speed up germination.
2. Select the Right Planting Location
Junipers thrive in full sunlight and well-drained soil. Before planting, choose a location with:
- Plenty of sun: Junipers love sunlight and need at least 6 hours of direct sun each day.
- Well-drained soil: Ensure the soil drains well to avoid waterlogging. Sandy or loamy soils are ideal for junipers.
3. Prepare the Soil
Once the cold stratification is complete, it’s time to prepare your soil.
- Loosen the Soil: Use a garden fork or shovel to loosen the soil to a depth of about 6–8 inches.
- Improve Drainage: If the soil is clay-heavy, mix in some sand or organic compost to improve drainage.
4. Plant the Seeds
Now that your soil is ready, it’s time to plant the seeds!
- Plant Depth: Dig small holes, about 1/8–1/4 inch deep. Juniper seeds are tiny, so don’t bury them too deep.
- Spacing: Plant seeds at least 6 inches apart to give each seedling room to grow.
Gently place the seeds in each hole and cover them lightly with soil. Water the area gently to ensure the seeds are settled in.
5. Water and Maintain Moisture 
Keep the soil consistently moist, but not soggy. Juniper seeds need moisture to germinate, but too much water can cause them to rot.
- Watering Tip: Use a fine mist or watering can to water the area, ensuring the seeds stay moist without being over-saturated.
6. Wait for Germination 
Patience is key during this phase. Juniper seeds can take anywhere from 2–4 weeks to germinate, depending on temperature and soil conditions.
- Monitor the Seeds: During this time, keep the area moist and watch for tiny green shoots emerging from the soil.
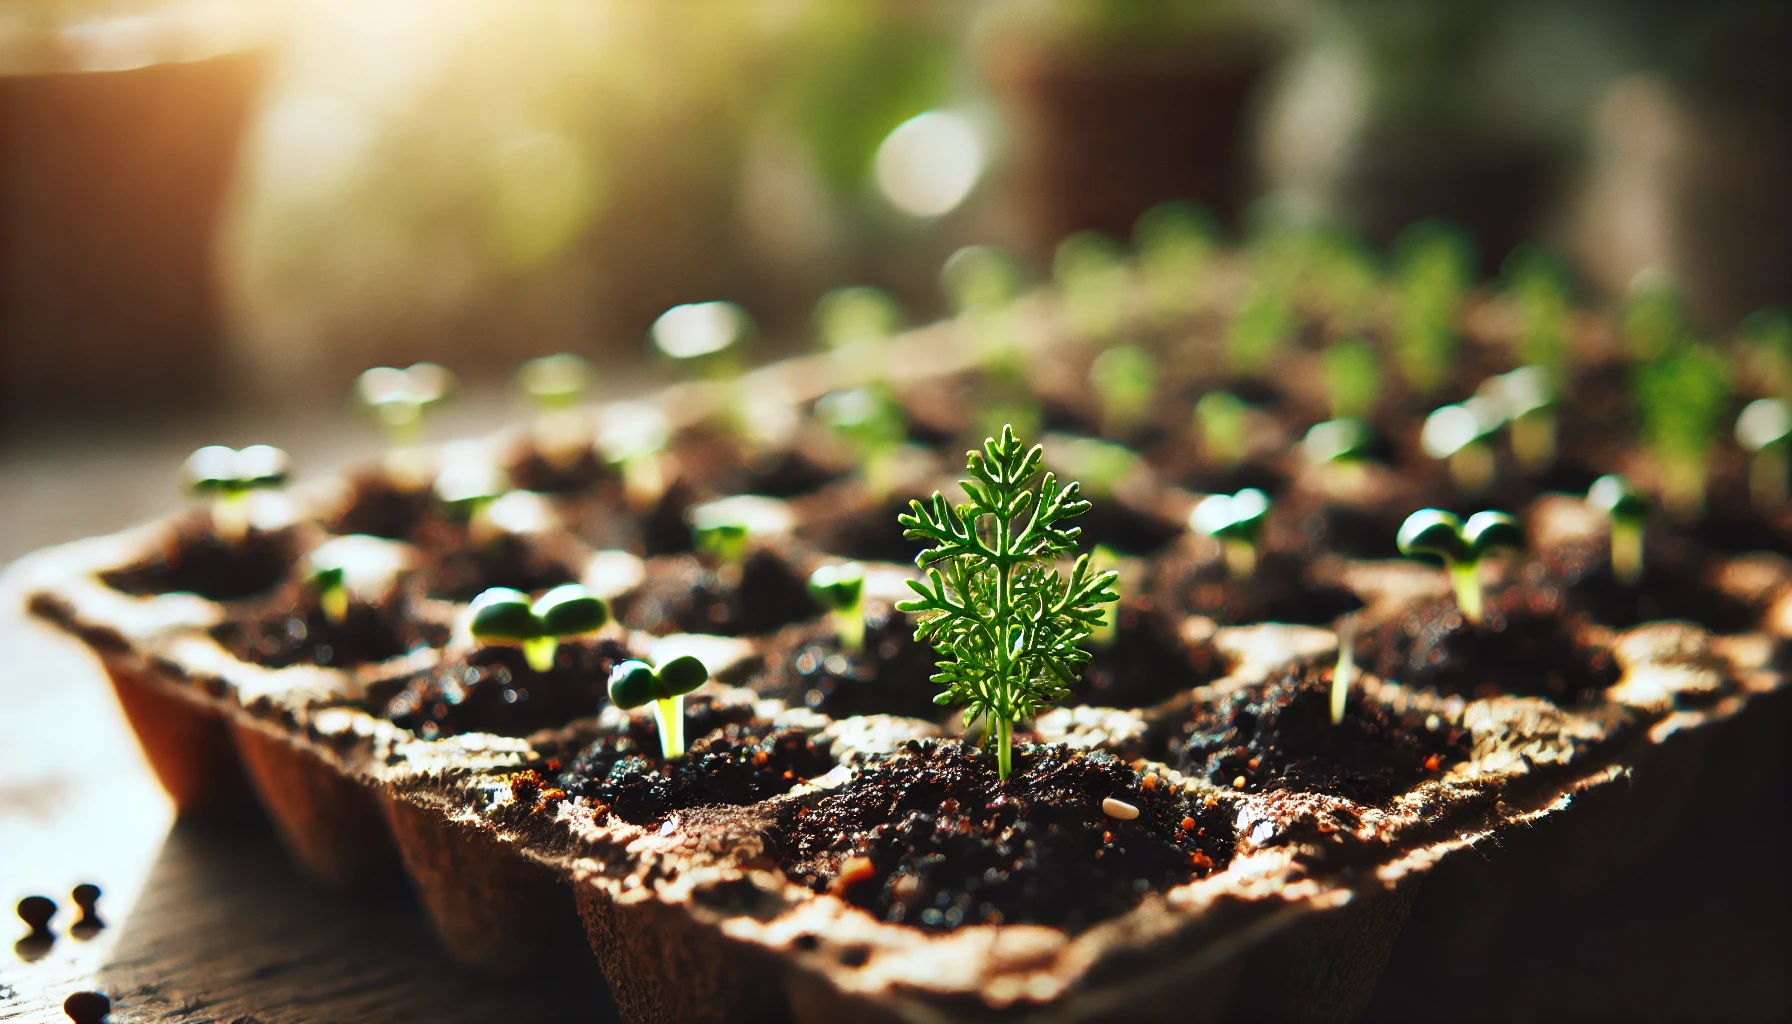
7. Transplant Seedlings 
Once your seedlings have developed a few leaves and are about 2–4 inches tall, it’s time to transplant them to their permanent spot in your garden.
- Transplanting Tip: Be sure to dig a hole slightly larger than the root ball of each seedling. Gently lift the seedlings with a small trowel and place them in the hole, filling it with soil around the roots.
8. Ongoing Care and Maintenance
To help your young juniper trees thrive, follow these simple care tips:
- Watering: Continue to water regularly during dry periods but allow the soil to dry out between waterings.
- Pruning: Lightly prune dead or damaged branches to encourage healthy growth.
- Mulch: Apply a layer of mulch around the base to help retain moisture and suppress weeds.
By following these steps, you’ll have your very own juniper trees growing strong and healthy! With time, you’ll see them develop into hardy, beautiful trees that will enhance your landscape for years to come.
Germinating Juniper Tree Seeds
Germinating juniper tree seeds can be a rewarding process, but it requires patience and the right conditions. Follow these easy steps to successfully grow your own juniper tree from seed!
1. Stratify the Seeds
Juniper seeds need a cold-stratification period to break their dormancy. This mimics the natural winter conditions and helps improve germination rates.
- How to do it: Place your juniper seeds in a plastic bag with some moist sand or peat moss. Store the bag in the fridge for about 30 to 60 days. Keep the temperature between 34-41°F (1-5°C). This step is crucial for triggering the germination process!

2. Prepare the Soil
Once stratification is complete, it’s time to plant your seeds! Junipers prefer well-draining, slightly acidic soil.
- Ideal Soil Mix: Combine equal parts of sand, perlite, and potting mix for a light, airy texture. Ensure the soil has good drainage to prevent waterlogging.
3. Plant the Seeds
Juniper seeds are tiny, so be gentle when planting them.
- How to plant: Fill a seed tray or small pots with the prepared soil mix. Scatter the seeds lightly on top of the soil and cover them with a thin layer of soil. Don’t bury them too deep—juniper seeds need light to germinate!
4. Maintain Moisture and Temperature
Now that your seeds are planted, you’ll need to create a comfortable environment for them to sprout.
- Watering: Keep the soil moist but not soggy. Mist the surface lightly to maintain a humid environment.
- Temperature: Juniper seeds germinate best at temperatures between 65°F and 70°F (18-21°C). Place your trays in a warm, bright location, but avoid direct sunlight, which could dry out the seeds.

5. Be Patient
Juniper seeds can take anywhere from a few weeks to several months to germinate, so don’t be discouraged if you don’t see results immediately! Patience is key here.
6. Transplant the Seedlings
Once your seeds have sprouted and grown into small seedlings with a few sets of leaves, it’s time to move them into larger pots or your garden. Ensure the soil is well-drained and the spot gets plenty of sunlight.
By following these simple steps, you can successfully germinate juniper seeds and enjoy watching them grow into strong, healthy trees. Happy planting!
Growing Your Juniper Trees from Seed
Growing juniper trees from seed can be a rewarding process, though it requires patience and care. If you’re looking to grow junipers from seed, here’s a step-by-step guide to help you get started and ensure successful germination and growth .
Step 1: Harvesting the Seeds
Juniper trees produce small, berry-like cones that contain seeds. Harvest these cones when they’re ripe and soft, typically in late summer or early fall. You can gather them by hand, making sure to select cones that have fully matured.
Step 2: Preparing the Seeds
Before planting, juniper seeds require a process called stratification. This mimics the natural winter conditions that seeds need to sprout in the wild. To stratify your seeds:
- Clean the seeds: Remove any pulp from the cones by soaking them in water for a day or two.
- Cold stratification: Place the cleaned seeds in a plastic bag with some damp sand or peat moss. Keep this bag in the refrigerator for about 30 days. This cold period will help break the seeds’ dormancy and trigger germination.
Step 3: Planting the Seeds
After the stratification period, it’s time to plant the seeds. Choose a well-draining potting mix to prevent waterlogged soil, as junipers don’t like their roots to sit in wet conditions.
- Planting depth: Plant the seeds about 1/8 inch deep into the soil. Junipers need light to germinate, so make sure not to bury them too deep.
- Watering: Keep the soil moist, but not soggy. Ensure the pot has good drainage to prevent root rot.
Step 4: Providing the Right Conditions
Juniper seeds need warmth and light to germinate, so it’s important to place them in a warm, sunny spot. Ideal temperatures are between 70°F and 80°F (21°C – 27°C). If you’re growing indoors, a south-facing window or a grow light works well.
- Humidity: Juniper seeds benefit from a bit of humidity, so covering the pot with a plastic dome or wrap can help create a mini greenhouse effect. Just be sure to provide ventilation to prevent mold.
Step 5: Germination Time
Germination can take anywhere from 2 to 6 weeks. Once you see little green sprouts, remove the plastic cover to allow the seedlings to harden off and acclimate to drier air. Be patient, as juniper seeds can be a bit slow to sprout.
Step 6: Transplanting the Seedlings
Once your seedlings have a few sets of leaves and are large enough to handle, it’s time to transplant them into individual pots or directly into the garden. Make sure the soil is well-draining, and choose a spot with plenty of sunlight.
As they grow, be sure to gradually acclimate your juniper trees to outdoor conditions by placing them outside for a few hours each day. This process, called “hardening off,” helps prevent shock when the seedlings are finally planted in the ground.
Final Thoughts
Growing junipers from seed can be a fun and fulfilling project, but it does require some patience. By following these simple steps and providing the right environment, you’ll be able to enjoy the beauty and resilience of your juniper trees for years to come!
Happy planting, and remember: with a little care, your junipers will thrive!
Caring for Mature Juniper Trees
Once your juniper tree matures, it becomes a resilient and low-maintenance beauty in your landscape. However, like all plants, it still requires attention to thrive. Here’s how to care for your mature juniper tree:
1. Watering Needs
Mature junipers are drought-tolerant, but during dry spells, they still need regular watering. Water deeply once every two weeks during the hot months to encourage deep root growth. Make sure the soil dries out between waterings to prevent root rot.
2. Pruning for Health 
Pruning is essential for maintaining a healthy, attractive tree. Remove any dead or diseased branches, particularly during the spring. Focus on thinning the canopy to improve air circulation and sunlight penetration. Always use clean, sharp pruning tools to avoid damaging the tree.
3. Mulching for Moisture Retention
A 2–3 inch layer of mulch around the base of your juniper tree helps retain moisture, suppress weeds, and protect roots from extreme temperatures. Keep the mulch away from the tree trunk to prevent rot.
4. Fertilizing 
Junipers are relatively low-maintenance when it comes to fertilizing. However, if your tree shows signs of poor growth or yellowing needles, apply a balanced, slow-release fertilizer in early spring. Avoid over-fertilizing, as this can damage the roots and cause excessive growth.
5. Pest and Disease Control 
While junipers are generally pest-resistant, they can still fall prey to scale insects, aphids, and fungal diseases. Inspect the tree regularly for pests and treat with appropriate organic insecticidal soap or neem oil if necessary. Ensuring proper air circulation and avoiding overwatering will also help prevent fungal infections.
6. Providing Protection Against Harsh Weather 
Although junipers are hardy, they can still be susceptible to wind damage and winter burn, especially in harsh climates. Consider wrapping the tree with burlap or providing a windbreak during extreme weather conditions to protect it.
By following these simple yet effective care tips, your mature juniper tree will continue to grow strong and add beauty to your landscape for many years to come.

Troubleshooting Common Problems with Juniper Tree Seeds
Growing juniper trees from seeds can be a rewarding experience, but like any gardening project, it comes with its challenges. Below, we’ll address the most common issues that might arise and offer practical solutions to help your juniper seeds thrive.
1. Slow Germination 
Juniper seeds are known to have slow germination rates, sometimes taking several months to sprout. If you’re seeing little or no growth, here’s what you can do:
- Cold Stratification: To encourage germination, it’s essential to mimic the natural winter conditions. Place your seeds in a damp paper towel, then in a plastic bag in the fridge for 30-60 days before planting. This cold treatment can improve germination rates.
- Check Temperature: Juniper seeds prefer cooler temperatures between 65-75°F (18-24°C). Avoid placing them in overly warm areas, which can hinder sprouting.
2. Poor Seedling Growth
Once your seeds germinate, you may notice that the seedlings aren’t growing as expected. Here are some tips to help them along:
- Ensure Proper Lighting: Junipers need plenty of light. Make sure your seedlings receive 12-16 hours of indirect light each day. A sunny windowsill or grow light can help.
- Avoid Overwatering: While junipers like well-moist soil, too much water can drown the roots. Allow the top layer of soil to dry out between waterings. A well-draining potting mix is crucial.
3. Yellowing Leaves 
Yellowing leaves can signal various issues with your juniper seedlings. Here’s how to fix it:
- Check for Overwatering: Yellow leaves often mean too much water. Ensure your pots have drainage holes, and reduce watering to let the soil dry out between waterings.
- Nutrient Deficiency: Juniper trees, especially young seedlings, need balanced nutrients. Use a diluted, balanced fertilizer once every 4-6 weeks during the growing season to keep your seedlings healthy.
4. Pest Infestations 
Junipers can be prone to pests like aphids, spider mites, and scale insects. Here’s how to deal with them:
- Inspect Regularly: Check the undersides of leaves and around stems for signs of pests. If you spot any, remove them by gently wiping the affected areas with a damp cloth.
- Natural Remedies: For mild infestations, spraying a mixture of water and dish soap can help deter pests. For more severe issues, consider using insecticidal soap or neem oil.
5. Weak or Spindly Growth
If your seedlings are growing tall and spindly, it usually indicates a lack of light or overcrowding:
- Improve Light Exposure: Move your seedlings to a brighter spot or increase the intensity of the grow lights. Junipers need plenty of light to develop strong stems.
- Thin Out Seedlings: If you have multiple seedlings growing close together, thinning them out can help reduce competition for light and nutrients, allowing the remaining seedlings to grow stronger.
By addressing these common problems early on, you can set your juniper trees up for success and enjoy healthy, thriving plants in no time!

Conclusion
Growing juniper trees from seeds is a rewarding and cost-effective way to add beauty and resilience to your landscape. By following the steps outlined in this guide—from seed collection to planting, germination, and long-term care—you’ll be well on your way to nurturing thriving juniper trees that will enhance your garden for years to come.
Remember, patience is key! Junipers grow slowly, but with the right care and attention, they’ll flourish into stunning, low-maintenance trees that provide year-round beauty and numerous environmental benefits. Whether you’re a seasoned gardener or just starting out, you now have the knowledge to grow juniper trees with confidence.

So, why wait? Start planting your juniper tree seeds today and watch your garden transform into a serene, green oasis. Happy gardening!