
When it comes to growing healthy new plants from cuttings or seeds, few factors are as crucial—and often misunderstood—as light. Whether you’re a beginner or an experienced gardener, understanding the light requirements for plant propagation can make the difference between thriving greenery and failed attempts. The right amount, type, and duration of light directly influence root development, stem strength, and overall plant vitality. In this article, we’ll break down the essentials of lighting for propagation, helping you create the perfect conditions to ensure your plants grow strong from the very start. Let’s shine a light on success! 

Why Light Matters for Propagation 

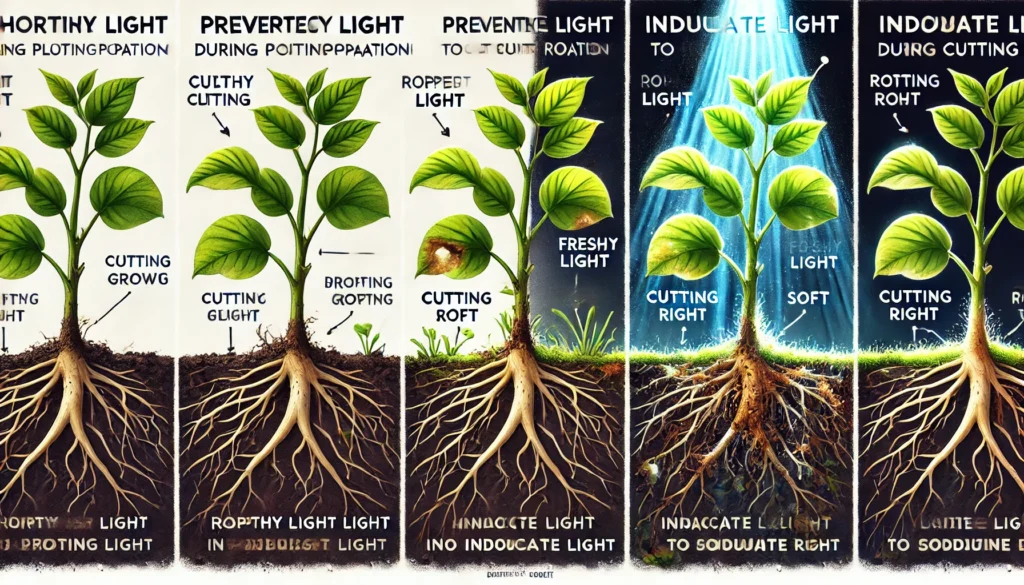
Light gives plants the energy they need to produce food through photosynthesis. During propagation, especially with cuttings, light helps support early leaf growth and encourages root development. Without enough light, plants can become leggy, weak, or fail to root altogether.
2. Best Light Conditions for Cuttings and Seeds 
- Bright, indirect light is ideal. Direct sunlight can burn tender cuttings or dry out the soil too quickly.
- A south- or east-facing window usually works best indoors.
- For seed-starting, a grow light can help maintain consistent brightness and timing, especially in low-light homes.
3. Avoiding Too Much or Too Little Light 
- Too much light can cause leaves to wilt, curl, or burn.
- Too little light results in slow growth, pale leaves, or failed rooting.
A good balance is key — think bright but gentle light, like morning sun through a sheer curtain.
4. Using Grow Lights for Consistency
If natural light is limited, use LED or fluorescent grow lights for 12–16 hours a day. Place the lights 6–12 inches above the plants for best results. Timers help keep things consistent, which is crucial during propagation.
Giving your propagated plants the right light from the start sets them up for healthy growth and successful transplanting.
Types of Light Plants Need During Propagation
When propagating plants, light plays a critical role in ensuring healthy growth. However, different types of plants have varying light requirements. Here’s a breakdown of the light types your plants need to thrive during propagation:
1. Indirect Light 
Most plants, especially leafy varieties, thrive in bright, indirect light. This means the light is filtered through a curtain or reflected off a wall. Place your cuttings near a window but avoid direct sunlight, which can scorch them. Indirect light mimics the natural light conditions plants experience in their native habitats.
2. Low Light 
Some plants, like snake plants and pothos, can tolerate lower light conditions. If you’re propagating these types, you don’t need to worry about placing them in a super sunny spot. Just ensure they get a bit of ambient light to encourage root development.
3. Artificial Grow Lights
If natural light is limited, consider using artificial grow lights. LED or fluorescent grow lights are ideal for propagating plants indoors. They provide the right spectrum of light for optimal growth. Ensure the light is on for about 12-16 hours a day to mimic a natural day-night cycle.
4. Direct Light 
Some plants, like succulents and cacti, need direct sunlight to thrive. For these plants, place them in a sunny spot where they can receive 4-6 hours of direct sunlight daily. Be cautious with young cuttings, as too much sun can cause them to wilt.
5. Light Intensity Matters 
Pay attention to how intense the light is. Too much light can lead to leaf burn, while too little light slows down growth. Adjust the intensity by moving plants further away or closer to the light source, depending on the needs of the plant.
By understanding the right type of light for your propagated plants, you’ll help them grow strong and healthy.
Best Light Conditions for Different Propagation Methods
The right light is essential for successful plant propagation. Whether you’re rooting cuttings, growing from seeds, or using other methods, understanding the light needs of your plants ensures healthy growth. Here’s a breakdown of the best light conditions for different propagation methods:
1. Cutting Propagation 
- Indirect or Bright, Filtered Light: Most plant cuttings thrive in bright, indirect light. Direct sunlight can scorch the delicate new roots and leaves. Place cuttings near a window with sheer curtains, or use a grow light if natural light is insufficient.
- Avoid Low Light: Insufficient light can lead to weak, leggy growth. Ensure your cuttings get at least 6-8 hours of indirect light each day.
2. Seed Propagation
- Bright Light or Full Sun: Seeds need plenty of light to germinate and grow strong. Ideally, place them in a sunny spot with 12-16 hours of light per day, either from a window or using grow lights.
- Consistent Light: Seeds that don’t receive enough light may become leggy and weak. If you’re using grow lights, keep them a few inches above the seedlings and set them to run for 14-16 hours a day.
3. Leaf or Stem Cuttings in Water 
- Bright, Indirect Light: When rooting cuttings in water, indirect sunlight is key. Direct sunlight can cause the water to heat up and harm the roots. Place the jar or vase near a well-lit window but out of direct sun.
- Avoid Darkness: Lack of light will slow down the rooting process. Ensure the water stays clear and fresh by changing it regularly to prevent algae growth, which thrives in low light.
4. Air Layering
- Indirect or Dappled Light: Air layering works best in indirect or dappled sunlight. The plant needs enough light to keep its health intact while the new roots form. A shaded spot or an area with filtered light is ideal.
- Temperature Considerations: In addition to light, temperature plays a role. Keep the air-layered plant in a warm spot with plenty of light but not too hot.
5. Tissue Culture Propagation 
- Artificial Light: In tissue culture, plants are grown in a controlled environment with fluorescent or LED lights. These lights are ideal for promoting rapid growth and strong development. Ensure the light cycles mimic natural daylight (12-16 hours of light per day) for best results.
Quick Tip : Always monitor your plants. If they start to stretch or grow unevenly, they may not be getting enough light. Adjust their position or light source to encourage strong, healthy growth.
By tailoring the light conditions to the propagation method, you’ll help your plants thrive and increase your success rate. Happy propagating!
Using Grow Lights: When and How to Use Them Effectively
Grow lights are a game-changer when it comes to indoor gardening. They help your plants get the light they need to thrive, especially when natural sunlight is limited. Here’s how to use them effectively:
1. When to Use Grow Lights 
If your plants are indoors and not getting enough sunlight, or if you’re growing plants in low-light conditions (like basements or rooms with small windows), grow lights are essential. They’re also perfect for extending daylight hours during the darker months.
2. Choosing the Right Grow Light
Not all grow lights are the same. Here are the main types to consider:
- LED Grow Lights: Energy-efficient and long-lasting, perfect for most indoor plants.
- Fluorescent Lights: Affordable and ideal for seedlings or low-light plants.
- Incandescent Lights: Not the best choice—too hot and inefficient for plants.
Make sure to choose a light that matches your plant’s needs!
3. How to Position Your Grow Lights
Place the grow light 6-12 inches above your plants to mimic the natural sun. Adjust the distance depending on the light’s intensity and the needs of your plant. Ensure the light covers the entire plant without causing overheating.
4. How Long to Use Them 
Most plants need around 12-16 hours of light per day for optimal growth. You can use a timer to set the light on a consistent schedule. During the night, plants need darkness to rest and grow.
5. Monitor Plant Health 
Watch for signs of overexposure or underexposure. Yellowing leaves can signal too much light, while leggy growth indicates insufficient light. Adjust the height or duration of the grow light to find the right balance for your plants.
By using grow lights correctly, you can boost plant growth and enjoy lush greenery, no matter the season. 
Common Light Mistakes to Avoid 
Proper lighting is essential for healthy plant growth, but many plant parents make simple mistakes that can harm their plants. Let’s explore common lighting errors and how to avoid them:
1. Too Much Direct Sunlight 
Placing plants in direct, harsh sunlight can lead to sunburned leaves. While some plants love full sun, others can’t tolerate it. Always check the light requirements of your specific plant and place it in an area with indirect or filtered light if needed.
2. Not Enough Light 
On the flip side, not providing enough light can lead to weak, leggy plants with sparse leaves. If your plant isn’t growing well, it may need more light. Move it to a brighter spot or use grow lights to supplement natural sunlight.
3. Inconsistent Light Levels 

Plants need a consistent light schedule to thrive. Shifting between very bright light and total darkness can cause stress. If you’re moving plants, ensure the new location offers similar lighting conditions or adjust gradually.
4. Wrong Light Type 
Not all light is the same. While natural light is best, artificial light can be a good option too. Ensure you’re using the right type of bulbs, like LED or fluorescent grow lights, to mimic the spectrum of sunlight your plant needs.
5. Ignoring Seasonal Changes 
As the seasons change, so does the intensity and duration of sunlight. In winter, plants often receive less light. Adjust their positioning to ensure they still get enough sunlight during these months, or supplement with grow lights.
Avoiding these common mistakes will keep your plants happy and healthy!
How to Tell If Your Propagated Plants Are Getting Enough Light
Light is one of the most crucial factors in the health of your propagated plants. Without the right amount, they can struggle to grow or thrive. Here’s how to tell if your plants are getting enough light:
1. Look for Leaning or Stretching
If your plant is leaning toward a light source or its stems are long and spindly (a condition called “etiolation”), it’s a sign it’s not getting enough light. Plants stretch towards light as they try to get more energy. This can lead to weak growth.
2. Check the Leaves for Color Changes 
Healthy plants often have vibrant, green leaves. If your propagated plant’s leaves are turning yellow, pale, or have a washed-out appearance, it might not be getting enough light. Dark green leaves can indicate the plant is thriving in proper light conditions.
3. Watch for Slow Growth 
A lack of light can cause your plant’s growth to slow down significantly. If your propagated plant seems to have stalled or isn’t growing as quickly as you expected, light could be the issue. Ensure your plant is placed in a bright location.
4. Leaf Drop or Curling Leaves
If the plant’s leaves are dropping off or curling, it could be a sign that the plant is not getting enough light. Low light stress can cause the plant to shed leaves to conserve energy.
5. Evaluate the Light Source
For optimal growth, most plants need bright, indirect sunlight. If your plant is in a low-light area, consider moving it to a spot where it gets at least 4-6 hours of indirect sunlight daily. If that’s not possible, you might need to supplement with a grow light.
6. Use a Light Meter 
For a more precise measurement, a light meter can help you assess the light intensity in your plant’s environment. Aim for light levels that match your plant’s needs, whether low, medium, or high light.
By paying attention to these signs, you can ensure your propagated plants get the right amount of light to grow healthy and strong.
Final Thought
Understanding the light requirements for plant propagation is a critical step in ensuring your plants grow strong and healthy. Whether you’re propagating seeds, cuttings, or other plant types, providing the right kind of light—at the right intensity, duration, and angle—can be the key to success.
By following the tips and insights shared in this guide, you can avoid common pitfalls, improve your propagation techniques, and watch your plants thrive. Remember, light is more than just a necessity—it’s the fuel that powers their growth. So, take the time to observe your plants, experiment with different light setups, and adjust as needed.
With the right light, your propagation efforts will flourish, leading to a garden full of vibrant, healthy plants. Happy propagating!