
Imagine standing before a tiny ancient forest grove, where multiple graceful trunks rise together from a single, powerful root base, their branches weaving into a delicate, asymmetrical canopy that whispers of centuries-old harmony. This is the magic of multi-trunk bonsai in the Kabudachi style – a living miniature that captures the essence of nature’s clustered woodlands in your home or garden. 😍
For bonsai enthusiasts, few styles evoke as much awe and challenge as the multi-trunk (Kabudachi) design. It transforms ordinary seedlings or nursery stock into a unified, dramatic composition that feels like a complete landscape rather than a single tree. Yet many hobbyists hit roadblocks: trunks end up too symmetrical (creating that dreaded “fan” look), lack depth, or fail to establish clear hierarchy. If you’ve ever stared at a clump of plants wondering how to turn it into a masterpiece, this in-depth multi-trunk bonsai styling guide is for you. Drawing from classic Japanese bonsai principles, insights from masters, and years of hands-on experience with species like Japanese maples, junipers, and ficus, we’ll walk through every step to create or refine a truly harmonious Kabudachi.
Whether you’re a beginner fusing young plants or an intermediate grower refining an existing multi-stem tree, this guide goes beyond basic tutorials. We’ll cover material selection, fusion techniques, advanced design rules, species-specific tips, long-term care, and troubleshooting – all to help you achieve that elusive balance of unity, movement, and natural elegance. Let’s dive in and build your own miniature forest masterpiece! 🌿
What Is Multi-Trunk Bonsai? Understanding the Kabudachi Style 📖
Kabudachi, the Japanese term for multi-trunk or clump style bonsai, features three or more trunks (almost always an odd number for visual balance) emerging from a single root system. Unlike Yose-ue (forest planting with separate trees) or Sokan (twin-trunk), Kabudachi presents as one cohesive organism – mimicking how trees naturally sprout in clusters from a shared stump, fallen log, or seed pod in wild forests.
The style excels at creating depth, movement, and narrative: the tallest trunk acts as the dominant leader, supported by progressively shorter companions that add layers and perspective. From the front view, trunks should never cross, and the overall silhouette forms a gentle triangle or soft dome. This creates negative space (ma) between trunks – essential for that airy, mature feel bonsai artists prize. 🌲
What makes Kabudachi so rewarding? It delivers the grandeur of a group planting in a compact pot, perfect for small spaces. But it’s tricky: poor trunk placement leads to flat, symmetrical “broom” shapes, while ignoring hierarchy results in a chaotic mess. Mastering it teaches core bonsai principles like proportion, asymmetry, and 3D design faster than almost any other style.
Choosing the Right Material for Your Multi-Trunk Bonsai 🌱🔍
Success starts with quality starting material. Here are top species recommendations, with pros, cons, and why they shine in Kabudachi:
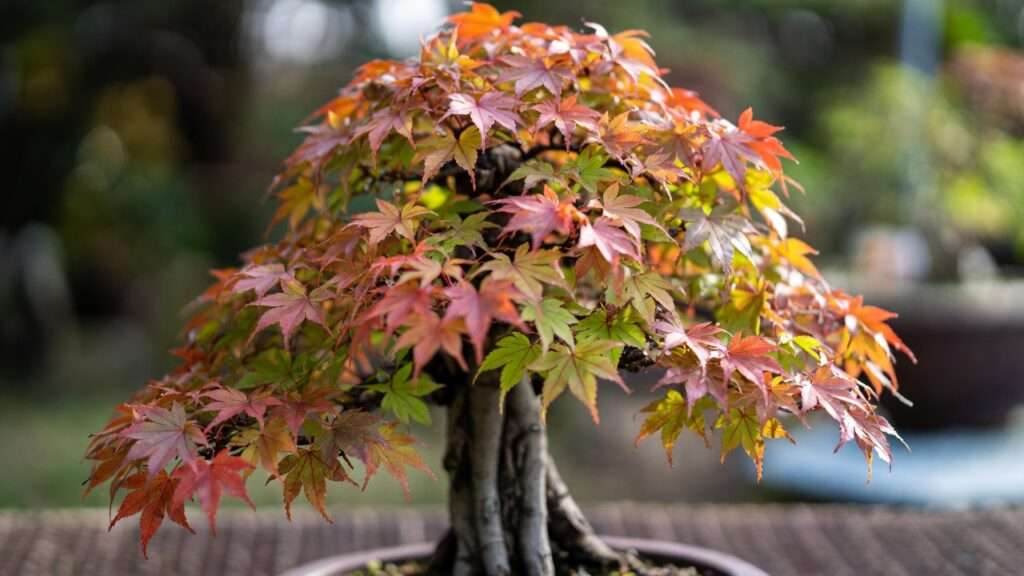
- Japanese Maple (Acer palmatum): Stunning seasonal color changes (spring reds, autumn fire), fine ramification, forgiving for beginners. Ideal for fusion. Cons: Needs protection from intense sun and frost in some climates. 🍁
- Trident Maple (Acer buergerianum): Tougher than palmatum, excellent nebari development, great bark texture over time.
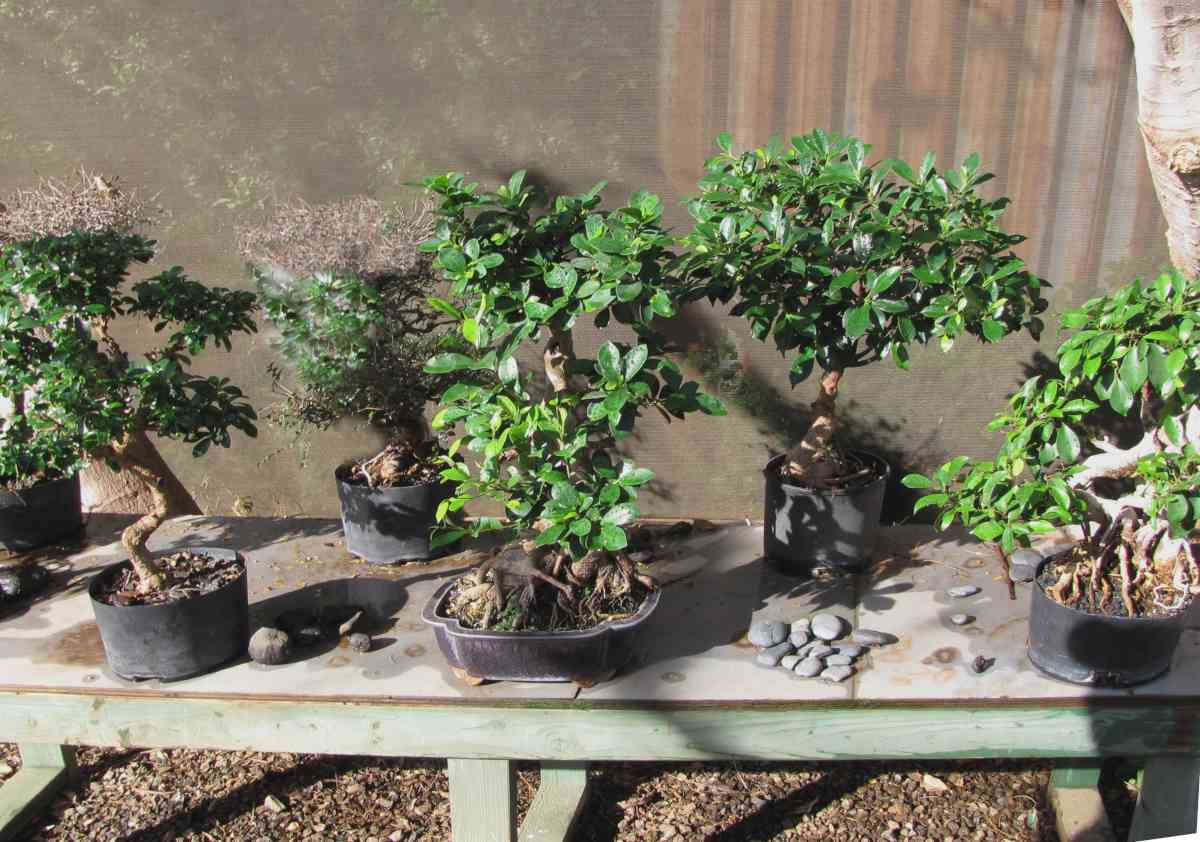
- Ficus (retusa, benjamina, microcarpa): Fast-growing, produces aerial roots for drama, tolerates indoor conditions well. Perfect for tropical/subtropical growers. Cons: Can become leggy without strong light. 🌿
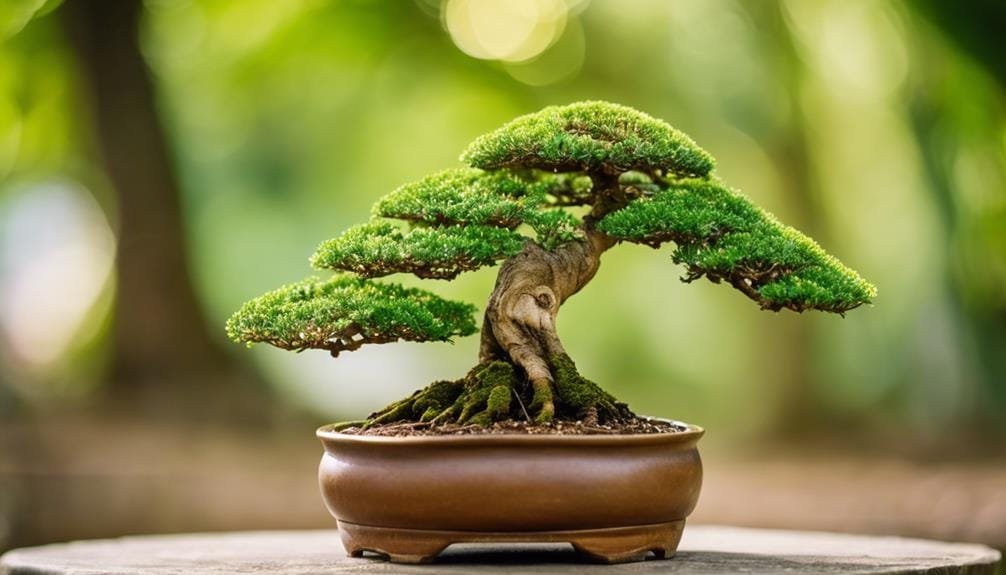
- Juniper (especially Shimpaku or procumbens nana): Classic conifer choice with rugged deadwood potential, windswept movement. Slow but rewarding. Cons: Wiring scars easily if overdone.
- Others worth trying: Chinese Elm (fast ramification), Hornbeam (great bark), Azalea (flowering clump), or Desmodium (vibrant blue flowers).
Sourcing tips:
- Fusion method (beginner-friendly): Buy 3–9 young seedlings or 1-gallon nursery plants of the same species/variety for uniform vigor.
- Nursery multi-stem stock: Look for plants already growing as clumps – saves years of waiting.
- Yamadori/collected: Rare natural multi-trunks with mature nebari, but require ethical collection and heavy root work.
Always prioritize strong surface roots (nebari), varying trunk thicknesses/heights, and healthy fibrous roots. Avoid perfectly matched stems – variation is your friend!

Step-by-Step: Creating a Multi-Trunk Bonsai from Scratch (Fusion Method) 🛠️
This is the most accessible path for most hobbyists. Here’s the detailed process:
Step 1: Gather and Prepare Young Plants Select 3, 5, or 7 seedlings (odd numbers prevent symmetry). Ensure similar vigor and health. Gently tease apart roots if pot-bound.
Step 2: Root and Base Preparation Prune roots to encourage radial spread. Expose nebari by removing soil – this creates a natural, flared base over time. 🌱
Step 3: Arranging the Clump Position the tallest/thickest trunk slightly off-center as the apex leader. Surround it with shorter, thinner trunks for support. Create depth: place some slightly back or angled. Aim for an irregular triangular footprint.
Step 4: Binding/Fusing Technique Use soft aluminum wire, raffia, or grafting tape to gently bind bases together (not too tight – allow cambium contact for fusion). Some artists drill small holes and use dowels for secure fusion without visible scars. Check monthly; remove bindings once fused (usually 1–2 years).
Step 5: Initial Potting & Aftercare Plant in a shallow training pot with well-draining bonsai soil (akadama, pumice, lava mix). Water thoroughly, place in partial shade, fertilize lightly after 4–6 weeks. Protect from extremes during establishment.
This method can yield a solid multi-trunk foundation in 2–4 years – far faster than styling a single tree into multiples!
Styling an Existing Multi-Trunk Bonsai: Refining for Harmony ✂️
If you already have a multi-stem plant (from nursery stock or an older fusion), the focus shifts to refinement rather than creation. This stage is where true artistry emerges – transforming a promising clump into a balanced, mature-looking Kabudachi.
Assessing Your Tree Start by placing the tree on a turntable at eye level. Rotate slowly and choose the best front view: one where the dominant trunk is slightly off-center, trunks don’t cross from the front, and there’s visible separation (negative space) between them. Mark the front with a small tag or mental note. Remove any suckers or low branches that disrupt the base line. 🌿
Establishing Hierarchy The golden rule: one clear leader. The tallest and thickest trunk becomes the apex, setting the overall height and movement. Supporting trunks should decrease in height and girth toward the edges – think of a natural forest edge where the central tree dominates while companions taper off. Vary the apex heights slightly for depth (no two at exactly the same level). This hierarchy creates focal interest and prevents a flat, equal-height “picket fence” appearance.
Pruning for Structure Use sharp concave cutters or bonsai shears to:
- Remove any branches growing straight upward or downward from the front.
- Eliminate crossing or inward-growing branches that hide trunks.
- Thin dense areas to reveal trunk lines and create airy pads. Aim for a triangular or gently domed silhouette. Prune back vigorous shoots to encourage back-budding and ramification. For deciduous species, major structural pruning works best in late winter/early spring before buds swell. Conifers require lighter, more frequent pinching. ✂️
Wiring Techniques Wiring brings movement and elegance. Use anodized aluminum wire (softer, easier for beginners) or copper (holds longer but harder to apply).
- Wrap at a 45-degree angle, starting from the base.
- Bend branches gently in small increments to avoid breakage.
- For multi-trunk, focus on directing secondary branches outward and slightly downward for natural droop.
- Remove wire before it bites in (usually 3–12 months depending on species and season). Pro tip: Wire the leader first to set the overall direction, then subordinates to complement it.
Creating Depth and Movement Angle outer trunks slightly outward or back for 3D illusion. Position branches to overlap subtly from side views but remain separate from front. This layering mimics how real forest clumps recede into the distance.

Advanced Design Principles for a Masterpiece Level Kabudachi 🎨
To elevate your Kabudachi from good to gallery-worthy, incorporate these expert-level principles inspired by Japanese bonsai masters and modern practitioners:
- Asymmetry is non-negotiable – Perfect symmetry looks artificial. Offset the leader left or right, vary branch lengths, and create uneven spacing. ⚖️
- Trunk visibility and flow – Every trunk should be visible from the front without heavy overlapping. Trunks should “flow” upward in a gentle S-curve or subtle lean for dynamism.
- Negative space (ma) – Intentional gaps between trunks allow air and light through, preventing a solid mass. This emptiness enhances the feeling of maturity.
- Silhouette perfection – The outline should form a soft triangle (apex dominant) or rounded dome. Avoid boxy or fan shapes.
- Age illusion enhancers – Develop taper variation (thicker at base, narrowing upward), introduce subtle jin/shari (deadwood) on older trunks for character, and encourage textured bark through time and sun exposure.
Common pitfalls to dodge:
- Fan shape → Caused by equal trunk heights and radial branching; fix by aggressive apex selection and selective pruning.
- Flat canopy → Results from over-pinching uniformly; allow some branches to extend for depth.
- Poor nebari → Weak surface roots make the clump look unstable; improve with surface root exposure during repots.
These principles, when applied patiently over years, turn a simple clump into a profound, story-telling bonsai.
Species-Specific Tips and Examples 🌸
Different species respond uniquely to multi-trunk styling – here’s tailored advice:
- Japanese Maple Kabudachi 🍁: Fuse in early spring for best callus formation. Prune aggressively in summer for fine twigs. Autumn color explodes when pads are well-developed. Example: A 5-trunk fusion starting as thin whips can become a fiery masterpiece in 7–10 years with consistent defoliation.
- Juniper (Shimpaku/Procumbens): Excellent for rugged, windswept multi-trunks. Introduce deadwood early for character. Pinch candles carefully – never remove all at once. Many famous Kabudachi feature twisted, ancient-looking juniper clumps with dramatic shari.
- Ficus Clump 🌿: Grows lightning-fast; aerial roots add wild drama (train them downward for age). Great for indoor/outdoor tropical bonsai. Fusion happens quickly (6–18 months). Example: Ficus retusa multi-trunks often develop thick, buttressed bases resembling ancient strangler figs.
Real-world inspiration: Look to progressions where hobbyists fuse 5–7 Japanese maple seedlings and refine over 3+ years into elegant, balanced clumps – the transformation is dramatic!
Ongoing Care and Long-Term Development for Your Kabudachi 🌞
Once your multi-trunk bonsai is styled and potted, the real journey begins: consistent, thoughtful care that refines and ages the tree over years (often 5–15+ for true maturity). Kabudachi demands slightly different attention than single-trunk styles due to multiple growing points competing for energy.
Watering Water when the top 1–2 cm of soil feels dry – use the finger test or a moisture meter. Multi-trunk trees often dry unevenly because of varying canopy density, so check multiple spots. In hot Dhaka summers, daily watering (sometimes twice) is common; in cooler months, reduce frequency. Always use room-temperature water to avoid root shock. Good drainage is non-negotiable – soggy roots kill faster than drought in clumps.
Fertilizing Feed with balanced organic or liquid bonsai fertilizer (e.g., 7-7-7 or higher nitrogen in growth season). Apply every 2–4 weeks during spring and summer; cut back in autumn and stop in winter. For flowering species like azalea, switch to bloom-booster formulas in late winter. Slow-release granules work well for busy hobbyists – just avoid over-fertilizing vigorous outer trunks at the expense of the leader.
Seasonal Care
- Spring: Major pruning window for deciduous; repot every 2–4 years (more frequently for fast growers like ficus). Root-prune carefully to maintain radial nebari.
- Summer: Protect from intense midday sun (especially Japanese maples) with 30–50% shade cloth if needed. Pinch new growth to encourage ramification.
- Autumn: Enjoy color changes; light pruning to refine pads. Reduce water and fertilizer as growth slows.
- Winter: Move tender species indoors or to a protected spot in Dhaka’s mild winters. Conifers can stay outside with wind protection.
Repotting Schedule & Nebari Improvement Repot in early spring before buds swell. Cut back 1/3–1/2 of the root mass, focusing on circling roots. Tilt the tree slightly forward during repotting to expose more surface roots over time – this dramatically improves the nebari “flare” that makes mature Kabudachi look ancient. Use a slightly larger training pot initially, then downsize as the tree matures.
Refinement Pruning & Pad Development Develop branch pads (cloud-like foliage groups) by allowing shoots to extend 4–6 nodes, then cutting back to 2–3 nodes. Repeat to build fine ramification. Maintain the triangular silhouette by always pruning back to a bud facing outward/downward. Apex control is crucial: never let side trunks outgrow the leader.
Wiring Removal & Re-wiring Timeline Check wired branches every 3–6 months. Remove before bark grows over (scars are permanent on conifers). Re-wire as needed for new growth. Over years, natural movement from wind and weight helps set elegant curves without wire.
With patience, your Kabudachi will thicken, bark will texture, and the clump will feel like a tiny, timeless woodland grove. 🌲
Common Mistakes and Pro Troubleshooting Tips ⚠️
Even experienced bonsai artists make these errors with multi-trunk styles – here’s how to spot and fix them:
- Mistake: Over-wiring or tight binding at the base → Causes ugly scars or girdling. Fix: Use soft materials and check monthly; remove as soon as fusion occurs.
- Mistake: Symmetrical or equal-height trunks → Looks artificial and boring. Fix: Ruthlessly select one dominant leader early; prune others aggressively.
- Mistake: Fan shape or flat top → Caused by radial, uniform branching. Fix: Create depth by angling trunks and branches; prune to build uneven, layered pads.
- Mistake: Crossing trunks from front view → Destroys trunk visibility. Fix: Choose a front where lines are clean; remove offending branches.
- Mistake: Neglecting weaker trunks → They die off, ruining balance. Fix: Protect subordinates during styling; fertilize evenly; wire to direct energy.
- Mistake: Poor negative space → Tree looks crowded and immature. Fix: Thin foliage pads regularly; embrace intentional gaps.
Pro tip from seasoned practitioners: Photograph your tree from multiple angles every season. Comparing progress photos reveals subtle improvements (and mistakes) you might miss day-to-day. 📸
FAQs: Answering Your Multi-Trunk Bonsai Questions ❓
How many trunks should I use in Kabudachi? Odd numbers (3, 5, 7, 9+) are traditional because they feel more natural and balanced to the eye. Three is perfect for beginners; five or seven allow more dramatic depth.
Can I separate trunks later if I don’t like the clump? Yes, but it’s risky. If fused well, separation often damages roots and bark. Better to plan hierarchy from the start.
What’s the best time of year to fuse or style multi-trunk bonsai? Early spring (just before bud break) for most species – cambium is active, healing is fast. Late summer works for tropicals like ficus.
How do I prevent the fan shape forever? Establish strong hierarchy early, prune for depth (not just width), and allow some branches to extend forward/backward for 3D structure.
Is Kabudachi suitable for indoor bonsai? Yes, especially with ficus or Chinese elm. Provide bright indirect light (south-facing window in Dhaka), high humidity, and good air circulation.
Conclusion: Your Path to a Harmonious Kabudachi Masterpiece Awaits 🌟
Creating a multi-trunk Kabudachi bonsai is one of the most rewarding journeys in the art. By focusing on hierarchy, asymmetry, negative space, and unity from a single root base, you transform simple plants into a living miniature forest that tells a story of time, patience, and nature’s quiet power.
Start small – fuse three Japanese maple seedlings this spring, or refine that nursery clump sitting on your balcony. Follow the steps in this guide, observe your tree daily, and don’t fear making mistakes – every correction teaches you more.
Share your progress in the comments below! Post before-and-after photos, ask questions, or tell us which species you’re trying. Your Kabudachi masterpiece is waiting to emerge – happy styling! 🌿✨


