
Orchids are known for their delicate and exotic beauty, but many people are intimidated by the idea of caring for them, especially when it comes to growing and nurturing orchid keiki, or baby orchids. In this complete guide, we will walk you through the step-by-step process of growing and caring for orchid keiki, including essential tips on watering, light requirements, and proper potting techniques. Whether you’re a beginner or an experienced orchid enthusiast, this guide will provide you with all the information you need to successfully care for your orchid keiki and help them thrive.
What is an Orchid Keiki?
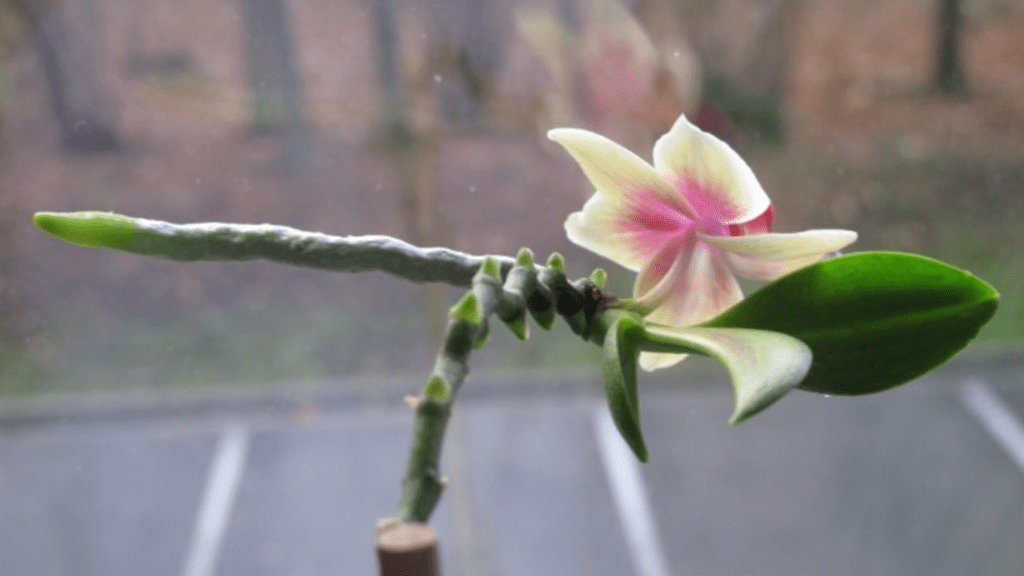
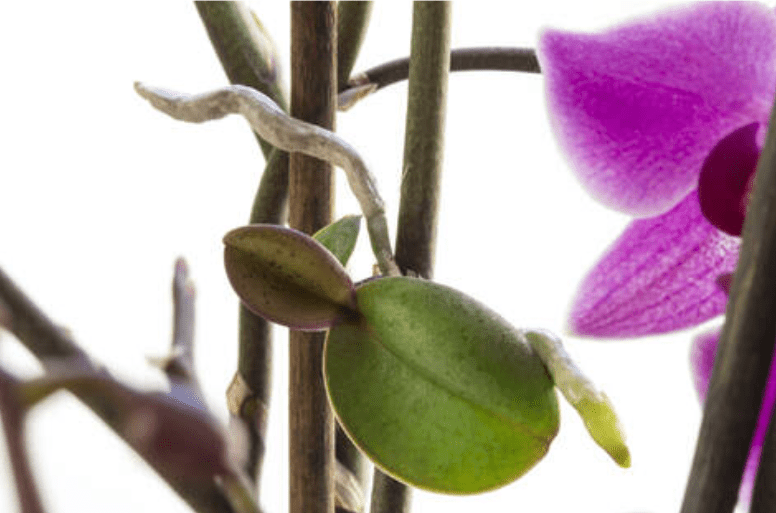
An Orchid Keiki is a term used to describe a baby orchid plant that forms on the stem or spike of a mature orchid plant. Keiki is a Hawaiian word that means “baby” or “child,” and it is used in the orchid world to refer to the new plant that grows from the parent orchid. These keiki plants are genetically identical to the parent plant and can be separated to grow into a new, independent orchid. They are often found growing along the stem or spike of the parent plant and can be identified by their small size and developing roots. It is important to care for and nurture these keiki plants to ensure their healthy growth and development into mature orchids.
How to Identify a Healthy Orchid Keiki
Signs of a Healthy Keiki: How to recognize a healthy keiki, including the appearance of roots and leaves.
When it comes to recognizing a healthy keiki, there are a few key signs to look out for. Firstly, healthy keiki will have strong, vibrant green leaves. The leaves should be firm and not wilted or discolored. Additionally, a healthy keiki will also have well-developed roots. These roots should be white or green in color and not mushy or black. A healthy keiki will also be actively growing and producing new leaves and roots. It’s important to keep an eye on the overall appearance and growth of the keiki to ensure it is thriving. By paying attention to these key signs, you can ensure that your orchid keiki is on the right track for healthy growth and development.
How Long to Leave Keiki on Mother Plant: The growth stage where keiki is ready to be separated.
When it comes to deciding how long to leave a keiki on the mother plant, it’s important to consider the growth stage of the keiki. A healthy keiki will have strong, vibrant green leaves that are firm and not wilted or discolored. Additionally, it will have well-developed roots that are white or green in color and not mushy or black. A healthy keiki will also be actively growing and producing new leaves and roots. Once you notice these signs of healthy growth, it may be time to consider separating the keiki from the mother plant. However, it’s important to continue monitoring the overall appearance and development of the keiki to ensure it is thriving. By keeping a close eye on these key indicators, you can make an informed decision about when the keiki is ready to be separated from the mother plant.
When and How to Remove Orchid Keiki
Best Time to Remove a Keiki: How to tell when your orchid keiki is ready for removal (based on root length and growth size).
When it comes to removing a keiki from the mother orchid plant, it’s important to carefully consider the growth stage of the keiki. A healthy keiki will have strong, vibrant green leaves that are firm and not wilted or discolored. Additionally, it will have well-developed roots that are white or green in color and not mushy or black. A healthy keiki will also be actively growing and producing new leaves and roots. Once you notice these signs of healthy growth, it may be time to consider separating the keiki from the mother plant. However, it’s important to continue monitoring the overall appearance and development of the keiki to ensure it is thriving. By keeping a close eye on these key indicators, you can make an informed decision about when the keiki is ready to be separated from the mother plant.
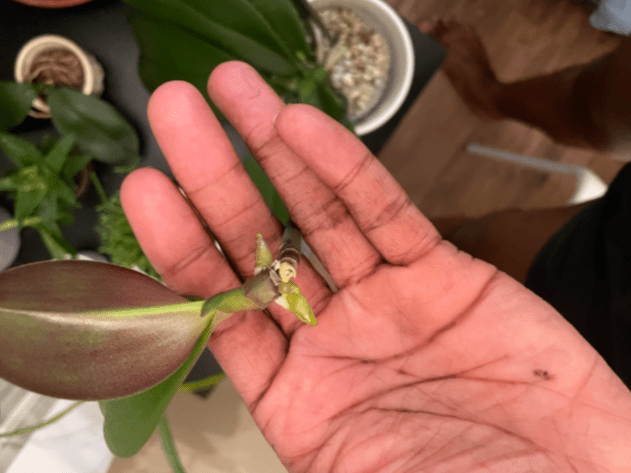
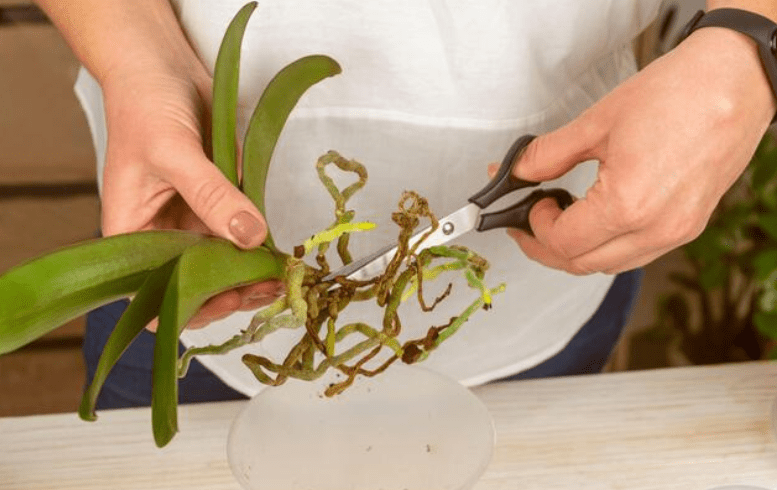
Step-by-Step Keiki Removal: A detailed guide on how to safely remove the keiki from the mother plant using sterilized tools.
When it comes to removing a keiki from the mother orchid plant, it’s important to carefully consider the growth stage of the keiki. A healthy keiki will have strong, vibrant green leaves that are firm and not wilted or discolored. Additionally, it will have well-developed roots that are white or green in color and not mushy or black. A healthy keiki will also be actively growing and producing new leaves and roots. Once you notice these signs of healthy growth, it may be time to consider separating the keiki from the mother plant. However, it’s important to continue monitoring the overall appearance and development of the keiki to ensure it is thriving. By keeping a close eye on these key indicators, you can make an informed decision about when the keiki is ready to be separated from the mother plant. When it comes time to remove the keiki, it’s important to use sterilized tools to prevent any potential damage or infection to the plant. Carefully follow a step-by-step guide to safely remove the keiki from the mother plant, ensuring that both the keiki and the mother plant remain healthy throughout the process.
How to Pot and Grow Orchid Keiki
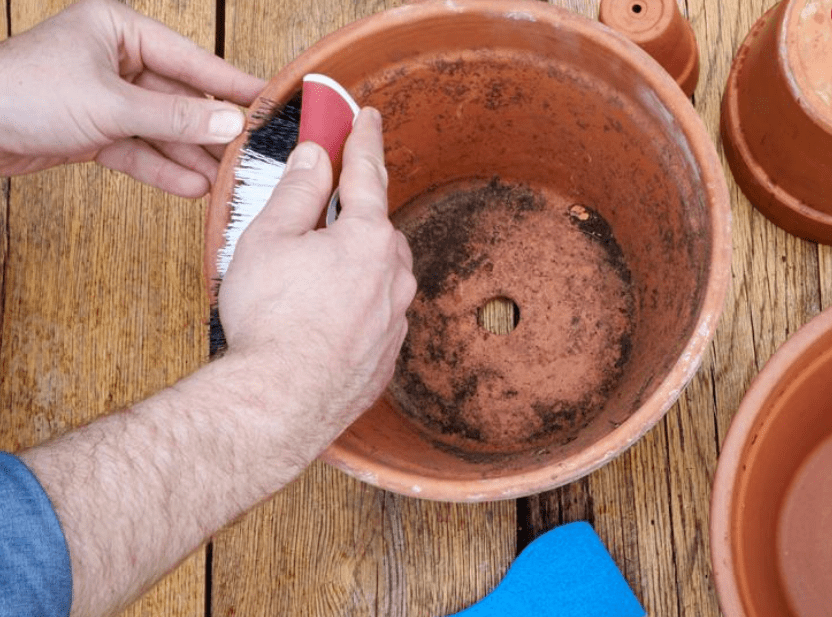
Preparing the Pot: Choosing the right potting mix and container size for the keiki.
The first step in preparing the pot for your orchid keiki is to ensure that it is healthy and ready for separation from the mother plant. A healthy keiki will have well-developed roots that are white or green in color, and not mushy or black. It will also be actively growing and producing new leaves and roots. Once you notice these signs of healthy growth, it may be time to consider separating the keiki from the mother plant. However, it’s important to continue monitoring the overall appearance and development of the keiki to ensure it is thriving. By keeping a close eye on these key indicators, you can make an informed decision about when the keiki is ready to be separated from the mother plant. When it comes time to remove the keiki, it’s important to use sterilized tools to prevent any potential damage or infection to the plant. Carefully follow a step-by-step guide to safely remove the keiki from the mother plant, ensuring that both the keiki and the mother plant remain healthy throughout the process. Once the keiki is removed, it’s important to choose the right potting mix and container size for its growth. A well-draining potting mix specifically designed for orchids is ideal, as it will provide the necessary aeration and moisture retention for the keiki to thrive. The container size should be appropriate for the size of the keiki, allowing room for growth and development. By following these steps, you can ensure the successful potting and growth of your orchid keiki.
Planting the Keiki: Step-by-step guide on planting the keiki, ensuring proper root placement and support.
Planting a keiki requires careful attention to detail to ensure its successful growth. Before separating the keiki from the mother plant, it’s important to keep an eye on key indicators such as root development and the presence of new growth. Once the keiki is ready to be removed, it’s crucial to use sterilized tools to prevent any potential damage or infection to the plant.
A step-by-step guide can help you safely and effectively remove the keiki from the mother plant, ensuring that both the keiki and the mother plant remain healthy throughout the process. After the keiki is separated, choosing the right potting mix and container size is essential for its growth and development. A well-draining potting mix designed for orchids will provide the necessary aeration and moisture retention for the keiki to thrive.
The container size should be appropriate for the size of the keiki, allowing room for growth and development. By following these steps and providing proper care, you can ensure the successful potting and growth of your orchid keiki. Remember to provide support for the keiki as it continues to grow and develop, and it will flourish and thrive in its new pot.
Watering and Fertilization: How much water and fertilizer a new keiki needs to thrive.
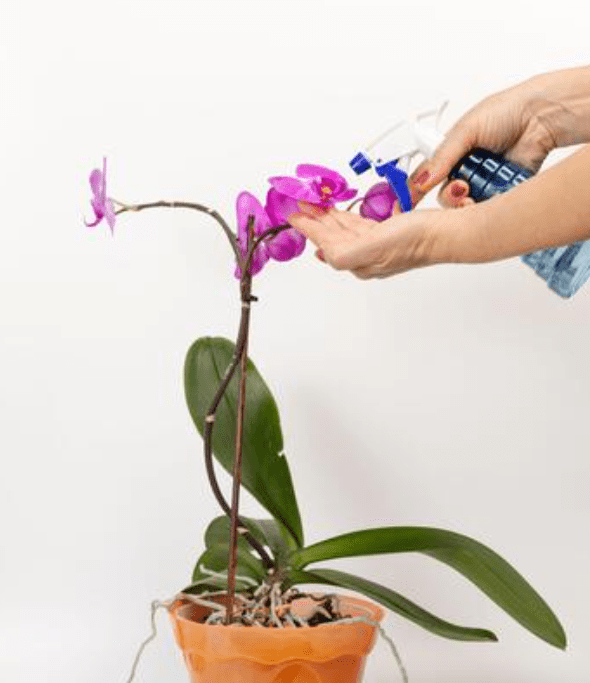
When caring for a new keiki, it’s important to pay attention to its watering and fertilization needs in order for it to thrive. As a general rule, water the keiki when the top layer of the potting mix feels dry to the touch. Be sure not to overwater, as this can lead to root rot. Using a spray bottle to mist the keiki and its potting mix can also help maintain the appropriate level of moisture.
When it comes to fertilization, it’s best to use a diluted orchid fertilizer and apply it sparingly. Too much fertilizer can actually harm the keiki, so it’s important to follow the instructions on the fertilizer package and apply it at the recommended frequency.
By paying attention to the watering and fertilization needs of your new keiki, you can help it to grow and thrive in its new environment. Additionally, providing proper care and attention to the keiki will help ensure its successful growth and development.
Best Light and Temperature Conditions: Ideal lighting, temperature, and humidity levels for optimal growth.
It’s important to provide the best light and temperature conditions for a new keiki to thrive. For lighting, orchids thrive in bright, indirect light. Place the keiki in a location where it can receive plenty of natural light, but avoid direct sunlight, as this can scorch the leaves. When it comes to temperature, orchids prefer daytime temperatures between 65-75°F and nighttime temperatures between 55-65°F. It’s important to maintain consistent temperatures to promote healthy growth. Additionally, orchids thrive in a humid environment, so it’s beneficial to place the keiki in a room with high humidity levels or use a humidifier to create the ideal conditions. By providing the best light and temperature conditions, you can ensure that your new keiki has the optimal environment to thrive and grow.
Ongoing Care for a Growing Orchid Keiki
Watering Routine: Proper watering schedule to prevent root rot and promote healthy growth.
When it comes to watering your orchid keiki, it’s important to establish a proper routine to prevent root rot and promote healthy growth. Orchids should be watered once a week, allowing the water to drain completely from the pot to prevent waterlogged soil. It’s important to water the roots and not the leaves to prevent rot and mold. Additionally, it’s beneficial to use tepid water and avoid using water that is too cold or too hot. By establishing a proper watering schedule and ensuring the roots are getting the right amount of moisture, you can help your orchid keiki thrive and grow into a healthy plant.
Fertilization Tips: How and when to fertilize the keiki as it grows.
The key to helping your keiki orchid thrive and grow is by providing the best light and temperature conditions. Make sure your orchid is getting the right amount of sunlight and is kept at the appropriate temperature for optimal growth. When it comes to ongoing care, it’s important to establish a proper watering routine. Orchids should be watered once a week, allowing the water to drain completely from the pot to prevent waterlogged soil. It’s also important to water the roots and not the leaves to prevent rot and mold. Additionally, using tepid water and avoiding water that is too cold or too hot can help promote healthy growth. Fertilizing your keiki orchid is also important for its growth and development. You can fertilize your orchid with a balanced fertilizer every 2-4 weeks during the growing season. Be sure to dilute the fertilizer to half or quarter strength to prevent fertilizer burn. By following these tips for watering and fertilizing, you can help your keiki orchid thrive and grow into a healthy plant.
Pruning and Shaping: How to prune dead leaves and stems to encourage healthy growth.
Pruning and shaping your orchids is an important part of promoting healthy growth. When it comes to pruning, it’s important to remove any dead or yellowing leaves and stems to allow the plant to focus its energy on new growth. This also helps prevent the spread of disease and pests. When pruning, be sure to use clean, sharp scissors to make clean cuts and avoid tearing the plant tissue. Additionally, shaping your orchid by removing any overcrowded or crossing stems can help improve air circulation and light penetration, promoting overall health and growth. It’s important to prune and shape your orchids with care and precision to avoid causing any damage to the plant. By following these pruning and shaping tips, you can encourage healthy growth and promote the overall well-being of your orchids.
Common Issues When Growing Orchid Keiki
Root Rot: How to prevent and treat root rot in young keiki.
Root rot can be a common issue when growing young keiki orchids. To prevent root rot, it’s important to ensure proper drainage in the growing medium and avoid overwatering. Use a well-draining potting mix specifically designed for orchids and allow the top layer of the soil to dry out between waterings. Additionally, make sure the pot has drainage holes to allow excess water to escape. If you notice any signs of root rot, such as mushy or discolored roots, it’s important to act quickly. Carefully remove the affected roots and repot the keiki in fresh, sterile potting mix. Be sure to adjust your watering schedule to prevent future occurrences of root rot. Keeping a close eye on the moisture level of the growing medium and taking proactive steps to prevent overwatering can go a long way in promoting the health of young keiki orchids.
Pests and Diseases: Identifying and addressing common orchid pests like spider mites or scale insects that can affect keikis.
When it comes to identifying and addressing common orchid pests like spider mites or scale insects, it’s important to be proactive in preventing and treating these issues. Regularly inspect your orchids for any signs of pests, such as webbing or unusual discoloration on the leaves. If you notice any pests, it’s important to take immediate action to prevent them from spreading to other plants. There are various pest control products available specifically designed for orchids, so be sure to choose the right one for the type of pest you are dealing with. Additionally, maintaining a clean and well-ventilated growing environment for your orchids can help prevent the occurrence of pests and diseases. Proper care and attention to the health of your orchids can help to keep them thriving and free from common pests and diseases.

Benefits of Growing Orchid Keikis
Growing orchid keikis has many benefits. Keikis are small plantlets that grow on the stems of orchid plants, and they can be a great way to expand your orchid collection. One of the key benefits of growing orchid keikis is that it allows you to propagate your orchids without having to purchase new plants. This can save you money and also give you the opportunity to share your orchids with friends and family. Growing keikis can also be a fun and rewarding experience, as you get to watch the young plants grow and develop over time. Additionally, keikis can help rejuvenate a struggling orchid plant, as they can be removed and grown into a new, healthy plant. Overall, growing orchid keikis can be a great way to expand your orchid collection, save money, and enjoy the process of growing and caring for new plants.
Conclusion
In conclusion, growing and caring for orchid keiki requires patience, attention to detail, and a good understanding of their specific needs. It’s important to provide the right amount of water, light, and proper potting techniques to ensure the health and growth of your orchid keiki. By following the tips and instructions in this guide, you can successfully nurture your orchid keiki and enjoy beautiful blooms for years to come. Remember, each orchid is unique, so it’s important to observe and adjust your care routine based on the specific needs of your orchid keiki.