

Picture this: Your vegetable garden overflowing with plump, sun-ripened tomatoes 🍅, crisp lettuce heads 🌿, vibrant peppers 🔥, and carrots straight out of the soil 🥕—all bursting with flavor and grown completely organically. No synthetic chemicals, just thriving plants fed naturally for maximum nutrition and taste.
The key to this dream harvest? A smart, stage-by-stage organic fertilizer schedule for vegetables that delivers the right nutrients at the right time. Many gardeners face the same frustrations: yellowing leaves from underfeeding, leggy plants from too much nitrogen, or disappointing yields despite lots of effort. This in-depth guide solves those problems with a comprehensive, expert-backed timeline drawn from university extension recommendations (like Old Farmer’s Almanac, University of Maryland Extension, and others), real-world organic practices, and proven soil-building strategies.
Whether you’re a beginner starting your first raised bed or an experienced grower aiming for record-breaking crops, this skyscraper guide goes beyond basic advice. You’ll learn how to tailor feeding to your soil, climate, and specific veggies—leading to healthier plants, bigger harvests, and richer, living soil year after year. Let’s dig in and transform your garden! 🌻✨
Why Organic Fertilizers Are the Smart Choice for Vegetable Gardens 🛡️🌍
Organic fertilizers aren’t just “natural”—they’re superior for long-term success in vegetable gardening. Unlike synthetic options that deliver a quick nutrient hit but can deplete soil life, organics feed beneficial microbes, earthworms, and fungi that build crumbly, nutrient-rich soil structure.
Key benefits include:
- Stronger plant immunity — Balanced nutrition reduces pest and disease pressure naturally.
- Superior flavor and nutrition — Homegrown veggies fed organically often taste sweeter and pack more vitamins.
- Environmental protection — Slow-release nutrients minimize leaching into waterways and groundwater.
- Sustainable soil health — Each season, your garden soil gets richer instead of poorer.
University extensions like the University of Maryland and UNH Extension emphasize that organic matter (compost, manures) supplies steady nitrogen (about 0.4 lbs per 1% organic matter per 1,000 sq ft), reducing the need for frequent supplements while preventing common issues like nutrient burn. In my years working with home gardeners, those who prioritize organics see fewer problems and more consistent yields. Ready to build that living soil? Let’s start with the basics. 🔬
Understanding NPK and Organic Nutrient Sources 📊
Every fertilizer label shows NPK ratios: Nitrogen (N) for lush leaves, Phosphorus (P) for strong roots/flowers/fruits, and Potassium (K) for disease resistance and quality produce.
Vegetables have varying needs:
- Leafy greens (lettuce, spinach, kale) crave higher N.
- Fruiting crops (tomatoes, peppers, squash) need balanced or higher P/K during bloom/fruit set.
- Root veggies (carrots, beets) prefer moderate everything—excess N leads to hairy roots.
Top trusted organic sources (look for OMRI-listed for certification):
- Compost & aged manure — Balanced slow-release; ideal base (chicken, cow, horse—aged 6+ months to avoid pathogens).
- Fish emulsion/seaweed/kelp — Liquid micronutrient powerhouses; fast-acting for foliar or soil drench 🌊.
- Bone meal/rock phosphate — Phosphorus boost for roots and blooms.
- Cottonseed/soybean/alfalfa meal — Nitrogen-rich for early growth.
- Worm castings — Microbial gold; gentle and full of enzymes 🪱.
- Wood ash — Potassium source (use sparingly; raises pH).
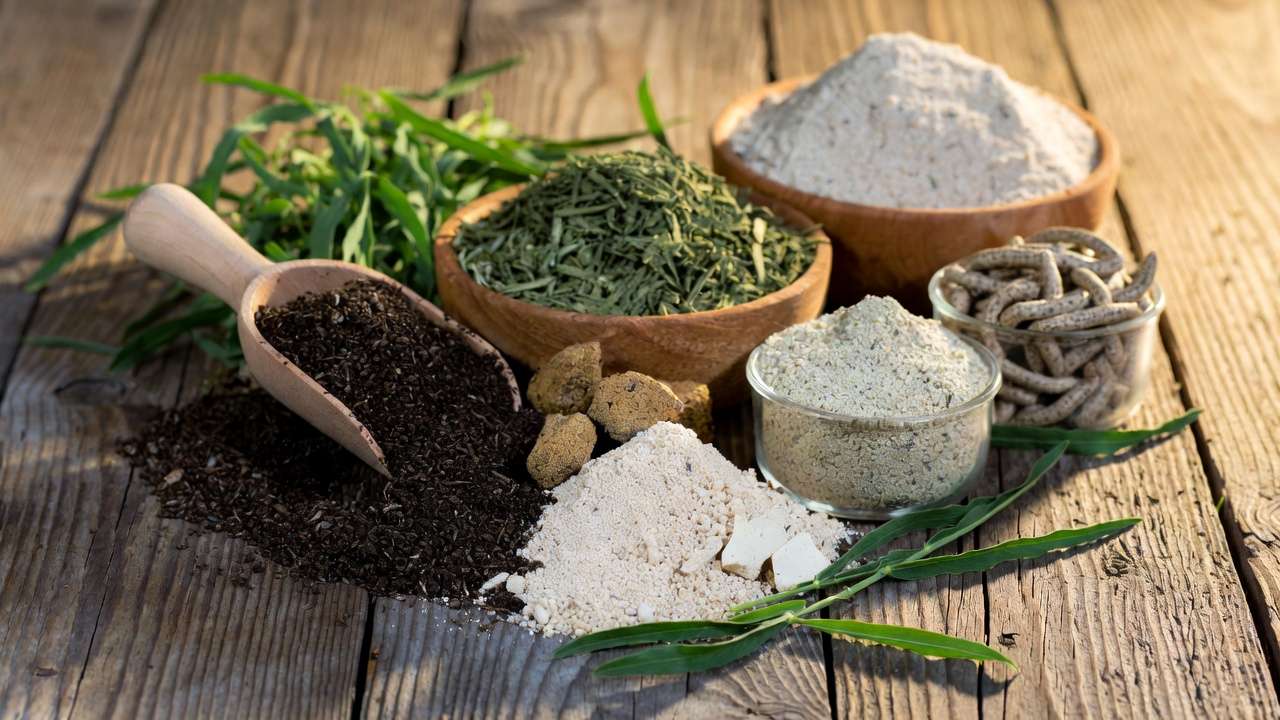
Pro tip: Combine sources for balanced feeding—e.g., compost + fish emulsion weekly. This mimics nature’s nutrient cycling far better than single products!
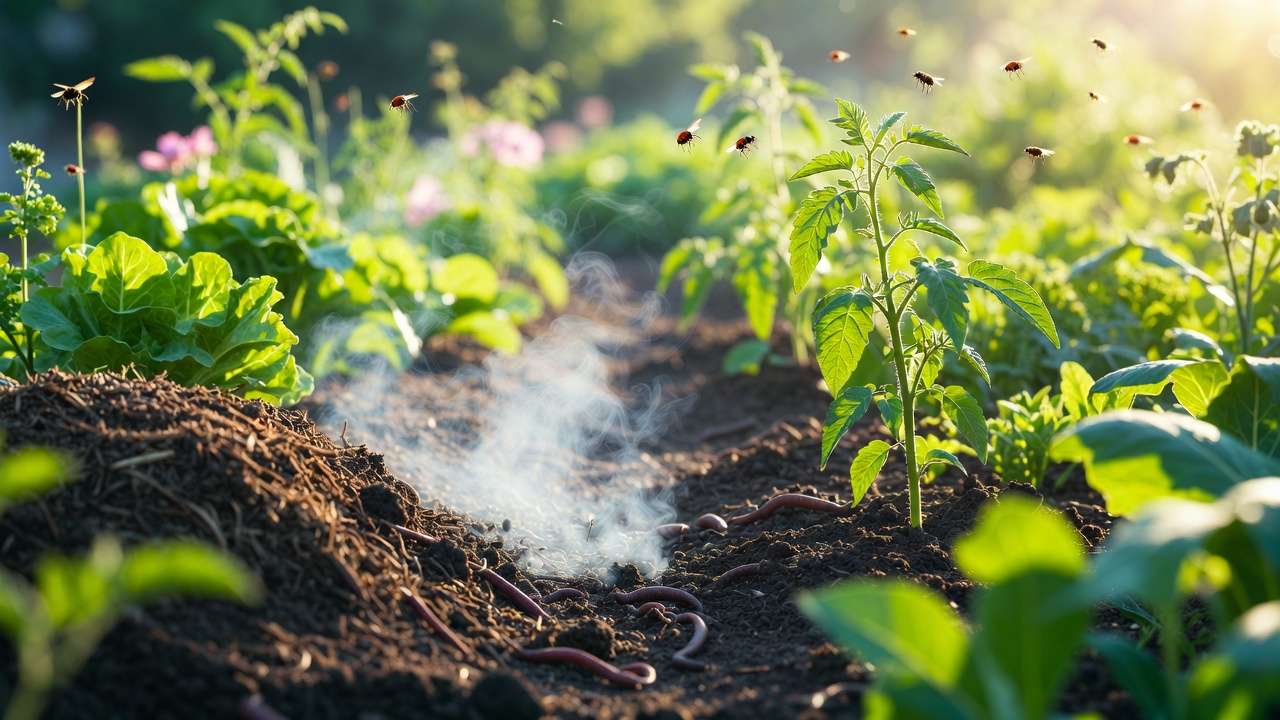
Step 1: Start with Soil Testing – The Foundation of Success 🧪
Skipping soil testing is like gardening blindfolded. A quick test (from local extension services or affordable kits) reveals pH (target 6.0-7.0 for most veggies), existing N-P-K levels, and organic matter percentage.
Why it matters:
- Acidic soil locks up nutrients → lime to correct.
- High phosphorus already? Skip bone meal.
- Low organic matter? Prioritize compost over fertilizers.
Test every 1-2 years—fall is ideal so amendments settle before spring. This precision prevents waste, avoids overfeeding, and ensures your organic fertilizer schedule actually works for your garden. I’ve seen yields double simply from this one step!
The Ultimate Organic Fertilizer Timeline for Vegetables ⏰🌿
This timeline suits most temperate climates (USDA zones 5-9; adjust ±2 weeks for your local last frost/first frost dates). Focus on building soil first, then supplement with slow-release granulars + liquid boosts. Always apply to moist soil and water in deeply.
Application Methods: Granular vs. Liquid vs
Pre-Planting / Early Spring (4-6 Weeks Before Planting) ❄️→🌱
Incorporate 2-4 inches of finished compost or well-aged manure into the top 6-8 inches. Add balanced organic granular (e.g., 4-4-4, 5-5-5, or 5-10-10) at 2-4 lbs per 100 sq ft. Goal: Wake up soil microbes and provide baseline fertility. This single step supplies slow nutrients for weeks.
At Planting / Transplanting Time 🌱
Mix a handful of compost + balanced granular or high-P organic (bone meal) into each planting hole. For direct-sown seeds: Lightly top-dress rows with compost. This gives seedlings a gentle nutrient kick without burn risk.
Early Growth Stage (First 3-4 Weeks After Germination/Transplant) 🚀
Side-dress with nitrogen-rich organics (fish emulsion, blood meal, soybean meal) every 2-3 weeks. Weekly liquid feed: Diluted kelp/fish emulsion (1-2 tbsp per gallon water) for trace minerals. Perfect for leafy greens, brassicas (broccoli, cabbage, kale), and heavy feeders.
Mid-Season / Flowering & Fruiting (4-8 Weeks In) 🌸🍆
Switch to bloom/fruit-focused formulas (e.g., 3-6-4 tomato blends). Granular side-dress every 3-4 weeks; add foliar seaweed sprays for quick uptake. Lower nitrogen for tomatoes/peppers/beans to encourage fruit over foliage. For continuous harvesters (zucchini, beans): Light, ongoing feeds.
Late Season / Maintenance (8+ Weeks or Until Harvest) 🍂
Taper nitrogen; emphasize potassium (kelp meal, wood ash sparingly). Top-dress compost for fall crops or soil rebuild. Stop feeding 2-3 weeks before final harvest—flavors concentrate beautifully!
Quick Reference Chart for Common Vegetables (adjust per soil test):
- Tomatoes/Peppers — Balanced at planting → 3-6-4 side-dress every 2-3 weeks after fruit set 🍅
- Leafy Greens (Lettuce, Spinach, Kale) — High-N every 2 weeks 🌿
- Root Crops (Carrots, Beets, Radishes) — Minimal extra N; phosphorus focus pre-plant 🥕
- Brassicas (Broccoli, Cauliflower) — Extra N side-dress 3 weeks after transplant
- Cucumbers/Zucchini — Balanced every 3 weeks; watch for powdery mildew cues
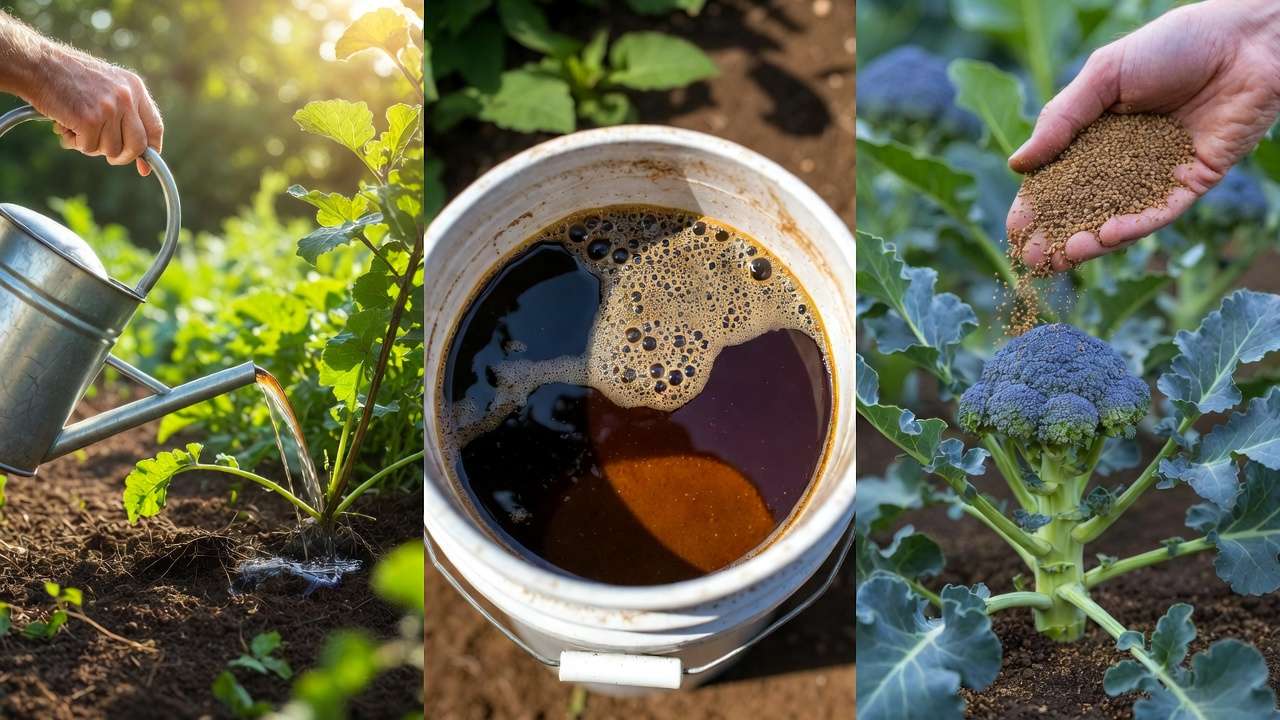
Application Methods: Granular vs. Liquid vs. Compost Tea – Which Is Best When? 🧴💧
Choosing the right delivery method can make or break your feeding schedule. Here’s how the pros do it:
Granular / Dry Organics
- Best for: Pre-planting, side-dressing, and long-term soil building.
- How to apply: Sprinkle in a band 4–6 inches from the plant base (never touching stems), lightly scratch into the topsoil, then water thoroughly.
- Advantages: Slow, steady release (4–12 weeks depending on product); less risk of burn; improves soil structure over time.
- Popular choices: Espoma Garden-Tone, Dr. Earth, or homemade blends of meals + rock minerals.
Liquid Fertilizers (Fish Emulsion, Seaweed/Kelp Extracts, etc.)
- Best for: Quick nutrient boosts, foliar feeding, or correcting mid-season deficiencies.
- How to apply: Dilute per label (usually 1–2 tbsp per gallon), apply as soil drench or fine mist on leaves early morning or late afternoon to avoid leaf burn.
- Advantages: Fast uptake (within hours to days); delivers trace minerals (iron, zinc, manganese) that granulars often lack 🌊.
- Pro tip: Combine fish emulsion (high N, fishy smell) with kelp (growth hormones + micronutrients) for a powerhouse weekly spray.
Compost Tea (Aerated)
- Best for: Boosting microbial life, especially in living-soil gardens.
- How to make: Fill a 5-gallon bucket ⅓ with finished compost or worm castings, add molasses or kelp meal (food for microbes), aerate with an aquarium pump for 24–48 hours, then dilute 1:10 and apply immediately.
- Advantages: Introduces billions of beneficial bacteria and fungi → stronger roots, better nutrient cycling, natural disease suppression 🪱☕.
- Frequency: Every 1–2 weeks during active growth. Many organic market gardeners swear by weekly compost tea as the single biggest yield booster.
Quick Decision Guide
- Soil feels lifeless or plants look pale → Start with compost tea + liquid foliar.
- Long season ahead → Rely on granular base + occasional liquid top-ups.
- Limited time? → Granular side-dress every 3–4 weeks is simplest and still highly effective.
Common Mistakes to Avoid (And Expert Fixes) ⚠️🛠️
Even experienced gardeners slip up. Here are the top pitfalls I see most often—and how to recover:
- Over-fertilizing Symptom: Dark green, overly lush foliage, few/no flowers or fruit, leaf-tip burn, stunted roots. Fix: Flush soil with heavy watering for 2–3 days. Reduce or pause feeding for 4–6 weeks. Next season: Always soil test first.
- Too much nitrogen on fruiting crops Symptom: Tomatoes/peppers/beans grow huge vines but drop blossoms or produce tiny fruit. Fix: Switch to low-N, high-P/K formulas mid-season. Remove some suckers on tomatoes to redirect energy.
- Applying to dry soil Symptom: Root burn or nutrient lock-up. Fix: Water plants deeply the day before feeding, then water again immediately after applying.
- Using fresh manure Symptom: Burned seedlings, possible E. coli contamination. Fix: Only use composted/aged manure (at least 6 months old). Hot composting kills pathogens.
- Ignoring micronutrients Symptom: Yellowing between veins (iron), purple leaves (phosphorus), curled leaf tips (calcium). Fix: Add kelp/seaweed products regularly—they contain over 60 trace elements.
- No fall soil rebuild Symptom: Declining yields year after year. Fix: After final harvest, spread 2–3 inches of compost, cover crop (clover, rye), or mulch heavily.
Bonus Expert Tips for Bigger, Tastier Harvests 🚀🥗
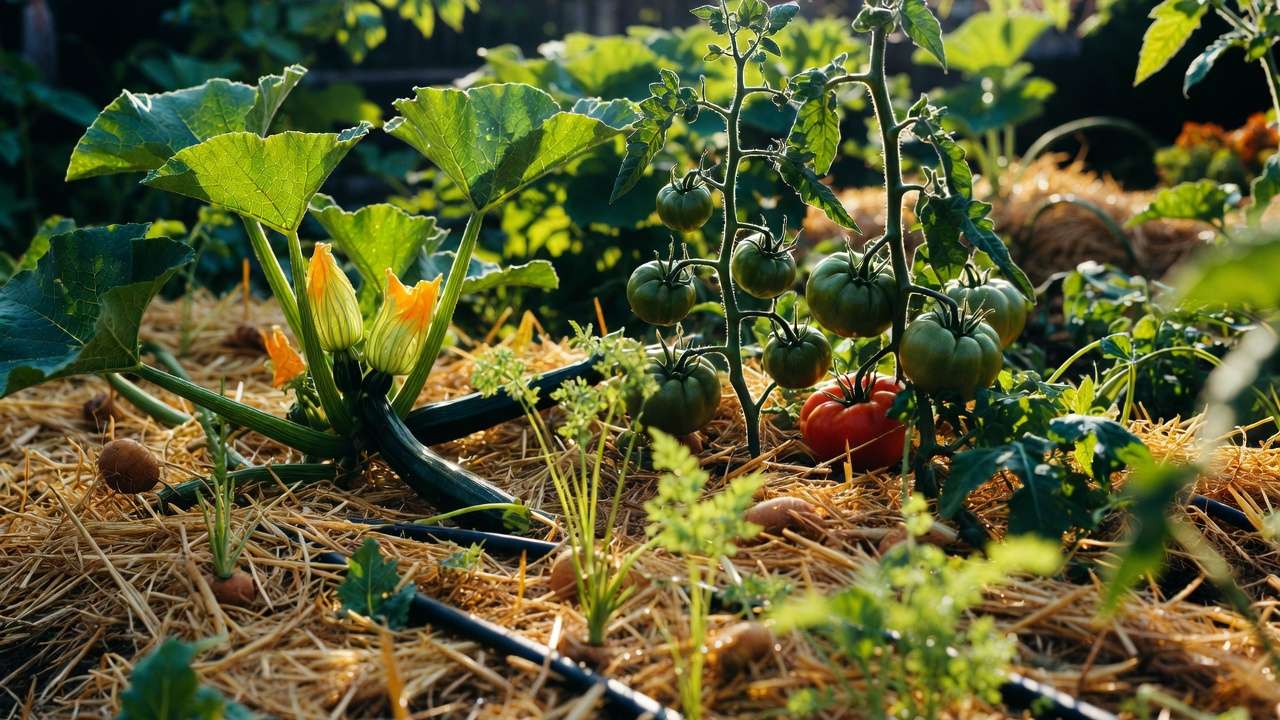
- Mulch religiously after every feeding — Straw, grass clippings, or shredded leaves lock in moisture, suppress weeds, and slowly decompose into more organic matter 🌾.
- Practice crop rotation — Never plant the same family (e.g., tomatoes → peppers) in the same spot two years running to prevent nutrient depletion and soil-borne diseases.
- Foliar feeding in the morning — Plants absorb nutrients best when stomata are open (cooler, humid conditions). Avoid midday sun.
- Watch plant language — Pale lower leaves = nitrogen need; blossom-end rot on tomatoes = calcium issue (add crushed eggshells or gypsum); slow growth = overall hunger.
- Combine methods for synergy — Granular base in spring + weekly liquid feeds + monthly compost tea = the “holy trinity” many market gardeners use for competition-level yields.
- Save money with homemade boosters — Save banana peels (K), eggshells (Ca), coffee grounds (mild N + acidity buffer) and steep into quick “tea” supplements.
Frequently Asked Questions (FAQs) ❓
Q: How often should I fertilize if my soil is already rich in organic matter? A: In high-organic soils (>5%), you may only need 2–3 supplemental feedings per season. Let plant appearance and soil tests guide you.
Q: Can I rely completely on homemade compost? A: Compost is fantastic, but it’s usually low-to-moderate in N-P-K. Supplement with targeted organics (fish emulsion, bone meal) when plants show hunger.
Q: Are organic fertilizers safe around pets and children? A: OMRI-listed products are generally very safe. Keep bags stored securely, and avoid letting pets dig in fresh manure or blood meal (some dogs find it tasty and can get sick).
Q: What if I accidentally over-fertilized? A: Water deeply and repeatedly to leach excess. Remove damaged leaves. Next feeding: cut recommended rate in half and observe.
Q: Do container vegetables need a different schedule? A: Yes—nutrients leach faster in pots. Use half-strength liquid feeds every 7–10 days throughout the season instead of heavy granular applications.
Q: When should I stop fertilizing? A: 2–3 weeks before final harvest for most crops. This lets plants focus energy on ripening and flavor development rather than new growth.
Conclusion: Grow Better, Eat Better, Year After Year 🌻🍴
Mastering an organic fertilizer schedule for vegetables isn’t about following rigid rules—it’s about listening to your soil and plants while working with nature instead of against it. Start with a soil test this season, build your fertility foundation with compost and aged manures, follow the stage-by-stage timeline outlined here, and supplement wisely with liquids and teas.
The reward? Juicier tomatoes, crunchier greens, sweeter carrots, and the deep satisfaction of knowing every bite was grown cleanly, sustainably, and with love. Your garden will thank you with bigger harvests, healthier plants, and soil that gets better every year.
Ready to put this plan into action? Grab your compost fork and soil test kit—your best garden season ever is just a few smart feedings away! 🌱🚀
Share your progress, questions, or favorite organic fertilizer combos in the comments—I read and reply to every one! Happy gardening, friends! 🥕✨


