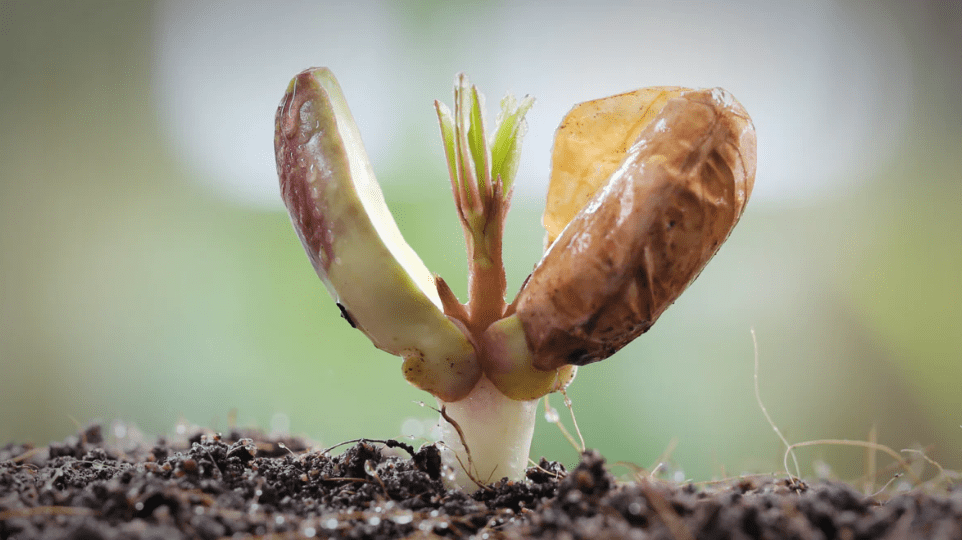
How to Grow Peanuts from Peanut Plant Seeds
Growing your own peanuts can be a fun and rewarding experience, and with the right knowledge and care, you can have a successful peanut harvest right in your own backyard. In this post, we’ll guide you through the step-by-step process of growing peanuts from peanut plant seeds, including the best planting methods, soil requirements, and care tips to ensure a bountiful harvest. Whether you’re a beginner or experienced gardener, this guide will help you grow your own delicious and nutritious peanuts.
Table of Contents
ToggleUnderstanding Peanut Plant Seeds
A. Describe what peanut plant seeds are
Peanut plant seeds are the seeds that come from the peanut plant. They are typically small and oval-shaped, and are the starting point for growing peanuts. These seeds contain all the genetic material needed to grow into a mature peanut plant and produce a harvest of peanuts.
B. Discuss different varieties of peanut seeds
There are several different varieties of peanut plant seeds, each with their own unique characteristics and growth requirements. Some common varieties include Virginia, Spanish, and Valencia peanuts. Each variety has its own flavor profile, size, and preferred growing conditions, so it’s important to choose the variety that best suits your local climate and soil type. It’s also important to note that some varieties may be better suited for commercial production, while others may be better for home gardens.

C. Highlight the importance of choosing the right variety for your region
It is important to choose the right variety of peanut seeds for your region to ensure a successful harvest. Different varieties have different growth requirements and may thrive in specific climates and soil types. By selecting the appropriate variety for your region, you can maximize the yield and quality of your peanut crop. Additionally, choosing the right variety can also help to minimize the risk of disease and pest damage, as certain varieties may be more resistant to common issues in your area. Therefore, it is crucial to consider the specific growing conditions of your region when selecting peanut seeds to plant.
Preparing for Planting
A. Outline the best time to plant peanut seeds
The best time to plant peanut seeds is in the spring, after the last frost has passed and the soil temperature has reached at least 65-70°F. This typically occurs in late April or early May, depending on your region. Planting too early can result in poor germination, while planting too late can reduce the growing season and lead to lower yields. Therefore, it is important to pay attention to the weather and soil temperature in your area to determine the optimal planting time for peanut seeds.
B. Detail soil requirements and preparation (pH, texture, nutrients)
Peanuts grow best in well-drained, sandy loam soils with a pH level of 5.8-6.2. It is crucial to ensure that the soil is free of any debris, rocks, or clumps that can hinder the growth of peanut plants. Additionally, adding organic matter such as compost or well-rotted manure can help improve soil structure and fertility. Before planting, it is recommended to perform a soil test to determine the nutrient levels and pH of the soil. Based on the soil test results, you may need to add fertilizer to provide the necessary nutrients for peanut plants to thrive. Preparing the soil ahead of planting is essential for the successful growth of peanut crops.
C. Discuss the ideal climate and temperature for peanut growth
Peanuts thrive in warm climates with temperatures between 70-90°F (21-32°C). They require a long, warm growing season of approximately 4-5 months without frost. Ideal temperatures for peanut growth are between 77-86°F (25-30°C) during the day and 68-77°F (20-25°C) at night. Consistent warmth and sunlight are necessary for proper fruit development. Additionally, peanuts require plenty of water, especially during the flowering and fruiting stages. Adequate rainfall or irrigation is essential to ensure the soil remains consistently moist but not waterlogged. Overall, a warm, sunny, and humid climate with regular rainfall or irrigation is ideal for the successful growth of peanut crops.
Planting Peanut Seeds
A.Tips for ensuring successful germination
To ensure successful germination of peanut seeds, it’s important to keep the soil consistently moist, but not waterlogged. This will help promote healthy and strong seedling growth. Additionally, providing a warm and sunny environment for the seeds will also contribute to successful germination. Keep an eye on the soil moisture and adjust watering as needed to ensure the seeds have the best chance of germinating and growing into healthy peanut plants.
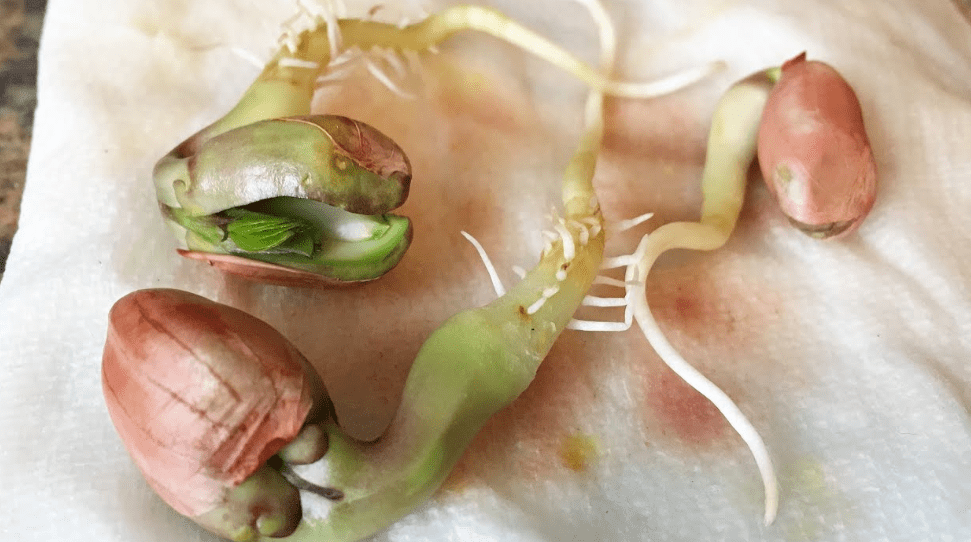
B. Step-by-step guide on how to plant peanut seeds
1. Soaking seeds (if necessary)
Before planting peanut seeds, it may be necessary to soak them in warm water for a few hours to soften the seed coat and promote germination.
2. Choosing the planting site
Select a well-draining, sunny area with fertile soil for planting peanut seeds. It’s important to ensure that the soil is warm, as peanuts prefer a warm environment for optimal growth.
3. Planting depth and spacing
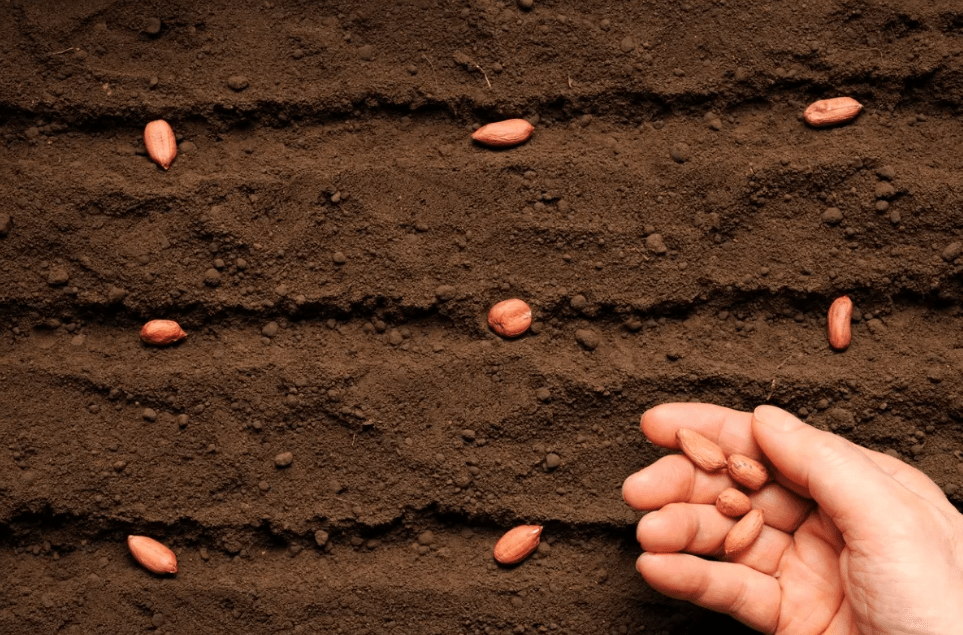
Plant peanut seeds about 1-2 inches deep in the soil, spaced about 6-8 inches apart in rows that are 24-36 inches apart.
4. Watering requirements during planting
After planting, water the seeds thoroughly to ensure the soil is moist. Peanuts require consistent moisture, especially during the flowering and fruiting stages, so it’s important to keep the soil consistently moist but not waterlogged.
Caring for Peanut Plants
A. Watering schedule and techniques
Water peanut plants regularly, providing about 1-1.5 inches of water per week, either through rainfall or irrigation. It’s important to water deeply to encourage the roots to reach deeper into the soil. Avoid overwatering, as this can lead to rot and disease. Mulching around the plants can help retain moisture and regulate soil temperature.
B. Fertilizing requirements (types of fertilizers and application frequency).
Fertilize peanut plants with a balanced fertilizer, such as a 10-10-10 blend, at planting time and again when the plants begin to flower. Avoid high nitrogen fertilizers, as they can encourage excessive foliage growth at the expense of peanut production. Be sure to follow the instructions on the fertilizer package for proper application rates.
C. Weed control methods.
There are several effective weed control methods for peanut plants. Hand pulling weeds is always an option, but it can be time-consuming. Mulching around the plants can also help to suppress weed growth. Additionally, using pre-emergent herbicides before planting can prevent weed seeds from germinating. It’s important to carefully follow the instructions on any herbicide products to ensure they are applied safely and effectively. Lastly, regular cultivation of the soil around peanut plants can help to disrupt weed growth.
D. Mulching tips to retain soil moisture and control weeds.
Mulching around peanut plants is a great way to retain soil moisture and control weeds. It helps to suppress weed growth by blocking sunlight and preventing weed seeds from germinating. Additionally, mulch can regulate soil temperature and prevent erosion. When mulching, be sure to leave a gap around the base of the plant to prevent rot and disease. Organic mulches like straw, wood chips, or leaves are good options, as they also improve soil health as they break down. Overall, mulching is an effective and eco-friendly way to maintain a healthy peanut crop.
Managing Pests and Diseases
A. Common pests that affect peanut plants and how to control them
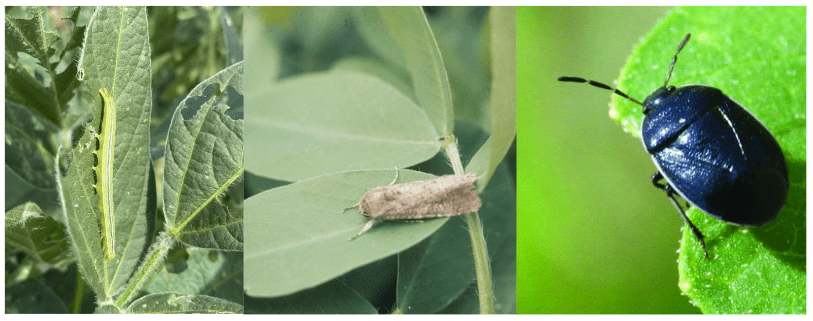
There are several common pests that can affect peanut plants, including aphids, thrips, and caterpillars. To control these pests, it is important to regularly monitor the plants for any signs of infestation and take appropriate action as soon as possible. This can include using insecticidal soaps, neem oil, or other natural remedies to deter pests. Additionally, practicing crop rotation and intercropping with pest-repelling plants can help to minimize pest problems.
B. Common diseases and preventive measures
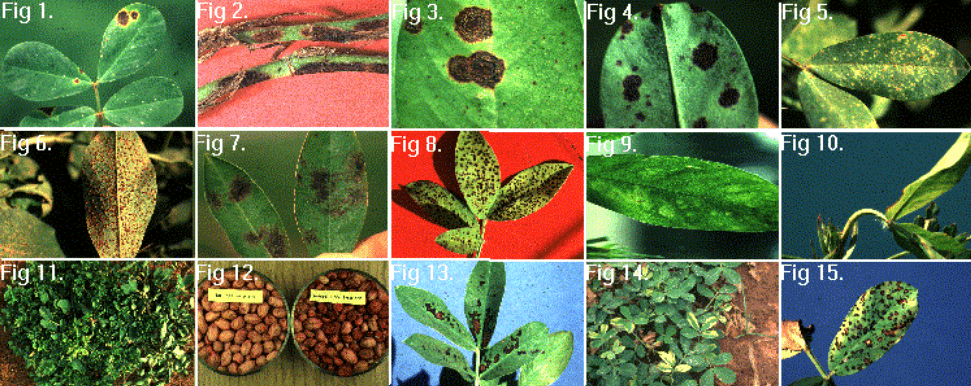
Common diseases that can affect peanut plants include early leaf spot, late leaf spot, and tomato spotted wilt virus. Preventive measures for these diseases include planting disease-resistant peanut varieties, practicing proper crop rotation, and maintaining good weed control to reduce disease pressure. It is also important to avoid overhead irrigation, as this can create optimal conditions for disease development. Additionally, applying fungicides and other disease management techniques can help to prevent and control the spread of diseases in peanut crops.
C. Organic and chemical pest control options.
Organic pest control options for peanut plants include using natural predators such as ladybugs and lacewings to help control insect populations, as well as using botanical insecticides made from natural plant extracts. In addition, implementing cultural practices such as removing infested plants and maintaining proper plant spacing can help reduce pest pressure.
Chemical pest control options for peanuts may include using insecticides and fungicides to control pest and disease populations. It is important to carefully follow all label instructions and guidelines when using chemical pest control products, and to consider the potential impact on non-target organisms and the environment. Integrated pest management strategies that combine both organic and chemical control methods can help to effectively manage pests while minimizing environmental impact.
Harvesting Peanuts
A. Signs that peanuts are ready to harvest
When peanuts are ready to harvest, the leaves of the plant will start to turn yellow and the peanut pods will begin to mature and turn brown. The shell will also start to harden, indicating that the peanuts are ready for harvest. It is important to carefully monitor the plants and harvest the peanuts at the right time to ensure the best quality and yield.
B. Step-by-step harvesting process
Step 1: Wait for the leaves of the peanut plant to start turning yellow and the pods to mature and turn brown.
Step 2: Test the peanut shells to make sure they are hard.
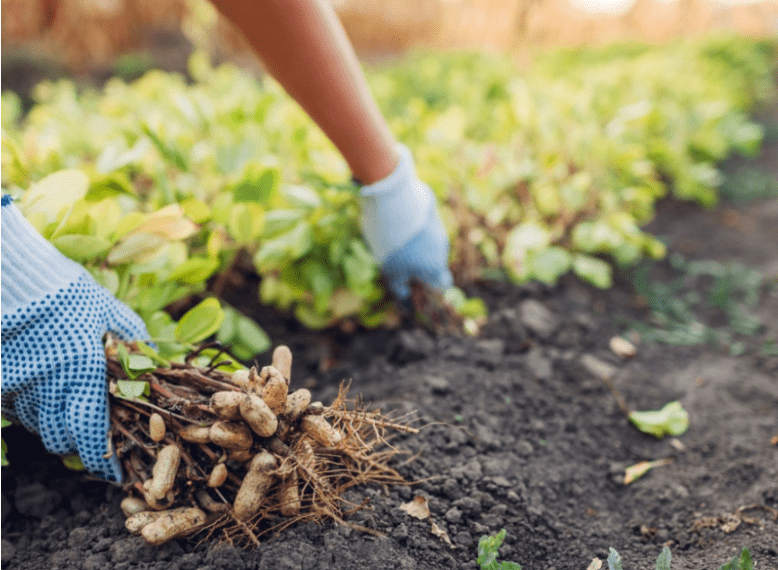
Step 3: Use a digging fork or shovel to gently loosen the soil around the plants to avoid damaging the peanut pods.
Step 4: Pull the plants from the ground and shake off any excess soil.
Step 5: Lay the plants out in a dry, sunny area to allow the peanuts to dry out further.
Step 6: Once the peanuts are fully dry, remove the pods from the plant and store them in a cool, dry place until ready to use or sell.
Storing and Using Harvested Peanuts
A. Proper storage methods to maintain freshness.
When storing harvested peanuts, it’s important to keep them in a cool, dry place to maintain their freshness. You can store them in a well-ventilated area, such as a pantry or cellar, in a breathable container like a mesh bag or a paper sack. Avoid storing peanuts in plastic bags or airtight containers, as this can cause them to become moldy or spoil. Keep them away from direct sunlight and moisture to prevent them from spoiling. If stored properly, peanuts can last for several months. Make sure to check on them periodically for freshness and discard any that show signs of mold or spoilage.
B. Different uses of harvested peanuts (culinary, replanting, etc.)
Harvested peanuts have a variety of uses, including culinary and replanting purposes. In the culinary realm, peanuts can be used in a wide range of dishes, from savory to sweet. They can be roasted and salted for a delicious snack, ground into peanut butter, used as a topping for salads or added to stir-fries and curries for added flavor and texture. Peanuts are also commonly used in baking, being added to cookies, cakes, and muffins for a nutty and rich taste.
For replanting purposes, harvested peanuts can be used to grow new peanut plants. To do this, select healthy and unblemished peanuts, shell them, and plant them in a sunny location with well-drained soil. Peanuts are a warm-weather crop and require a long growing season, so they are best suited for planting in the late spring after the last frost has passed. With proper care, the peanuts will sprout and produce new plants, allowing for a continuous harvest in the future. Overall, harvested peanuts have a multitude of uses and can be enjoyed in various ways.
Tips and Tricks for Successful Peanut Growth
A. Additional tips for maximizing yield.
To maximize peanut yield, it is important to select the healthiest and unblemished peanuts for replanting. It is also important to plant them in a sunny location with well-drained soil, as peanuts are a warm-weather crop and require a long growing season. Additionally, it is best to plant them in late spring after the last frost has passed. Proper care, including regular watering and fertilization, will help the peanuts sprout and produce new plants, allowing for a continuous harvest in the future. With these tips and tricks, you can successfully grow peanuts and enjoy a bountiful harvest.
B. Common mistakes to avoid.
Common mistakes to avoid when growing peanuts include planting them in soil that is too compact or poorly drained, as this can lead to rotting of the seeds. Overwatering can also be detrimental to peanut plants, as they prefer well-drained soil and can be susceptible to diseases in waterlogged conditions. Additionally, planting peanuts too early in the spring when there is still a risk of frost can result in poor germination and stunted growth. It is important to follow the recommended planting schedule for your specific region. Lastly, neglecting to provide adequate nutrients through fertilization can result in poor yield and stunted growth. By avoiding these common mistakes, you can increase the likelihood of a successful peanut harvest.
C. Personal experiences or anecdotes from successful peanut growers.
Personal experiences or anecdotes from successful peanut growers can provide valuable insights and tips for growing peanuts. For example, some successful peanut growers recommend checking the soil moisture regularly and adjusting watering practices accordingly to prevent overwatering. Others might suggest using well-draining soil and adding organic matter to improve soil structure. Additionally, successful peanut growers may share their experiences of following the recommended planting schedule for their specific region and the positive outcomes they have seen from doing so. Overall, gaining insights from experienced peanut growers can help you avoid common mistakes and increase your chances of a successful peanut harvest.
In conclusion, growing peanuts from peanut plant seeds is a relatively straightforward process that requires the right soil, planting methods, and care tips. By following the steps outlined in this post, you can successfully grow your own peanuts and enjoy a bountiful harvest. Whether you’re a beginner or experienced gardener, these tips will help you cultivate healthy peanut plants and reap the rewards of your efforts. Happy gardening!
Frequently Asked Questions (FAQs)
Yes, you can! Peanut plants produce seeds that can be used to grow more peanut plants.
Peanut plants grow best in well-drained, sandy soil with a pH between 5.8-6.2.
Peanut plants require regular watering, especially during the growing season. However, it’s important not to overwater them, as this can lead to disease.
It takes about 120 to 150 days for peanuts to reach maturity and be ready for harvesting.
Yes, you can grow peanuts in a container, as long as the container is large enough to accommodate the plant’s root system.
Yes, peanut plants require full sunlight for optimal growth. Make sure to place them in a sunny location.
When the plants are mature, dig up the entire plant and shake off the excess soil. Then, hang the plants in a warm, dry place to cure for a few weeks before removing the peanuts from the pods.
It’s important to rotate your peanut crop with other plants to prevent diseases and maintain soil fertility. Additionally, be mindful of any potential pest issues and address them as needed.
