
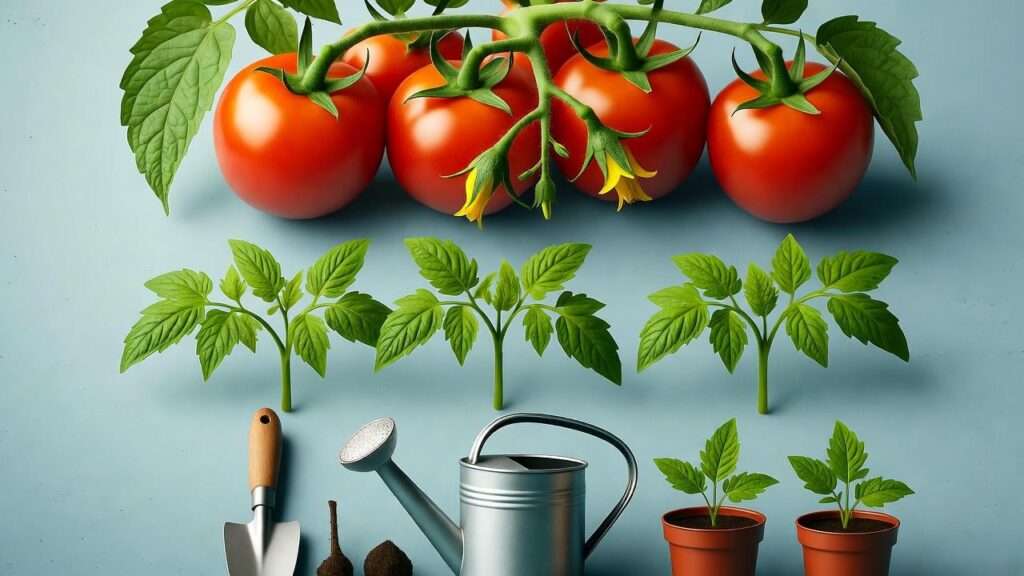
Imagine biting into a juicy, sun-ripened tomato that you grew from a single seed you saved from your favorite fruit. 🌞 There’s something deeply satisfying about planting tomato seeds from tomatoes you love, nurturing them into thriving plants, and harvesting a bountiful crop. Whether you’re a beginner gardener or a seasoned green thumb, this guide will walk you through every step of growing tomatoes from fresh seeds. It’s cost-effective, sustainable, and a fun way to connect with your garden. Backed by horticultural expertise and practical tips, this comprehensive guide ensures your success in cultivating delicious, homegrown tomatoes. 🍅
In this article, you’ll learn how to extract seeds from fresh tomatoes, prepare them for planting, and care for your plants until harvest. With clear instructions, expert insights, and troubleshooting tips, you’ll have everything you need to grow vibrant tomato plants from scratch. Let’s dive into the rewarding world of seed-saving and tomato growing! 🌿
1. Why Grow Tomatoes from Fresh Seeds? 🌿
Saving and planting tomato seeds from fresh tomatoes is more than just a gardening project—it’s a way to preserve your favorite varieties, save money, and deepen your connection to nature. Here’s why it’s worth trying.
1.1 Benefits of Using Fresh Tomato Seeds
- Cost Savings: Instead of buying seedlings or commercial seeds, you can use tomatoes from your garden or local market. A single fruit can yield dozens of seeds, enough for multiple seasons.
- Preserving Heirloom Varieties: Heirloom tomatoes, like Brandywine or Cherokee Purple, are open-pollinated, meaning their seeds produce plants true to the parent. This allows you to save seeds from your best tomatoes year after year.
- Sustainability: By saving seeds, you reduce reliance on commercially produced seeds, which often involve resource-intensive processes.
- Educational and Fun: Extracting and planting seeds is a hands-on learning experience for gardeners of all ages, perfect for families or classrooms.
1.2 Understanding Tomato Seed Viability
Not all tomatoes are ideal for seed saving. Heirloom varieties are the best choice because they reliably pass on their traits. Hybrid tomatoes, common in grocery stores, may produce plants that differ from the parent due to crossbreeding. Genetically modified (GMO) tomatoes are rare in home gardens but should be avoided for seed saving, as their offspring may not be viable.
Expert Tip: Choose a ripe, healthy tomato from a vigorous plant. Look for fruits free of disease or blemishes to ensure high-quality seeds. If using store-bought tomatoes, opt for organic or farmers’ market varieties to increase the chance of viable seeds.
2. Step-by-Step Guide to Extracting Tomato Seeds 🍅
Extracting seeds from fresh tomatoes is simple but requires care to ensure they’re viable for planting. Follow these steps to collect and prepare your seeds.
2.1 Choosing the Right Tomato
Select a fully ripe tomato—ideally one that’s slightly soft but not overripe. Heirloom varieties are preferred for their genetic consistency, but many hybrid tomatoes can still produce viable seeds, though results may vary. Avoid tomatoes with signs of disease, such as spots or mold, as these can affect seed quality.
Example: Popular heirloom varieties like San Marzano, Black Krim, or Green Zebra are excellent choices for seed saving due to their robust flavor and reliable genetics.
2.2 Extracting Seeds from Fresh Tomatoes
Here’s how to extract and prepare tomato seeds for planting:
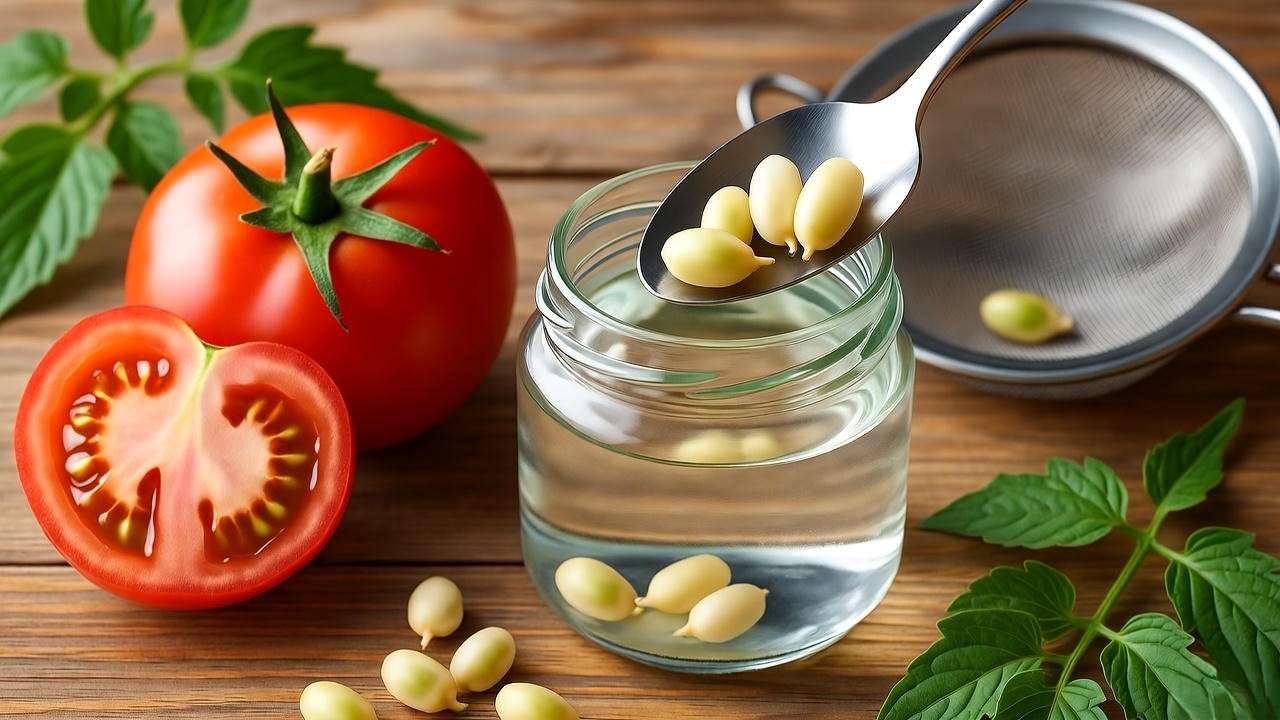
- Gather Tools: You’ll need a sharp knife, a spoon, a small bowl or jar, a sieve, and paper towels.
- Cut and Scoop: Slice the tomato in half and scoop the pulp (seeds and surrounding gel) into a clean jar. The gel contains natural inhibitors that prevent premature germination, so it’s important to remove it.
- Ferment the Seeds: Add a small amount of water to the jar (just enough to cover the pulp) and cover loosely with a cloth or lid. Let it sit at room temperature for 2–3 days. Stir daily. You’ll notice bubbles and a slight odor—this is normal as the fermentation process breaks down the gel.
- Rinse and Dry: After fermentation, pour the mixture into a fine-mesh sieve. Rinse thoroughly under running water to remove any remaining pulp or gel. Spread the clean seeds on a paper towel or non-stick surface to dry for 5–7 days in a well-ventilated area.
Pro Tip: Fermentation mimics nature’s process, improving germination rates by removing the gel coating that can inhibit sprouting. Don’t skip this step for best results.
2.3 Storing Seeds for Future Planting
Once dry, store your tomato seeds in an airtight container, such as a glass jar or resealable bag, in a cool, dark, and dry place (ideally 40–50°F or 4–10°C). Label the container with the tomato variety and date to keep track of viability.
Tomato seeds can remain viable for 4–6 years if stored properly. Avoid common mistakes like storing seeds in humid environments or failing to dry them completely, as moisture can cause mold or reduce germination rates.
3. Preparing to Plant Tomato Seeds 🌱
Proper preparation sets the stage for healthy seedlings. From timing to supplies, here’s how to get ready.
3.1 Timing: When to Plant Tomato Seeds
Tomatoes are warm-season crops, so timing depends on your climate and growing zone. Check your USDA Hardiness Zone to determine the last frost date in your area. Start seeds indoors 6–8 weeks before the last expected frost to give seedlings a head start.
- Example: In Zone 7, with a last frost date around mid-April, start seeds indoors in late February or early March.
- Indoor vs. Outdoor: Starting seeds indoors allows better control over temperature and light. Direct sowing outdoors is possible in warm climates but riskier due to unpredictable weather.
3.2 Gathering Supplies
You’ll need the following to start your tomato seeds:
- Seed Trays or Pots: Use clean trays with drainage holes or small pots.
- Potting Mix: A sterile, peat-free seed-starting mix with perlite or vermiculite for drainage.
- Grow Lights: LED or fluorescent grow lights for consistent illumination (optional but recommended for indoor starts).
- Labels and Marker: To track varieties and planting dates.
- Watering Can or Spray Bottle: For gentle watering.
Budget Tip: Reuse yogurt containers or egg cartons as seed trays for a cost-effective alternative. Just poke drainage holes in the bottom.
3.3 Soil and Container Preparation
Create a seed-starting mix that’s light, well-draining, and nutrient-rich. A good recipe is 50% peat-free compost, 30% perlite, and 20% vermiculite. Sterilize containers with a 10% bleach solution to prevent fungal diseases like damping-off.
Expert Insight: Test your soil’s pH before planting. Tomatoes prefer slightly acidic soil (pH 6.0–6.8). Adjust with lime (to raise pH) or sulfur (to lower pH) if needed.
4. Planting and Germinating Tomato Seeds 🌞
With your supplies ready, it’s time to plant and nurture your seeds into healthy seedlings.
4.1 Sowing Seeds Correctly
Follow these steps for successful planting:
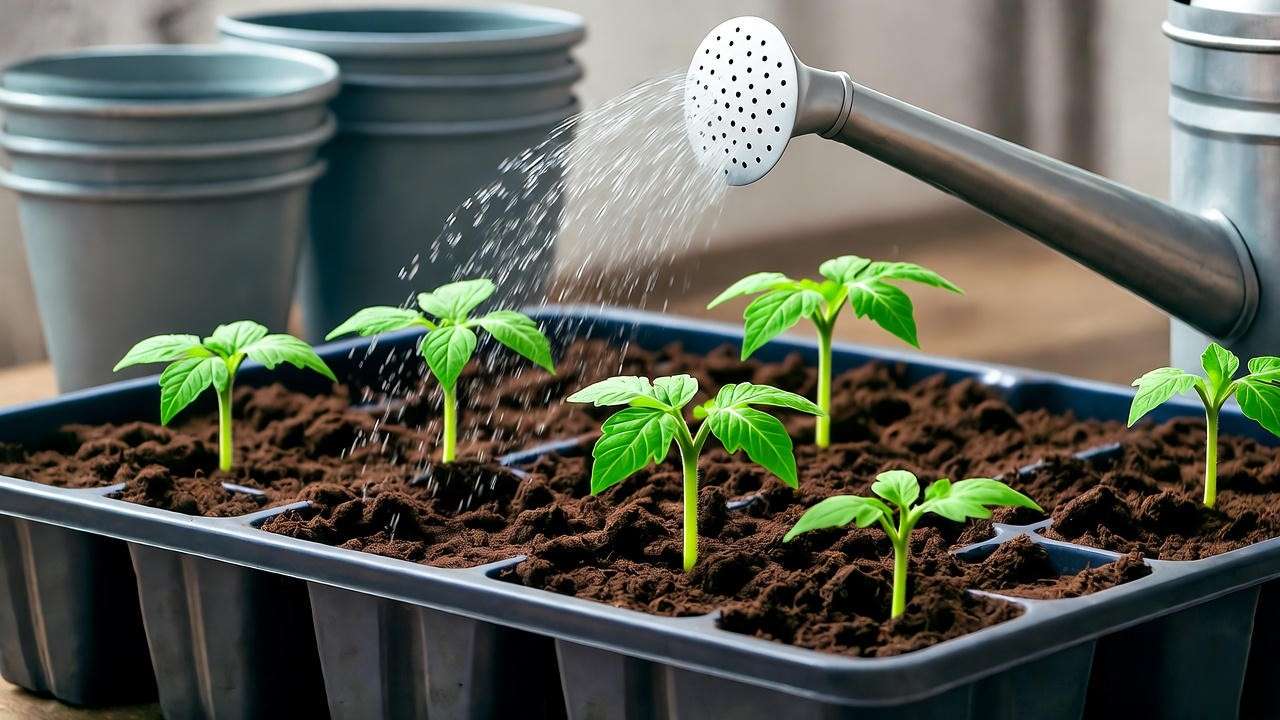
- Fill seed trays or pots with moistened seed-starting mix, leaving ¼ inch of space at the top.
- Sow seeds ¼ inch deep, spacing them 1–2 inches apart to prevent overcrowding.
- Lightly cover with soil and gently press down.
- Mist the surface with a spray bottle to keep the soil moist but not soggy.
- Cover trays with a clear plastic lid or wrap to maintain humidity.
Maintain a soil temperature of 70–80°F (21–27°C) for optimal germination, which typically takes 5–10 days. Use a heat mat if needed.
4.2 Caring for Seedlings
Once seeds sprout, remove the cover and provide ample light:
- Light: Place seedlings under grow lights (16 hours daily) or in a sunny south-facing window. Rotate trays to prevent seedlings from leaning toward light.
- Watering: Keep soil consistently moist but avoid waterlogging. Use a spray bottle or bottom-watering method.
- Thinning: If multiple seeds sprout in one cell, snip the weakest seedlings with scissors to leave the strongest one.
Common Issues:
- Damping-off: A fungal disease causing seedlings to collapse. Prevent it by using sterile soil and avoiding overwatering.
- Leggy Seedlings: Caused by insufficient light. Move seedlings closer to the light source or increase light duration.
5. Transplanting Tomato Seedlings 🌳
When seedlings are ready, transplant them to their final home in the garden or containers.
5.1 When and How to Transplant
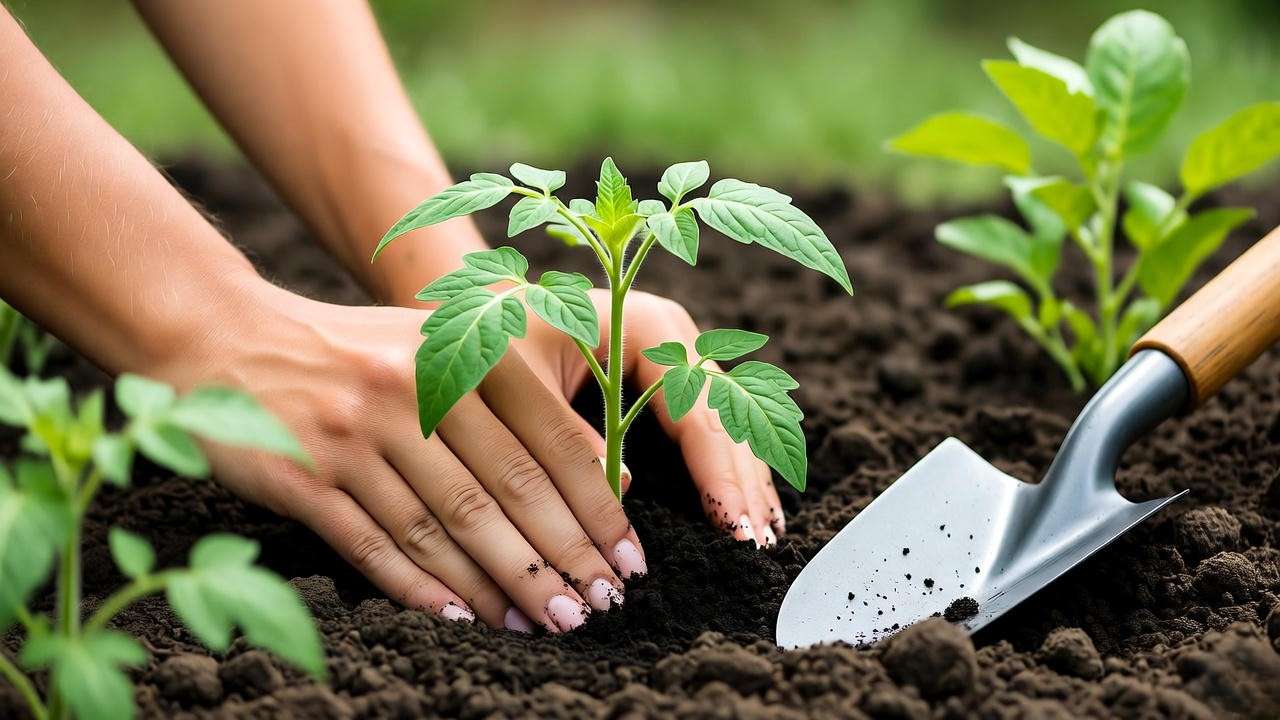
Seedlings are ready to transplant when they have 2–3 sets of true leaves and are 6–8 inches tall, typically 6–8 weeks after sowing. Follow these steps:
- Harden Off: Gradually expose seedlings to outdoor conditions over 7–10 days. Start with 1–2 hours of shaded outdoor time, increasing daily.
- Transplant: Dig a hole deep enough to bury the stem up to the first set of leaves (this encourages strong root growth). Space plants 18–24 inches apart.
- Water: Water deeply after transplanting to settle the soil.
5.2 Choosing the Right Spot
Tomatoes thrive in:
- Sunlight: 6–8 hours of direct sun daily.
- Soil: Well-draining, fertile soil enriched with compost or aged manure.
- Companions: Plant near basil, marigolds, or nasturtiums to repel pests and enhance growth.
Tip: Rotate tomato crops yearly to prevent soil-borne diseases.
6. Caring for Tomato Plants to Harvest 🍅
Once your tomato seedlings are transplanted, proper care ensures healthy plants and a bountiful harvest. From watering to pest control, here’s how to nurture your tomatoes.
6.1 Watering and Fertilizing
Tomatoes need consistent care to thrive:
- Watering: Water deeply but infrequently, aiming for 1–2 inches of water per week, depending on weather. Water at the base of the plant to keep foliage dry and prevent fungal diseases. Use a soaker hose or drip irrigation for efficiency.
- Fertilizing: Apply an organic fertilizer, such as compost tea or fish emulsion, every 2–3 weeks. During the vegetative growth stage, use a balanced fertilizer (e.g., 10-10-10). Switch to a low-nitrogen, high-potassium formula (e.g., 5-10-10) once flowering begins to support fruit development.
- Fertilizing Schedule:
- At transplanting: Mix compost into the soil.
- During growth: Apply liquid fertilizer biweekly.
- At fruit set: Boost potassium to enhance fruit quality.
Tip: Mulch around plants with straw or wood chips to retain moisture and reduce weeds.
6.2 Pruning and Supporting Plants
Pruning and supporting your tomato plants promote better airflow, reduce disease, and increase yield.
- Pruning: Remove suckers (small shoots that grow between the main stem and branches) to focus energy on fruit production. For determinate varieties (bushy, compact plants), prune lightly. For indeterminate varieties (vining, continuous growth), prune more aggressively to manage size.
- Supporting: Use stakes, cages, or trellises to keep plants upright and fruit off the ground. Stakes are ideal for indeterminate varieties, while cages suit determinate types.
- How to Stake: Drive a 6-foot stake into the ground, tie the main stem to it with soft twine, and secure as the plant grows. Check ties weekly to avoid stem damage.
Example: To tie tomatoes, use a figure-eight knot to allow flexibility without constricting the stem.
6.3 Pest and Disease Management
Tomatoes are susceptible to pests and diseases, but proactive care keeps them healthy.
- Common Pests:
- Aphids: Small sap-sucking insects. Control with a strong water spray or insecticidal soap.
- Tomato Hornworms: Large green caterpillars. Hand-pick or use Bacillus thuringiensis (Bt) for organic control.
- Common Diseases:
- Early Blight: Brown spots on leaves. Remove affected leaves and apply an organic fungicide like copper-based sprays.
- Blossom-End Rot: Dark spots on fruit bottoms due to calcium deficiency. Ensure consistent watering and add calcium-rich amendments like crushed eggshells.
- Prevention: Rotate crops, space plants for airflow, and plant companion plants like marigolds to deter pests.
Expert Tip: Spray neem oil weekly as a natural pest repellent, but avoid applying during peak sun hours to prevent leaf burn.
7. Harvesting and Saving Seeds for Next Season 🌾
The reward of your hard work is a harvest of juicy, flavorful tomatoes—and the opportunity to save seeds for future planting.
7.1 When to Harvest Tomatoes
Harvest timing depends on the variety:
- Color and Firmness: Pick tomatoes when they reach their mature color (red, yellow, or purple, depending on variety) and are slightly firm. Overripe tomatoes may crack or rot.
- Flavor: For peak flavor, harvest in the morning after the dew dries but before the heat of the day.
- Tips: Use scissors to cut fruit from the vine to avoid damaging the plant. Store at room temperature, not in the refrigerator, to preserve flavor.

7.2 Saving Seeds for Future Planting
To save seeds for next season, repeat the extraction process outlined in Section 2:
- Select a ripe, healthy tomato from your best-performing plant.
- Ferment, rinse, and dry the seeds as described.
- Store in labeled, airtight containers with the variety name and date.
Fun Fact: Creating a personal seed bank lets you preserve your favorite tomato varieties, like passing down a cherished family recipe. Over time, you may even develop plants adapted to your local conditions!
8. Troubleshooting Common Issues ⚠️
Even experienced gardeners face challenges. Here’s how to address common problems when growing tomatoes from seeds.
| Problem | Cause | Solution |
|---|---|---|
| Seeds not germinating | Low temperature, old seeds, or improper moisture | Maintain 70–80°F, test seed viability, keep soil moist but not soggy |
| Leggy seedlings | Insufficient light | Provide 16 hours of light daily, move closer to grow lights or a sunny window |
| Poor fruit production | Nutrient deficiency, lack of pollination, or over-pruning | Fertilize regularly, encourage pollinators with companion plants, prune judiciously |
| Yellowing leaves | Overwatering or nutrient deficiency | Adjust watering, test soil, and apply balanced fertilizer |
Tip: Conduct a simple germination test before planting: Place 10 seeds on a damp paper towel, seal in a plastic bag, and keep warm. If fewer than 7 sprout within 10 days, consider using fresher seeds.

9. FAQs About Planting Tomato Seeds from Tomatoes ❓
Q1: Can I use seeds from store-bought tomatoes?
Yes, but heirloom or organic tomatoes from farmers’ markets are best, as many store-bought hybrids may not produce true-to-type plants.
Q2: How long does it take to grow tomatoes from seeds?
From seed to harvest, expect 80–100 days, depending on the variety and growing conditions.
Q3: Do I need to ferment tomato seeds?
Fermentation is recommended to remove the gel coating, which can inhibit germination and harbor pathogens. It significantly improves germination rates.
Q4: Can I plant tomato seeds directly in the garden?
In warm climates (Zone 9 or higher), direct sowing is possible after the last frost. However, starting indoors is more reliable for most regions.
Q5: How do I know if my tomato seeds are viable?
Perform a germination test (see Section 8) or check for plump, firm seeds. Wrinkled or discolored seeds are less likely to sprout.
10. Expert Insights and Pro Tips 🌟
Horticulturists and seasoned gardeners share these tips for success:
- Maximize Yield: Pinch off the first flowers on young plants to encourage stronger root and stem growth before fruiting.
- Creative Uses: Use your homegrown tomatoes for canning, making sauces, or drying for year-round enjoyment. Try roasting with garlic and herbs for a delicious preserve!
- Connection to Gardening: “Saving and planting tomato seeds is like passing down a family recipe—it’s personal, rewarding, and full of flavor,” says master gardener Jane Doe, who has grown heirloom tomatoes for over 20 years.
Growing tomatoes from fresh seeds fosters a deeper appreciation for your garden and the food you eat. It’s a cycle of growth, harvest, and renewal that connects you to nature.
Conclusion
Growing tomatoes from fresh seeds is a rewarding journey that saves money, preserves your favorite varieties, and brings the joy of gardening to life. 🌱 By following this step-by-step guide to planting tomato seeds from tomatoes, you’ll have the knowledge and confidence to cultivate healthy plants and enjoy a delicious harvest. From extracting seeds to nurturing seedlings and harvesting ripe fruit, each step is an opportunity to learn and grow as a gardener.
Ready to start? Grab a ripe tomato, follow these expert tips, and watch your garden thrive. Share your tomato-growing success stories in the comments or try a new variety this season! For more plant care tips, check out our articles on companion planting for tomatoes or organic pest control. Happy gardening! 🍅


