
Planting potato sprouts is a rewarding endeavor that promises a bountiful harvest when done correctly. Whether you’re a seasoned gardener or a beginner, understanding the essentials of potato sprouts planting is key to achieving healthy, productive plants. This comprehensive guide will walk you through the entire process, from preparation to harvest, ensuring you get the most out of your potato crop.
Understanding Potato Sprouts
A. What are potato sprouts?
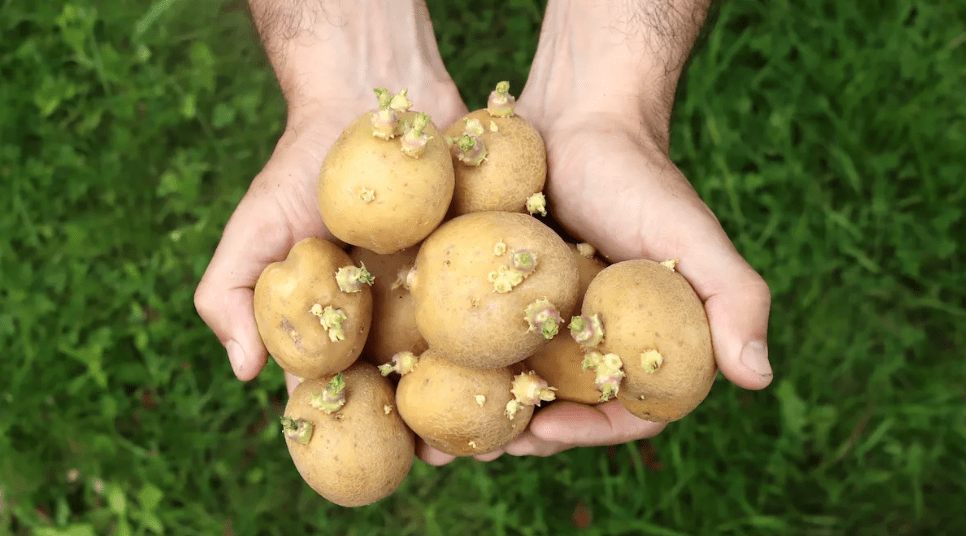
Potato sprouts are small shoots that emerge from the eyes of a potato. These sprouts are the early growth stages of a new potato plant and are essential for planting and growing a successful potato crop.
B. Benefits of planting potato sprouts
- Increased yield: Planting potato sprouts can result in higher yields of potatoes at harvest time.
- Uniform growth: Planting sprouts ensures that the potato plants will grow in a consistent and uniform manner.
- Disease prevention: By planting healthy sprouts, you can reduce the risk of diseases affecting your potato crop.
- Cost-effective: Planting sprouts is a cost-effective way to start growing potatoes, as it allows you to use the eyes of a potato that you already have on hand.
- Better quality: By planting sprouts, you can ensure that the potatoes you harvest will be of high quality.
C. Varieties of potatoes suitable for sprouting
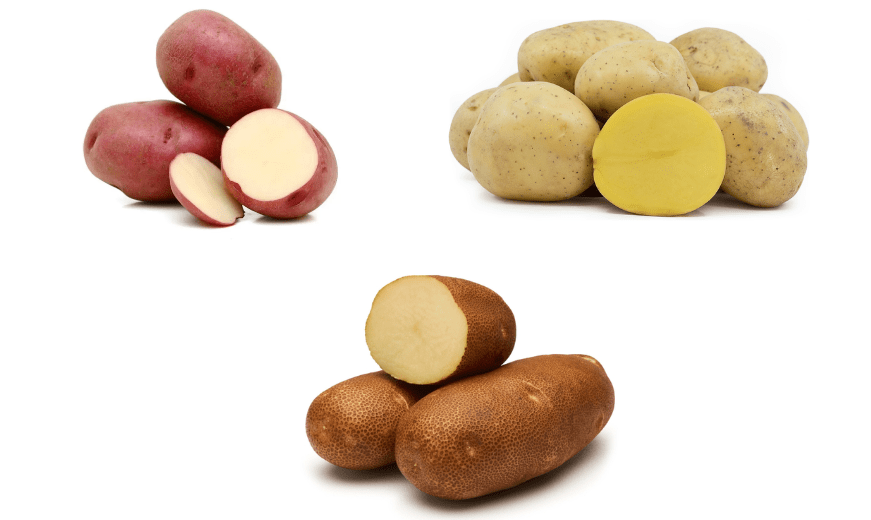
Varieties of potatoes suitable for sprouting include Russet, Yukon Gold, and Red Pontiac, among others. These varieties are known for their ability to produce strong and healthy sprouts, leading to a successful potato crop.
Preparing for Planting
A. Selecting the right potato seeds
When selecting potato seeds for planting, it is important to choose healthy and disease-free potatoes. Look for sprouts that are firm and have a good amount of eyes. Avoid potatoes that are soft, wrinkled, or have any signs of disease. The quality of the potato seeds will directly impact the success of your potato crop, so it is important to choose carefully.
B. Preparing the soil
Preparing the soil for planting potatoes is crucial for a successful crop. Potatoes thrive in well-drained, loose, and fertile soil. Start by tilling the soil to loosen it and remove any weeds or debris. Add organic matter, such as compost or well-rotted manure, to improve soil fertility and structure. Potatoes prefer slightly acidic soil with a pH of 5.0 to 5.5, so you may need to amend the soil with lime if it is too acidic. It’s also important to ensure that the soil has good drainage to prevent waterlogging, as potatoes do not tolerate waterlogged conditions. Once the soil is prepared, you can then plant your potato seeds.
C. Tools and materials needed
Tools and materials needed for planting potatoes include a garden tiller or a hoe for tilling the soil, compost or well-rotted manure for adding organic matter, a pH testing kit to check the acidity of the soil, and lime if necessary to adjust the pH. You will also need potato seeds or seed potatoes for planting. It’s important to space the seeds or seed potatoes about 12 inches apart in rows with 2-3 feet between rows. As the plants grow, you may need to add more soil around the base of the plants to promote tuber development and prevent them from being exposed to sunlight, which can cause them to turn green and become toxic. Finally, be sure to keep the soil consistently moist but not waterlogged, and be on the lookout for pests and diseases that can affect potato plants. With proper soil preparation and care, you can look forward to a successful potato harvest.
Chitting: Pre-Sprouting Potatoes
A.What is chitting?
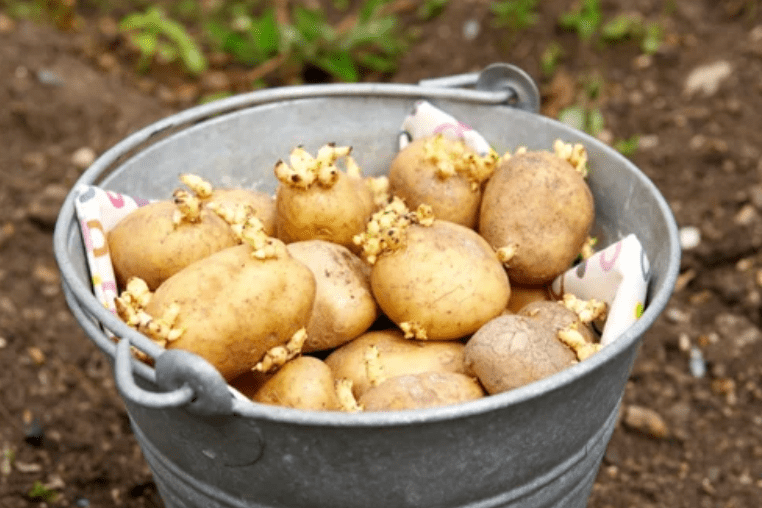
Chitting is the process of allowing potato seed potatoes to sprout before planting them in the ground. This can help to jumpstart the growth of the potato plants and can lead to a more bountiful harvest. To chit potatoes, simply place them in a cool, light-filled area and allow the eyes to develop small sprouts before planting.
B. How to chit potatoes
To chit potatoes, you can start by selecting your seed potatoes and placing them in a cool, light-filled area. Be sure to position them with the eyes facing upwards to encourage sprouting. Allow the potatoes to develop small sprouts before planting them in the ground. This process can help jumpstart the growth of the potato plants and lead to a more successful harvest.
C. Identifying healthy sprouts
When identifying healthy sprouts on your chitted potatoes, look for small, sturdy sprouts that are green or purple in color. These sprouts should be firm and not mushy or rotten. Avoid sprouts that are pale, soft, or have any signs of mold or disease. Healthy sprouts are a good indicator that your potatoes are ready to be planted and will lead to a successful crop.
Planting Potato Sprouts
A. Best time to plant
The best time to plant your chitted potato sprouts is in early spring, once the soil has warmed up and there is no longer a risk of frost. Planting at the right time will give your potato plants the best chance of thriving and producing a successful harvest.

1. Seasonal considerations
It is important to consider the seasonal conditions when planting potato sprouts. Ensure that the soil temperature is at least 45-50°F (7-10°C) for optimal growth. In colder regions, you may need to wait until later in the spring to plant. Additionally, consider the length of the growing season in your area, as potatoes typically need 90-120 days to mature. Planting at the right time will help your potato plants make the most of the growing season and produce a bountiful harvest.
2. Climate factors
Climate factors also play a role in determining the best time to plant potatoes. Potatoes thrive in cool but not freezing temperatures, so it’s important to consider the average climate in your area. If you live in a region with hot summers, it’s best to plant early in the spring to give the potatoes plenty of time to grow before the heat sets in. In cooler climates, you may have a longer planting window, but still need to be mindful of frost and cold temperatures. Understanding the climate in your area will help you determine the best time to plant your potatoes for optimal growth and yield.
B. Planting techniques
When it comes to planting techniques for potatoes, it’s important to choose a location with well-drained soil and plenty of sunlight. Potatoes also benefit from being planted in rows or mounds to provide good air circulation and drainage. It’s also important to space the potato plants properly to ensure they have enough room to grow and develop. Additionally, using certified seed potatoes that are disease-free and ready to plant will help set your plants up for success. Finally, be sure to properly water and fertilize your potato plants throughout the growing season to help them thrive and produce a bountiful harvest.
1. Traditional trench method
The traditional trench method for planting potatoes involves digging a trench about 4-6 inches deep and placing the seed potatoes about 12 inches apart within the trench. Cover the seed potatoes with about 3-4 inches of soil, and as the plants grow, gradually fill in the trench with soil to create a mound. This method helps to provide the potatoes with good drainage and allows for easy access to the tubers when it’s time to harvest.
2. Container planting
Container planting is a great option for those who have limited space or want to control the soil quality and conditions for their potato plants. You can use a large container, such as a half-barrel or a grow bag, and fill it with a mix of potting soil and compost. Plant the seed potatoes about 4-6 inches deep and space them about 8-10 inches apart. As the plants grow, you can add more soil to the container to create a mound and encourage more tuber growth. Just be sure to keep the soil consistently moist and provide adequate drainage to ensure healthy growth.
3. Raised bed planting
Raised bed planting is a popular method for growing potatoes as it allows for better soil drainage and aeration. To plant potatoes in a raised bed, fill the bed with a mix of soil and compost. Plant the seed potatoes about 4-6 inches deep and space them about 8-10 inches apart. As the plants grow, gradually add more soil to the bed to create a mound, which helps to support the plants and encourages more tuber growth. It’s important to keep the soil consistently moist and provide good drainage to ensure healthy potato growth. Raised beds also make it easier to harvest the potatoes when the time comes.
Caring for Potato Plants
A. Watering needs
Potato plants require consistent moisture to grow properly. It’s important to water the plants regularly, especially during dry periods, to ensure they have enough water to develop healthy tubers. However, it’s crucial to avoid overwatering, as this can lead to rot and other issues. It’s best to water deeply, allowing the soil to dry out slightly between waterings. Implementing a drip irrigation system or using a soaker hose can help provide the consistent moisture that potato plants need.
B. Fertilizing tips
Potato plants benefit from a balanced fertilizer, such as a 10-10-10 blend, to promote healthy growth and abundant tubers. It’s important to fertilize the soil before planting and then again as the plants begin to grow. Be sure to follow the instructions on the fertilizer label, as over-fertilizing can lead to excessive foliage growth at the expense of tuber development. Additionally, it’s best to avoid high-nitrogen fertilizers, as they can promote excessive vegetative growth at the expense of tuber formation. Instead, opt for a balanced fertilizer to ensure the plants receive the nutrients they need for overall health and a bountiful harvest.
C. Pest and disease management
Potato plants are susceptible to a variety of pests and diseases, so it’s important to be vigilant in their management. One common pest is the Colorado potato beetle, which can be controlled through the use of insecticidal sprays or handpicking. Additionally, regular inspections of the plants for signs of damage or infestation can help catch and address issues early.
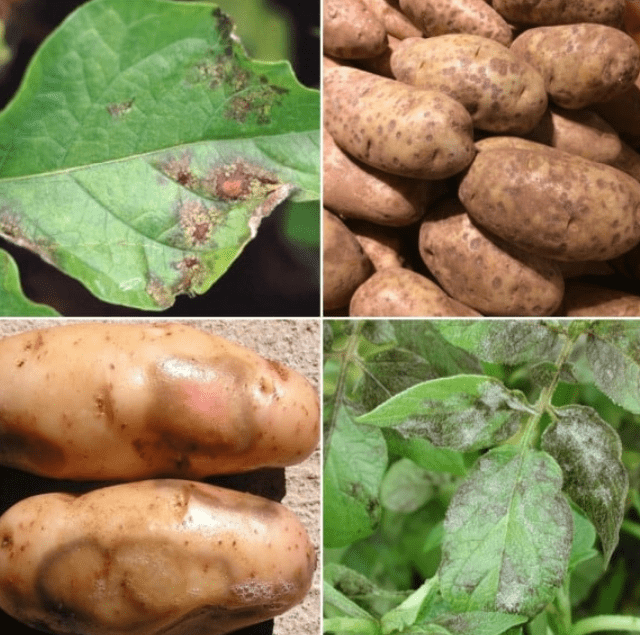
In terms of diseases, blight can be a major concern for potato plants. It’s important to practice good crop rotation, as well as proper spacing and ventilation to reduce the risk of blight. Fungicidal sprays can also be used preventatively to protect against blight and other diseases.
Overall, a proactive and integrated approach to pest and disease management, including monitoring, proper cultural practices, and the use of targeted treatments, can help keep potato plants healthy and productive.
D. Hilling and mulching
Hilling and mulching are also important practices to consider for potato plant health. Hilling, or mounding soil around the base of the plant, can help prevent tubers from being exposed to sunlight, which can cause them to turn green and produce a toxic compound. Mulching can help conserve moisture and suppress weed growth, which can also contribute to the overall health of the potato plants. By implementing these practices and staying vigilant for signs of pests and diseases, potato growers can help ensure a successful and bountiful harvest.
Monitoring Growth and Development
A. Stages of potato plant growth
Monitoring the stages of potato plant growth is essential for ensuring a successful harvest. This includes keeping an eye on the emergence of the plants, the formation of tubers, and the overall health and vigor of the foliage. By closely monitoring these stages, growers can identify any potential issues early on and take proactive measures to address them, such as adjusting irrigation, applying nutrients, or implementing pest and disease management strategies. This level of attentiveness can help maximize the health and productivity of potato plants.
B. Signs of healthy development
Signs of healthy development in potato plants include strong and vibrant foliage, uniform growth and development of tubers, and resistance to common pests and diseases. Additionally, healthy potato plants will have a consistent and robust growth pattern, with no signs of wilting or yellowing leaves. By regularly monitoring these indicators, growers can ensure that their potato plants are thriving and on track for a successful harvest.
C. Troubleshooting common problems
Common problems that growers may encounter when monitoring potato plants include signs of nutrient deficiencies, such as yellowing or stunted growth, which can be remedied by adjusting fertilizer applications. Additionally, issues with over or under irrigation can lead to wilting or waterlogged plants, and can be addressed by adjusting watering schedules. Pest and disease problems, such as fungal infections or pest infestations, should be addressed promptly with appropriate management strategies to prevent further damage to the crop. By staying vigilant and addressing these common issues, growers can ensure the continued health and productivity of their potato plants.
Harvesting Potatoes
A. Determining the right time to harvest
The right time to harvest potatoes is typically when the plants have started to die back and the tubers have reached their full size. This is usually around 2-3 weeks after the foliage has died down. To determine if the potatoes are ready for harvest, gently dig around the base of the plant and check the size and maturity of the tubers. It’s important to harvest before the ground freezes, as cold temperatures can damage the potatoes. Once harvested, allow the potatoes to cure in a cool, dark place for 1-2 weeks before storing them in a cool, dry, and well-ventilated area. This will help extend their shelf life and maintain their quality.
B. Tools and techniques
To harvest potatoes, you will need a digging tool such as a garden fork or a shovel. Gently loosen the soil around the base of the plant and carefully lift the potatoes out of the ground, being careful not to damage them. It’s best to harvest on a dry day when the soil is not too wet, as wet soil can make it more difficult to dig and can also increase the risk of damaging the potatoes. Once the potatoes are harvested, gently brush off any excess soil and allow them to air dry before storing. This will help prevent rot and extend the shelf life of the potatoes.
C. Post-harvest handling
After harvesting the potatoes, it’s important to allow them to cure in a cool, dark place for 1-2 weeks before storing. This allows the skins to toughen up and any minor cuts or bruises to heal, which helps to extend their shelf life. Once they have cured, store the potatoes in a cool, dry, and well-ventilated area to maintain their quality. Using the right tools, like a garden fork or shovel, and harvesting on a dry day can help prevent damage to the potatoes. Gently brushing off any excess soil and allowing them to air dry before storing can also help prevent rot and extend their shelf life.
In conclusion, planting potato sprouts can be a rewarding and fruitful experience if done correctly. By selecting the right sprouts, planting them at the right time, and providing proper care and maintenance, you can ensure a bountiful harvest of delicious potatoes. Whether you’re a beginner or experienced gardener, following these tips will help you to successfully grow and harvest your own potatoes. Happy planting!