
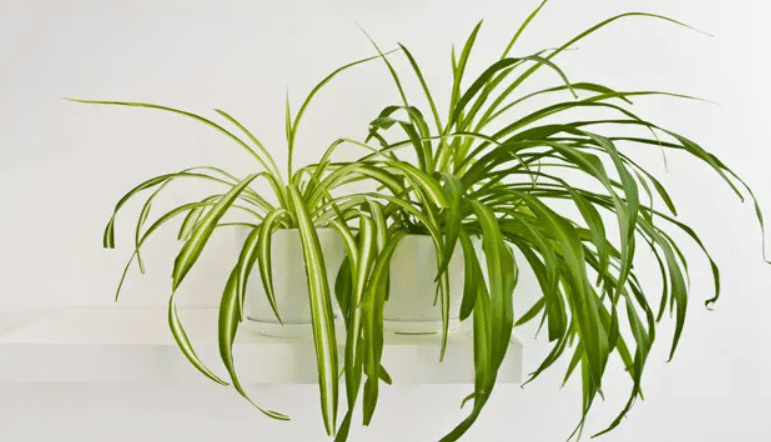
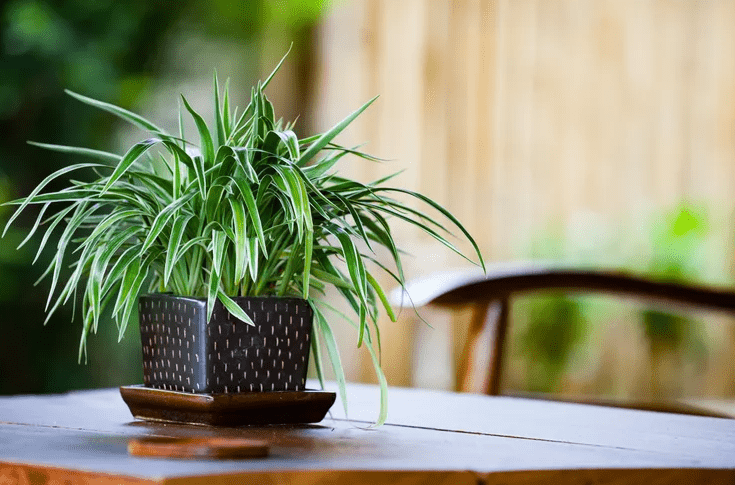
If you’re looking to expand your indoor garden, learning how to propagate a spider plant is a great way to start. Spider plants (Chlorophytum comosum) are popular houseplants known for their easy care and ability to produce “spiderettes” or baby plants. Propagating a spider plant not only helps you grow new plants for free but also allows you to share these beautiful green companions with friends and family. In this article, we’ll explore the different methods you can use to propagate a spider plant successfully, ensuring healthy growth and vibrant new plants.
Understanding Spider Plant Propagation
Is essential for any plant lover looking to expand their indoor garden. Spider plants are a popular choice for houseplants due to their easy care and ability to produce new baby plants, known as spiderettes. Propagating a spider plant is a great way to grow new plants for free and share them with your loved ones. There are several methods you can use to successfully propagate a spider plant, including using baby spiderettes, dividing the plant, or using plantlets. By understanding the different propagation methods, you can ensure healthy growth and vibrant new plants for your indoor garden. With the right knowledge and care, you can enjoy the beauty of spider plants in your home and share them with others.
Best Time to Propagate Spider Plants
Discuss the optimal seasons for propagation.
When it comes to propagating spider plants, the optimal time to do so is during the spring and summer months. This is when the plant is actively growing and has the best chance of successfully producing new plants. During this time, the plant is in its growth phase, and the warm temperatures and increased sunlight help to stimulate the growth of new spiderettes. It’s important to avoid propagating spider plants in the fall and winter, as the plant is in a dormant phase and may not have the energy to support new growth. By choosing the right time to propagate your spider plants, you can increase the likelihood of successful propagation and ensure healthy, vibrant new plants for your indoor garden.
Explain the signs that indicate a spider plant is ready for propagation.
There are a few signs that indicate a spider plant is ready for propagation. The first sign is the appearance of spiderettes, which are small offshoots that grow from the main plant. These spiderettes will have their own root system and can be easily removed from the parent plant to be propagated. Another sign is when the parent plant becomes overcrowded in its pot. This is a good indication that the plant is healthy and growing well, and that it is a good time to propagate and repot the spiderettes. Additionally, if the parent plant is producing new leaves and growing vigorously, it may also be a good time to consider propagating. Overall, the best time to propagate a spider plant is when the plant is healthy, actively growing, and producing new offshoots. By paying attention to these signs, you can ensure successful propagation and continue to enjoy the beauty of spider plants in your home.
Materials Needed for Propagation
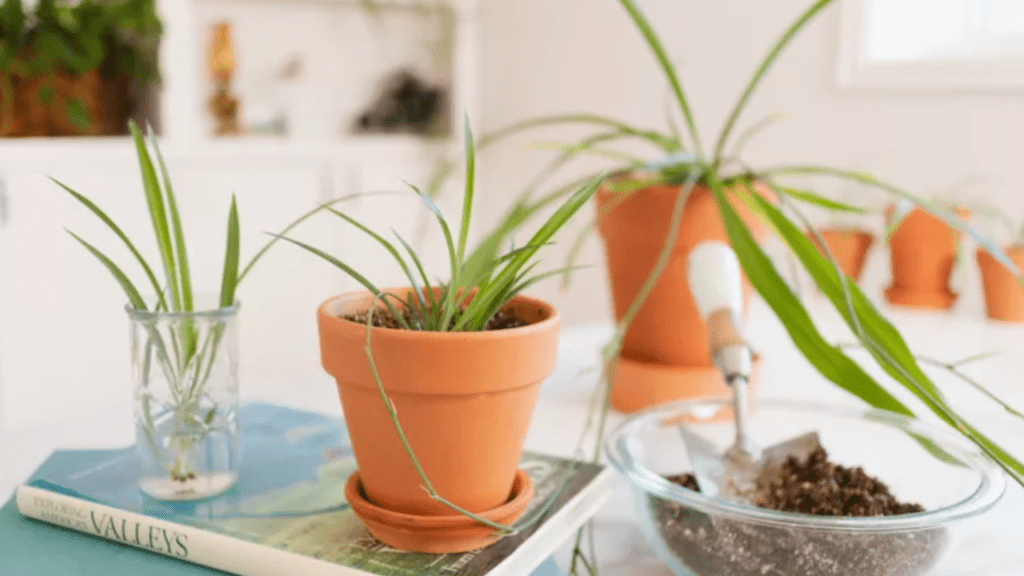
List all the necessary materials, such as a healthy spider plant, sharp scissors, pots, and soil.
When propagating a spider plant, it is important to have the necessary materials on hand. You will need a healthy spider plant with spiderettes, which are small offshoots that grow from the main plant. You will also need a pair of sharp scissors to cut the spiderettes from the parent plant. Additionally, you will need pots and soil for repotting the spiderettes. It is important to use well-draining soil to prevent root rot. When selecting pots, choose ones that are slightly larger than the current pot size to allow room for the spiderettes to grow. Once you have all of these materials, you can successfully propagate your spider plant and continue to enjoy its beauty in your home.
Step-by-Step Guide to Propagating a Spider Plant
Step 1: Identifying the Offshoots (Spiderettes)
Explain how to find the small plantlets that are ready for propagation.
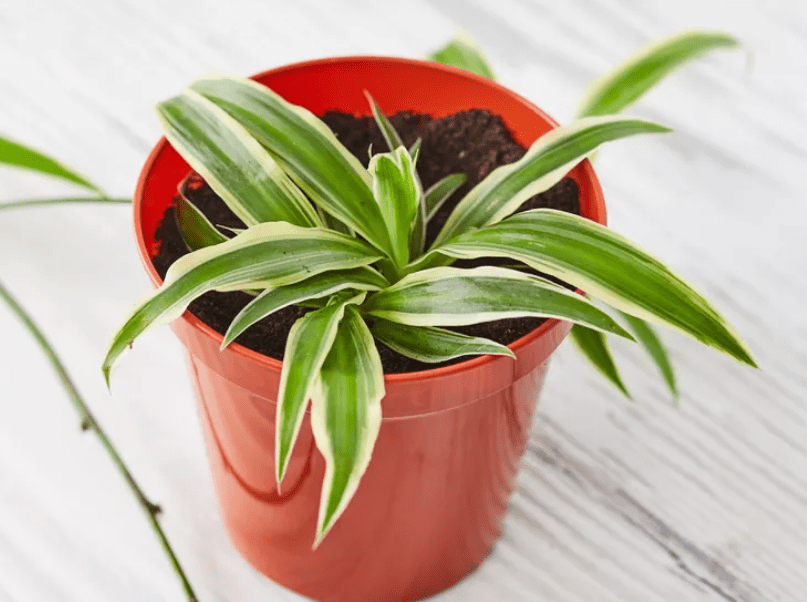
When looking for small plantlets to propagate from a spider plant, you will want to look for the small offshoots, also known as spiderettes, that grow from the main plant. These are usually located at the end of long stems and can be easily identified by their small size and leafy appearance. Once you have identified the spiderettes, you can use a pair of sharp scissors to carefully cut them from the parent plant. It is important to make clean cuts to ensure the health and vitality of the spiderettes as they are being propagated. Once you have cut the spiderettes, you can then repot them into pots with well-draining soil, allowing them to continue growing and thriving as individual plants. With the right materials and proper care, you can easily propagate spider plantlets and continue to enjoy the beauty of this popular houseplant.
Step 2: Cutting the Spiderettes
Provide detailed instructions on safely cutting the offshoots from the mother plant.
Step-by-Step Guide to Propagating a Spider Plant
Step 1: Identifying the Offshoots (Spiderettes)
When looking for small plantlets to propagate from a spider plant, you will want to look for the small offshoots, also known as spiderettes, that grow from the main plant. These are usually located at the end of long stems and can be easily identified by their small size and leafy appearance. Once you have identified the spiderettes, you can use a pair of sharp scissors to carefully cut them from the parent plant. It is important to make clean cuts to ensure the health and vitality of the spiderettes as they are being propagated. Once you have cut the spiderettes, you can then repot them into pots with well-draining soil, allowing them to continue growing and thriving as individual plants.
Step 2: Cutting the Spiderettes
When cutting the spiderettes from the mother plant, it is important to use clean, sharp scissors to make a clean cut. Look for the point where the spiderette meets the main stem of the plant and cut just below this point. It is best to cut at a slight angle to provide the best chance for the spiderette to thrive. Be sure to avoid damaging the main plant or any other nearby leaves during the cutting process.
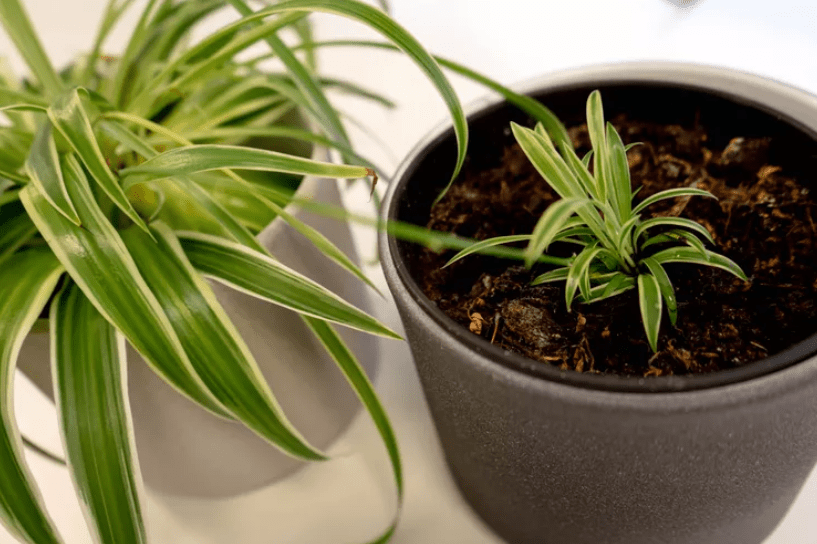
Step 3: Repotting the Spiderettes
After cutting the spiderettes from the mother plant, it is important to carefully repot them into individual pots with well-draining soil. Gently remove any excess soil from the roots of the spiderettes and place them into the new pots, making sure to cover the roots with soil and gently patting it down to secure the plant in place. Water the newly potted spiderettes thoroughly and place them in a location with bright, indirect sunlight to encourage healthy growth.
By following these steps, you can safely and effectively propagate spider plantlets from the mother plant, allowing you to continue enjoying the beauty of this popular houseplant.
Step 3: Rooting in Water or Soil
Discuss both methods: rooting in water and directly in soil, with pros and cons for each.
When propagating spider plantlets, there are two main methods you can use: rooting in water and directly in soil. Rooting in water involves placing the spiderette in a container of water and waiting for roots to develop before transferring it to soil. This method allows you to easily monitor root growth and can be a fun way to watch the process unfold. However, the plantlets may struggle to adapt to soil after being in water for an extended period of time.
On the other hand, rooting the spiderette directly in soil can be a more seamless transition for the plantlet, as it can start establishing itself in the soil right away. This method also reduces the risk of rotting that can occur when roots are submerged in water for too long. However, it can be more challenging to monitor root growth and ensure that the plantlet is receiving enough water.
Ultimately, both methods can be successful, and the choice between the two may depend on your personal preference and the specific needs of the spider plantlet. Whichever method you choose, be sure to provide the plantlet with proper care and attention to support its healthy growth.
Step 4: Planting the Spiderettes
Step-by-step guide on how to plant the rooted spiderettes into pots.
If you have spiderettes that have rooted and are ready to be planted, there are a few different methods you can use. One method is to plant the rooted spiderettes directly into pots with soil. This allows the plantlets to start establishing themselves in the soil right away, reducing the risk of rotting that can occur when roots are submerged in water for too long. However, it can be more challenging to monitor root growth and ensure that the plantlet is receiving enough water.
Another method is to continue growing the rooted spiderettes in water until they have developed a more established root system, and then transfer them to pots with soil. This method allows you to easily monitor root growth and can be a fun way to watch the process unfold. However, the plantlets may struggle to adapt to soil after being in water for an extended period of time.
Ultimately, both methods can be successful, and the choice between the two may depend on your personal preference and the specific needs of the spider plantlet. Whichever method you choose, be sure to provide the plantlet with proper care and attention to support its healthy growth.
Step 5: Caring for the New Spider Plants
Offer tips on watering, light, and general care for newly propagated plants.
When transplanting the rooted spiderettes into pots, it’s important to water them regularly, but be careful not to overwater as this can lead to root rot. Make sure the pots have drainage holes to allow excess water to escape. Place the pots in a location with bright, indirect sunlight, as spider plants thrive in well-lit areas. Rotate the pots occasionally to ensure even growth. Keep the soil moist but not waterlogged, and fertilize the plants every 2-4 weeks during the growing season. Trim any brown or yellow leaves to promote new growth and keep the plants looking healthy. With proper care, your newly propagated spider plants will thrive and continue to produce spiderettes for years to come.
Common Mistakes to Avoid When Propagating Spider Plants
Discuss common errors, such as improper cutting, overwatering, or insufficient light.
When propagating spider plants, it’s important to avoid common errors such as improper cutting, overwatering, or insufficient light. Improper cutting can lead to unsuccessful propagation, so be sure to use sharp, clean scissors to cut the spiderettes from the main plant. Overwatering is a common mistake that can lead to root rot, so it’s important to water the newly potted spiderettes regularly but not excessively. Ensuring that the pots have drainage holes can help prevent waterlogged soil. Insufficient light can also hinder the growth of spider plants, so be sure to place the pots in a location with bright, indirect sunlight. Rotating the pots occasionally can also ensure even growth. Keeping the soil moist but not waterlogged, and fertilizing the plants every 2-4 weeks during the growing season can also help ensure successful propagation. Additionally, trimming any brown or yellow leaves can promote new growth and keep the plants looking healthy. Avoiding these common mistakes can help ensure that your newly propagated spider plants thrive and continue to produce spiderettes for years to come.
Provide solutions to these common issues.
When propagating spider plants, it’s important to be mindful of common issues such as overwatering and insufficient light. Overwatering can lead to root rot, so it’s important to water the newly potted spiderettes regularly but not excessively. Ensuring that the pots have drainage holes can help prevent waterlogged soil. Additionally, insufficient light can hinder the growth of spider plants, so be sure to place the pots in a location with bright, indirect sunlight. Rotating the pots occasionally can also ensure even growth. Keeping the soil moist but not waterlogged, and fertilizing the plants every 2-4 weeks during the growing season can also help ensure successful propagation. Additionally, trimming any brown or yellow leaves can promote new growth and keep the plants looking healthy. Avoiding these common mistakes can help ensure that your newly propagated spider plants thrive and continue to produce spiderettes for years to come.
Benefits of Propagating Spider Plants
Highlight the advantages of propagation, such as cost-effectiveness and the joy of sharing plants with others.
Propagating spider plants has many advantages, including cost-effectiveness and the joy of sharing plants with others. When you propagate spider plants, you are essentially creating new plants from the ones you already have. This can save you money on buying new plants, as well as provide you with the satisfaction of watching your plants grow and thrive. Additionally, propagating spider plants allows you to share the joy of gardening with others. You can give away the new plants to friends and family, or even sell them to make a little extra money. It’s a great way to spread the beauty of spider plants and connect with others who share your love for gardening. So, if you have spider plants, consider propagating them not only for the cost-effectiveness but also for the joy of sharing the beauty of plants with others.
Mention the environmental benefits of growing more plants indoors.
Growing more plants indoors has a variety of environmental benefits. First, indoor plants help improve air quality by removing pollutants and carbon dioxide from the air. This can help reduce the risk of indoor air pollution and create a healthier living environment. Additionally, the presence of plants indoors can help regulate humidity levels and improve overall air quality. Moreover, growing more plants indoors can also help reduce energy consumption by acting as natural air purifiers and humidifiers, reducing the need for artificial air purifiers and humidifiers. In turn, this can lead to lower energy bills and a reduced carbon footprint. Finally, growing more plants indoors can also contribute to a sense of well-being and connection to nature, which can have positive effects on mental and emotional health. Overall, propagating and growing more plants indoors can have a positive impact on both the environment and personal well-being.
Conclusion
In conclusion, propagating a spider plant is a fun and rewarding process that can result in beautiful new plants for your home or to share with friends. Whether you choose to propagate through division, plantlets, or seeds, following the steps and tips provided in this guide will help you successfully grow new spider plants. With a little patience and care, you can enjoy the satisfaction of watching your spider plant babies thrive and flourish.